Servers & Networks
-

-

-
-

-
 February 12, 2024
How to Fix Error 503 Backend Fetch Failed on Your Website?
-
 December 11, 2023
How to Fix a Spectrum Modem with Flashing Blue and White Lights
-
 November 17, 2023
Arris Router Login: Default Name, Password & IP Address
-

-
 September 15, 2023
How to Turn OFF BT Wi-Fi on your Smart Hub 2
-
 September 13, 2023
URI vs URL: Explainer, Differences, Relation & Uses
-
 August 1, 2023
Guide: Check Browser History Stored on your Router
-
 July 26, 2023
How to Set Up Uptime Monitoring with Pingdom?
-
-
 July 11, 2023
How to Find Your IP Address on Windows & Mac
-
-

-

-

-

-
 April 13, 2023
What is Spanning Tree Protocol (STP) and how it works?
-
 March 21, 2023
Guide: Setup and Configure a New Router for your Home
-

-
 March 4, 2023
How to Fix “Streaming Error” on Ring Doorbell?
-
 February 26, 2023
Upgrade Firmware on Cisco Devices (Step-by-Step Guide)
-
 February 25, 2023
What is an IP Helper address and How to Configure it?
-
 February 25, 2023
Guide: How to Perform Password Recovery on Cisco Devices
-
 February 24, 2023
Guide: Port Forwarding in NetGear Routers
-
 February 15, 2023
[FIX] “NT AUTHORITY/LOCAL SERVICE Cannot Be Found” Error
-
 February 14, 2023
Guide: Create SolarWinds Orion Maps to Troubleshoot Network Issues
-
 February 10, 2023
Setup a NetGear Wi-Fi Extender Properly (Detailed Guide)
-
 February 9, 2023
Guide: Backup or Restore Configuration on Cisco Routers
-
 February 2, 2023
Xfinity TV and Internet Stopped Working – Troubleshooting Guide
-
 January 23, 2023
Troubleshoot Common AT&T Internet Problems (All Fixes)
-
 January 5, 2023
Xfinity Gateway is Blinking Orange? Here’s How to Fix It
-
 December 18, 2022
How to Create Network Global Site Map on Solarwinds WorldWide Map
-
 December 5, 2022
CDMA vs GSM: Which Technology is Better?
-
 November 14, 2022
How to Create an Executive Dashboard for NOC Team
-
 November 14, 2022
How to Monitor Routing Neighbors using Solarwinds
-
 November 8, 2022
Using Solarwinds Advanced Alerts to Manage Network Issues
-
 November 8, 2022
How to Monitor the Temperature of a Network Device
-
 October 29, 2022
How to use Solarwinds QoE for Deep Packet Analysis?
-
 October 29, 2022
How to Monitor Advanced Network Devices with SolarWinds?
-

-
 October 9, 2022
Solarwinds NCM: A Must Have Tool for Network Administrators
-
-
-

-
 September 23, 2022
How to Use PerfStack to Troubleshoot Web Performance Related Issues?
-
 September 23, 2022
How to Use Solarwinds NCM to Monitor Config Changes?
-
 September 22, 2022
How to Identify and Fix High Bandwidth Utilization on the Network?
-

-
 January 16, 2022
Google Wi-Fi Flashing Orange? Try these Fixes
-
 December 22, 2021
How to Fix Orbi Router Flashing White Light?
-
 October 3, 2021
How to Monitor Performance of Hyper-V Virtual Machines?
-

-
 September 25, 2021
How to Download and Use Open Visual TraceRoute?
-
 September 25, 2021
How to Use Advanced IP Scanner?
-
 September 25, 2021
How to Backup Your Router Configurations to TFTP Server?
-
 September 23, 2021
How to Configure and Connect SFTP Server from Windows Command Prompt?
-

-
-
 August 29, 2020
Fix: Routerlogin.net not Working (Netgear)
-
 August 6, 2020
How to Manage Security Groups of Amazon EC2 Instances?
-
 July 30, 2020
How to Monitor the Status of Amazon EC2 Instances?
-
-
-

-

-

-
-
-
-
-
-
-
-

-
-
-
-

-

-

-

-

-

-

-

-

-
 April 30, 2020
How to Manage DHCP Scopes running out of IP Addresses?
-

-

-

-

-
 April 27, 2020
How to Change WiFi Network’s Name and Password?
-
 April 27, 2020
How to Check Who is Connected to Your WiFi Network?
-

-
-
-
-

-
-
-
-
-
-
 January 26, 2020
What is the Difference Between a Router and a Modem?
-
 January 26, 2020
Fix: Gateway Authentication Failure Error U-Verse
-

-
 December 16, 2019
Find your Router’s IP Address from any Device
-
 December 12, 2019
Troubleshooting Complete Signal Loss Error on DISH
-
 December 4, 2019
Creating Clustered and Non-Clustered Indexes in SQL Server
-
 November 28, 2019
Fix Python Socket Error 48
-
 November 27, 2019
Fixes for Spectrum WiFi not Working
-
 November 23, 2019
Using LOGGLY for log analysis & monitoring
-
 November 19, 2019
How to Remove Duplicate Rows from a SQL Server Table?
-
 November 3, 2019
How To Use DROP IF EXISTS in SQL Server?
-
 November 3, 2019
How to Generate Config Files using Network Config Generator?
-
 October 26, 2019
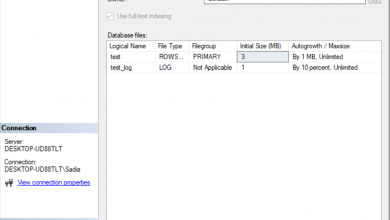
How to Rename a SQL Server database?
-
-

-
 October 15, 2019
How to Fix Z-Wave Connection Issues with the Wink Hub?
-
 October 5, 2019
Analyze netflow of network using Real-Time NetFlow Analyzer
-
 September 27, 2019
How to Monitor your Network Performance using NPM?
-

-
 September 22, 2019
How to Manage User Access using Access Rights Manager?
-
 September 18, 2019
What is Traceroute and How to use Traceroute NG?
-
 September 16, 2019
How to Backup your Server using Solarwinds Backup?
-
 September 16, 2019
How to Perform a Port Scan on your Network using Port Scanner
-
 September 15, 2019
How to Map your Network using Network Topology Mapper
-
 September 14, 2019
Track and Monitor Network Devices with SolarWinds UDT
-

-
 September 14, 2019
How to Monitor your Network using ipMonitor
-

-

-
-

-

-

-

-
 July 11, 2019
The 5 Best IP Address Management (IPAM) Softwares
-

-
-

-
 May 29, 2019
The 5 Best Access Rights Management Tools
-
 May 29, 2019
The 5 Best Network Topology Mapping Software
-

-
 February 20, 2019
The 5 Best Storage Resource Monitoring and Management Software
-

-
 February 1, 2019
Best Tools for Ping Monitoring and Management


