How to Monitor the Status of Amazon EC2 Instances?
We’re at a time where monitoring your network takes great importance when it comes down to network management. Cloud computing is a solution everyone is going towards and instead of having to buy the physical hardware, virtualization is a much more cost-effective derivative. In order to ensure the availability and reliability of your Amazon instances, it is important that you know how to monitor the instances from the AWS Web Console.
Collecting data from all the points of your AWS solutions is important as it is really helpful in debugging a failure especially one which might have made multiple points inoperable. Monitoring is no easy task but it indeed is worth the effort and the time put in considering it can save you a longer downtime. In order to be on top of your EC2 instances, it is recommended that you measure the performance of your instance at different times with different loads and see the reaction of the instance. This will help you in concluding the maximum capacity of your instance.

You can also create images of your instances often so you can be quickly back online in case of a data loss or a hardware failure. Nonetheless, moving on to the topic at hand, there are two types of monitoring options that AWS provides i.e. automated monitoring in which you have to configure the tools to do all the monitoring that you need. The second type is manual monitoring which, as obvious from the name, involves manual interventions of the IT admins to reach the desired outcome. We will be focusing on automated monitoring in this guide.
Instance Status Checks
Amazon EC2 regularly performs automated checks on your running EC2 instances in order to see if there are any problems with the instance. Problems that might prevent the instance from running applications. These status checks are done every minute so you are always updated on the status of your EC2 instances. The result of the status check is either a pass or a fail.
There are two types of checks that are performed, System status checks and Instance status checks. System status checks are problems that require AWS involvement to fix the issue such as power loss, no network connectivity, etc. Instance status checks need your involvement to repair the issue and often detect problems like a corrupted file system, incorrect networking configuration, etc.
Viewing Status Checks
You can view the status checks of your EC2 instances on the AWS Management Console. Here’s how to view it:
- Log in to the AWS Management Console and go to EC2.
- From the navigation pane on the left-hand side, click Instances.
- Now, on the Instances page, click on Status Checks under the instances list.
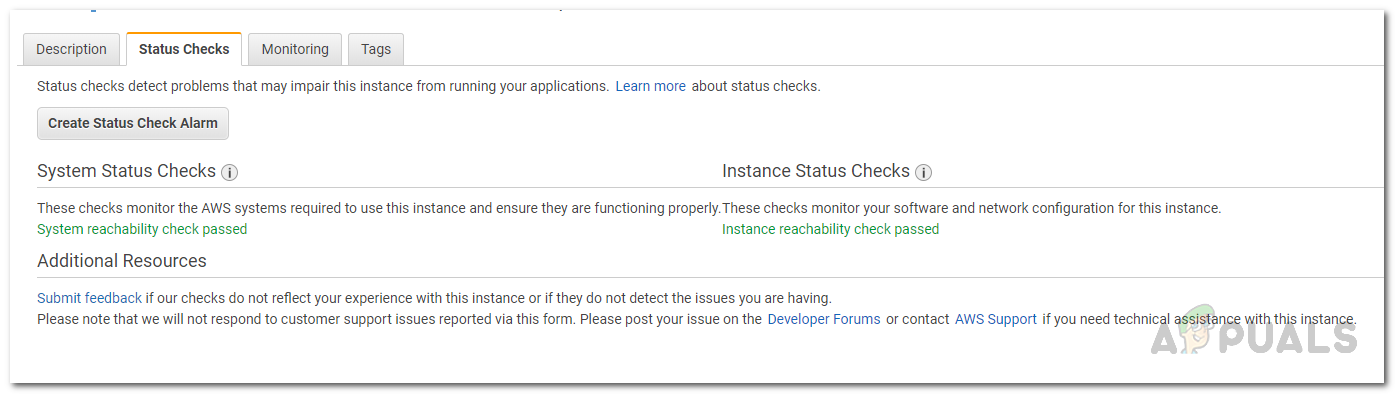
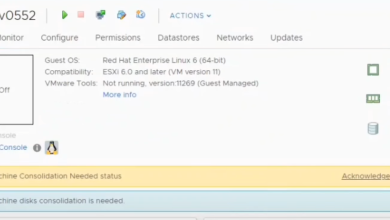
EC2 Status Checks - Make sure to select the instance for which you want to see the status check. If anything fails, you can find more information about it under Monitoring.
Monitoring Amazon EC2 Instances
Other than Status checks, you can find additional information about your instance under Monitoring. It shows information about various metrics via real-time graphs so that it is easier for you to comprehend and read. From CPU Utilization to disk operations such as disk read or disk writes, from inbound network to outbound network in bytes, all of it and much more are available under Monitoring.
Here’s how to view the data:
- Go to the EC2 Management Console.
- On the left-hand side, click on Instances and then select the Instance for which you wish to see the data.
- Click Monitoring in the tab below to view various information in real-time.
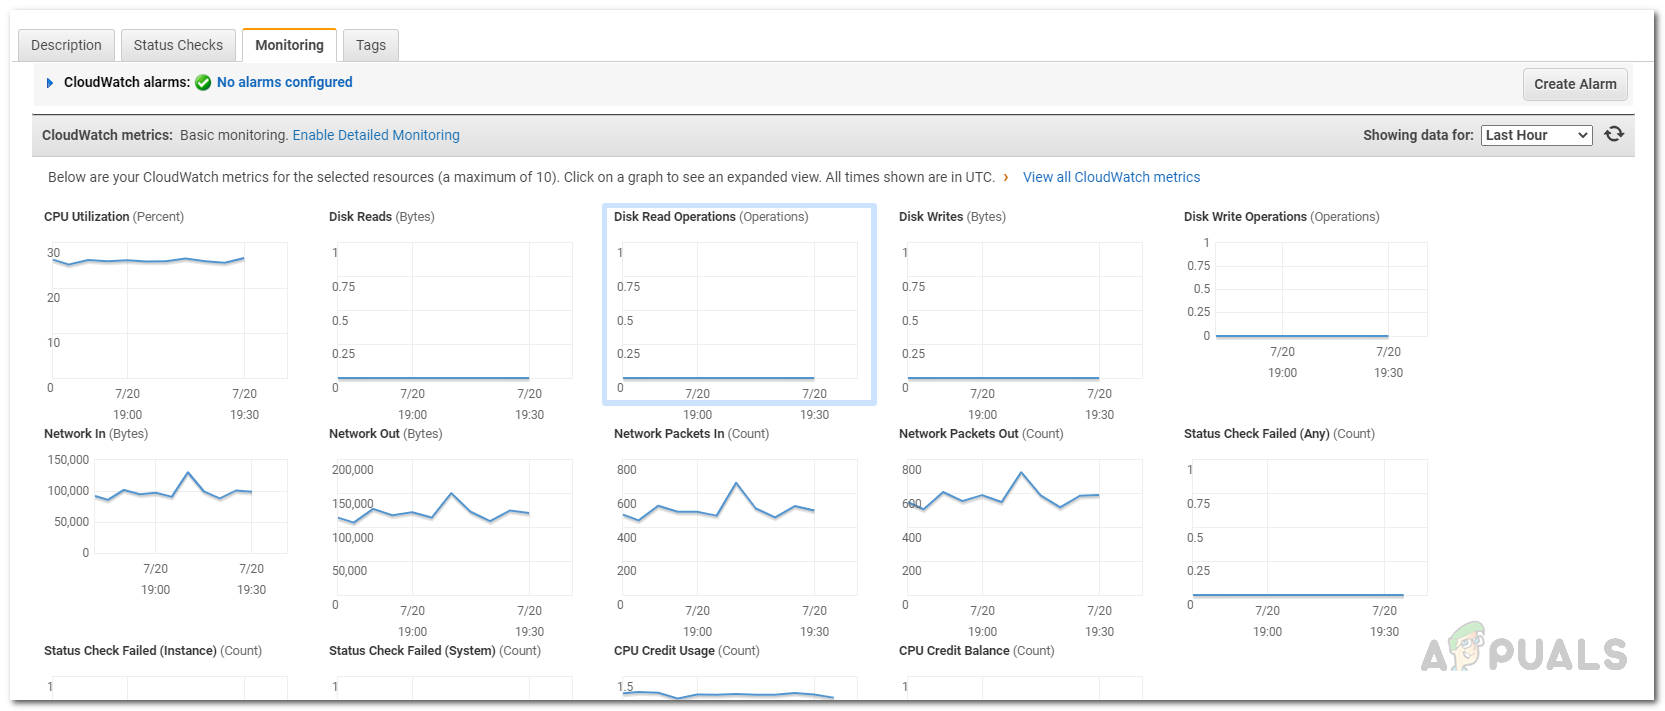
EC2 Monitoring Tab - You can also change the graphs to show the collected data of various periods; up to the last two weeks. To do this, just choose an option in the Showing data for the drop-down menu on the top-right corner of the tab.
- Click on a graph to change how the data is collected for the specific metric. You can change the Period as well as the Statistic of the metric.
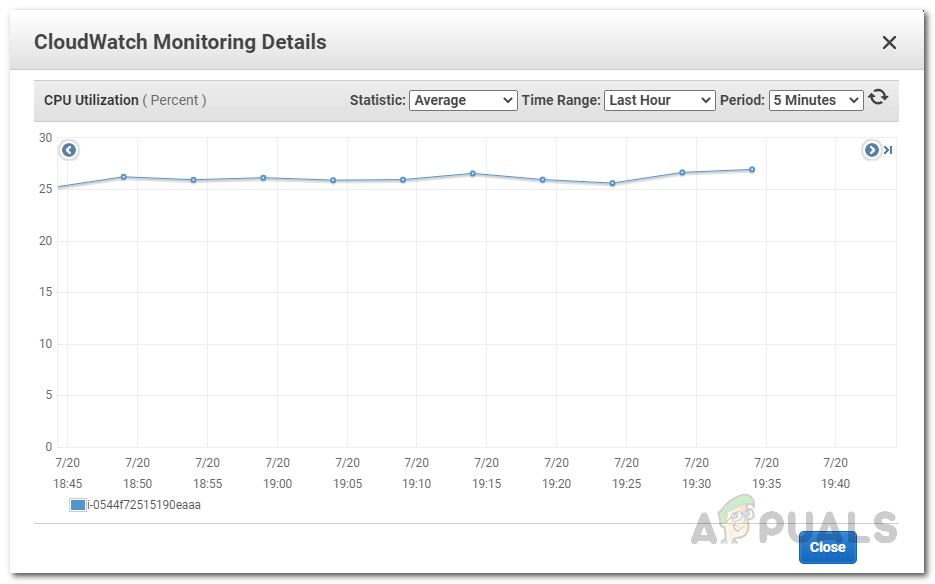
Monitoring Details - For more detailed monitoring, you can enable CloudWatch detailed monitoring which will cost you a bit more. To do this, just click on the Enable Detailed Monitoring option provided and then click Yes, Enable on the pop-up dialog box. Then, click Close.
Creating an Alarm
You can create alarms so that you are notified whenever the metrics reach a threshold that you specify in the alarm settings. An alarm can be easily created via the EC2 Management Console. You can create various alarms that perform certain actions such as stop an instance, reboot or terminate the Amazon EC2 instance. To create an alarm using the Amazon EC2 Console, do the following:
-
- Login to the EC2 Management console.
- Go to Instances from the navigation pane on the left-hand side.
- Select the instance for which you wish to create an alarm.
- Go to the Monitoring tab and then click the Create Alarm button.
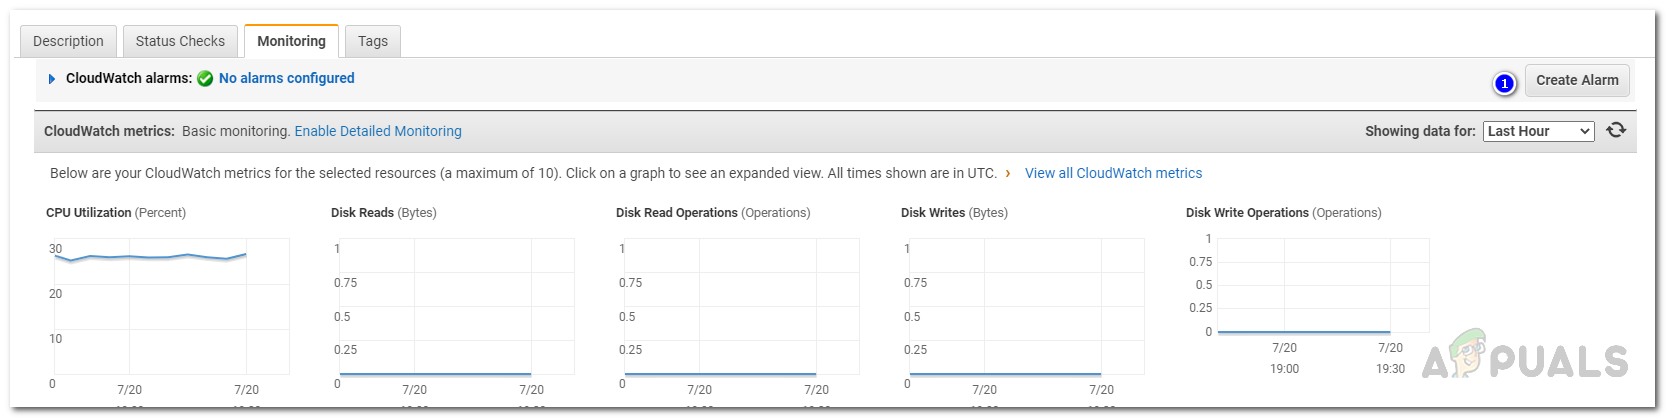
EC2 Monitoring Tab - Click on the create topic option to give the notification a title.
- After that, provide the email addresses that should receive the notification in the With these recipients box.
- If you wish to take any action when the alarm is triggered, check the Take the action box.
- Then, choose if you wish to reboot the instance which means restart the operating system, stop the instance, terminate, or recover the instance.
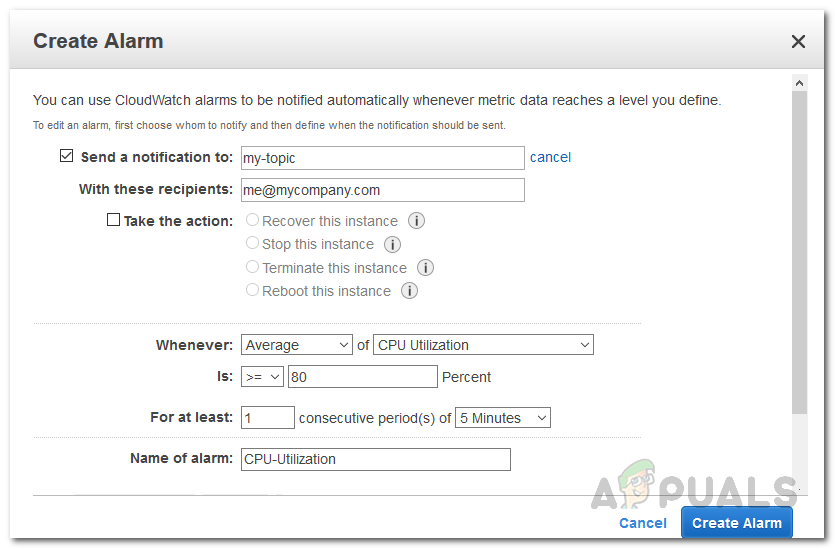
Creating an Alarm - Choose the specific metric for which you wish to create the alarm and then provide a criteria for the alarm policy. For example, if you wish to be notified whenever the CPU Utilization reaches/exceeds 80 percent, leave Whenever to Average and set the Is to >= to 80. After that, you can provide a period for the threshold.
- Finally, give the alarm a name in the Name of alarm box and then click the Create Alarm button.
- This will create your alarm and you will be notified whenever the metric threshold reaches your provided threshold.
Similarly, you can create status checks alarms using which you can perform the same actions if a certain status check fails. To create a status check alarm, go to the Status Checks tab, and then click on the Create Status Check Alarm button. The rest of the procedure is the same as above.