Create SSH key pair in Microsoft Azure and add it to Ubuntu Server
Connection to our virtual machines in Azure can be established by using credentials or SSH. SSH (Secure Shell) is a protocol used to remotely connect to the host machine via an encrypted connection. It can be used to connect to switches, routers, VMware, Linux, or any host that supports SSH connection. . In this article, I will show you how to create an SSH key and add it to a new Ubuntu Server 18.04 LTS installed in Azure.
SSH consists of two keys, private and public key. The public key is placed on the Linux VM and the private key is what we present to verify our identity.
In the first step, we will create an SSH key, and then, in the second step, we will create an Ubuntu Server and add an SSH key to it.
Step 1: Create an SSH key
- Login to Azure Portal
- Open Azure Cloud Shell at the right top window. If you haven’t used it before, you will need to create a new storage account and allow Azure Cloud Sheel to persist files there. This will incur a small monthly cost.

- Wait until the terminal is properly connected.
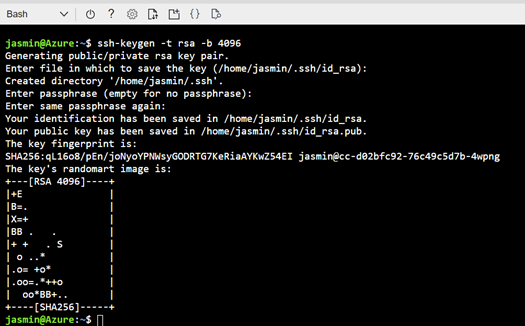
- Type ssh-keygen -t rsa -b 4096 and press Enter to create SSH key.
- Enter the file name to save the key. In our case, we will save the file to the default location by pressing Enter. The command creates two files: id_rsa and pub in the ~/.ssh directory. The files are overwritten if they exist.
- Enter a passphrase. This passphrase will be used to connect to the VM. The output should look like this.
- You can see the content of the previously created file by typing the command cat ~/.ssh/id_rsa.pub and pressing Enter. The output should be like this. You will need the output key for your virtual machine.

Step 2: Assign it to the Ubuntu Server
Once we created the SSH key in the previous step, the next step would be to add it to your Ubuntu Server hosted on Azure. This can be done in two scenarios, for the existing Ubuntu Server or a new one your create. I´ll walk you through the procedure for both scenarios. Let´s start with the new virtual machine.
- Login to Azure Portal.
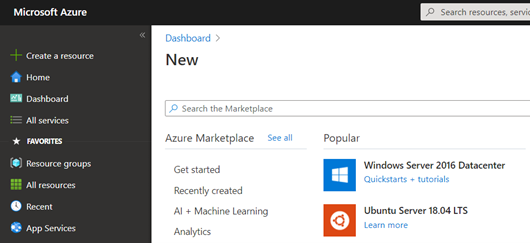
- Click on the Create a resource on the left side of the window.
- Click on Ubuntu Server 18.04 LTS.
- Under the Basic type the necessary virtual machine information for a subscription, resource group, virtual machine name, region, availability options, image, and virtual machine size. Once you do that, scroll down to the Administrator account and select the SSH public key.
- Type the username.
- Under SSH public key source choose Use existing public key.
- Under SSH public key add the SSH key you previously generated in Step 1 (command cat ~/.ssh/id_rsa.pub).
- Under Select inbound ports choose SSH (22).
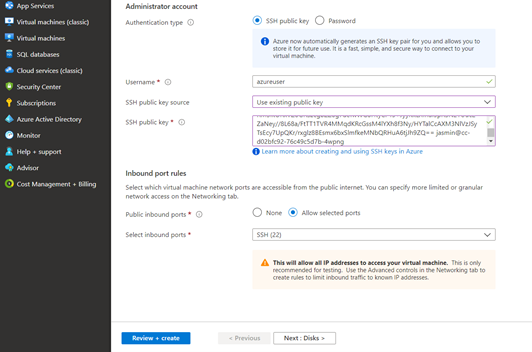
- Configure the rest of the configuration for your virtual machine and click on Review + create.
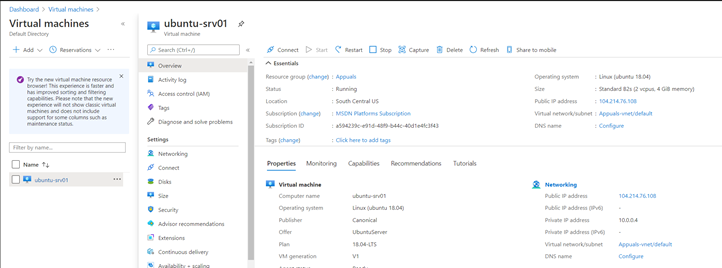
- Navigate to the virtual machine and then click on Overview as shown in the screenshot below.
- Click on Connect and then choose SSH. That will open a new window from where you can download SSH clients (PuTTy or other clients) or you can easily connect to your VM using Azure Cloud Shell.
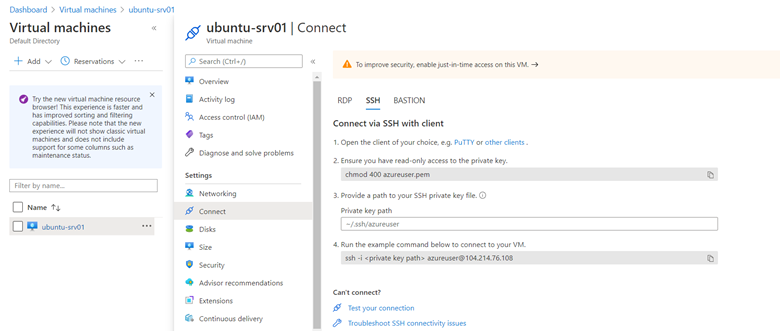
- In our case, we will open Azure Cloud Shell and connect to the virtual machine by typing the following command: ssh azureuser@104.214.76.108 where azureuser is a username and 214.76.108 is the public IP address.
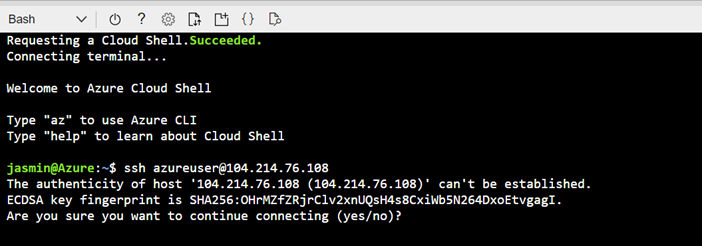
- As this is your first connection to the newly created virtual machine by using SSH, type Yes and press Enter to confirm authentication to host.
- Enter the passphrase you created in step 1 and press Enter.
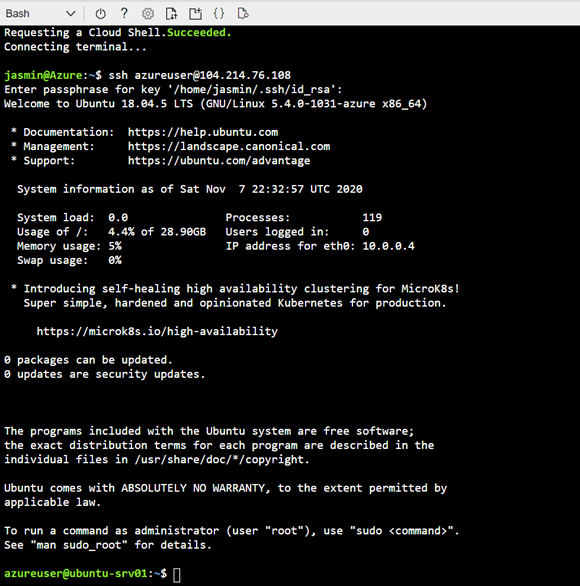
- You are successfully connected to Ubuntu Server.