How to move Amazon EC2 Instance to a Different AWS Region
The flexibility and reliability of the AWS IaaS can help us to follow our personal or business needs. If you are located in the USA, but you are running your business in Europe, your primary goal is to provide the best service to your customers without any latency issues when accessing the business resources. Amazon has more than 15 regions that can be used to host the Amazon EC2 instance.
The Amazon EC2 instance that is hosted in one region or one availability, can be easily moved to another region or another availability zone. We already talked about moving Amazon EC2 instance to another availability zone within the same region.
In order to explain the procedure of moving the Amazon EC2 instance to a different region, we will create a realistic scenario. Let´s imagine we are hosting a webshop app in Amazon EC2 instance in US East (Ohio). All our customers are located in DACH (Germany, Austria, and Switzerland) and they are experiencing high latency when accessing the webshop. This negative experience will automatically reflect on customer satisfaction. In order to solve this challenge, we will move Amazon EC2 instance from EU East (Ohio) to Europe (Frankfurt).
- Login into AWS Management Console
- Click on Services and then click on EC2
- Click on Running instances
- Right-click on the instance and then click on Instance state and then Stop
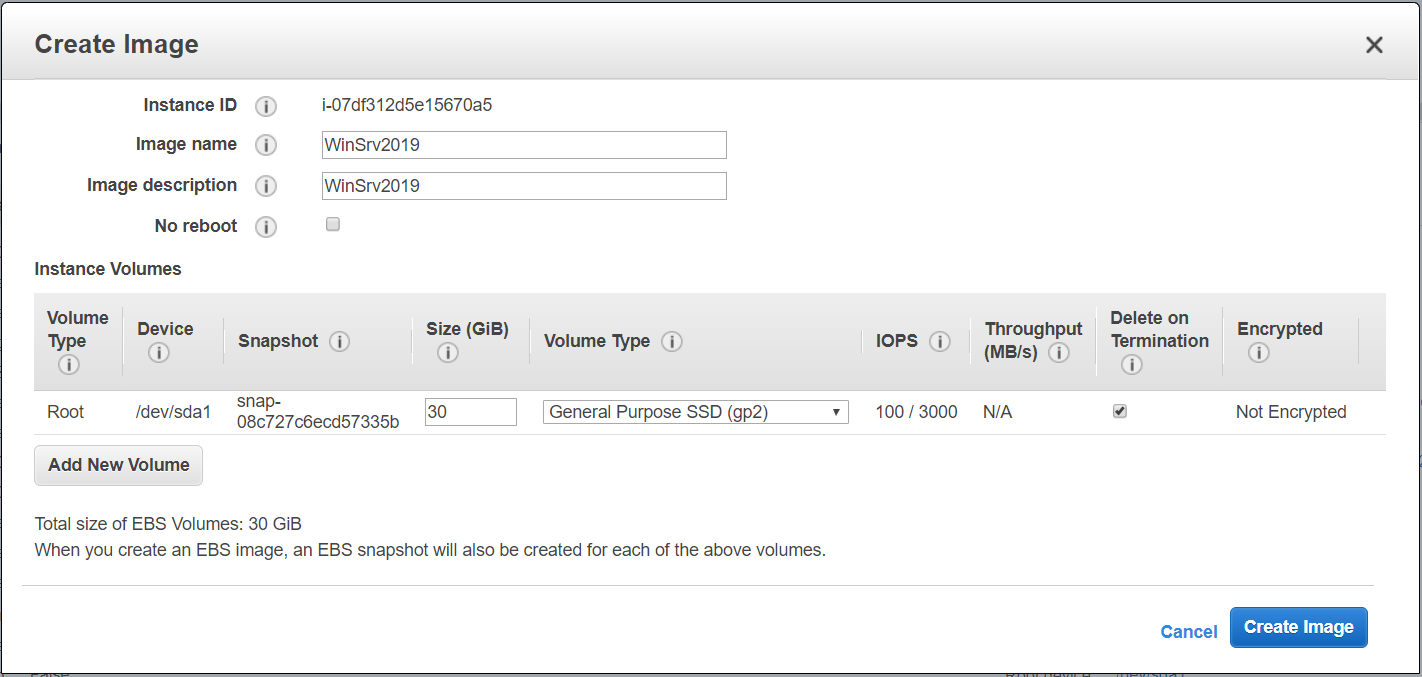
- Right-click on the instance and then click on Image and then Create Image

- Under Create Image fill in the following settings and then click on Create image.
- Image name – type the name of the image
- Image description – type the description of the contents and purpose of the image.
- No reboot – When enabled, Amazon EC2 does not shut down the instance before creating the image. When this option is used, file system integrity on the created image cannot be guaranteed. In our case it is disabled.
- Instances Volumes – define the volume size and volume type. In case you want to create an additional volume click on Add New Volume. We will keep the default settings.
- Click on View pending image ami-xxxxxxxxxx under Create Image request received.
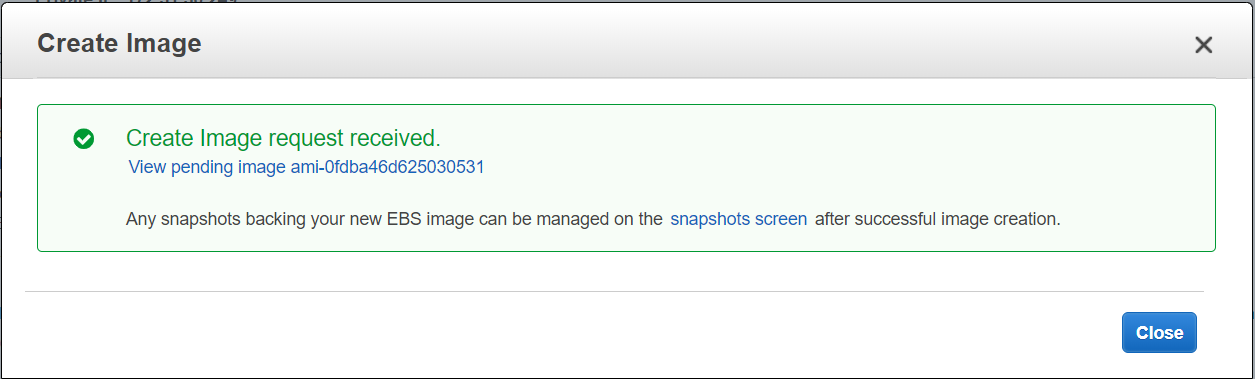
- The AMI image is successfully created as can be seen under Status: available.
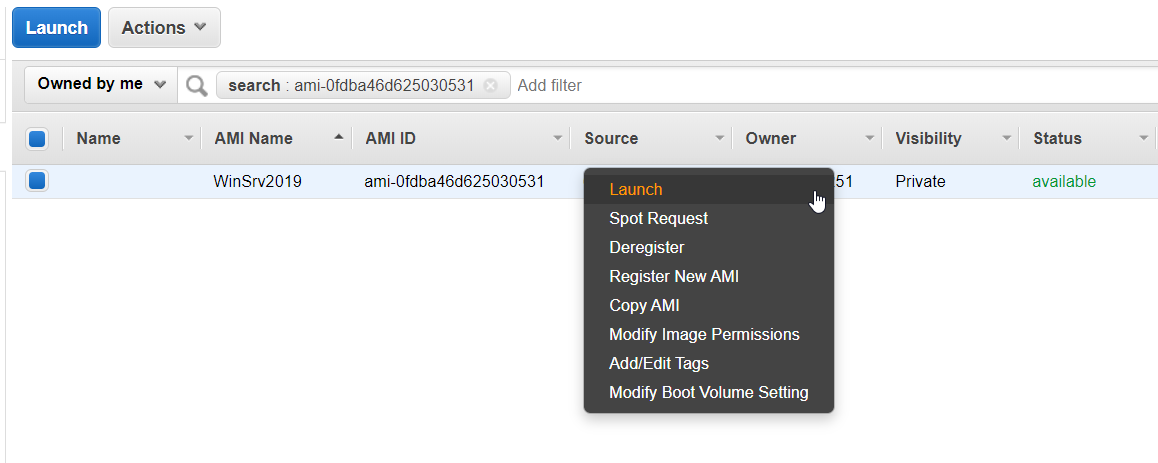
- Right-click on the AMI image and then click on Copy AMI
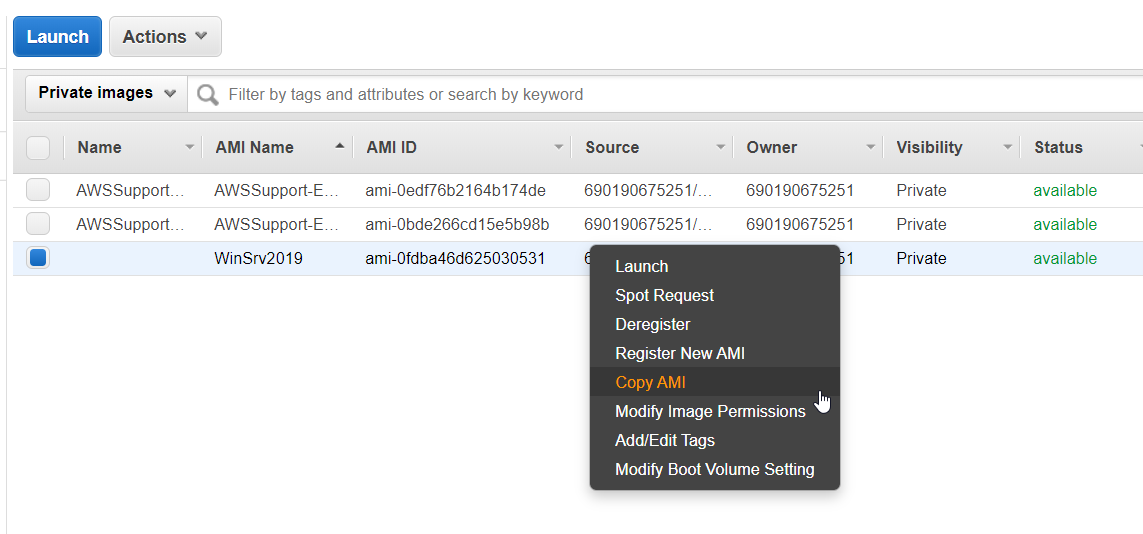
- AMI ‘ami-0fdba46d625030531’ will be copied to a new AMI. Set the new AMI settings below:
- Destination region – select destination region. There are currently 16 AWS regions. We will move Amazon EC2 instance from US East (Ohio) to Europe (Frankfurt).

- Name – define the name of the Amazon EC2 instance
- Description – type the description of the AMI
- Encryption – encrypt target EBS snapshot. We will not do it.
Once you configure the AMI setting, click on Copy AMI.

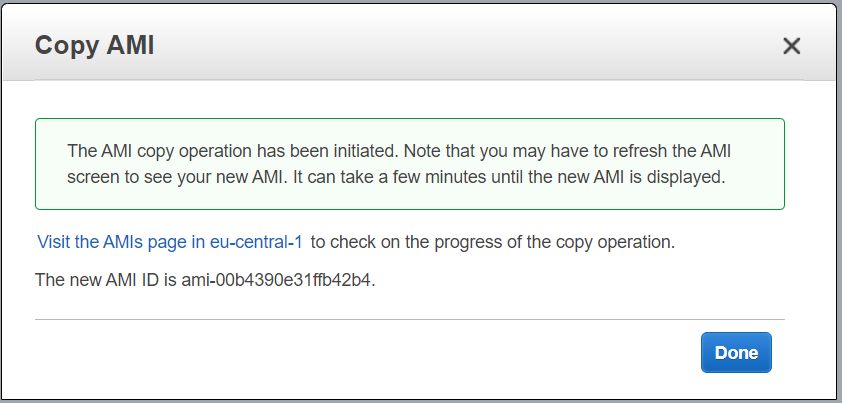
- The AMI copy operation has been initiated. Note that you may have to refresh the AMI screen to see your new AMI. It can take a few minutes until the new AMI is displayed. Click on Visit the AMIs page in eu-central-1 to check on the progress of the copy operation.
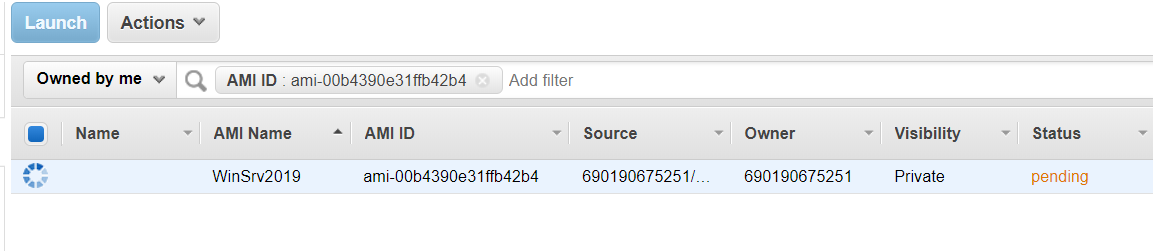
- The status is shown under Status: pending.
After a few minutes, our AMI image is available.

- Right-click on AMI image and then click on Launch
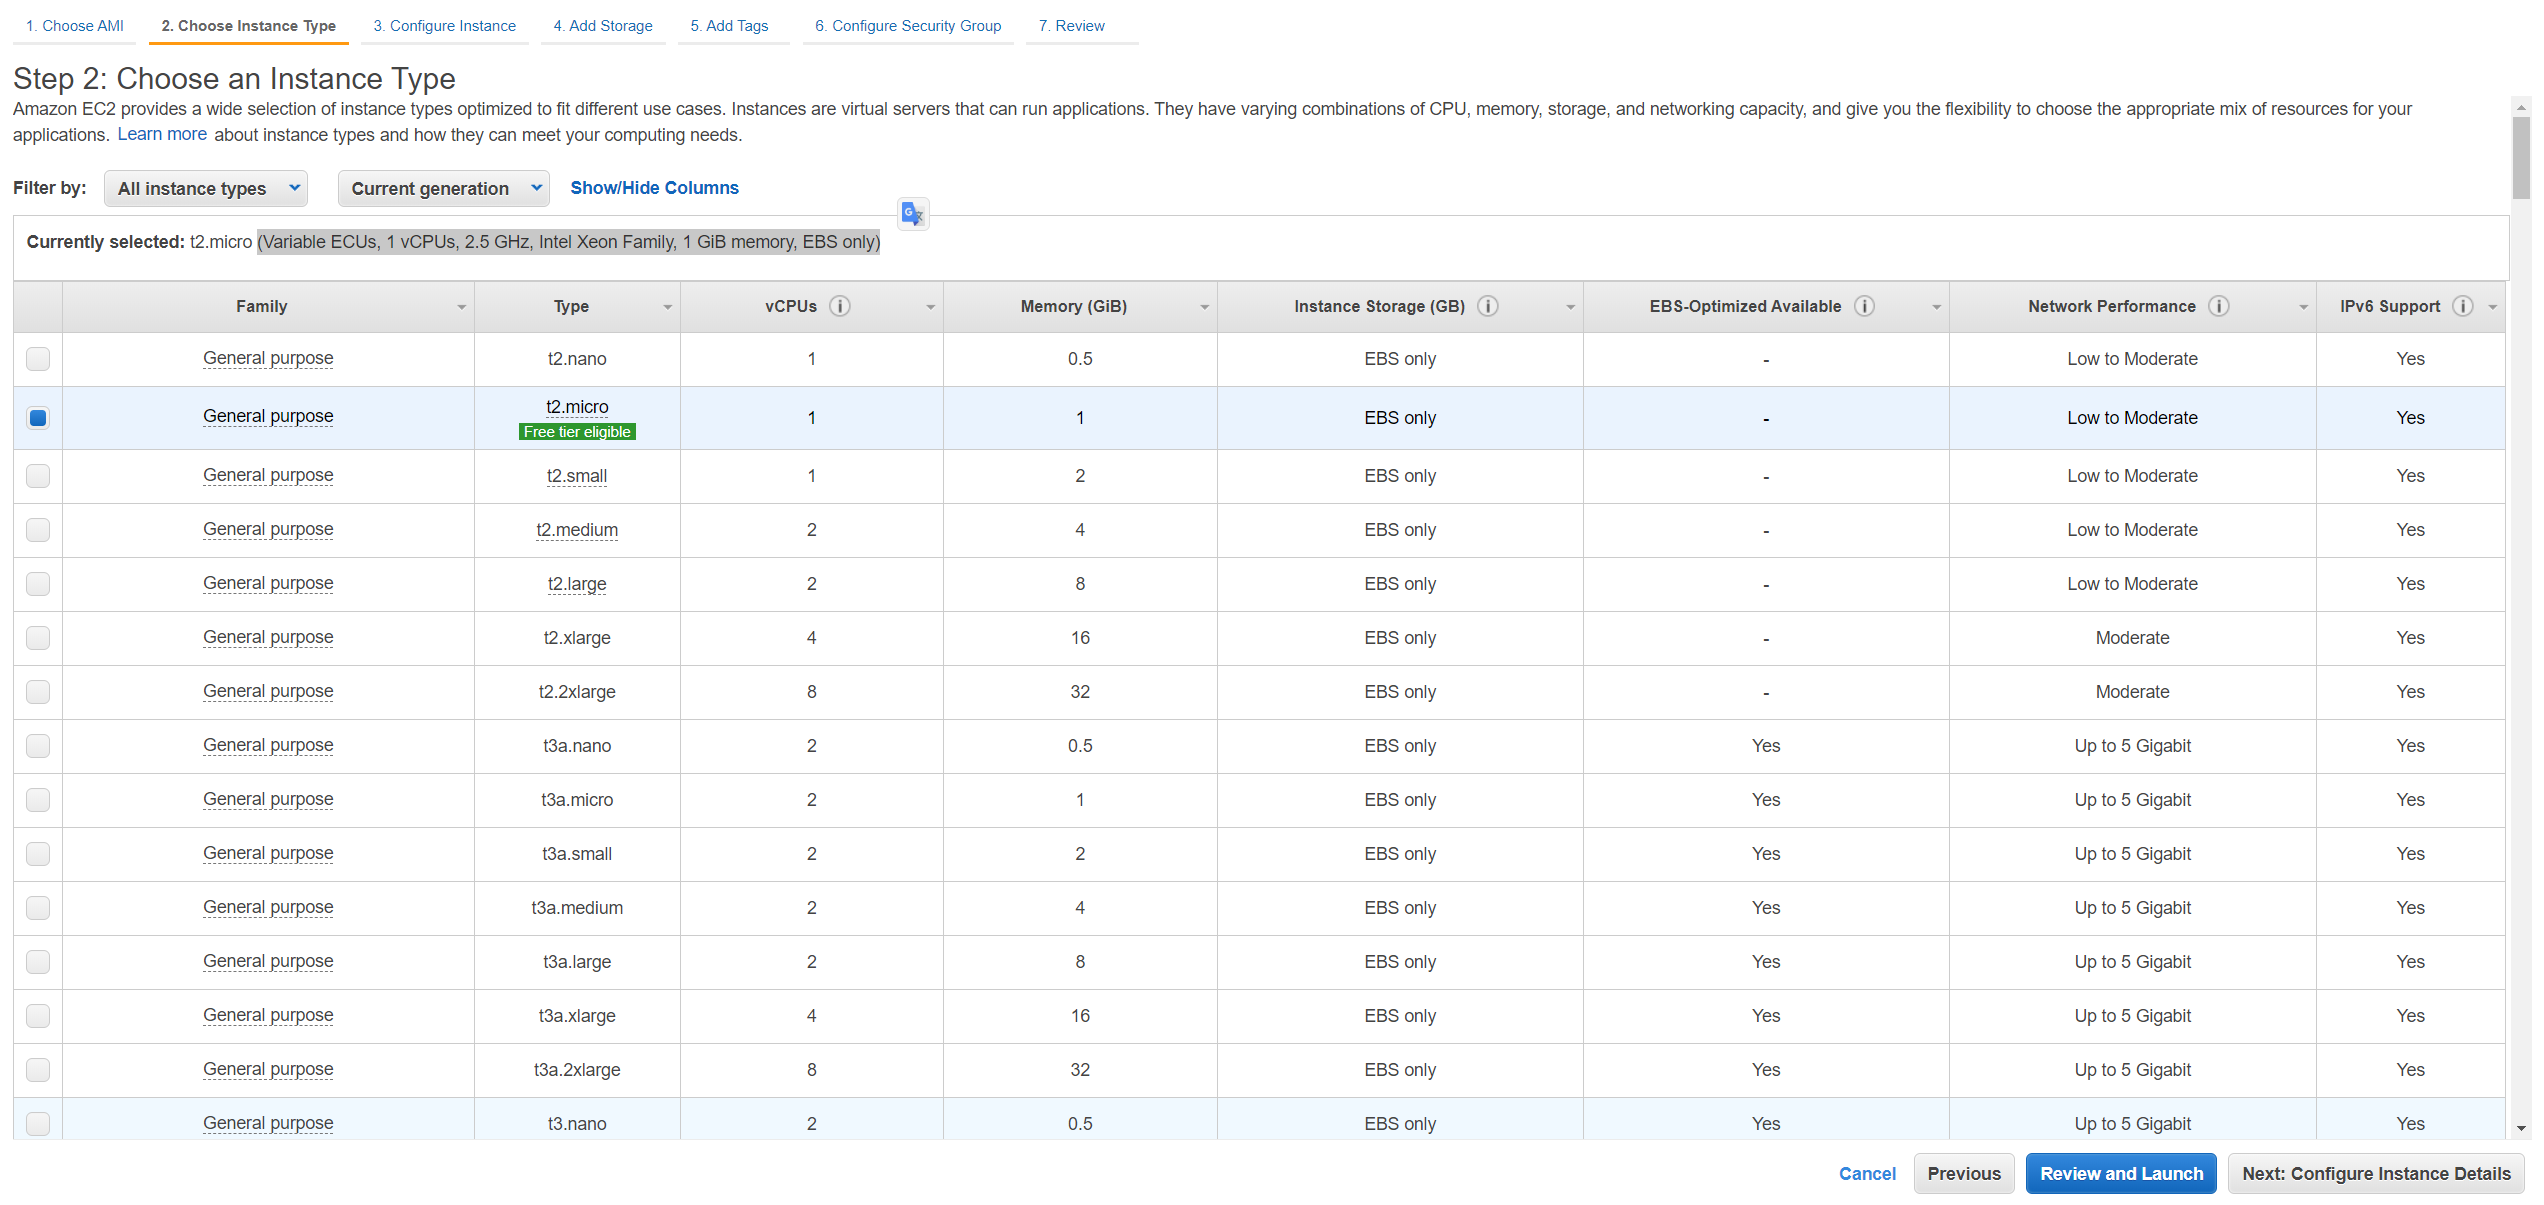
- Choose an Instance Type and then click on Next: Configure Instance Details. In our case, we will choose t2.micro (Variable ECUs, 1 vCPUs, 2.5 GHz, Intel Xeon Family, 1 GiB memory, EBS only)
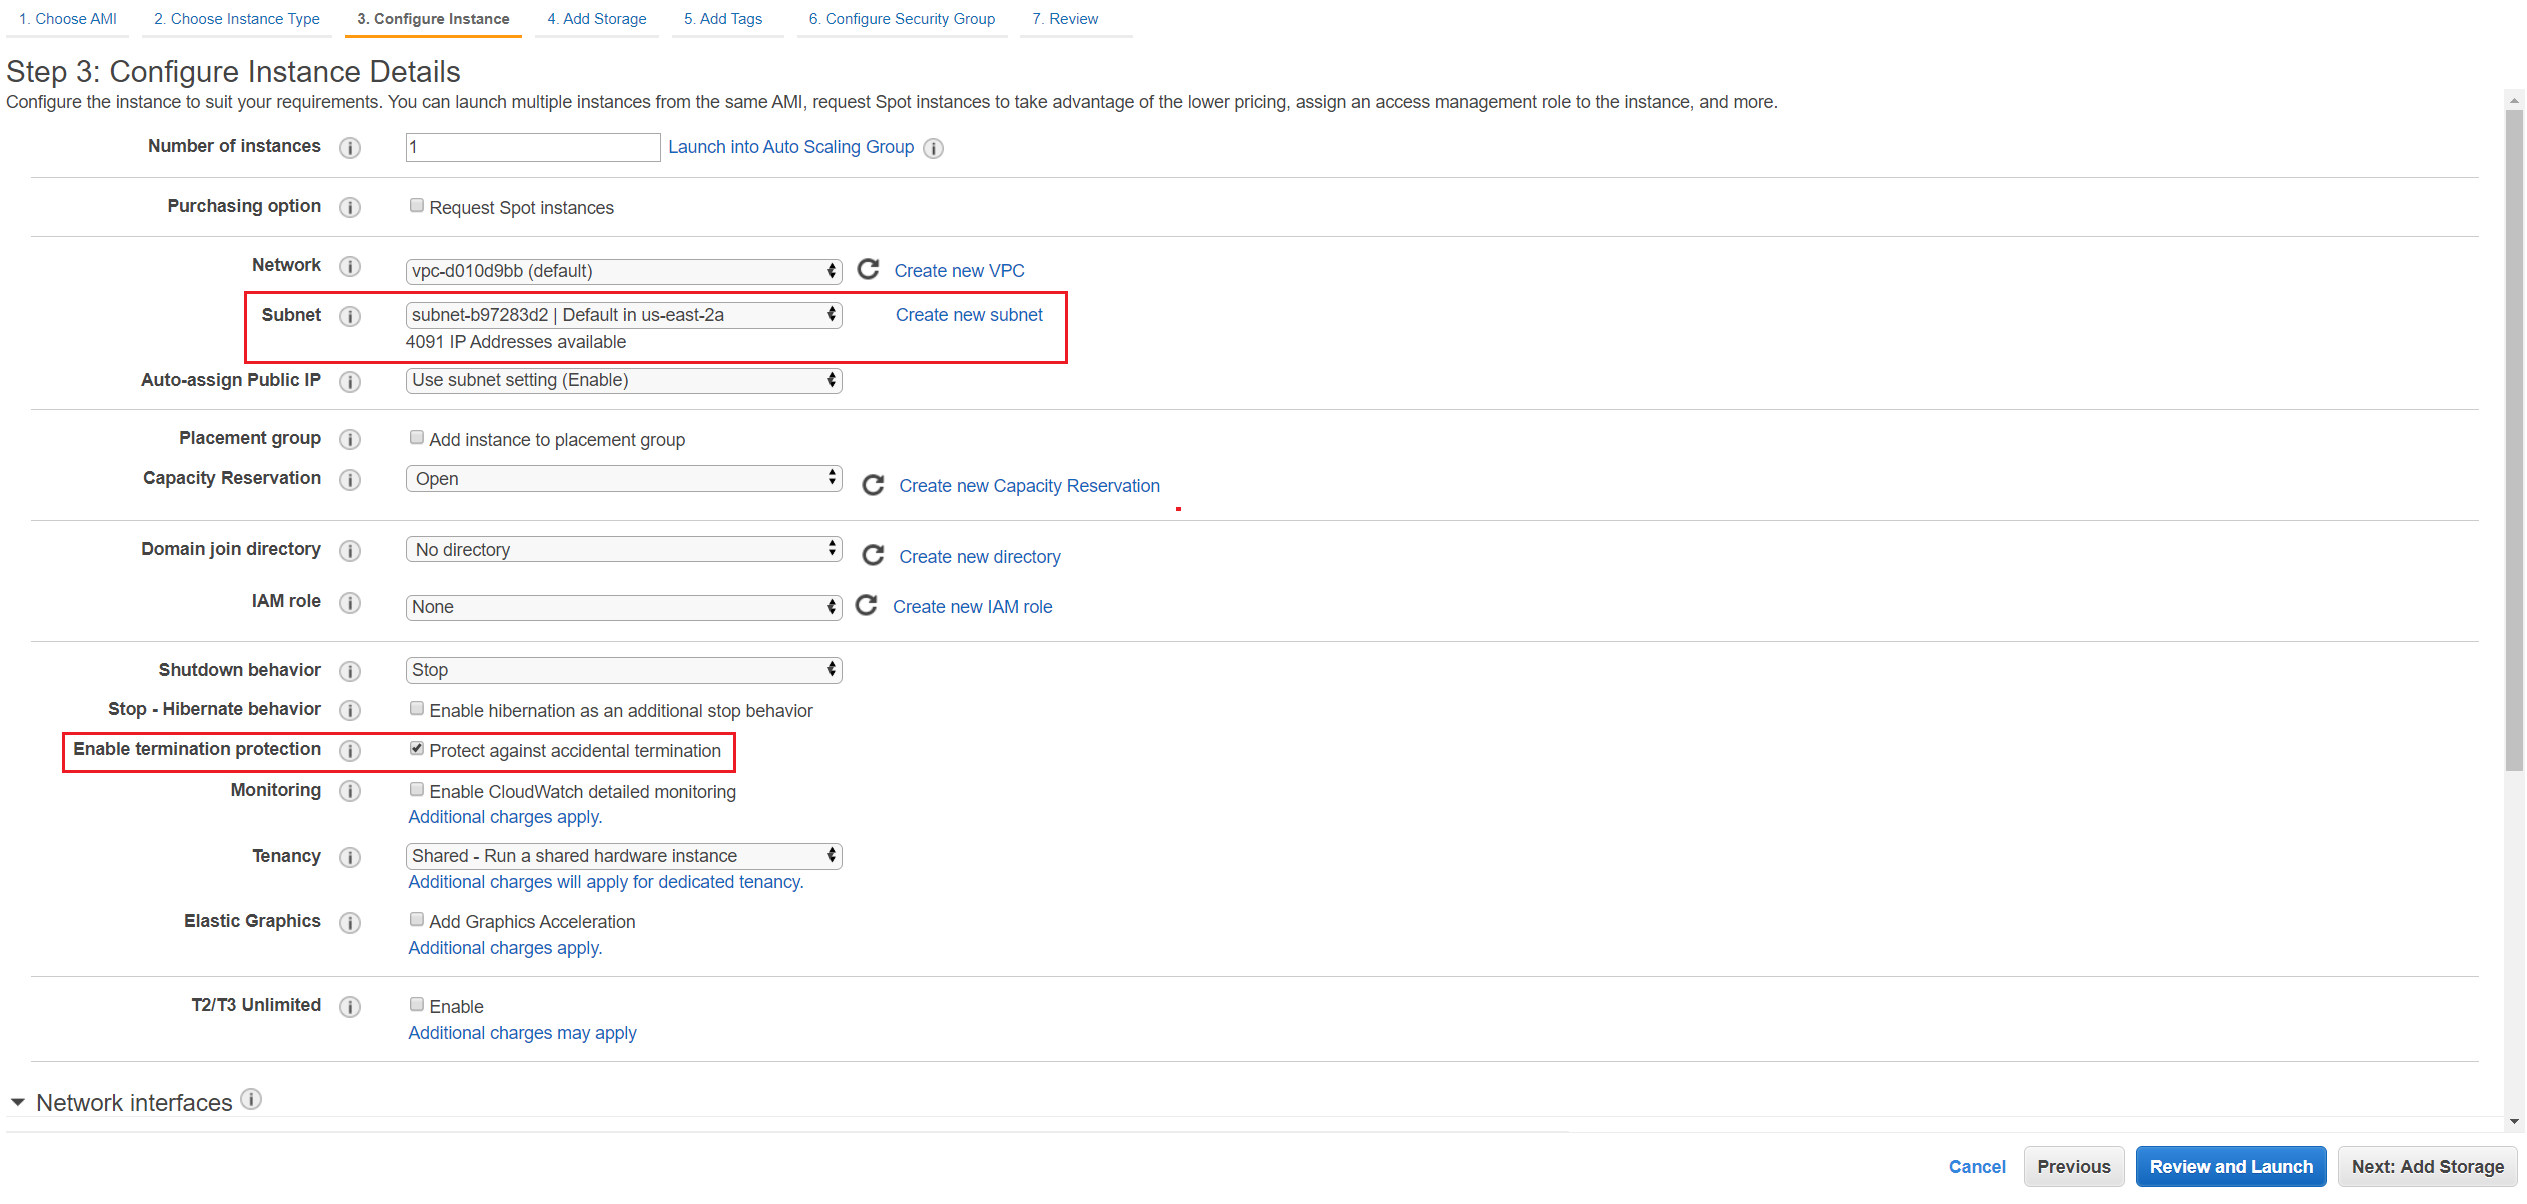
- Configure instance details based on your needs. Under Subnet, please choose the proper subnet and availability zone in Europe (Frankfurt). Also, we do recommend enabling termination protection which will protect instances from being accidentally terminated. Once you do that click on Review and Launch.
- Review instance settings and then click Launch.
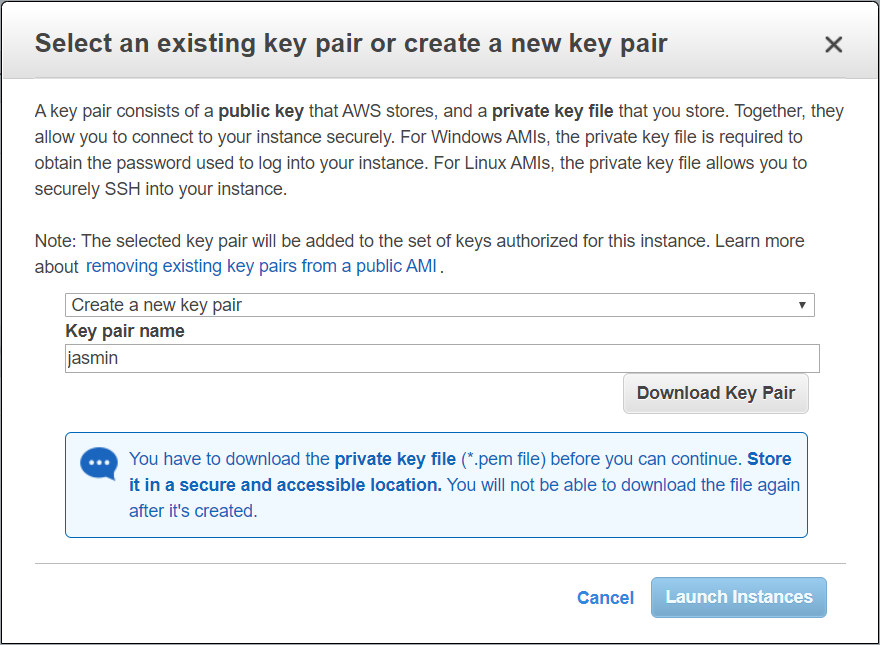
- Select an existing key pair or create a new key pair. A key pair consists of a public key that AWS stores, and a private key file that you store. Together, they allow you to connect to your instance securely. If you click on Create a new key pair, you will need to define pair name and Download key Pair that will be used to decrypt Windows password. You have to download the private key file (*.pem file) before you can continue. In our case, we will create a new key pair.
- Click Launch Instances.
- Your instances are now launching. Click on View launches.
- Please wait a few minutes until your instance is successfully initialized.
- Connect on your Amazon EC2 instance and verify if everything works fine.


Great Blog Kevin, much appreciated! I am learning AWS and wanted to do this as proof of concept for me and a potential customer, and this walked me right through it. Clear and easy to understand. Thank you!