How to Manage User and Computer Accounts using Admin Bundle For Active Directory?
Every network or system administrator is aware of Active Directory. A service that is developed by Microsoft for the Windows Server that is tasked with managing access and permissions to the network resources. It is a great tool and is being used to this day with many updates pushed out by Microsoft for it. Through the years, it has evolved and improved a lot, yet it still lacks some of the must-have features that management software should have at this level. With Active Directory, the system administrator can manage the network resources, however, there’s no automation which leads to the consumption of a lot of time. Time, that otherwise could have been used for other purposes.
Managing user accounts on a domain is essential. This helps you prevent security leaks and tightens your security infrastructure. Thanks to the modern automated tools, fortunately, you have the choice of using a third-party administrative bundle to perform various tasks that otherwise would have consumed a ton of time on Active Directory. For this purpose, we will be using the Admin Bundle for Active Directory by Solarwinds. The name Solarwinds is not a stranger in this world of networking as the company has gained a reputation throughout the years for itself that its competitors can hardly ever touch. The Admin Bundle For Active Directory tool comes up with a three-set of different automated tools that you can use to manage your Active Directory. These utilities are known as the inactive user account removal tool which you can use to remove all the obsolete accounts, the inactive computer account removal tool which is the same as the user account tool with the exception that it enables you to remove inactive computer accounts. Finally, the third tool is called the user import tool using which you can add multiple users at a single time.
In this article, we will be showing you how you can manage your Active Directory environment using the Admin Bundle For Active Directory tool. So, let us begin.
Installing Admin Bundle For Active Directory
Before you start using the tools, you will have to install them on your system. The installation process is very simple. First of all, head to this link and download the tool by clicking ‘Download Free Tool’. Once you have provided the requested information, you will be given a download link. After downloading the tool, follow the instructions below:
- Extract the .zip file to any location you want and then navigate to that location.
- You will see three different folders. Each folder represents a separate tool that we have mentioned above.
- Navigate to the Inactive Computer Tool folder and run the installer.
- Click Next when the installation wizard pops up.
Inactive Computer Removal Tool Installation - Agree to the license agreement and then hit Next.
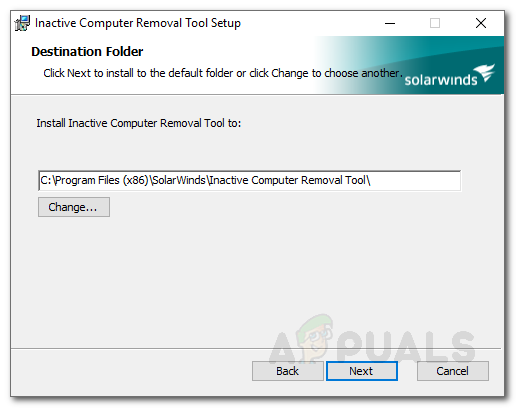
- Choose the installation directory of the tool by clicking Browse. Once done, click Next.
Inactive Computer Removal Tool Installation - Click Install to start the installation process. You will be prompted with a UAC dialog box. Click Yes.
- Do the same for the rest of the tools. For the user import tool, run the UserImportTool.msi file first. If the installation fails due to permission restrictions, run the ServiceInstaller.msi and then follow it up with the UserImportTool.msi file.
Using the Inactive User Account Removal Tool
Once you have installed all of the three tools, you can start removing the obsolete users. To do so, follow the below instructions.
- Run the Inactive User Account Removal Tool from the Start Menu.
- Once the tool starts, you will be asked for the Domain Controller, username and password. Fill in the required fields and then hit click Next.
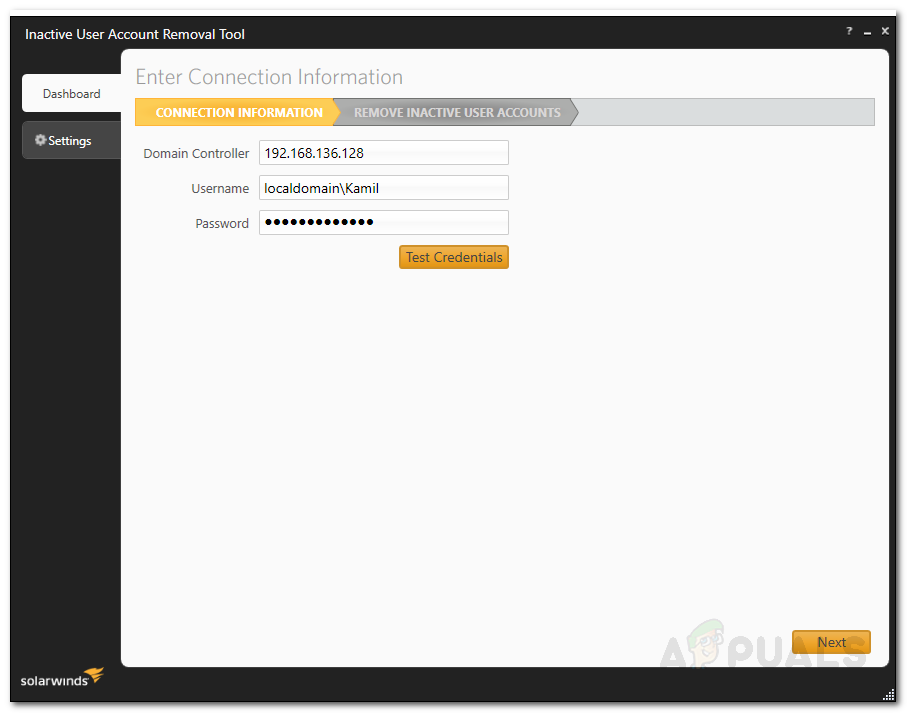
Inactive User Account Removal Tool Credentials - The tool will now list all of the inactive users on the active directory environment.
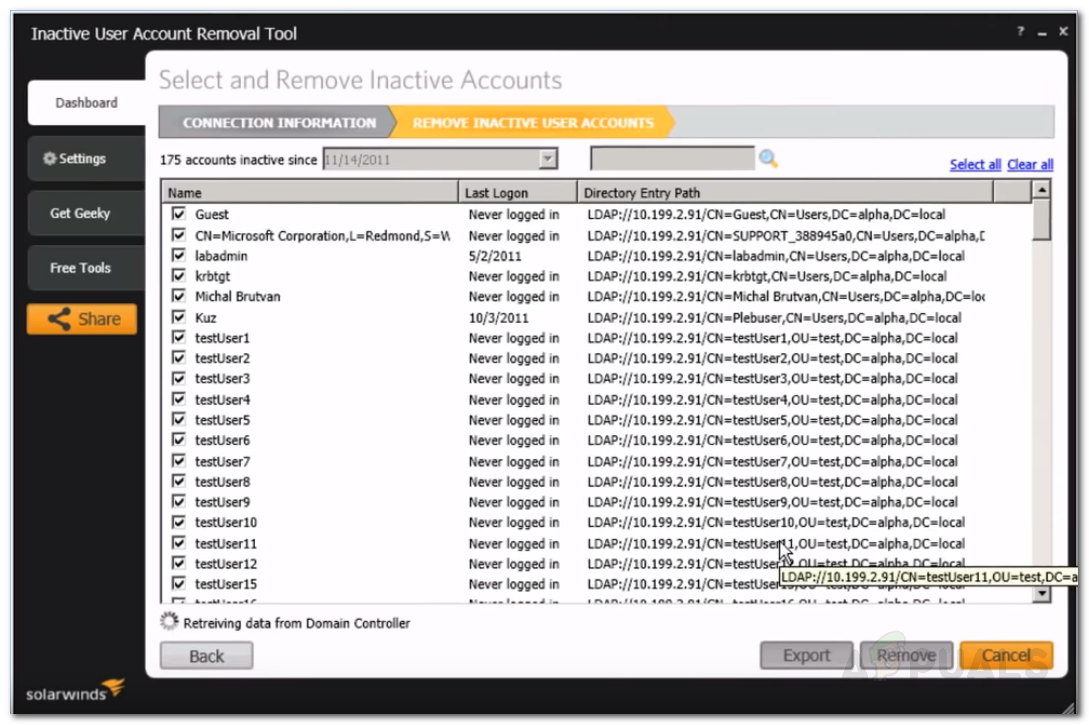
Inactive User Accounts - You can change the inactive since from the drop-down menu.
- You can search for your user by typing the username in the search box.
- Once you have selected the accounts you want to remove, click Remove.
- You can also export the list of accounts by clicking Export. Select the location where you want the export file and click Export.
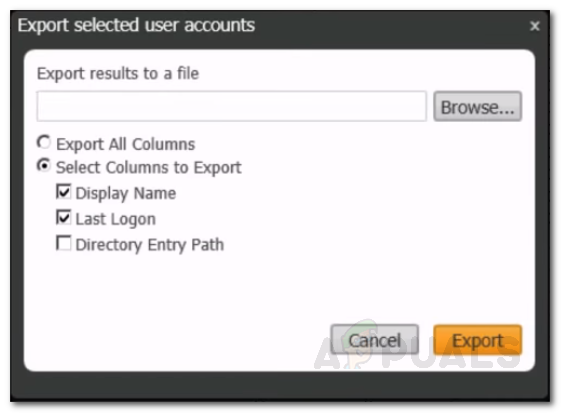
Exporting User Accounts List
Using the Inactive Computer Account Removal Tool
If you want to remove inactive computer accounts, just run the Inactive Computer Account Removal Tool from the Start Menu. Then, follow the same instructions provided for the User Account Removal tool and you will be good to go.
Using the User Import Tool
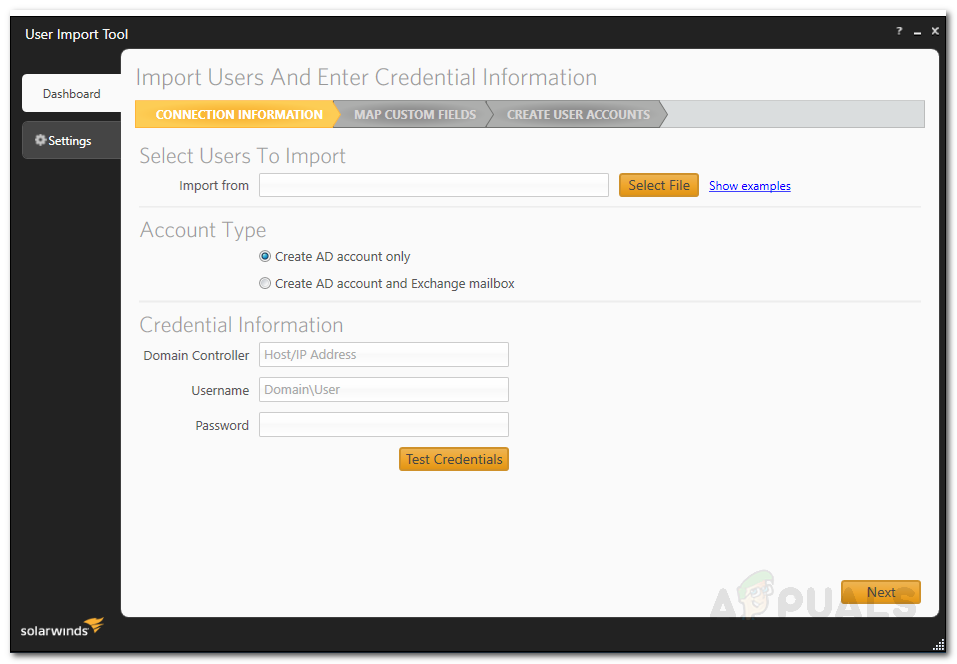
The final tool is the User Import Tool. Using this, you can add multiple users at a single time. For this purpose, you will be needing a .csv file or excel. To add in multiple users, make sure that you have entered the respective column header for each column. For example, make sure to enter the column header user first and then write down the usernames of the account you want to add under it. The same goes for the other columns. Once you have your file, follow the instructions below to import users:
- Run the User Import Tool from the Start Menu.
- Choose the file containing the details. You can click on ‘Show examples’ to check the right pattern of the accepted files.

User Import Tool Connection Credentials - After that, provide the domain credentials information and click Next.
- On the Map Custom Fields page, you can map the fields in your import file with what is available in the Active Directory.
- To map an attribute, select the entry on the left-hand side and then choose the entry that you want to map it to on the right-hand side. After that, click the Map Attribute button.

Mapping Custom Fields - If there is a property that does not appear on the right-hand side, you can easily search for it using the search box. Choose the right attribute for your search from the drop-down menu and then click Add.
- Once you are done, click Next.
- Now, you will be shown all the accounts that you are importing with their information. You can make any changes if you want to.
- Once you have made changes per your needs, you can click on Create to import the user accounts to Active Directory.