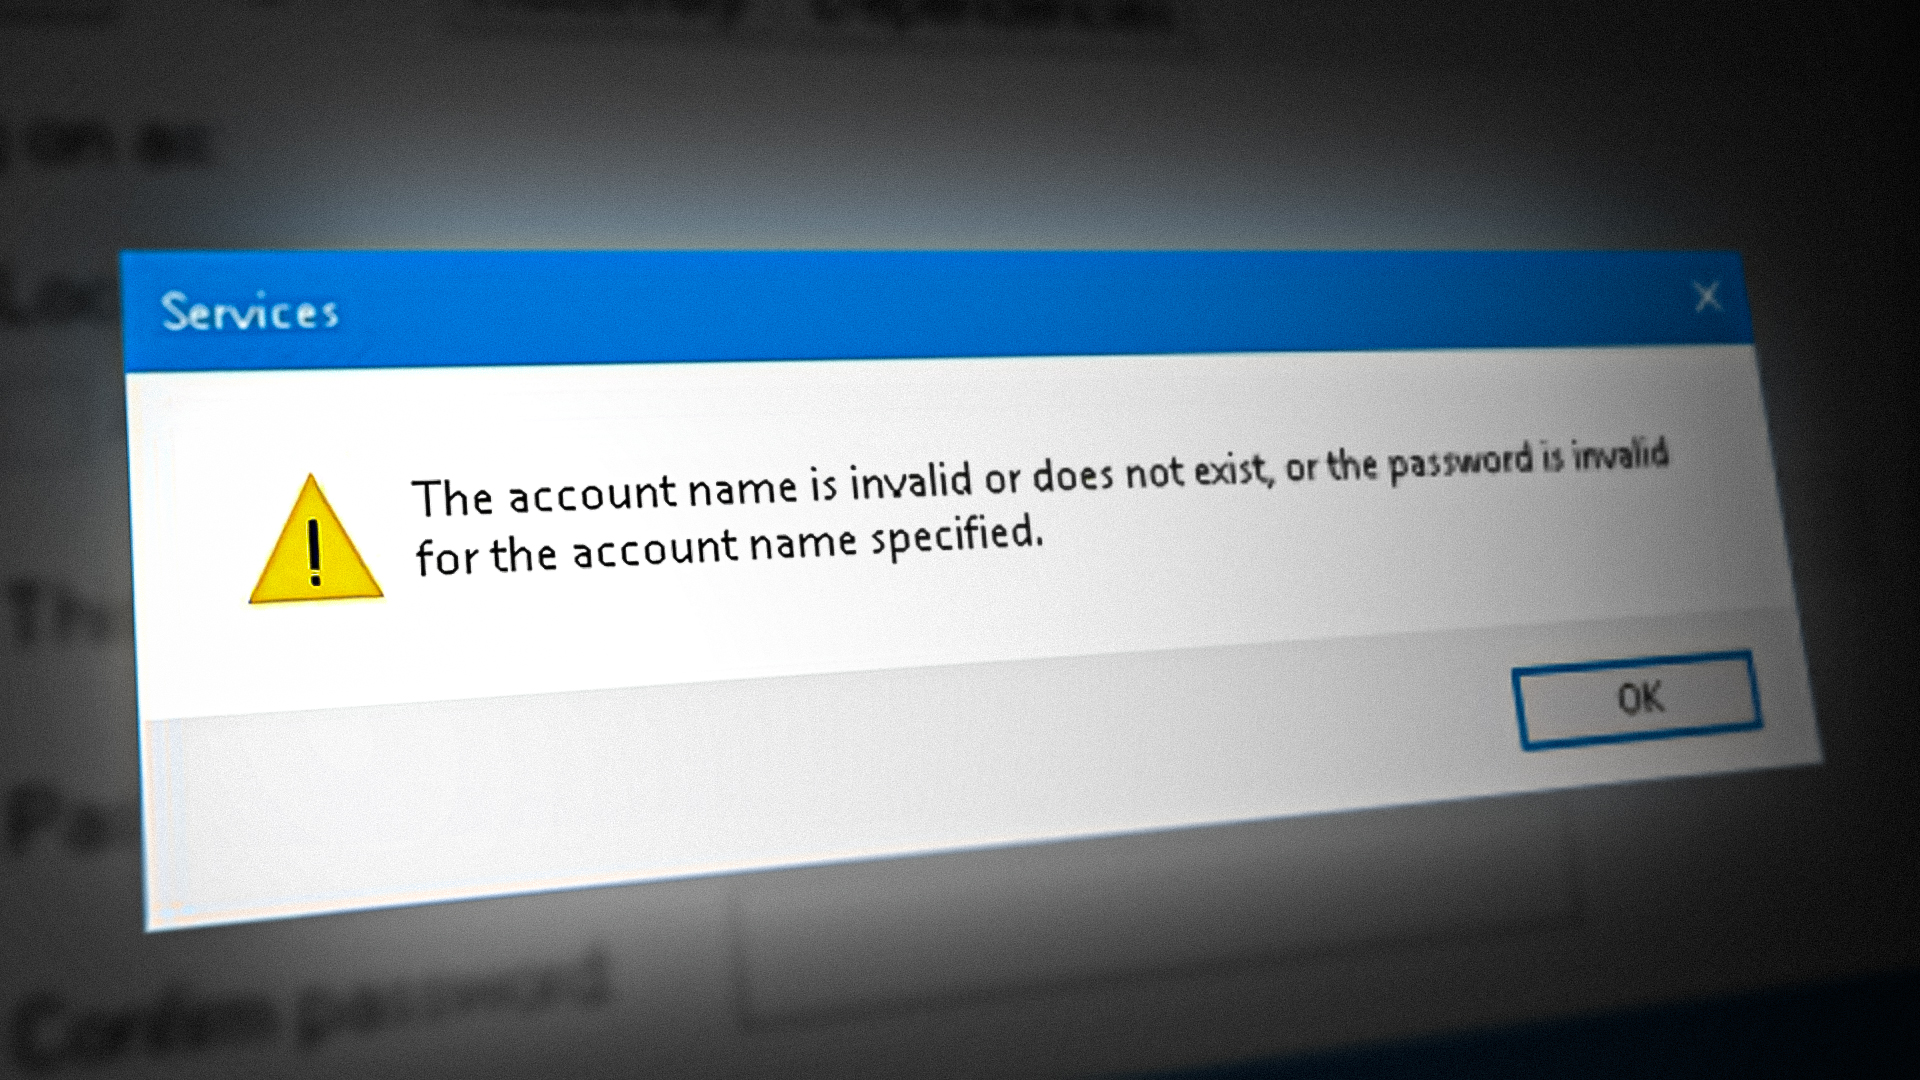
[FIX] “NT AUTHORITY/LOCAL SERVICE Cannot Be Found” Error
The error ‘NT AUTHORITY/LOCAL SERVICE cannot be found‘ is a SQL server data error that typically occurs with Visual Studio or when performing certain tasks in Windows Server editions. While some people experience this problem after installing new server applications or when compiling a Visual Studio app, others see it when attempting to install a service using the Advanced installer.
There are several different common reasons why you might experience the NT AUTHORITY\NETWORK SERVICE error and these will vary depending on your use case.
Most commonly, your network administrator might have removed the specific Windows Login due to a variety of reasons. In consequence, you will not be able to grant login access to the SQL server.
Another reason you might see this error is when you try to add a new login with the same SID as an existing SQL Server login. In this case, you should also see the 15401 error code.
However, ‘NT AUTHORITY/LOCAL SERVICE cannot be found’ error is also confirmed to occur when the login is located in a different domain than the SQL server or if the specific name resolution mechanism that you’re using (WINS, DNS, HOSTS or LMHOSTS) is not configured properly.
Below you’ll find a series of confirmed fixes that other affected users have successfully used to get to the bottom of this issue.
1. Check if NT AUTHORITY\LOCAL SERVICE exists and has the necessary permissions
Before you move on to more technical fixes, the first thing you need to do is ensure that the NT AUTHORITY\LOCAL SERVICE account actually exists on the system where you are trying to leverage it.
If you conclude that the account exists, take the time to make sure you have enough privileges to actually create the necessary logging and associated user at the SQL Server Level.
This procedure will be a little different depending on your version of the Windows server, but the general steps are the same on every Windows Server version.
Here’s what you need to do:
- Open up the Windows Server Essentials Dashboard.
- Access the main navigation bar and click on Users.
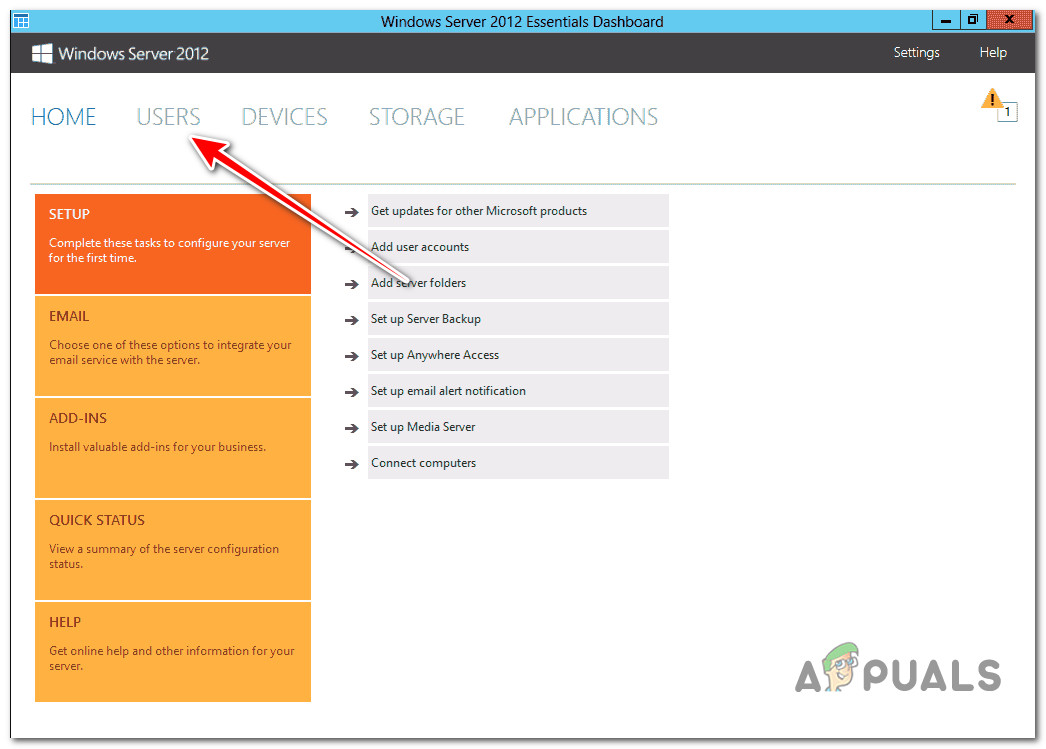
Accessing the users tab - Cycle through the list of current users and see if you can find an entry named NT AUTHORITY\LOCAL SERVICE.
Note: If the entry associated with NT AUTHORITY\LOCAL SERVICE is missing, click on the Add a user account hyperlink to bring up the Add a User Account Wizard. From there, follow the instructions to create the users for NT AUTHORITY\LOCAL SERVICE and make sure the naming convention is on point. - Once you’ve made sure that the account is present, let’s make sure it has the necessary permissions. To do this, click on the NT AUTHORITY\LOCAL SERVICE account under Users, then go to the Tasks pane and click on Properties.
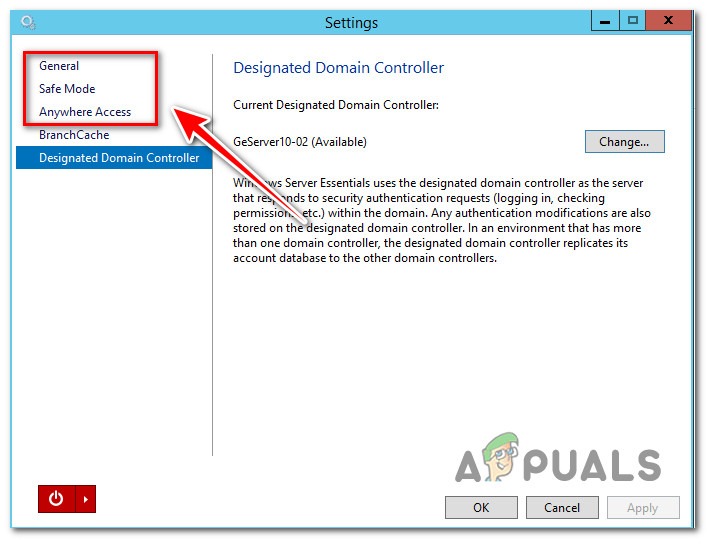
- Next, go to the General tab, the Sharded folders tab, and then on the Anywhere Access tab and enable every permission that this account needs depending on your particular use case.
Enabling the required permissions for the account - Save the changes and repeat the action that was previously causing the ‘NT AUTHORITY/LOCAL SERVICE cannot be found’ is now fixed.
If you’ve already made sure that NT AUTHORITY\LOCAL SERVICE user account is created and it has the necessary permissions, move down to the next method below.
2. Create SQL Server login (if applicable)
If you get this error while using the SQL Server data-tier application in a Visual Studio project, chances are you see this error after creating the script that adds NT AUTHORITY\LOCAL SERVICE to the login list under Server Level Objects.
If you used the following scripts to create the logins and add them under Database Level objects, this method is applicable:
CREATE LOGIN [NT AUTHORITY\LOCAL SERVICE] FROM WINDOWS WITH DEFAULT_LANGUAGE=[us_english]
CREATE USER [NT AUTHORITY\LOCAL SERVICE] FOR LOGIN [NT AUTHORITY\LOCAL SERVICE]
In this case, you are likely getting the error when trying to compiled the project with the error “Unable to find NT AUTHORITY\LOCAL SERVICE because it does not exist or a permission in not granted”.
If this scenario is applicable, the reason why you can’t create the [NT AUTHORITY\LOCAL SERVICE] login is that NT AUTHORITY\LOCAL SERVICE is nothing more than a built-in Windows Service Accoount in this instance. Each service in SQL Server must have an account defined during installation in order to start and run.
SQL Server startup accounts can be built-in system accounts, local user accounts, or domain user accounts. The Local Service account is a built-in account that has access to the same resources and objects as members of the Users group. This restricted access serves to protect the system in the event that particular services or processes are hijacked.
Services that operate as the Local Service account use a null session to access network resources.
IMPORTANT: Be careful that the SQL Server or SQL Server Agent services do not support the Local Service account. The account’s full name is “NT AUTHORITY/LOCAL SERVICE”.
To get around this issue, you’ll need to create an SQL Server login that uses Windows Authentication via Transact-SQL.
To do this, start by creating a user in Windows, then open up the following Transact-SQL command with Query Editor and make sure the login name is the same as the Windows User name:
CREATE LOGIN <name of Windows User> FROM WINDOWS; GO
Note: Keep in mind that <name of Windows User> is simply a placeholder. Replace it with the actual name of the Windows users.
3. Add proper permissions to SQL (if applicable)
Another reason why you might be experiencing this issue is a scenario in which you didn’t add the proper permissions in SQL for the NT AUTHORITY/LOCAL SERVICE service and only gave control on the folder.
To rectify this issue, you’ll need to open SQL Server Management Studio (Enterprise Manager) and explore the SQL instance you are trying to connect to. From there, you’ll need to go to Security > Logins and create a new login using the Windows Authentication method for NT AUTHORITY/LOCAL SERVICE.
Here’s a quick guide on how to do this:
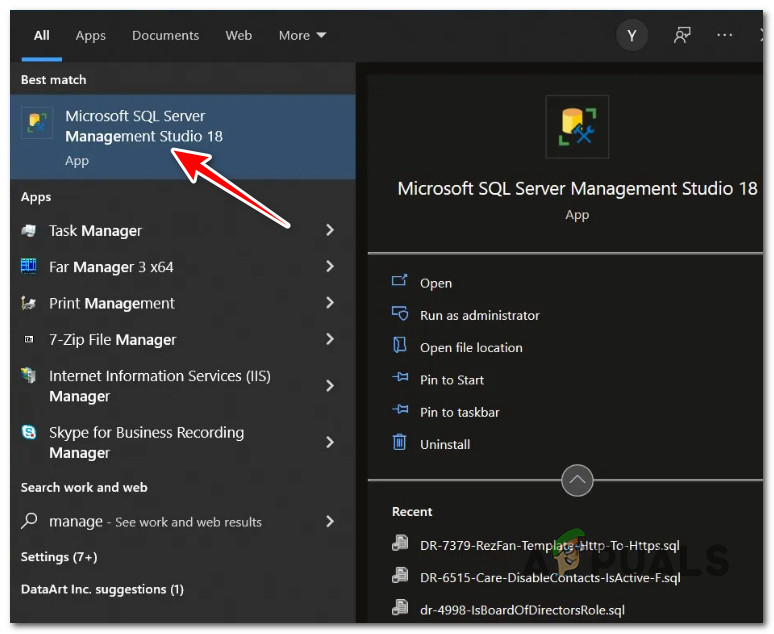
- Open up the Start page and type ‘SSMS’.
- From the list of results, select Microsoft SQL Server Management Studio.
Open up the SQL management studio - Once you’re inside the Microsoft SQL Server Management Studio utility, navigate to the specific SQL instance that is giving you the error.
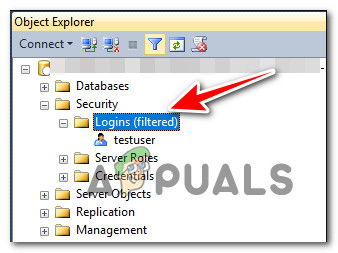
- After you have successfully accessed the specific SQL instance, explore it to Security > Logins (filtered).
Accessing the logins folder - Right-click on the underlying item, then click on Windows Authentication.
- Next, type ‘NT AUTHORITY/LOCAL SERVICE’ and confirm to create the proper SQL permissions.
- Make sure to add the proper permissions to this new account if you haven’t already.
Note: Go back to Method 1 for specific steps. - Repeat the action that was previously causing the problem and see if the issue is now fixed.
4. Rebuild the SQL Server database (if applicable)
If you already tried changing the ‘Log on as’ user inside the SQL server service to NT AUTHORITY/LOCAL SERVICE and it didn’t work, you might be able to get the issue resolved by using the Download Installer to extract the hexadecimal name before rebuilding the SQL database and copying the files right back.
Here’s a quick guide on how to do this:
- Run the downloaded installer and let it extract the files in the default location.
Note: The extraction will be deployed on the root directory of your OS drive (most like C:/) in a long hexadecimal name. - Once the extraction is complete, take the time to copy all files into a different folder to prevent the following action from erasing it;’s contents.
- Close the installer.
Note: As soon as you do this, the contents of the hexadecimal folder you’ve created at step 2 will be erased. - Press Windows key + R to open up a Run dialog box.
- Next, type ‘cmd’ and press Ctrl + Shift + Enter to open up an elevated Command prompt of your server.
Open up an elevated CMD window - At the User Account Control (UAC), click Yes to grant admin access.
- Use CD to navigate to the location where you previously saved the extracted files (at step 3). Here’s an example command:
CD C:\23420247290247292740
Note: This is just an example snip. Modify the command above to navigate to the actual location where you’ve saved the files (at step 3).
- Once you arrived in the correct location, run the following command to recreate and rebuild the database:
setup /action=RebuildDatabase /InstanceName=SQLEXPRESS /SqlSysAdminAccounts=BUILTIN\Administrators
- Close the elevated CMD prompt and repeat the action that was causing the ‘NT AUTHORITY/LOCAL SERVICE cannot be found’ to see if the issue is now fixed.
5. Curate MachineGUID & Reboot SQL service
If you get this error while attempting to start your SQL server and the problem started to occur after you changed the built-in logon from Local Service to Local System, the issue is likely caused by a MachineGUID registry key that is no longer pointing towards the correct path.
Other users finding themselves in a similar situation have confirmed that they managed to fix the issue by creating a backup of the problematic key before modifying the path and restarting the SQL service.
Here’s a quick guide on how to do this:
- Press Windows key + R to open up a Run dialog box.
- Next, type ‘regedit’ and press Ctrl + Shift + Enter to open up Registry Editor with admin access.
Opening up the Registry Editor - At the User Account Control (UAC), click Yes to grant admin access.
- Inside Registry Editor, use the left-hand pane to navigate to the following location:
HKLM\SOFTWARE\Microsoft\Cryptography\MachineGuid
- Once you arrive to the correct location, identify the problematic key. It should have the GUID of the affected machine with the curly braces (e.g. {xxxxxxxx-xxxx-xxxx-xxxx-xxxxxxxxxxxx})
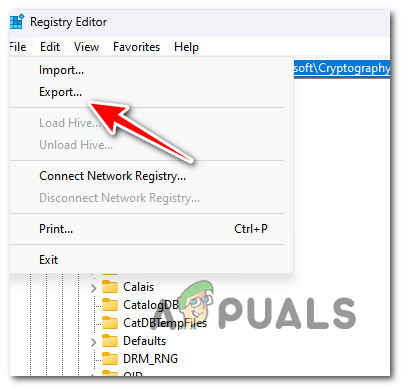
- Once you’ve identified the affected machine correctly, we need to create a backup. To do this, make sure the machine key is selected, then use the ribbon file at the top to go to File and click on Export.
Exporting the file - Set a location and give a recognizable file name and make sure the Save as type is set to Registration Files (*.reg).
- Finally, before clicking on Save, make sure that the Export Range is set to Selected branch and that the correct branch is selected.

Exporting the specific branch - Click on Save to complete the backup process.
- Once the backup is completed, rename the problematic key and remove the braces.
Note: The value of MachineGuid should go from {xxxxxxxx-xxxx-xxxx-xxxx-xxxxxxxxxxxx} to xxxxxxxx-xxxx-xxxx-xxxx-xxxxxxxxxxxx. - Once this modification has been enforced, close the Registry Editor and reboot and start the SQL service. Important: In case the service doesn’t start immediately, uninstall and reinstall SQL before rebooting again. If you get a different error, restore the original backup that you created at step 8 and move to the next method below.
6. Modify User Mappings
If you get the ‘NT AUTHORITY/LOCAL SERVICE cannot be found’ when trying to fetch data from your SQL server using asp.net, one quick way to fix any local cause is to modify the user mapping to its correct values.
Note: This fix is effective in situations where you are using a local SQL Server Management Studio database and you’re trying to input data to it using an asp.net application.
If you’ve double-checked the inputs and all the code is correct yet you still get the error, follow the instructions below to use the SQL Server Management Studio to access the Logins page and modify the currently assigned User Maapings from the Properties screen.
Here’s a quick step-by-step guide on how to do this:
- Press the Start key on your keyboard, then type ‘SSMS’ in the Start page.
- From the list of results, select Microsoft SQL Server Management Studio.
Open up the SQL management studio - Next, login into the server that is causing the ‘NT AUTHORITY/LOCAL SERVICE cannot be found’ error.
- Navigate to Security, then access the Logins sub-section.
- From the list of options, right-click on NT AUTHORITY\NETWORK SERVICE or NT AUTHORITY\LOCAL SERVICE (depending on your particular use case) and click on Properties from the context menu.

Accessing the Properties screen of Local service - Once you’re inside the Login Properties screen, choose User Mappings from the top-left section of the screen.
- On the right side, you’ll get a list of databases roles. Make sure the db-owner checkbox is checked, then click Ok.
- Re-run the code that was previously causing the issue and see if the problem is now resolved.
7. Grant sysadmin role access (if applicable)
In case you get this error while you attempt to access a database for an application created locally, the first thing you should check is whether the current configuration allows NT AUTHORITY/LOCAL SERVICE under the sysadmin role.
You can do this by opening up the Microsoft SQL Server Management Studio and modifying the properties of the NT AUTHORITY/LOCAL Service in order to enable the sysadmin role.
Here’s a quick guide on how to do this:
- Press the Start key on your keyboard, then type ‘SSMS’ in the Start page.
- From the list of results, select Microsoft SQL Server Management Studio.
Open up the SQL management studio - Next, go under Security and expand the Logins menu.
- Right-click on NT AUTHORITY/Local System and click on Properties from the context menu.
- Inside the Properties screen, click on Server Roles from the left-hand side menu.
- Go over to the right-hand side and ensure that the box associated with sysadmin is checked.

Modifying the server roles - Save the changes, then restart your machine and see if the problem is now fixed.
In case you are not able to access the Microsoft SQL Server Management Studio for any reason, you can also enforce this fix from an elevated Command prompt (if your access allows it).
Here’s how to do this:
- Press Windows key + R to open up a Run dialog box.
Next, type ‘cmd’ and press Ctrl + Shift + Enter to open up Registry Editor with admin access.
Open a CMD prompt - At the User Account Control (UAC) prompt, click Yes to grant admin access.
- Inside the elevated command prompt, type the following command (and modify the placeholder) to access the specific server causing the issue:
sqlcmd -S (*server name*)
Note: Make sure to modify the *server name* with the actual sever name in your particular case.
- Next, type the following command and press Enter to access the SQL sever on your machine:
select name from sys.server_principals where name = 'NT AUTHORITY\SYSTEM'
- Next, type the next command to take the result and use it in a sortprocedure where sysmin rights will be added to it:
SP_ADDSRVROLEMEMBER 'NT AUTHORITY\SYSTEM','SYSADMIN'
- Once both commands have been processed successfully, close the elevated CMD prompt and repeat the action that was causing the ‘NT AUTHORITY/LOCAL SERVICE cannot be found’ error.
8. Change server lang to English (if applicable)
If you get the ‘NT AUTHORITY/LOCAL SERVICE cannot be found’ when using Advanced Installer to call upon the NT AUTHORITY\LOCAL SERVICE, the error might be a symptom caused by a bug that is affecting foreign servers.
This problem is confirmed to occur when certain Advanced Installer users try to launch the XUA Automation Server service manually via the Service screen or when they try to launch manually by typing the username alone (without NT Authority).
Note: This problem occurs because the SCM doesn’t support localized names even though the security subsystem will localize them. While you will receive a localized name for your account on a foreign server, the account must be NT AUTHORITY\LocalService when you use functions like CreateService or ChangeServiceConfig.
If this scenario is applicable, the only solution as of now is to use the English version of the naming convention.
So instead of using commands in the local server language (e.g. AUTORITE NT\SERVICE LOCAL) use the English equivalent (NT AUTHORITY\LocalService).