How to Identify Shared Files and Directories on OneDrive?
In a network, there are various things that are shared and utilized by the employees. This includes network resources as well as files that are being worked on together by a team. Cloud storage is one of the most commonly used technologies these days. Instead of having to buy physical hardware, you can just have a cloud system in place that can be accessed anywhere in the network by anyone with the required credentials.
OneDrive is a cloud file hosting service that offers the possibility of storing folders and files in the cloud. Using OneDrive, you can easily share directories or specific files with other users so that they have access to them as well. This can be really useful in a network where there are different people working on the same project. Often times, you will have to check in on the shared files and folders just to verify that nothing sensitive is being shared with people that are not cleared to view it.
This is something that can be done easily via an access management software. Having an access rights manager software these days is very important considering how large and complex networks have become. There are many users to be handled manually and that is why IT admins need to look for an ARM tool that will help them manage user permissions more efficiently.
Downloading Solarwinds Access Rights Manager
Finding the right access management software can be hard because there are so many available on the internet these days. Whenever you go for such tools, try to go for a product that is developed by a renowned company. That way, you are most likely going to get a great product for yourself. That is exactly why we are going to be using Solarwinds Access Rights Manager (download here) in this guide. Solarwinds is a very well renowned company when it comes to system and network management. Most of their products are top-notch and industry favorite, just like Access Rights Manager.
Access Rights Manager simplifies your access rights approach via an intuitive UI where you can view the permission rights of all of the users and groups. You can easily manage and audit access rights via the user friendly interface in your Active Directory and more. You can also view the access rights changes that have been made in your Active Directory and even better, you will be able to see what changes were made by who and when.
We will be using the tool in this guide as mentioned previously so make sure to download the software from the link provided. You can download the free trial to test the product for yourself if you wish to which lasts for 30 days while being fully functional. The installation process is very simple and easy. You will be prompted to choose a type installation. If you wish to use an existing SQL server, go for Advanced Installation, otherwise Express Installation is the way to go as it includes all the required components that are needed for the product.
Setting up Access Rights Manager
Once you have installed the ARM tool on your system, you will have to configure it before it is ready to use. The configuration process involves providing Active Directory credentials that will be used by the tool to view it, creating a database, changing RabbitMQ settings and more. After you are done with the first wizard, there is a second wizard that pops up known as the Scan Wizard. Here, your environment will be scanned so that the Access Rights Manager has all the required data before it starts showing it.
So, without further ado, let us get started.
- When you run the ARM tool for the first time, you will be automatically taken to the Configuration Wizard.
- Login as the user who installed the tool on the system on the login page.
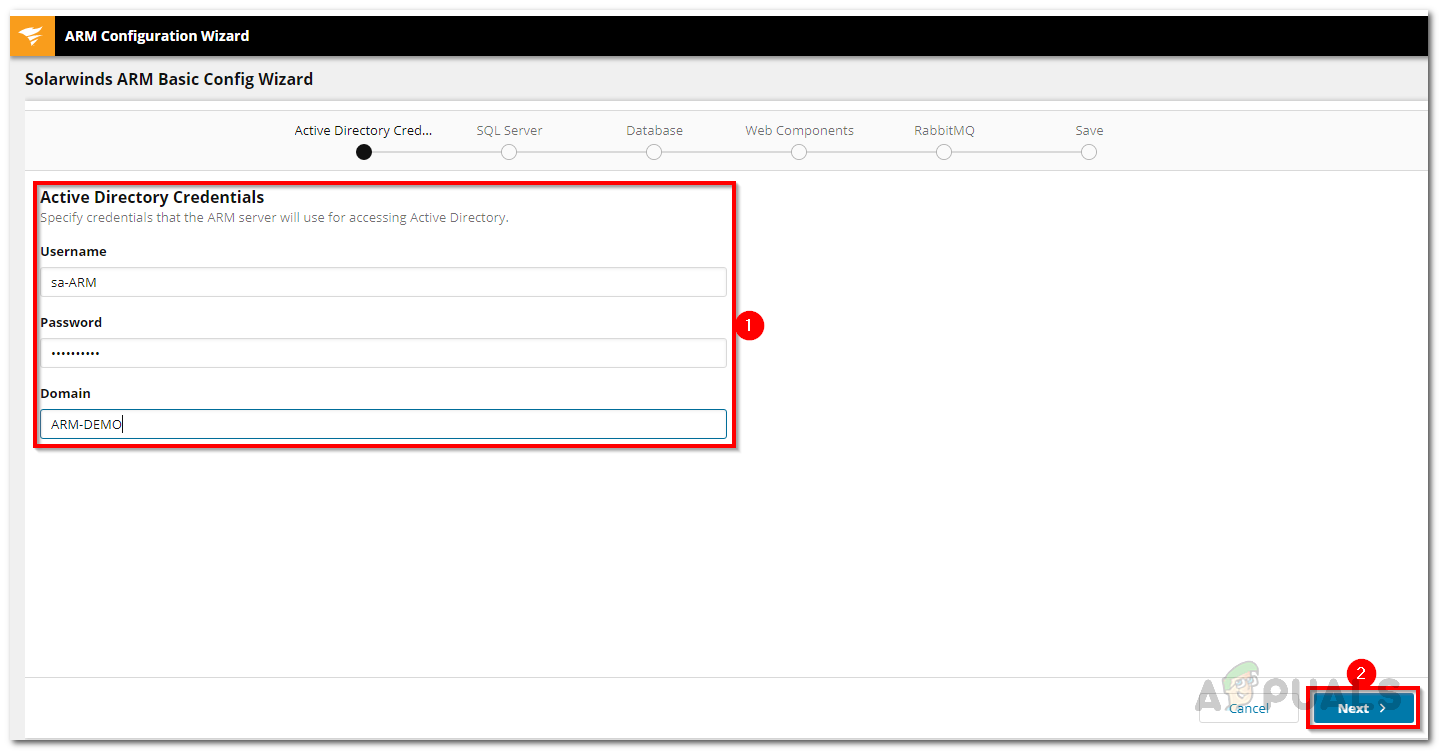
- After that, on the Active Directory page, provide the AD credentials which will be used to access the Active Directory by the ARM tool.
Active Directory Credentials - On the next page, provide the SQL server details and choose an authentication method.
- Then, on the Database page, you can choose to either use an existing database or create a new one.

ARM Database - After that, on the Web Components page, you can specify a server where the web components are to run. It is recommended to run the web components on the ARM server itself.
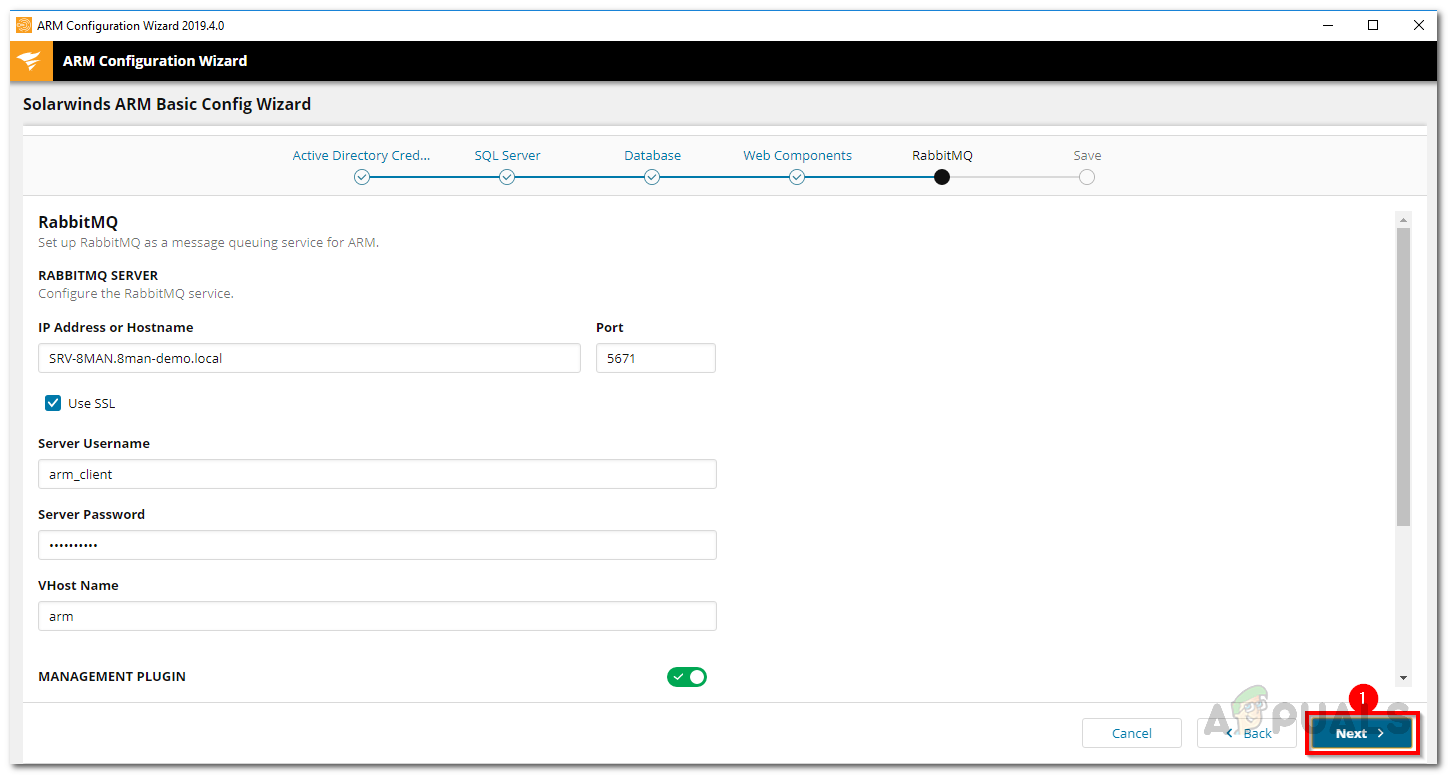
- Then, you can change the RabbitMQ settings on the next page if you wish. It is, however, recommended to use the default values.
RabbitMQ Settings - An overview of your settings so far will be shown on the Save page. Go through the settings and then click the Save Config button.
- This will restart the ARM server and then you will be shown the Server not connected message which is fine and completely normal. You do not have to worry.
- After that, the Scan wizard will initiate.
- On the Active Directory page here, provide the credentials that will be used to scan the AD and file server. Also, select the domain from where the provided account is coming from.
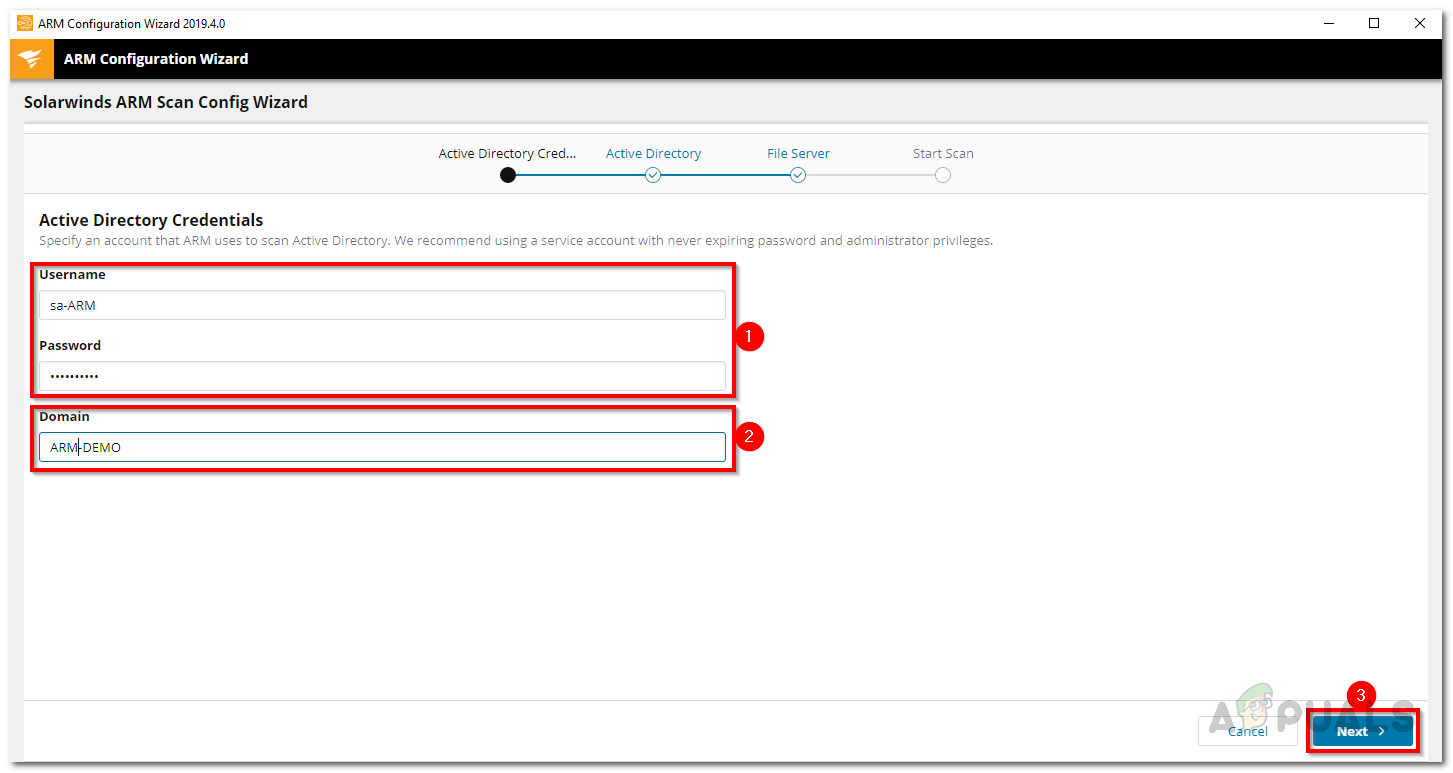
Active Directory Scan Credentials - Select the domain to scan on the Domain page and then click Next.
- Provide the details of the file server and then click Next.
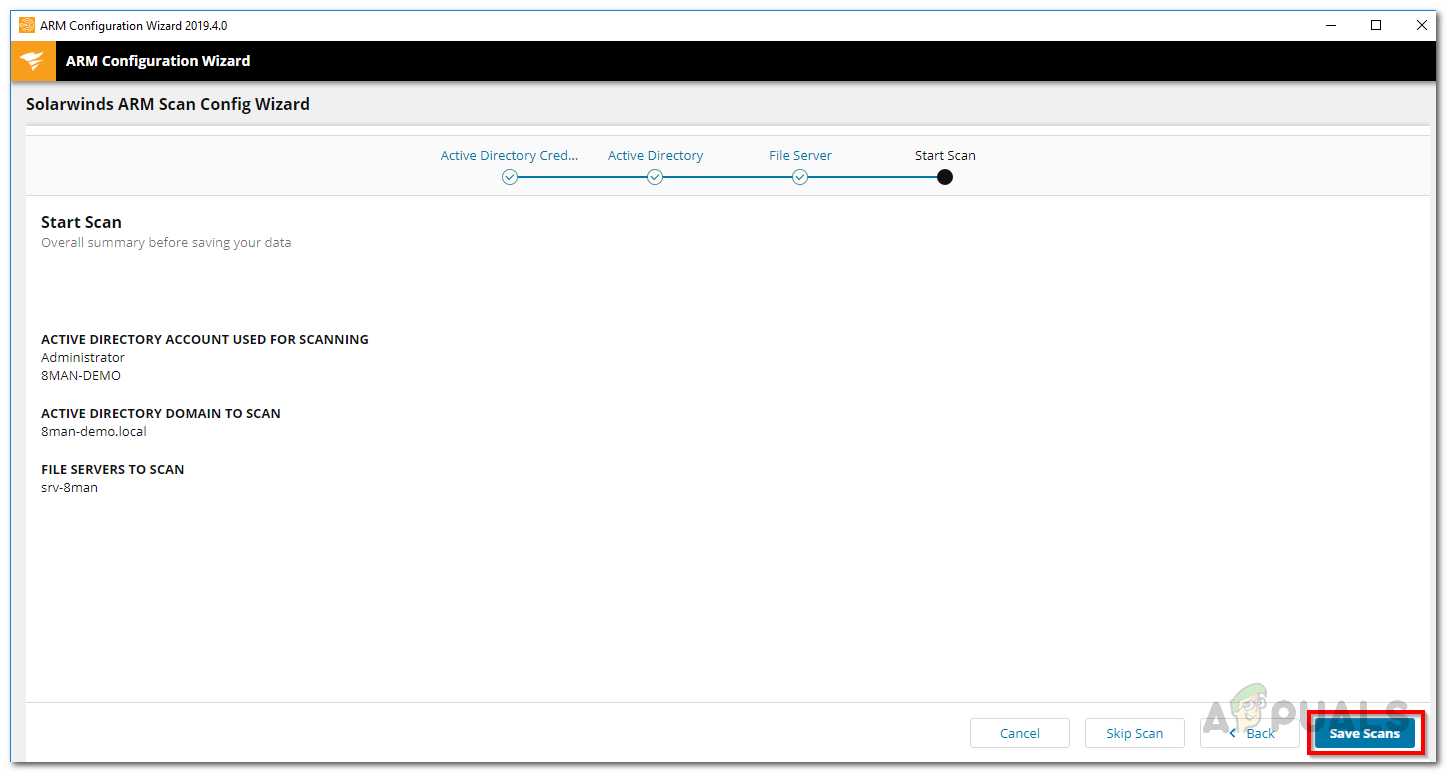
- The scan settings will be shown on the Start Scan page. Once reviewed, click on the Start Scan page to initiate the scan.
Scan Settings
Locating Shared Files and Directories on OneDrive
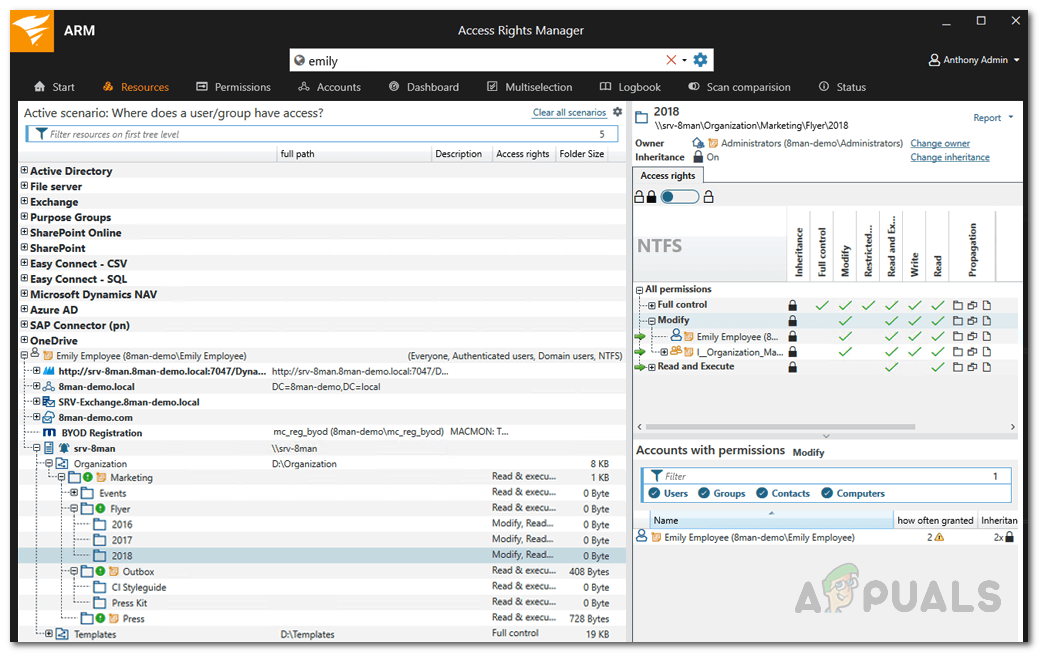
Now that you are done with installing and setting up the Access Rights Manager on your system, it is time we get into the main topic i.e. identifying shared files and directories on OneDrive. This can be done very easily via the intuitive UI of the Solarwinds Access Rights Manager.
The advantages of a cloud system like OneDrive are pretty obvious as multiple employees can work on the same files with convenience. ARM will show you which users shared what files and folders with who.
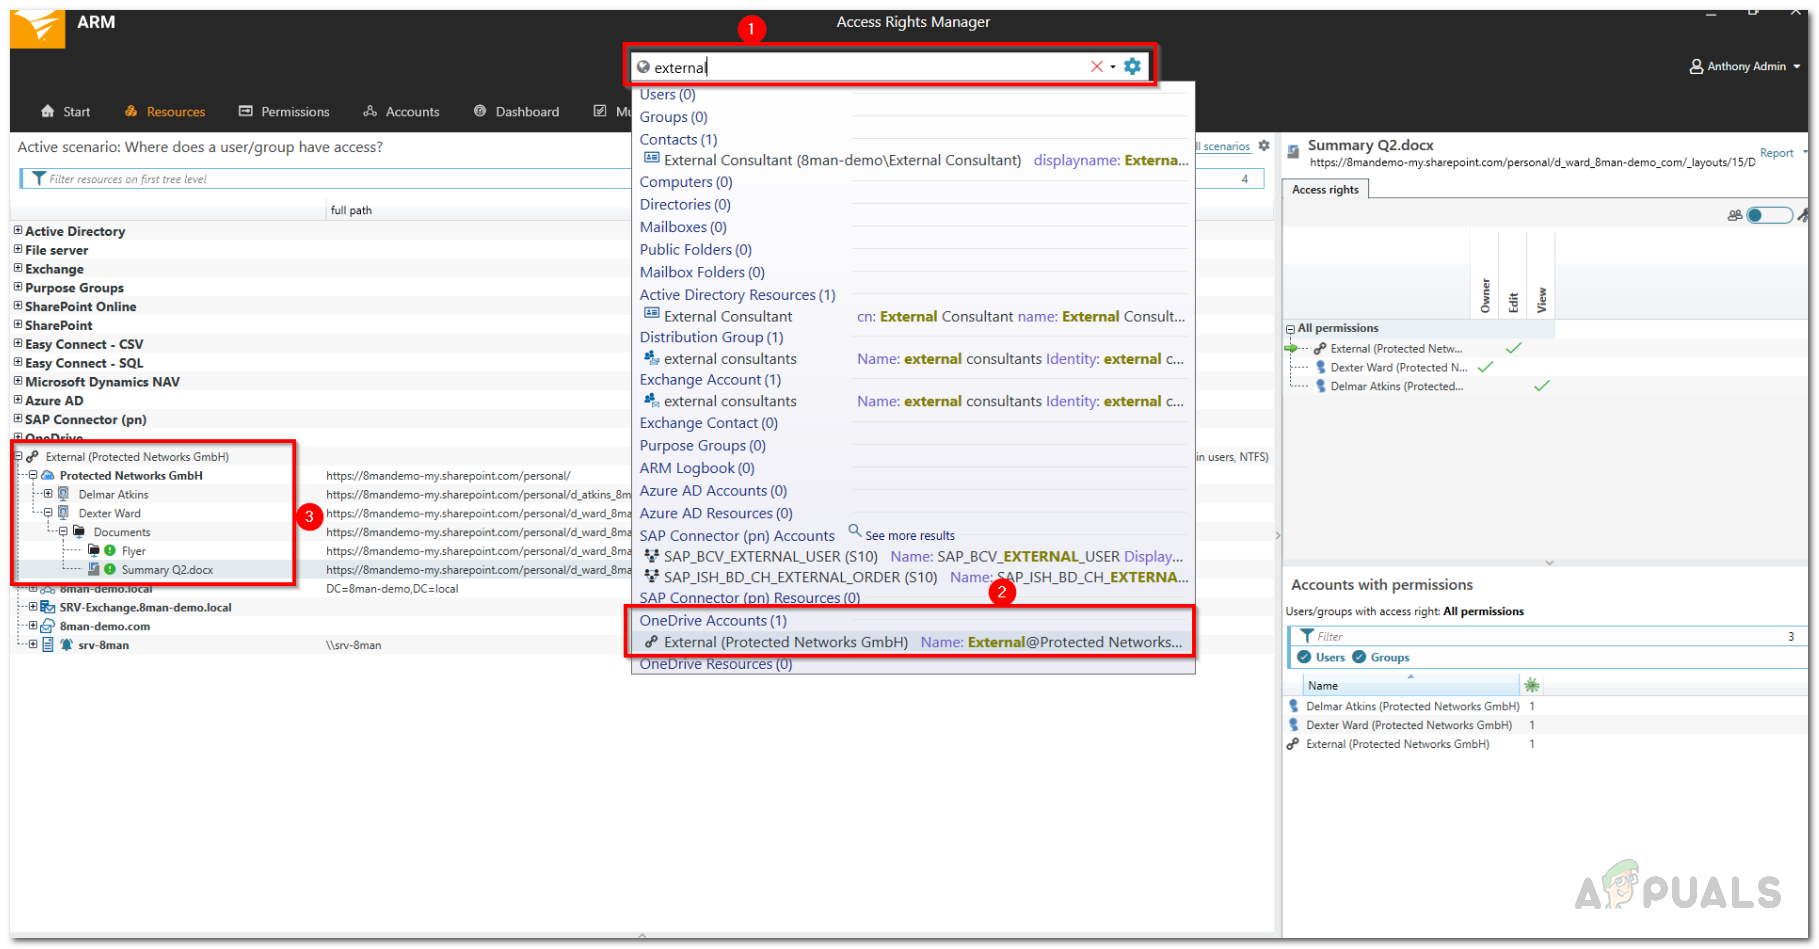
- Go to the Resources page.
- Then, expand the OneDrive category.
- Browse the OneDrive structure to view which users have permissions over the files and folders.
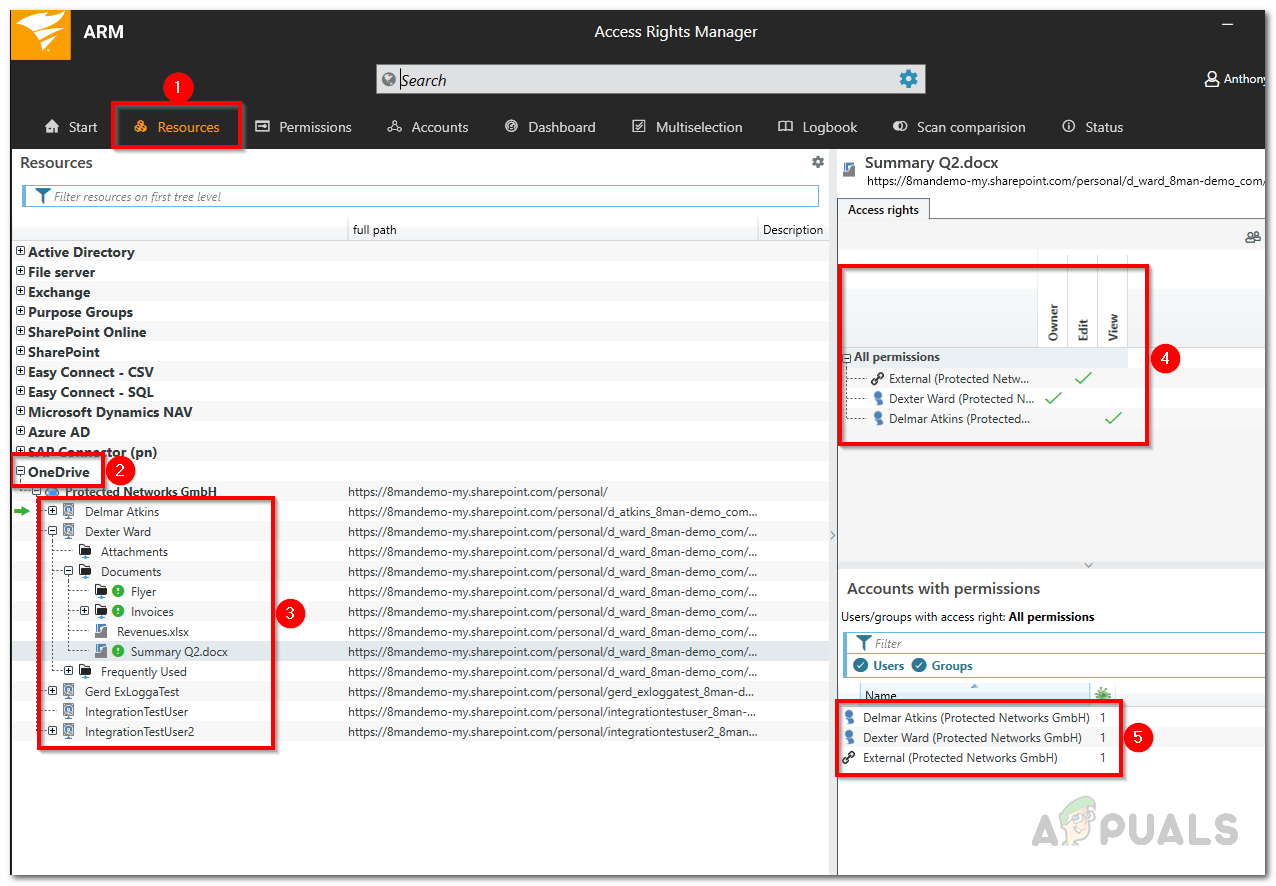
Viewing OneDrive User Permissions - If you wish to view files shared externally, type External in the search bar and then click on the desired result under OneDrive Accounts.
Viewing Internal and External Files - In case you want to view files and folders that are shared internally within the organization, type Internal in the search bar and then click on the result under OneDrive Accounts.
- Access Rights Manager in each case will open up a scenario that shows files and folders shared externally and internally respectively.