How to Identify Recursive and Empty Groups in Active Directory using Access Rights Manager?
As networks proceed to becoming bigger, more users are added to it that have access to the resources of the network. Companies have become way too reliant on their data and it is almost convenient considering the time we are at right now. Be it client data to any other private or company related data, it is important to have everything secured and safe. This becomes even more important and takes an even greater significance when you consider the recent increase in the cyber attacks.
That is why, necessary actions are to be taken in order to ensure you are safe from any data leaks or whatsoever. Like we mentioned, with the increase in the size of a network, more users are granted access to the network. This enables them to use the various resources of the network. In some cases, a poorly managed access rights system leads to various leaks. This is because you might have several user groups in your network that have access to something they are not required to. That, however, is not the only example of a poor user management system.
Other than that, in most Active Directories, there are various groups that serve no purpose after a certain while. In addition to that, there are always recursive groups in an Active Directory that have been paid no attention and thus needs removing. If you were to locate such groups manually, that would consume a lot of time and energy that otherwise could have been more productive. That is why, in this article, we will be going through an access right management tool that lets you manage your Active Directory with ease and makes tasks such as finding empty and recursive groups easy.
Downloading the Solarwinds Access Rights Manager
Solarwinds is a company that, at this point, requires no introduction, especially to the guys involved in the network and system management fields. There are various ARM or Access Right Managers available on the internet, without a doubt. However, some of them are often too complicated for newcomers or they do not offer such an extended functionality as the one we will be using in this one.
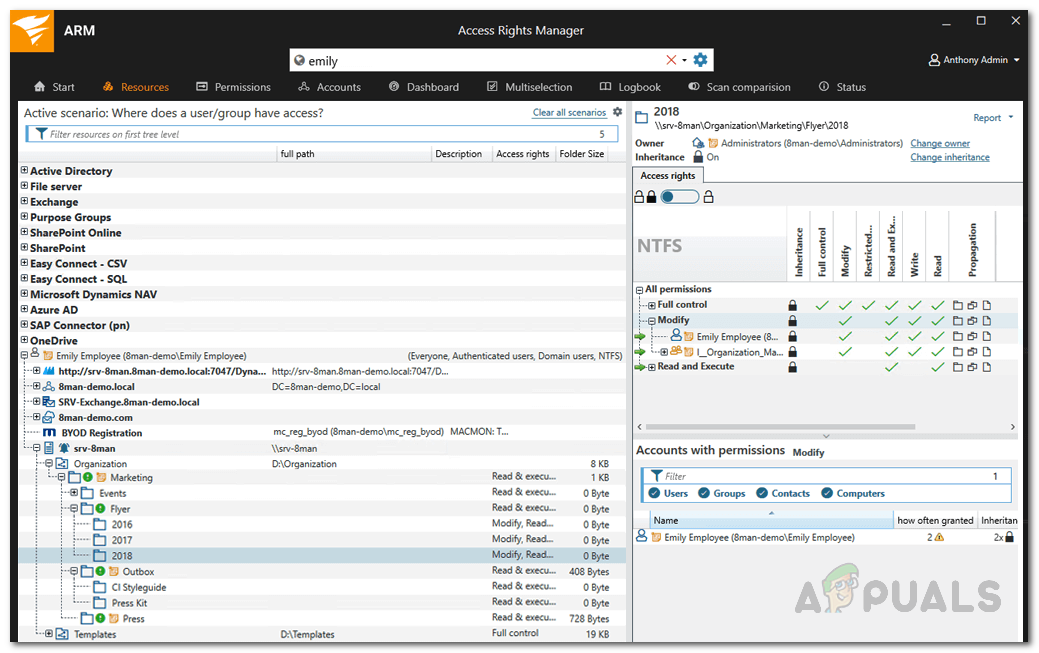
Solarwinds Access Rights Manager (download here) is, as obvious from the name, an access right management tool that lets you manage and audit your IT infrastructure. It comes with various Active Directory management tools that enables you to manage your AD in a much better way as you have more overall visibility over the user groups and their access rights.
With an intuitive user interface, you will be able to view and edit the permissions of every single user in Active Directory, and other file servers. Thanks to the history feature, you are able to view the exact changes that have been made by different user accounts if you wish to which can help in finding any unauthorized actions or user accounts.
We will be using the Solarwinds Access Rights Manager in this article so go ahead and download the tool from the link provided. Once you have downloaded the tool, run the installation wizard which is pretty straight forward. During the installation, you will be asked to select an installation type between two options. In order to use an existing SQL server, you will have to choose the Advanced Installation option. Other than that, the installation is pretty simple and usually takes just a few minutes.
Configuring Access Rights Manager using the Configuration Wizard
Once you have the Access Rights Manager tool on your system, you will have to configure before you start using it. This configuration wizard involves providing the credentials of the Active Directory as well as the SQL server, setting up a database and much more. Once you have gone through the configuration wizard, you will be able to use the tool to its fullest.
Before you start configuring, you will have to login as the user who installed the ARM tool. So, without further ado, let us get started.
- When you open up the ARM for the first time, you will be taken to the Configuration Wizard automatically. Before you start off, you will have to login as the user that installed ARM. Therefore, provide the required details and then click Login. Make sure the hostname matches that of the system where the ARM server is installed.
- On the first page, you will be asked to provide the credentials for the Active Directory. These credentials will be used to access the Active Directory. Then, click Next.
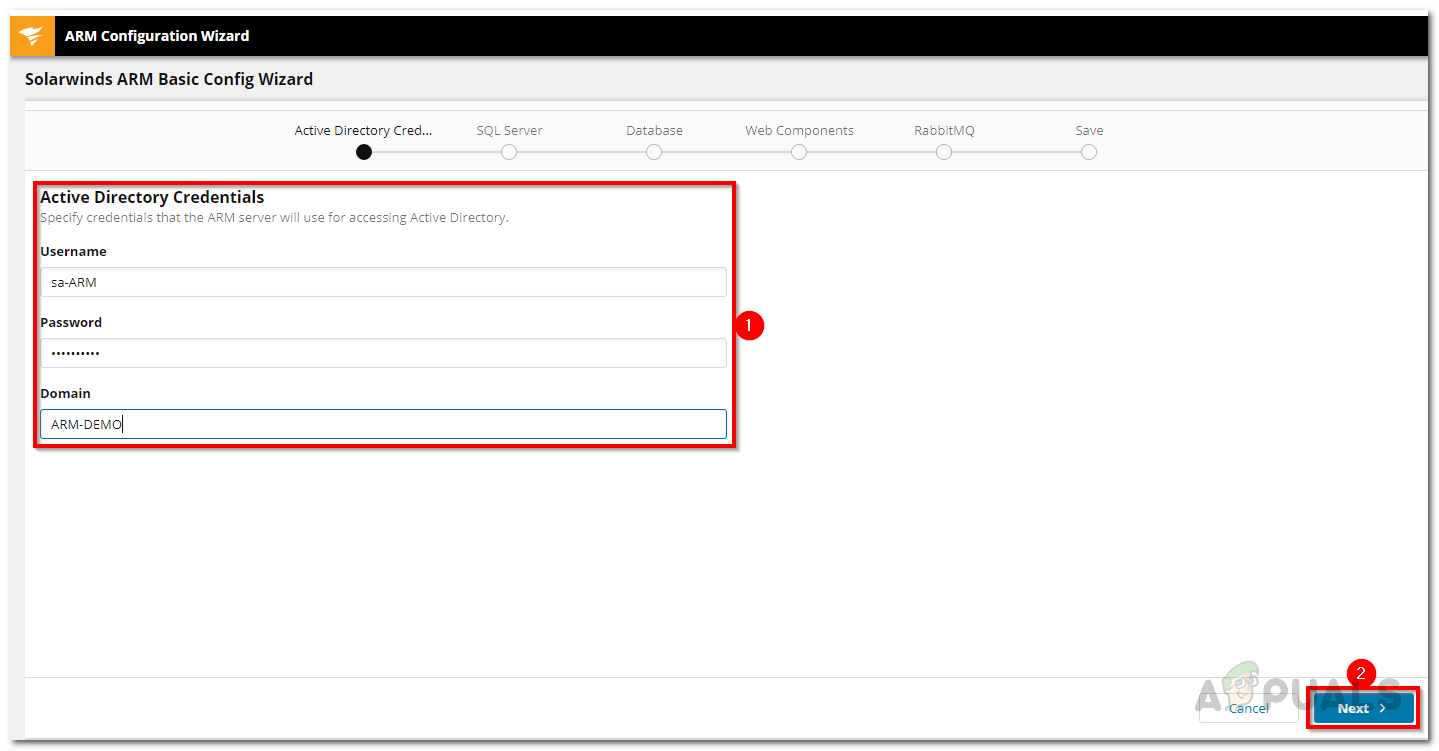
Active Directory Credentials - After that, enter the SQL server credentials and then choose an authentication method. Provide the required credentials for the selected authentication method. Hit Next.
- On the Database page, you can either create a new database or use an existing one. Then, click the Next button.
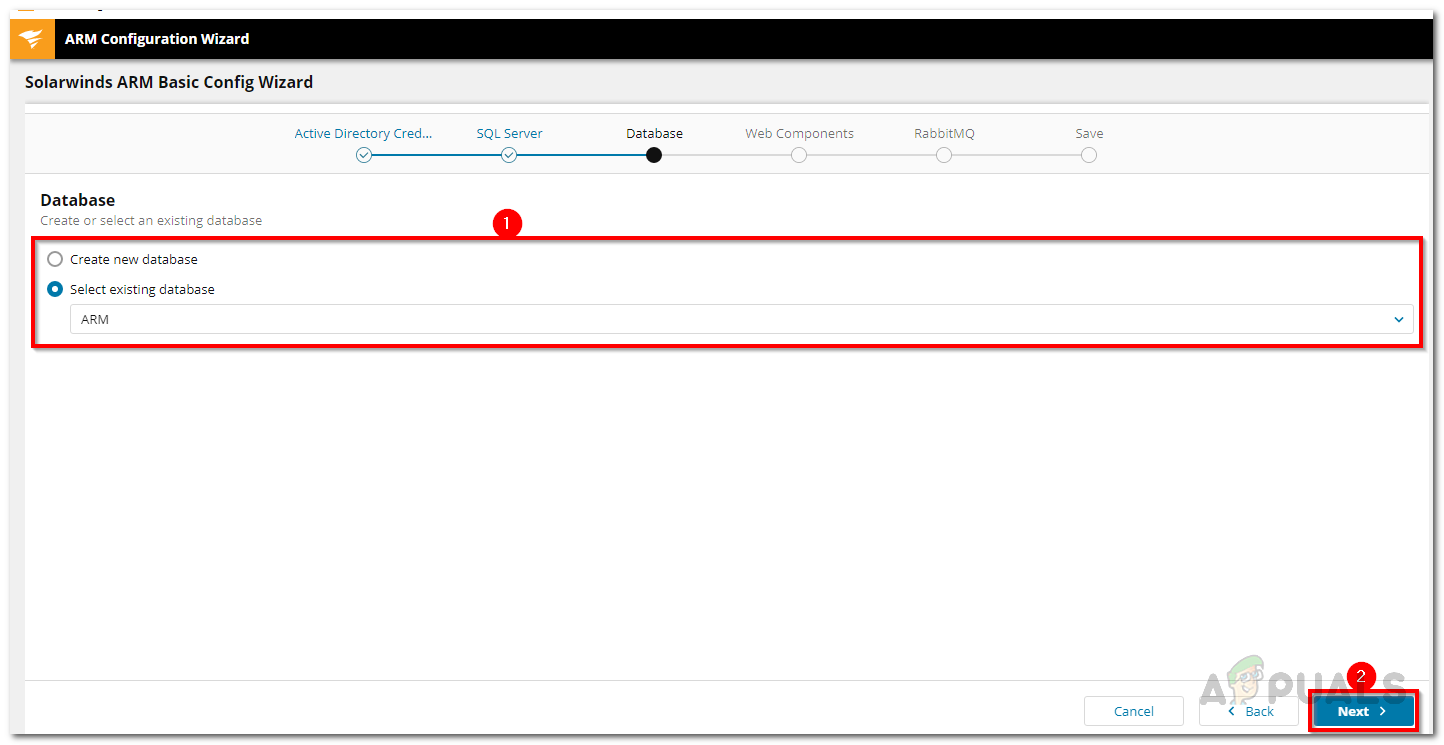
ARM Database - On the Web Components page, you can configure the web access of the ARM tool by changing the port or anything else. Click Next once done.
- You can change the RabbitMQ settings if you wish but it is recommended that you use the default values. Click the Next button.

RabbitMQ Settings - After that, an overview of all the settings will be displayed. Go through it and once sure, click the Save Config button.
- The ARM service will be restarted and then a Server not Connected message will be shown. This is normal so you don’t have to worry.
- After that, the ARM Scan Config Wizard will open up.
- Enter the Active Directory credentials that will be used to scan the AD and file server.
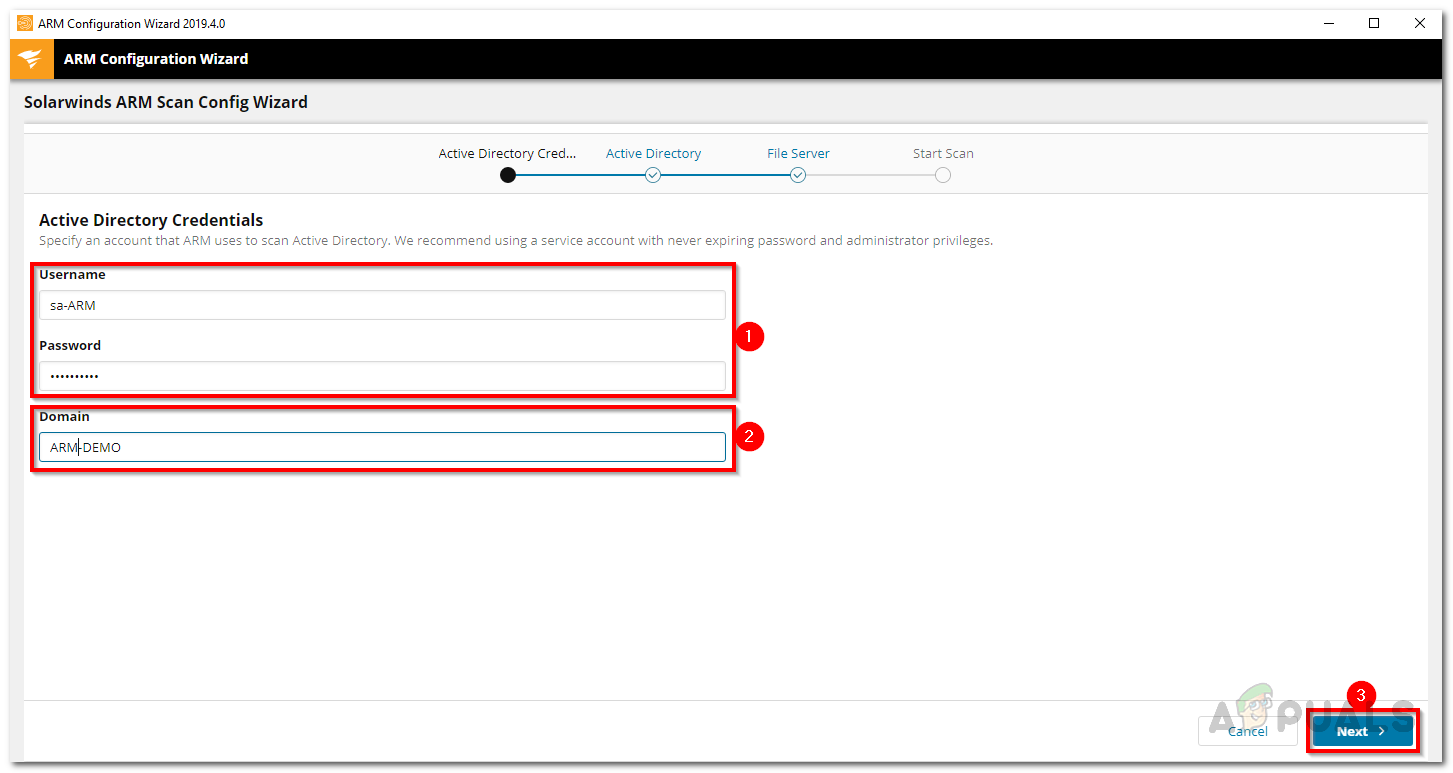
Active Directory Scan Credentials - The domain is where the scan account is coming from. Click Next.
- After that, select the Active Directory domain to be scanned. Then, click Next.
- Select a file server to scan and then click the Next button.
- Finally, a summary of the scan settings is displayed. Click Save Scan when you are ready. This will initiate the scan.
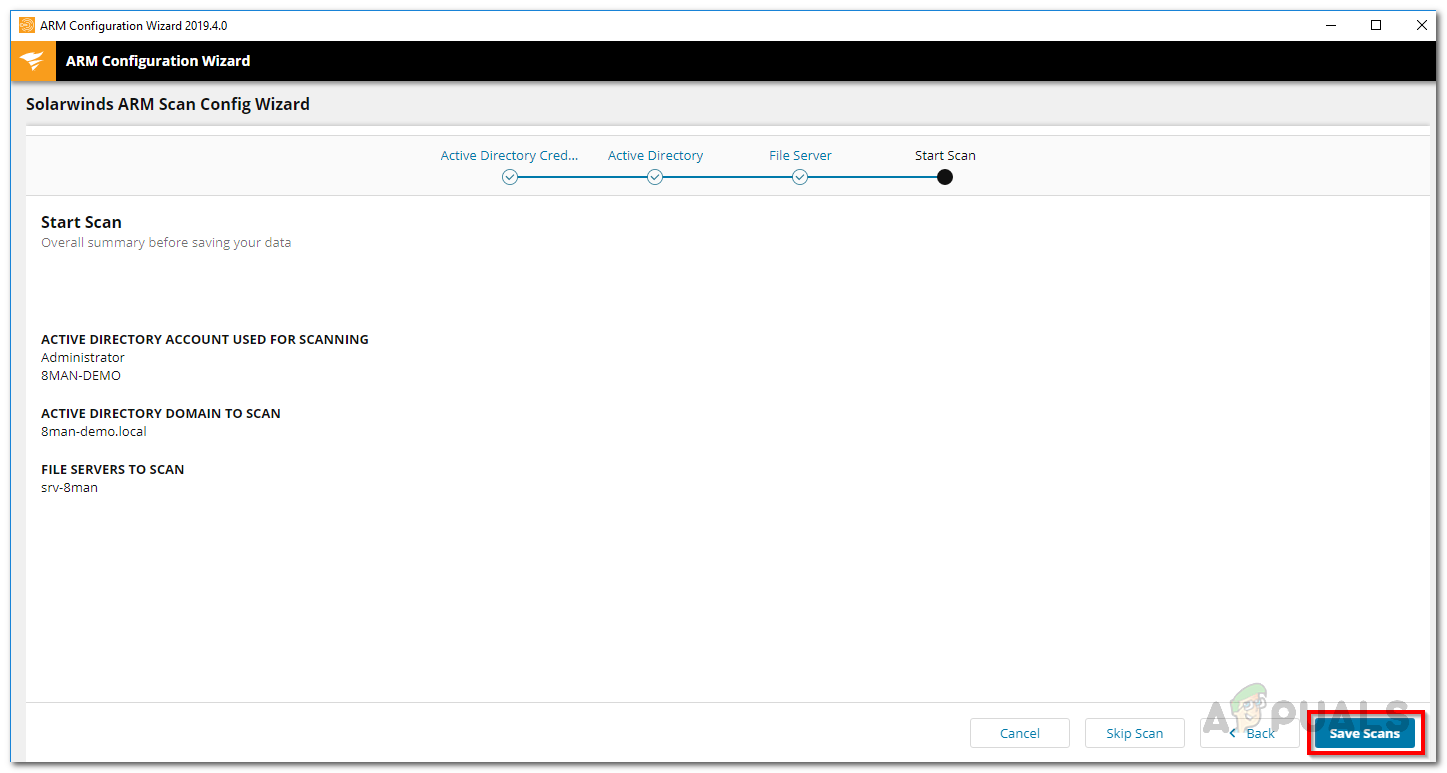
Scan Settings - With all of that done, you can now login to the ARM and start using it.
Finding Empty Groups in Active Directory
Now that you have finally configured the Solarwinds Access Rights Manager, you will be able to use it to manage the access rights in a more convenient manner. As time goes by, there are often empty groups in an AD structure that affects the performance and transparency. To find any empty groups in the Active Directory, follow the instructions given down below.
- First of all, click on the Dashboard tab and then double-click the Empty Groups option on the left-hand side.
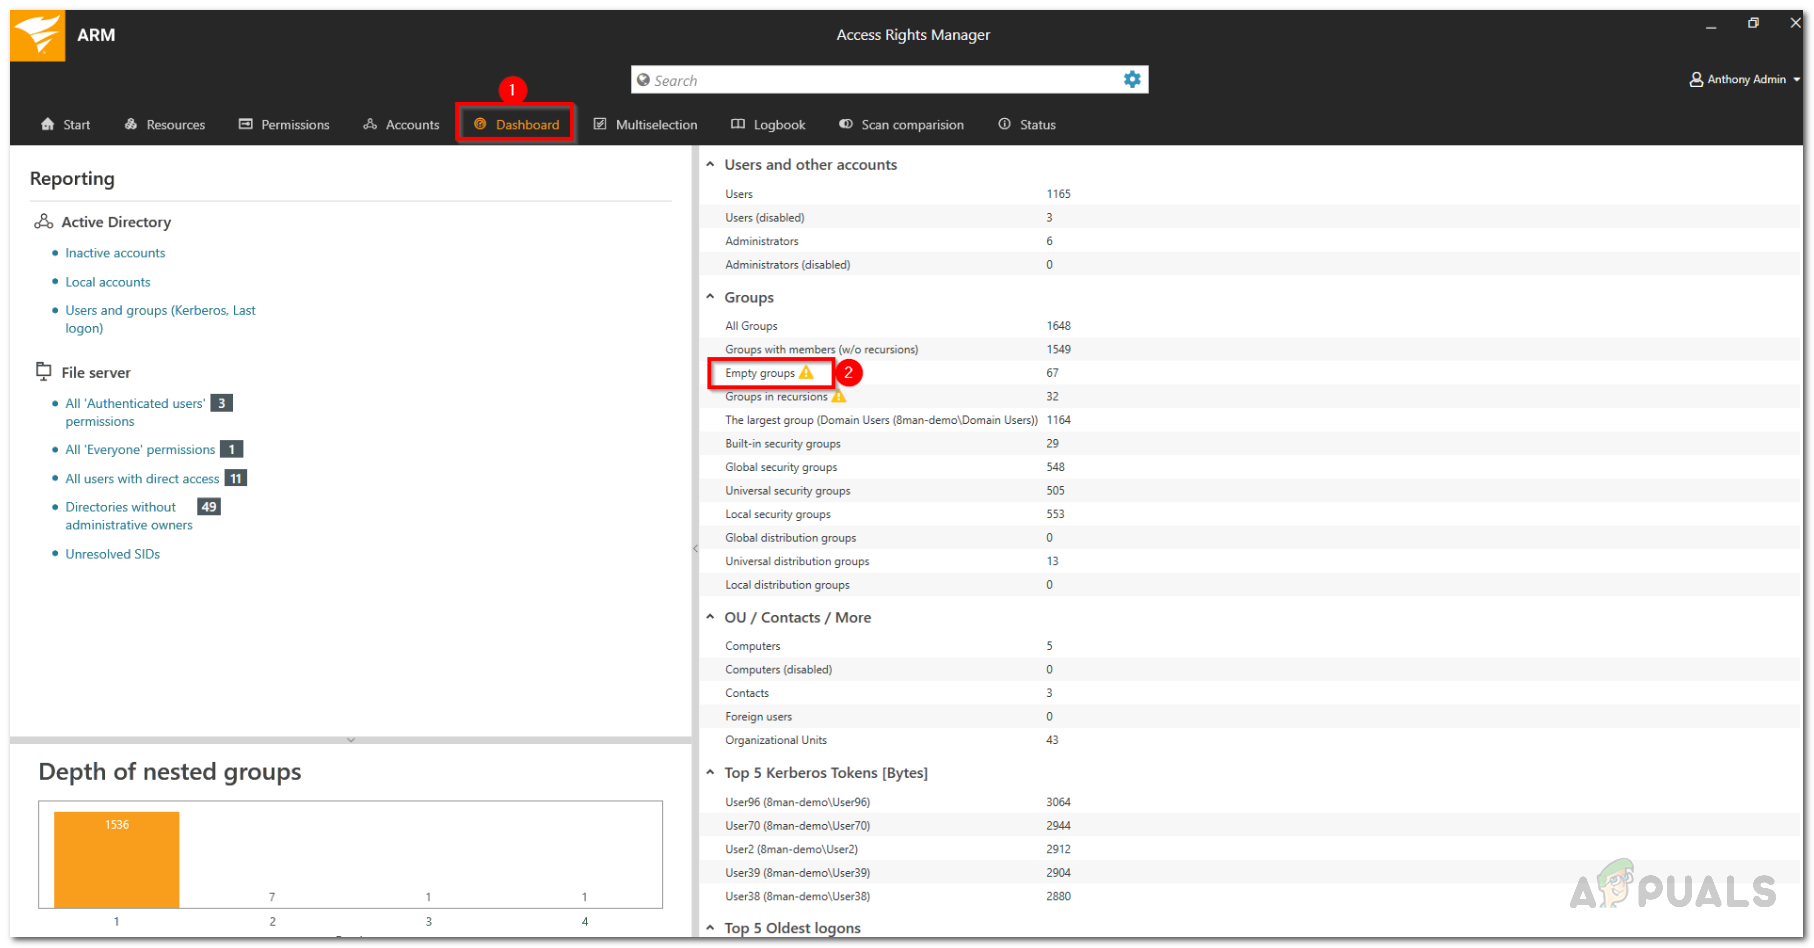
ARM Dashboard - This will make the ARM to automatically switch to the Multiselection tab and the Empty scenario is activated.
- All the groups listed are empty. Simple as that.
Finding Recursive Groups in Active Directory
In some cases, user groups are often members of other groups. Active Directory allows children groups to become parents in their family tree. Group membership assignments can become ineffective if the nested group structure loops in a circular way. With the help of these nested circular groups or recursions, every user who is a member of these recursive groups is granted all the permissions of all the groups. This can be very confusing and is often a mess. It is recommended that you break the chain and remove recursions. Access Rights Manager automatically identifies these recursions.
Here’s how to locate these recursive groups:
- Go to the Dashboard tab by clicking on Dashboard in the menu provided.
- After that, click on the Group in recursions option on the left-hand side.
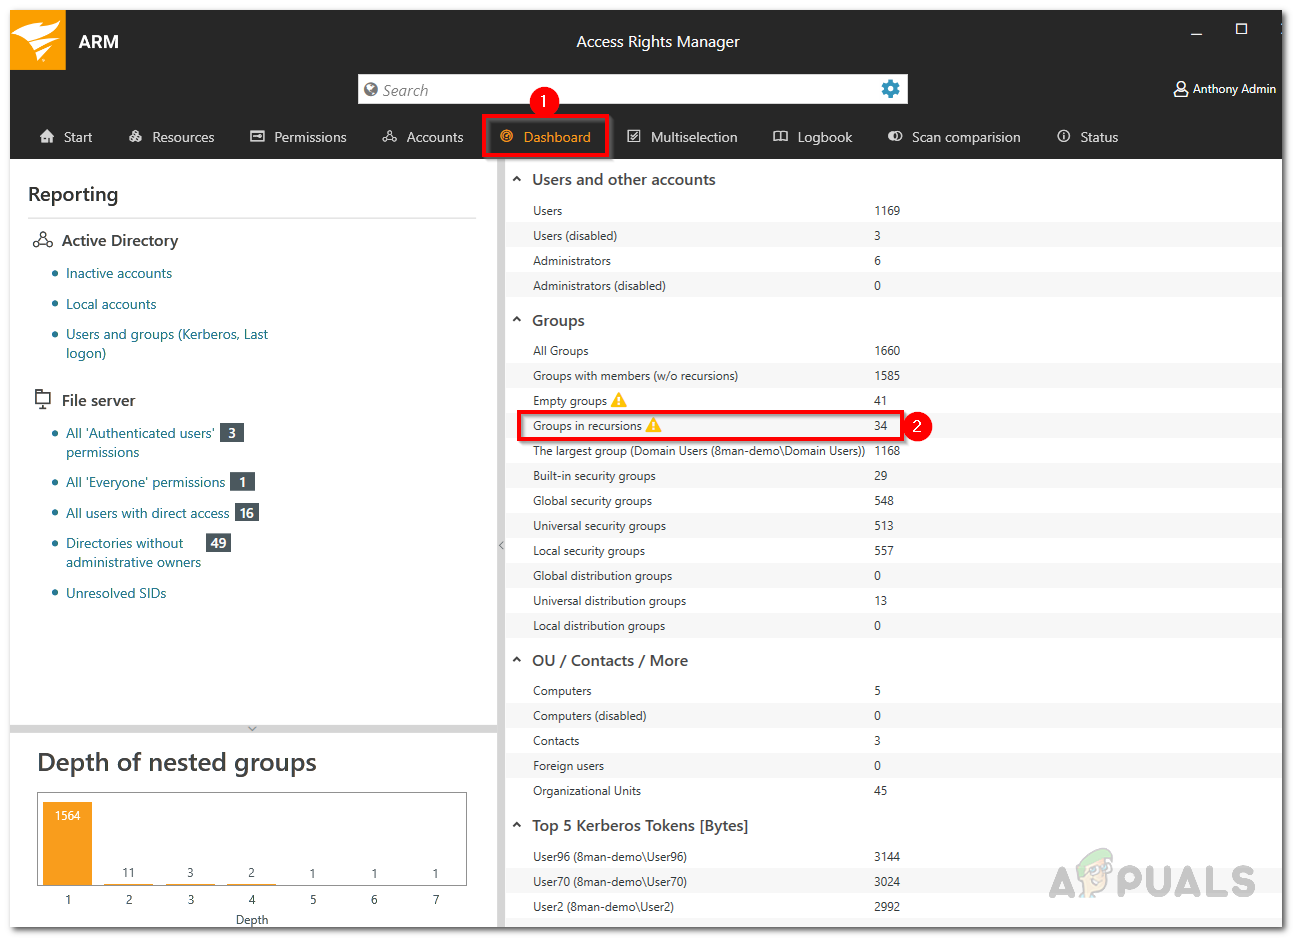
ARM Dashboard - This takes you to the Multiselection tab again and the group in recursions scenario is activated.
- This will list all the groups in recursions. Click on a Group and you will be shown all the users and groups in the selected recursion.
- If you double-click on a group, you will be taken to the account view where you will be able to see the recursion.
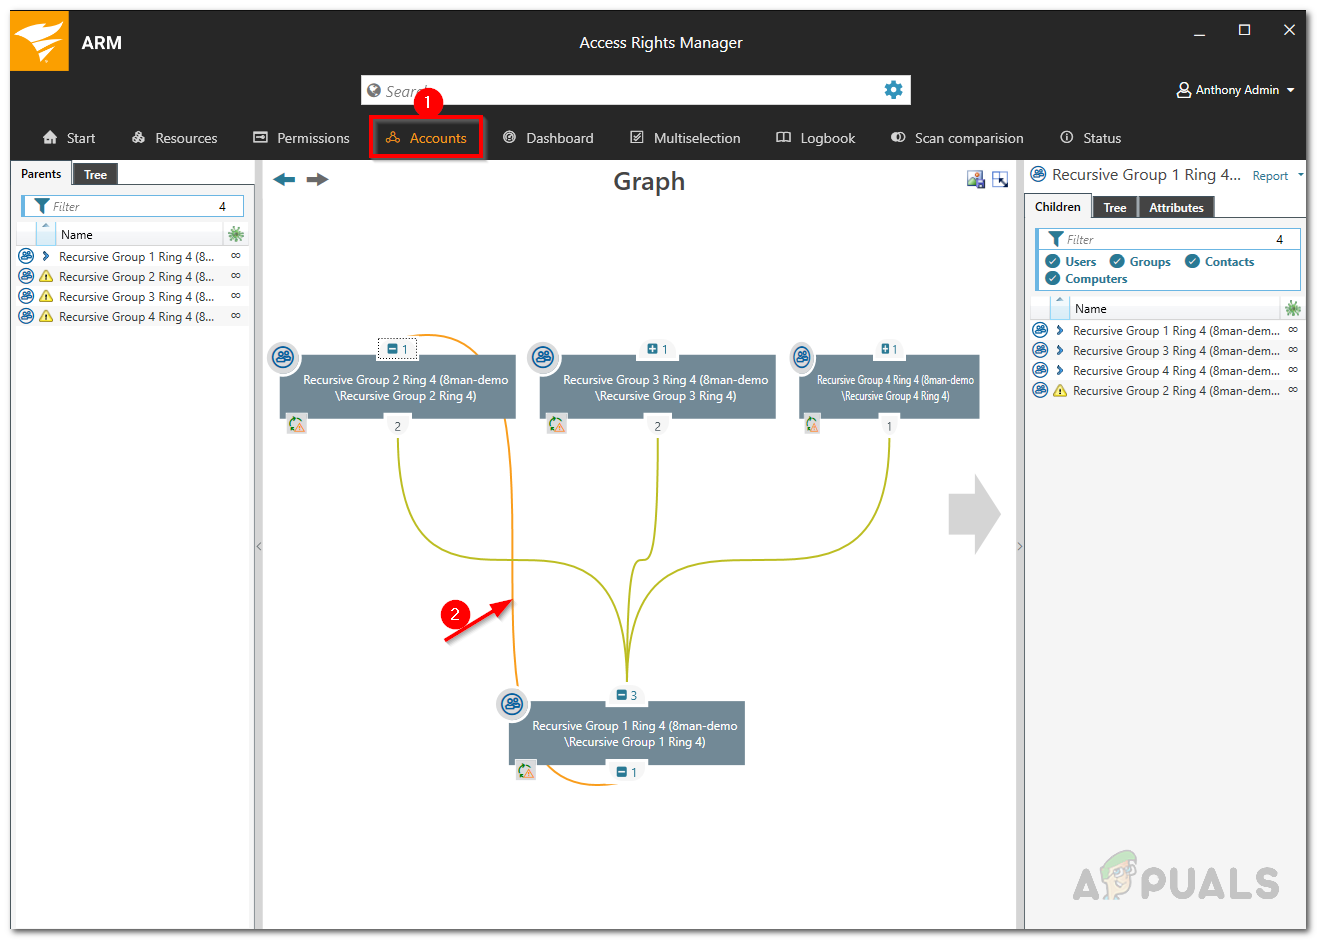
Example of Recursion - The recursion is indicated by an orange line.