Fix: High CPU Usage by Service Host: Local System (Network Restricted)
Many Windows users have suffered from a problem where up to 95% of their CPU or/and Disk have been used by a process known as System Host: Local System (Network Restricted). This problem first surfaced back in the days of Windows 8 and has stuck around to haunt the brave users of Windows 10. Users affected by this issue have reported the System Host: Local System (Network Restricted) process hogging up to 95% of their CPU and up to 72 MB/s of their computer’s total capability to read data from and write data to its Hard Disk Drive. Those statistics are significant, to say the least.
However, System Host: Local System (Network Restricted), in and of itself, is pretty ambiguous as it is not anyone service but a guise under which many different Windows system services run, any of which could be causing unusually high CPU and/or Disk usage. Besides, to make things worse, this issue can also be caused by a memory leak in the non-paged pool of memory. Thankfully, due to a lot of intelligent dwelling on the matter, it has been found that the most common offender that gives birth to this issue is a Windows system service known as Superfetch – a service that Microsoft claims aims to maintain and improve the performance of computers as time goes by but, in actuality, is nothing but a problem waiting to happen. If, in any case, Superfetch is not the root of the issue, it is certainly being caused by a memory leak in the non-paged pool.
But before moving on with the solutions, make sure your system’s Firewall is not blocking any important service/application. Also, temporarily disable Windows updates to check if they are creating the problem.
1. Disable the Superfetch Service and Background Intelligent Transfer Service
Superfetch and Background Intelligent Transfer Service are services which perform a major role in speeding up your applications and other services running in the background. It basically manager several modules running side-by-side and efficiently schedules them. However, they might sometimes malfunction or not get in sync properly which will cause the high CPU usage. Disabling them might solve the issue.
- Press Windows Logo key + R to open a Run command box.
- Type services.msc into the Run dialog and press Enter.
- Scroll down the list of services on your computer and locate the service named Superfetch.
- Double-click on Superfetch to edit its settings.
- Click on Stop to stop the service.
- Set the Startup type for Superfetch to Disabled.
- Click on Apply and then on OK.
Change Startup Type of Superfetch to Disabled - Now find out the Background Intelligent Transfer Service and double-click to open its settings.
- Click on Stop to stop the service.
- Set the Startup Type for Background Intelligent Transfer Service to Disabled.
- Click on Apply and then on OK.
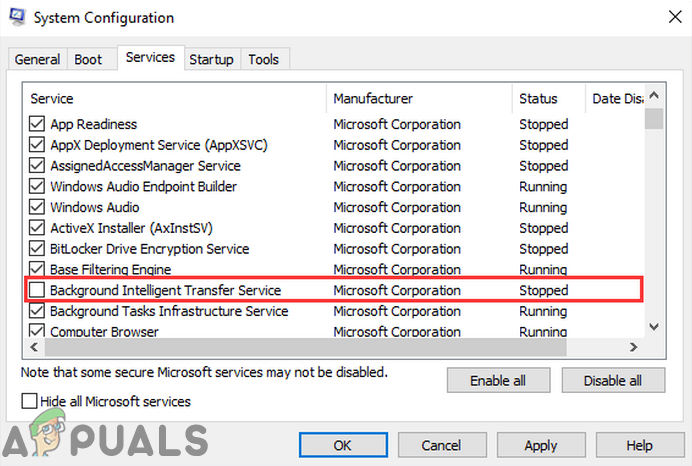
Turn Off Background Intelligent Transfer Service - Click Apply and OK to confirm the changes.
- Restart your computer and check if the problem has been fixed.
2. Fix the Memory Leak in the Non-Paged Pool of Memory
If Solution 1 doesn’t work, don’t fret as you can still move onto this solution. To try and resolve this issue using this solution, you need to:
- Press Windows Logo key + R to open a Run
- Type Regedit into the Run dialog and press Enter.
- In the left pane of the Registry Editor, navigate to the following directory:
HKEY_LOCAL_MACHINE > SYSTEM > ControlSet001
- Click on Services in the left pane and then scroll down under services and choose “Ndu“.
- In the right pane, locate and double-click on the registry value titled Start to modify it.
- Change its Value data to 4. Doing so will disable it and plug the memory leak in the non-paged pool.
- Click on OK.
- Close the Registry Editor.
Change Ndu Value to 4 - Restart your computer. When your computer boots up, you should see that System Host: Local System (Network Restricted) is no longer using a massive amount of your CPU and/or Disk.
3. Running the System File Checker
System File Checker (SFC) is an in-built tool which downloads a manifest of all the essential files from the internet and compares them to the version present in your computer. If it finds any discrepancies, it will automatically download the latest version from the internet and replace it. Running SFC might resolve the high CPU if there is an issue with your system files.
- Open the Start menu and type ‘cmd’. Right-click on the Command Prompt icon and click on ‘Run as Administrator’.

Running Command Prompt as an administrator - Accept the UAC prompt when it comes up.
- In the command prompt, type the “sfc /scannow” and press enter.

SFC Command - Wait for the scan to complete and perform a fix as well. If it’s successful, you’ll see the response ‘Windows Resource Protection found corrupt files and successfully repaired them. Details are included in the CBS.Log. It can be found at
%WinDir%\Logs\CBS\CBS.log.’
- Enter the command
dism /Online /Cleanup-Image /RestoreHealth.
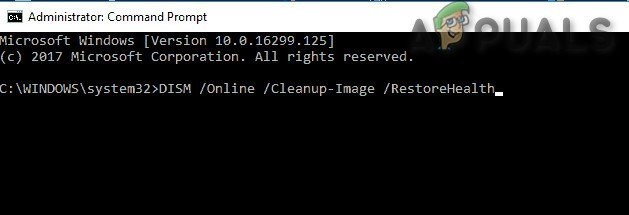
Run DISM Command - After this command finishes running, monitor your CPU and Memory load and then check if the issue still exists.
4. Killing SVChost
Killing the Service Host (SVChost) process in the Task Manager solves this issue. After this, try to download your pending updates with an unmetered Wi-Fi connection.
- Press Ctrl + Shift + Del to launch the Windows Task Manager. You can also right-click on the taskbar and select Task Manager.
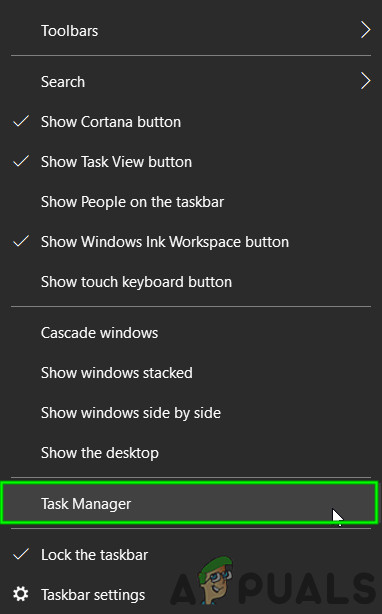
Open Task Manager - Click on More details to expand the manager. This reveals all the running processes.
- Search through the process for “Service Host: Local System”. This process hosts Windows Update and the Update Orchestrator Service. Select on this task and click End task.
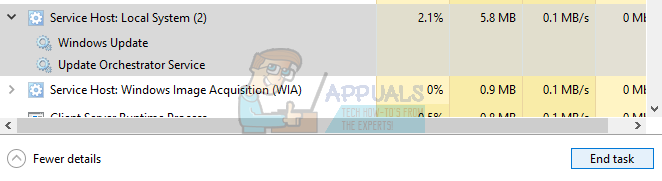
End Process of Service Host: Local System - When the confirmation dialog shows up, click on the checkbox of Abandon unsaved data and shut down and click the Shutdown.
- Monitor the CPU load and check if the issue has been solved.
5. Performing a Clean Boot
In some cases, a third-party application or service might be causing High Cpu usage. Therefore, in this step, we will be disabling all non-essential services and applications at startup i.e. clean boot the system. You have to find what application/driver is causing the issue but the following applications are known to create the problem you are facing.
- Virtual Disc App
- Dragon Naturally Speaking
- MST Command Center
- VPN Chrome Extensions
- HP Related Processes especially HP Help
To clean boot your system:
- Log in to the computer with an Administrator account.
- Press “Windows” + “R” to open up the “RUN” prompt.

Opening Run Prompt - Type in “msconfig” and press “Enter“.

Running MSCONFIG - Click on the “Services” option and uncheck the “Hide all Microsoft Services” button.
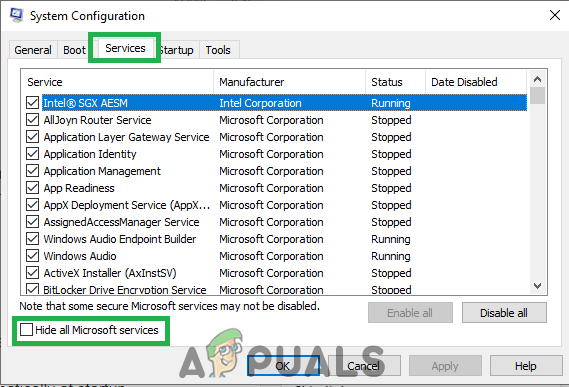
Clicking on the “Services” tab and Un-checking the “hide all Microsoft Services” option - Click on the “Disable All” option and then on “OK“.

Clicking on the “Disable All” option - Click on the “Startup” tab and click on the “Open Task Manager” option.

Clicking on the “Open Task Manager” option - Click on the “Startup” button in the task manager.
- Click on any application in the list that has “Enabled” written next to it and select the “Disable” option.

Clicking on the “Startup” tab and selecting an application listed there - Repeat this process for all applications in the list and restart your computer.
- Now your computer has been booted in the “Clean Boot” state.
- Check to see if the issue goes away.
- If the error isn’t encountered anymore, start enabling the services one by one and identify the service by enabling which the error comes back.
- Either, reinstall the service or keep it disabled.
6. Disable Windows Update Delivery Optimization
Windows update uses delivery optimization to speed up processes. But this delivery optimization can be stuck in operation and cause the High CPU Usage by Service Host. In that case, turning off delivery optimization may solve the problem. You might notice some effect in the speed and in particular, the optimization of Windows update but it is a fair trade-off to remove the high CPU usage.
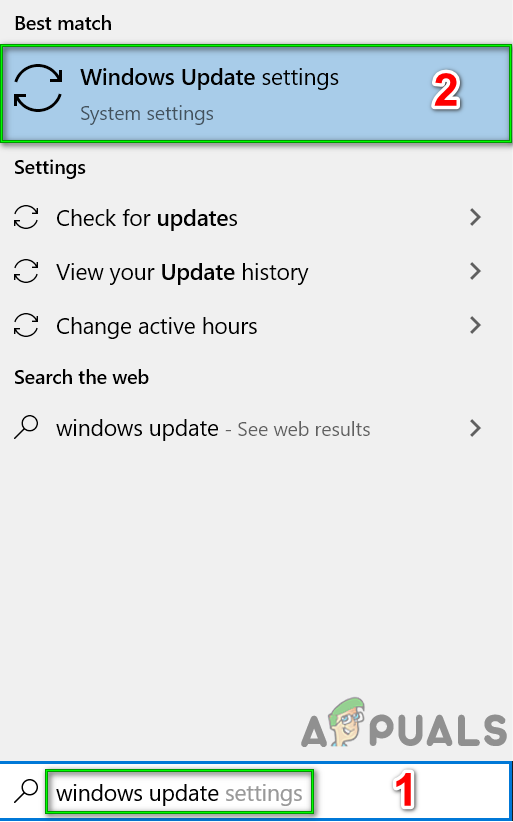
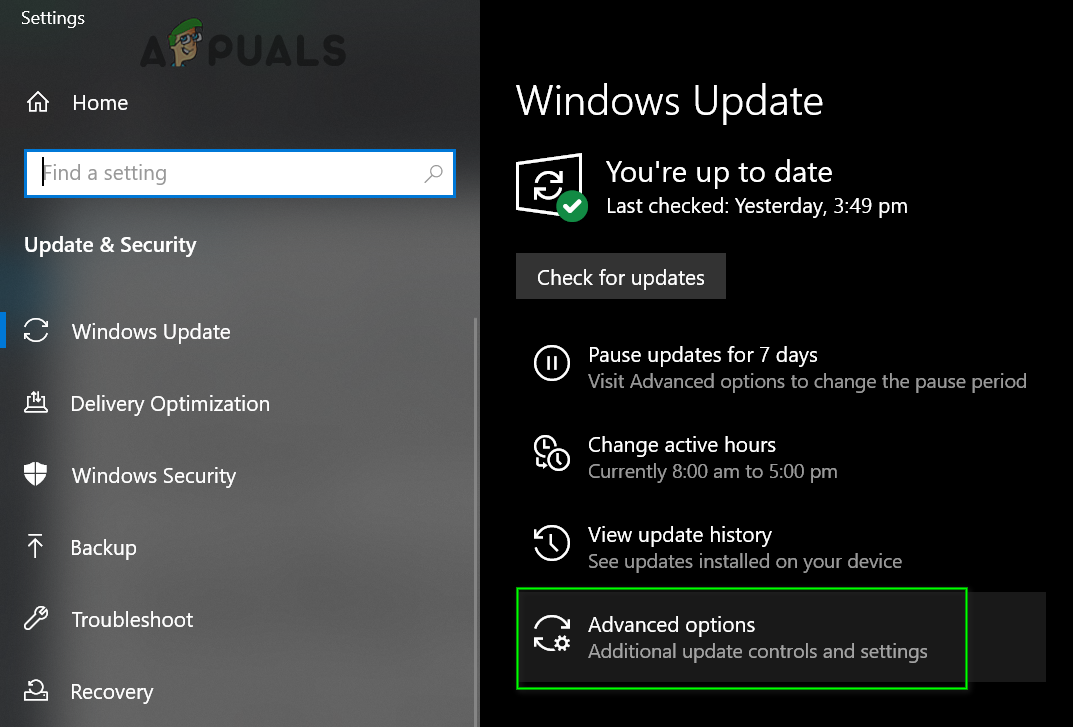
- Click on the Windows button and type Windows Update. Now in the resulting list, click on Windows Update Settings.
Open Windows Update Settings - Now click on Advanced options.
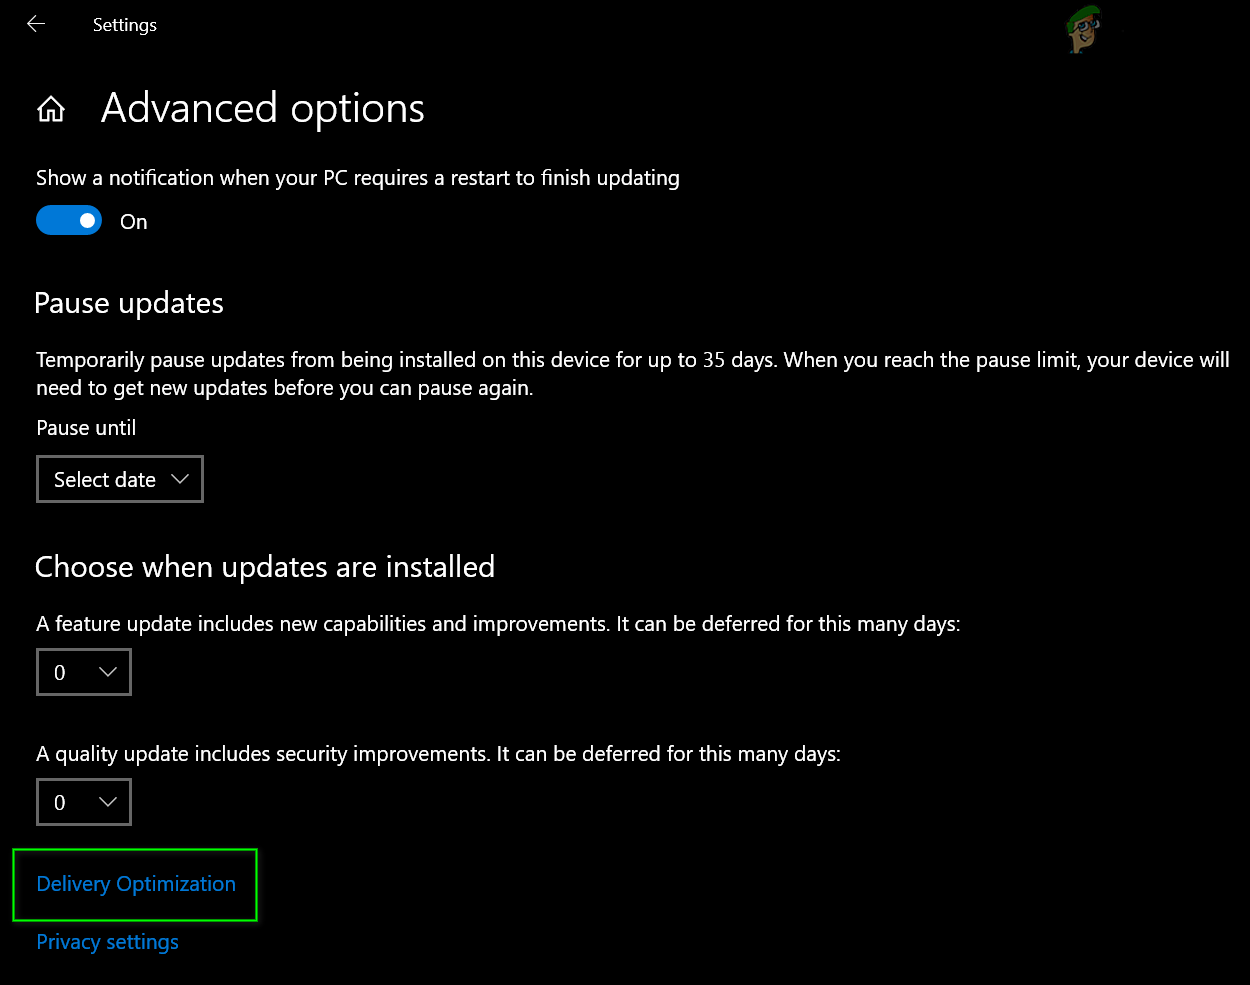
Open Advanced Options of Windows Update - Now click on Delivery Optimization.
Open Delivery Optimization - Now toggle the switch of Allow Download from other PCs to off.
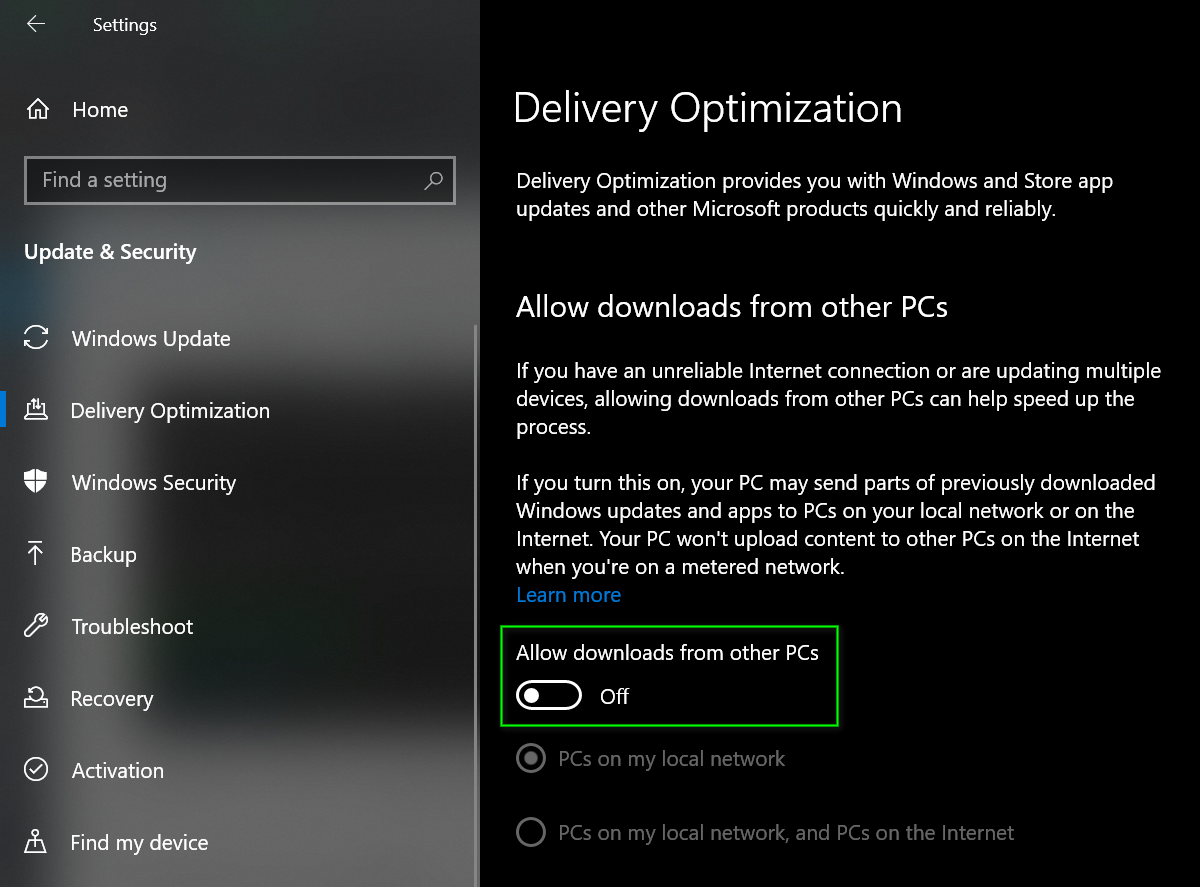
Turn Off Allow Downloads from other PCs - Now restart your system and check if the problem is solved.
7. Restarting Windows Update services
If the methods shown above haven’t helped you, it’s possible that your Windows Update is stuck doing an update which can lead to high CPU and Disk Usage spikes. Follow these steps below:-
- Search for Command Prompt and click “run as administrator”.
- Now type the following commands one by one:-
net stop bits
net stop wuauserv
net stop appidsvc
net stop cryptsvc
ren %systemroot%\SoftwareDistribution SoftwareDistribution.bak
ren %systemroot%\system32\catroot2 catroot2.bak
net start wuauserv
net start bits
net start appidsvc
net start cryptsvc
- Check to see if the usage is stable now.
If nothing has helped you so far, then run the chkdsk command to fix any issues with the system’s hard drive.
Disable the windows event log service to get rid of this problem.