Fix: Windows Resource Protection Found Corrupt Files but was Unable to Fix
Running an SFC (System File Checker) scan is pretty straightforward for the most part, but what do you do if you encounter the following error message at the end of it: “Windows Resource Protection found corrupt files but was unable to fix some of them“? Several Windows users have been unsure of what to do next after the System File Checker utility has been unable to resolve the issue for them.
What is System File Checker?
System File Checker is a well-regarded Microsoft Windows utility that allows users to identify and repair Windows system files. This utility has been around since Windows 98 and is still being shipped to all the latest Windows versions.
In Windows Vista, Windows 7 and Windows 10, the SFC (System File Checker) utility is integrated with Windows Resource Protection (WRP). This provides enhanced protection for registry keys, folders, and critical system files.
What causes the “Windows Resource Protection found corrupt files but was unable to fix some of them” error?
We investigated this particular error message by looking at various user reports and the repair strategies that they followed through with in order to resolve the error message. Based on our findings, there are several common scenarios that are known to force the System File Checker to throw this particular error message:
- False positive – There are a lot of reasons why the System File Checker scan will report a false positive. A common false positive is Nvidia’s opendll.dll file which the SFC might flag even in those instances where the file is not corrupt. In this case, a DISM scan will determine whether the flagged file is indeed corrupted or not.
- 3rd party interference – This particular error can also occur if an installed application is interfering with the SFC (System File Checker) scan. Most that have been through this particular scenario reported that the SFC scan concluded without errors when they ran it during a clean boot.
- Irregular system file corruption – There are cases where this error occurs due to a degree of corruption that cannot be recovered using the default Windows utilities (SFC and DISM). In this case, the only solution is to install/reinstall the os files.
If you’re currently looking for some ways to resolve the corrupted files that have been fixed/replaced by System File Checker, this article will provide you with several verified repair strategies. Down below, you’ll discover a suite of methods that other users in a similar situation have used to eliminate corrupted system files.
To keep the whole ordeal as efficient as possible, we advise you to follow the methods below in the order that they are presented. You should eventually stumble upon a fix that will resolve the issue in your particular scenario.
Method 1: Using DISM to fix corrupt files
Chances are you already know that the next step when the SFC utility is unable to resolve the problem is to use the DISM (Deployment Image Servicing and Management) utility to repair the Windows image. DISM has been around since Windows Vista and is generally considered the superior utility when it comes to finding & resolving system file corruption conflicts.
While the SFC scan replaces corrupted files with locally stored copies (which can also become corrupted), DISM uses the Windows Update component to get the job done. Of course, this means that you’ll need to ensure that you have a steady internet connection before running a scan.
There are multiple scan parameters that can be used with DISM. But for the sake of keeping things simple, we will use RestoreHealth – a command which will automatically scan the Windows Image for any corruption and perform any necessary repair automatically. Here’s what you need to do:
- Press Windows key + R to open up a Run dialog box. Then, type “cmd” and press Ctrl + Shift + Esc to open up an elevated Command Prompt. When prompted by the UAC (User Account Control), click Yes to grant administrative privileges.
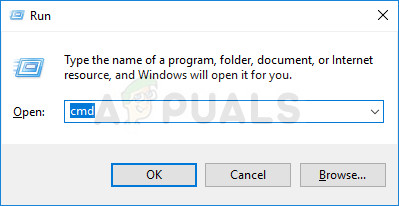
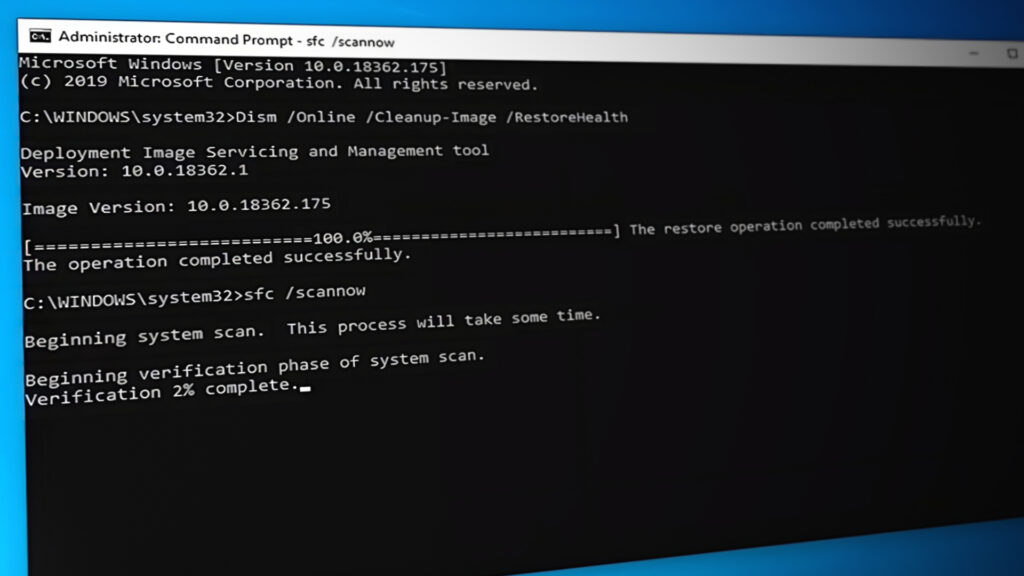
Opening Command Prompt via Run dialog box - Inside the elevated Command prompt, type the following command and press Enter to initiate a DISM scan with the Restore Health option:
DISM /Online /Cleanup-Image /RestoreHealth
- Wait for the process to complete. Depending on your PC configuration, it might take less or more than one hour.
Note: Do not close this window before the procedure is complete. Keep in mind that the DISM scan has a tendency of getting stuck when it gets around 30%. But do not close the window as it’s normal behavior – the progression will resume after a couple of minutes. - If the process completes and you get a message saying that the file corruption was resolved, restart your computer and run an SFC scan at the next startup to see if the issue has been resolved.
If you’re still encountering the “Windows Resource Protection found corrupt files but was unable to fix some of them” error when running the SFC scan, move down to the next method below.
Method 2: Removing remnants of a 3rd party Antivirus software (if applicable)
As a couple of users have suggested, the SFC error could also occur as a result of a false positive. Most commonly, remnants from a poorly uninstalled antivirus/security solution will set the grounds for an occurence of this kind. Most of the time, affected users point toward Avast and McAfee as being responsible for this particular issue.
Keep in mind that the steps of removing remnant from a manually deleted AV are not that simple. Most AV solutions will have a dedicated uninstaller – finding the one applicable to your version is not always easy.
Fortunately, we have created a detailed article that will help you completely uninstall your security program regardless of your 3-rd party AV – follow this article (here) to identify the remnant files and remove them from your system.
Once the remnant antivirus files have been removed, restart your computer and run the SFC scan again at the next startup. If you’re still seeing the “Windows Resource Protection found corrupt files but was unable to fix some of them” error at the end of the scan, move over to the next method below.
Method 3: Perform an SFC/DISM scan in a clean boot state
If the two methods above didn’t eliminate the SFC error, it’s very likely that the issue is caused by one of the following factors – It’s either an issue caused by an interfering 3rd party application or you’re dealing with an unrecoverable system file error that SFC and DISM couldn’t make sense of.
In this method, we are going to cover the scenario where the error is caused by an interfering 3-rd party application that is roadblocking the System File Checker utility. We are going to ensure that there’s no 3-rd party interference by performing a clean boot and running the two utilities above once again.
Note: If you’re in a hurry and can’t afford to spend a couple of hours repeating the methods above in a clean boot state, move directly to Method 4. But keep in mind that the next method is a little more intrusive and will make you lose some user preferences at the least (depending on which operation you choose).
A clean boot will start your computer with a minimal set of drivers and startup programs. This will help us figure out if a background program, driver, service or 3rd party program is interfering with the SFC scan.
Here’s a quick guide on how to perform a clean boot and check if any third party applications are causing the issue:
- Press Windows key + R to open up a Run dialog box. Then, type “msconfig” and press Enter to open up the System Configuration screen. If you’re prompted by UAC ( User Account Control), choose Yes to grant administrative privileges.
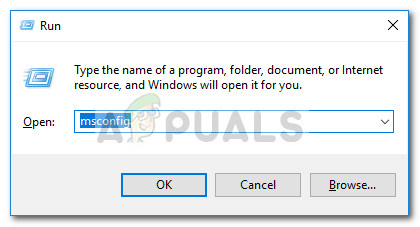
Run dialog: msconfig - Inside the System Configuration window, go to the General tab and choose Selective startup. Under Selective startup, make sure that you uncheck the box associated with Load Startup items.
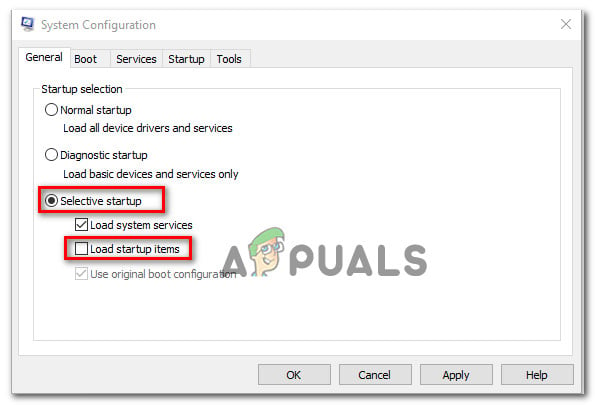
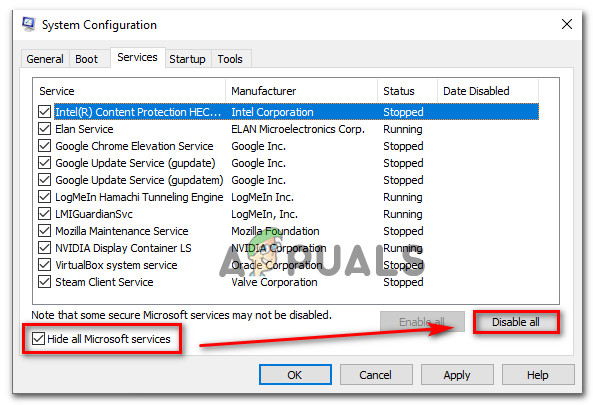
Preventing Startup Items from loading - Next, move over to the Services tab and check the box associated with Hide all Microsoft services. Then, click on the Disable all button to ensure that any 3rd party services are prevented from running at the next startup.
Disabling all non-Microsoft startup items - Click Apply to save the current boot configuration and comply if you’re prompted to restart your machine. If not, do it manually.
- Once your computer restarts in a clean boot state, press Windows key + R to open up another Run dialog box. Then, type “cmd” and press Ctrl + Shift + Enter to open up an elevated Command Prompt.
Opening Command Prompt via Run dialog box - Inside the elevated Command Prompt, type the following command and press Enter to initiate another DISM scan:
DISM.exe /Online /Cleanup-image /Restorehealth
Note: This command uses Windows Update to provide the files required to fix the corrupted data. Because of this, you need to ensure that you have a stable internet connection.
- Once the process is complete, don’t close the elevated Command Prompt. Instead, type the following command and press Enter to trigger an SFC scan and see if the error is no longer occurring:
sfc /scannow
In the event that the two scans (SFC and DISM) where hindered by a 3rd application service, the “Windows Resource Protection found corrupt files but was unable to fix some of them” error will no longer occur.
However, if the error is still occurring, it’s clear that your system is suffering from a kind of system file corruption that can’t be fixed conventionally. In this case, move over to the final method below to replace all Windows components and resolve the issue.
Method 4: Performing a repair install
If you’ve come this far without a result, there are two procedures that will most likely get the issue resolved:
- Clean install – This procedure will essentially override all the other content on your Windows installation driver. On top of removing all the data related to your operating system, you will also lose any personal files & personal preferences (photos, images, music, applications, user preferences, etc.)
- Repair install – This is a different kind of installation process in which the setup will essentially reinstall the same build over the existing operating system installation. This approach is way less destructive since it will allow you to preserve all your personal files, user settings, and any installed application.
Regardless of which way you end up choosing, we’ve got you covered. If you want to keep your personal files and limit the damage as much as possible, follow this article (here) to perform a repair install. In case you want to start fresh, follow this article (here) to perform a clean install.


I got to the first step, and received this back:Error 87
DISM doesn’t recognize the command-line option “Online”Any help with that?