Fix: Windows Start Menu Resets to Default Automatically
Windows Start menu offers the option to customize it as per your liking but recently, an issue is popping up where the utility reset to default by itself, causing the users to lose their preferred settings.
There can be quite a few reasons as to why this might be happening, such as:
- Generic corruption error – your PC might be infected by a corruption error that is messing with the system utilities like the Start menu.
- Third-party interruption – you might be using a similar third-party application (Start menu) that is interfering with the default Start menu.
Now that we know about the causes, let’s take a look at the troubleshooting methods which can resolve the issue,
1. Run an SFC Scan
If the start menu on your system resets to default by itself, then the first thing that you should do is run a system scan using the System File Checker. SFC (System File Checker) is an administrator tool for checking for corrupted files in Windows. If it finds any inconsistencies within the system files, it will replace the faulty files with their healthy counterparts.
You can run the System File Checker using the Command Prompt in all Windows versions.
Here is how to proceed:
- Type cmd in the search area of the taskbar and click on Run as administrator.
- Alternatively, you can also press the Win + R keys together to open Run and type cmd in the text field.
- Press Ctrl + Shift + Enter keys to launch Command Prompt with administrative privileges.
- In the Command Prompt window, type the command mentioned below and click Enter to execute it:
sfc /scannow
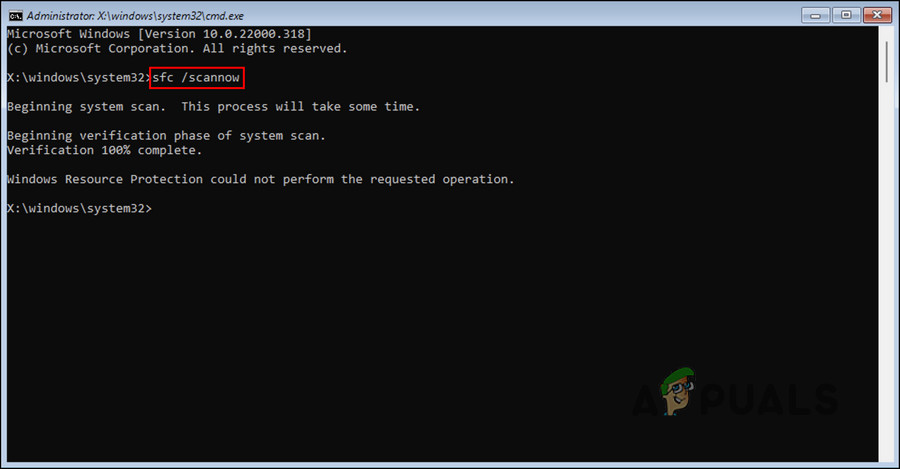
Execute the SFC command
Once the command is executed, close the Command Prompt and check if the issue is resolved.
2. Check If You Are Logged Into the Right Profile
In several cases, users did not realize that they are logged into another user account which is why they are can see the default version of the Start menu.
While this might not always be the case, it is worthwhile to check if you are logged into the right user account with the customized Start menu.
3. Backup Your Start Menu
This is more of a workaround than a troubleshooting method.
You can create a backup of your customized Start menu and save it on the system. Whenever the Start menu acts up, you can use this backup to get your settings back. This way, you will not have to lose the settings every time the Start menu resets automatically.
Here is how you can do that:
- Launch Command Prompt again by following one of the methods listed above.
- In the Command Prompt window, execute the command mentioned below.
reg.exe export "HKCU\Software\Microsoft\Windows\CurrentVersion\CloudStore\Store\Cache\DefaultAccount" "%userprofile%\desktop\StartLayout.reg" /y
- Once this is one, execute the following command:
copy "%LocalAppData%\Packages\Microsoft.Windows.StartMenuExperienceHost_cw5n1h2txyewy\LocalState\start.bin" "%userprofile%\desktop\"
- Your File Explorer will now have two files named “StartLayout.reg” and “start.bin”. Copy these files and save them in a protected location.
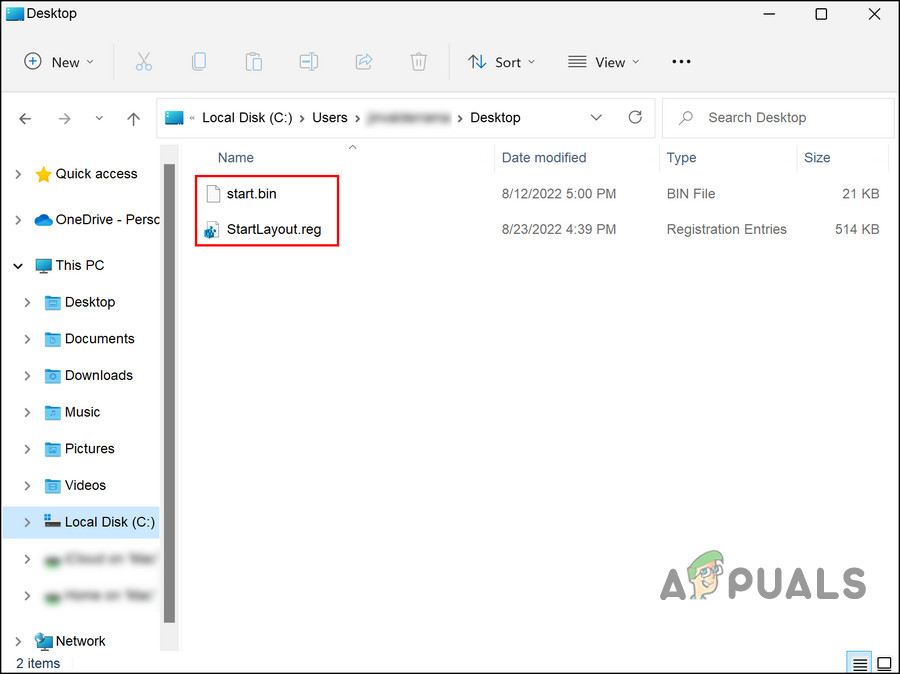
Start menu files in the File Explorer
You can use these files to revert to the current state of the Start menu whenever something goes wrong in the future.
4. Uninstall Third-Party Start Menus (If Applicable)
If you are using a third-party Start menu on your operating system as well, then there is a chance that it is interfering with the process of the built-in Start menu.
If this situation applies to you, then you can uninstall any similar third-party programs and see if it makes any difference.
5. Use the System Restore Utility
When Windows 11 first launched, several users had concerns about the new Start menu and tried different tweaks to customize this utility as per their liking. If you tweaked the Start menu as well, maybe one of the changes is causing issues with the utility.
If this scenario is applicable, you can try to revert the system state back to a point where the Start menu was working fine. This is done using the System Restore utility, which creates restore points every now and then. You can use these restore points to go back to a previous system state.
Remember, however, that any changes you made after the restore point you selected was created will be lost when you revert your system.
Follow these steps to proceed:
- Type Control Panel in the search area of the taskbar and click Open.
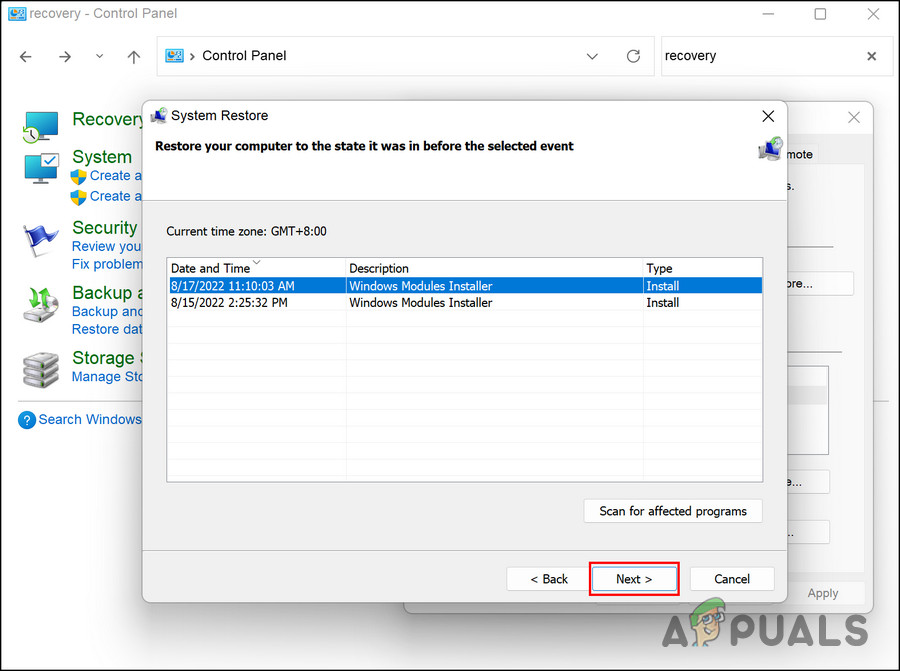
- In the Control Panel window, search for Recovery and choose Create a restore point > System Restore.

Choose the System Restore button - Click Next.
- In the following window, you should see a list of restore points created on your system. Choose one, preferably the most recent one, and click Next.
- Wait for the changes to implement.
If you face the problem again even after restoring the system to a previous point in time, it is best to contact Microsoft support and report the issue to them. They might help you pinpoint the exact cause of the issue and suggest a relevant troubleshooting method.


