How to Set Up Uptime Monitoring with Pingdom?
 Reviewed by Muhammad Zubyan
For any business, it is crucial to ensure its website is always available and accessible to its customers. Any downtime can result in revenue loss, customer dissatisfaction, and damage to reputation. To prevent such negative outcomes, businesses need to monitor their website’s availability to ensure it is available to their customers.
To achieve this, SolarWinds offers a SaaS-based web application performance and digital experience monitoring solution called Pingdom. Pingdom is a powerful and versatile tool that assists businesses in proactively monitoring their website performance. It enhances visibility of web application performance and facilitates troubleshooting. To download and try SolarWinds Pingdom, click here!
In this article, let’s discuss one of the features available in Pingdom, called “Uptime Monitoring”. We will introduce you to Pingdom’s uptime monitoring, demonstrate how to set it up, and show you how to check the uptime details of websites. Additionally, we’ll explain how to set up alerts and how to pull reports.
Pingdom Uptime Monitoring
Pingdom Uptime Monitoring regularly checks the availability of websites from more than 70 different global locations. It checks the availability of your website every minute and instantly alerts you if the website is not available. Additionally, Pingdom provides root cause analysis which contains vital information such as HTTP error codes, request contents, and traceroute details.
To set up uptime monitoring in Pingdom follow the below steps.
- Login into your Pingdom web console.
- Click on Synthetics Icon from the left pane menu.
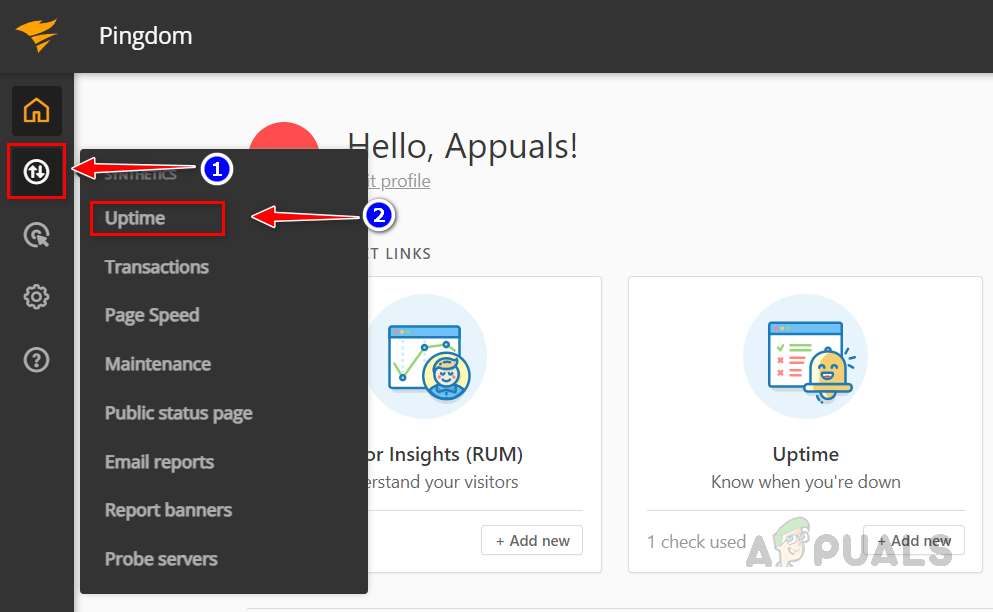
- Click on Add New.

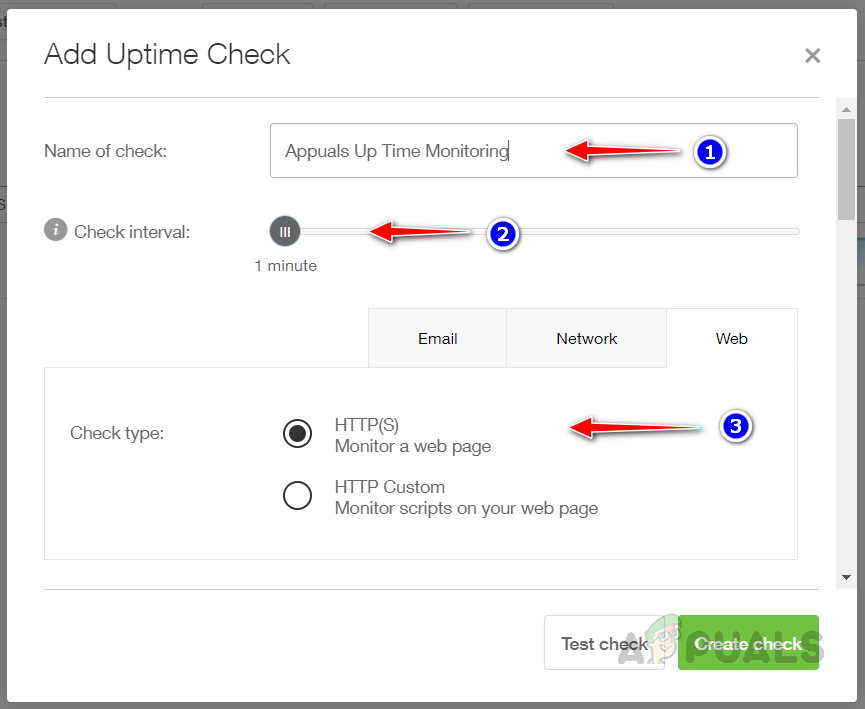
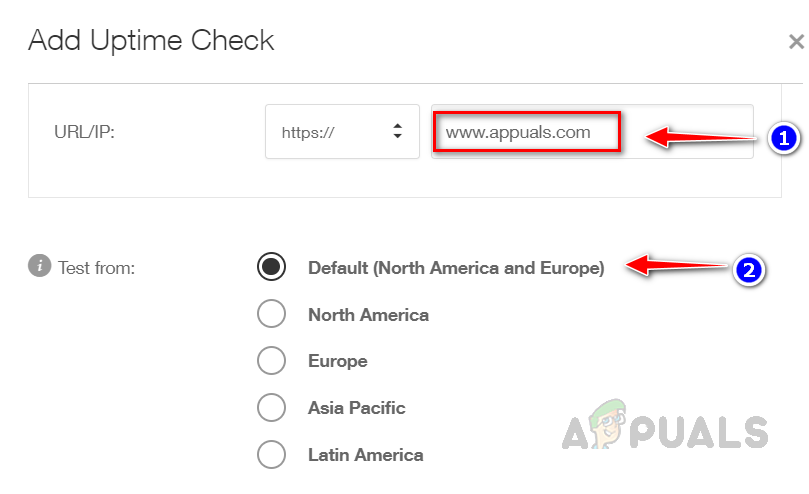
- Provide an appropriate name, select an appropriate check interval time by dragging and dropping the cursor, and then choose HTTP or HTTPS from the Web tab based on your requirement.
- Enter the URL that you want to monitor and select from which region you want to check the website’s availability. Each region has multiple test servers from different locations to test the availability of the website.
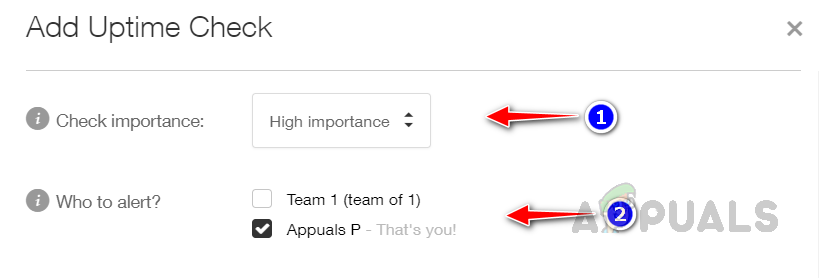
- Select the importance from the drop-down list and then select to whom you want to trigger the alert. We will discuss how to set up the recipient’s email address later in this article.
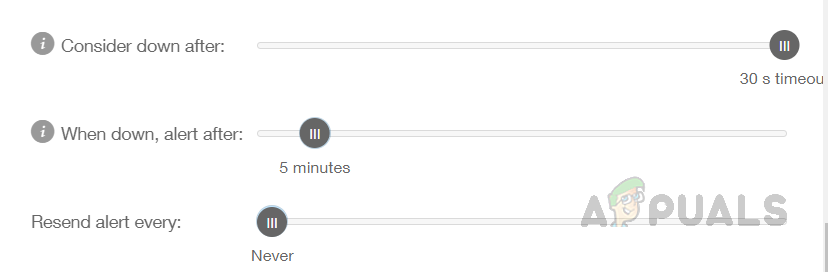
- Select the threshold using the cursor, if Pingdom didn’t receive any response from the website after the threshold, it determines the website is down. Select after how many minutes you want to receive an alert if the website is down. You can alert resend interval as well.
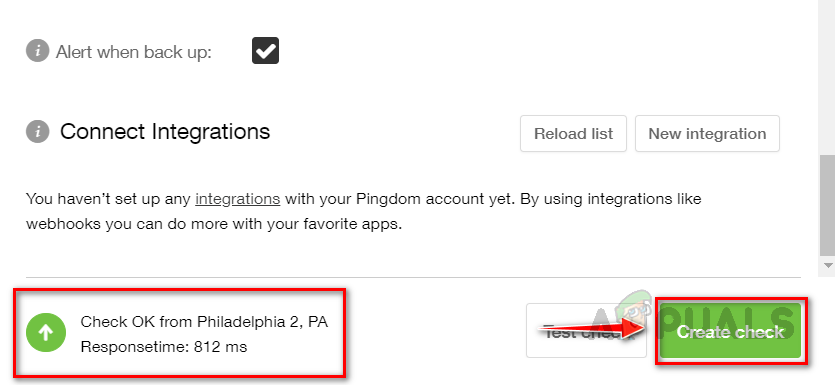
- Provide custom message for the Email alert if you would like to set up any. If you would like receive an alert once the website comes up check “Alert when back up”.
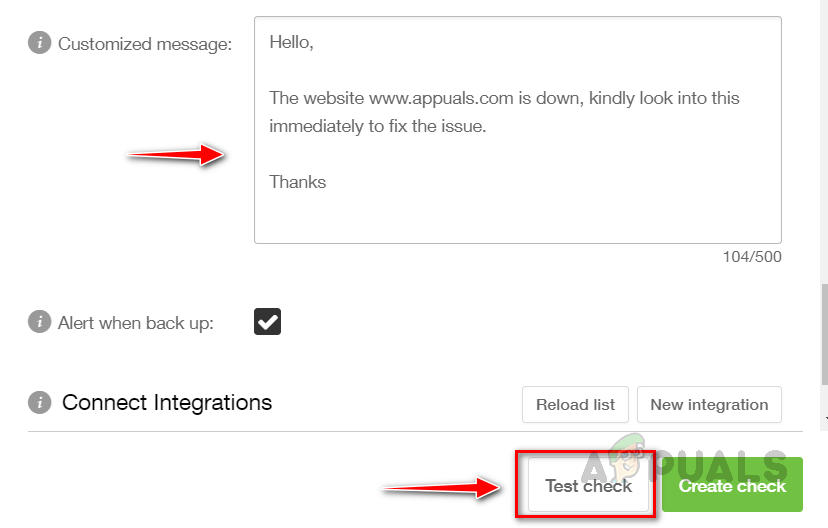
Once done, click on Test Check. - Now, you will recieve a check ok message, then click on create check and save it.
- Now the website is added to monitoring.

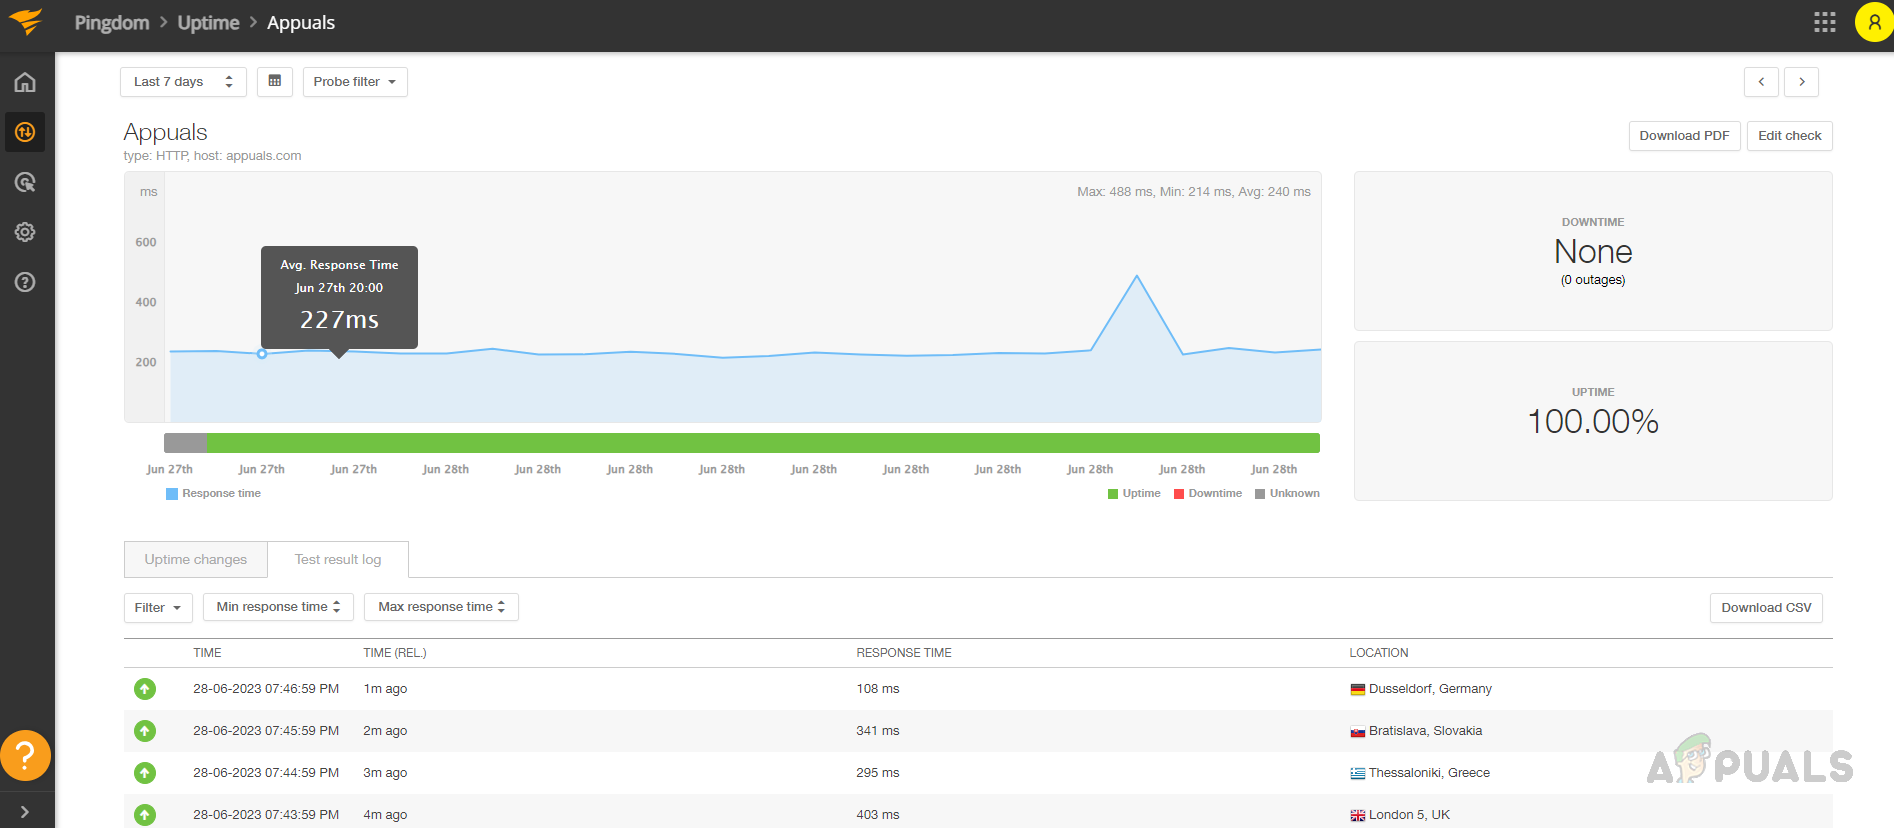
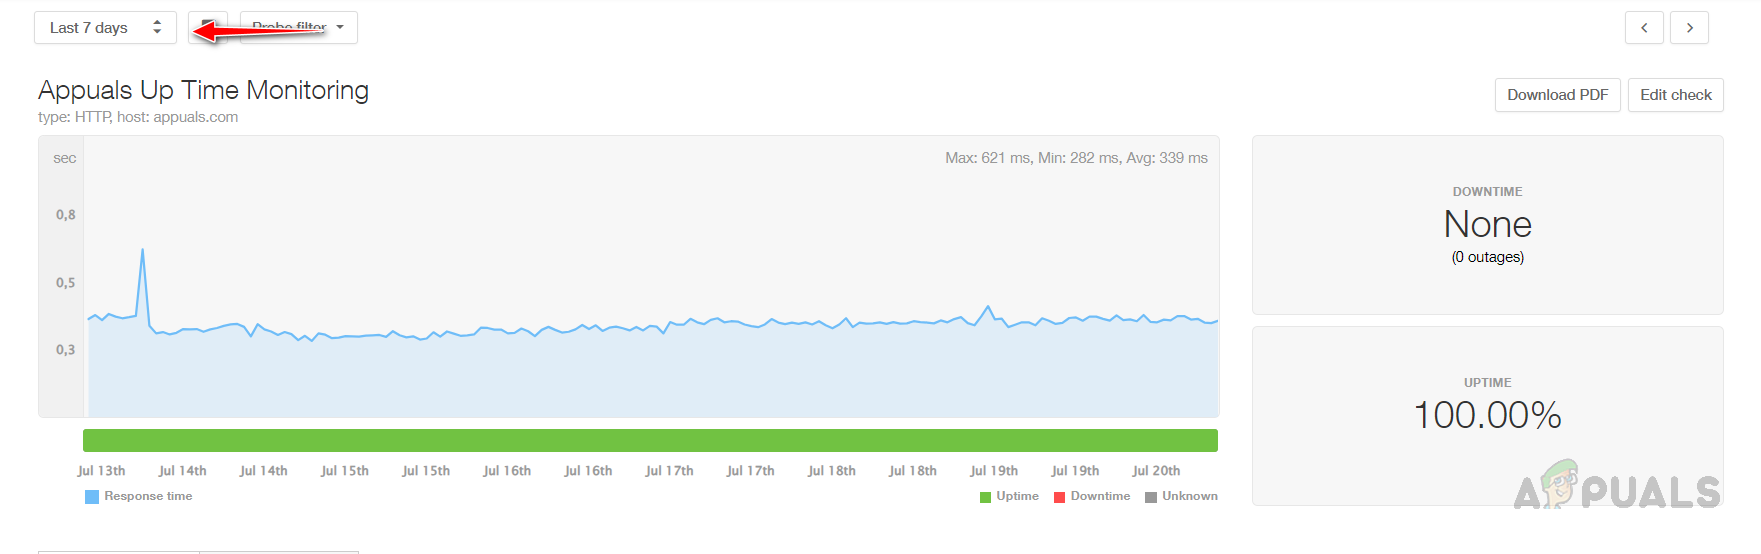
- You can see the response time and uptime graph once enough details are collected by Pingdom.

- Click on the website to check more details.
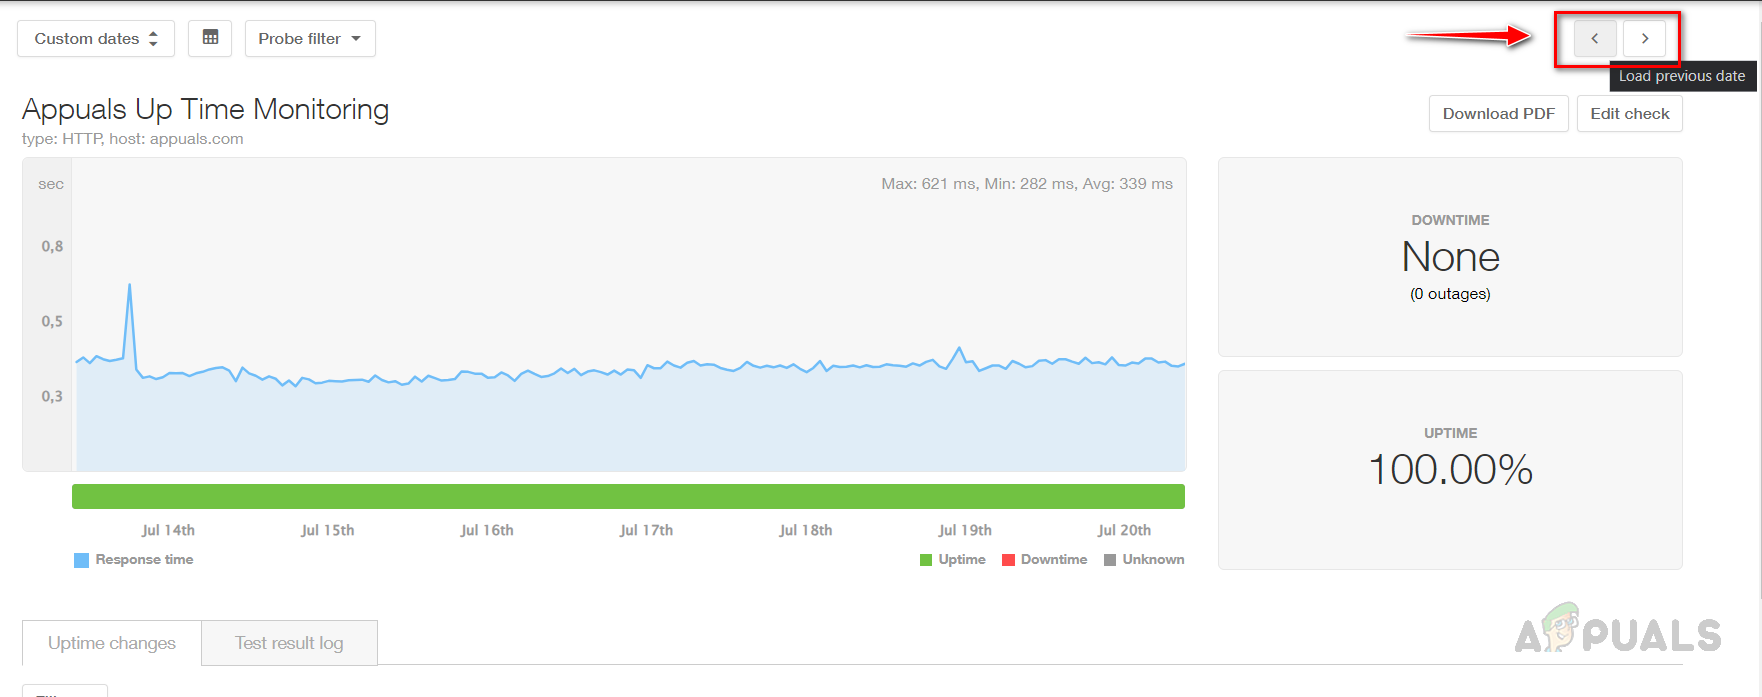
- You can see availability graph, availability and down time percent. Also, You have option to check the availability of your website from any required duration. You can use the predefined values or choose any custom duration.
- You can use the toggle key as well to switch between the days to check availability on a specific day.
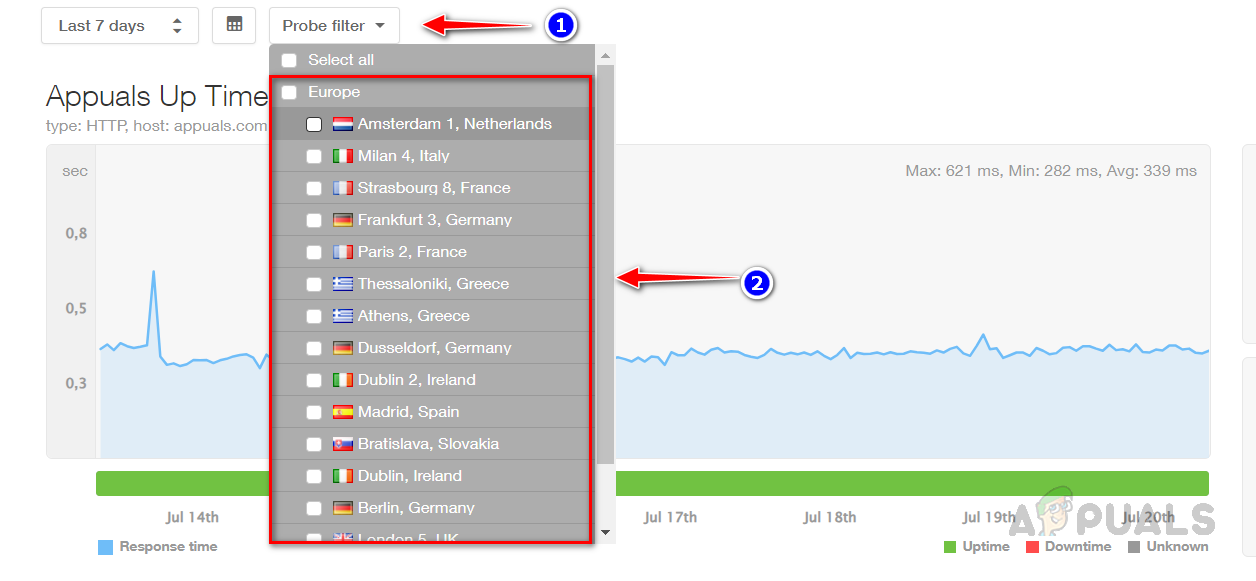
- Click on the Probe Filter to check availability from any specific location.
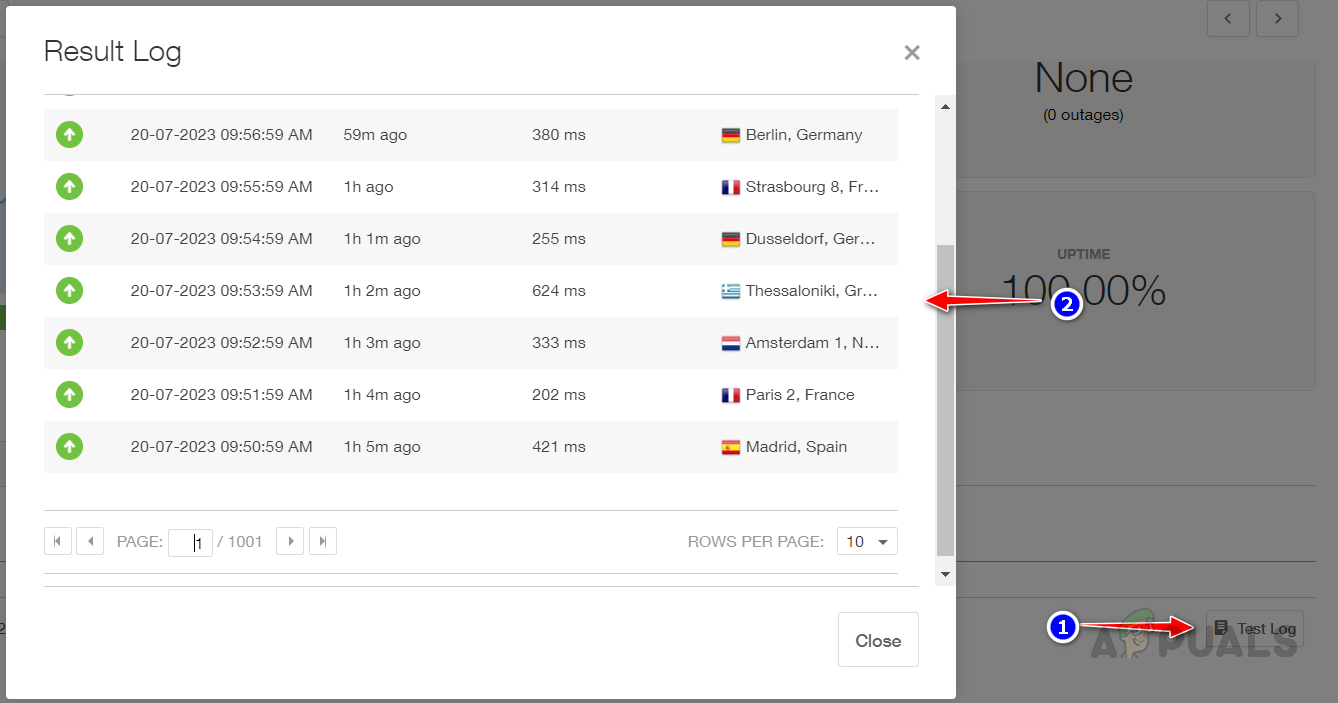
- Scroll down to check the uptime monitoring log.

- Click on Test Log to check the uptime data for the website from different locations.
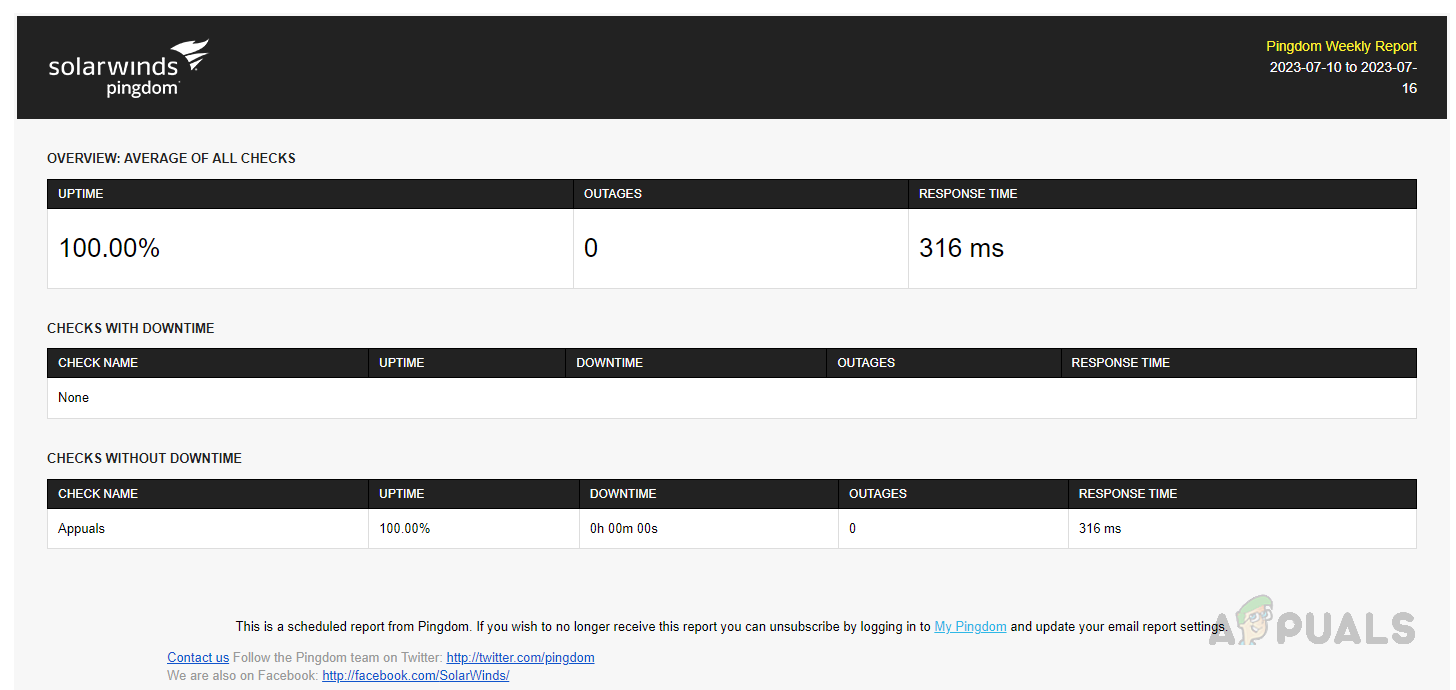
- Pingdom automatically delivers weekly reports to the Email IDs selected for the specific website monitoring check.
Scheduling Reports in Pingdom
If you would like to recieve daily or monthly reports, Pingdom provides options to schedule reports. Follow the below steps to schedule reports in Pingdom.
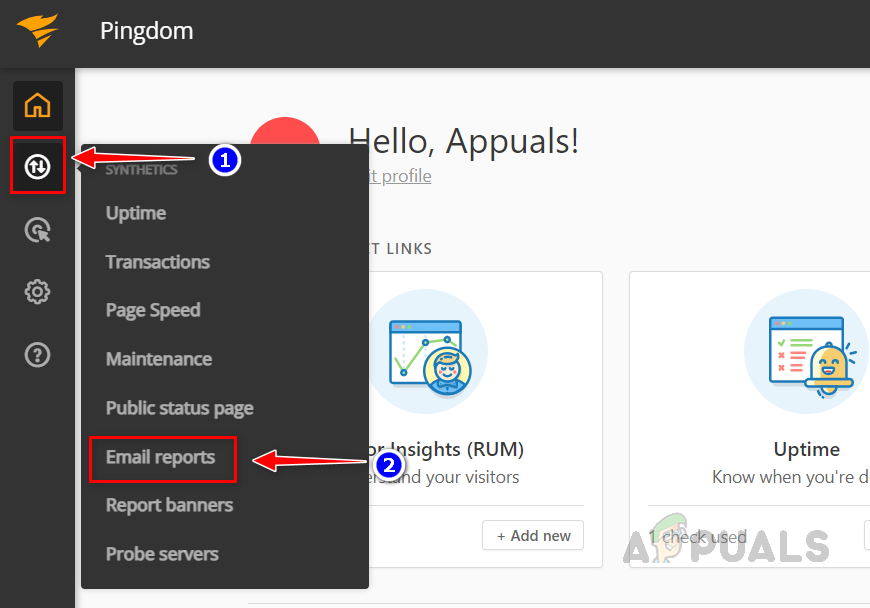
- To schedule reports, click on Synthetics and then Email Reports.
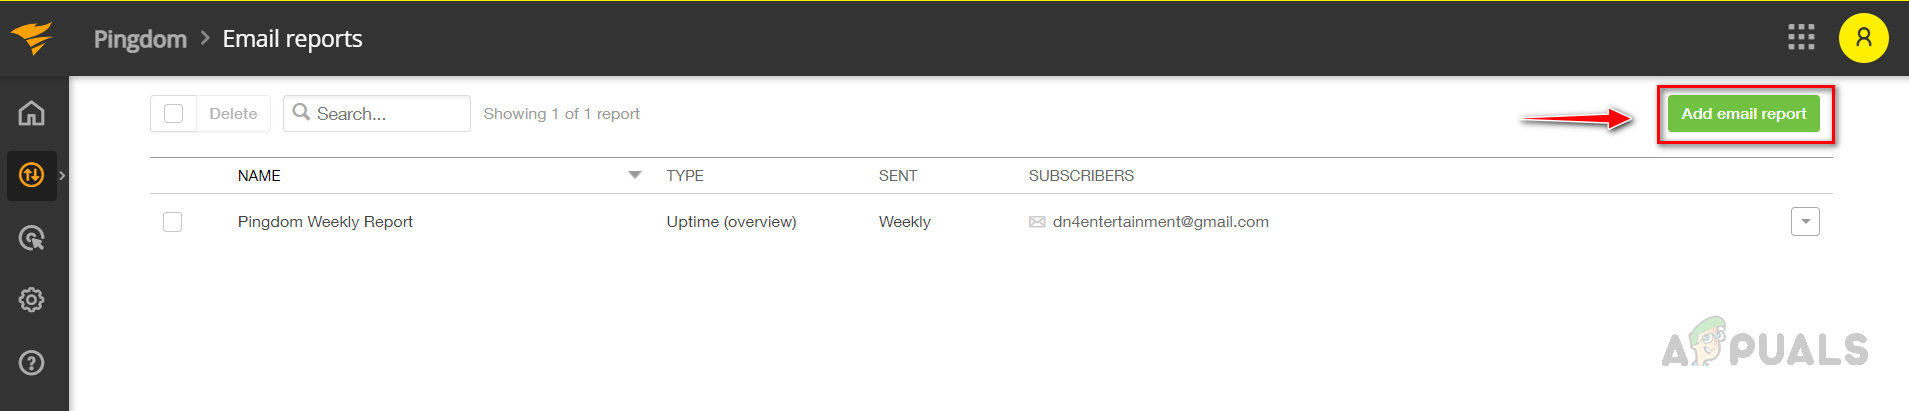
- Click on Add Email Report.
- Provide an appropriate name for the report, and then enter the requried recipient Email addresses.
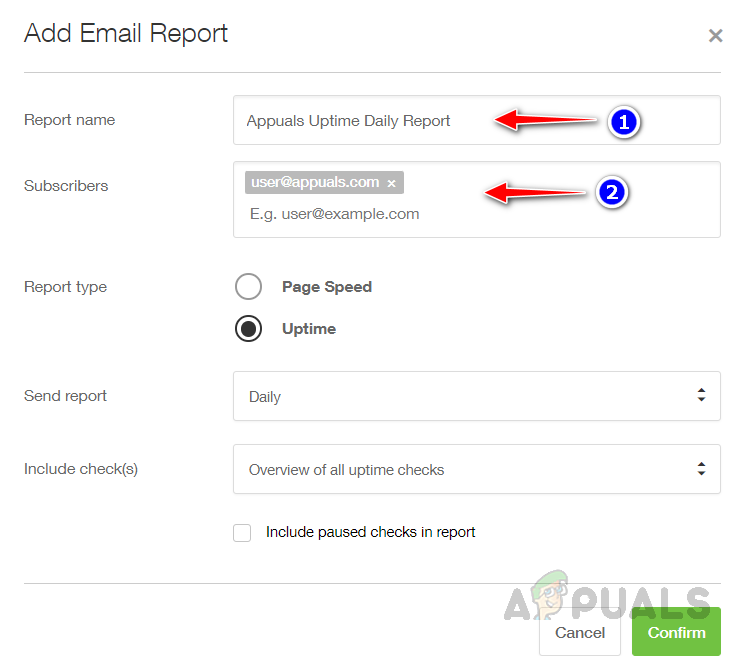
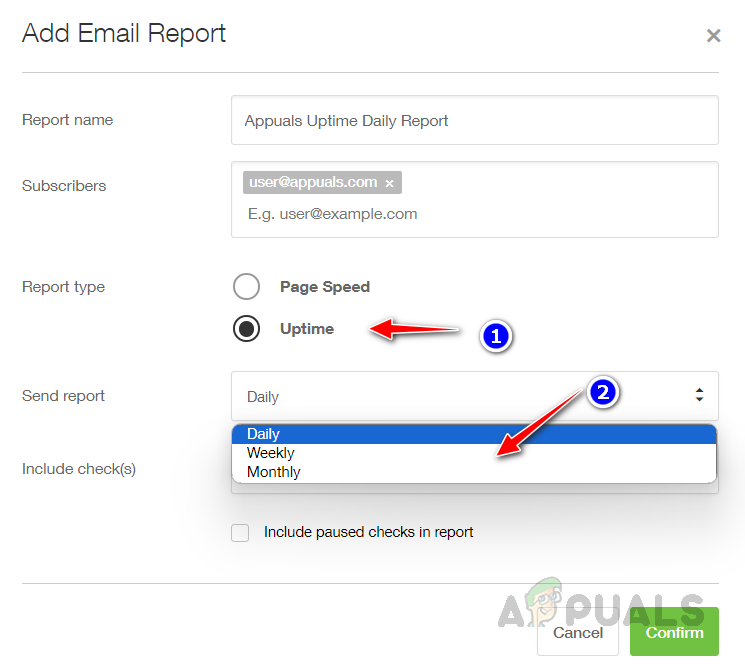
- Select the report type you want and then select how frequent you want to receive the report.
- Select the website check that you wish to receive in this report, or choose to view an overview of all uptime checks to receive a comprehensive report on all the websites. Once complete, click confirm to save the schedule.
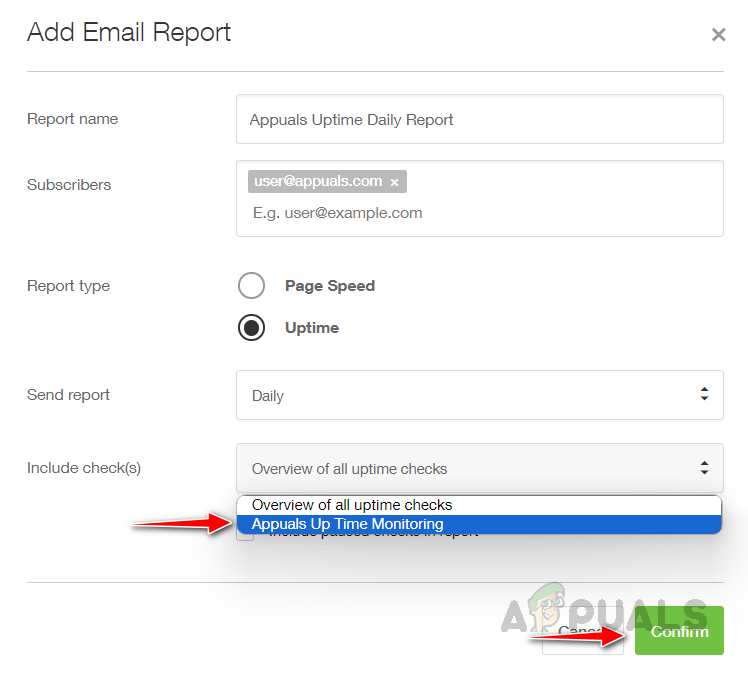 This is how we can scheduele reports in Pingdom.
Adding Recipients for Email Alerts
To add recipients Email addresses to alerts follow the below steps.
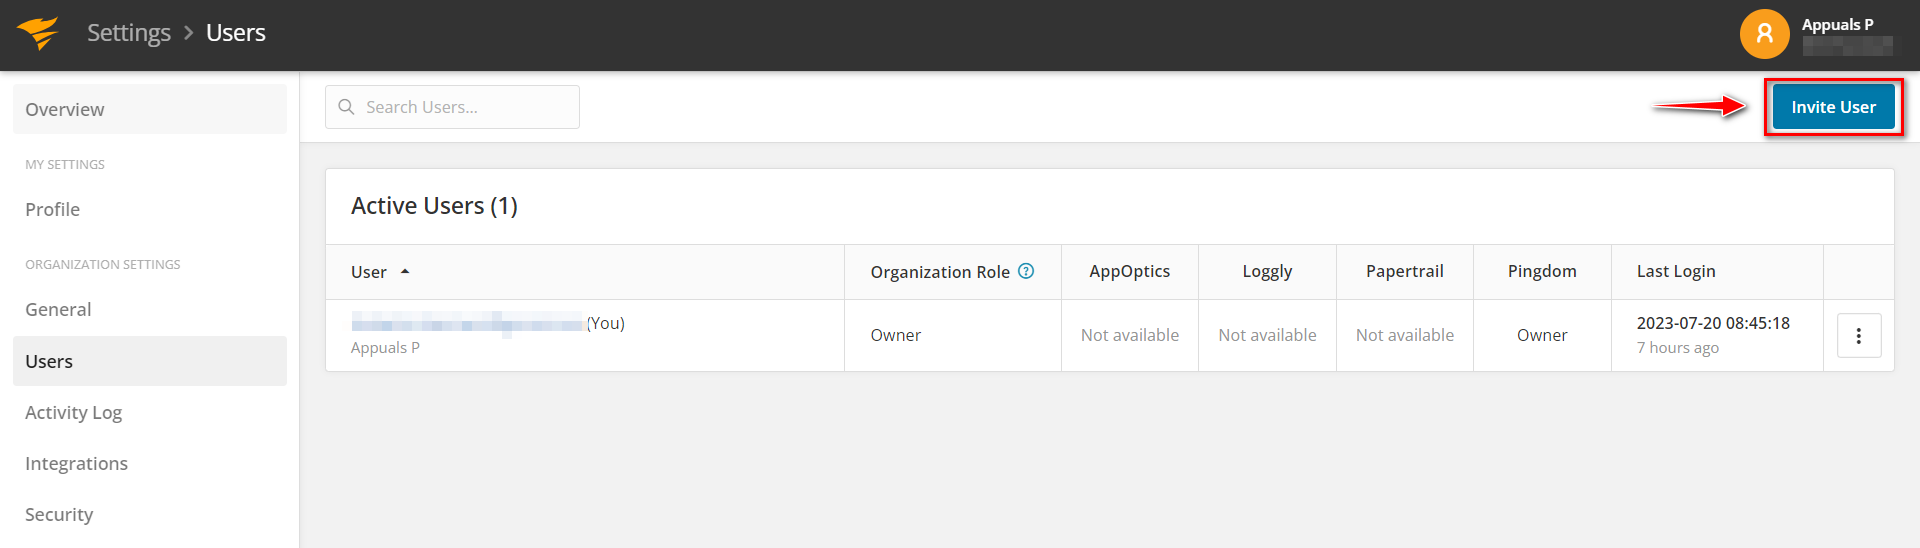
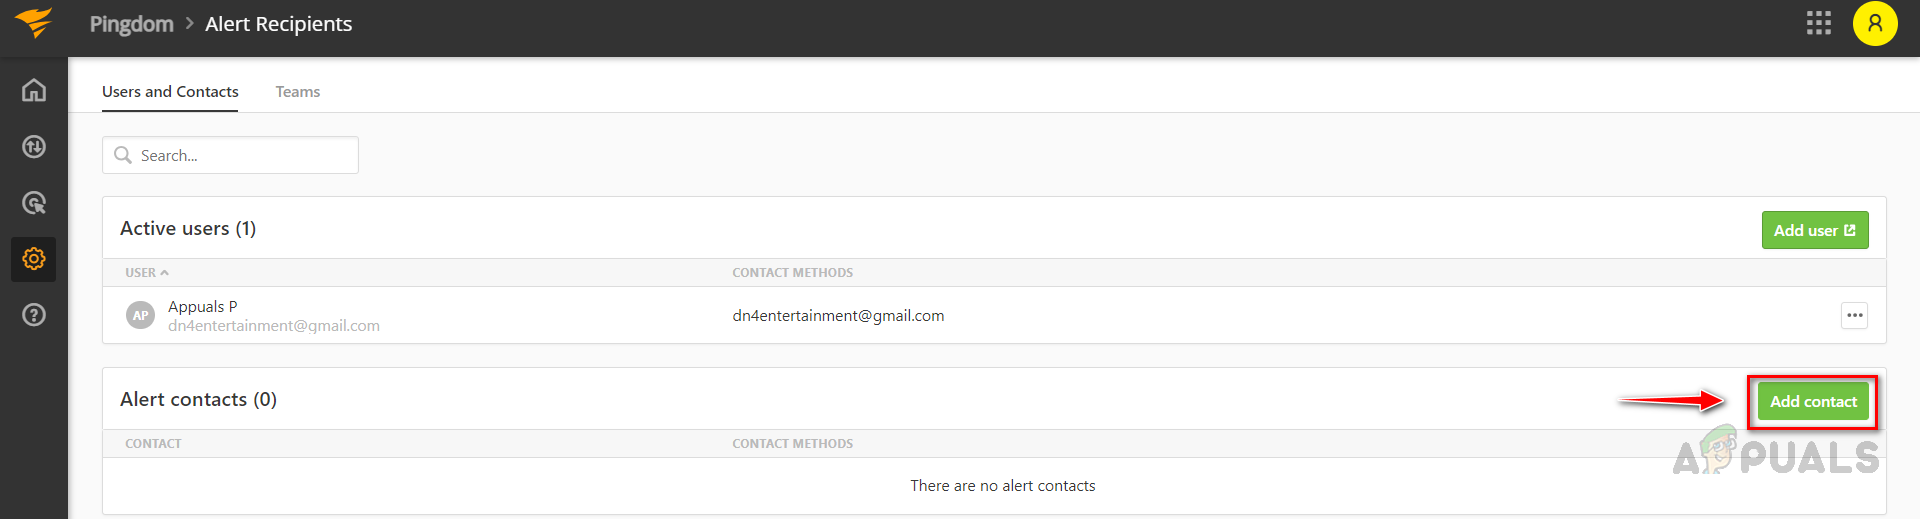
- Click on Settings and then click on Alert Recipients.

- Click on Add User to add Email address.

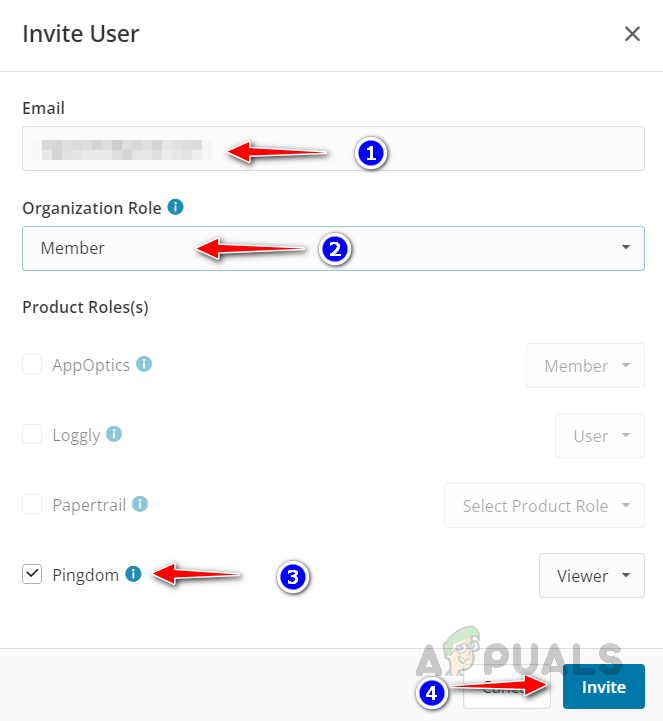
- Click on Invite User.
- Enter the user Email Address and select the role of the user, select Pingdom and then click on invite.
- Mentioned user will recieve the below Email, they will start receiving alerts once they click on Accept Invitation.

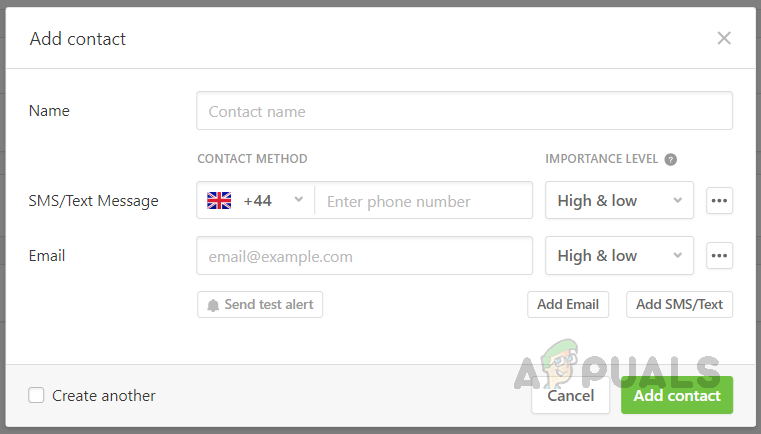
- You can also add mobile number to send the alert as a text message. To do that click on Add Contact.
- Provide the details to receive the text alerts.
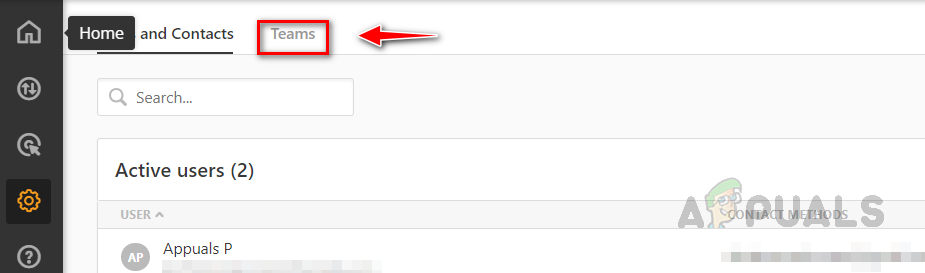
- You can also create a team using multiple email addresses to use as a distribution list to trigger alerts. You can utilize this team to avoid typing multiple email addresses into the recipient details while creating an uptime monitoring check.
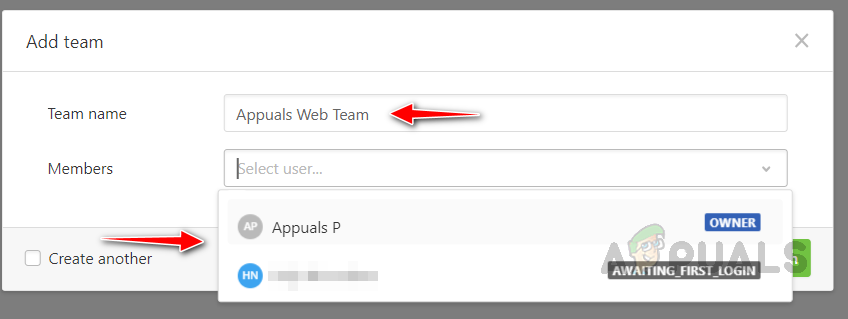
- To create team, click on Teams.
- Click on Add Team.

- Provide an appropriate name for the team, and select the users.
- Click on Add Team to create the team.
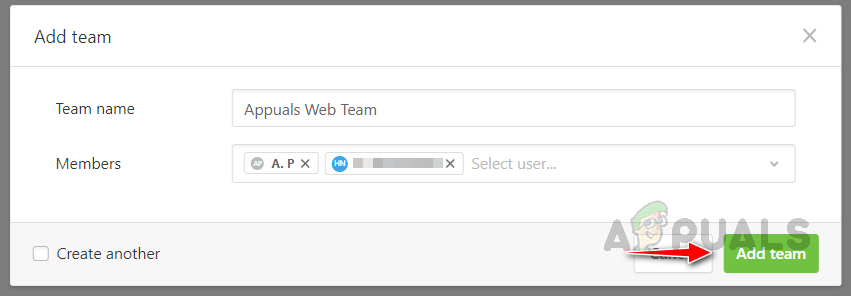
- You can use the created team as alert recipients for Email Alerts.

This is how we can use SolarWinds Pingdom’s Uptime Monitoring feature to monitor website availability, ensuring the website is always accessible to customers and preventing any revenue loss due to unexpected outages.
Reviewed by Muhammad Zubyan