How to Monitor Site-to-Site VPN Tunnels Using SolarWinds?
Monitoring the Site-to-Site VPN tunnels or IPSec VPN Tunnels is important for a Network Administrator to maintain the Network Infrastructure secure and reliable. By monitoring the Site-to-Site VPN tunnels you can ensure the availability and optimize the performance by identifying and fixing any potential issues.

SolarWinds Network Performance Monitor (Solarwinds NPM) provides best-in-class options to monitor your Site-to-Site VPN tunnels. You can monitor your Site-to-Site VPN tunnel on Cisco ASA, Palo Alto, and other firewalls with Solarwinds NPM. To learn more about SolarWinds NPM and try its features click on this link.
Let’s see how to monitor Site-to-Site VPN Tunnels using Solarwinds.
Monitoring Site-to-Site VPN Tunnels Using SolarWinds
First, we need to add the device where the VPN Tunnel is configured. Follow the below steps to add the device to monitoring.
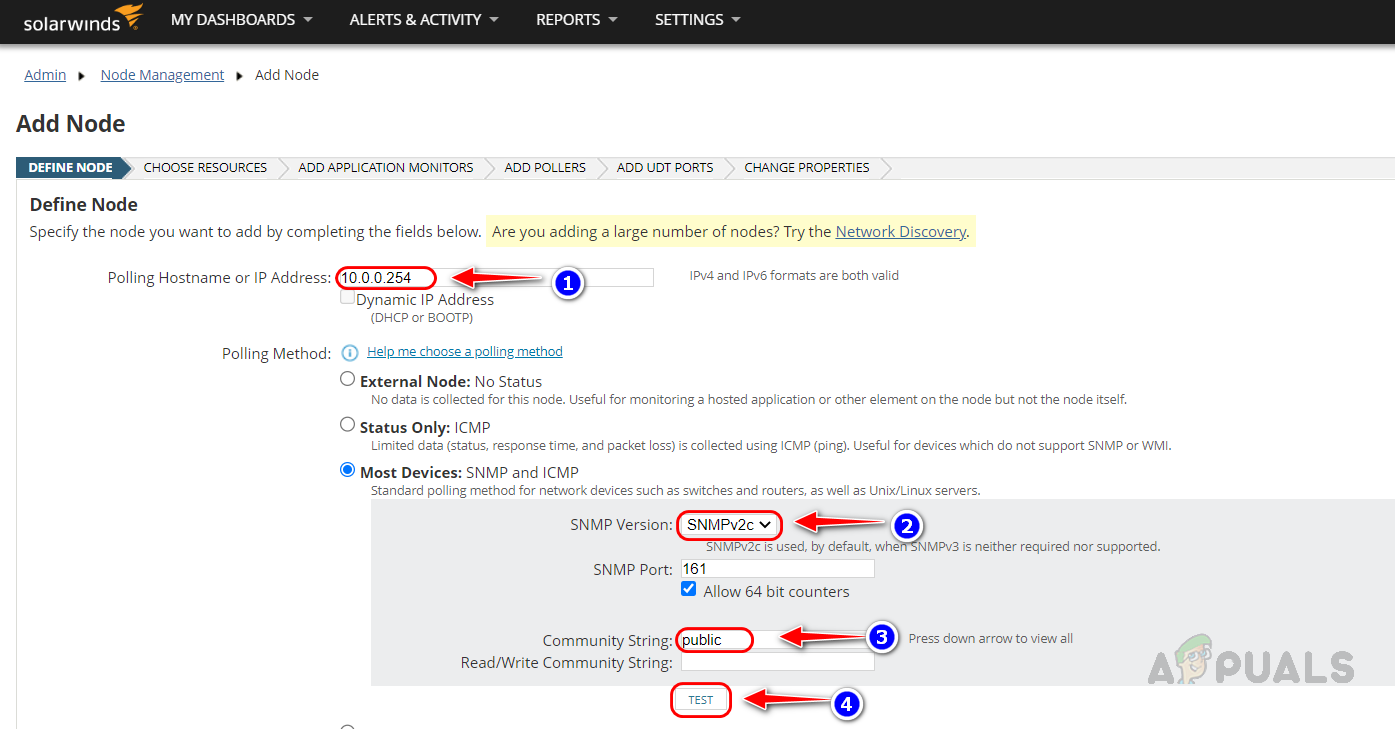
- Enter the IP Address or hostname of the device that you want to monitor. Select the SNMP version and provide the community string if it is v1 or v2, if it is v3 you need to provide the authentication method and its password, encryption method, and its password. Once provided click on test, and you should get Test Successful message.
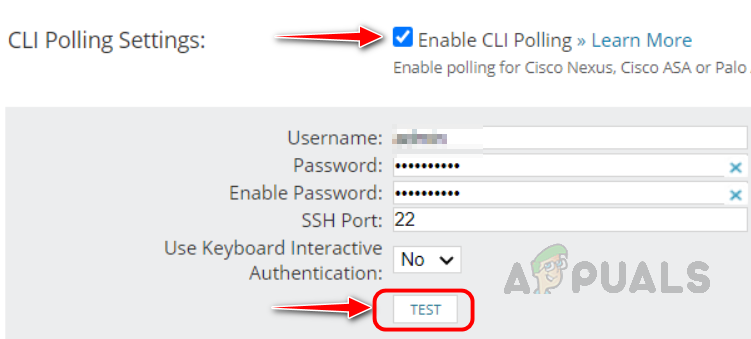
- Solarwinds uses a combination of SNMP polling and CLI (Command Line Interface) polling to monitor advanced devices. We can use the CLI polling option for Cisco ASA, Palo Alto, and all other supported firewall devices. This CLI polling provides additional data from the devices. Hence enabling CLI polling while adding the device or enabling CLI polling for an existing device helps in getting more data from the device. To enable CLI polling while adding a node, on the last page, scroll down to CLI polling settings and then check Enable CLI Polling.

- Enter the CLI credentials used to login into the Cisco ASA device. Click on Test to validate the credentials.
- By following the above steps you can add your Firewall into monitoring.
Checking Site-to-Site VPN Tunnel Data on Your Firewall
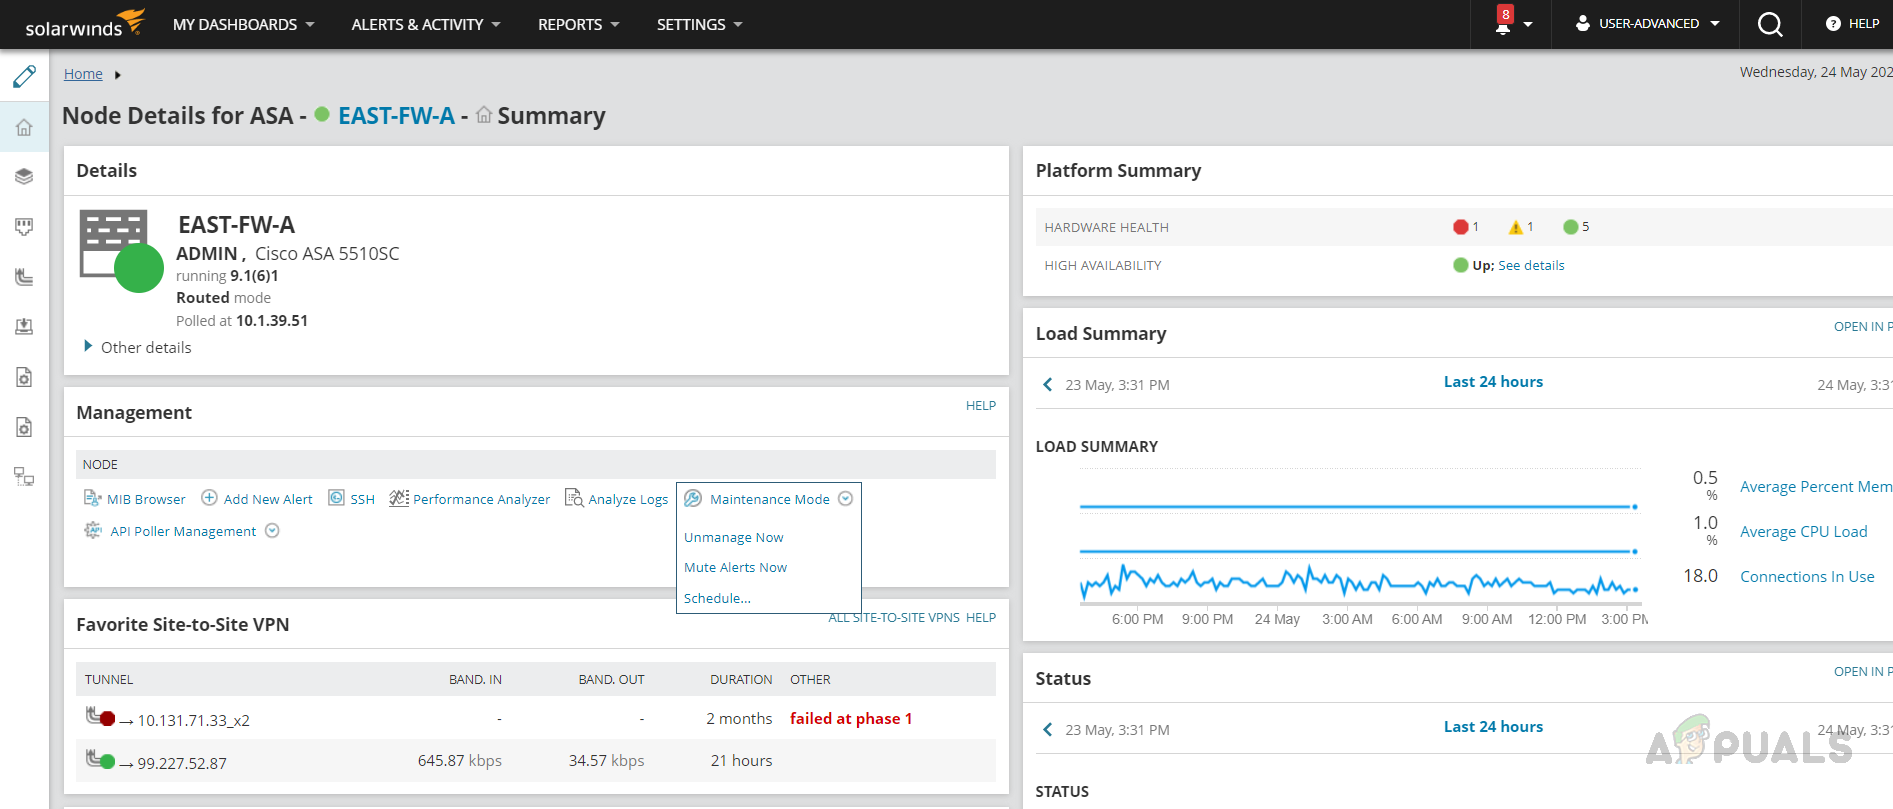
- Select the Firewall you want to check from the Summary page or Manage Nodes page.
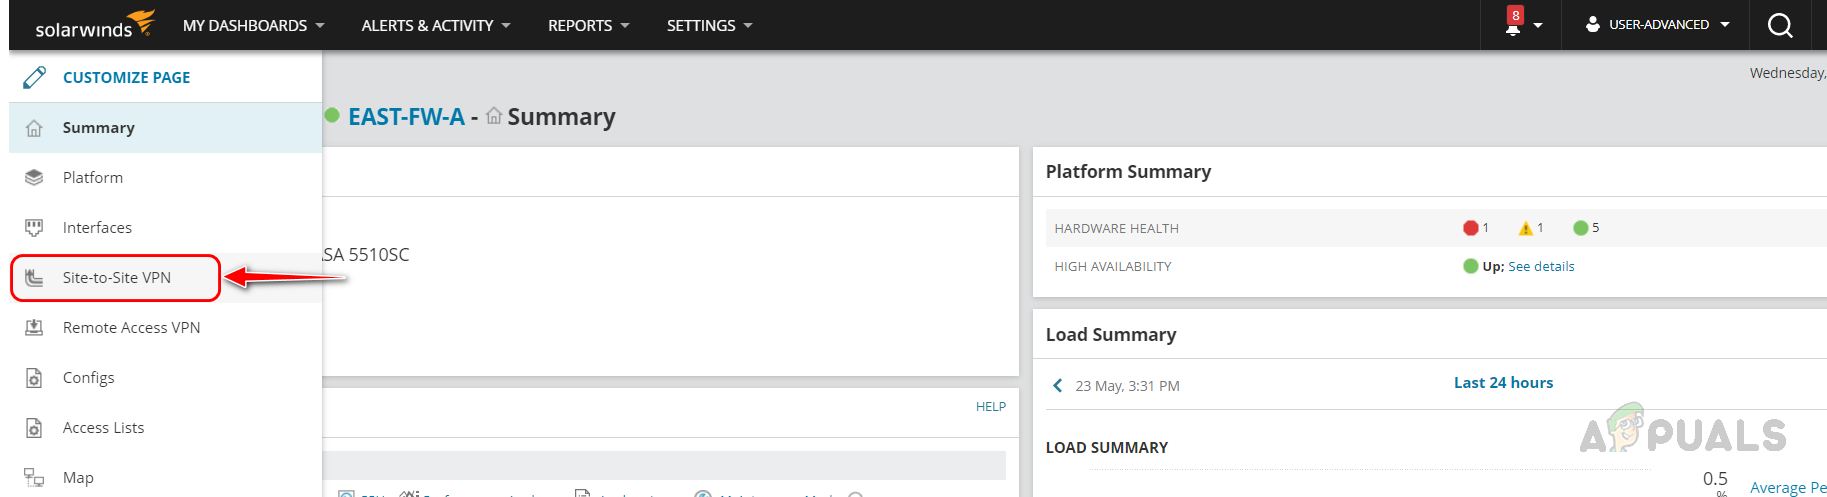
- Click on the Site-to-Site VPN Tunnel tab from the left navigation pane.
- On this page, you can review your Site-to-Site VPN tunnels available on the firewall. you can use the Filters option to filter the tunnels based on your needs.
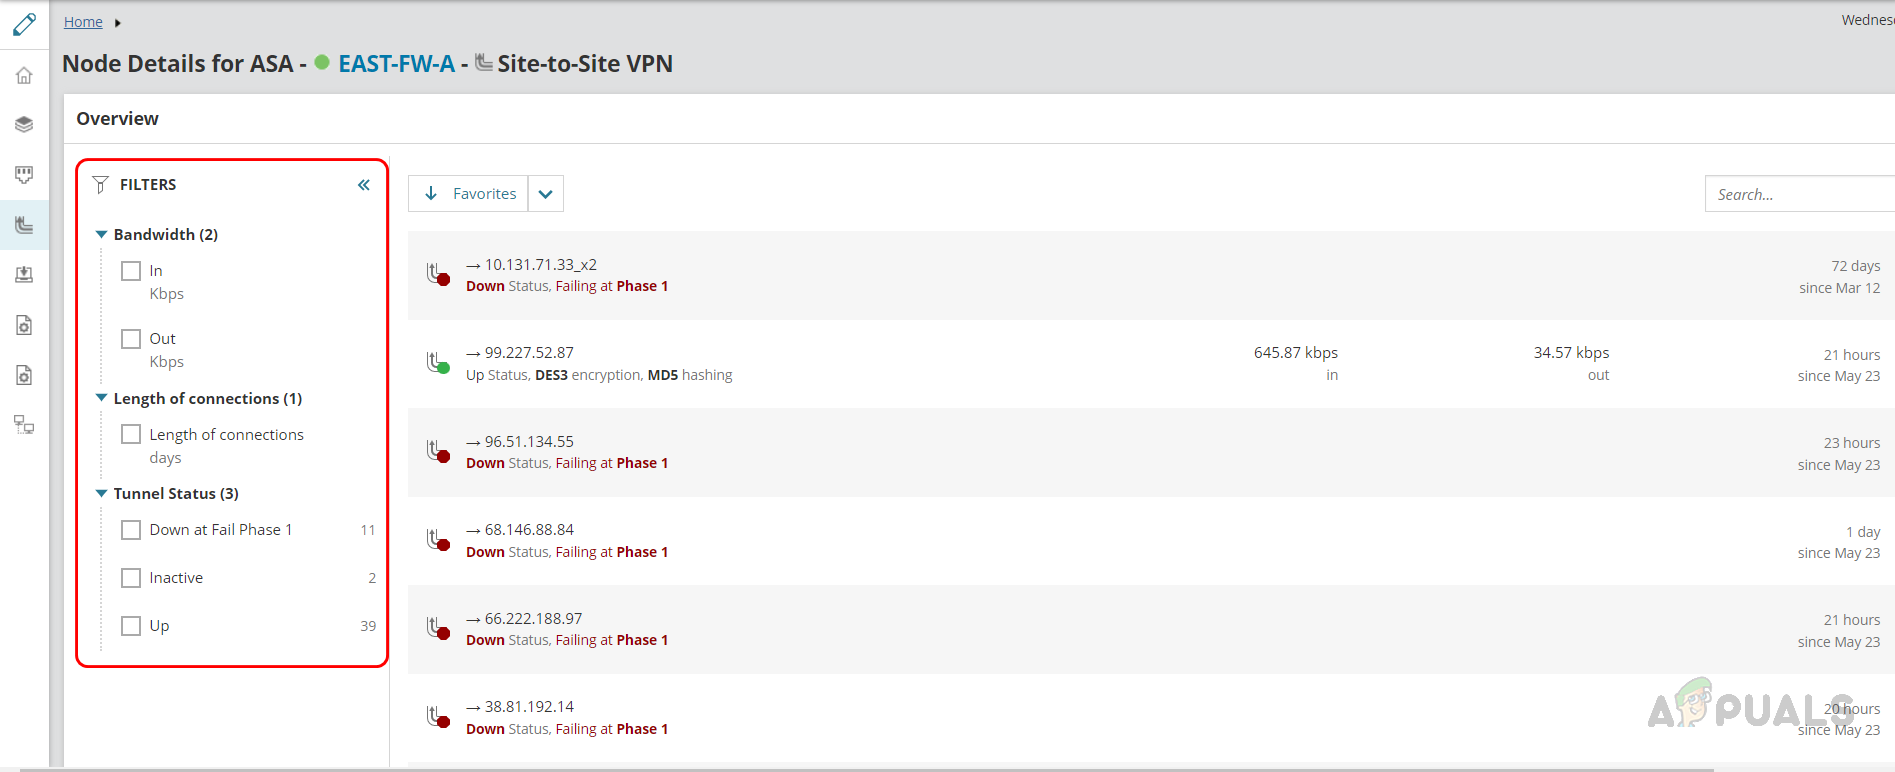
- You can use the search option to find any specific tunnel from the list.

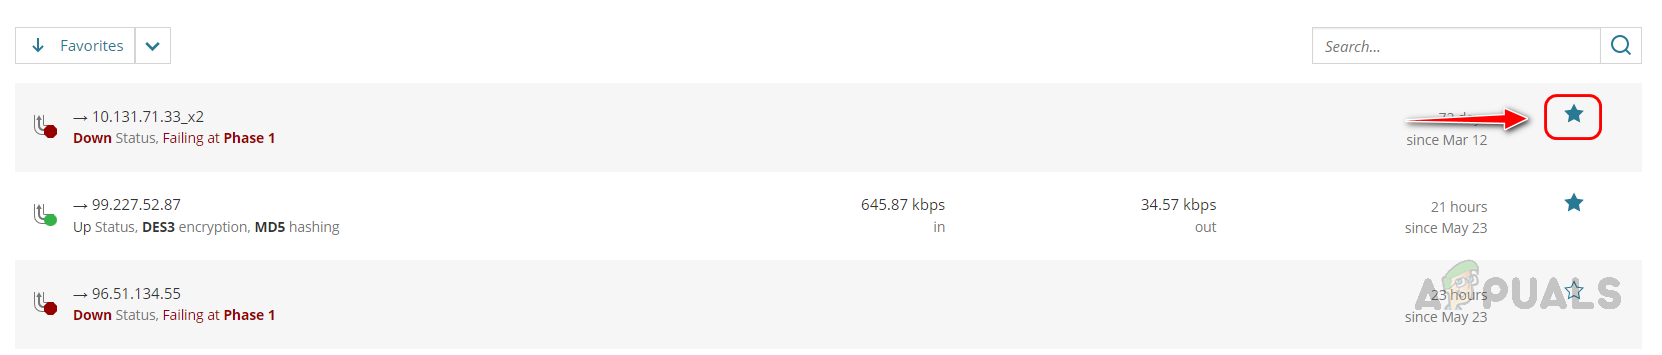
- By clicking on the star icon you can add that specific tunnel to your favorites and that tunnel will be featured in the Node Summary page. We can easily check the tunnel-related details from the node summary page itself.
- VPN Tunnel status will be shown under the tunnel IP Address.

- If a Site-to-Site VPN Tunnel is down, you can see which phase it is failing and from when the tunnel is down.

- For the Site-to-Site VPN Tunnel which is up, you can see the Encryption and Hashing methods used in the tunnel, how much traffic flows through the tunnel also the uptime of the tunnel.

From this Site-to-Site VPN Tunnel section, we can see all the necessary information related to that device. Solarwinds also provides reporting and alerting features for Site-to-Site tunnels. Let’s see how to check the reports and alerts for the VPN Tunnels.
Reporting on Site-to-Site VPN Tunnels
Solarwinds NPM has inbuilt reports for Site-to-Site VPN Tunnel, you can use them to pull current or historical reports on your Site-to-Site VPN Tunnels. You can customize those inbuilt reports based on your needs.
Follow the below steps to check Site-to-Site VPN Tunnel related reports.
- Go to Reports and then click on All Reports.
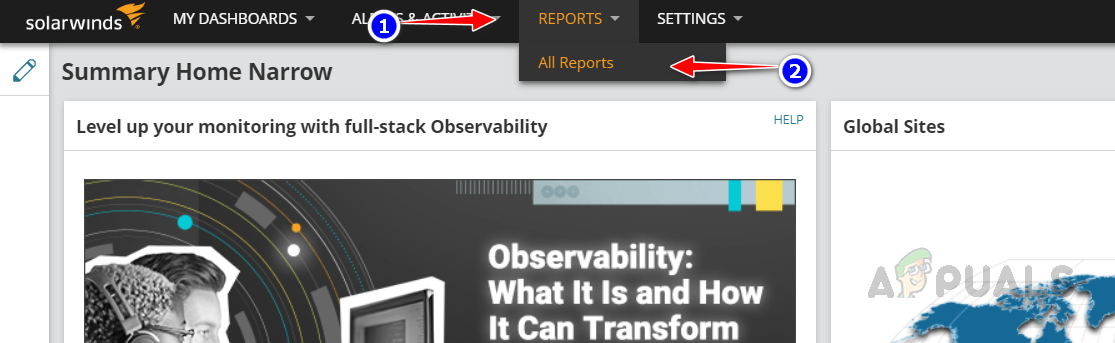
- Search for site-to-site in the Search box and open the Site-to-Site VPN tunnel report from the search result.
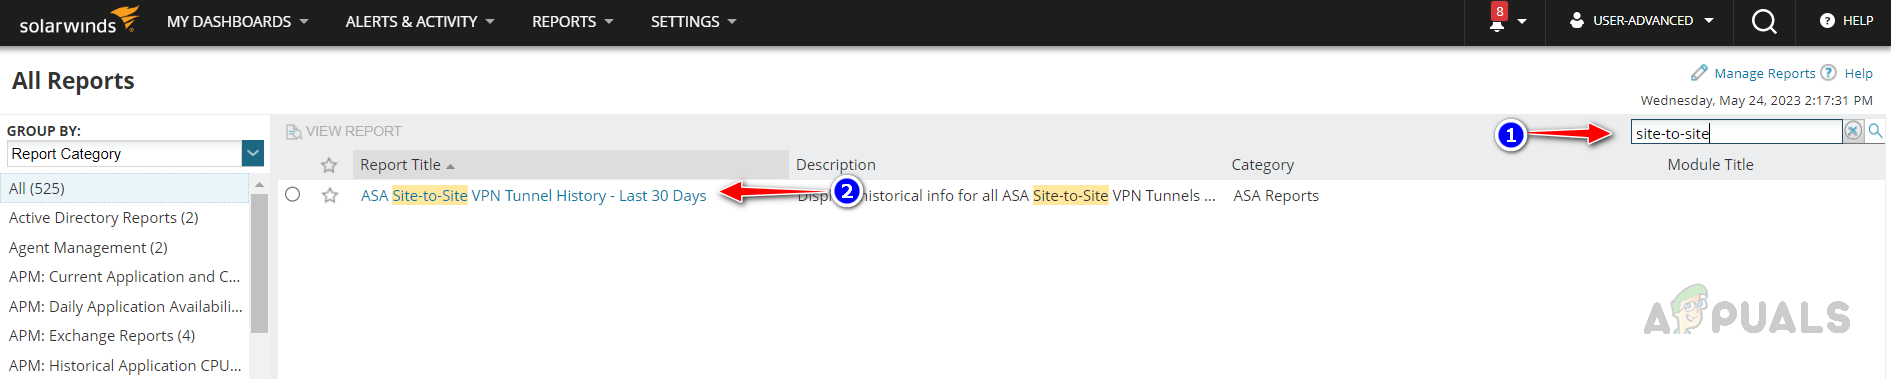
- This specific report is for the last 30 days’ historical for Site-to-Site VPN Tunnels.
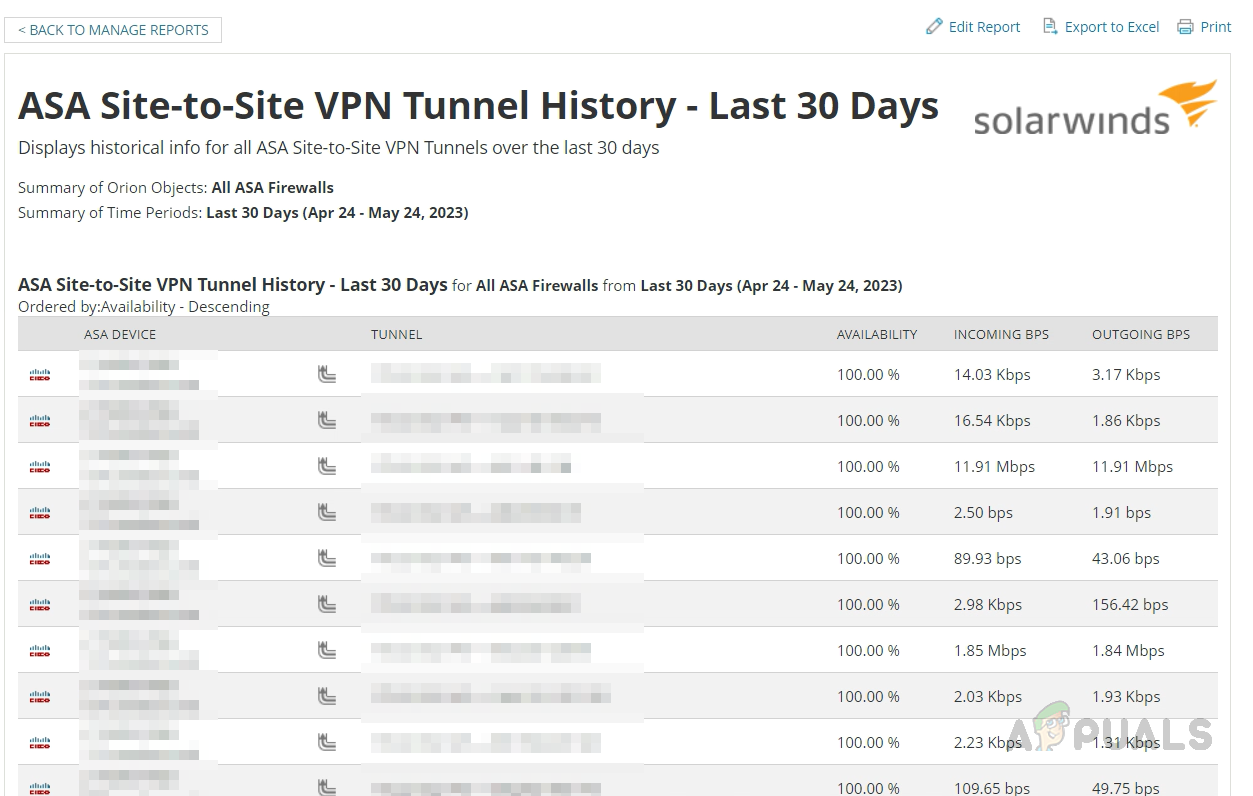
- You can create your own report for Site-to-Site tunnels based on the Vendor or you can customize the existing reports.
- You can schedule these reports as well to deliver at specific time intervals. To learn how to create custom reports and schedule them in SolarWinds click on this link.
Alerting on Site-to-Site VPN Tunnels
Solarwinds NPM provides built-in alerts for Site-to-Site VPN Tunnel’s availability. You can enable the default alerts or you can customize those built-in alerts based on your needs.
Follow the below steps to enable alerts for Site-to-Site VPN Tunnels.
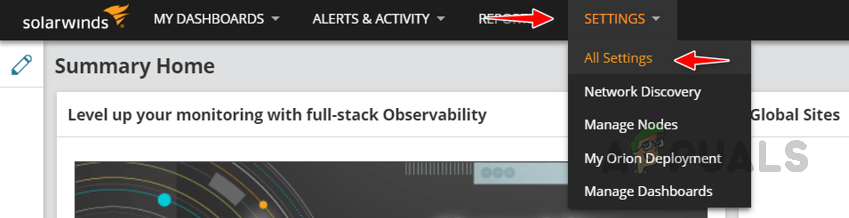
- Go to Settings and then click on All Settings.
- Click on Manage Alerts under Alerts & Reports.

- Search for site-to-site in the Search box. You can see built-in alerts for Cisco ASA and Palo Alto.

Toggle the enable button to turn on the alerts. Alerts will trigger based on the built-in alert condition. - You can check the alerts on the active alerts page. To go to the Active Alerts page follow the below steps.
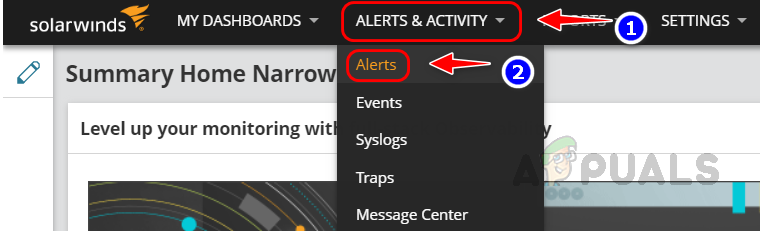
- Go to Alerts & Activity and click on Alerts.
- Choose Alert Name from the Group By drop-down list.
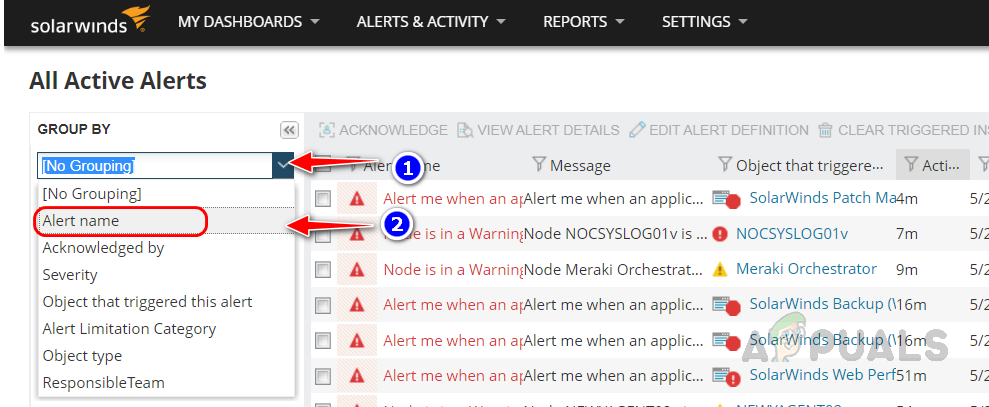
- Select the Site-to-Site VPN Tunnel alert from the list, you can see all the alerts triggered for Site-to-Site VPN Tunnel.

- From the alerts, we can identify what are tunnels down on which device.
- You can also set up Email notifications for the alerts.
- To learn how to configure custom alerts and set up Email notifications click on this link.
With all these advanced features provided by Solarwinds, you can monitor your Site-to-Site VPN Tunnel’s availability and performance to identify and fix the issues before they cause any major outage in your organization. You have the feasibility to customize the reports and alerts to better align with your organization’s specific needs. To download and try the features of SolarWinds NPM click on this link.