How to Monitor Routing Neighbors using Solarwinds
Monitoring routing neighbors like BGP, OSPF and EIGRP using Solarwinds
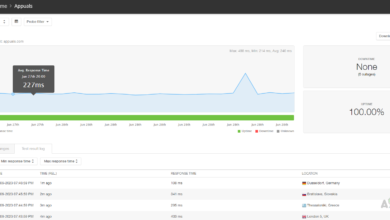
Solarwinds Orion has an excellent feature to monitor all your routing neighbors like BGP, OSPF, and EIGRP. Solarwinds routing neighbor monitoring provides information like routing neighbor protocol configured on a device, its status, and when the last change occurred for the routing neighbor.
We can also configure alerts for the routing neighbors monitored in Solarwinds; this will help us identify and resolve the issue as quickly as possible. If the problem was unnoticed, that might lead to a significant impact. We can avoid such issues with Solarwinds advanced alerting feature. Also, we can use the Solarwinds reporting feature to pull routing neighbors configured in the environment with their current status. This can be used as an inventory for the routing neighbors in the network infrastructure. Click on this link to try Solarwinds routing neighbor monitoring.
Now, let’s see how to monitor routing neighbors and configure alerts and reports using Solarwinds.
How to Monitor Routing Neighbors
To monitor routing neighbors on a router, we need to monitor the router using SNMP. The respective routing neighbors need to be enabled for monitoring in the list resource page while adding the router to monitoring.
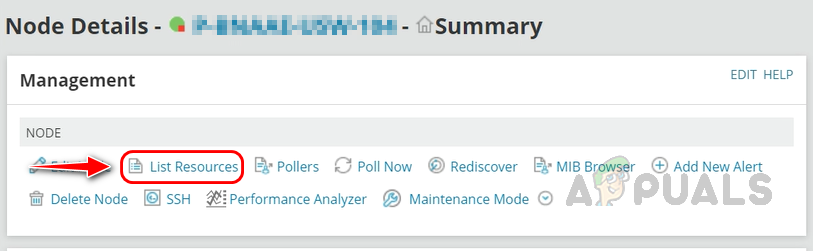
To enable routing neighbor monitoring for the nodes already available in monitoring, open the router and click on List Resources on the node summary page.
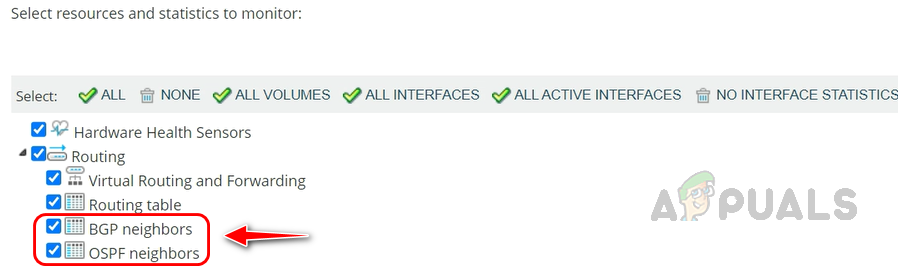
Select the available routing neighbors on the device you want to monitor and click Submit to save the changes.
This is how we can enable routing neighbor monitoring for a router. To check the routing neighbor details on the router, follow the below steps.
- Open the router that you want to check the status of the routing neighbors.
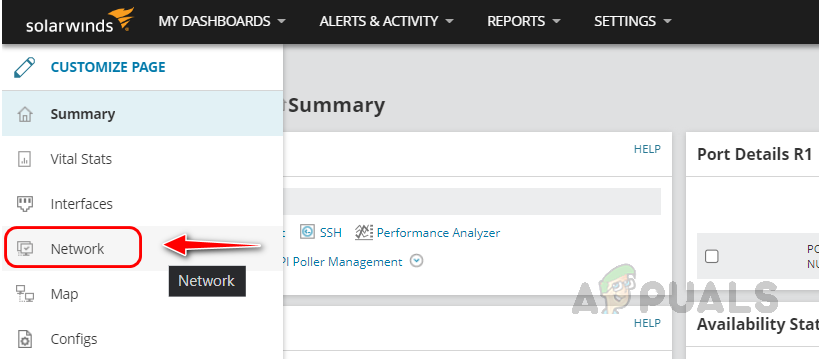
- Click on Network from the left navigation pane on the node summary page.
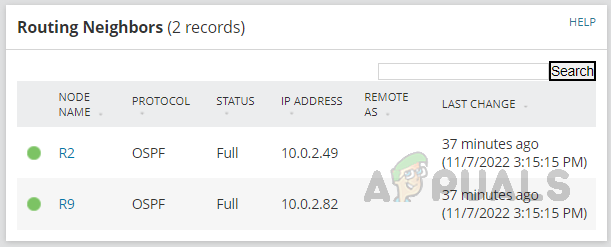
- On the Network page, you can find the Routing Neighbors widget with the routing neighbor details.
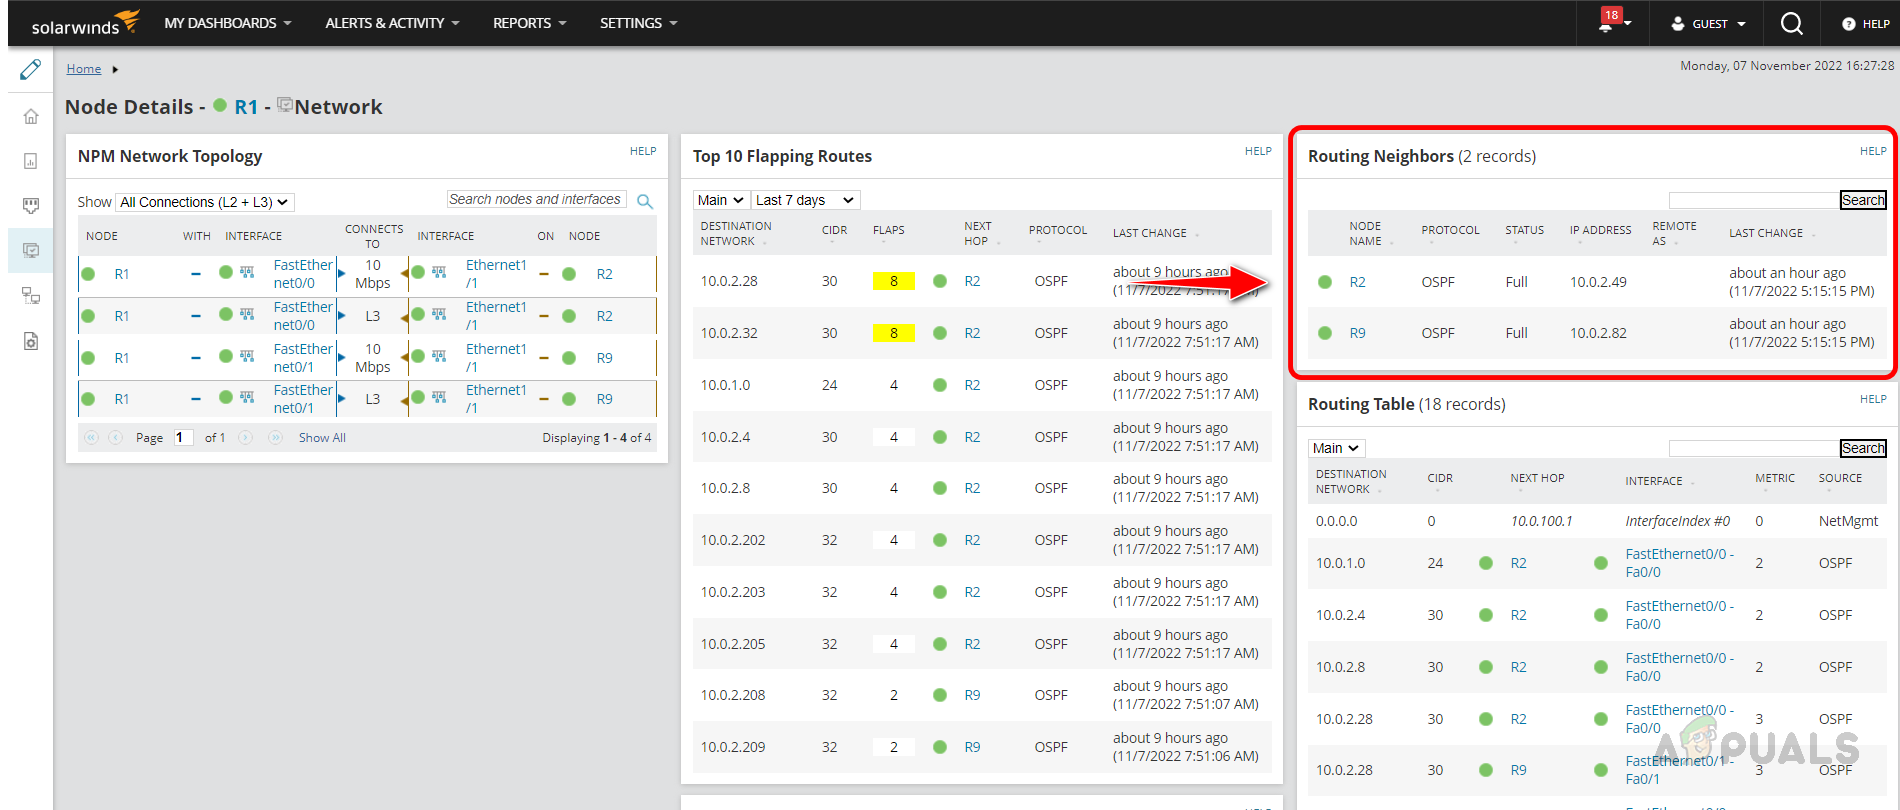
- The routing Neighbor widget may be placed in a different column inside the Network pane per your environment settings.
This is how we can enable routing neighbor monitoring for the routers available in the network infrastructure. Now let’s see how to configure alerts for routing neighbors.
Configuring Alerts for Routing Neighbors
Alerts can be configured based on the routing neighbor’s status. Alerts must be configured separately for each routing protocol since their state value will differ. Trigger conditions will differ for each routing neighbor. All other steps are the same as standard alert configuration steps. To learn about complete alert configuration steps, click on this link. Here, we will see how to set trigger conditions and customize the Email alert action for each protocol.
Alert Trigger Condition for BGP Neighbors
Follow the below steps to configure the trigger condition for BGP routing neighbors.
- On the trigger condition page, select Routing Neighbors from the I want to alert on the drop-down list.

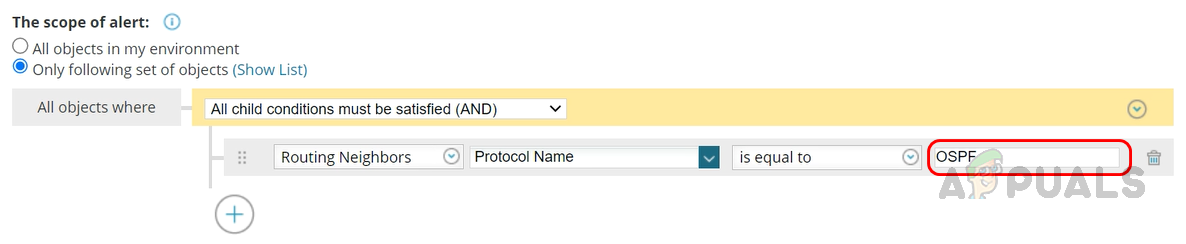
- Select Only following set of objects under The scope of alert.
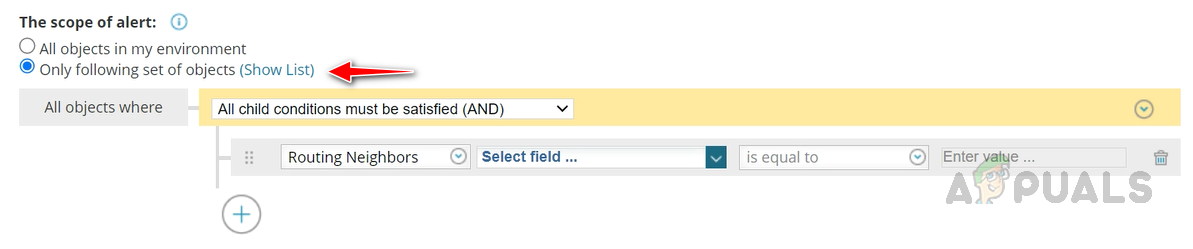
- Select Browse All Fields from the Select Field drop-down list.
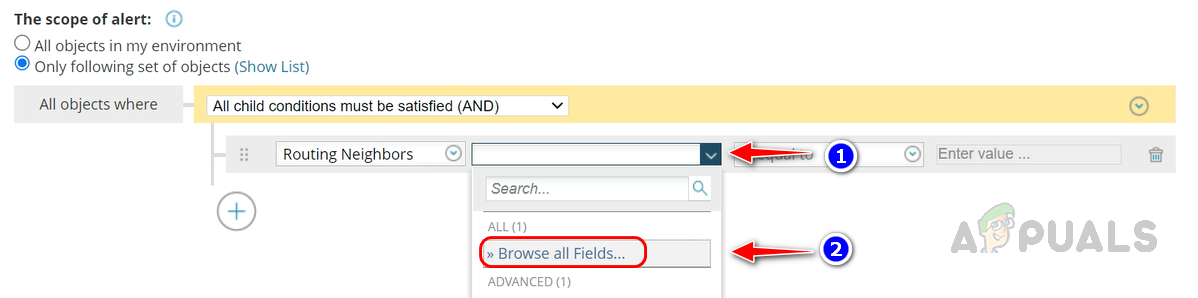
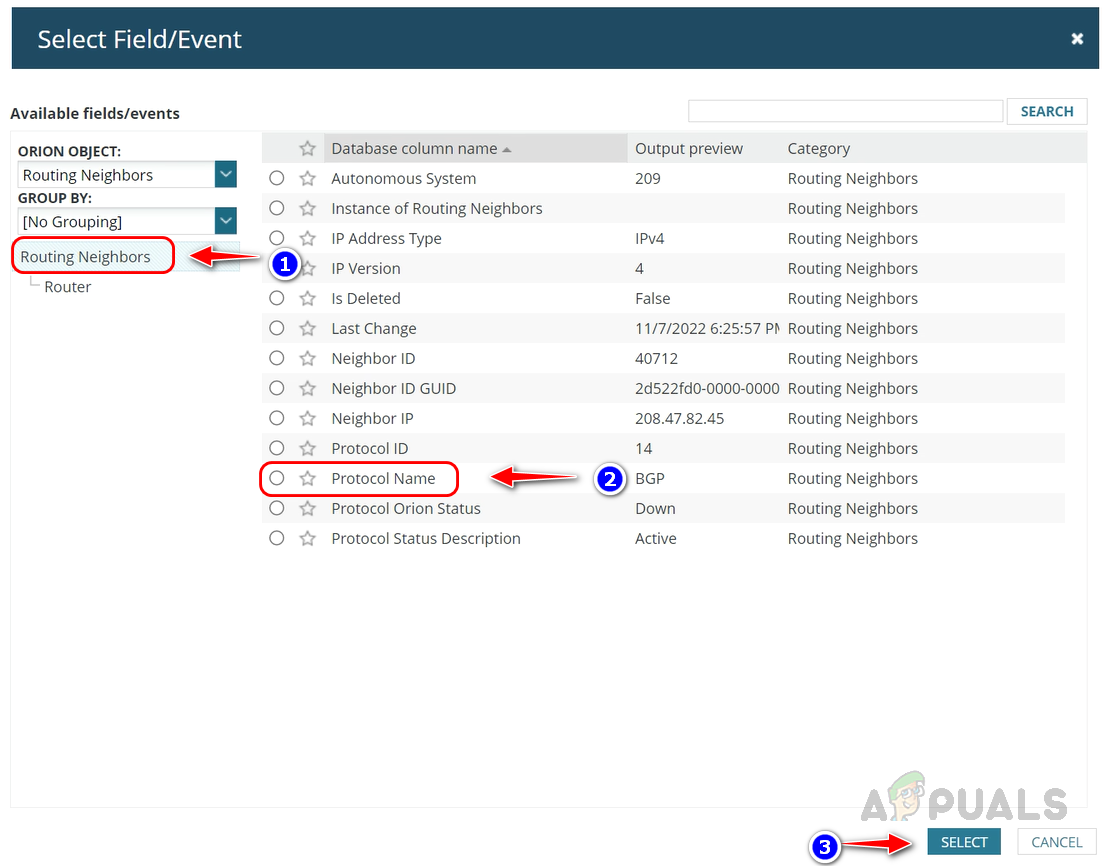
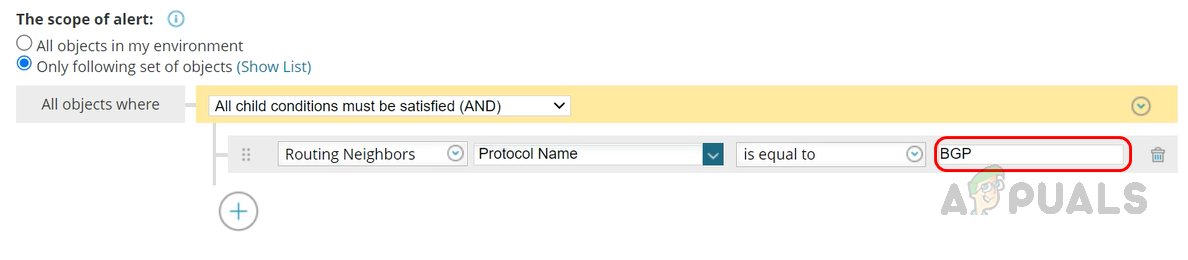
- Select Protocol Name from the Routing Neighbors table and click on Select.
- Mention BGP in the text box.
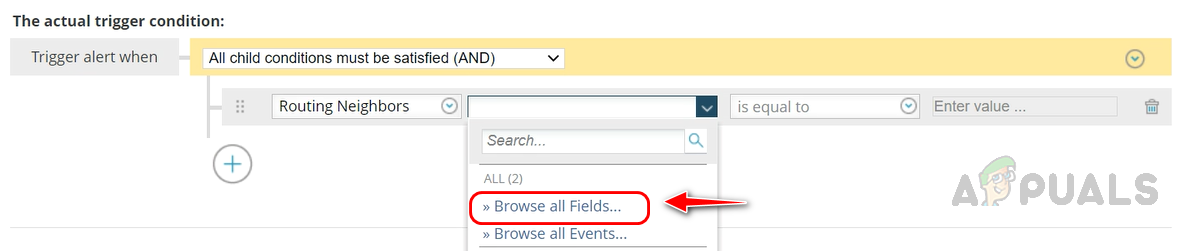
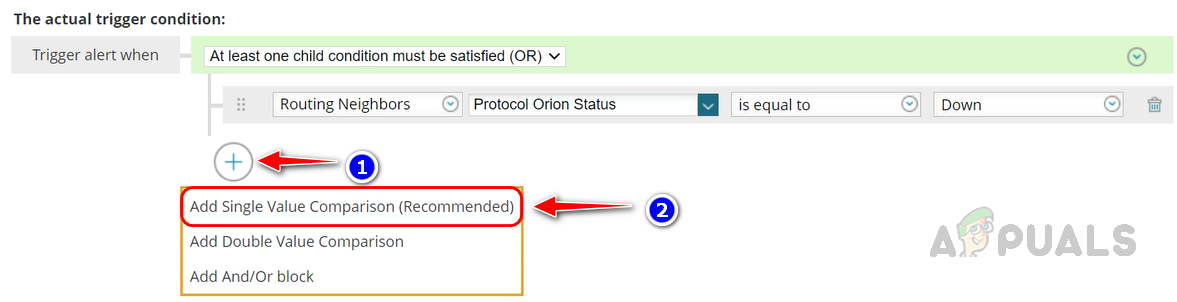
- In the Actual Trigger Condition section, select At least one child condition must be satisfied (OR).

- Select Browse All Fields from the Select Field drop-down list.
- Select Protocol Orion Status from Routing Neighbors table.
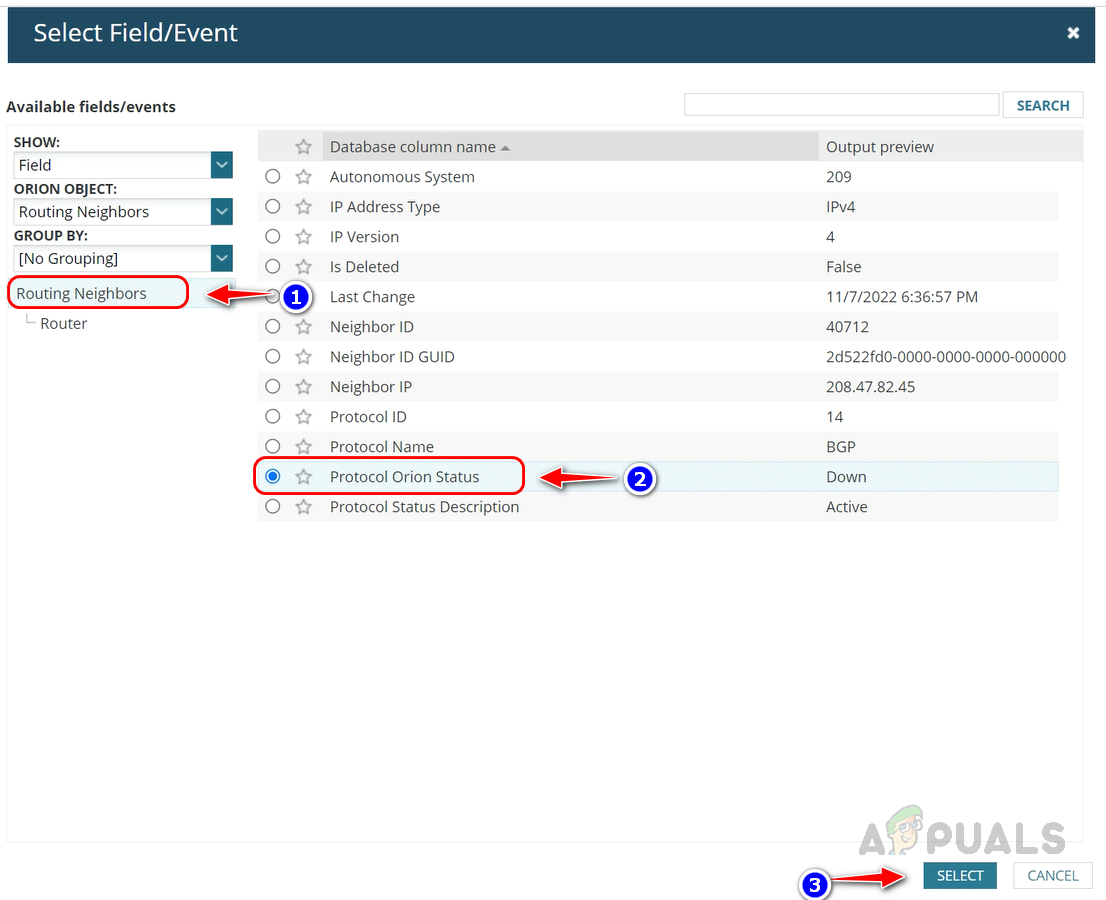
- Select Down from the drop-down list.

- Now click on the + icon and select Add Single Value Comparison to add one more condition.
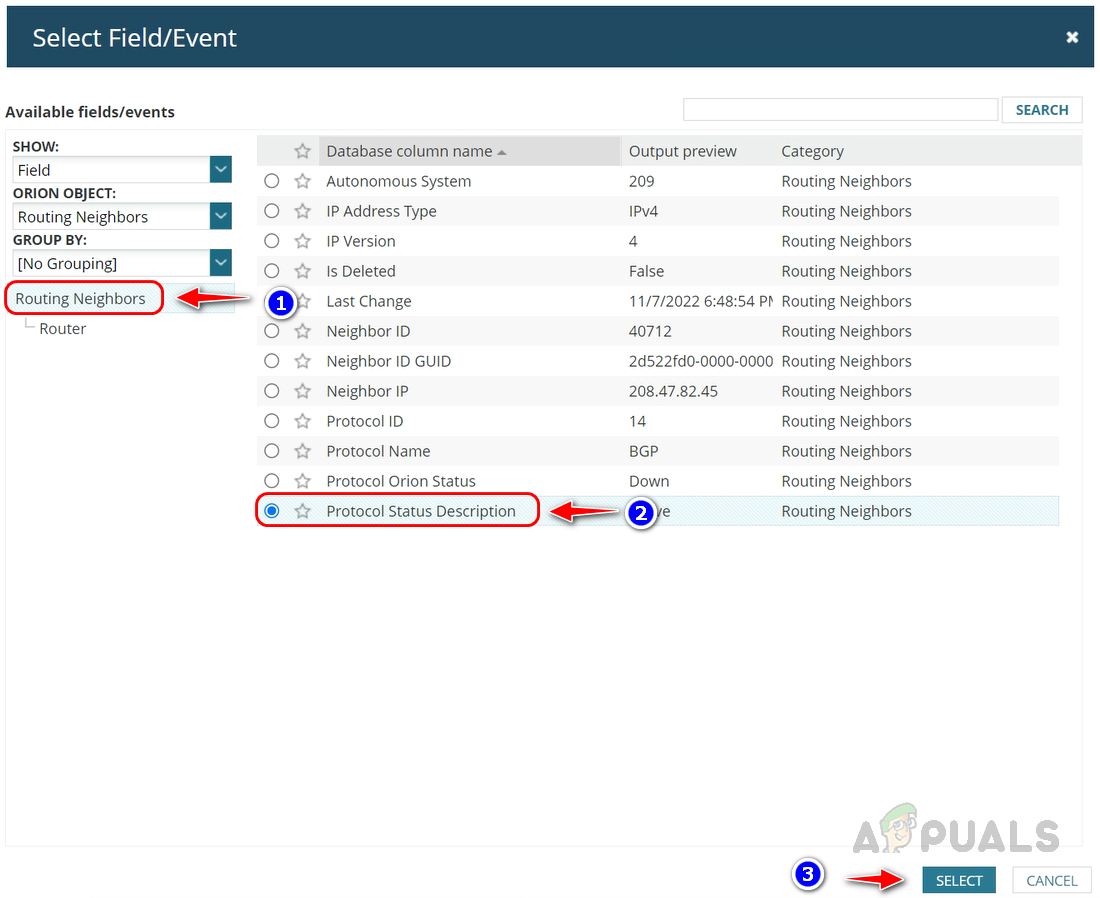
- Select Browse All Fields from the Select Field drop-down list.
- Select Protocol Status Description from the Routing Neighbors table.
- Select is not equal to and Established from the drop-down lists.
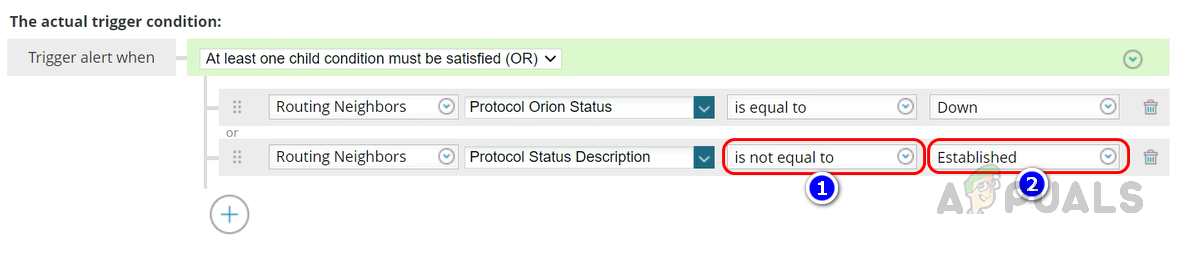
- Now we have set conditions to trigger alerts whenever the BGP routing neighbor goes down, or the routing neighbor state is not established.
- Let’s see how to customize the Email alert action for routing neighbor alerts.
- On the Trigger Actions section, click on Add Action.

- Scroll down to the bottom and select Email/Page action.

- Configure the Recipient’s details.
- Expand the Message section.
- Click on Insert Variable to bring the router’s name, routing neighbor, and IP address in the Email subject.
- Search for protocol in the search box, select Protocol Name from the result, and click on Insert Variable.
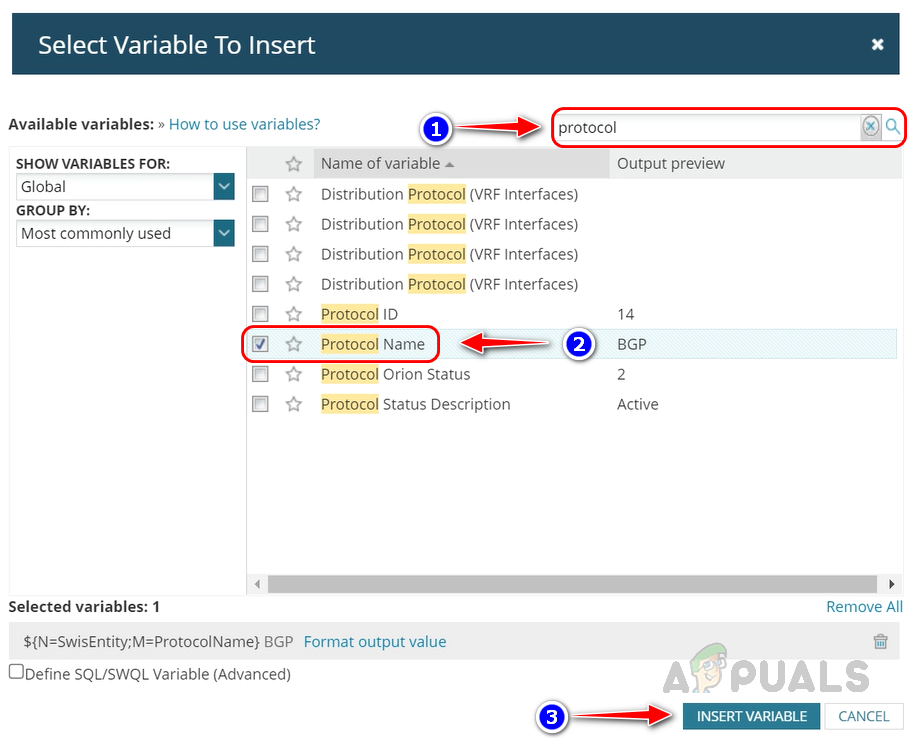
- Click on Insert Variable again to bring the BGP neighbor IP address in the subject.
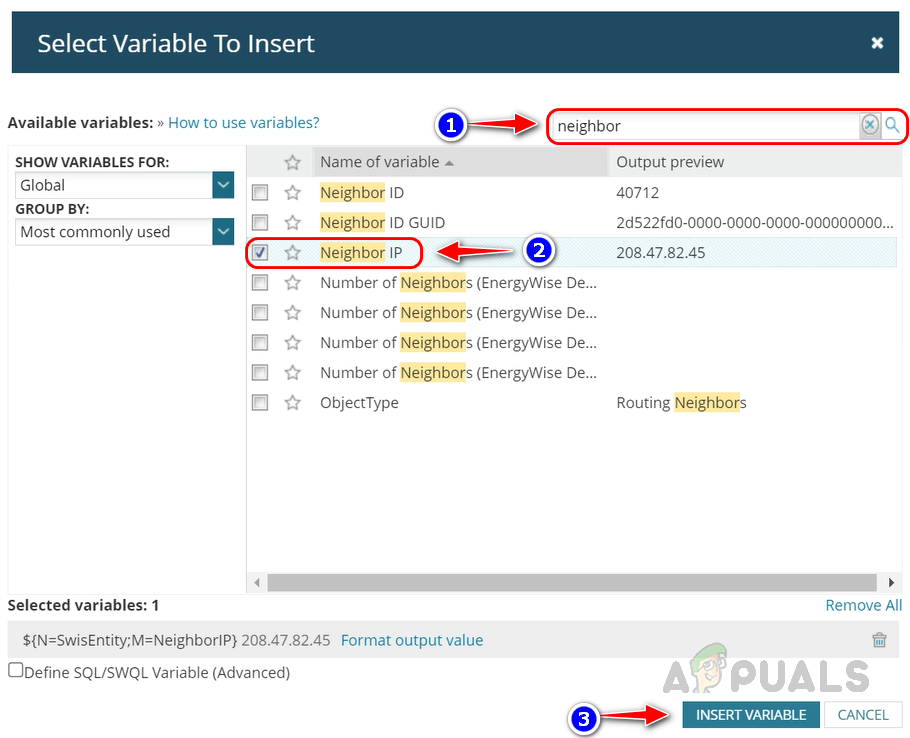
- Search for neighbor in the search box, select Neighbor IP from the result, and click on Insert Variable.
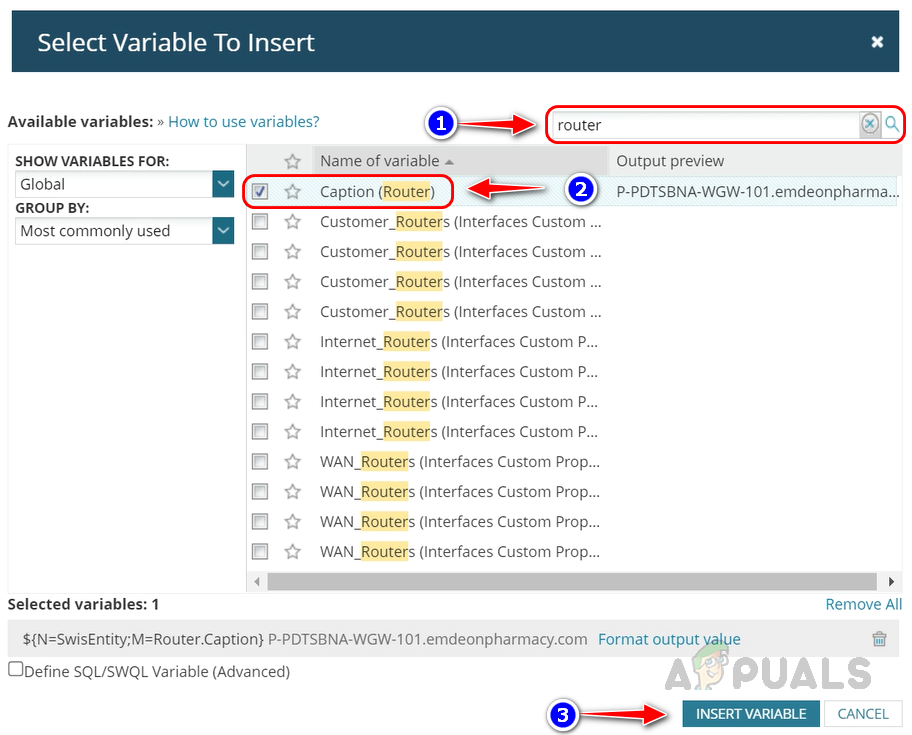
- To add the router name to the subject, click on Insert Variable, search for Router, and insert the variable.
- Message body also can be customized using the Insert Variable option.
- Provide your custom message and bring the necessary variables.
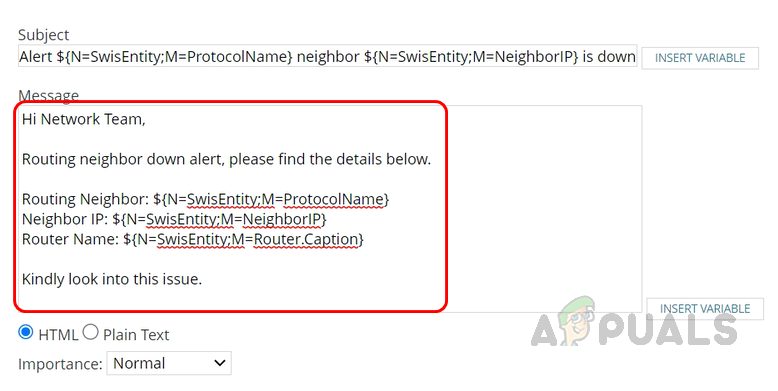
- Customize the Email subject and body as per your needs and save the action.
- Click on Next and copy the trigger action to the Reset Action section and make the necessary changes and the action.
- Review the summary page and click on Submit to save the alert.
- Whenever the alert condition is met, an alert will be triggered for the BGP neighbors.
Alert Trigger Condition for EIGRP Neighbors
Follow the steps from 1 to 4 from the above section.
- Mention Cisco EIGRP in the text box where we need to mention the protocol name.

- In the Actual Trigger Condition section, select At least one child condition must be satisfied (OR).
- Select Browse All Fields from the Select Field drop-down list.
- Select Protocol Orion Status from Routing Neighbors table.
- Select Down from the drop-down list.
- Now click on the + icon and select Add Single Value Comparison to add one more condition.
- Select Browse All Fields from the Select Field drop-down list.
- Select Protocol Status Description from the Routing Neighbors table.
- Select is not equal to and Established from the drop-down lists.
- Now we have set conditions to trigger alerts whenever the EIGRP routing neighbor goes down or the routing neighbor state is not established.
Email alert action can be configured like the above steps discussed in the BGP section.
Alert Trigger Condition for OSPF Neighbors
Follow steps 1 to 4 from the BGP neighbor trigger condition section.
- Mention OSPF in the text box where we need to mention the protocol name.
- In the Actual Trigger Condition section, select At least one child condition must be satisfied (OR).
- Select Browse All Fields from the Select Field drop-down list.
- Select Protocol Orion Status from Routing Neighbors table.
- Select Down from the drop-down list.
- Now click on the + icon and select Add Single Value Comparison to add one more condition.
- Select Browse All Fields from the Select Field drop-down list.
- Select Protocol Status Description from the Routing Neighbors table.
- Select is not equal to and Full from the respective drop-down lists.
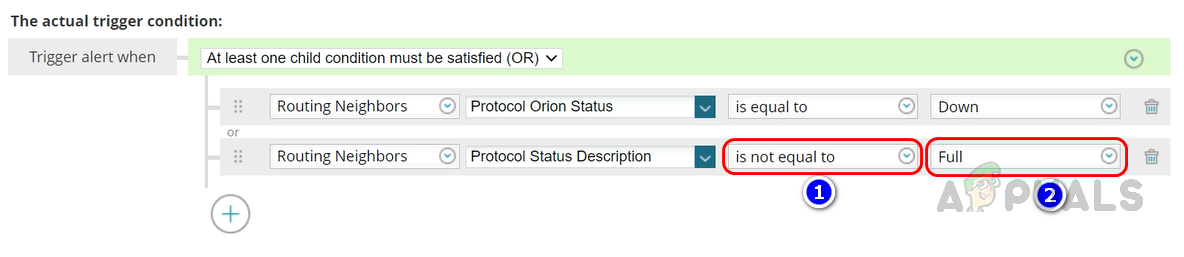
- Whenever the OSPF routing neighbor status is down, or the routing neighbor state is not Full, then an alert will trigger.
Email alert action can be configured like the above steps discussed in the BGP section.
How to Create Reports for Routing Neighbor Status
Routing neighbor status reports for the neighbors like BGP, OSPF, and EIGRP can be pulled in a single report or separate reports per your needs. Let’s create a single report for all the routing neighbors. To learn how to create a report from scratch, click on the following link. In this demo, let’s see how to modify the report query builder and bring the necessary columns for the routing neighbor status report.
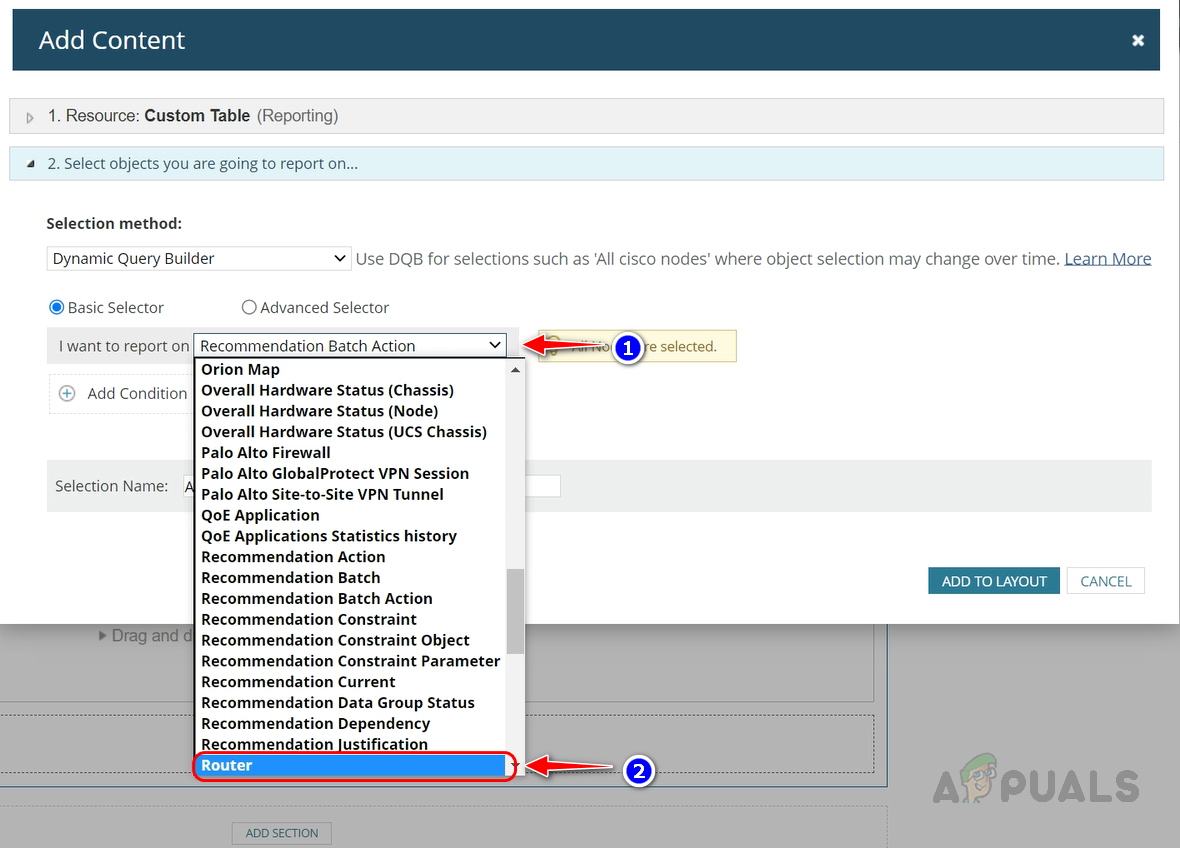
- Select Custom Table in the resource section.
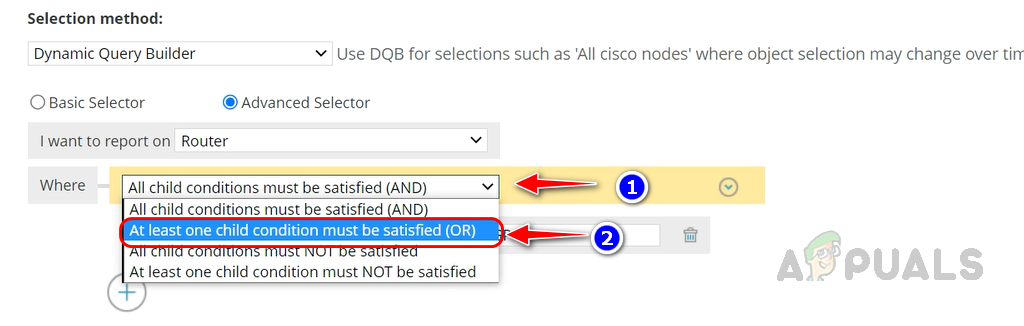
- Choose Advanced Selector in the Dynamic Query Builder.
- Select Router from the I want to report on drop-down list.
- Select At least one child condition must be satisfied (OR) from the drop-down list.
- Click on Select Field, select Protocol Name from the Routing Neighbors table, and click Add Column.
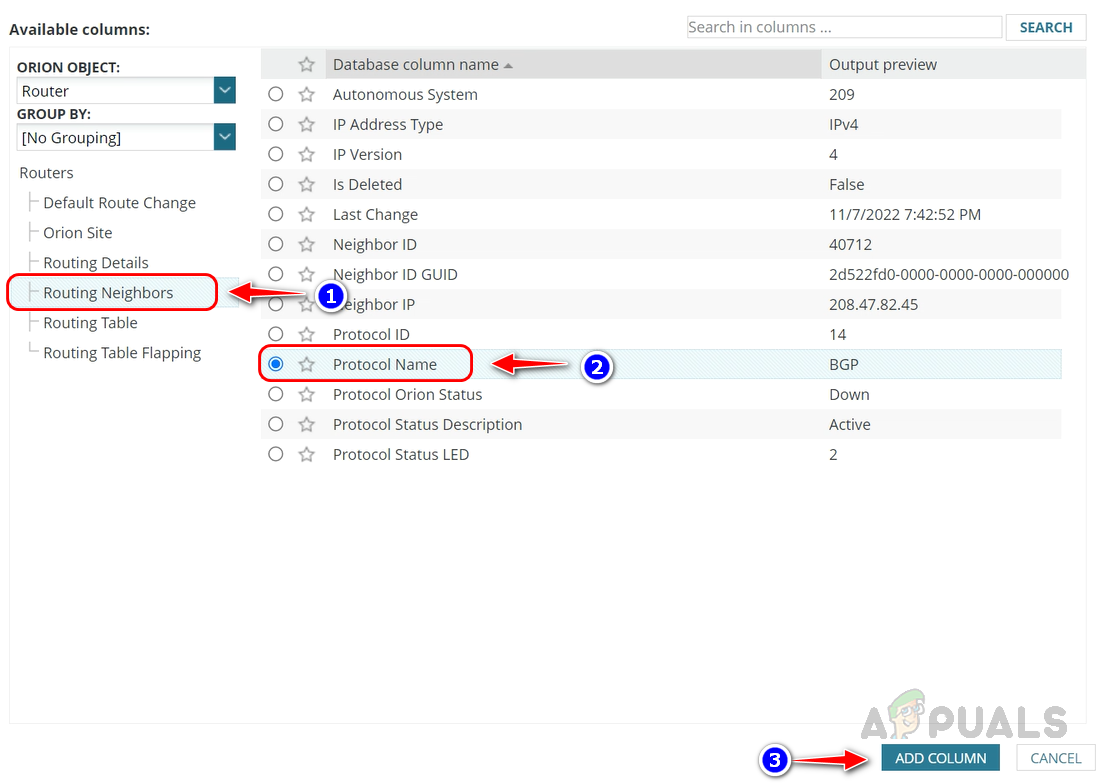
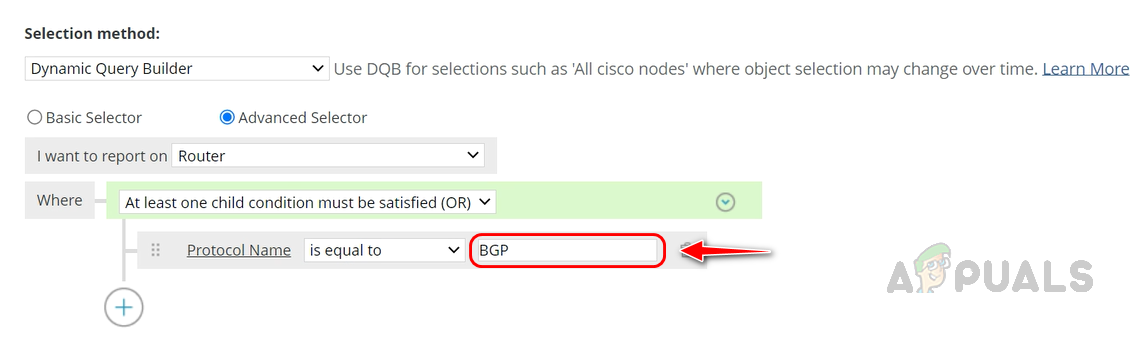
- Mention BGP in the text box.
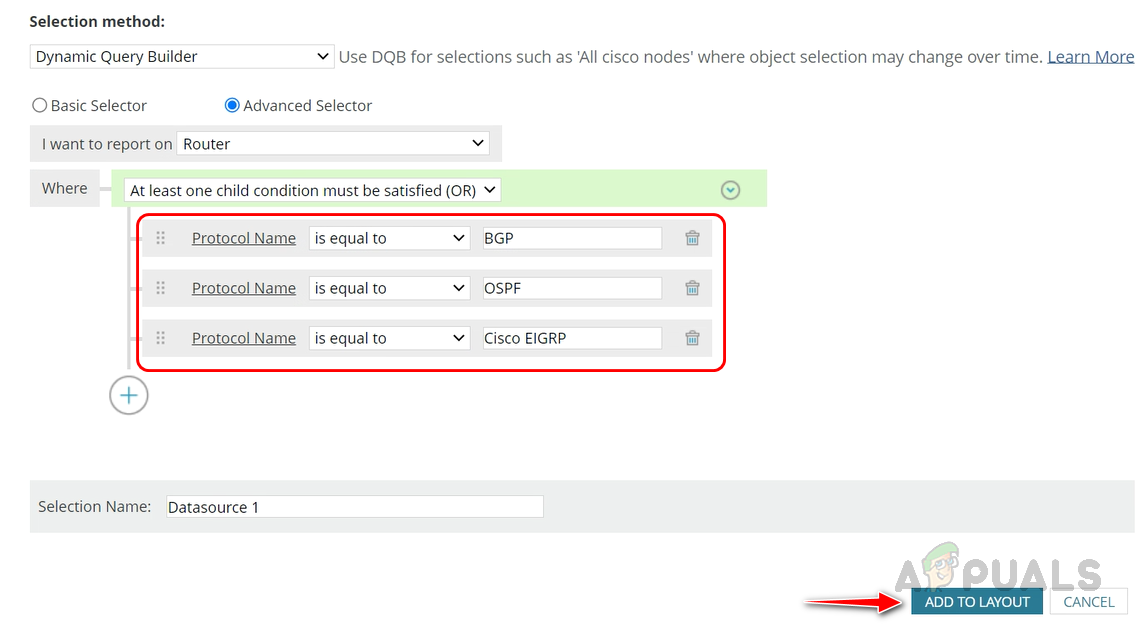
- Click on the + icon and select Add Simple Condition.
- Add two more conditions, mention OSPF and Cisco EIGRP and click on Add to Layout.
- The report manager will redirect us to the Table Layout page once we click Add to Layout.
- Click on Add Column to select the necessary columns for our report.
- We need the router name, routing protocol name, routing neighbor, and its status on the report.
- Let’s select the column from the respective tables.
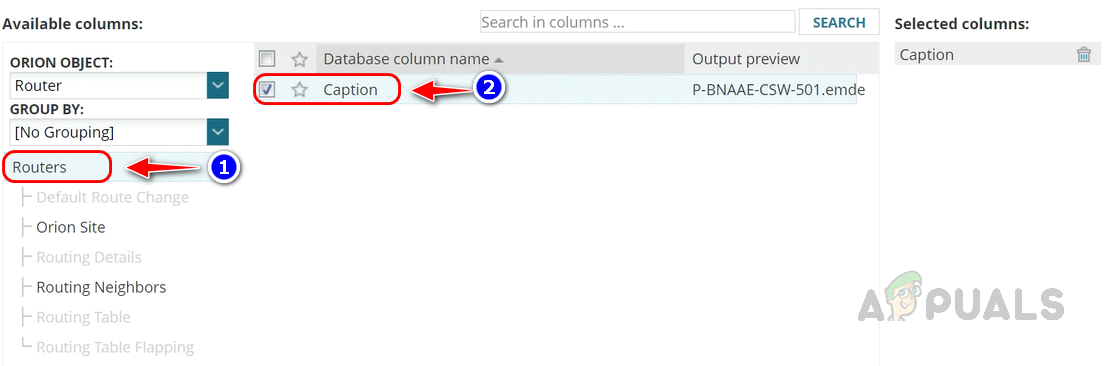
- Select Caption from the Routers table to bring the router name into the report.
- Select columns related to routing neighbors from the Routing Neighbors table and click Add Column.

- Selected columns are added to our table layout.

- Click on Preview Resource to validate the data.
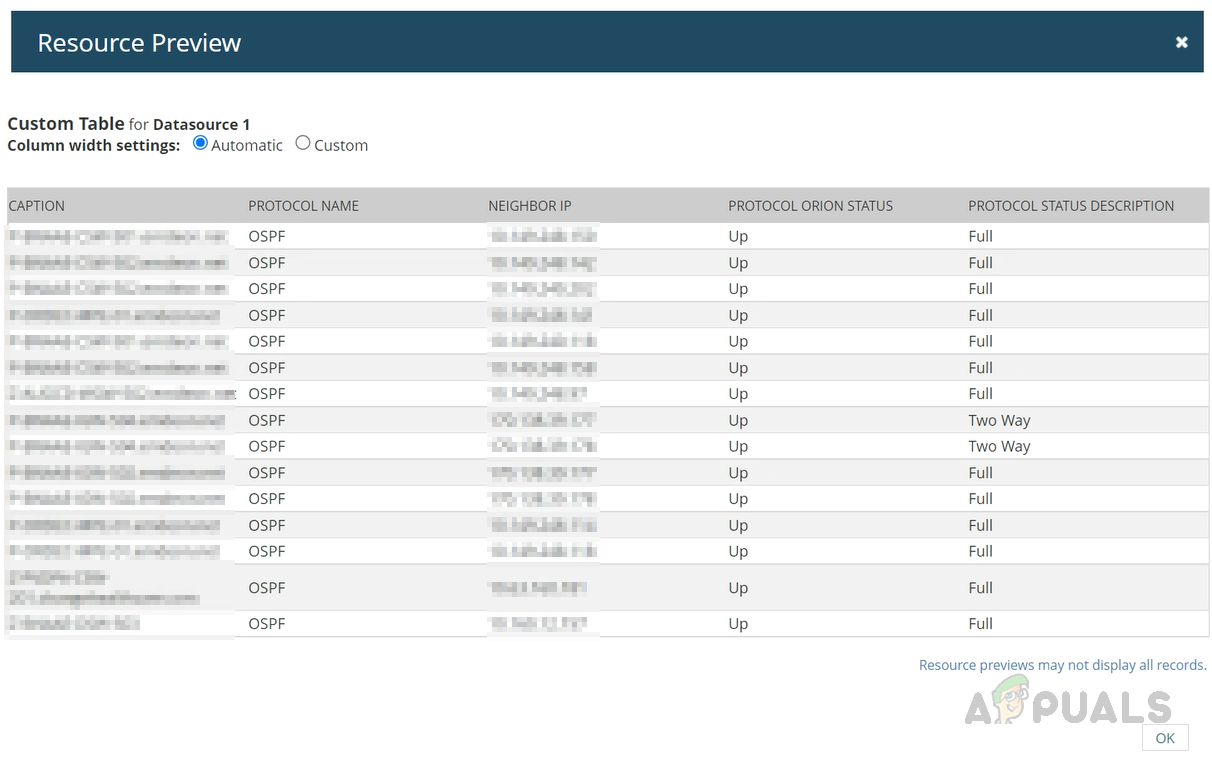
- Close the preview and click on Submit to save the table layout.
- Now follow the standard report creation steps to complete the report creation.
We can schedule this report to automatically deliver to a set of recipients on a preferred frequency. To schedule the report, refer to the report scheduling section on this link.
This is how we can efficiently monitor the routing neighbors like BGP, OSPF, and EIGRP available for a router in your network environment. Alerts can be set up to trigger alerts whenever an issue on the routing neighbor to act immediately and avoid significant impact to the business. Reports can be pulled periodically to manage the routing neighbors.