How to allocate Elastic IP address to Amazon EC2 Instances
Three types of IP addresses can be assigned to Amazon EC2 instance: private IP, public IP, and elastic IP. The private IP address is used for internal communication between instances that are in the same VPC. It is assigned by Amazon DHCP and it is a static IP address.
The public address is reachable via the Internet, it is dynamic and assigned by Amazon. Whenever we deploy a new instance, Amazon will take an IP address from IANA (Internet Assigned Numbers Authority) and assign it to the Amazon EC2 instance. As it is a dynamic public IP address, whenever you stop or start the EC2 instance, Amazon will provide you with a new public address.
Imagine the scenario where we are running a web server on the Amazon EC2 instance that needs to be restarted due to installed updates. Once it is restarted, Amazon will assign a new public address and our web server will not be reachable. In order to avoid unnecessary inconvenience, we will allocate an elastic IP address to Amazon account and running EC2 instance(s). The elastic IP address is a static public address that stays always the same regardless if we are stopping an Amazon EC2 instance.
All the mentioned IP addresses (private, public, elastic) can be seen under the Description tab of every Amazon EC2 instance.
In this article, we will explain to you how to allocate an Elastic IP address to the Amazon account and assign it to running Amazon EC2 instance. Please follow the procedure below.
- Login into AWS Management Console
- Click on Services and then click on EC2
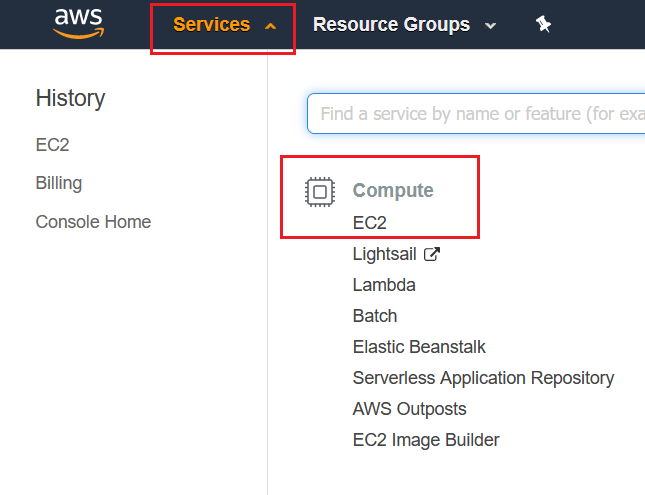
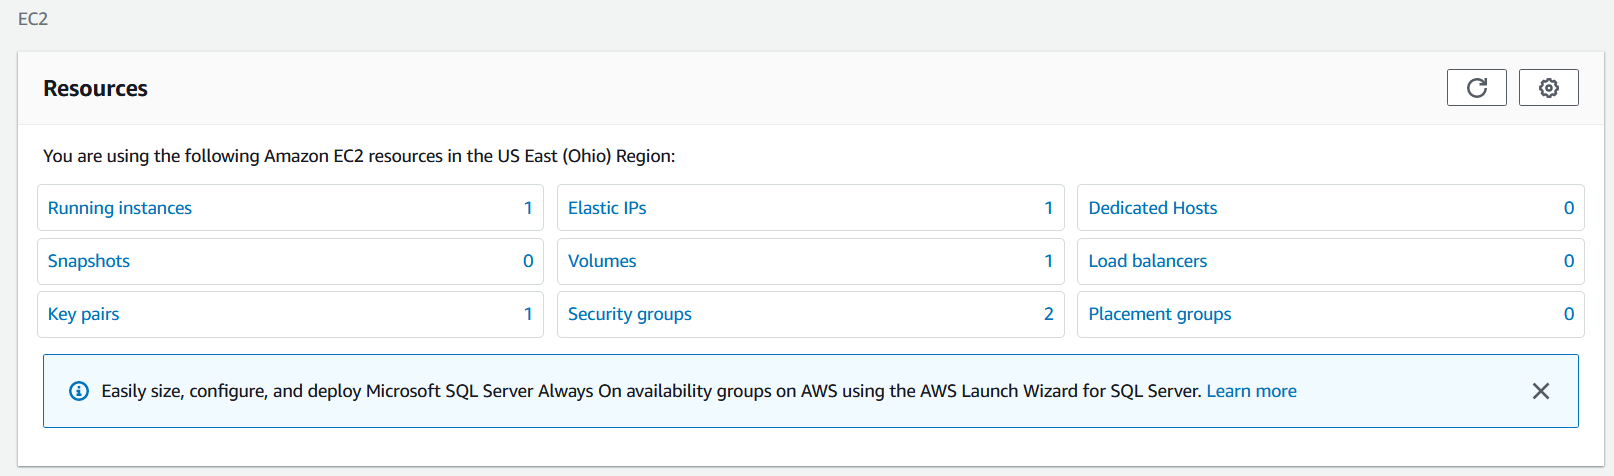
Under Resources, you can see more information about available Amazon EC2 resources in a certain region. In our case, we have one running instance and none of the elastic IPs. We will not go through other resources, but EC2 and Elastic IPs.

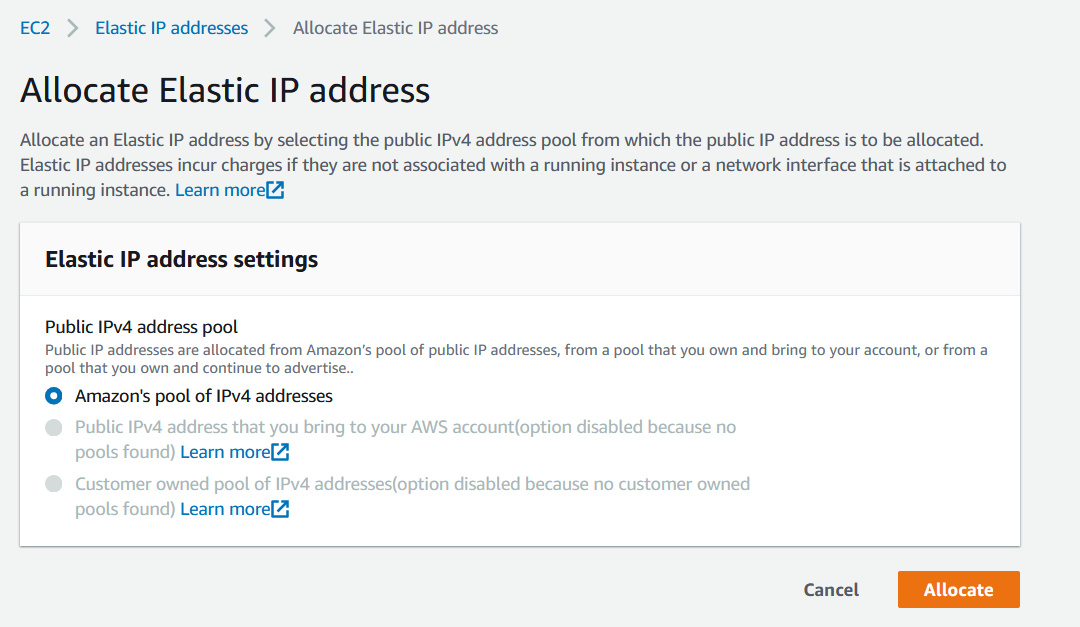
- Click on Elastic IPs
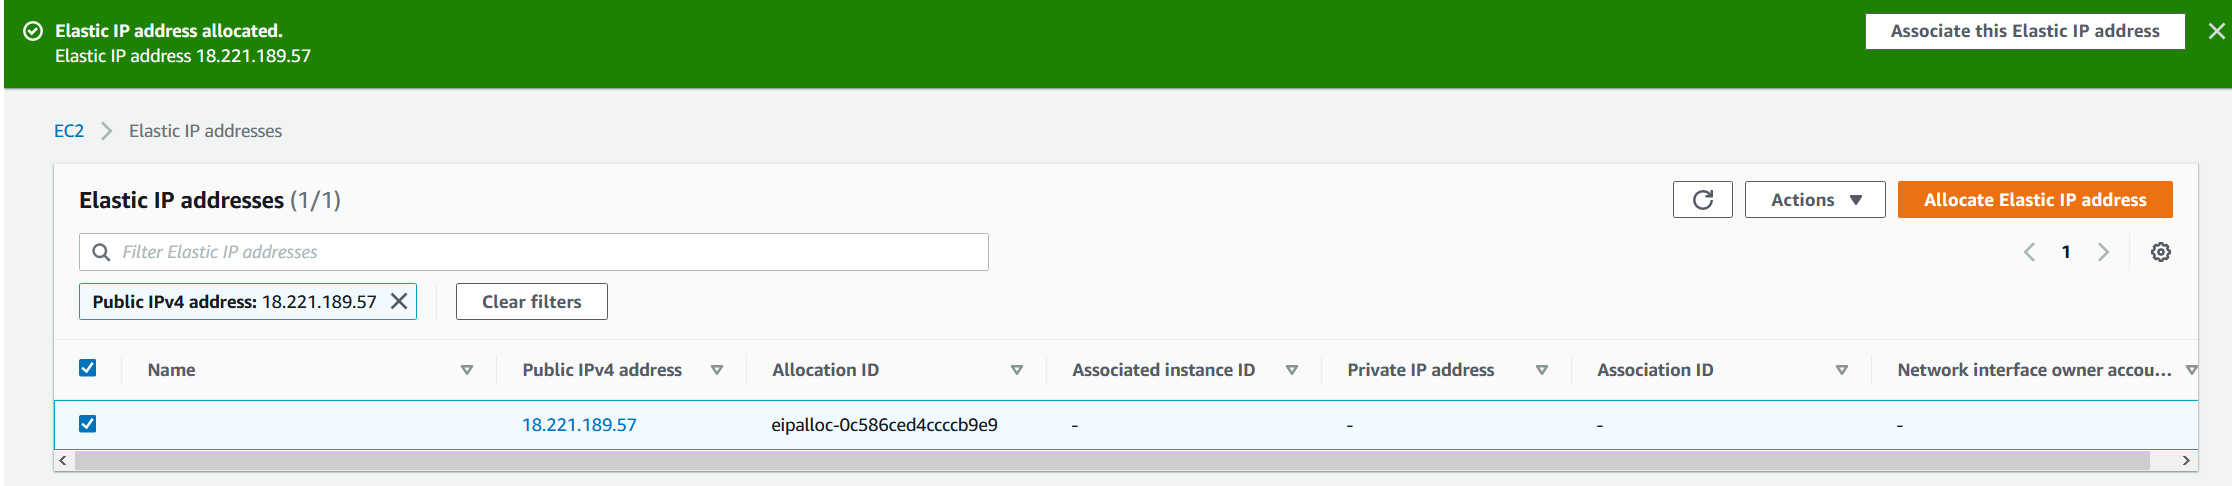
- Click on Allocate Elastic IP address at the top right side of the window.

- Under Allocate Elastic IP address click on The elastic IP address can be allocated from Amazon’s pool or you can bring your public IPv4 or customer’s owned pool. Elastic IPs does not support IPv6 addresses. In our case, we will assign an IP address from Amazon’s pool.
- Click on Associate this Elastic IP address at the top right side of the window. You can see that Amazon has allocated Elastic IP, and we need to confirm it.
- Under Associate Elastic IP address, search for the running instance that should get an elastic IP address and choose the private IP address that will be associated with Elastic IP address, and then select Associate. If you associate an Elastic IP address to an instance that already has an Elastic IP address associated, this previously associated Elastic IP address will be disassociated but still allocated to your account.
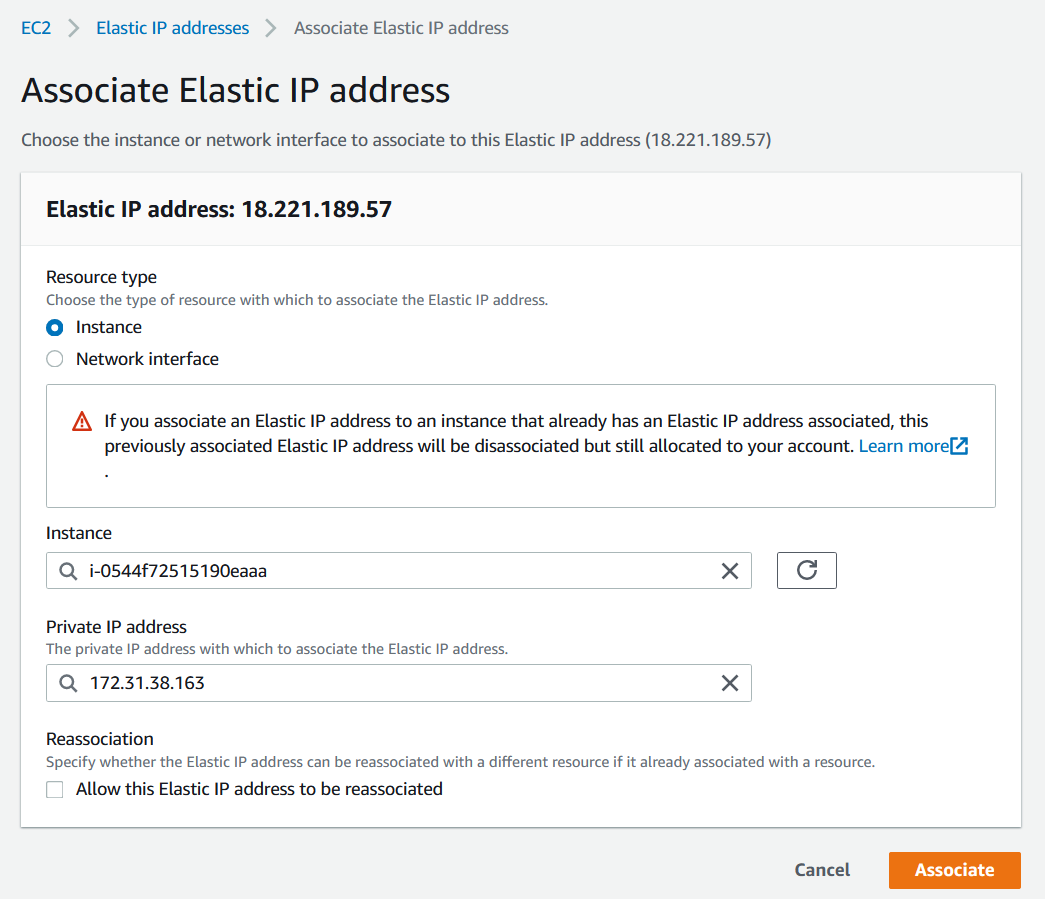
As per Amazon’s documentation, if the Elastic IP address is already associated with a different instance, it is disassociated from that instance and associated with the specified instance. If you associate an Elastic IP address with an instance that has an existing Elastic IP address, the existing address is disassociated from the instance but remains allocated to your account.
- The elastic IP address is successfully associated with the instance.
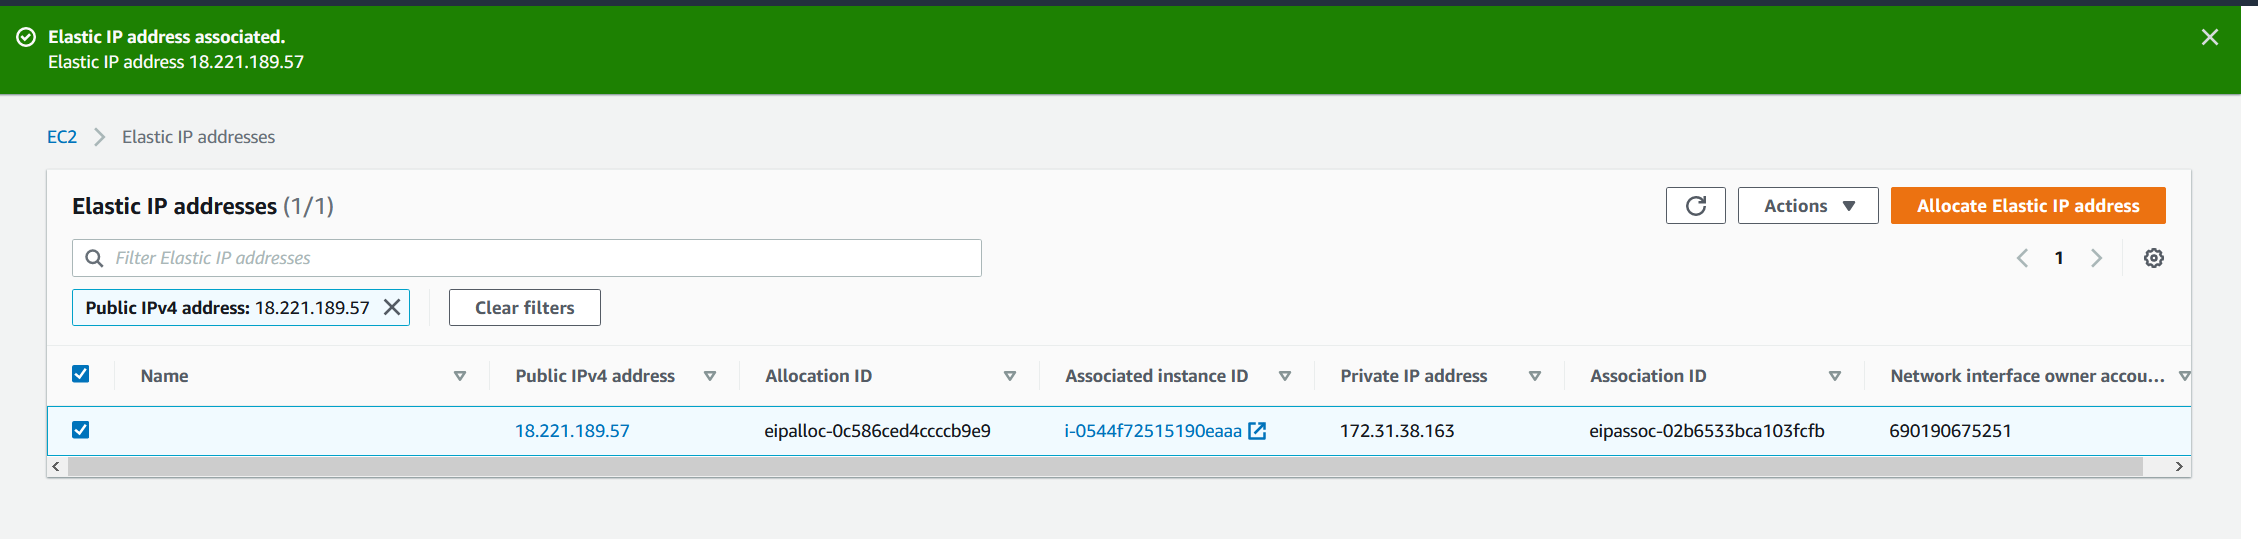
- Go back to EC2 instance (for example, click on EC2 or click on Services – EC2). As you can see there is one Elastic IPs associated with Amazon account and running instance.
If you click on running instance, you will also what Elastic IP address is associated with it.