How to Manage User Access using Access Rights Manager?
We are at a time where cyber-attacks have become an everyday business. Securing your network has never been more difficult than it is now. This is because of the rapid increase in technology and how everything these days is connected to the internet. For an organization, all of the data is sitting in a database. This includes all of their users’ data along with organizational information. Because you never know when you’ll be targeted by a cyber-attacker, you must keep tabs on your security infrastructure. One of the ways to do this is to make sure that the users on your network have access to only what they are supposed to.
This way, you can prevent security leaks and keep your data secure from the inside. Along with this, modern automated tools can also show you in real-time what data is being accessed by the various users on your network. When you have this information, you will be able to prevent any leaks before they occur. The way of doing that would be to restrict the users’ permissions so that they are not able to access everything on the network. To do all of this manually is a nightmare. Why? Because there are so many users on a network and managing the permissions for each user manually can be near to impossible. Thus, what you need is an automated tool that can help you manage user access as well as notify you when there is a user accessing information that he/she is not supposed to. Thus, the Access Rights Manager by Solarwinds is a perfect match for this. It not only helps you set up user permissions but it can also monitor the network so that no ordinary user is accessing critical information. Hence, let us begin with this article.
Installing Access Rights Manager
First of all, you will have to deploy the Access Rights Manager tool on your system. For this purpose, head to this link and download the tool by clicking the respective button. Once you have downloaded the tool, follow the instructions given down below to perform a successful installation:
- Extract the .zip file to any desired location. After that, navigate to that directory.
- Once there, run the installation file and wait for the installation wizard to open up.
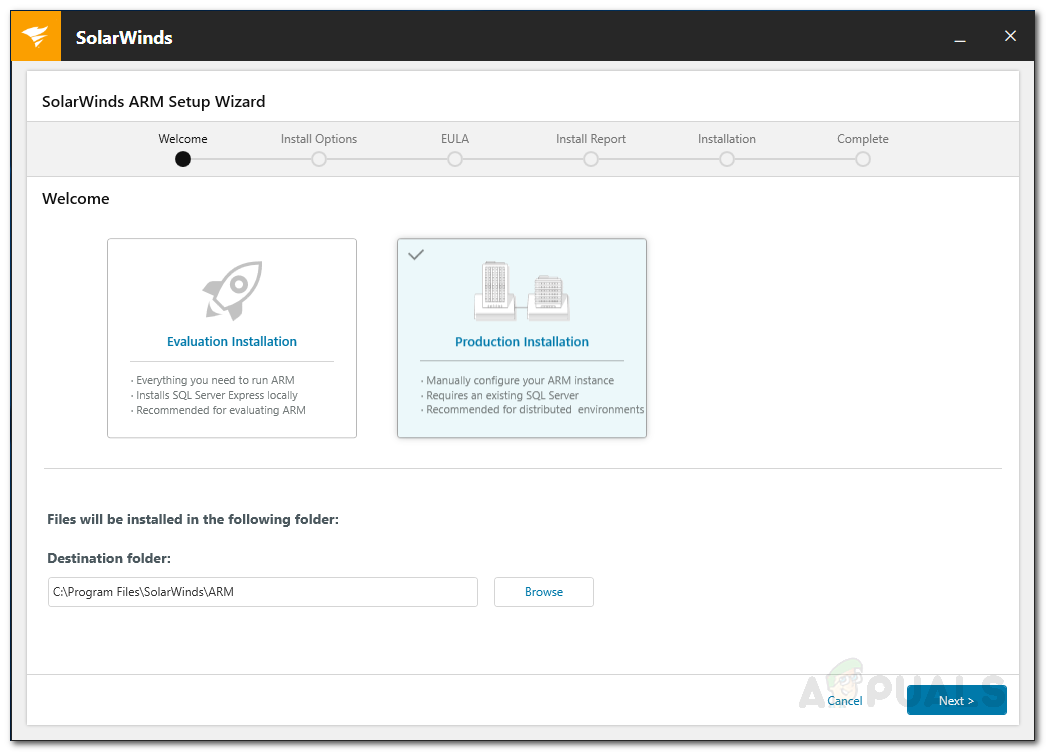
- Select the type of installation per your needs. Selecting the Evaluation Installation option will install a SQL Server Express Edition on your system so that you can evaluate the product. If you wish to use an already existing SQL Server, select Production Installation. Click Next.
ARM Installation - Choose Full Installation and click Next.
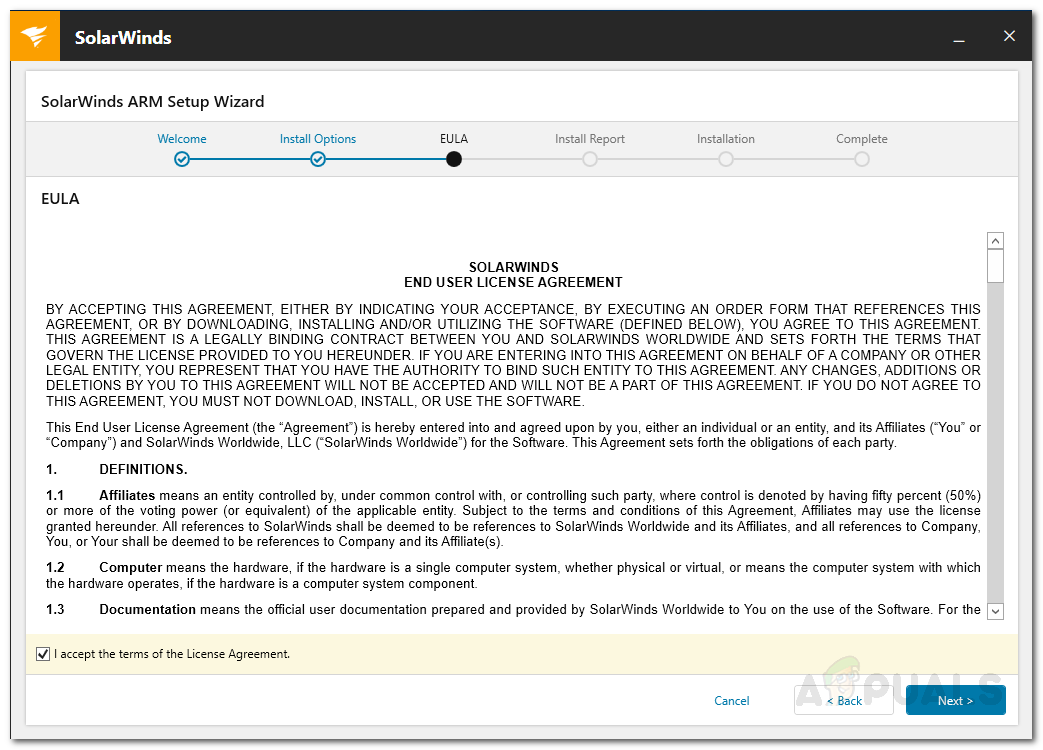
- Agree to license terms and then click Next.
License Agreement - The installation process should start. If any required components are missing from your system, the installer will automatically scan and install them for you on the Install Report page.
- Once everything has installed successfully, click on Launch Scan Wizard to launch the Configuration Wizard.
Configuring Access Rights Manager
Once the tool has installed successfully on your system, you will have to perform some basic configuration before you can use Access Rights Manager. The configuration wizard is used to collect information for the first Active Directory scan and the base configuration. Once the installation wizard completes, the Configuration Wizard will load up automatically. Here’s how to configure Access Rights Manager:
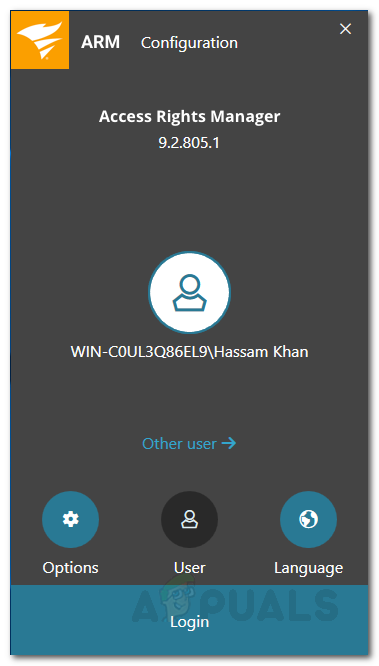
- Once the Configuration Wizard launches, you will have to log in. You can log in as the user who installed the Access Rights Manager tool. Later on, you will be able to create more users.
Configuration Login - After you have logged in, provide the required credentials for the Basic Configuration. Most of the values might be present by default and you will just have to provide the password for the user that installed ARM. You can change this if you wish.
- To check the credentials, click on the Refresh button on the bottom left corner.
- Click the Save button to proceed.

Basic Configuration - After that, you will have to set up your first Active Directory scan.
- Provide the credentials that are to be used for the Active Directory scan.
- Access Rights Manager will display the name of the domain that is scanned. Hit Next.

Active Directory Scan - After that, Access Rights Manager will display the file servers in the selected domain.
- Select a file server and then click Next.
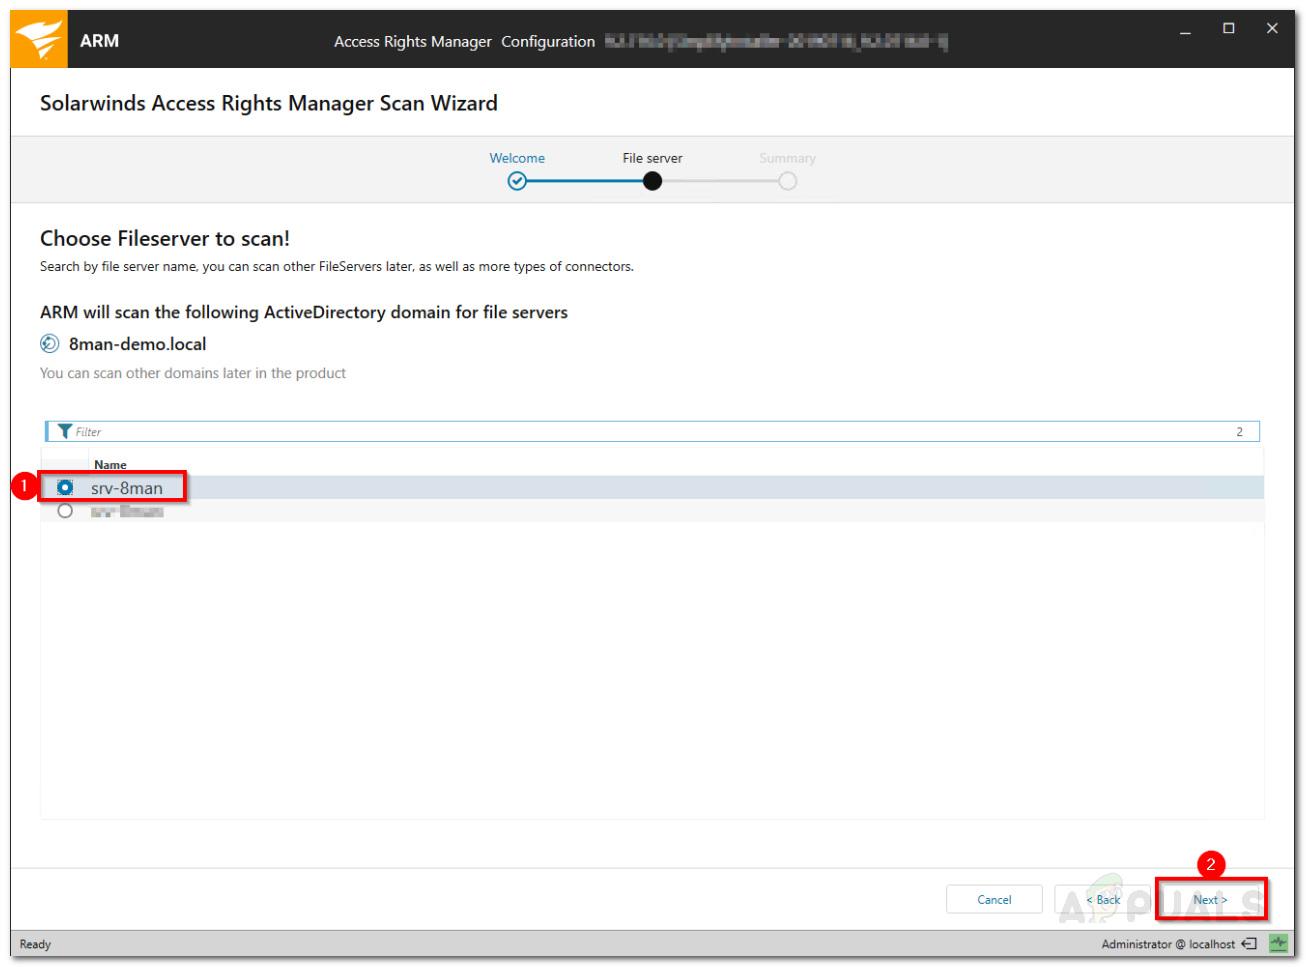
Fileserver Scan - On the Summary page, check your provided information. Once you are ready, click Start Scan. If the scan completes successfully, that means you are ready to start using Access Rights Manager.
Managing Access Rights
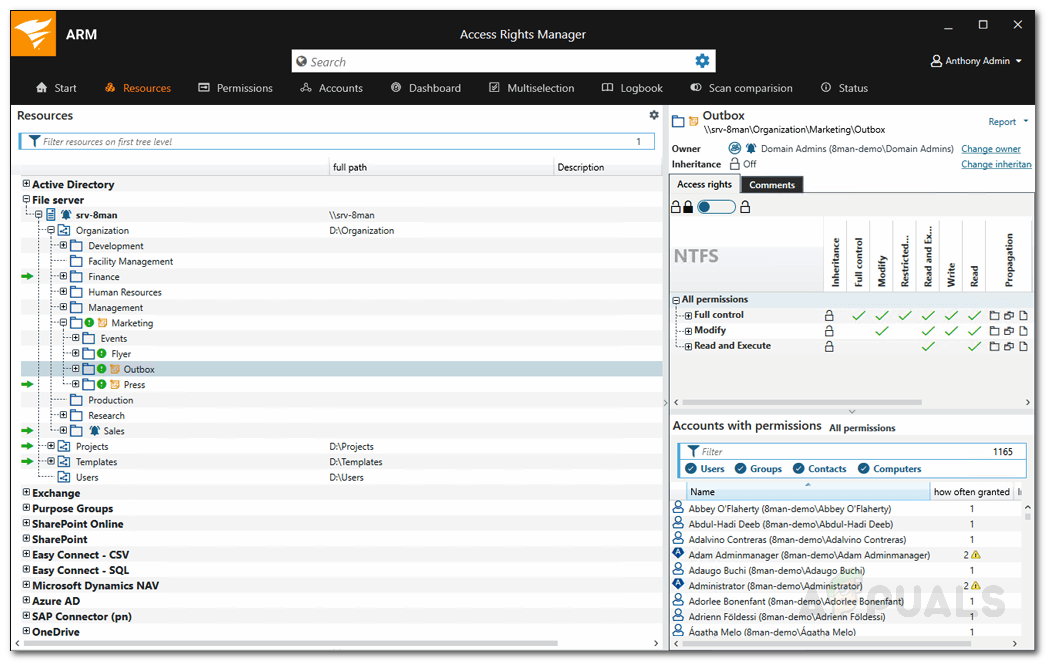
Now that you have set up everything, you can start using Access Rights Manager to view the different directories and the users that have access to it. To start, it is recommended you target the directories that have the most sensitive data and check the various users that have access to it. Here’s how to do it:
- On the Start page, search for the directory by typing its name in the search bar.
- Click the directory you want to manage from the search results.
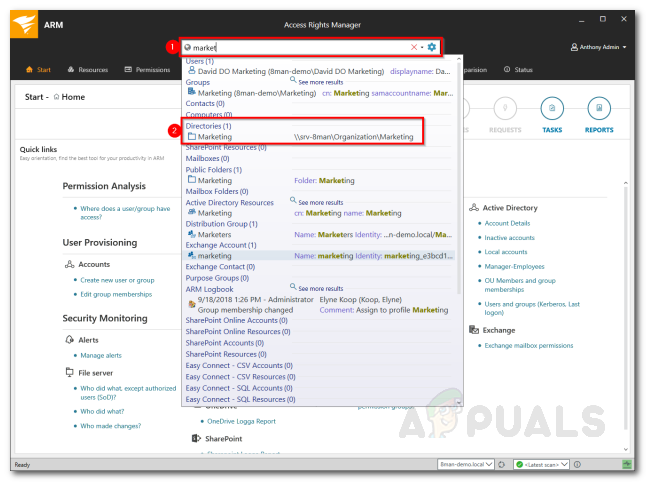
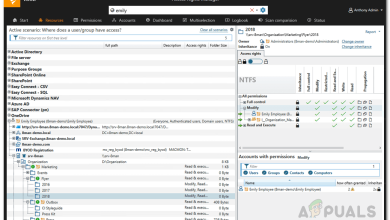
Searching for Directory - Access Rights Manager will automatically switch to the Resources tab.
- Select your directory and you will be able to see on the right-hand pane.
- Here, the ARM will display all the users and the permissions they hold.
- You can search for accounts that hold specific permissions for the chosen directory.
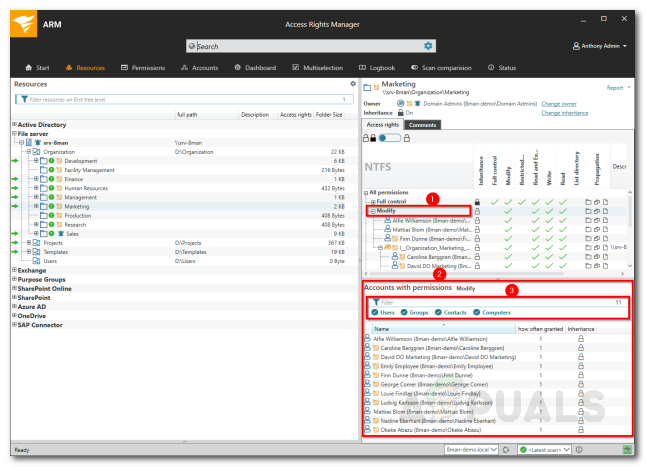
Viewing User Access - You can make any changes per your needs.
Monitoring Access to Sensitive Data
With the Access Rights Manager tool, you can monitor access to the sensitive data on your network. This will help you get notified if someone attempts to access those files. Pretty useful if you don’t want users to access the specified data. Here’s how to do it:
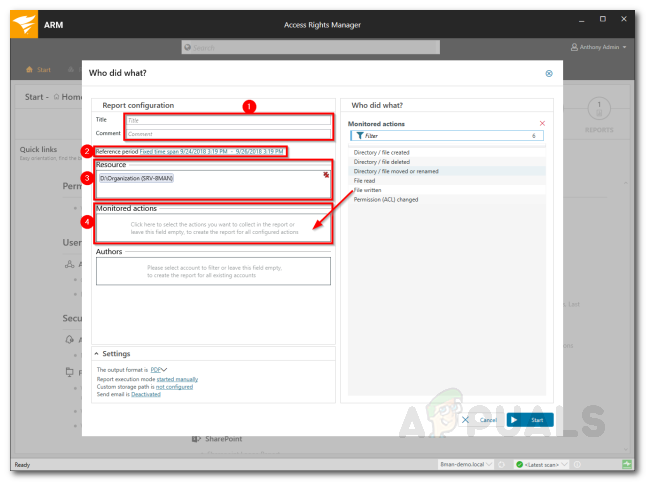
- Click on Start and then under Security Monitoring, click Who did what?
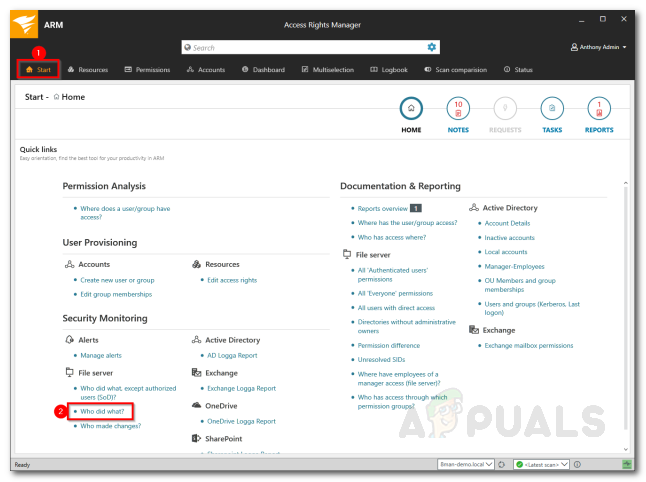
Access Rights Manager – Security Monitoring - After that, fill in the required fields i.e. a title for the report, enter a comment if you like. You can specify a period for logging the events. Along with that, you can add resources and actions on which you want to get a report. Leave the actions field empty if you wish to be reported about all the actions.
Setting up a Report - You can add authors to the report and specify the output settings under Settings.
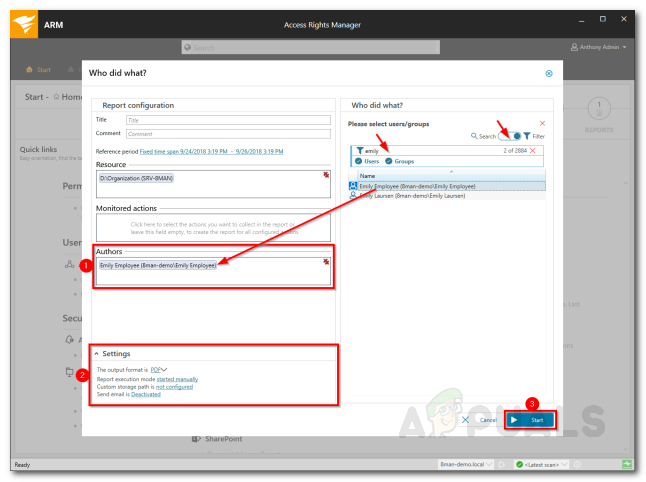
Setting up a Report - Once done, click Start.