How to Schedule Tasks Across Network Devices and Servers using Kiwi Syslog?
The importance of log files cannot be denied or overlooked. The significance of log files even increases in large networks where several devices are communicating with each other and with the internet. This, however, does not mean that small networks can overlook the availability of a syslog server. Whenever these network devices communicate with each other, event logs are generated that include information regarding the transaction. Thus, monitoring log messages is really useful whenever an error pops up in the network and you have to pinpoint the issue meaning finding the specific network device responsible for the problem from all the devices present in the network. Network and system administrators often rely on log files to fix issues that plague the network and need a quick resolution. Therefore, having a syslog server in place in a network is really useful and important. There are tons of log management software out there that offer many extended functionalities that can be utilized by almost every network admin in monitoring syslog data.
Solarwinds Kiwi Syslog Server is a syslog server that is available only for the Windows platform. It collects syslog messages from other network devices as well as SNMP traps (Simple Network Management Protocol). SNMP traps are basically alert messages that are sent by a SNMP-enabled network device to the syslog server. Kiwi Syslog Server receives all these system messages from network devices like routers, firewalls, and switches. The server can also be configured to receive Windows event logs in syslog format which makes event logs management easier.
Kiwi Syslog Server
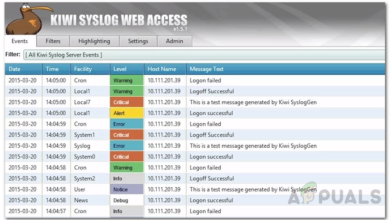
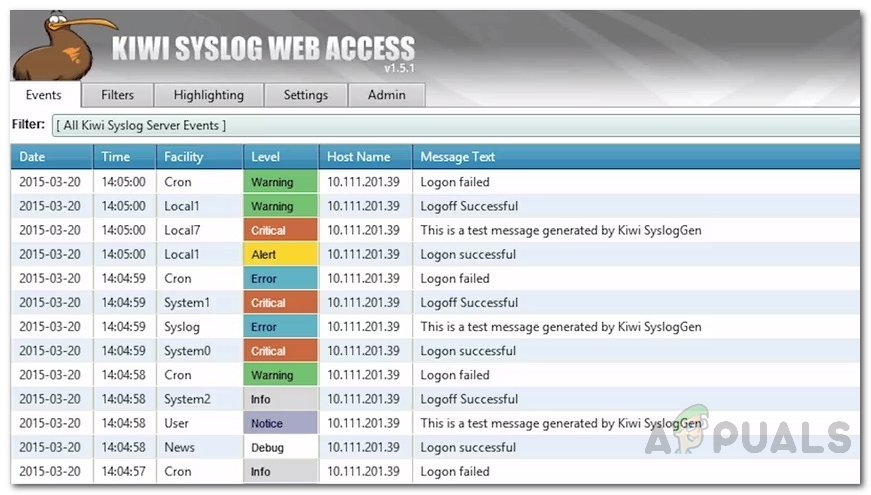
The Kiwi Syslog Server (download here) is the best option for having a central syslog manager or a syslog server in your network that receives all the logs that are sent by different network devices and has a friendly user interface. With Kiwi Syslog, you will be able to create custom rules which then initiate actions that you have defined such as restarting a device or sending out real-time alerts/emails. Therefore, the tool offers full customizability that is essential for a syslog server. Other than that, you can create scheduled tasks that will be executed daily at the time specified. Kiwi Syslog Web Access offers a web interface so that you can access the syslog facility from anywhere in the network. You can filter syslog messages by priority of syslog message as well as monitor log messages by different type of syslog messages with the help of a web console that comes with the tool. This helps in viewing the top syslog priority levels messages more quickly and ensures a higher security level of the network.
Before we get into that, you will have to make sure that you have downloaded and installed the Kiwi Syslog Server tool on your computer. So, go ahead and download the free tool from the link provided above. Some of these tasks cannot be done in the free version of the software which is why you’ll have to get the licensed version of the said tool. You can avail a free trial of the licensed version of the tool to see it for yourself. The installation process of the tool is pretty straightforward and does not require any configuration. However, it does require .NET Framework 3.5 so make sure you have that installed. You can set Kiwi Syslog to be installed as an application or as a service per your needs. Once you are done with that, you will be able to follow through this guide.
Creating Scheduled Tasks
As mentioned above, you can automate certain tasks with the help of Kiwi Syslog server. These tasks include running a script, executing a program, archiving log files as well as cleaning up tasks. Kiwi Syslog allows you to create upto 100 scheduled tasks that are triggered to initiate when the Kiwi Syslog Server application either starts or stops as well as on a schedule. So, without further ado, let’s get into it.
Archiving Log Files
Whenever log files are no longer needed for troubleshooting or if they are more than a week old, you can create a scheduled task to archive the log files. This will save up disk space for you that can be utilized by incoming log files. The options provided in archiving tasks include moving the files to a different location, encrypting the files or compressing them. To do this, follow the step-by-step instructions:
- Open up the Kiwi Syslog Server and go to File > Setup.
- On the left-hand side, right-click on Schedules and then choose Add new schedule.
- A new schedule will be created. Replace the default name by giving it an appropriate name as per the task.
- As the Task Type, choose Archive from the drop-down menu. For the Task Trigger, you can either choose for it to run on a schedule or when the application/service either stops or starts.
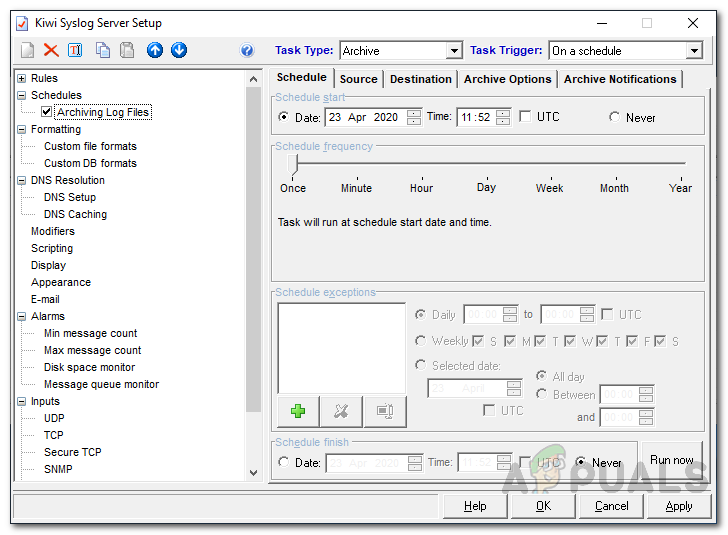
Archiving Log Files - If you choose On a schedule, you will have to specify a starting date, the frequency of the task and then an ending date.
- In the Source tab, specify the source location of the files that you wish to archive.
- Under the Source Files heading, you can choose which files to archive.
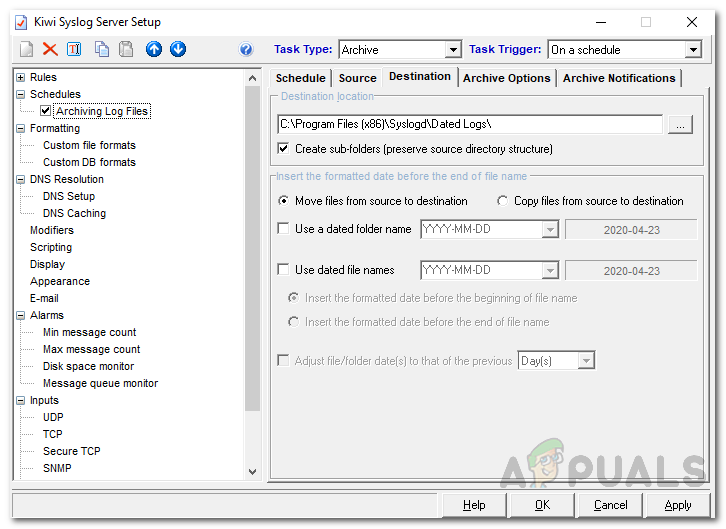
- After that, on the Destination tab, choose where you wish to archive the selected files. You can also choose to either move them or copy the files to the said location.
Destination of Archive Files - To compress the log files, go to the Archive Options tab and tick the Zip files after moving/copying checkbox. After that, you can choose the compression method and level.
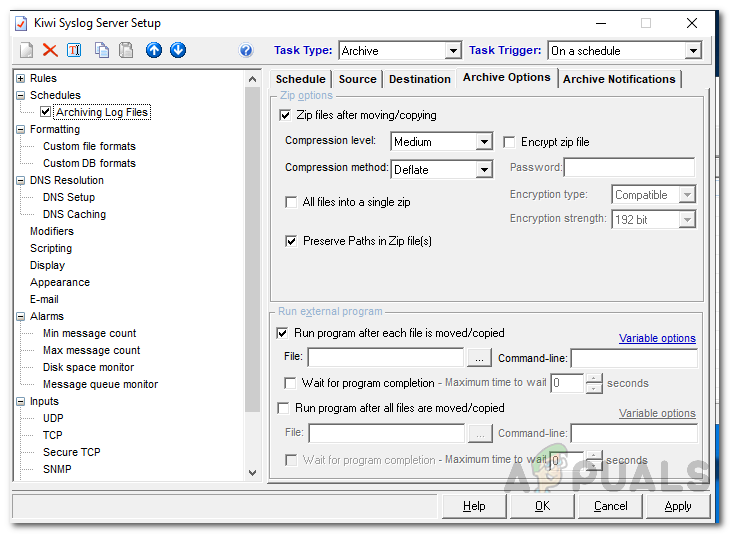
Archive Options - You can also run a program every time a file is moved or copied. To do this, tick the Run program after each file is copied/moved checkbox. Specify the location of the executable file and any command-line parameters that are needed for the program.
- You can also choose to wait for the program to run completely, this can be done via the Wait for program completion checkbox. You can also provide a specific number of seconds to wait for the program to execute.
- Finally, you can have yourself notified by having the server send out email alerts every time the archive task is run on the Archive Notifications tab.
- Once you have configured everything, click the Apply button to save your settings.
Deleting Files
With the help of clean-up tasks, you can have the Kiwi Syslog Server delete log files that have been saved for a specific period of time. The server can be configured to delete the files per its age, size etc. Here’s how to do it:
- Create a new schedule as shown above and name it accordingly.
- For the Task Type, choose Clean-up from the drop-down menu provided and then choose a Task Trigger per your need.
- After that, on the Source tab, provide the location of the folder which holds the files that you wish to delete.
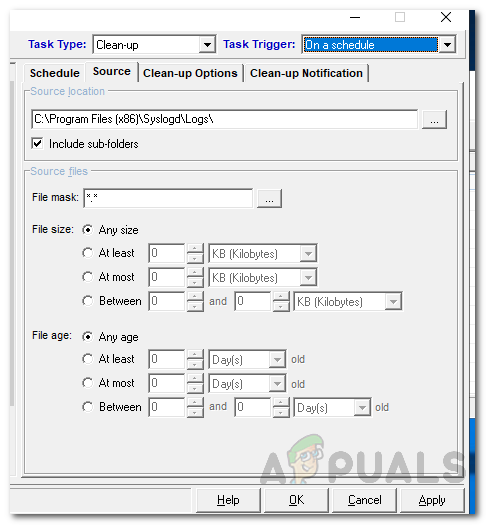
Clean-up Task - Under the Source Files heading, specify the files that you wish to delete either by its age or size.
- On the Clean-up Options tab, you can choose to delete empty folders.
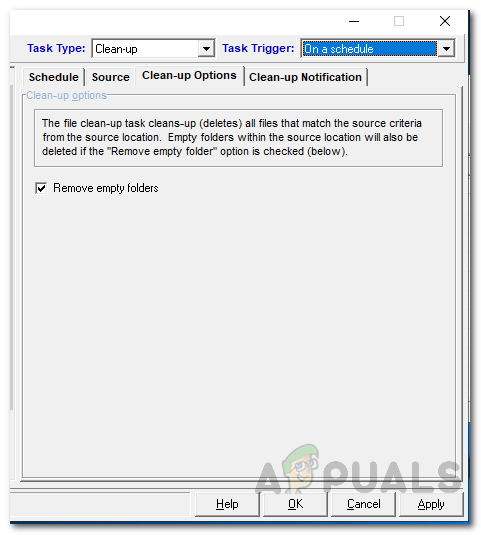
Clean-up Options - Finally, you can have the server email you whenever the clean-up task is run.
- After that, click the Apply button to save your configuration.
Running a Program
You can schedule a task to run a Windows program, batch file or process in the Kiwi Syslog server. Here’s how to do it:
- Create a new schedule as explained above and then give it a proper name.
- This time, choose Run Program as the Task Type and then choose a Task Trigger per your need.
- After that, on the Program Options tab, specify the location of the program that you wish to execute and follow it up with any command line parameters that you wish to be passed to the program.
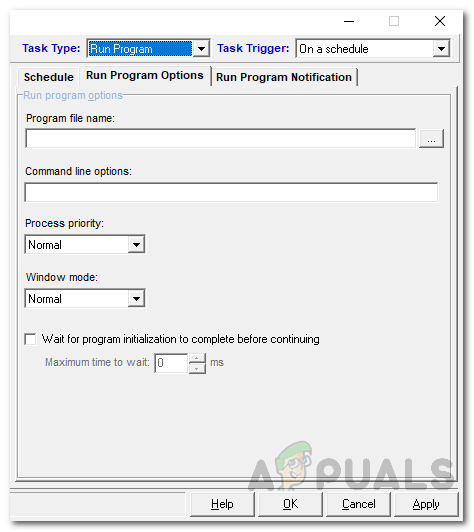
Program Options - You can choose the priority of the process from the drop-down menu provided.
- You can have the server wait for a certain number of seconds so that the program execution is completed.
- Finally, you have a report sent to you everytime the task is run on the Run Program Notifications tab.
- After that, click Apply to save your settings.
Running a Script
The final type of task that you can schedule is known as running a script. You can have the script run at regular intervals by creating a schedule for it. Here’s how to do it:
- Create a schedule and give it a name.
- Choose Run Script as the Task Type and then choose a Task Trigger from the provided options in the drop-down menu per your need.
- On the Run Script Options tab, provide the location of the script file. You can also provide a description about the script if you wish.
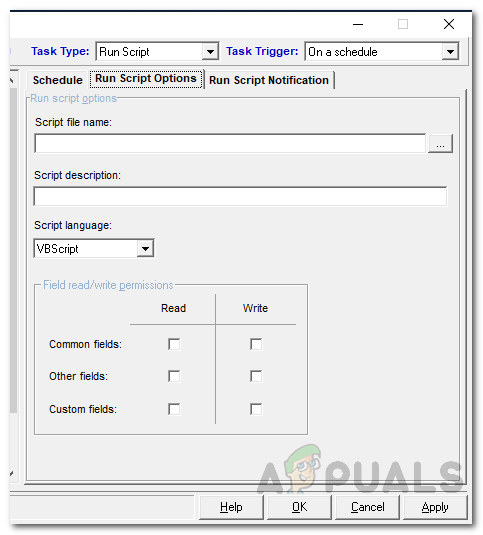
Script Options - Select the language of the script from the drop-down menu.
- Provide field read/write permissions and then finally, if you wish to be notified, you can do so on the Run Script Notifications tab.
- After that, click the Apply button to save your configuration changes.