How to Perform a Port Scan on your Network using Port Scanner
With the rise of the digital world and computer networks, the knowledge of computer systems and networking is becoming more common. More and more people opt-in for programs that are related to the digital world. While many people tend to use the information they acquire throughout the years within ethic grounds, some are still more attracted to the unethical activities. Cybercrime is not something that can be regarded as ineffective and light, rather it’s quite the opposite. There’s no denying that cybercrime is on the rise, however, fortunately, manufacturers are aware of the critical issue at hand and keep on releasing updates to keep the systems safe. All of that is appreciated, however, that is not entirely sufficient.
Have you ever wondered how many open ports you have running on your network? Open ports are pathways for others to connect to your system should they have the right data. For a business network to embrace an attack is quite the deal — it impacts your reputation significantly along with delivering other sorts of damages. So, how do you make sure to prevent such incidents? To start, you will have to monitor your IT infrastructure, this includes properly mapping your network, deploying tools to monitor your network and server configuration. Another thing you surely have to do is to monitor all the ports on your network. Automated tools like Port Scanner by Solarwinds are great for doing that as they provide all of the required information about a specific port along with displaying all the open ports on your network.
In this article, we will be showing you how to perform a port scan on your network using the free Port Scanner tool developed by Solarwinds so that you can monitor all of the activity on your network from a single window. Hence, without any further ado, let us begin.
Installing Port Scanner
The installation process is very easy and simple. To download the tool, head to Solarwinds website right here and click on ‘Download Free Tool’. You will be asked to provide some basic information after which you will be able to download the tool. Once you have downloaded the tool to your system, follow the given instructions.
- Extract the .zip file to any desired location. Navigate to the extracted directory and run portscanner.exe.
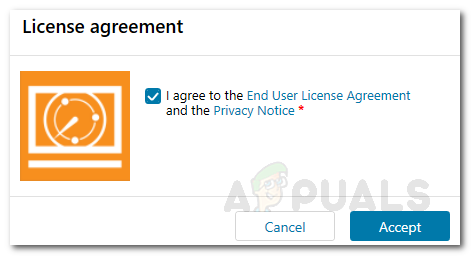
- Agree to the license terms and click Accept.
Port Scanner License Agreement - Now, the tool will check if all of the requirements are installed on the system. If you are missing anything, it will automatically install it for you.
- If that is the case, you will be prompted with a ‘Preparing Application for first use.’ dialog box.
- Wait for it to finish installing and that’s it. Once done, the tool is ready to use.
Scanning your Network
Now that the tool is all set and running, you will have to configure the scan settings to discover your network. To do that, follow the instructions down below:
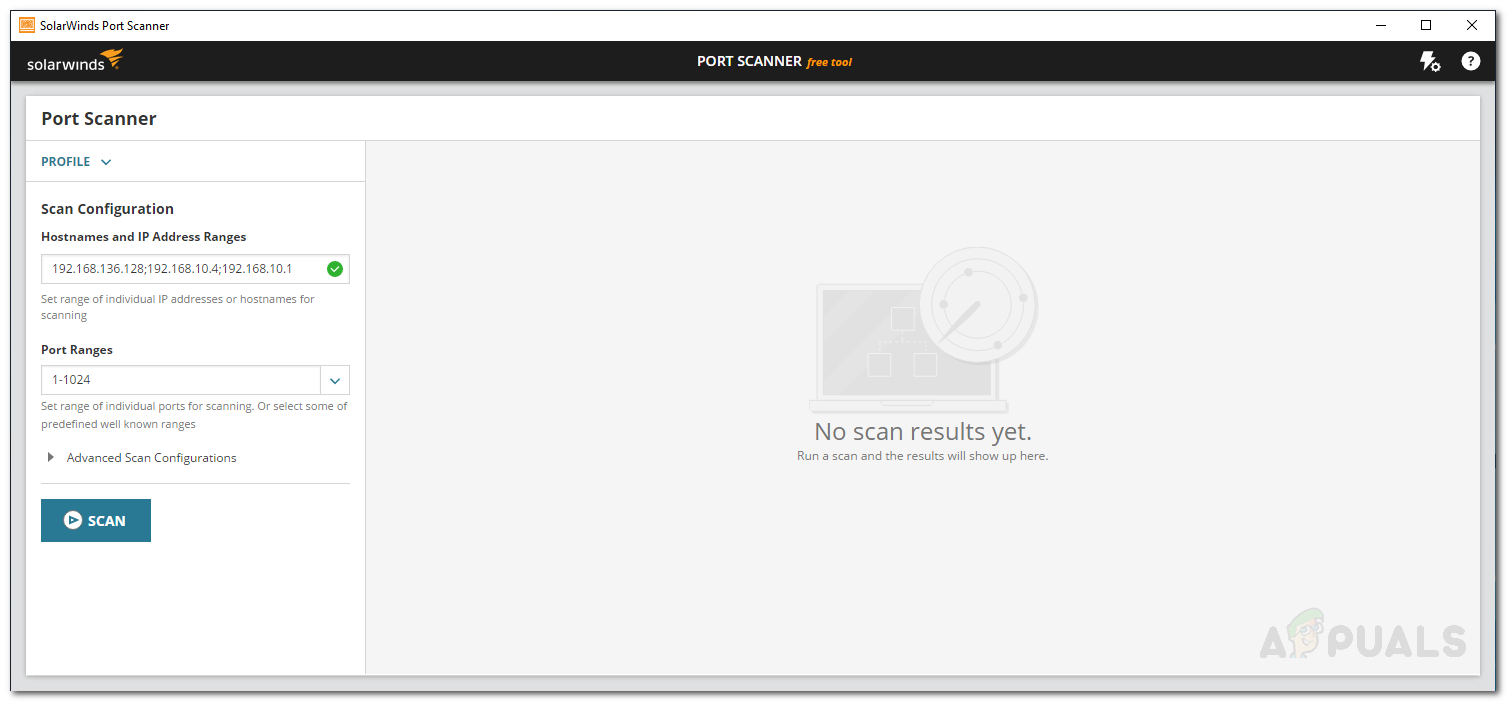
- To scan your network, provide a range of IP addresses, hostnames or individual IP addresses. Use the semicolon ( ; ) sign to separate individual IP addresses.
- Specify a Port Range to discover.
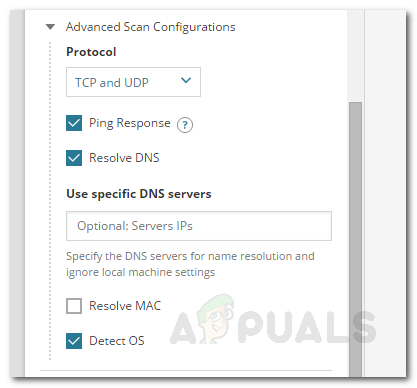
Scan Configurations - Under Advanced Scan Configurations, you can choose a protocol type i.e. TCP or UDP.
- You can also provide specific DNS servers. If you wish to detect the OS, tick the respective option.
Advanced Scan Configurations - You can also save your scan configurations. This will create a profile for your current scan configurations. To create a profile, click on Profile and then click Save As.
- Once you are all set, click Scan.
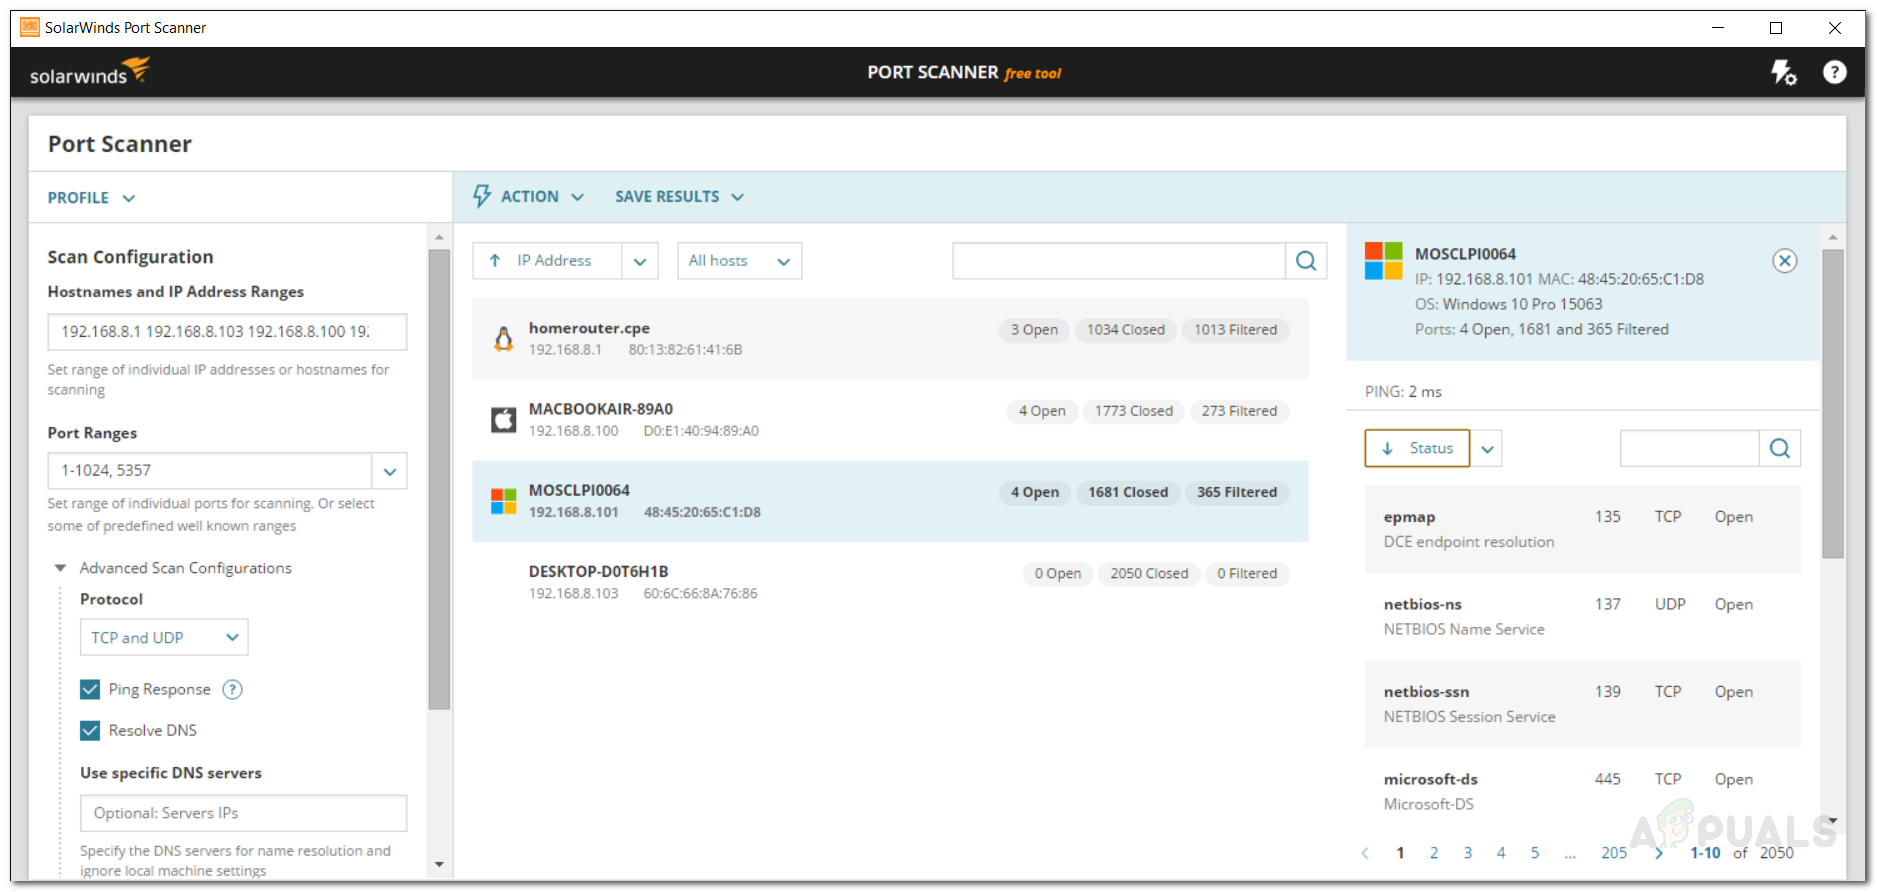
- The tool will start scanning and list the discovered devices on the right pane.
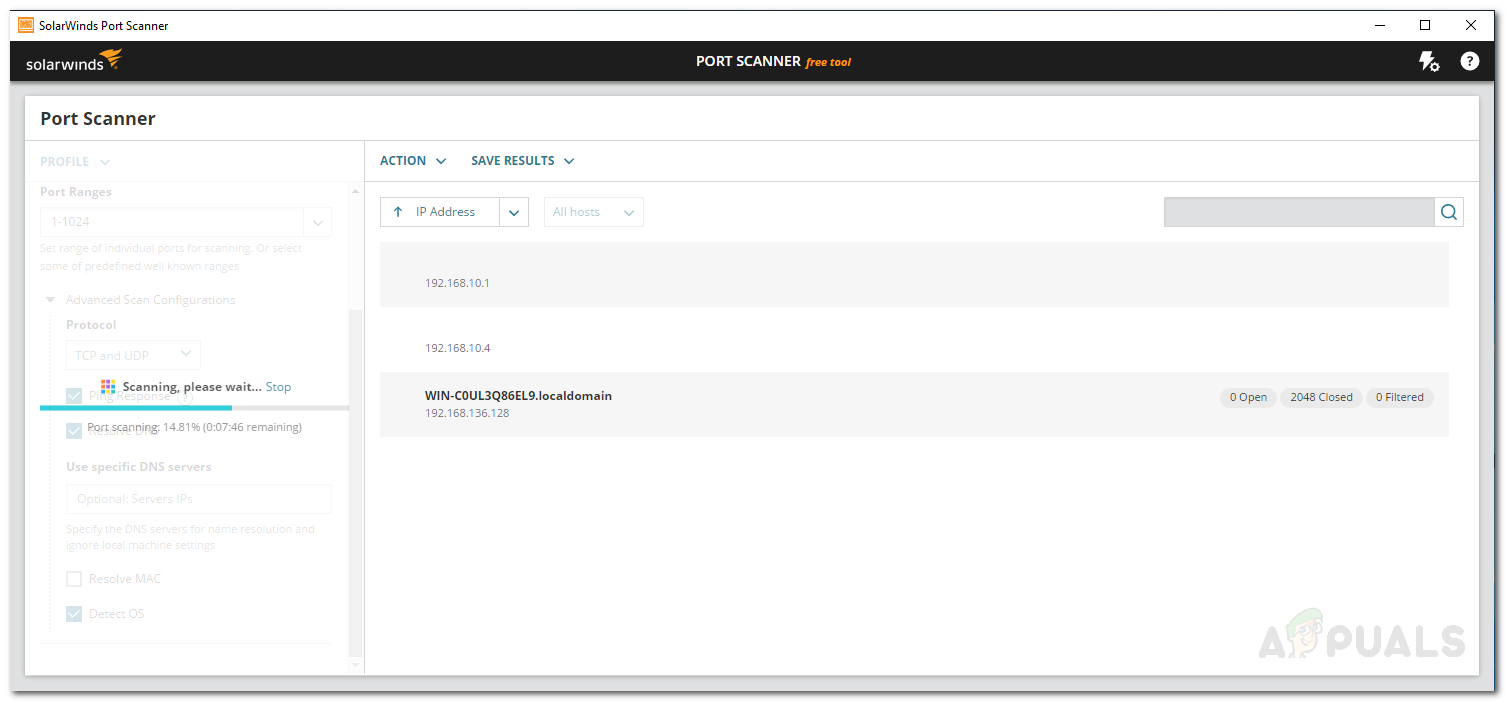
Port Scanning
Managing and Adding Actions
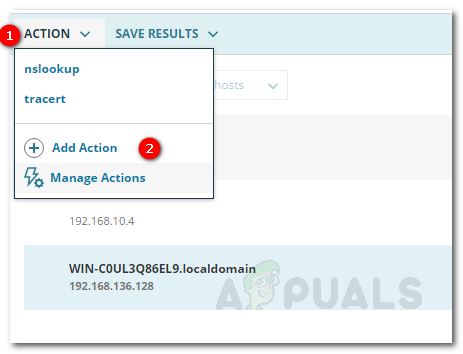
Using SolarWinds Port Scanner, you can perform various actions on the discovered devices. To add an action, follow the below steps:
- Click on the device to highlight it.
- Now, click on the Actions drop-down menu and then hit Add Action.
Adding an Action - Give the action a name and then enter the Action command.
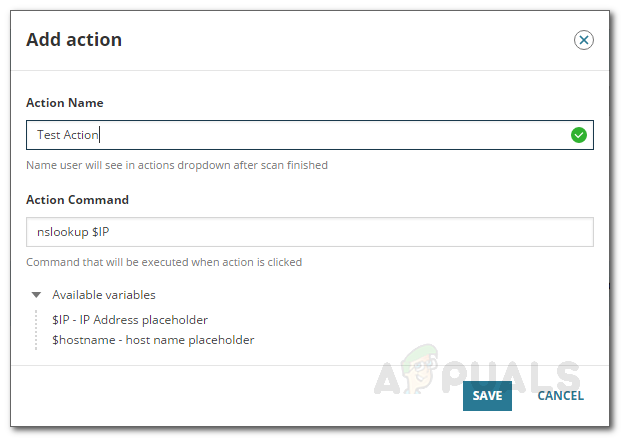
Adding an Action - Once done, click Save.
To manage the present actions, do the following:
- Click on the Actions drop-down menu and then hit Manage Actions.
- Here, you will be able to see all of the present actions.
- If you wish to edit an action, simply select the action and click on Edit.
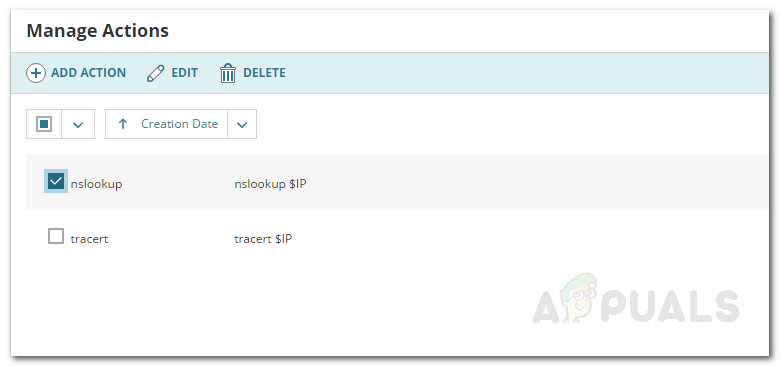
Managing Actions - If you want to delete an action, select the action and then hit Delete.