How to Fix Z-Wave Connection Issues with the Wink Hub?
Z-Wave is used primarily for home automation and is based on a wireless communications protocol. It uses a mesh network of low-energy radio waves to communicate between appliances.
The Wink Hub is a product by Wink Labs Inc that connects the different protocols/technologies of smart home products into one, which is controlled by Wink App. It’s compatible with Bluetooth Low Energy (LE), Wi-Fi, Z-Wave, Kidde, Lutron Clear Connect & ZigBee, which are the leading smart home protocols found in the majority of products.
The Wink hub usually works extremely well but sometimes the devices connected to it can act a bit weird. The following steps can be taken to resolve any connection issues with all of Z-Wave sensors and devices connected to the hub. But it is a good idea to restart your hub and devices before moving on.
Method 1: Refresh the Z-Wave Connection Map
Z-Wave uses mesh networking to connect all devices & sensors which means that each sensor connects straight to the hub and also, they can connect before connecting to the hub. Thus, each device transmits a better signal and the wireless range is also much wider than regular Wi-Fi.
However, when new Z-Wave sensors are added over time, they sometimes don’t take out the best route possible to the hub. So, it’s quite possible that some sensors & devices are not optimally connected to nearby devices.
There is a Wink hub setting to refresh the Z-Wave connection map available in the Wink app to fix this. This will reset all the connections of all the sensors & devices connected to the hub that use Z-Wave and will make them reconnect, and will figure out the best possible route automatically for the strongest signal. To do this
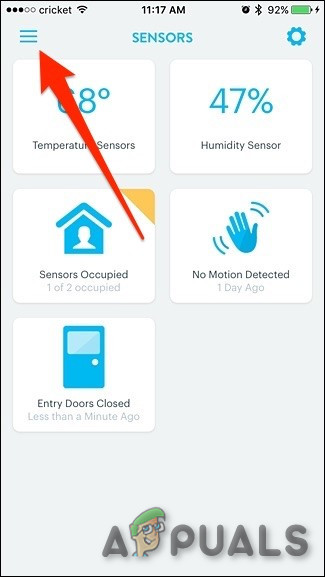
- Open up the Wink app
- Tap on the hamburger menu button in the top-left corner of the screen.
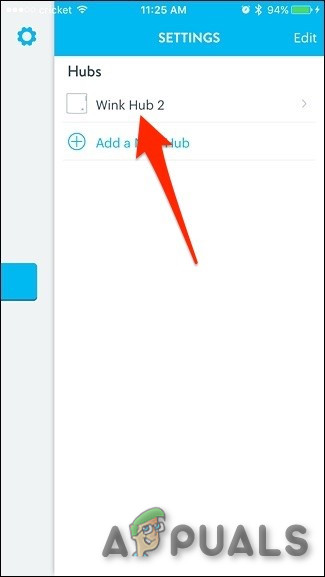
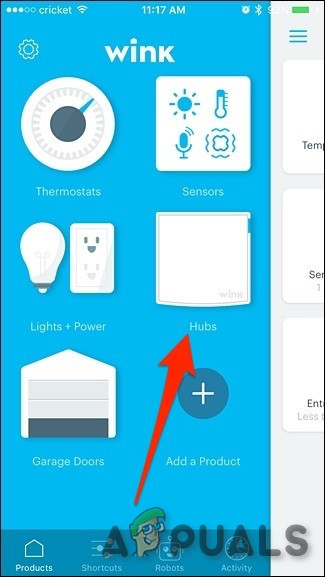
Menu of Wink Hub - Now, tap on the “Hubs”.

Hubs - Now tap on the Settings gear icon in the top-right corner.

Settings - Select the Wink hub you have to reset.
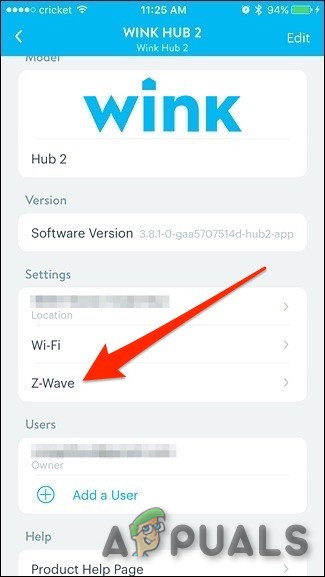
Tap on Concerned Hub - Now Scroll down & tap on the “Z-Wave”.
Z-wave - Now Tap the “Z-Wave Network Rediscovery”.

Z-Wave Network Rediscovery - Wait for a sometime soon you will see a “Success” alert. Keep in mind that during this process, normal commands may not operate properly.
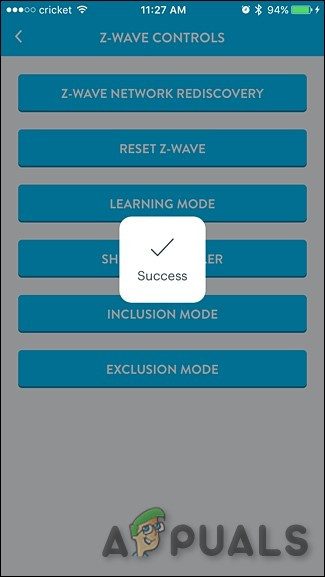
Most probably your Z-Wave devices & sensors all have better connections now.
Method 2: Use a Device as a Signal Repeater
If the above method has not fixed the connection issues, have a careful look to see where all of the Z-Wave devices & sensors are placed. If any of the devices & sensors are at a distance than the rest, then it is possible that the distant device/sensor might not be getting a good signal from the closest device.
A quick fix is to place another device halfway between the distant device/sensor & its closest device/sensor. The new device placed will act as a sort of a signal repeater, allowing the problematic sensor to finally good connection it needs. It can also be done by the use of other smart home hubs that use Z-Wave.
Remember that battery-powered devices/sensors will not act as repeaters but the plugged-in modules/powered outlets & switches will work.
Whatever the case, either put this new device in good use on something around or just place it & have it just been used as a signal repeater and if that’s the case, try to get the cheapest Z-Wave device or you can get an actual signal repeater.
Do not forget to repeat method 1, so, that the new device could get the best signal connection.
Method 3: Stay Away from Metal
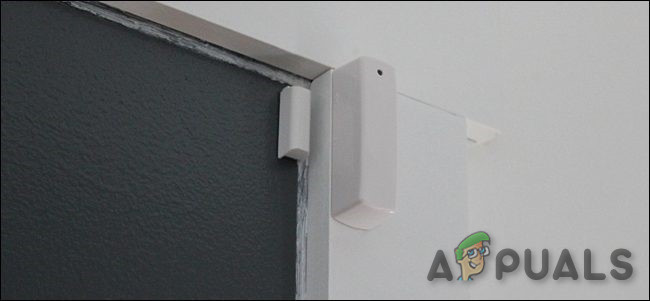
If a lot of door & window sensors (a two-part magnet sensor) & there are constant issues with few of them, which could be because they are placed near some kind of metal.
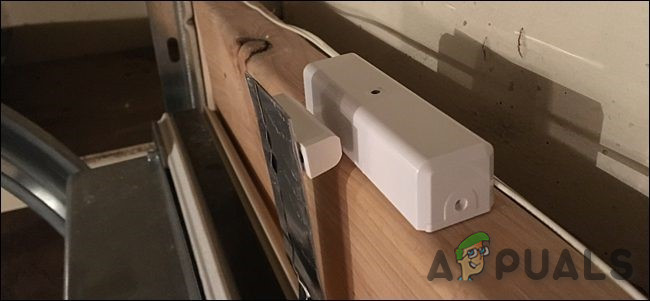
Placing the devices/sensors a few inches away from metal is fine, but placing the devices/sensors right on a metal part will create issues. That’s because of the metal on the door/window will interfere with the magnet system of the sensors.
Either place the sensors a few inches away from the metal or Use mount for the sensor to keep it a few inches away from the nearest metal.
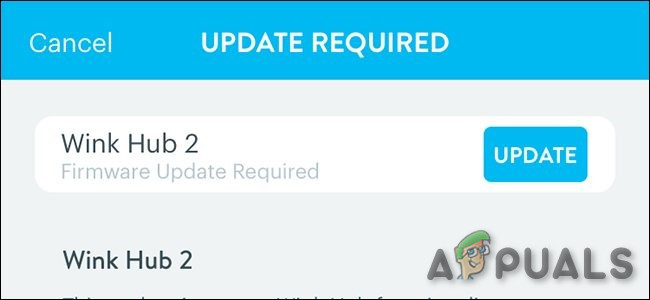
Method 4: Update the Hub’s Firmware
If the above-said methods did not solve your problem then as a last resort, update the hub’s firmware if an update is available.
- Open up the Wink app
- Tap on the hamburger menu button in the top-left corner of the screen.

Hamburger Menu - Now, tap on the “Hubs”.
Hubs - Now tap on the Settings gear icon in the top-right corner.

Settings Icon - Select the Wink hub you have to update.

Concerned Hub - Now Scroll down & tap on the “Firmware Updates”.
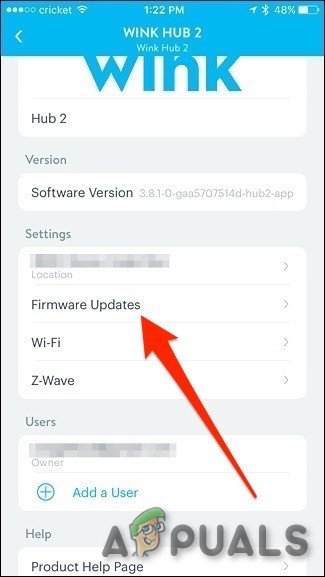
Firmware Update - Tap the toggle switch next to “Enable Firmware Updates” to on position if it’s not already turned on.
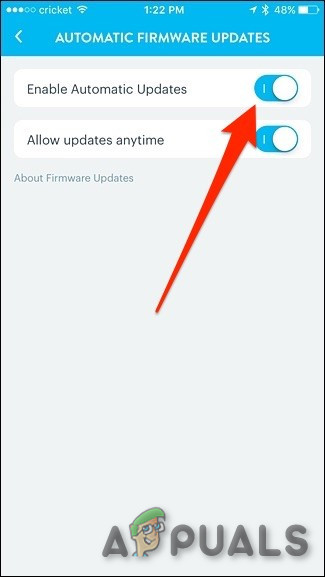
Enable Firmware Updates - Now choose when firmware updates are installed by turning off the toggle switch next “Allow Updates Anytime” or let it be remained on if you want to update at any time.
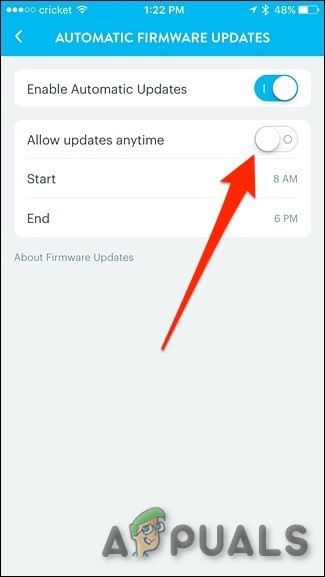
Allow update anytime - If “Allow update anytime” is turned off then choose a start and end time to create a time window when firmware updates will be installed, preferably not the time when you may want to use the Wink system. But remember that Wink has warned that lights may automatically turn on/off after the update. So be prepared for that.