How to Configure Security rules in Amazon EC2 Instance
Configuring inbound and outbound rules in your Amazon is highly important for security reasons and to fulfill the purpose of our personal or business needs. For example, if you are planning to host a web app on your Amazon EC2 instance, you will need to enable HTTPS inbound communication so the outside world can reach out hosted web app.
If your Amazon EC2 instance needs to reach email servers hosted somewhere on the Internet, you will need to enable IMAP, POP3, and SMTP outbound communication.
Part I: Configure inbound rules by enabling HTTPS
In the first part, we will show you how to configure inbound rules by enabling HTTPS protocol. HTTPS (Hypertext Transfer Protocol Secure) is used for secure communication between a web browser and the website (webserver).
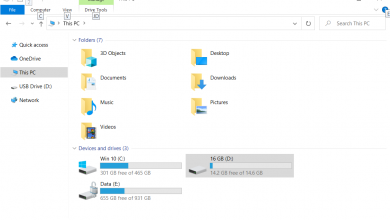
- Login into AWS Management Console
- Click on Running instances
- Select the instance
- Click on the Description tab and navigate to the Security groups at the right side of the window as shown in the screenshot below.
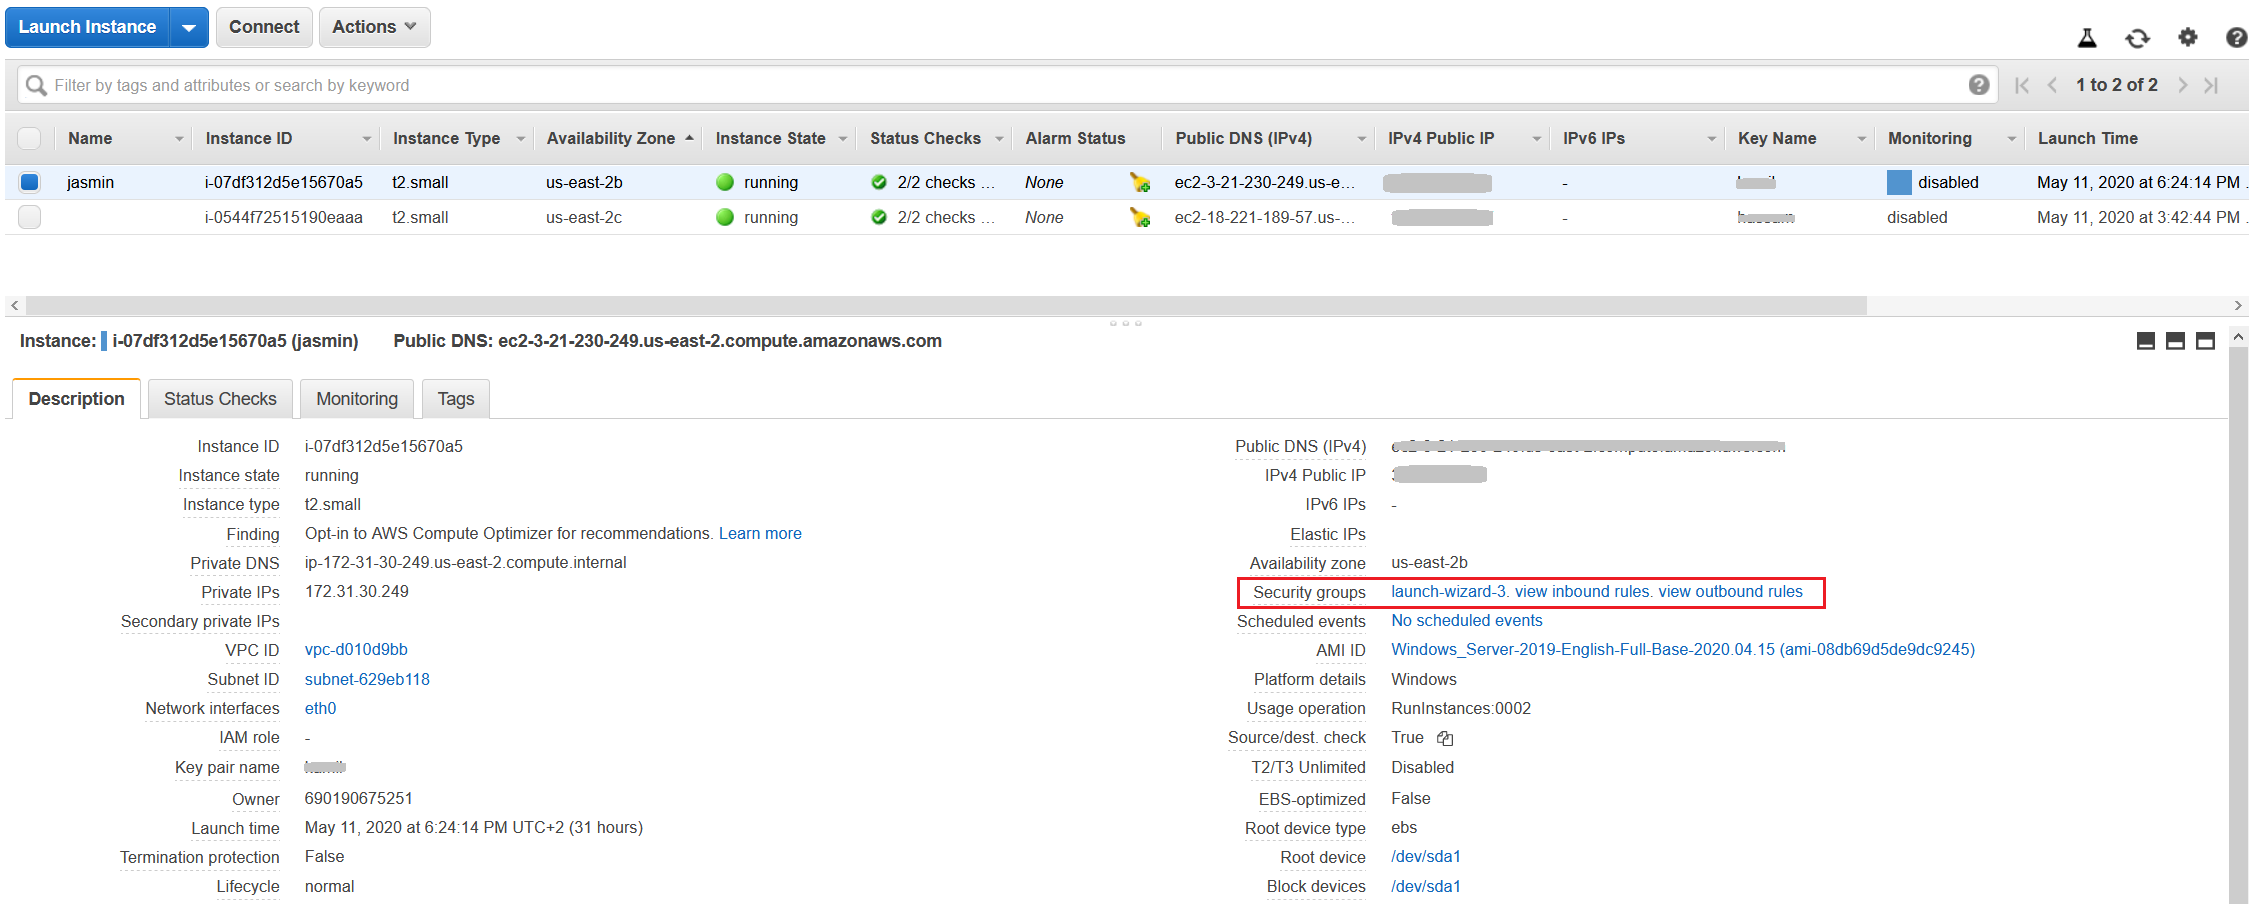
Under Security groups, you can find three groups, including:
- launch-wizard-3 – the name of the security group. It is used to configure inbound and outbound rules for the EC2 instance. In our case, the name is launch-wizard-3.
- inbound rules – create inbound rules used to define incoming communication to your Amazon EC2 instance. By clicking on view, you can see existing inbound rules.
- outbound rules – create outbound rules used to define outgoing communication to your Amazon EC2 instance. By clicking on view, you can see existing outbound rules.
- Click on launch-wizard-3 to configure security rules
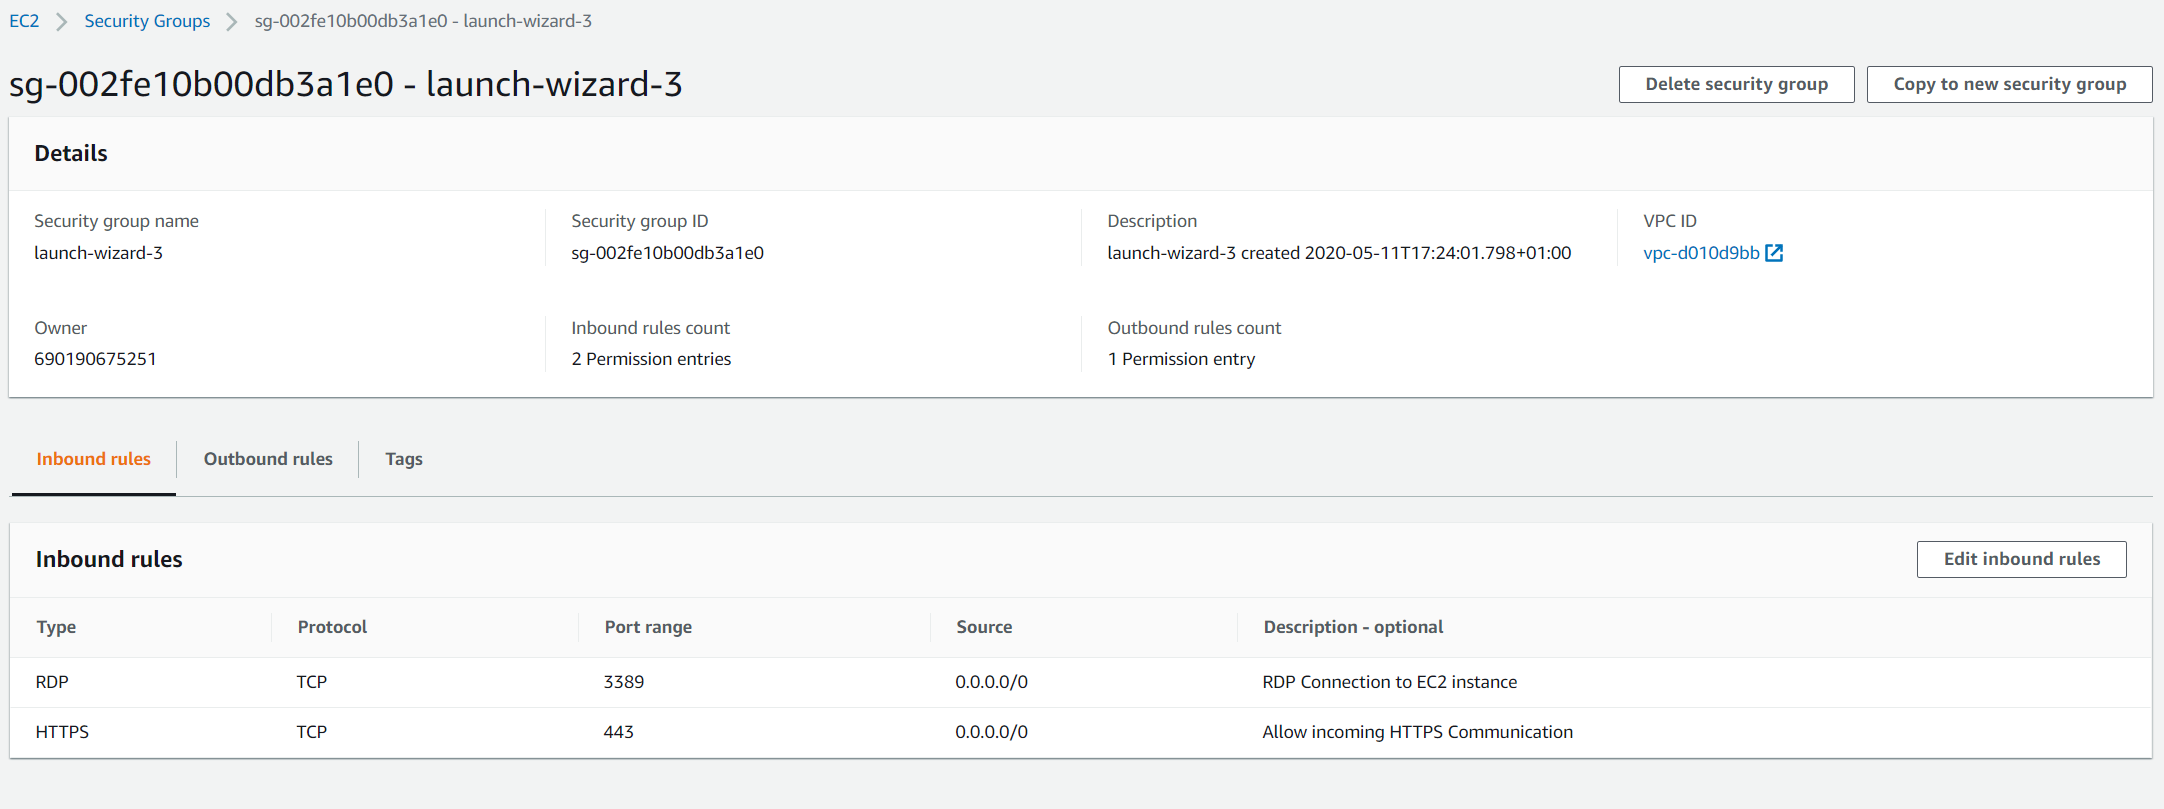
- Under Security Group click on security group associated with our instance. In our case, it is the security group ID called sg-002fe10b00db3a1e0.

- Click on Inbound rules and then click on Edit inbound rules
- Under Inbound rules click on Add rule
- Configure rule as following:
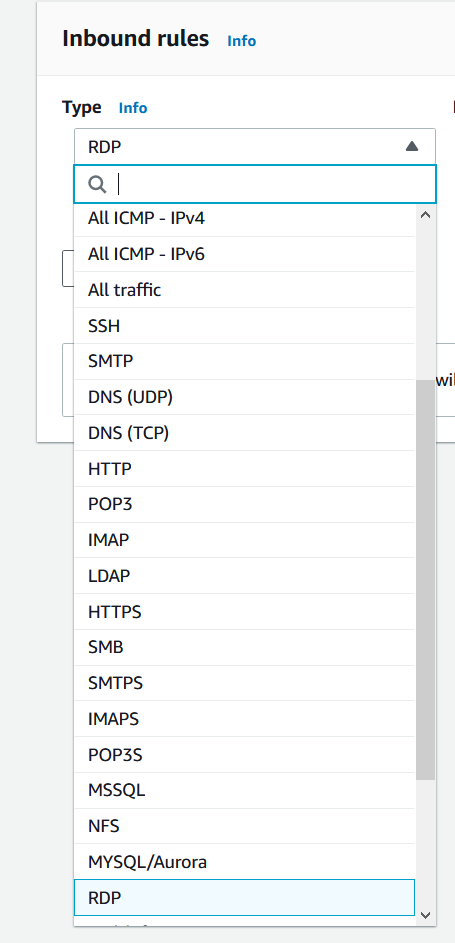
- Type – from the list choose HTTPS. You can choose a common protocol, such as SSH (for a Linux instance), RDP (for a Windows instance), or others. You can also manually enter a custom port or port ranges. There are more than 30 protocols that can be configured. In case you want to enable DNS, IMAP, SMTP, or other protocols, you can do it by following the same procedure as with configuring HTTPS protocol.
- Protocol – it will use TCP protocol by default. The type of protocol, for example, TCP or UDP. It provides an additional selection for ICMP.
- Port range – once you select HTTPS as the type of the rule, it will automatically assign 443 as the default port. For custom rules and protocols, you can manually enter a port number or a port range.
- Source – specify a single IP address or an IP address range in CIDR notation (for example 203.0.113.5/32) that should reach our EC2 instance. In our case, we will choose Anywhere. That will automatically add IPv4 and IPv6 range 0.0.0/0 and ::/0 which means that any host from any network ID can reach our EC2 instance. If connecting from behind a firewall, you’ll need the IP address range used by the client computers. You can specify the name or ID of another security group in the same region. To specify a security group in another AWS account (EC2-Classic only), prefix it with the account ID and a forward slash, for example, 111122223333/OtherSecurityGroup.
- Description – optional – A description for a security group rule.
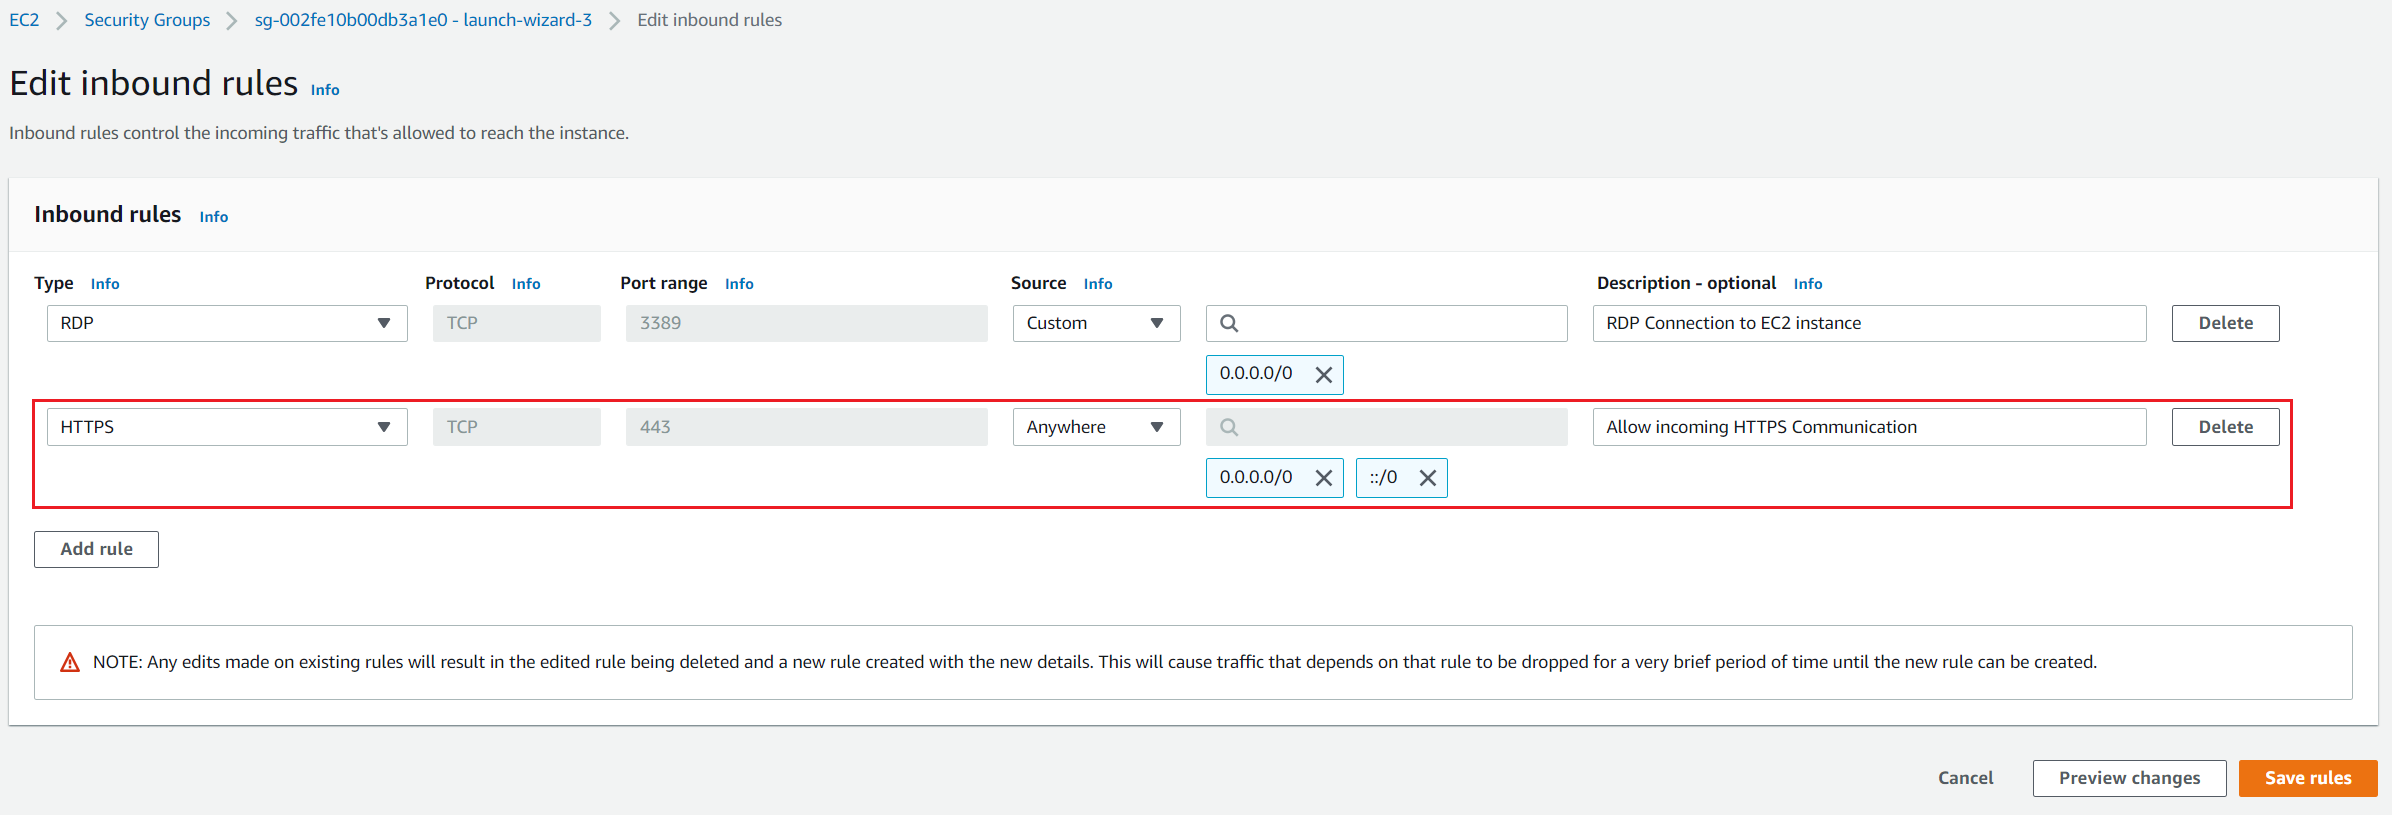
- Click on Save rules. You have successfully created the inbound rule. You can successfully reach your web app hosted on Amazon EC2 instance.
Part II: Configure Outbound traffic by enabling IMAP, POP3, and SMTP:
In the second part, we will show you how to configure outbound rule by enabling IMAP, POP3, and SMTP protocols. IMAP (Internet Message Access Protocol) and POP3 (Post Office Protocol 3) are protocols for receiving emails and SMTP (Simple Mail Transfer Protocol) is a protocol for sending an email.
- Open your security group
- Click on Outbound rules. As you can see in the screenshot below, one outbound rule is created for Amazon EC2 instance. The rule is named All traffic, and it is used to allow any outgoing communication from Amazon EC2 instance to the outside world.
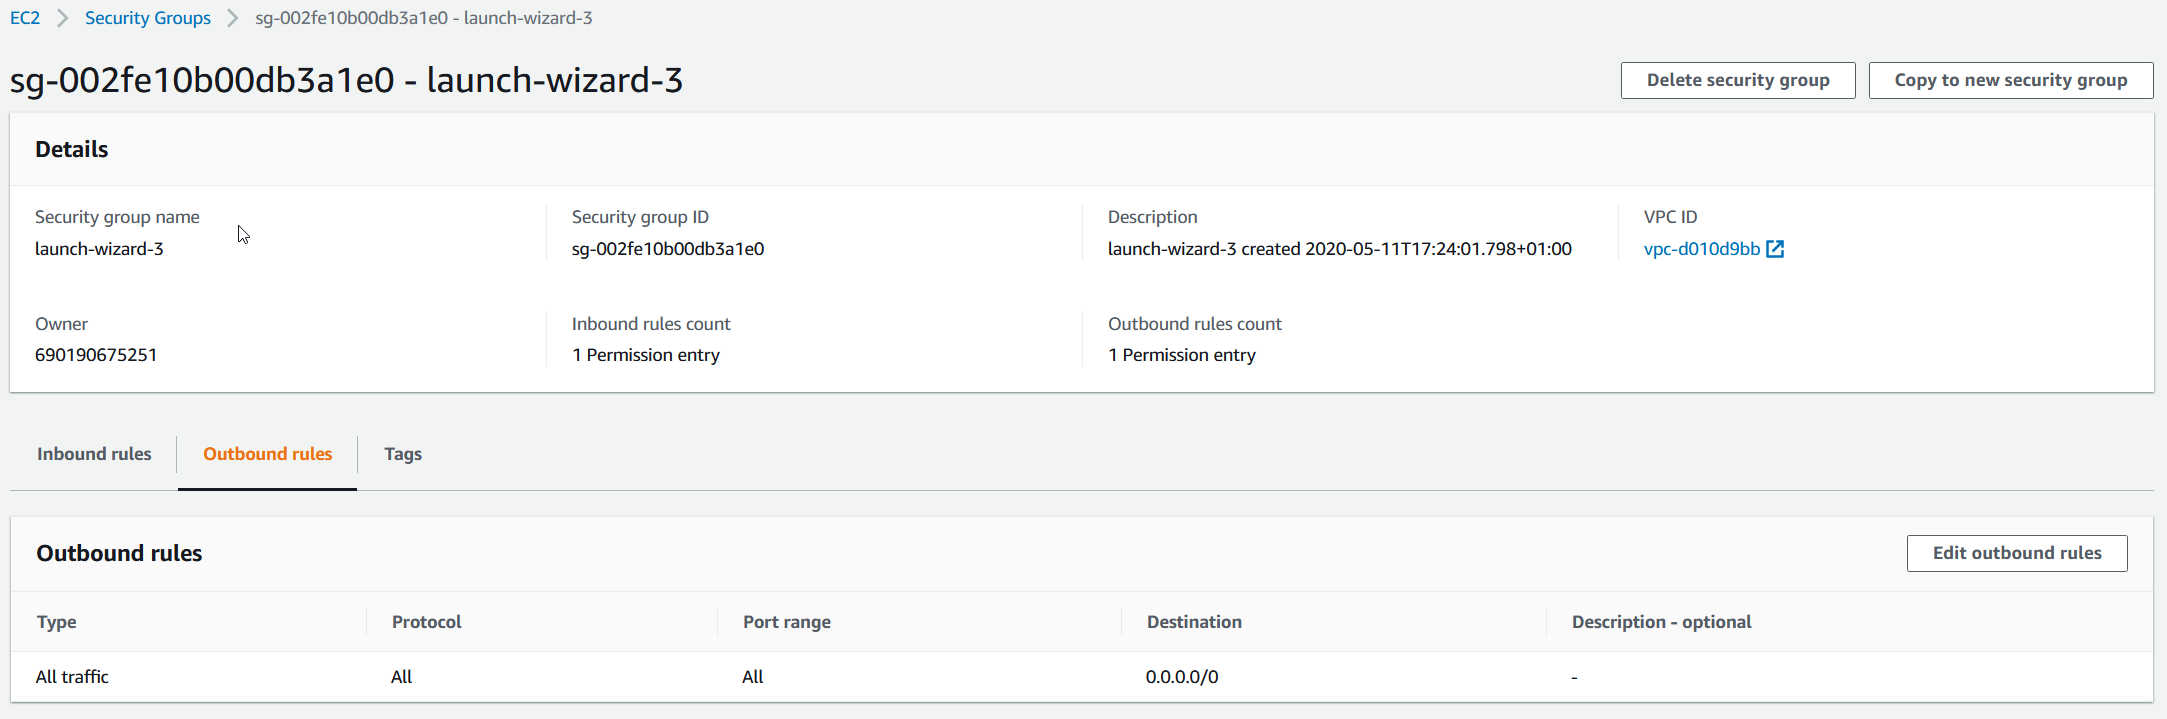
- Click on Edit outbound rules and delete All traffic rule by clicking on Delete
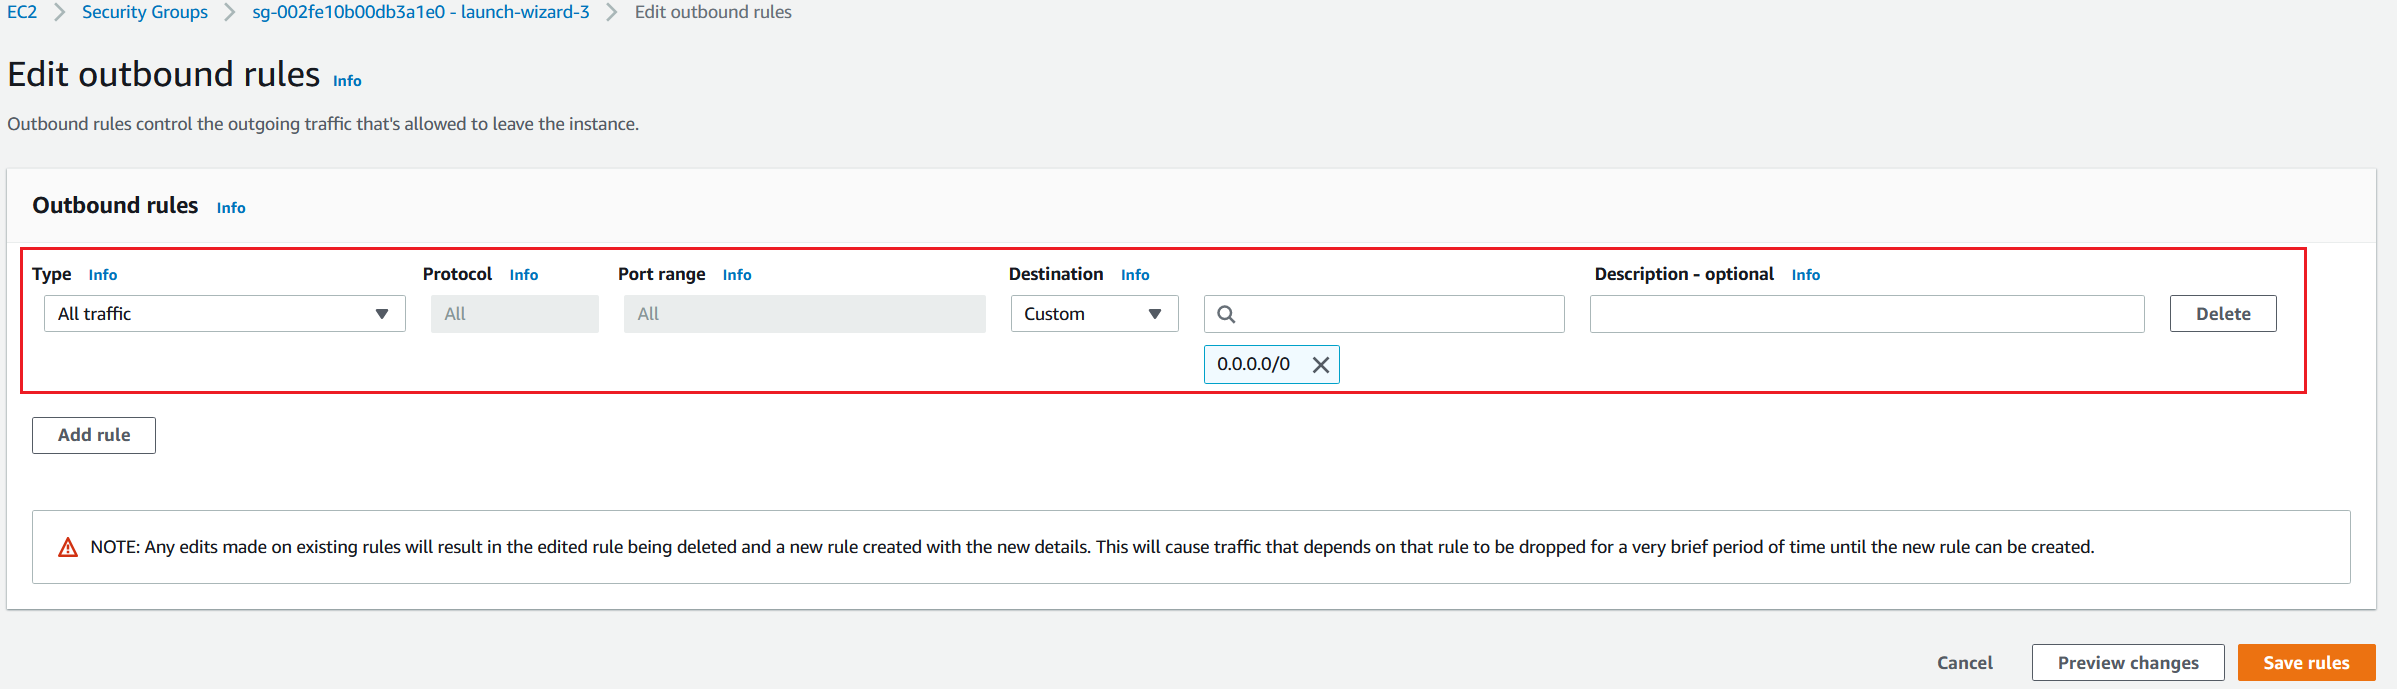
- Click on Add rule to create a new rule
- Configure the rule as follows:
- Type – from the list choose IMAPS.
- Protocol – it will use TCP protocol by default. The type of protocol, for example, TCP or UDP. It provides an additional selection for ICMP.
- Port range – once you select IMAPS as the type of the rule, it will automatically assign 993 as the default port.
- Source – specify a single IP address or an IP address range in CIDR notation (for example 203.0.113.5/32) that should reach our EC2 instance. In our case, we will only allow access to a certain public IP address.
- Description – optional – A description for a security group rule.6. Click on Add rule and create a rule for POP3S and SMTPS
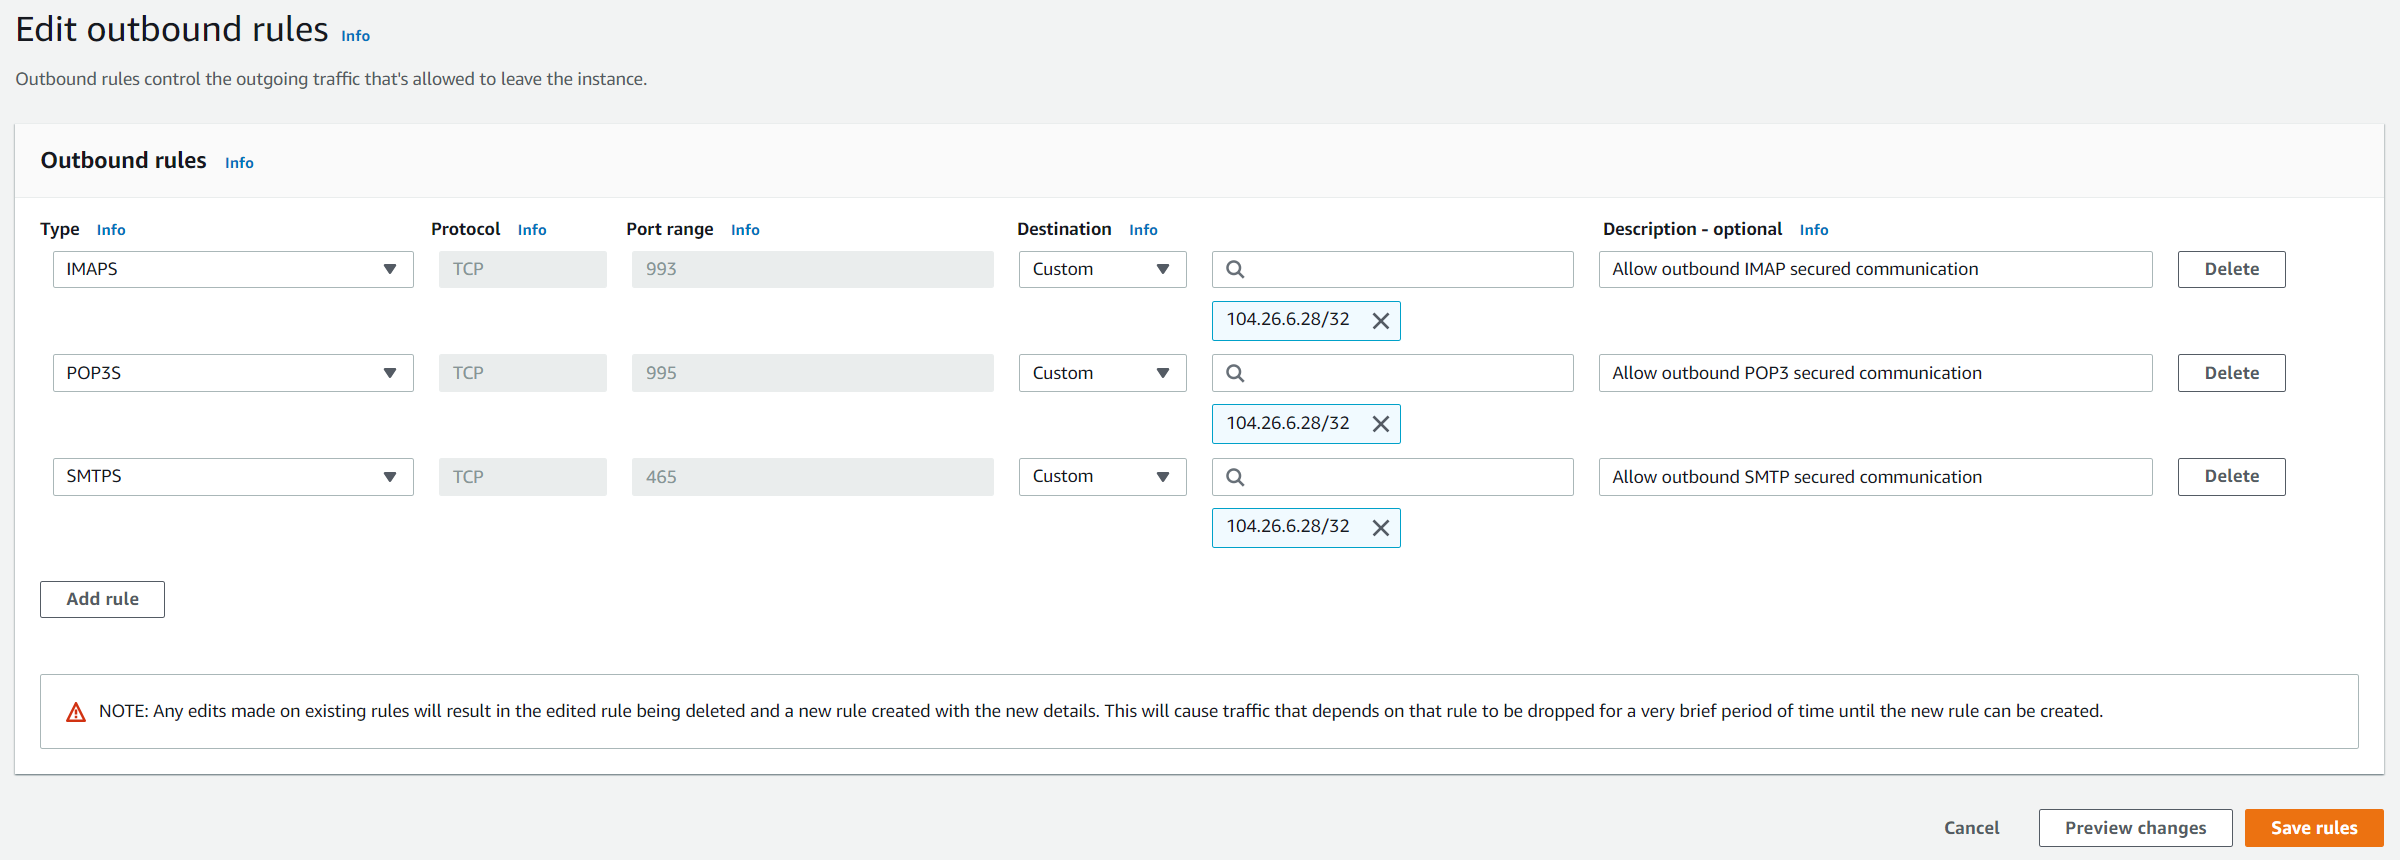
7. Click on Save rules. You have successfully created three outbound rules.

8. Login into Amazon EC2 instance and verify if rules are applied successfully.