What is Traceroute and How to use Traceroute NG?
Connection issues are very common in this digital world. When we try to connect to other servers or machines, our computers communicate with each other. This communication is carried out piece by piece known as packets. This sending and receiving of packets depend on your internet connection. Usually, it happens at very high speed (taking into consideration the speeds of this modern world) and hence most of us are often unaware of what’s happening at the backend. When these packets are not able to reach their destination from the host machine, you will not be able to establish a connection. Traceroute is a very basic diagnostic tool that comes in handy in such conditions. Let us discuss it in detail.
What is Traceroute?
Trace is a very useful and interesting tool that you can use to figure out how packets are being transmitted from the host device to the targeted machine. Within the internet, the packets that are being transmitted from your computer to the targeted machine are going to be touched by different routers. These routers transmit the packets from one to another until the packet finally reaches its destination. These routers, of course, have their IP addresses as they can transmit the packets. Traceroute works in a very clever way. What it does is it exploits a field in the IP packet header known as TTL or Time to Live.

TTL is used to prevent packets from looping. Let’s say a network is misconfigured and hence a packet is caught amid this misconfiguration causing it to route back and forth between two routers. Now, if it wasn’t for TTL, the packet would be stuck forever consuming the resources of the network. How it works is before the packet is sent it is given a specific TTL value, let’s say 4. When the packet reaches the first router, it loses its value by 1 meaning it decrements the Time to Live value. Once the value reaches 0, the packet is dropped and hence preventing loops.
How does Traceroute Work?
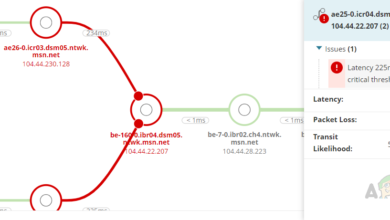
So, what traceroute does is it exploits this TTL field to figure out the IP addresses of these routers along the routing path. How does it do that you might ask? For finding the identities for the routers, what traceroute does is send a packet with TTL value 1 which when touched by a router is dropped because the value is decremented to zero. The router, in response, sends a message to the source informing such. Traceroute uses that message or ping to find out the identity of the router. The value of the packet keeps on increasing by one and as a result, traceroute gets the IP addresses of all the routers in the routing path. Hence, providing you with the connection path analysis. This information can be used to diagnose connectivity issues by network administrators and is helpful.
How to use Traceroute NG?
Traceroute NG is an improved traceroute tool developed by Solarwinds that you can use to diagnose connection issues. It offers fast and accurate network path analysis using TCP and ICMP probing. We will be guiding you on how to use it, and to be honest, it’s pretty basic. To use the tool, you will first have to download the tool from Solarwinds’ website. For that, head to this link and click on ‘Download Free Tool’. Once the tool has downloaded, follow the instructions given down below:
- Extract the downloaded .zip file to any location you like and then navigate to that specified location.
- Run the traceng.exe file to start traceroute NG.
- When you run the tool, you will be prompted to the License Agreement box. Agree to the agreement and then click Accept.

License Agreement - If you do not have WinPcap on your system, traceroute will automatically load up the installation wizard of WinPcap. When prompted with a UAC dialog box, click Yes.
- Install WinPcap by going through the installation wizard.

WinPcap Installation - Once done, open the Traceroute NG command prompt window. You will be shown all of the available parameters and the requirement description.
- There are a bunch of parameters that you can use while tracerouting.
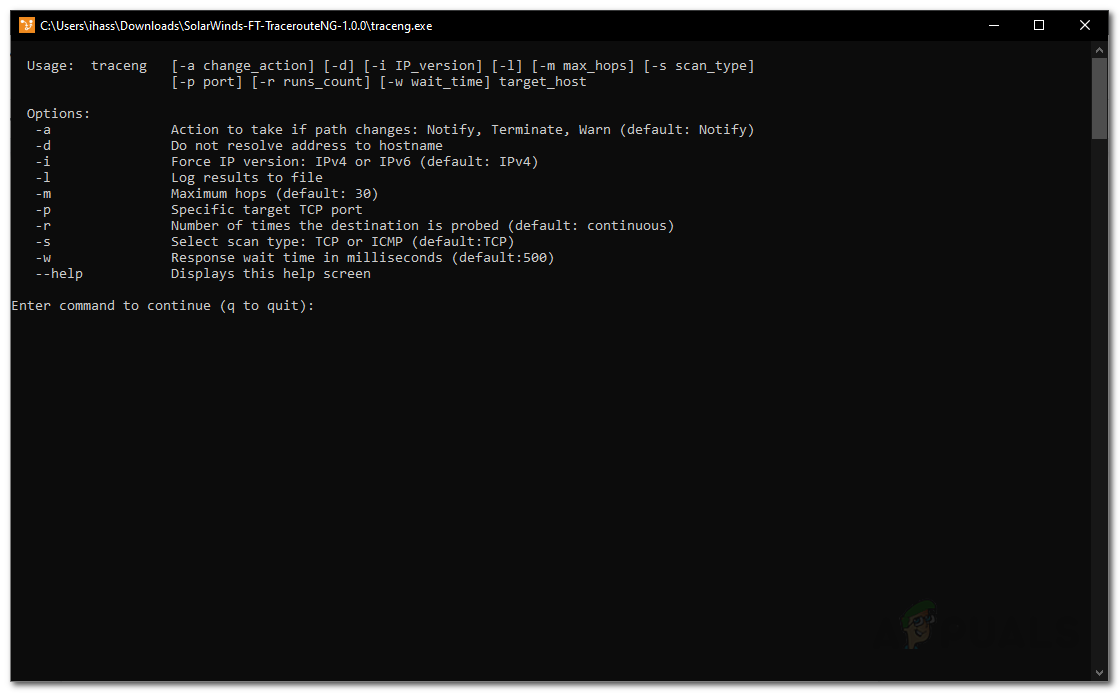
Traceroute NG Usage - You can use the -a parameter to take one of the mentioned actions when the path changes.
- If you wish to create a log file, use the -l parameter which will create a log file of the path analysis. This will save you from manually writing all the IP addresses if that’s what you wish by saving them in a log file automatically. The logs will be saved in the ‘logs’ folder of traceroute.
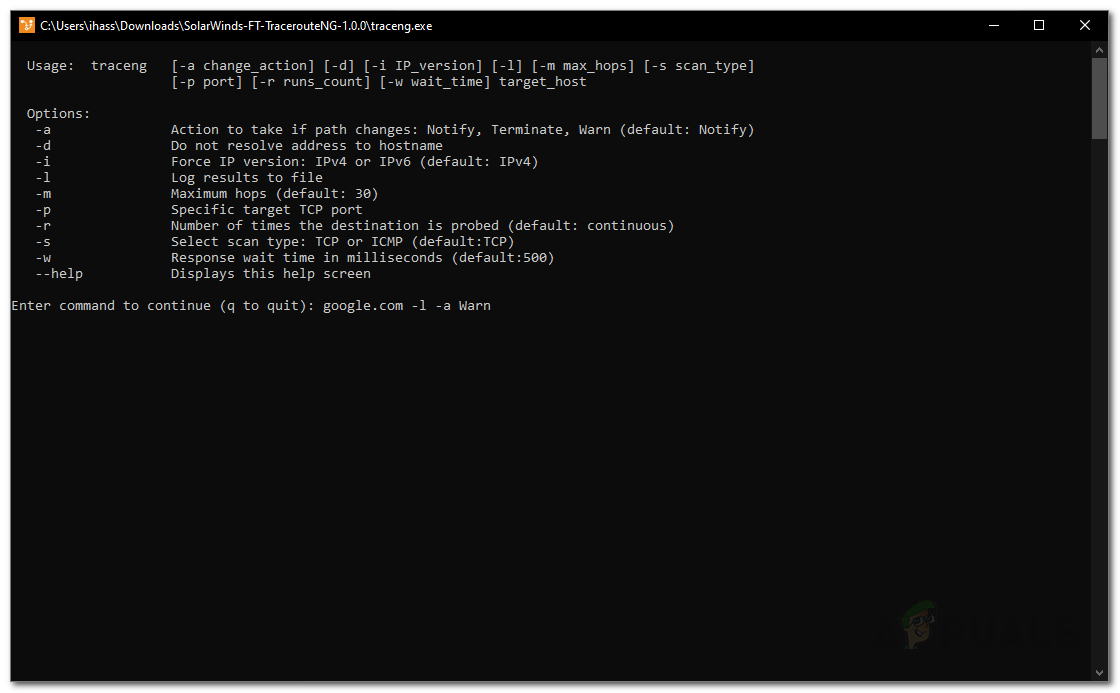
- To use the tool, just specify the URL of any website followed by any parameters you desire and hit Enter.
Traceroute NG CMD - During the traceroute, if any issues are faced, it will be displayed in front of Issues.
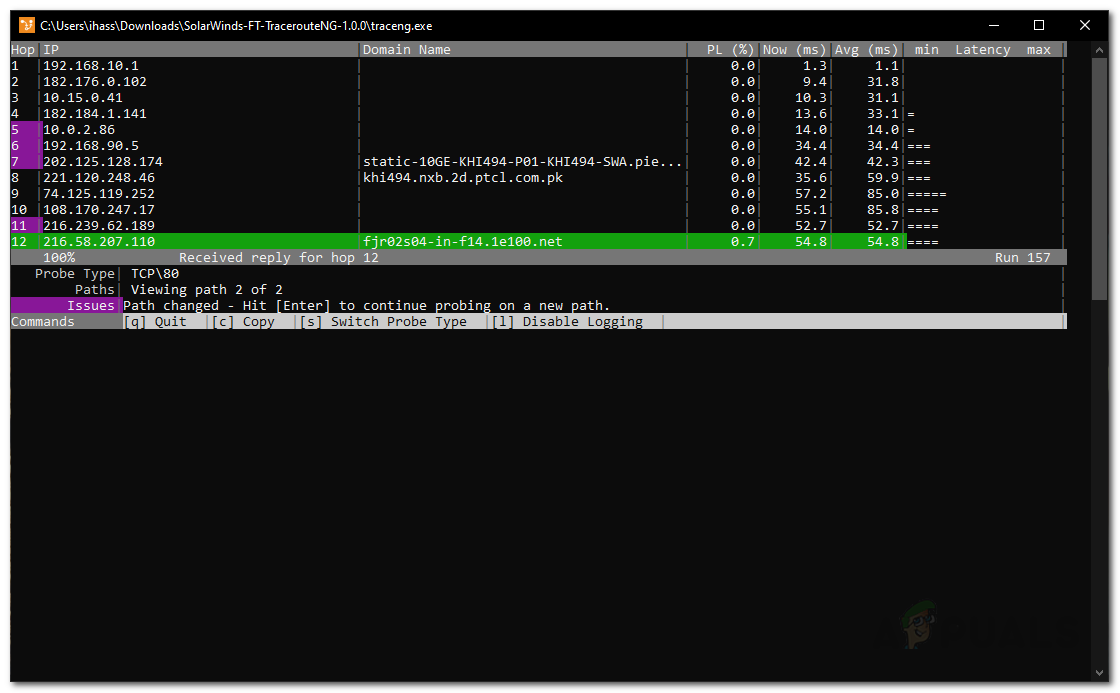
Displaying Issues - If you wish to stop the traceroute, just type in ‘q’ without the apostrophes and hit Enter.