How to Perform Backup and Restore in Windows Server 2019
Implementation of backup and restore strategies in a personal or business environment is highly important. There are tons of different tools available to perform different types of backups on different operating systems or applications to on-premise storage or cloud such as AWS, Azure, or Google Cloud.
In this article, we will show you how to install, configure, and perform backup and restore by using the native Windows Backup Server in Windows Server 2019. The same procedure also applies to previous Windows Server operating systems.
1. Install Windows Server Backup feature
In the first step, we will install the Windows Server Backup feature in Windows Server 2019.
- Open Server Manager
- Click on Add roles and features
- Under Before you begin click Next
- Under Select installation type, choose Role-based or feature-based installation and click Next
- Under Select destination server, choose your server and click Next
- Under Select server roles click Next
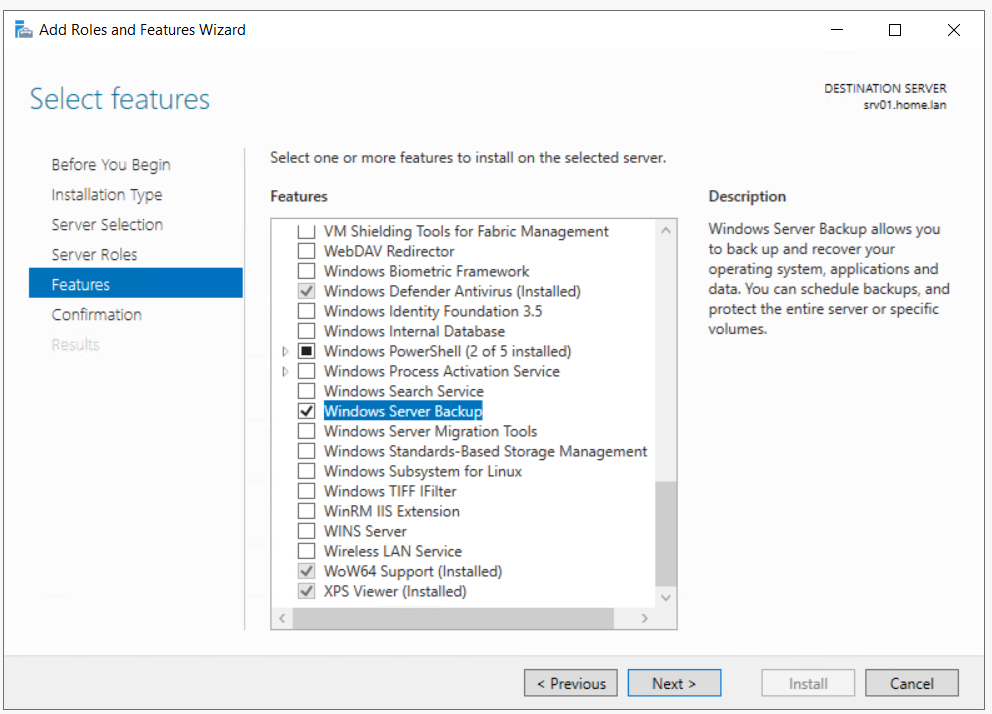
- Under Select features select Windows Server Backup and Next
- Under Confirm installation sections click Install
- Under Installation progress click Close
2. Configure Windows Server Backup
In the second step, we will show you how to configure and perform a backup by using Backup Once and Backup Schedule features.
- Open Server Manager
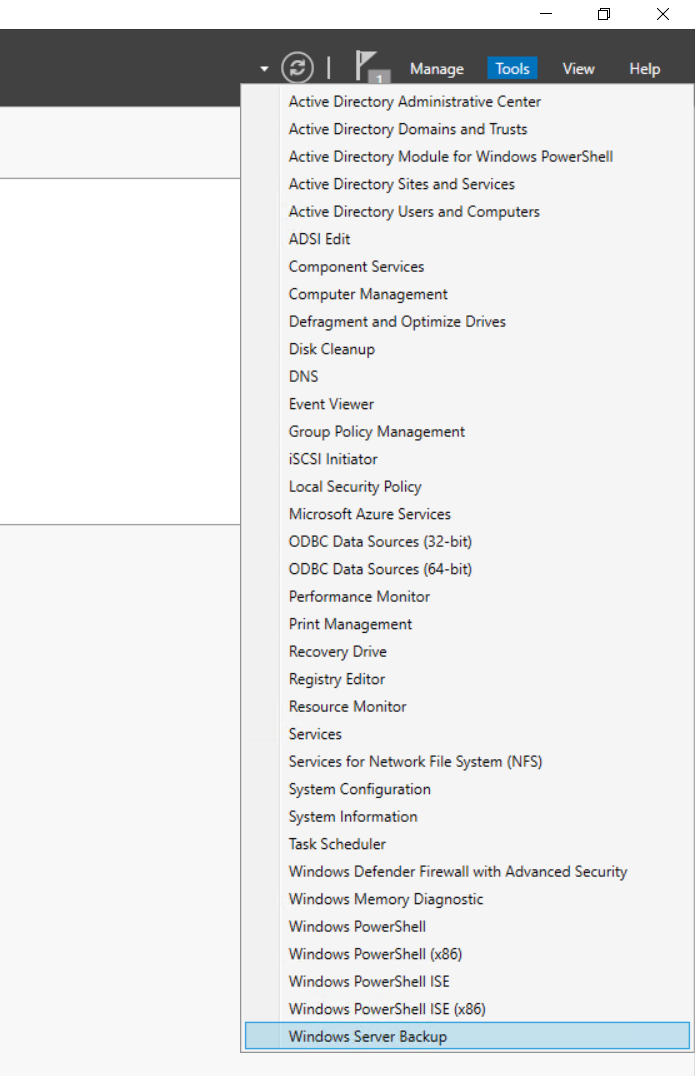
- Click on Tools at the top right side of the window and then click Windows Server Backup
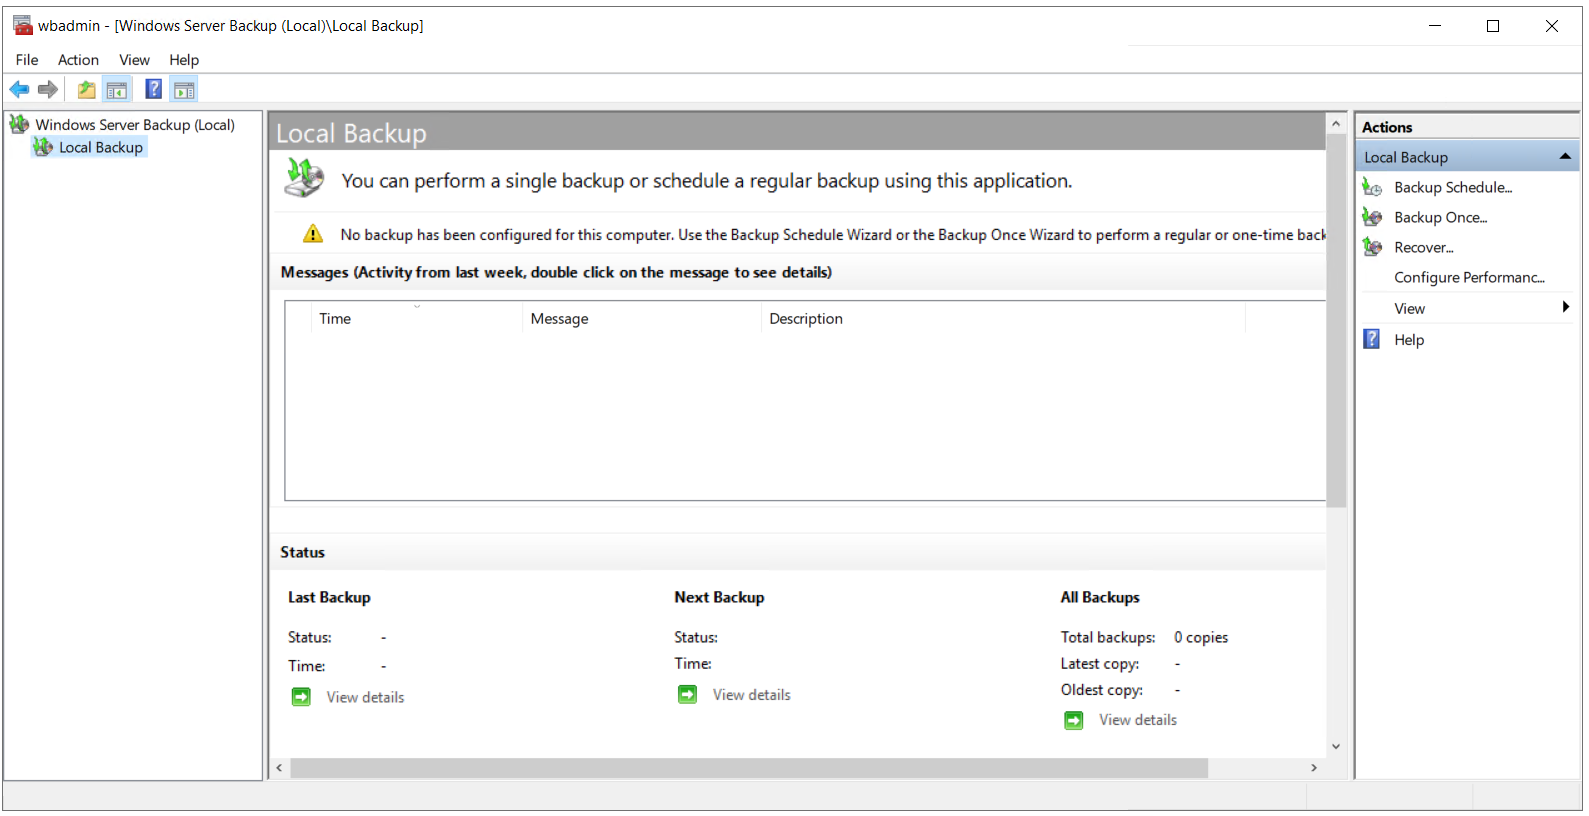
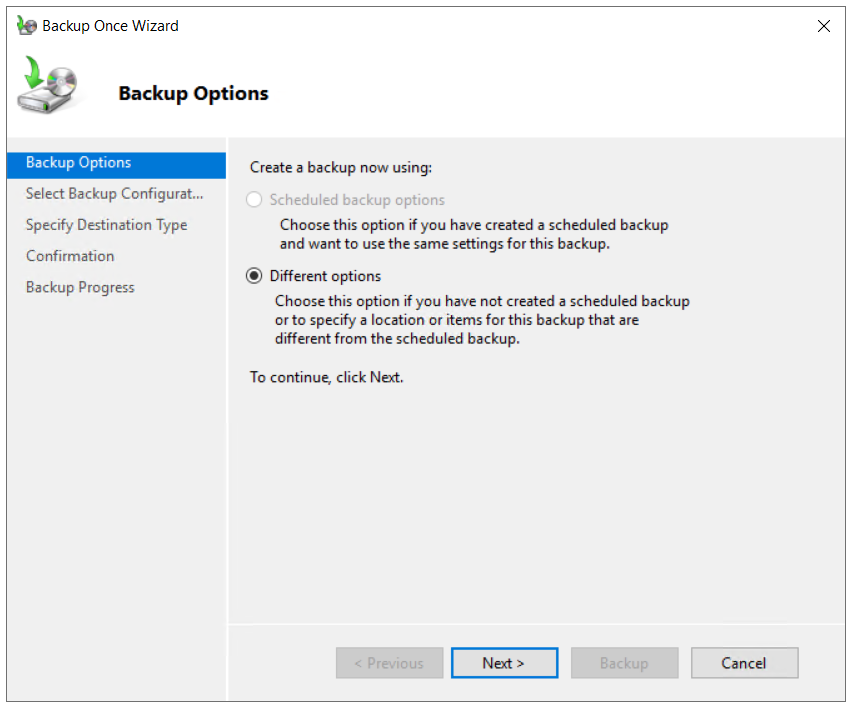
- Click on the Action tab and then choose Backup Once. You can do the same by clicking on Backup Once on the right side of the software.
- Under Backup Options select Different options and click Choose Different options if you have not created a scheduled backup or to specify a location or items for this backup that are different from the scheduled backup.
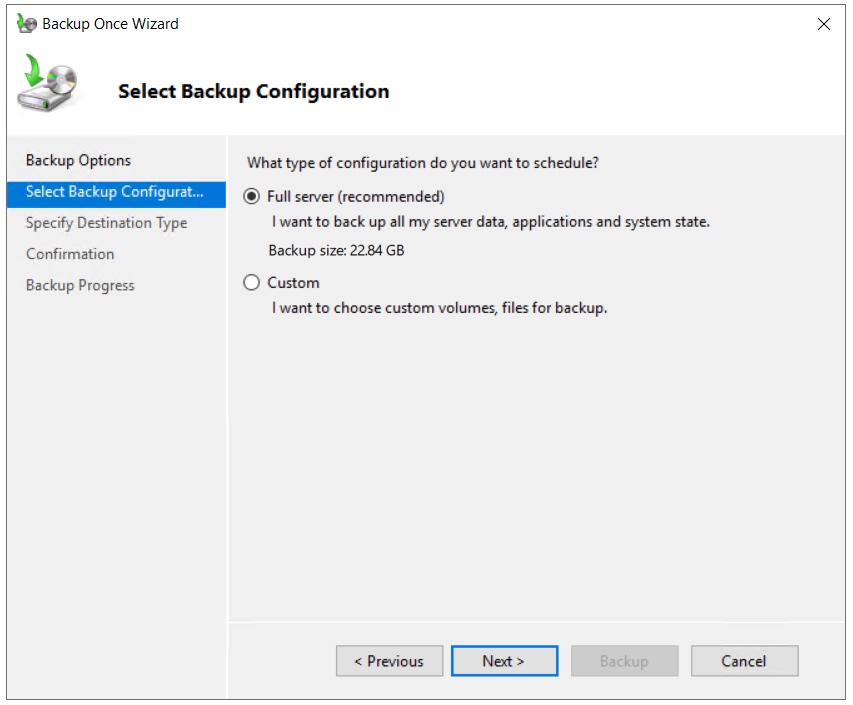
- Under Select Backup Configuration select Full server (recommended) to backup all server data, applications, and system state. Click Next.
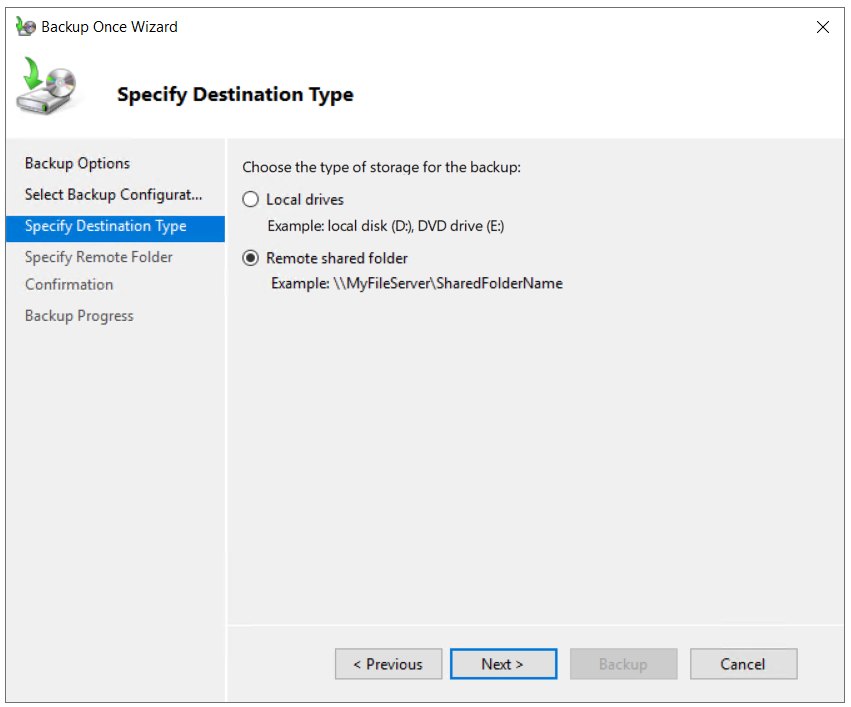
- Under Specify Destination Type select Remote shared folder and click You can not back up data to local storage if backup storage is not available. Exclude a volume from the list of volumes or back up or add another disk and then retry the operation.
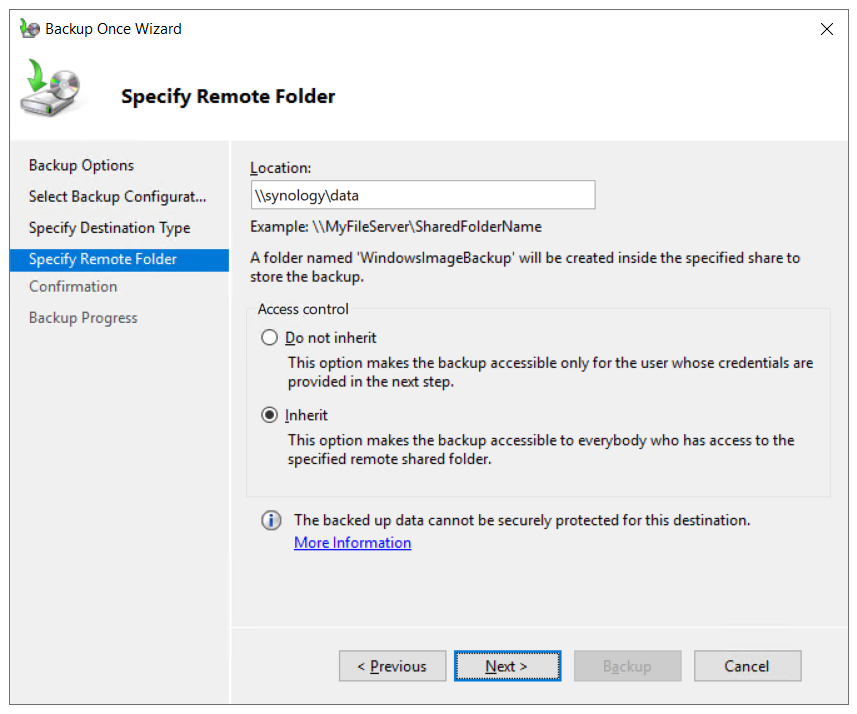
- Specify a remote location, click on Inherit, and click The inherit option makes the backup accessible to everybody who has access to the specified remote shared folder.
- Provide credentials of a user who has write access to the shared network folder.
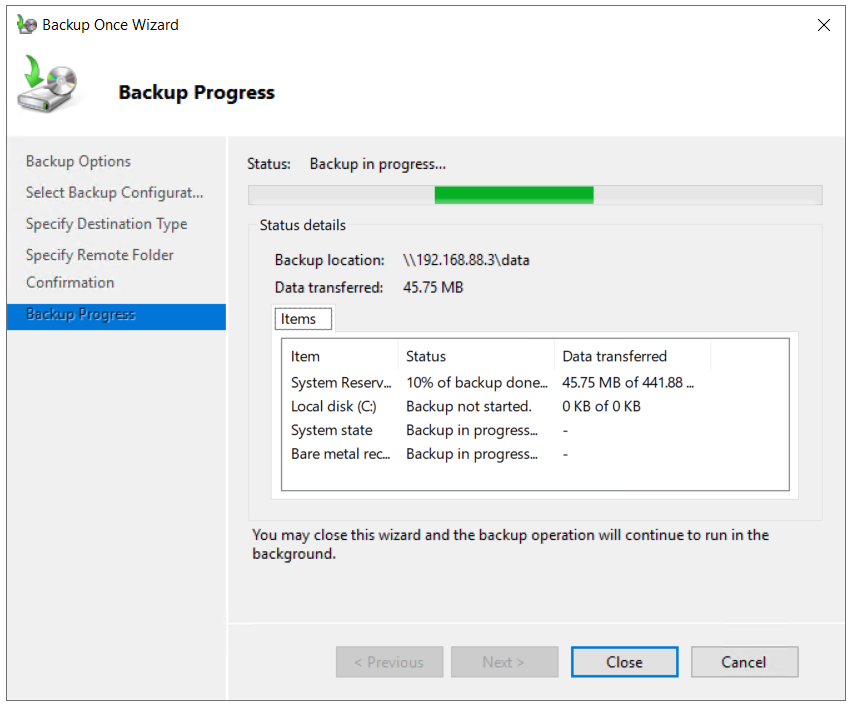
- Under Confirmation click on Backup
- Check the Backup Progress. You may close this wizard and the backup operation will continue to run in the background. You can also check it directly in the Backup tool.
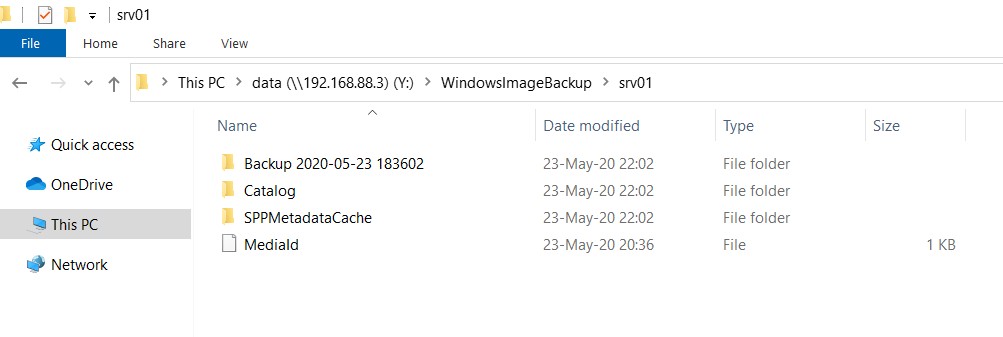
- Open File Explorer and navigate to the location where you have stored your backup. You will see a new folder called WindowsImageBackup which includes backed data.
3. Scheduling the Backup
- Open Windows Server Backup
- Click on the Action tab and then choose the Backup Schedule. You can do the same by clicking on Backup Schedule at the right side of the tool
- Under Getting Started click Next
- Under Select Backup Configuration, select Full server (recommended) to backup server data, application and system state and then click Next
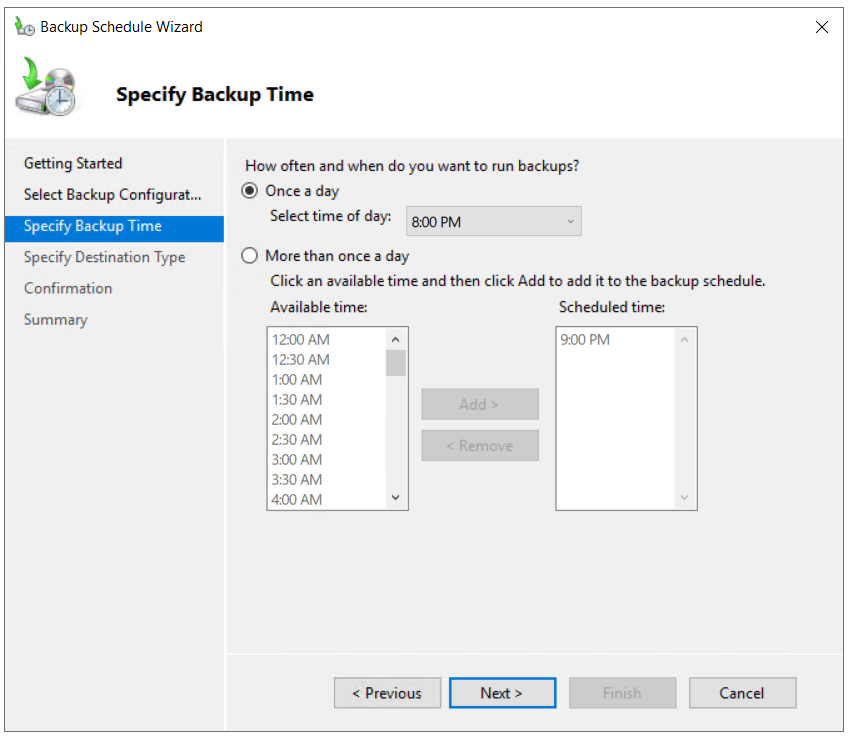
- Under Specify Backup Time configure the schedule when you want to perform full server backup and click Next. There are two options to configure, backup once a day and for more backups once a day. In our case, we will do a scheduled backup once a day at 8:00 PM.
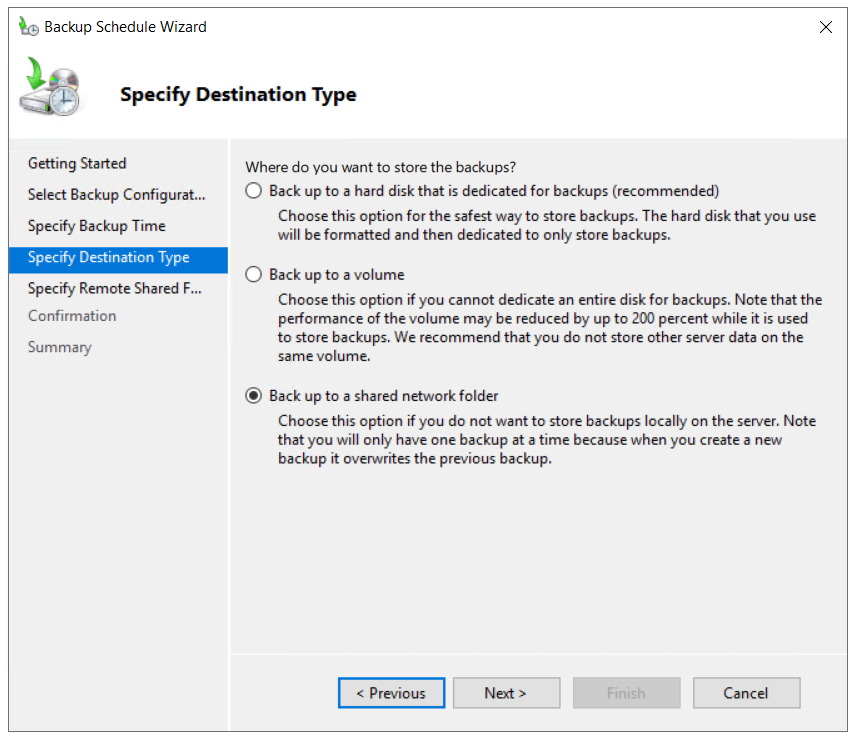
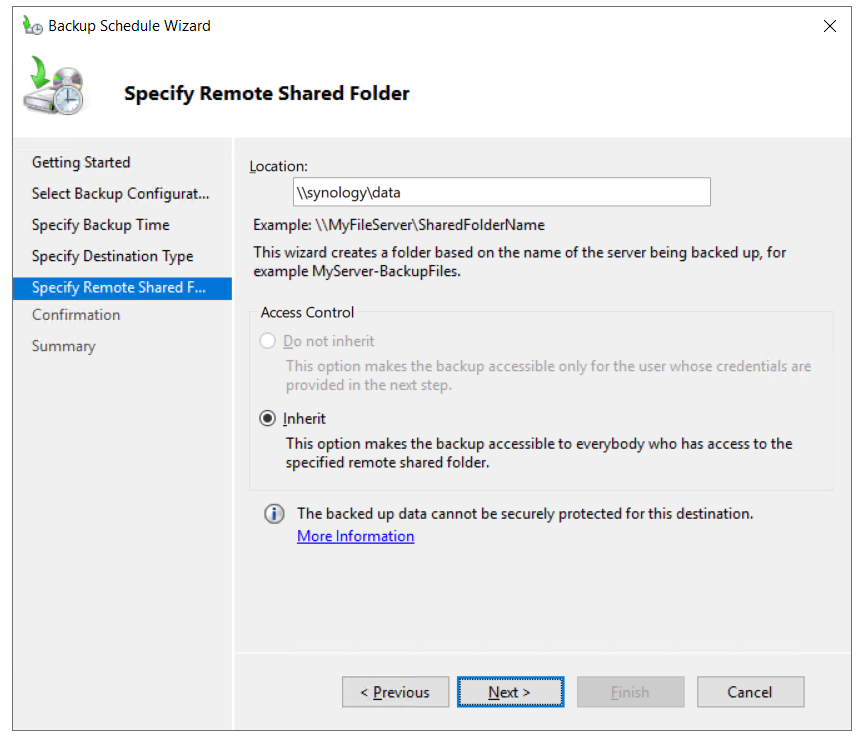
- Under Specify Destination Type choose the place you want to store the backups and click Next. As you can see in the screenshot there are three options available, back up to a hard disk that is dedicated for backups (recommended), back up to a volume, and back up to a shared network folder. In our case, we will choose Back up to a shared network folder. Please note when you use a remote shared folder as the storage destination for scheduled backups, each backup will erase the previous backup, and only the latest backup will be available.
- Under Specify Remote Shared Folder type the location, choose Inherit, and click Next.
- Register Backup Schedule by typing username and password.
- Under Confirmation click on Finish.
- Click Close to close the window.
4. Restore Backed up data
The way you should do a recovery depends on the scenario. In case you can access Windows and open Windows Server Backup, you can do it by running the Recover option as described below.
- Open Windows Server Backup
- Click on Action and then click Recover
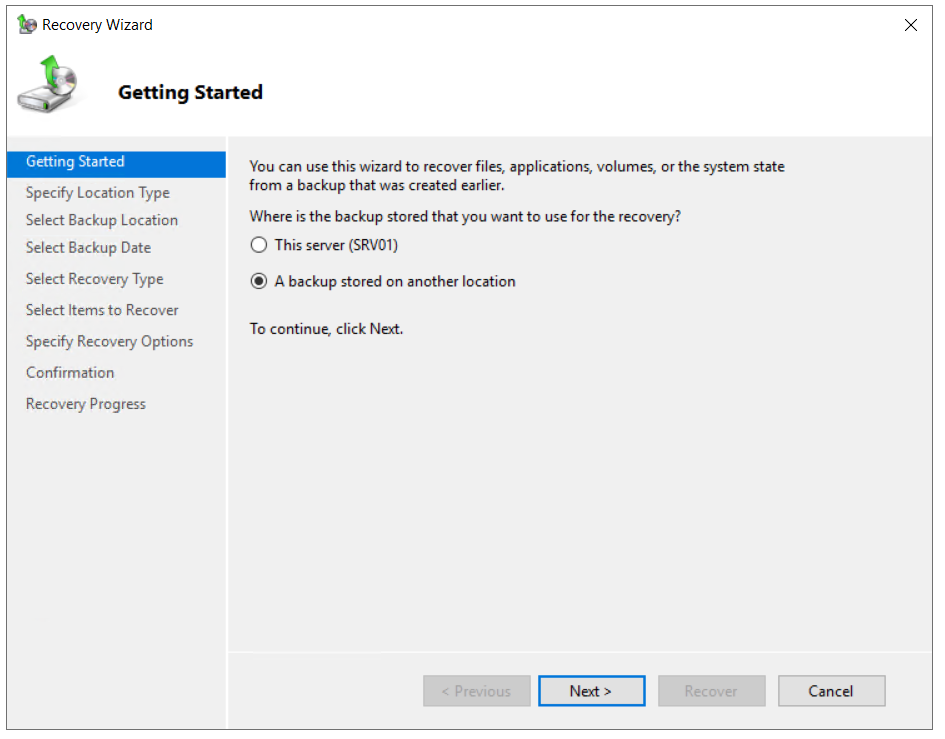
- Under Getting Started, choose the location where you have stored your backup and click Next. In our case, it is stored on a network share.
- Specify the location type by choosing a local and remote shared folder. In our case, it is a Remote shared folder.

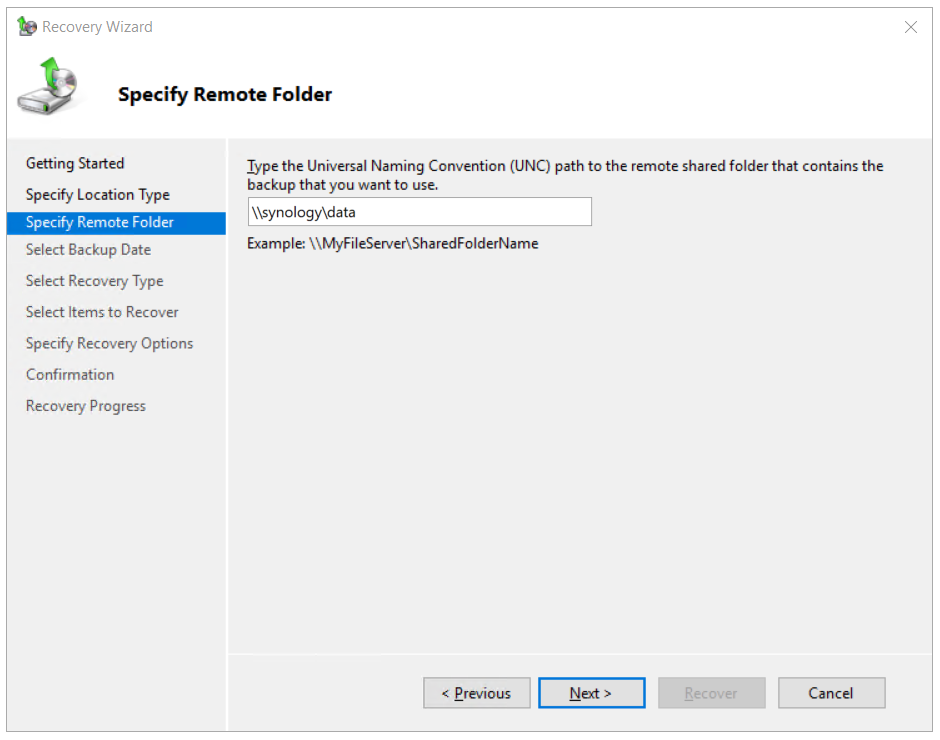
- Specify Remote Folder and click Next.
- Provide credentials of a user who has read access to the shared network folder.
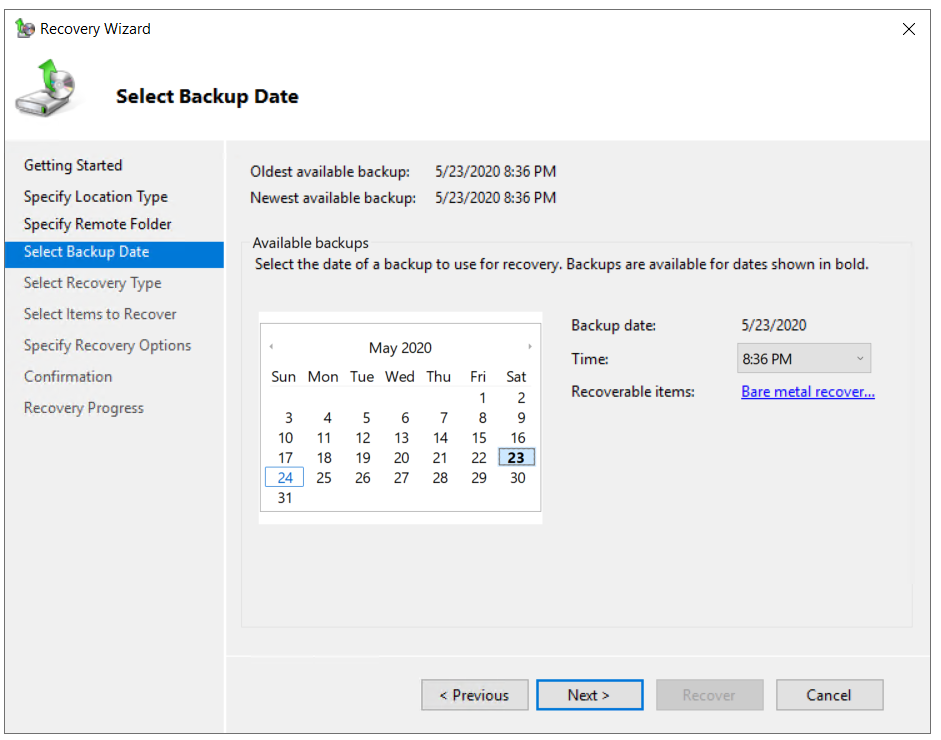
- Select the date of a backup to use for recovery. Backups are available for dates shown in bold.
- Select Recovery Type and click Next. There are five options available, Files and folders, Hyper-V, Volumes, Applications, System State. We will recover Files and storage.
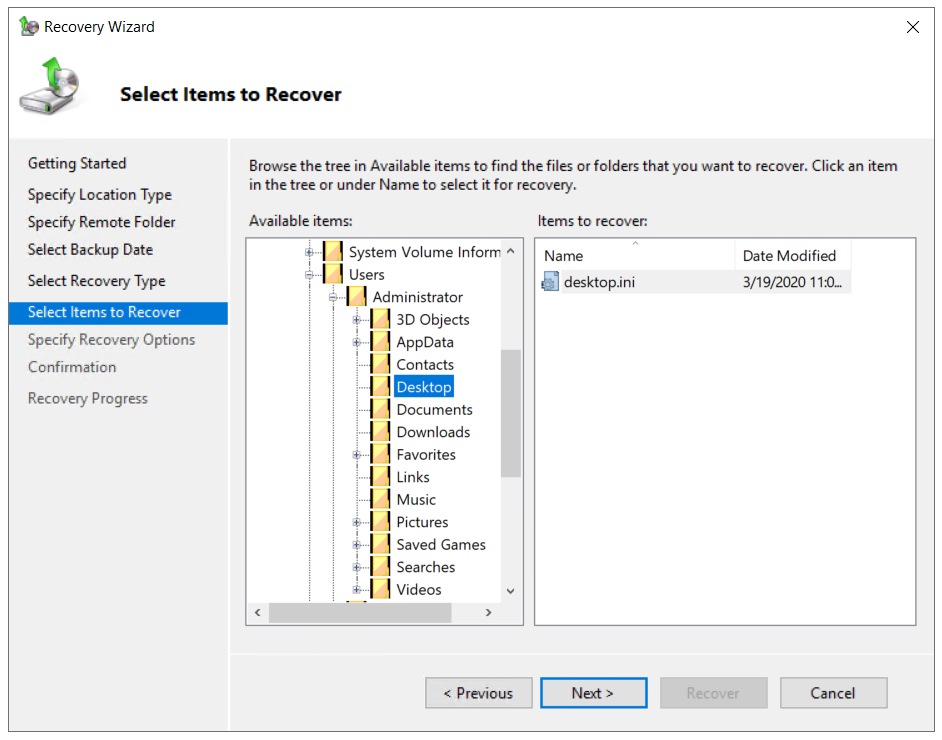
- Select Items to recover and click Next. As an example, we will recover all files from the Desktop.
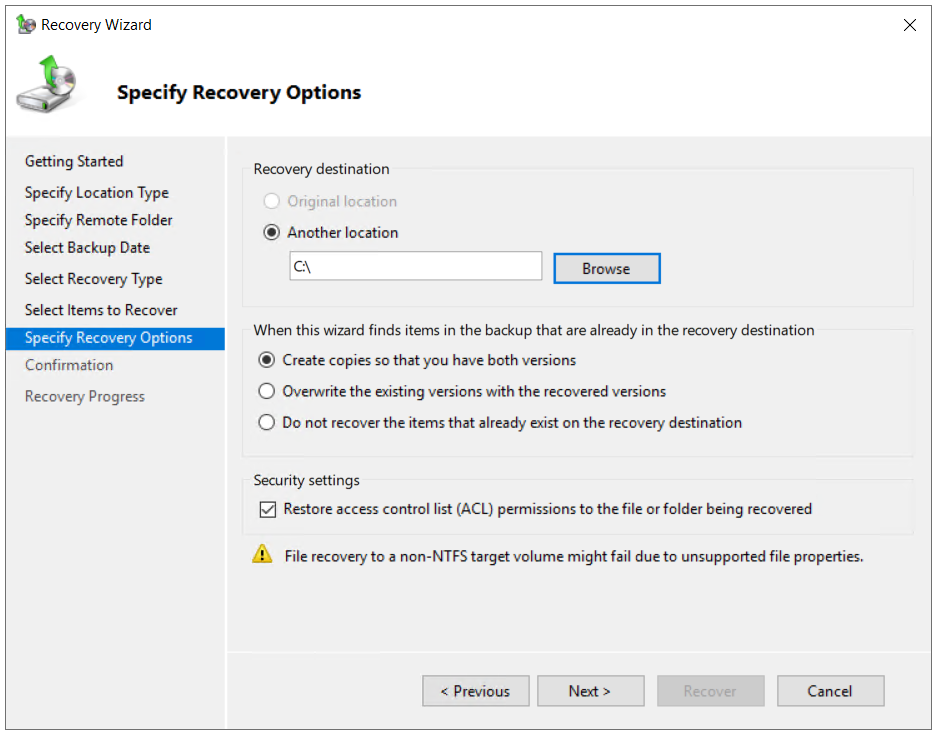
- Specify Recovery Options and choose what do you want to do with copies and click Next.
- Under Confirmation click Recover
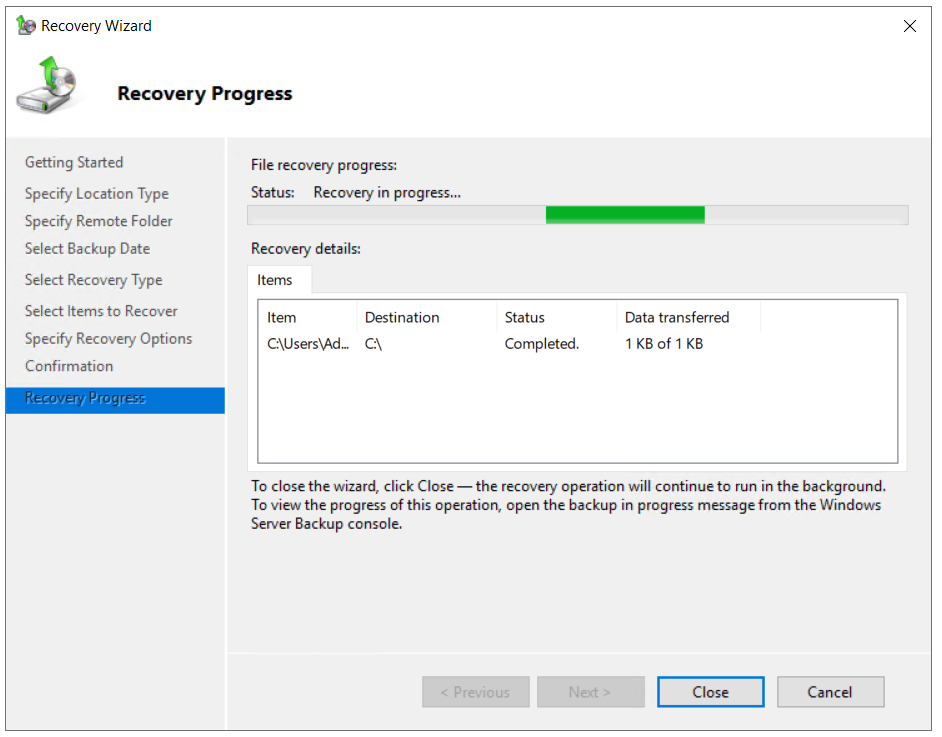
- Check the Recovery progress. Once it is finished click Close.
- Open File Explorer or navigate to the location where you have recovered your files.
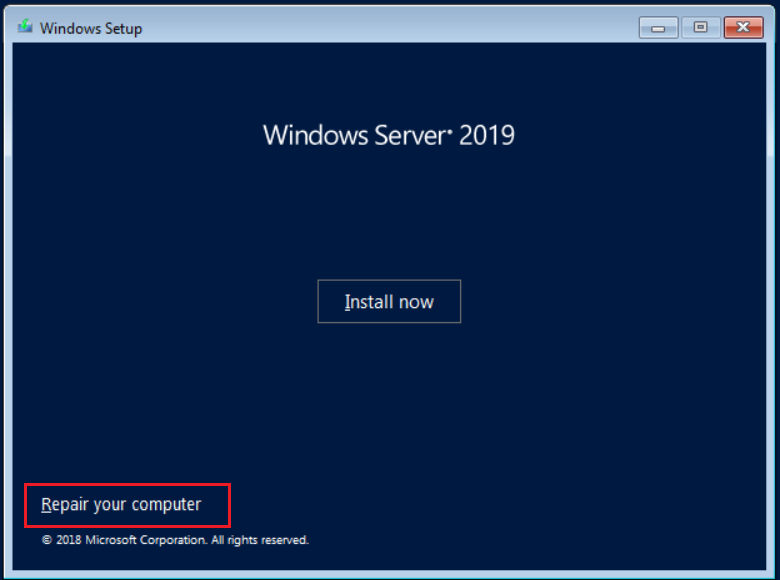
In case you are not able to start your Windows due to the issues with boot files, then you will need to run the recovery environment and start system restore.
- Insert or attach a bootable DVD or USB to the machine. The bootable drive must include the Windows image you are running on your machine. In our case, it is Windows Server 2019.
- Configure bootable options in BIOS or Hypervisor and reboot your machine.
- When you see Press any key to boot from CD or DVD, please press Enter.
- Under Windows Setup choose your language, time and currency format, keyboard, and press Next.
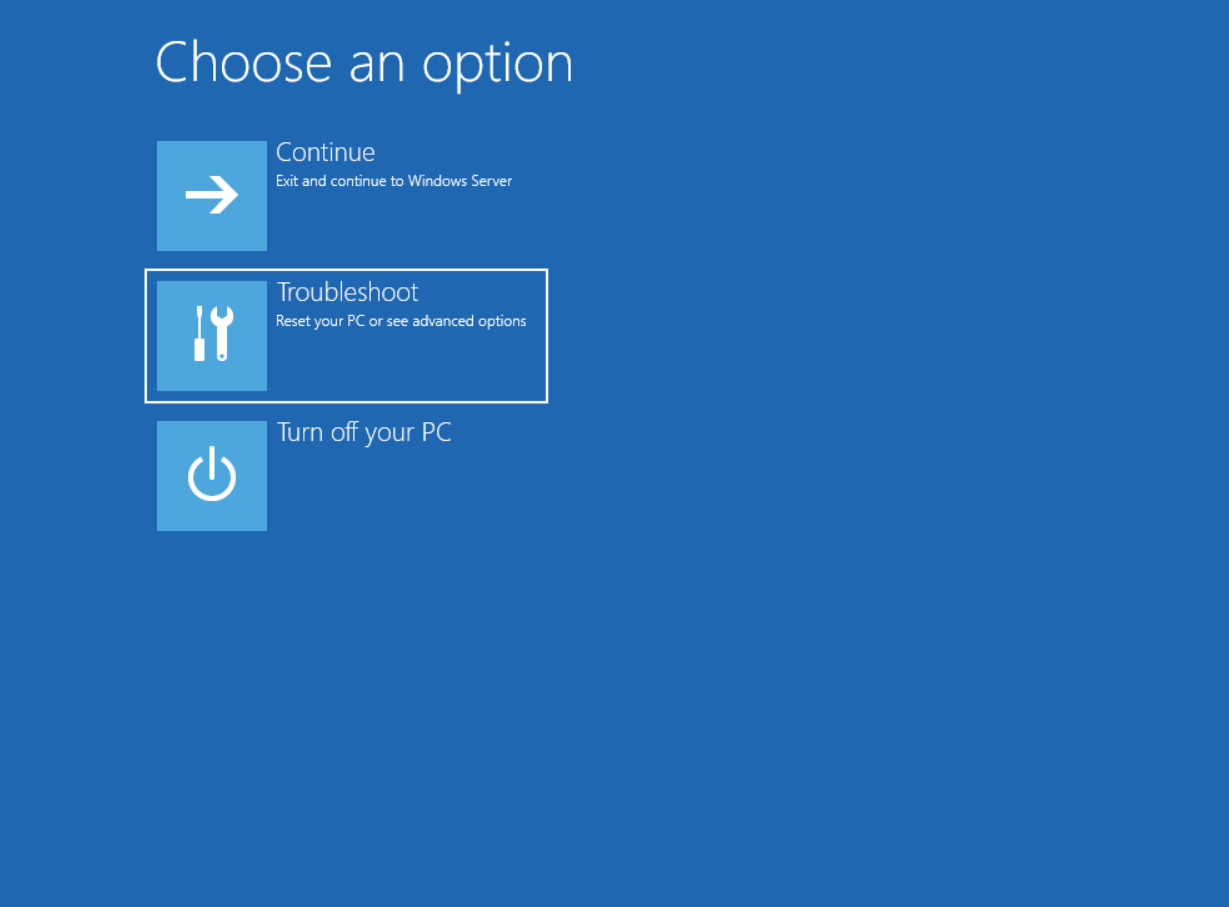
- Click on Repair your computer
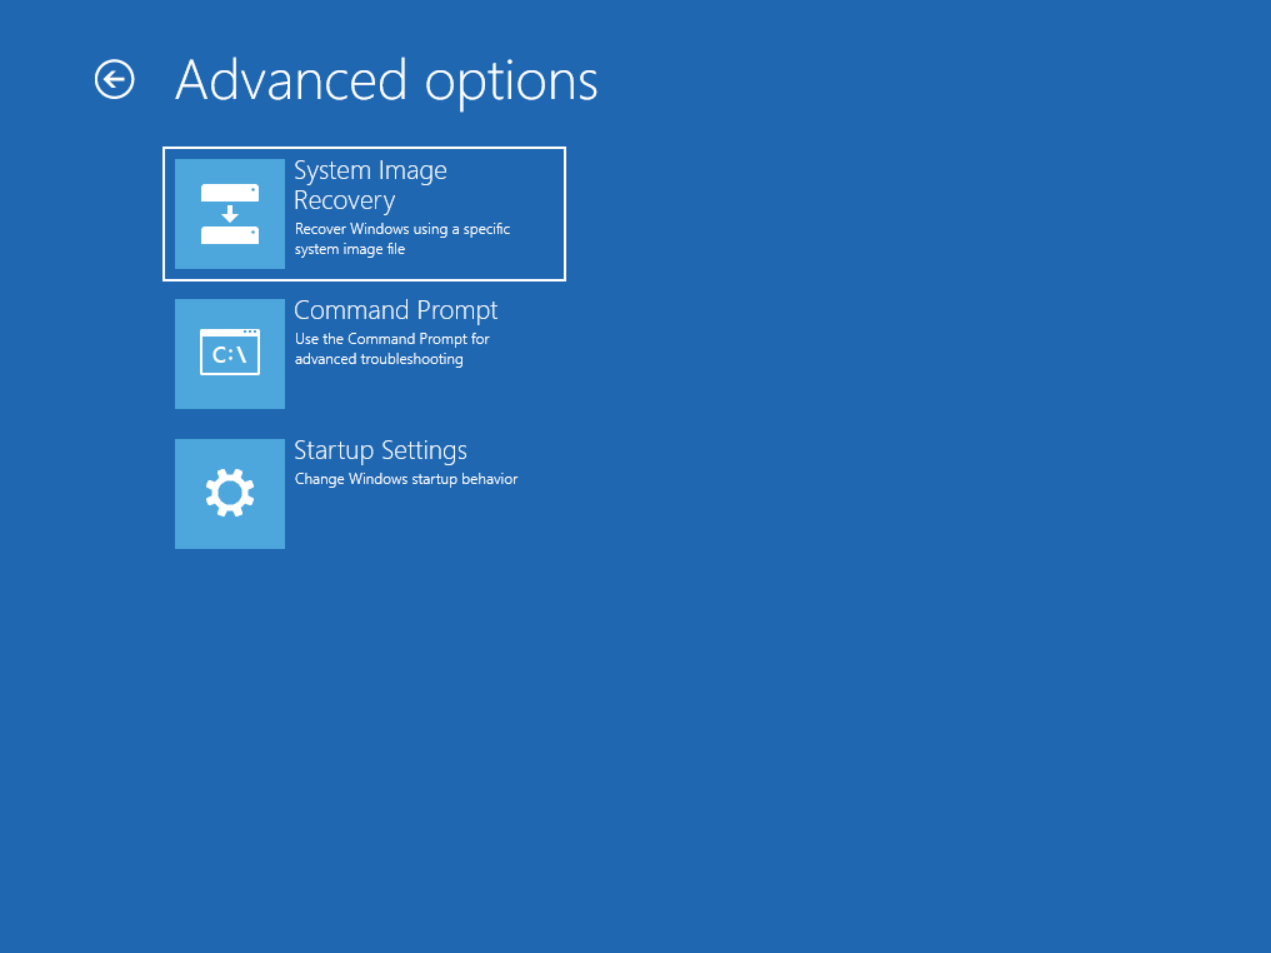
- Click on Troubleshoot
- Click on System Image Recovery
- Choose the target operating system.
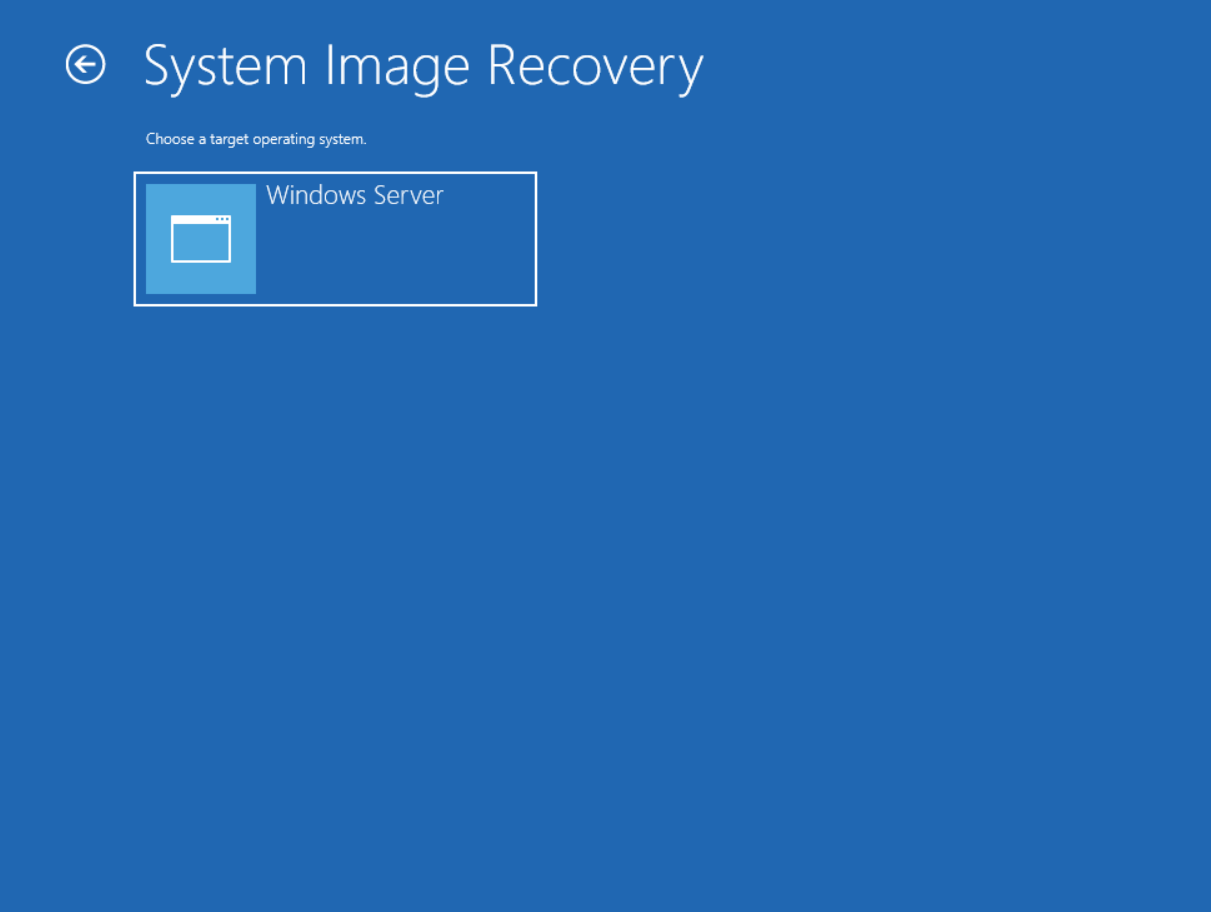
- Follow the procedure to recover Windows using a system image from your removable drive or network share.