How to Backup your Server using Solarwinds Backup?
Data is invaluable in this digital world. Long gone are the days when network and system administrators had to manually store the data without any automation. A server without data is an empty vessel and what good can an empty vessel be when you have lost all of your data? Sure, it can be used to store all of the data again but what about the data that has been lost to a misfortune? To have a backup system should be something common considering how advanced and well-established the internet has become. Yet, it is quite the opposite. Backups are often overlooked even though we are well aware of the possibilities and risks and the data that is at stake, yet we simply hope for the ordeal not to fall upon us.
If your servers go down due to a hardware failure or any other issue and you end up losing all of your data, rebuilding the database from scratch would be a nightmare. Not to mention the factor that greater the downtime is, greater the loss to suffer. A few simple actions can save you from this misfortune i.e. to keep an updated backup of your servers. When you have your servers backed up, the fear of losing your data will disappear for good. Solarwinds, an American company that excels in developing network and system management tools, offers a product to help you save your data locally along with a cloud backup feature known as Backup. In this article, we will be showing you how to utilize the tool in saving a backup of your server.
Getting the Solarwinds Backup Tool
Before you can back up your server, you will have to get the Backup tool from the SolarWinds website. Head to this link and provide the required information to start your free trial for evaluation. An email will be sent to you with a link using which you will be able to access the Solarwinds Backup dashboard. Open up the link and create an account. Once you have created an account, you will be taken to the SolarWinds Backup dashboard using which you will be able to backup your data.
Adding a Device
After you have access to the Backup dashboard, you will have to add a device using the ‘Add Wizard’. Once you have done that, you will be able to backup your data. Here’s how to do it:
- On the Backup Dashboard, click on Add a device.
- Click on Servers or Workstations.
- Select the Customer account and then select the type of installation per your operating system. For the sake of the article, we will be choosing Regular.
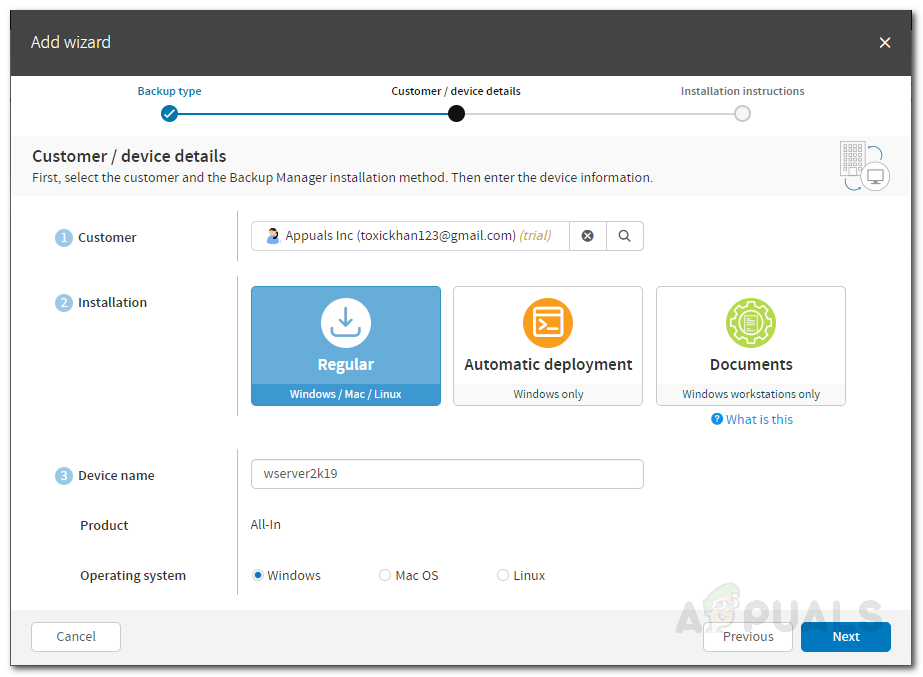
Adding a Device - Provide a device name, choose your operating system and then click Next.
- Now, if you wish to send an email of the instructions (including your device name and password) click on Email Instructions. Otherwise, you can just write it down and be good to go.
- Download the Backup Manager using the link provided.
Backing up your Data
Once you have downloaded the Backup Manager on the system that you want to backup, it is time to set it up and start backing up your data. Here’s how to do it:
- Run the Backup Manager once it has finished downloading.
- You will be prompted to a web browser where you will be able to schedule backups.
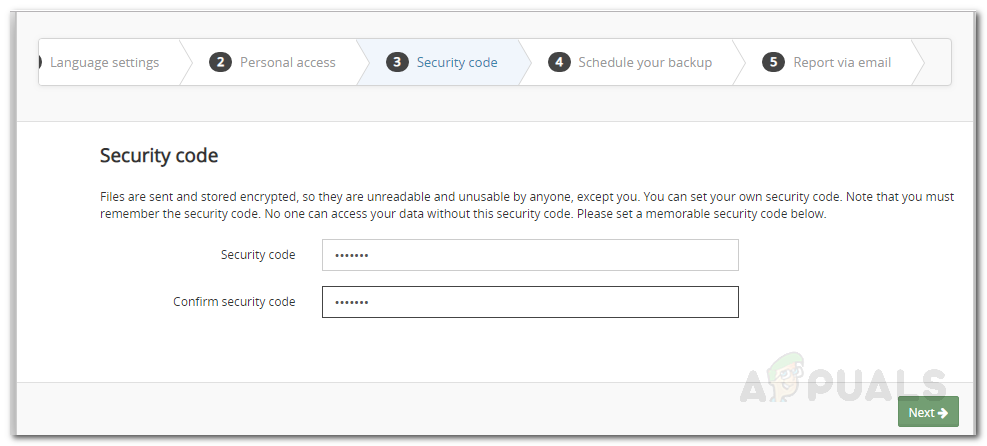
- Choose your language and click Next.

Backup Manager Installation - Now, enter the device name and password that were provided to you and click Next.
- After that, provide a security code which will be your encryption key. If you lose this code, you will not be able to access your data.
Backup Manager Installation - Select a time of your desire for the daily backup.
- Click Next.
- Provide an email where you will receive notifications about the backups and click Next.
- Wait for the backup service to be initialized.
- Once the service has started, you will be prompted to a backup tab. Here, you can choose all the files and folders that you want to backup.
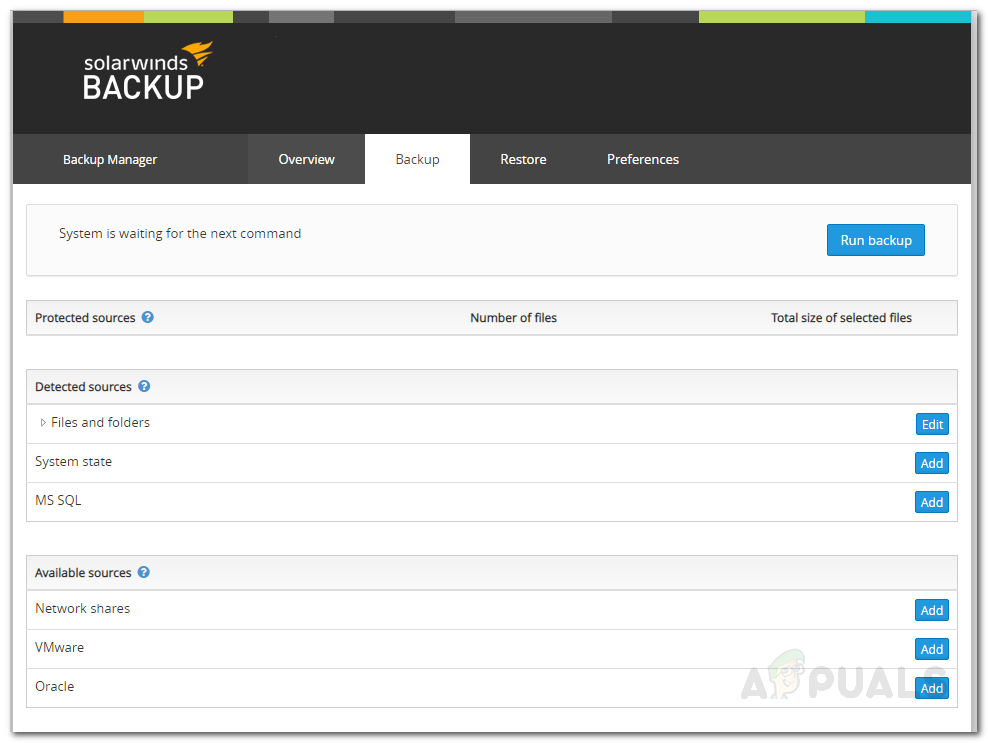
Choosing Backup Data - After you have selected all your data, click Run Backup. Wait for the backup process to complete.
Scheduling a Backup
If you wish, you can schedule a backup so that the Manager will automatically back up the files and folder without you manually having to run the backup each time. To do this, follow the instructions below:
- On the Backup Manager, go to the Preferences tab.
- Switch to the Schedule pane. Here, you will be able to save a schedule for automatic backups.
- Give the schedule a name, select a time at which you would the backup to run and specify the days to run the backup.
- Remove the data source you don’t to backup.
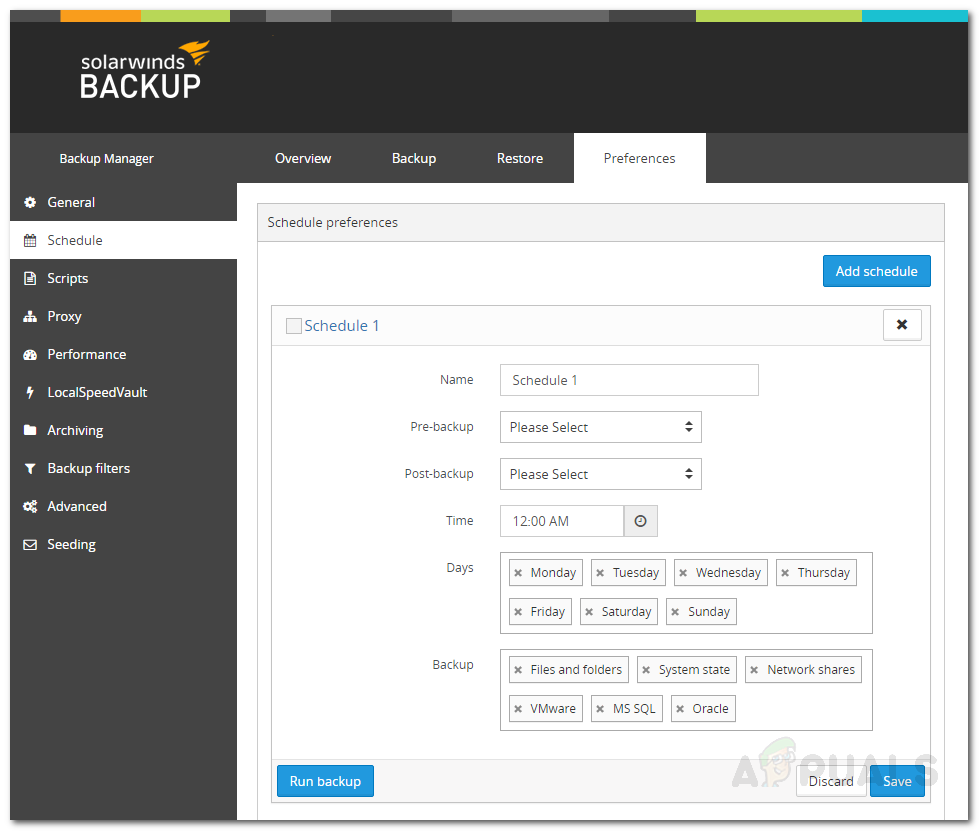
Scheduling Backup - The files and folders that you have selected on the Backup for the specific data source type will be automatically backed up.
- Click Save.
- If you wish to add another schedule, just click Add Schedule.
Restoring Data
Now that you have set up regular backups on your server, you can restore the data anytime you want. If you wish to restore the data on a different device, simply install the Backup Manager on that device and then follow the instructions given down below:
- On the Backup Manager, go to the Restore tab.
- Select the date and time of the backup. Also, select the files and folders you want to restore.
- After that, click on ‘Restore to new location’. Select a location where you wish to restore the data by clicking Browse.
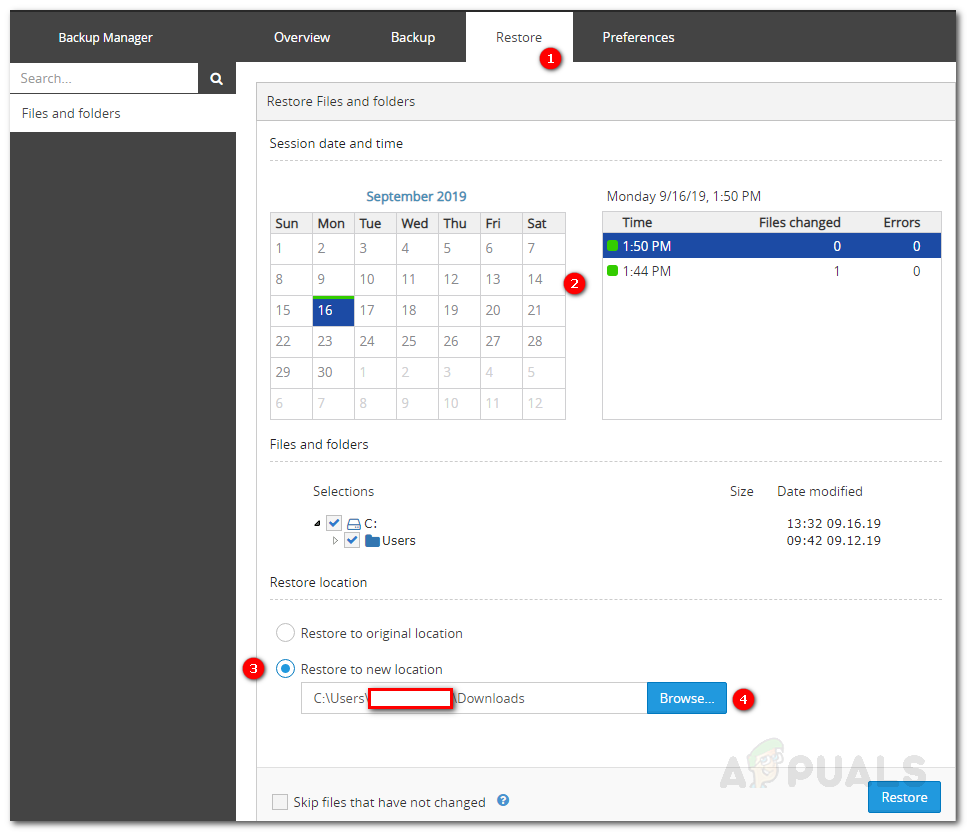
Restoring Data - Once done, click Restore.
- The restoring process will start. Wait for it to finish and you will have all of your data.