How to Track and Manage the IP Addresses on your Network using IP Address Manager
We know that computer networks are becoming more and more popular with the rapid growth in online trading or e-commerce. Even it is just providing information about something, monitoring the traffic on your network is important. Every device has a specific IP address assigned to it. This helps you keep logs on the user experience and activities, the devices that are currently connected to your network and most importantly, it enables you to improve your website’s security. Doing this used to be an ordeal but now, thanks to the modern tools, it can be done via a few clicks.
In this article, we will be showing you how you can track and manage the IP addresses on your network using a tool called IP Address Manager. The tool is developed by Solarwinds Inc which is an American company that provides network and system management services and develops just the right tools for it to be done by its users. So, let us get started.
Installation
First of all, you will have to download the tool from Solarwinds’ website. You can do so by clicking here and then hitting the ‘Download Free Trial’ button. You can try the tool for free for 30 days and use it to your needs. IP Address Manager is a premium tool that you can utilize to track the IP addresses on your network, manage the devices connected to your network and prevent errors from disrupting your network. To install the tool, follow the steps given below:
- Download the tool from the given link.
- Make your way to the downloaded file and run it. Once you run it, wait for it to extract the required files and start the installation wizard.
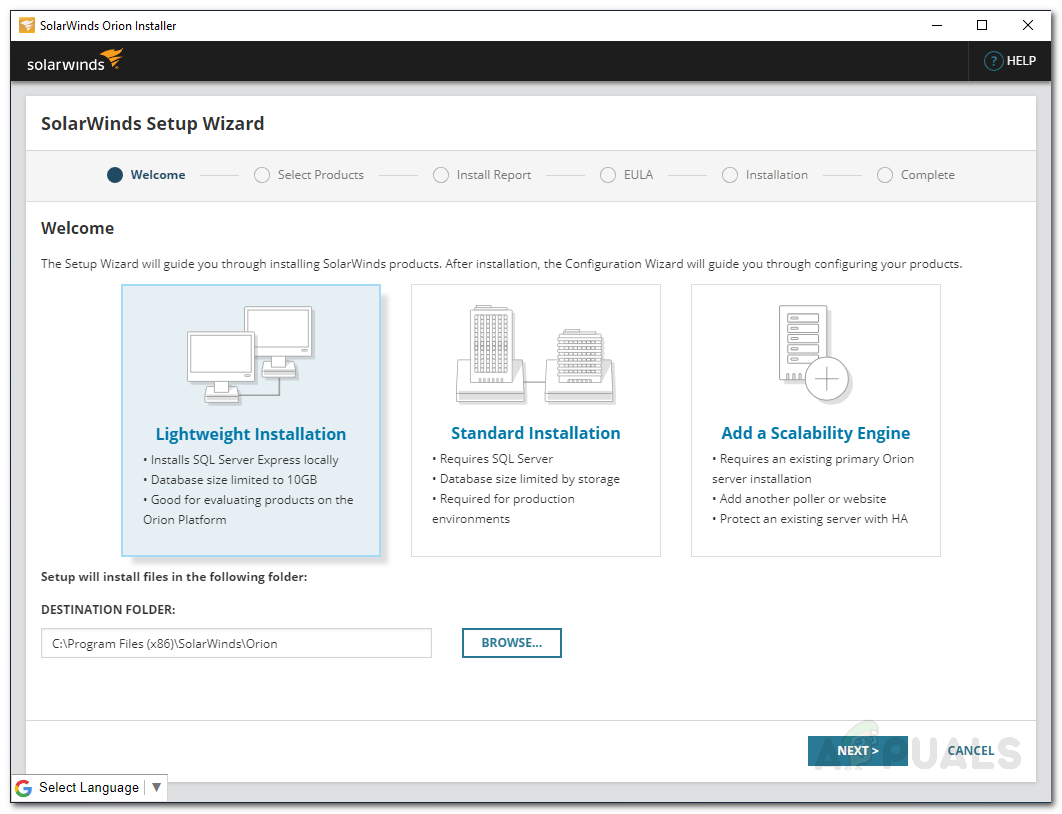
- Once the setup loads up, on the first prompt, choose Lightweight Installation. You can also change the installation directory by clicking Browse.
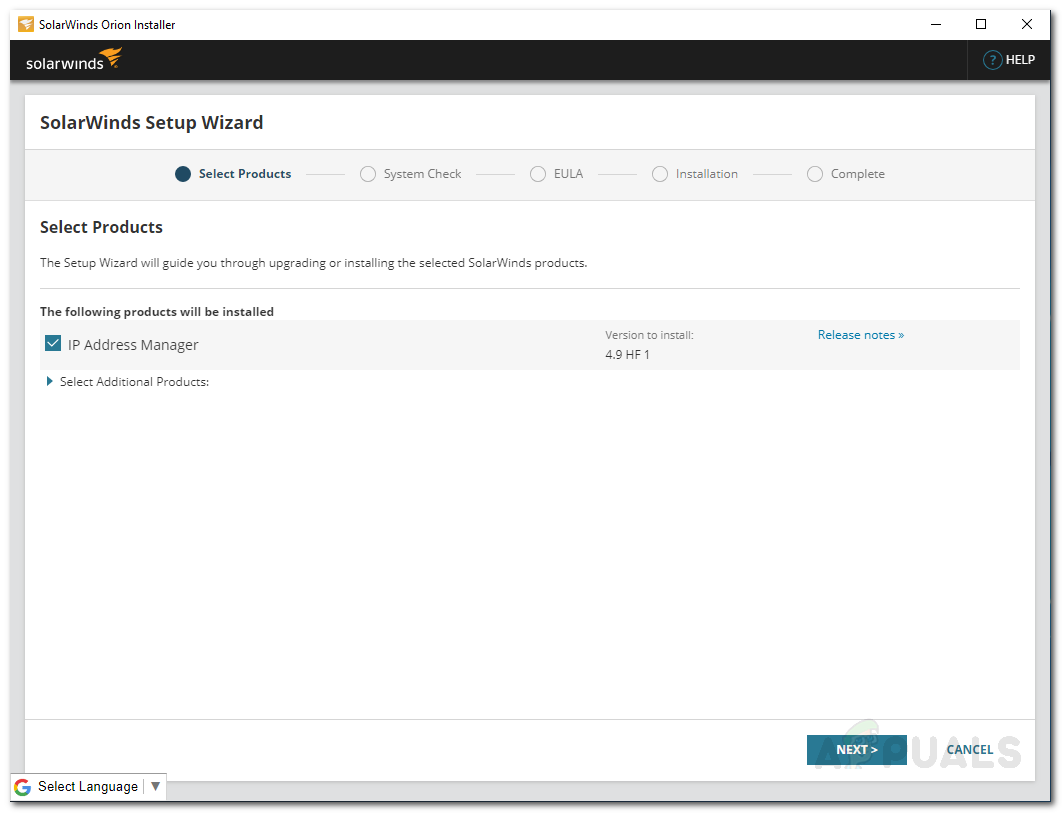
Orion Installation - On the Select Product page, make sure the IP Address Manager is selected and click Next.
IPAM Installation - Accept the license terms and click Next again.
- Orion Installer will start installing the tool, wait for it to finish.
- Once the installation has finished, the Configuration Wizard will open up automatically.
- Wait for it to finish. This might take a while, so be patient.
- Once the configuration wizard has completed, click Finish.
Discovering Network Devices
Now that you have successfully finished the installation process of IP Address Manager, it is time we get into the real stuff and start discovering our network devices. Solarwinds has a web user-interface known as Orion Web Console using which you can interact with IPAM and manage your network. Once you click the Finish button on the configuration wizard, the Orion web console will automatically open up in your browser. In case, it does not, you can just access by typing YourIPAddress:Port or Hostname:Port. The port, by default, is 8787. Or, you can just simply type localhost:8787 and you will be able to access the web console.
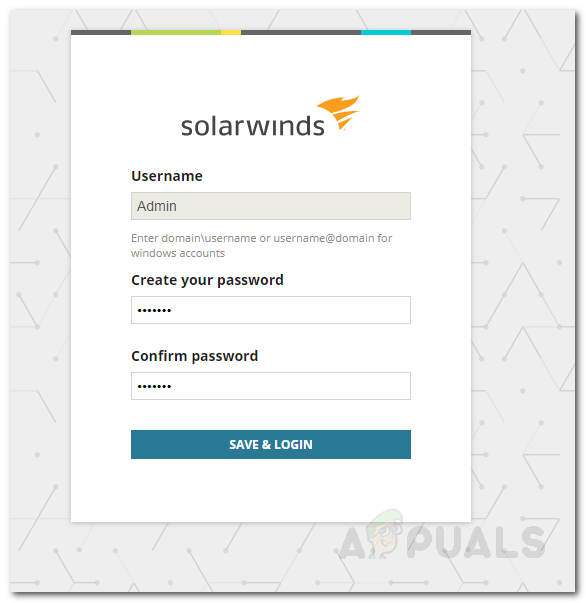
- Once you open up the web console, it’ll ask you to create a password for the admin account. Provide a password and click Save & Login.
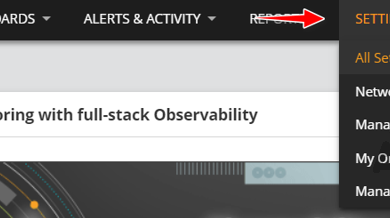
Orion Web Console - Now, you will be taken to the Discovery page automatically. If you are not prompted to the Network Sonar Discovery page, you can access it by going to Settings > Network Discovery. Click Start.
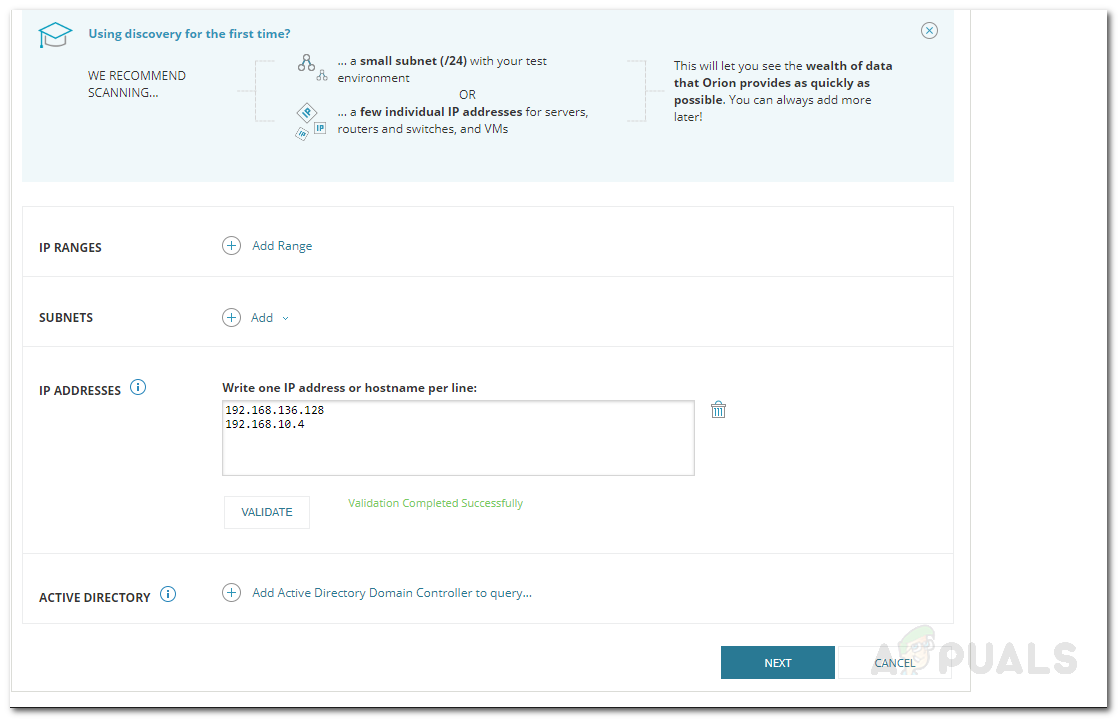
- There are four ways you can discover your network — by providing an IP range, providing a subnet, providing IP addresses or using the Active Directory Controller. Just click on Add and provide the required fields.
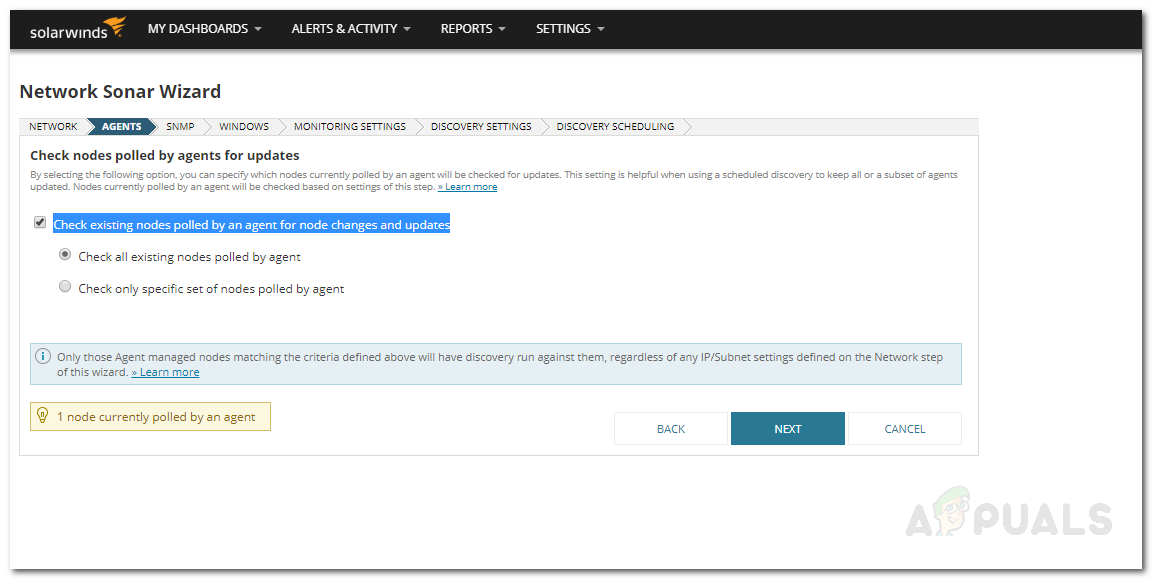
Network Discovery - On the Agent page, click the ‘Check existing nodes polled by an agent for node changes and updates’ option and click Next.
Network Discovery Wizard - Now, on the SNMP page, click on the ‘Add New Credential’ option if your network devices use community strings other than public or private. You can also use SNMPv3 by providing the required information. Click Next.
- On the Windows page, if you wish to discover Windows devices that do not support SNMP, click Add New Credential and provide the required fields. Click Next.
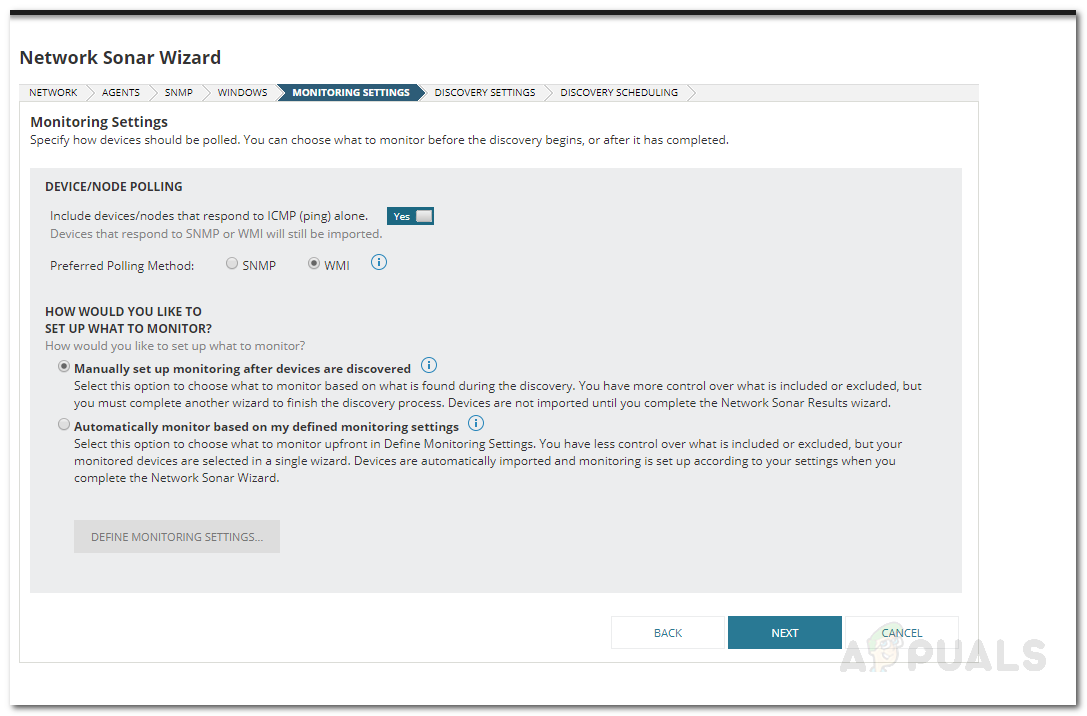
- On Monitoring Settings, choose WMI as polling method if you are discovering Windows devices. Choosing WMI does not mean SNMP will not be used, the tool will just prioritize WMI first and then SNMP. Leave ‘Manually set up monitoring after devices are discovered’ selected and click Next.
Monitoring Settings - When prompted to the Discovery Settings page, just use the default values and click Next.
- You can select the frequency of discovery on the Discovery Scheduling page.
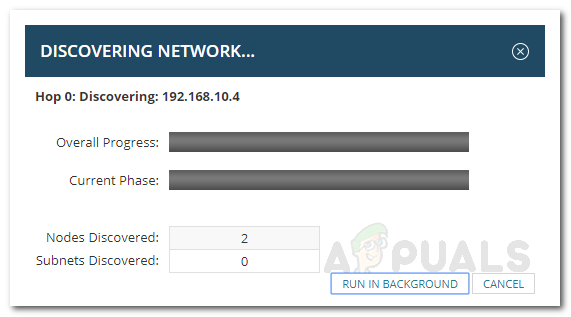
- Finally, click Discover. Wait for it to finish.
Discovering Network
Adding Discovered Devices
Once the search has finished, it is time to add the discovered devices to the IP Address Manager. Here’s how to do it:
- Once the discovery has finished, you will be taken to the Network Sonar Result Wizard. Select the devices you want to import and click Next.

Discovery Results - Select the Volume types to import.
- After that, preview the devices you want to import. Once you are satisfied, click Import.
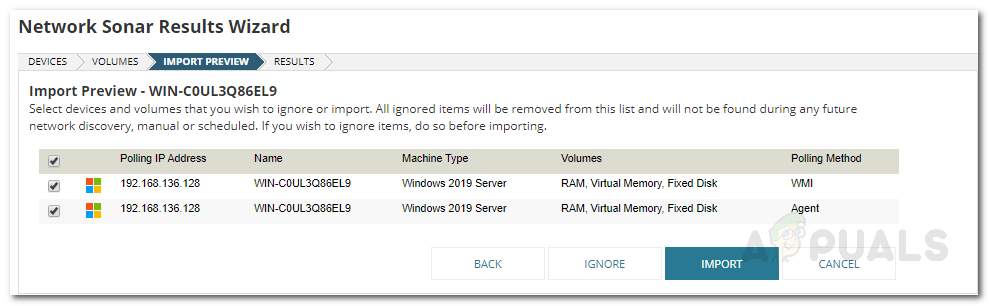
Import Preview - It will start importing, wait for it to finish and click Finish on the Results page.
Importing IP Addresses from a Spreadsheet
You can also import IP addresses to the tool using an excel spreadsheet. Here’s how:
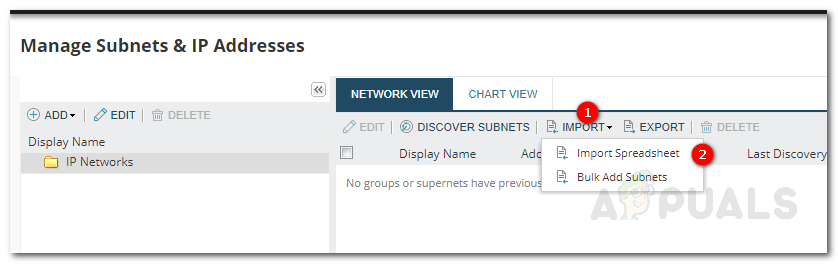
- Go to My Dashboard > IP Addresses > Manage Subnets and IP Addresses.
- Click on Import > Import Spreadsheet.
- Read the ‘Preparing to import a spreadsheet’ page and then click Next.
- Select the file by clicking Browse. Once done, click Next.
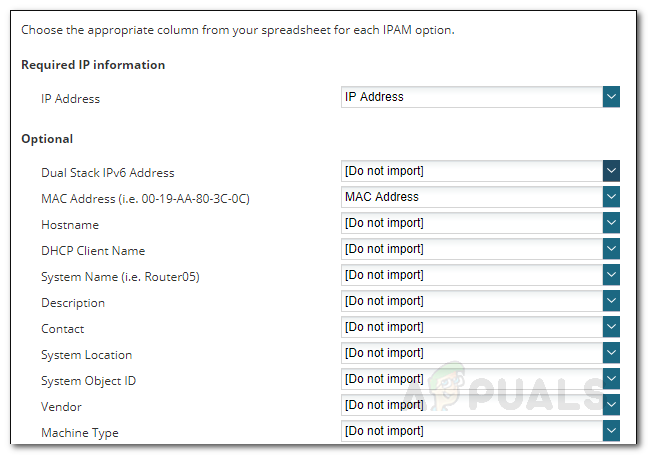
- IP Address Manager detects the columns in your spreadsheet file and then prompts you whether you want to import additional information. Only the fields in IPAM, if present in your spreadsheet, is detected. Once you are done, click Next.
Importing IP Addresses using Spreadsheet - Now, you can also add Subnet columns on the Subnet matching page. You will have to tell IPAM what to do by choosing one of the options provided. Click Next.
- The spreadsheet is now displayed, if there are any problems, they are displayed in red color. You will have to rectify them and then import again. If you wish to add a custom column, click on the Add Custom Property button. Select the type and then hit Save.
- Click Next and then hit Import.
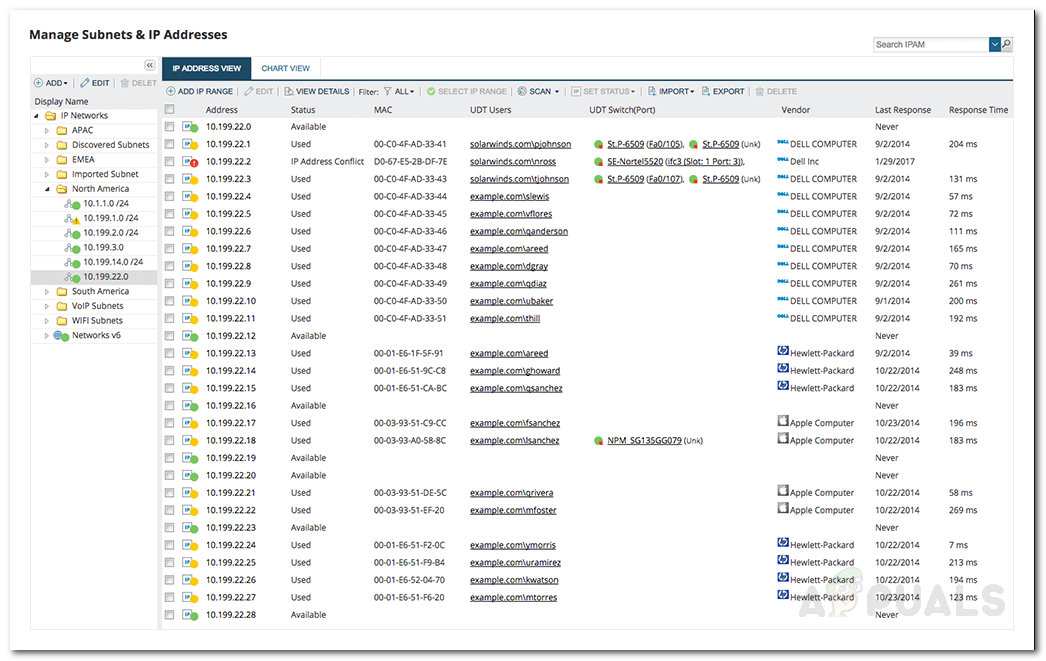
Track and Manage the IP Addresses
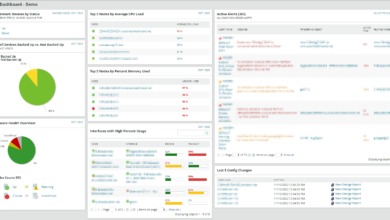
Now that you are done with discovering networks and adding IP addresses or subnets from a spreadsheet, it is time you start tracking and managing your IP addresses. To do so, just go to My Dashboard > IPAM Summary. The networks and IP addresses will be displayed there.