How to Monitor Performance of Hyper-V Virtual Machines?
 Reviewed by Jasmin Kahriman
Virtual infrastructures are becoming a lot more common these days. All of that is thanks to the great invention of virtualization. Virtual machines are used in almost every network now. To the point where we have whole networks virtually instead of establishing one physical due to numerous reasons. While virtual machines are really helpful as you can easily manage them as compared to having physical hardware which consumes way more time, there is a crucial aspect that shouldn’t be overlooked when it comes down to virtual machines or any network for that matter. Overlooking this can turn out to be drastic for you especially in this competitive era — monitoring and managing your virtual machines.

As it turns out, in order to be able to run your network efficiently and avoid any issues that may otherwise end up causing a lot of issues, monitoring your network really takes precedence. When you have the right tools in place that monitor your network for you, it enables you to resolve issues before that even have a greater impact and as a result your network performance remains optimal. In order to monitor your Hyper-V virtual machines, we will be using the Virtualization Manager which in addition to monitoring lets you manage your virtual servers as well. So, without further ado, let us get started.
Installing Virtualization Manager
To start off, we will first have to download and install the Virtualization Manager on the computer. Developed by SolarWinds, a company that requires no introduction to system and network administrators, Virtualization Manager is really the best virtualization monitoring and management tool. To download the tool, head to this link and download the product by clicking the option provided. You can also choose to go with a trial period of the product which lasts for 30 days during which you are able to fully utilize the tool. Follow the instructions down below to install Virtualization Manager:
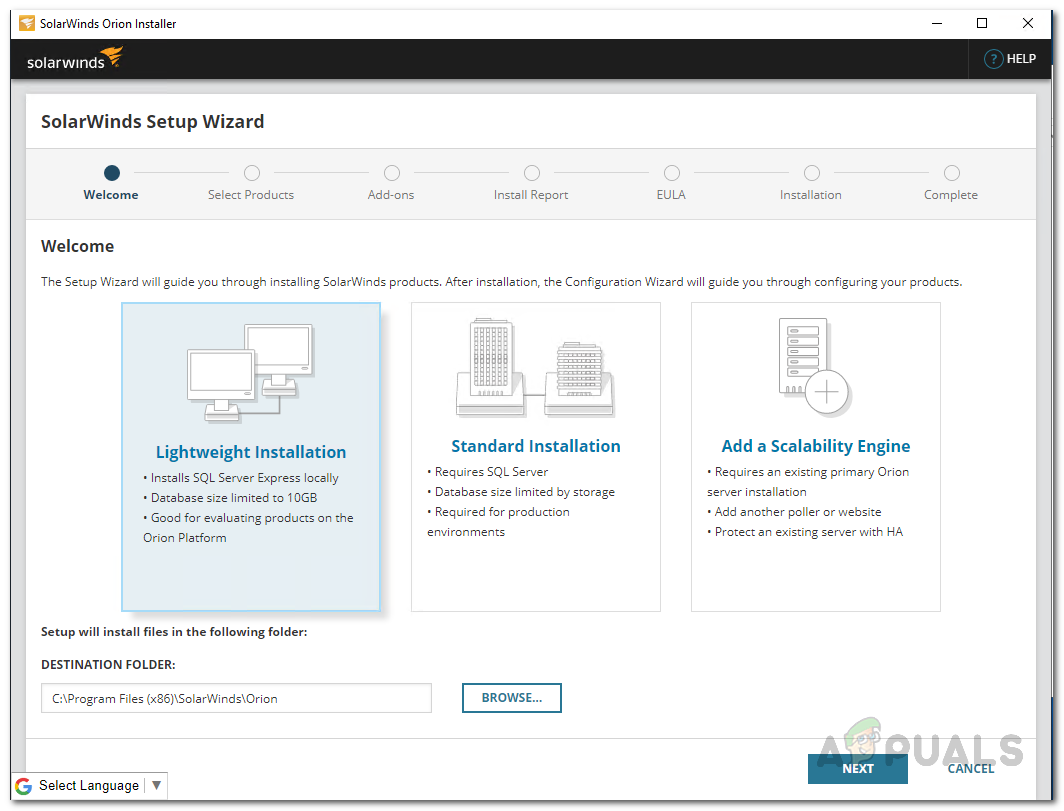
- First of all, go ahead and download the tool from the link provided above. Once you do that, you will have the Orion Installer file on your computer. Go ahead and run the installer.
- As the Orion Installer starts up, you will be asked to choose the type of installation you want. You can go with the Lightweight Installation option if you wish to try the tool for evaluation purposes or the Standard Installation where you will have to use your own SQL Server. In addition, you can also change the destination of the tool via the Browse button provided. Click Next.
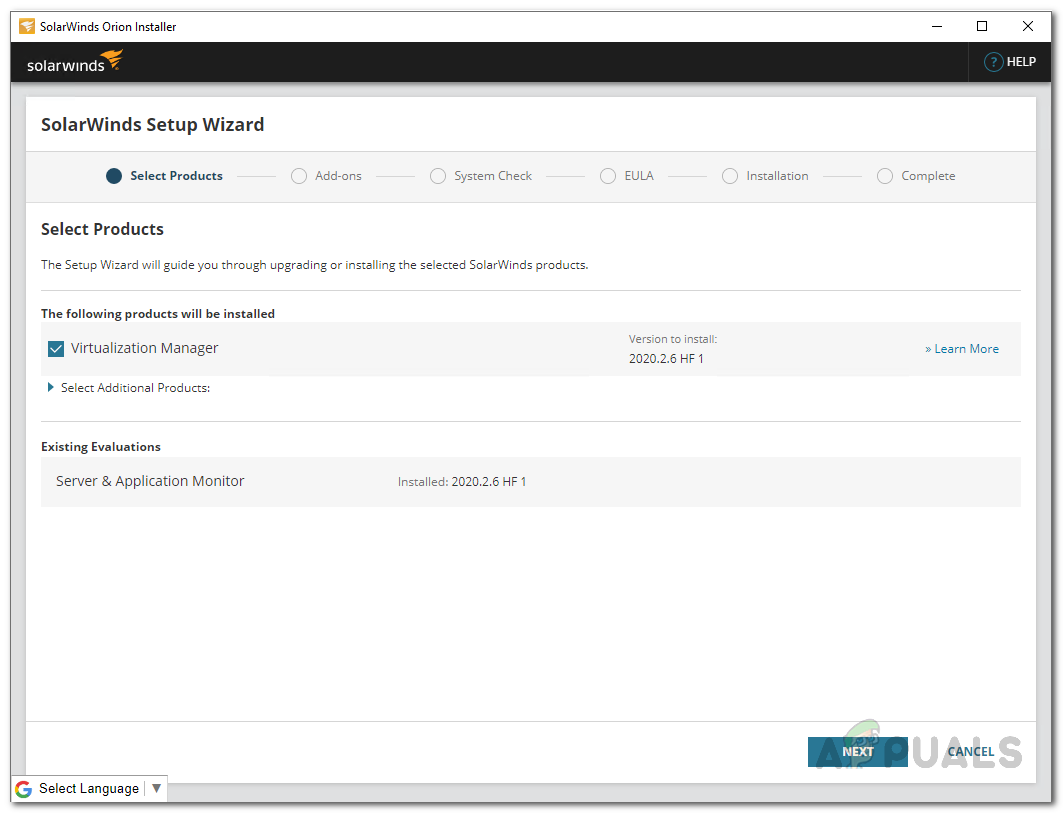
Choosing Installation Type - On the Select Products page, Virtualization Manager should be selected by default. Make sure of it and then click the Next button.
Selecting Virtualization Manager - Now, the Orion Installer will perform some system checks so wait for that to finish.
- After that, you will be prompted with the license agreement. Agree with it and then click the Next button.
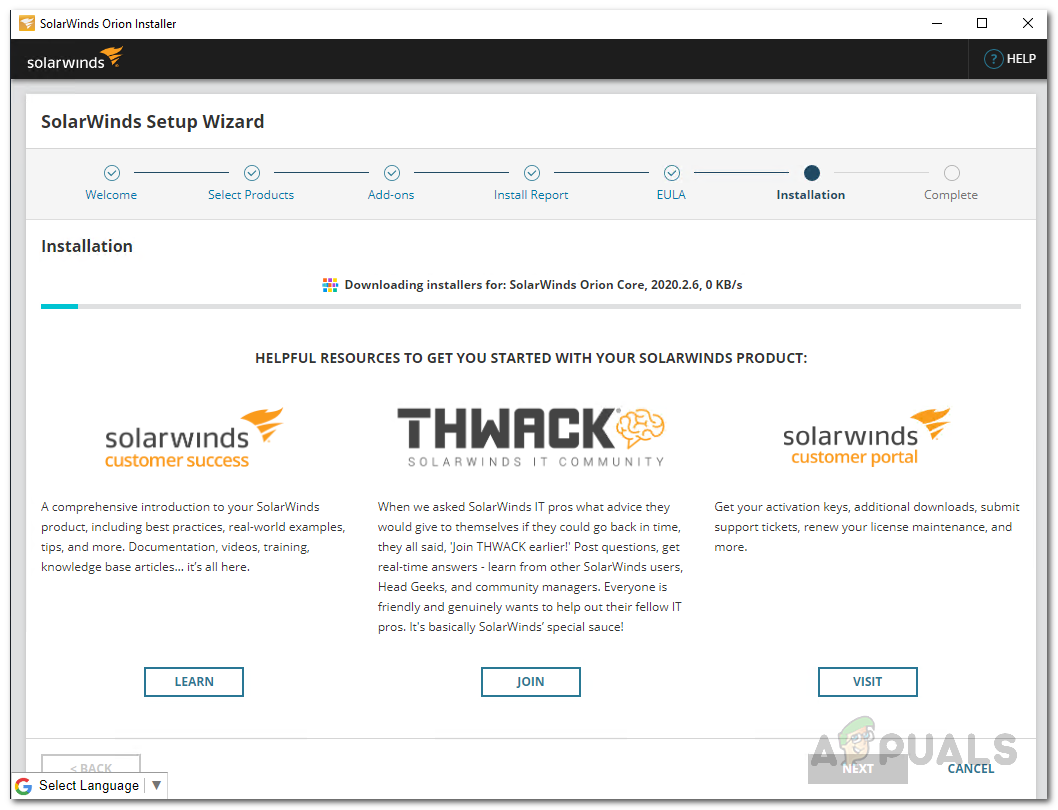
- At this point, the Orion Installer will start downloading the required files for the Virtualization Manager and then install them on your system along with the SolarWinds Orion Platform.
Installing Virtualization Manager - Once the installation has finished, click the Finish button provided.
- After the Orion Installer, the SolarWinds Configuration Wizard should come up. Here, you will have to provide your database details if you went with Standard Installation earlier.
- Go through the Configuration Wizard and provide the required database credentials, and then wait for it to finish.
- Once the configuration wizard has completed, click the Finish button.
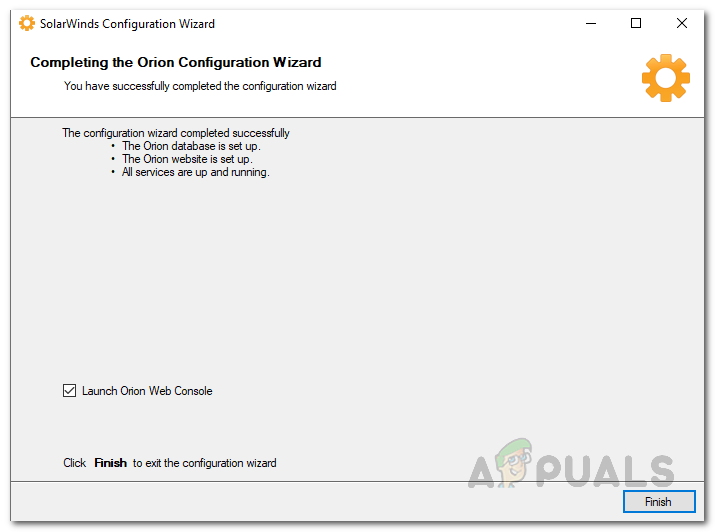
SolarWinds Configuration Wizard
Add Hyper-V Virtual Machine to Virtualization Manager
Now that you have installed the Virtualization Manager successfully, you will have to add the Hyper-V virtual machines that you wish to monitor to the tool. This is done via the Orion Platform which can be accessed through the Orion web console which opens up automatically in a browser window as you close the Configuration Wizard. By default, the web console is located at “hostnameORIPaddress:8787” where 8787 is the default port used by the Orion web console. You can also change this through the IIS window but we won’t get into that here. To add the Hyper-V virtual machines, follow the instructions given down below:
- First of all, make sure that you have the Orion web console open. If it didn’t open up automatically, use the address provided above to access the web console.
- When you access the web console for the first time, you will be asked to create a password for the admin account. Go ahead and create a password and then click the Save and login button.
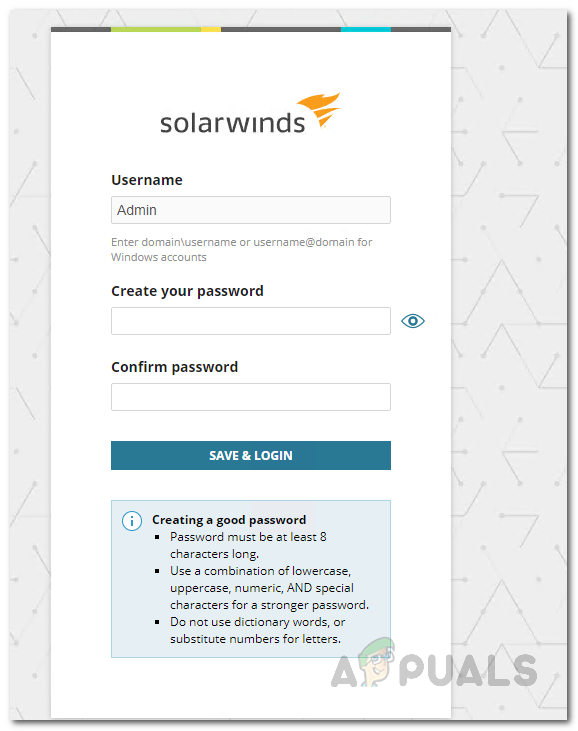
Creating a Password for the Admin Account - Once you login into the web console, click on the Settings drop down menu and then choose All Settings.
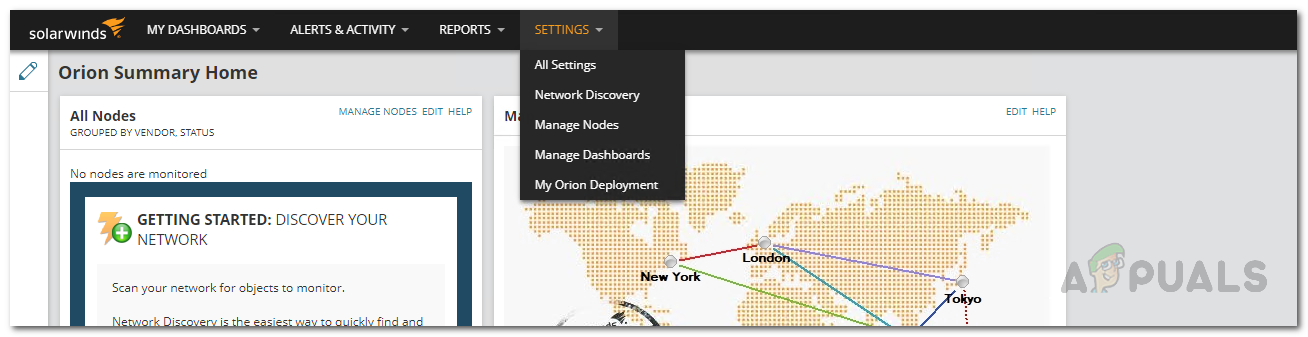
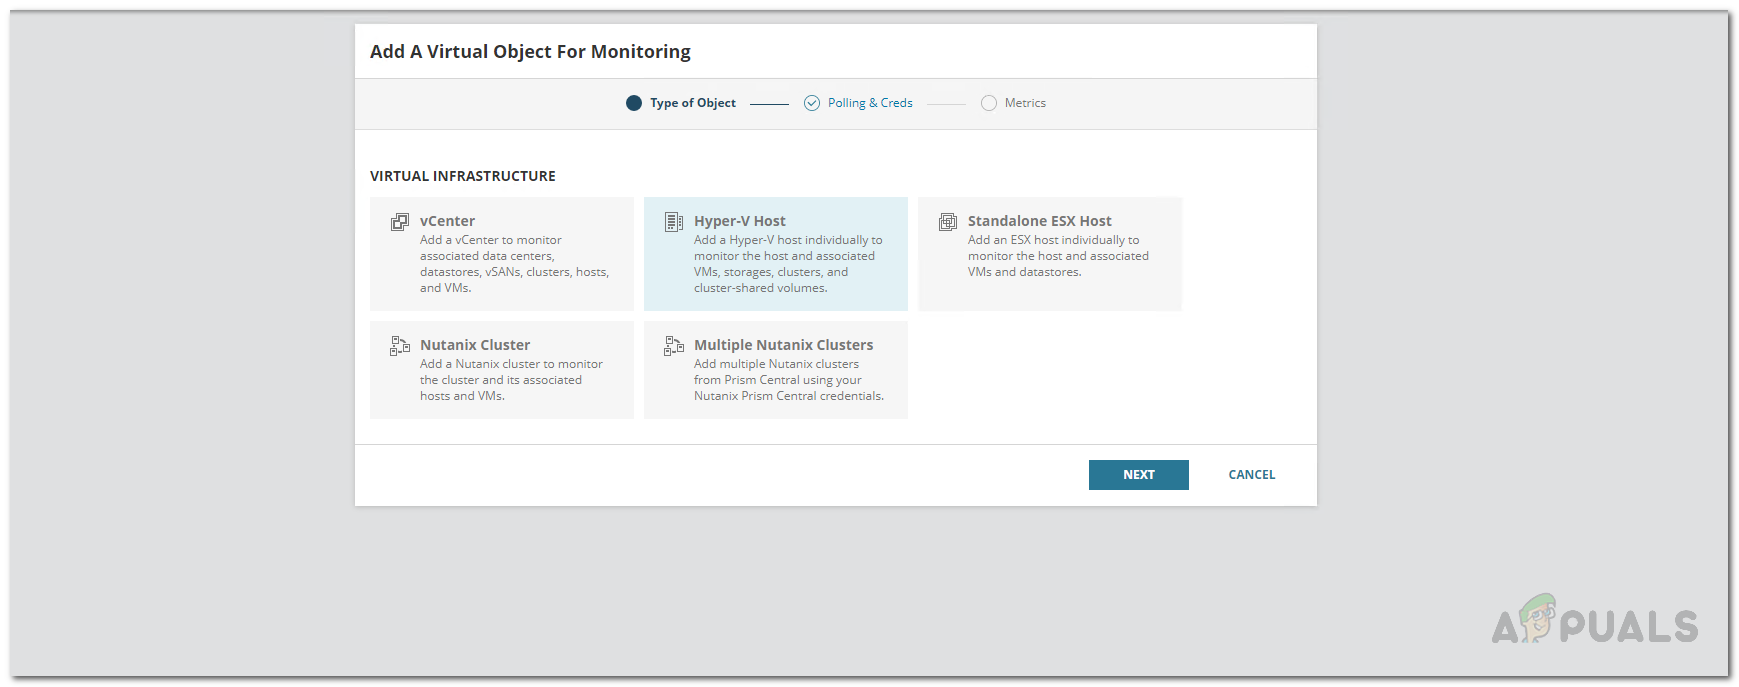
Navigating to All Settings - On the All Settings page, click on the Add VMware, Hyper-V or Nutanix entities option provided.
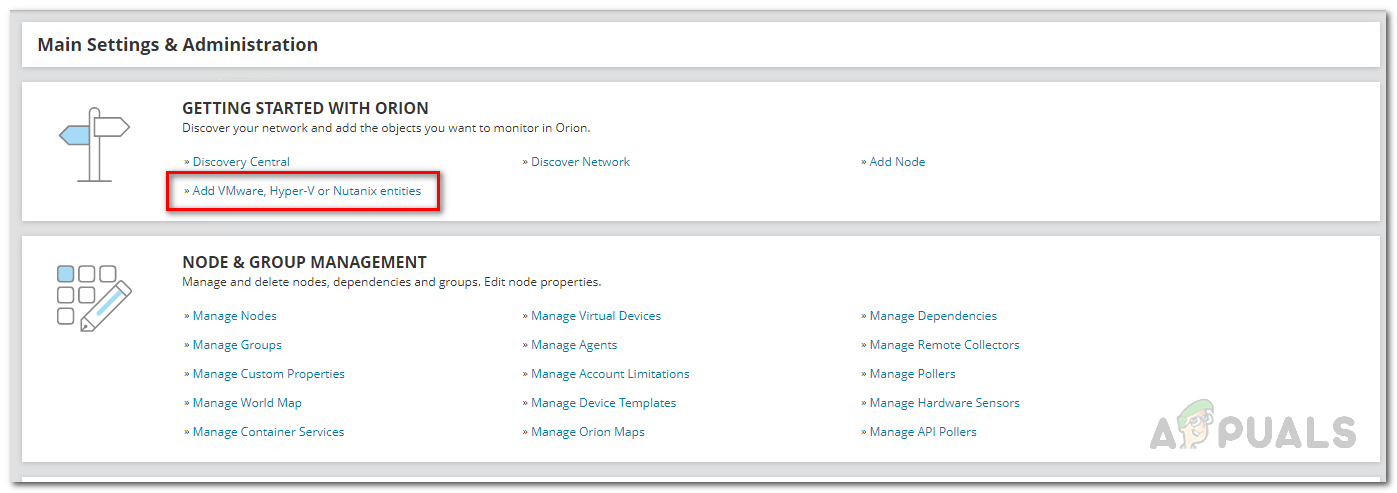
Opening up Virtual Machine Wizard - Now, click on the Hyper-V Host option provided and then click the Next button.
Adding Hyper-V Host to Virtualization Manager - On the Polling and Creds tab, provide the IP address of the virtual machine and then follow it up with providing the required credentials of the account that is to be used to collect the data. You will have to make sure that the account that you are providing has Remote Enable and Account Enable permissions. After that, click Next.
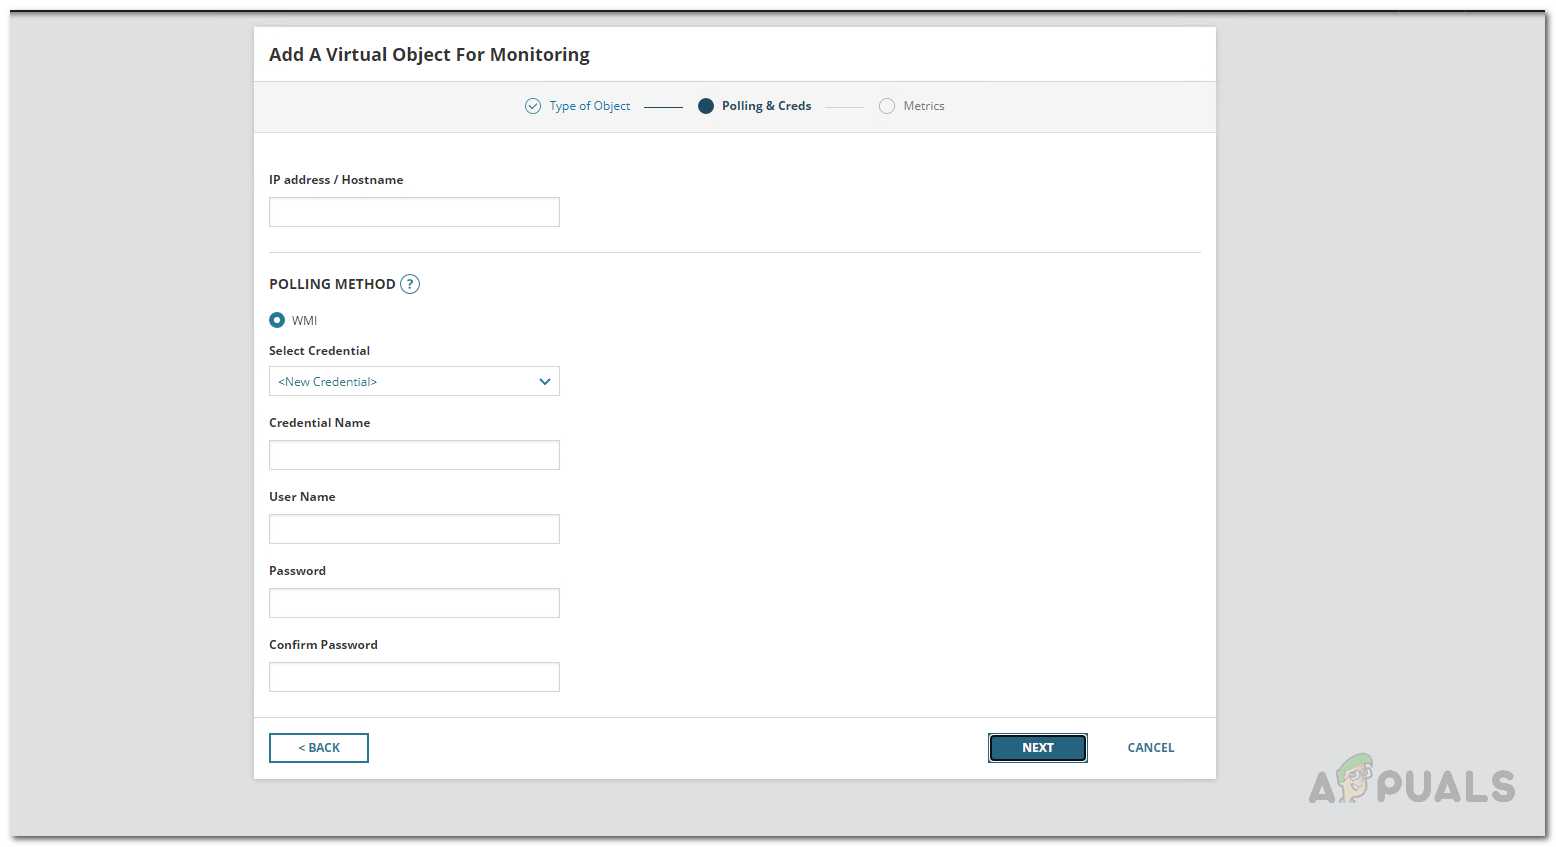
Providing Hyper-V Virtual Machine Details - Once you have done that, you will be shown the type of metrics that will be monitored by the Virtualization Manager.
- Finally, click the Finish button provided to add the virtual machine to VMAN.
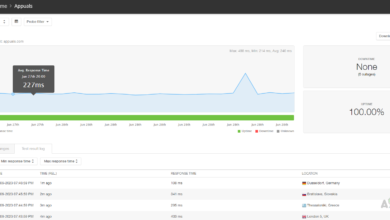
Start Monitoring your Hyper-V Virtual Machines
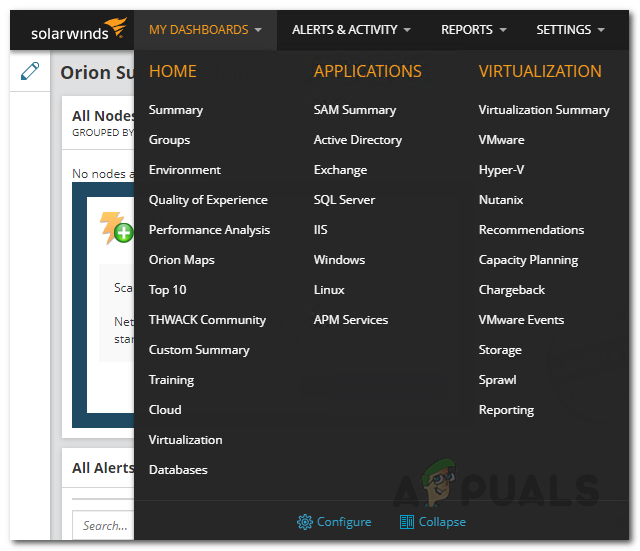
At this point, you have successfully added your Hyper-V virtual machines to the Virtualization Manager. Now, you will have to wait for a while before you are able to monitor your virtual machines as the Virtualization Manager will have to collect enough data before it is able to present it to you. To monitor your Hyper-V virtual machines, navigate to My Dashboards > Virtualization > Hyper-V where you will be shown the summary of the virtual machines and you can also dive into further details of a specific virtual machine if you desire.
 Reviewed by Jasmin Kahriman