Guide: Setup and Configure a New Router for your Home
 Reviewed by Muhammad Zubyan
In modern times, you can’t work without an internet connection. Whether it’s your apartment, workplace, university, or any place else, a working Wi-Fi connection is an absolute need. Many people are afraid to install the router themselves as they think it requires a lot of technical knowledge. However, it is not mandatory to know the ins and outs of routers and their firmware to do the setup and configure a new router for your home or office.
The process is pretty straightforward and you’ll need to follow the steps that we take you through. It will be an hour or two before you have an up-and-running Wi-Fi connection ready to be used. Make sure you have the prerequisites set in order before moving to the next process.
Preliminary Steps for Router’s Setup
There are three steps that you need to keep in mind before setting up the router. These are essential for both the setup and configuration.
1. Test the Internet Connection
Firstly, if you already have a modem or gateway to which you’re connecting the router, then we assume that the internet source will be working fine. However, if you’re shifting to a new house, building, or workplace, then checking the internet before installing the router is necessary.
So you’ll be getting a new internet service in the fresh location which should be working up to the minute. Nevertheless, it’s still recommended to check the connection.
Here’s how to do it:
- Plug the modem or ISP Gateway directly into your PC or laptop with an ethernet cable.
Note: If there’s no ethernet port on your device, then use an ethernet adapter.
- If the internet is activated and running smoothly, then go on with the router installation.
2. Read the Router’s Documentation
Most of the users ignore the documents that come with a router, although it is very helpful to read the instructions there. It won’t only help you with setting up the router, but your admin username and password will be there too.
3. Fit and Extend the Antennas
Many routers come with antennas in the box. They are useful for strengthening and propagating Wi-Fi signals. Just simply install the antennas with screws and extend them.
Setting up the Router
Before you configure your new home router, it’s obligatory to do its setup first. Again, there are three steps that you should keep in check.
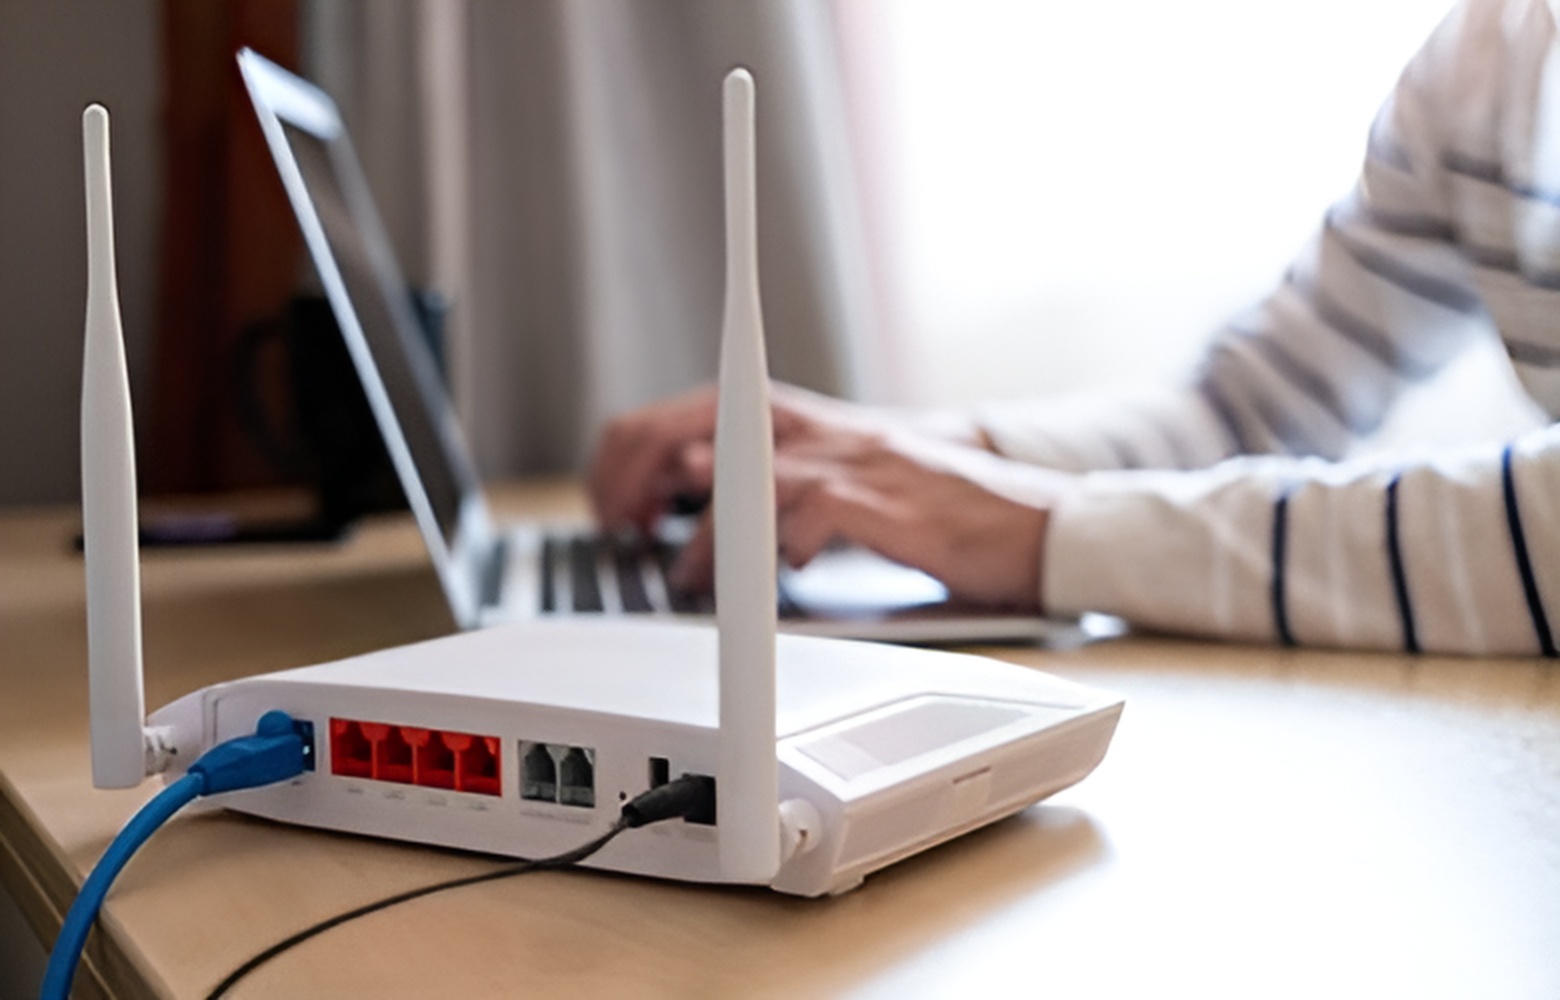
1. Place the Router in a Suitable Spot
First and foremost, the router needs to be placed in an open place in your home, workplace, or anywhere else. It would be even better if you place it in the center and at a good height. This way, the Wi-Fi signals can transmit to all four directions.
In case the Wi-Fi is set up in a corner, the signals will become weak and you’ll have a hard time surfing the internet. Secondly, ensure not to place the router near any metal objects and appliances like microwaves.
2. Power on the Router
Upon powering up, the router should be working properly. The lights should start blinking and changing colors. For instance, when you plug in some routers, their power icon turns from red to green indicating that the router is running now. Certain routers take some time to start, so be patient for a moment.

We would also recommend seeing which one is the power indicator icon on your router. The information will be available in the user manual.
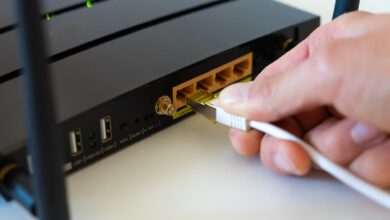
3. Connect the Router to an Internet Source
The internet source can be an ISP Gateway, a modem, a DSL cable, or others. Anyway, you need to connect it to your router via an ethernet cable for the internet to start working. The internet sources are the ones that will enable the router to propagate Wi-Fi signals and the devices to connect with the network.
Here’s how to connect the router to your internet source:
- Plug in the ethernet cable to the WAN/Internet/DSL port of your router.
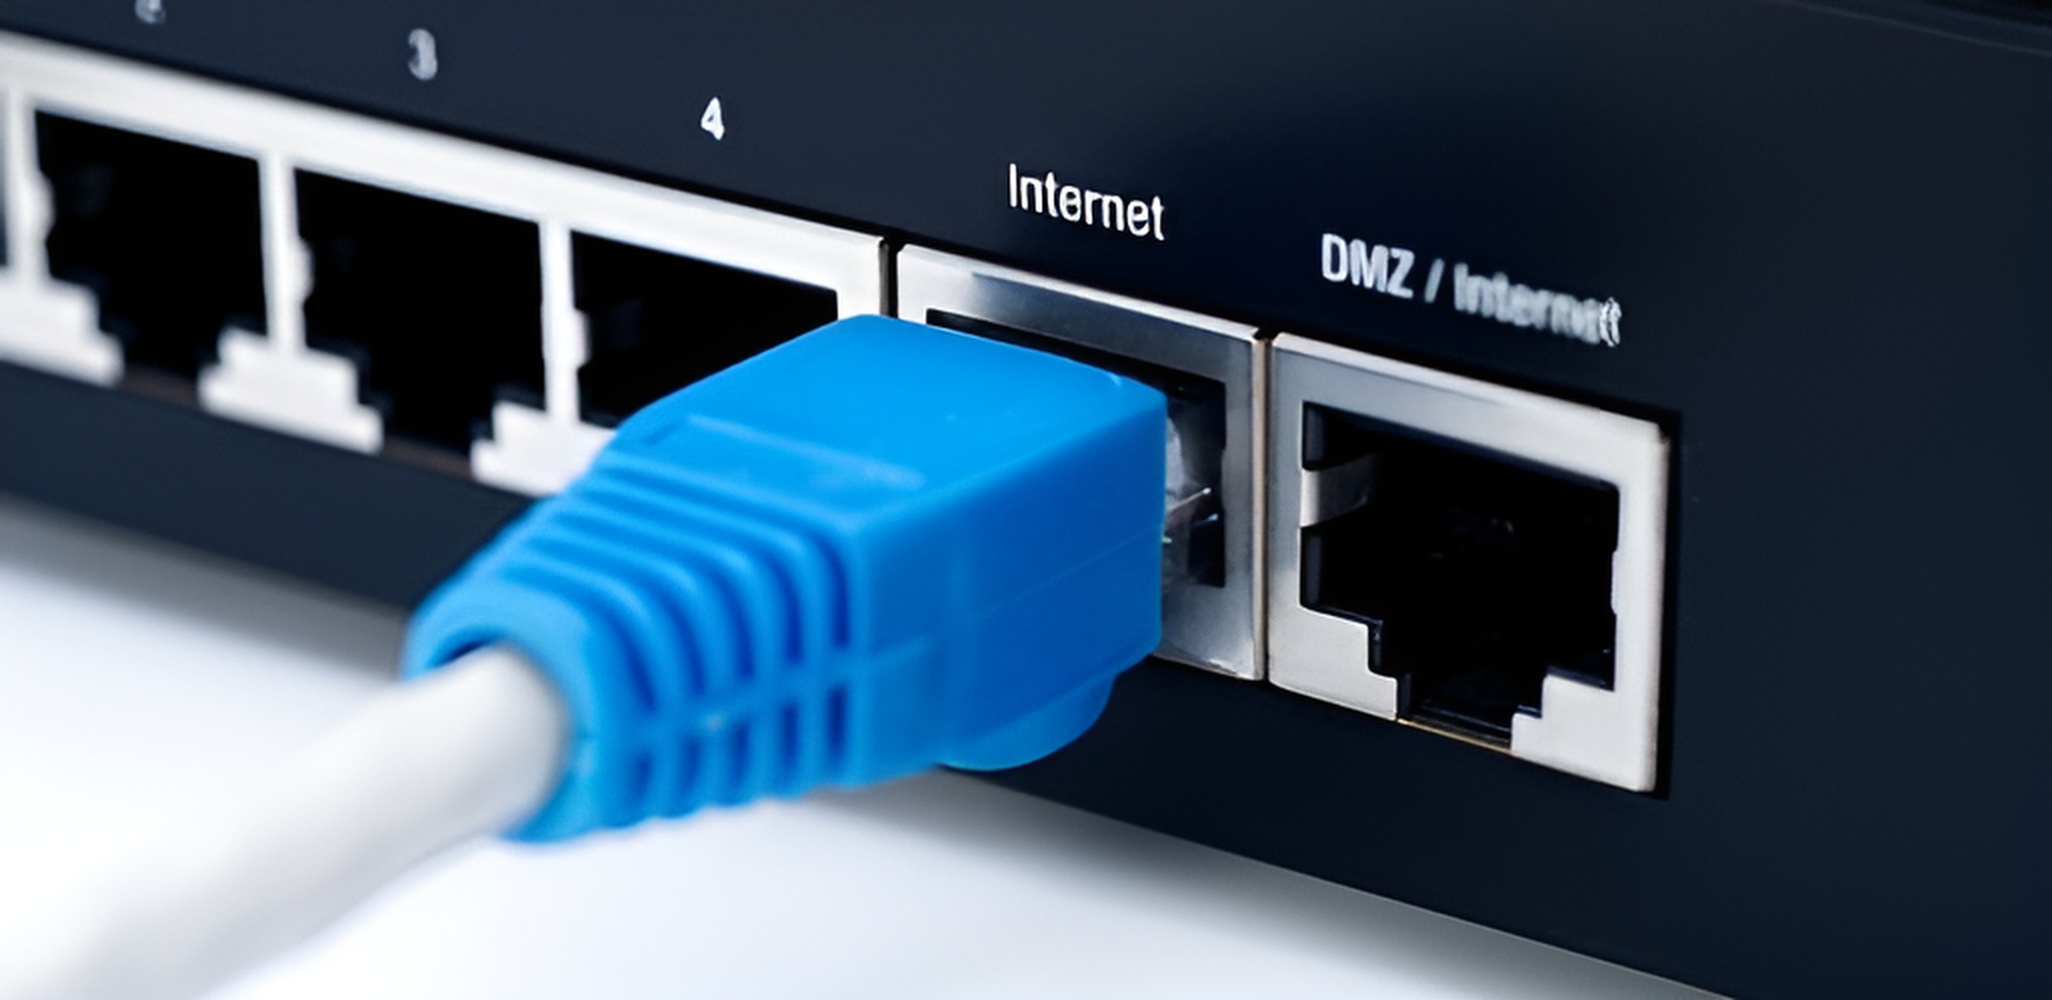
Note: This port will either be colored differently or have the internet source’s name written on top of it. Moreover, it can also be separated from other ports in a corner.
- An additional LED should start blinking upon connecting the ethernet cable. This will indicate that the internet has been linked to the router.

Router’s internet LED blinking
- If it doesn’t happen, then the connection will be wrong. Recheck it and try again.
- Now wait for the LED to stop blinking and become still (this happens in some routers while in others the LED will keep flickering)
- Finally, check if the internet is working or not by plugging in your laptop or PC on the ethernet port of the router.
Configuring the Router
Now that we have done the setup for the home router, it’s time to configure it. Here, we’ll be changing its password and updating the firmware. Furthermore, settings for the Wi-Fi encryption will be changed before connecting devices to the network.
1. Change your Router’s Admin Password
Every router comes with a default admin username and password. It is recommended to change at least the password, if not the username. This will allow only you to access the web portal of your router and make the changes.
The settings to change the password will vary for different routers. But generally, you will find the password option under security settings.
Follow the steps below to change your router’s admin password:
- Use the ethernet cable to connect your router to the PC.
- Enter the IP address of your router in any web browser. It is mostly 192.168.1.1 or 192.168.0.1. Every router’s IP address is written in its user manual.
Note: Some routers have their own app that allows you to change the settings from there.
- Enter the default username and password. Again, they’ll be in the user manual or at the backside of the router.
- Now you’ll be at the web interface of your router.
- Look for the security/access control settings or elsewhere where you can change the password. The menus will be distinct for different companies.
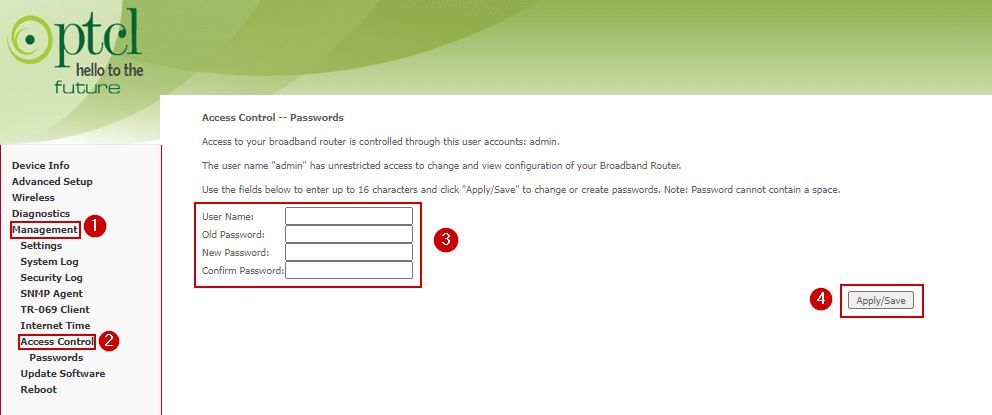
Router’s settings to change the admin password
- Once you find the settings, change the password and apply the changes.
- Now you can use the new password to log in to your router’s portal.
2. Update the Firmware of your Router
While you’re in the router’s web interface, it is better to update its firmware as well. Many manufacturers release new updates from time to time, which can be easily downloaded. The updates are mostly related to security protocols, so it’s essential to always keep your router up-to-date.
The update settings are different for each vendor, so follow the steps below to find out yours.
- Open your router’s web interface.
- Navigate to the router’s support page in a new tab.
- Search for the settings to update your firmware. The update settings are usually under the Advanced, Administration, or Management tabs.
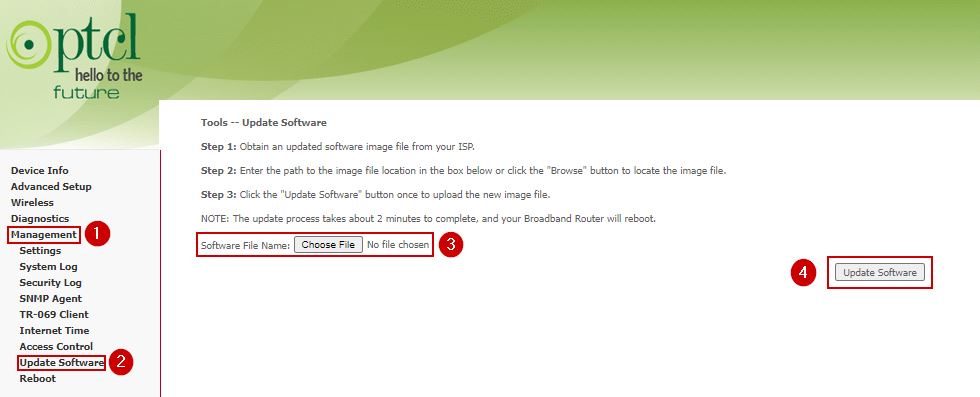
Router’s firmware update setting
- Now head back to the web interface and update your router.
- Wait while the router updates.
- Once done, turn off the router and power it on again.
3. Change the Password and Encryption of your Wi-Fi
More often than not, routers come with a default SSID and password. SSID is basically the name of your Wi-Fi that will show up while scanning.
You’ll find both of them on the back of your router. We recommend changing them in the settings since default passwords are easy to crack and SSIDs are not unique.
Moreover, the encryption for your network needs to be WPA2 and not WEP. The latter is outdated and doesn’t provide the much-needed security for your network connection.
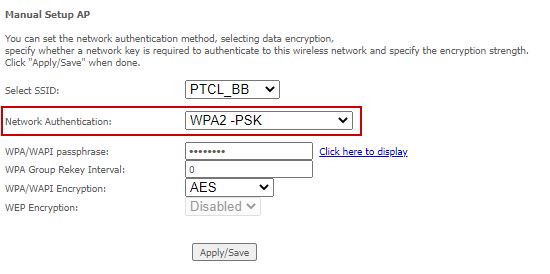
You’ll find both the password and encryption settings in the same tab in many routers. They will usually be under Wireless > Security.
4. Connect your Devices to the Wi-Fi Network
Now that your new home router’s setup is complete and you don’t want to configure it further, it is time to connect your devices to the Wi-Fi network and start using the internet.
- Go to your mobile settings.
- Navigate to Wi-Fi.
- Scan for new networks.
- Look for your SSID and click on it.
- Enter the password that you set.
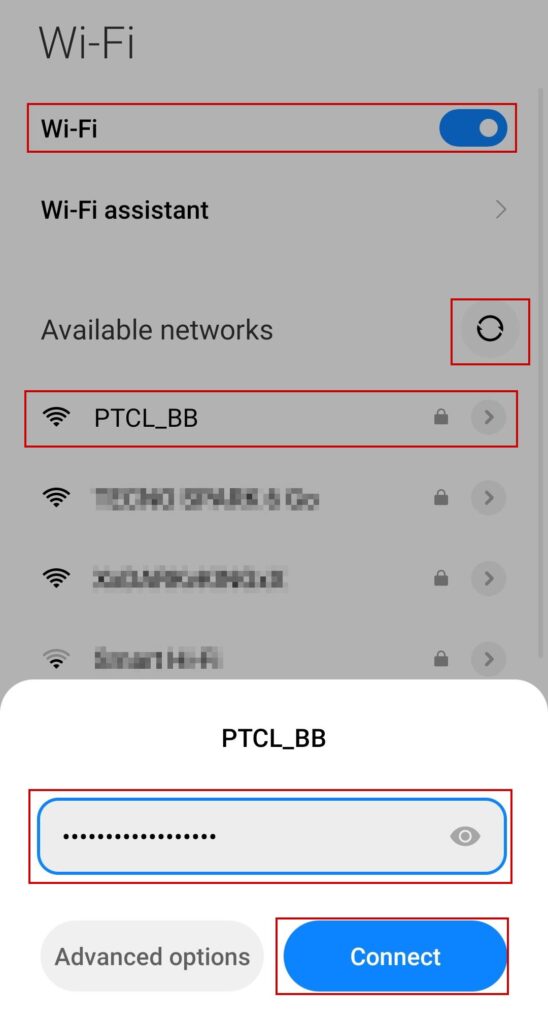
Connect to the Wi-Fi Network
- Click on connect.
- Repeat the same steps on your laptop and PC.
Reviewed by Muhammad Zubyan