Setup a NetGear Wi-Fi Extender Properly (Detailed Guide)
If you just brought a Wi-Fi range extender from NetGear and you’re scratching you’re head unsure on how to set it up, this article will help. We’ll walk you through both methods of setting up a Wi-Fi extender from NETGEAR and we’ll tell you exactly what method is compatible with your particular model.

Note: An extender from NETGEAR (or any other manufacturer) will expand your home’s Wi-Fi network by providing an additional anchor to your connection improving the overall coverage.
Depending on which NETGEAR WiFI range extender you own, you might have one or two choices when it comes to setting it up.
Recently, NETGEAR introduced the Nighthawk app which is their proprietary support app for setting up networking devices in their suite.
Unfortunately, this application only works for newer models and will not be compatible with the majority of Wi-Fi range extenders released before 2017. You can find out if your range extender from NETGEAR supports Nighthawk below.
In situations where the Nighthawk app is supported, we recommend using this method since it’s way easier, faster, and won’t require you to tweak any router settings.
1. Install & Set Up the NETGEAR Extender using the Nighthawk app
If the NETGEAR Nighthawk app is supported on your WiFi range extender, use it to save time and take out all the technical aspects that will make the setting up procedure harder than it needs to be.
The NightHawk app is available on both Android and iOS and is compatible with the following WiFi Range Extender models from NETGEAR: EAX11, EAX11v2, EAX12, EAX14, EAX15, EAX15v2, EAX18, EAX20, EAX30, EAX50, EAX80, EX6100v2, EX6150v2, EX6250, EX6250v2, EX6400v2, EX6400v3, EX6410, EX6410v2, EX6420, EX6470, EX6500, EX7300v2, EX7320, EX7500, EX7700, EX8000, RBS40V Universal.
Note: IF the NETGEAR range extender that you’re using is not in the list above, move down to method 2 for the manual route.
If your NETGEAR range extender supports the NIghthawk app integration, follow the instructions below to set up your networking device using the NETGEAR proprietary app:
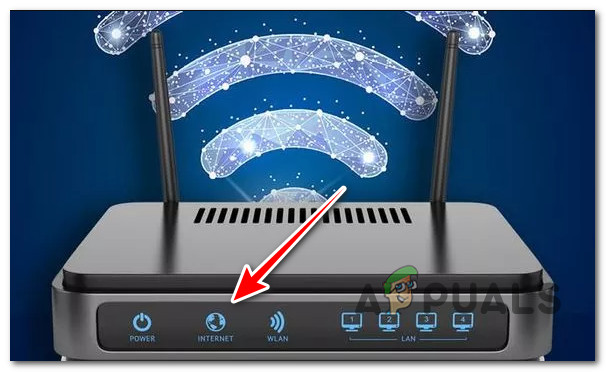
- First, start by ensuring that your router has Internet access.
Check if the router has Internet access Note: Additionally, if you don’t have this information already, take note of the SSID and password you use when you connect to the internet. You’ll need these credentials to complete the setup process.
- On a mobile device, download the NETGEAR Nighthawk app from the Apple Store (iOS) or the Google Play Store (Android):
NightHawk for Android
NightHawk for iOS - Once the NightHawk app is successfully installed, ensure that the mobile device is connected to the home router.
- Plug in your range extender and wait until it powers on completely.
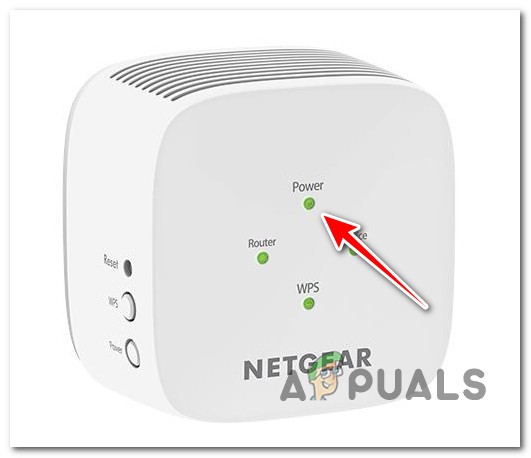
Checking the power on WiFi Extender Note: The operation is complete once the power LED stops blocking and becomes solid green.
- On your iOS or Android Device, go to Settings and access the Wi-Fi tab. Inside, connect to the extender’s default Wi-Fi network. It will be named NETGEAR_EXT on every model.
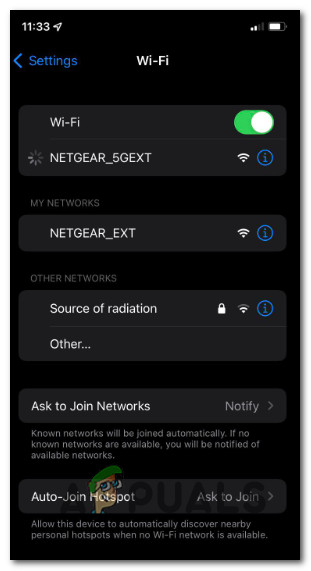
Connecting to NetGear EXT Note: If you get asked for a password, look on the back of your range extender for it. In case you’re setting up the extender for a 5Ghz network, make sure to connect to NETGEAR_3GEXT instead.
- Once your mobile device is successfully connected to the NETGEAR default Wi-Fi network, open the NETGEAR NightHawk app.
- Follow the instructions displayed inside the NightHawk app to complete the connection and link the extender to your network to facilitate increased coverage. Keep in mind that the instructions here will be different depending on your type of network and WiFi extender model.

Connecting via the NightHawk app Note: If you’re trying to connect a mesh extender from NETGEAR, the SSID, and password will always be the same as the router’s SSID and password.
In case this procedure fails at any point or your WIFI extender is not compatible with the NightHawk app, move down to the manual method below.
2. Install & Set Up NETGEAR Extender Manually
If the NightHawk app is not supported for your extender, you don’t have a mobile device in hand or you simply prefer the manual route, this method is your only choice.
Note: You can use the steps below to set up your NETGEAR Extender regardless of your WiFi extender model.
Some of the screens you’ll see below might be different from model to model, but the base procedure is identical for every NETGEAR range WiFi extender.
Here’s a quick guide on manually installing a NETGEAR WI-Fi range extender the manual way:
- Take your range extender out of the box, remove the protection plastics, and plug it into the ideal spot.Note: Ideally, you should place your range extender in a place where the signal received from the router is still at the maximum strength. Keep in mind that you can always adjust the placement of the extender after the initial connection.
- Plug in the extender and wait until the power LED lights up and becomes a solid green color.
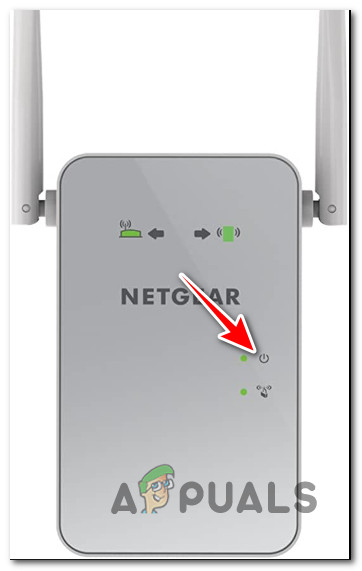
Access the Power button Note: If the power LED does not light up by itself, press the power button or On / Off button (depending on your model).
- Next, decide on the device you’ll use for the initial setup to the extender’s WiFi Network. You can either use a desktop (PC or Mac) or a mobile device (Android or iOS).
- On your desktop or mobile device, access your WiFi list from the Settings menu and connect to the extender’s Wi-Fi Network (NETGEAR_EXT or NETGEAR_5GEXT).
Connecting to NetGear EXT Note: With most NETGEAR models, the extender network that you’ve just connected to either has no password or the default password is password.
- If you get a warning about the Internet being unavailable, don’t worry as this is completely normal. Remain connected to the WiFi connection.
- Open a web browser and navigate to mywifiext.net or the following address:
192.168.1.250
Note: You can simply paste the address inside the navigation bar and press Enter. This will bring up the New Extender Setup page.
- From the New Extender Setup page, click or ap on Yes, then on I Agree to accept the manufacturer policy.
- Next, you’ll be prompted to establish the admin credentials for the extender that you are about to set up. You can leave the referral questions unanswered.
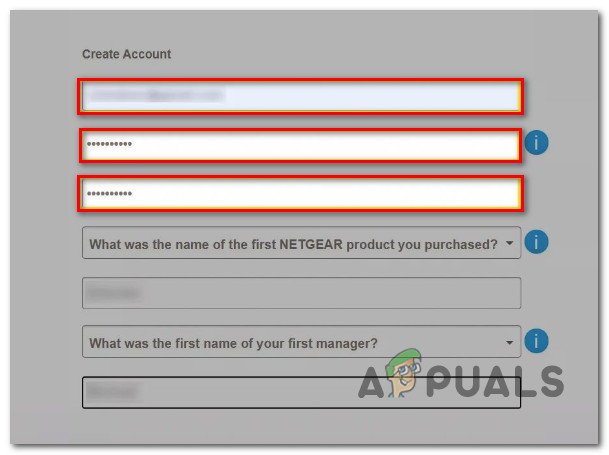
Setting the credentials for new extender Note: It’s best to note these credentials down as you’ll need to use them whenever you’ll need to access your extender’s setting from a web browser. Our recommendation is to keep the username as admin and choose a password that’s different from the Wi-Fi network password to protect yourself against brute-force attacks.
- Go through the security setup and establish at least two security questions using the associated dropdown menus.
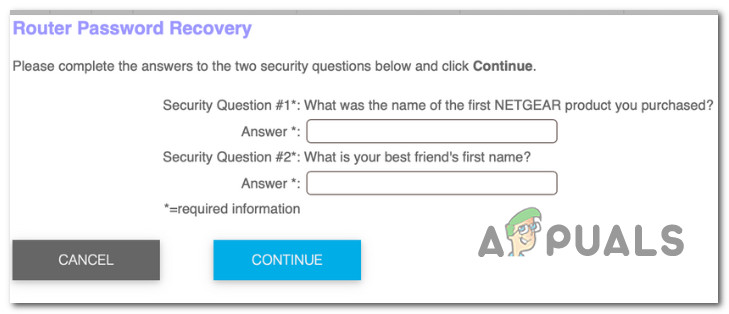
Setting up security questions Note: Take these questions seriously as these will be your only ways of recovering the admin username and password in case you ever forget them.
- From the next menu, click or tap on Next, then click or tap Yes (or Continue) to use the NETGEAR Genie feature if available.
Note: This will simplify the procedure a bit by automatically searching for your extender among the present local networks. - Once the initial scan is complete, select the correct radio buttons for your network’s 2.4GHz and 5GHz WiFi Network Names (SSID). In case the networks are not displayed in the menu by default, click or tap on See More.
Establishing the credentials for extender network Note: If your range extender doesn’t support 5 GHz networks, you only need to configure the SSID for the 2.4 GHz network.
- Click or tap on Next, then enter the existing password of your network, then click or tap on Next once again.
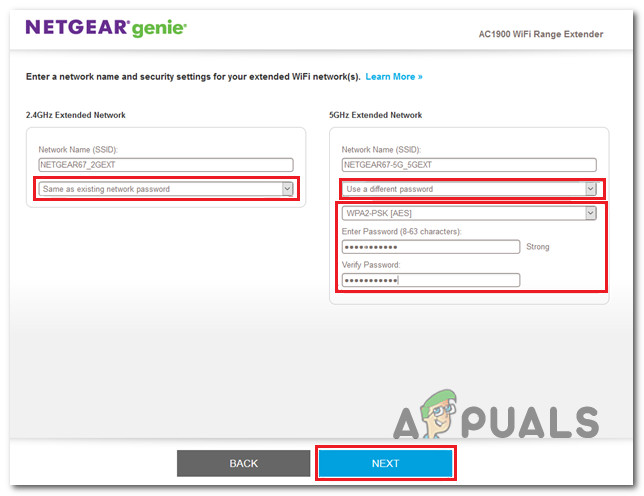
- Next, you’ll need to select the custom SSIDs password for your extender. You can set different values for the 2.4GHz and 5GHz WiFi Network Names (SSID).

Establish the values for the new networks in your extender settings Note: The extender will utilize the name of your current network, appending _2GEXT for the 2.4GHz band and _5GEXT for the 5GHz band. Your current network password serves as the default for each band.
- OPTIONAL STEP: If you are setting up a mesh extender, you will have the option to use the already established WiFi name and password as your existing network. To do this, check the enable One Wi-Fi Name box to enable this feature. This option will not be available if your extender does not support it.
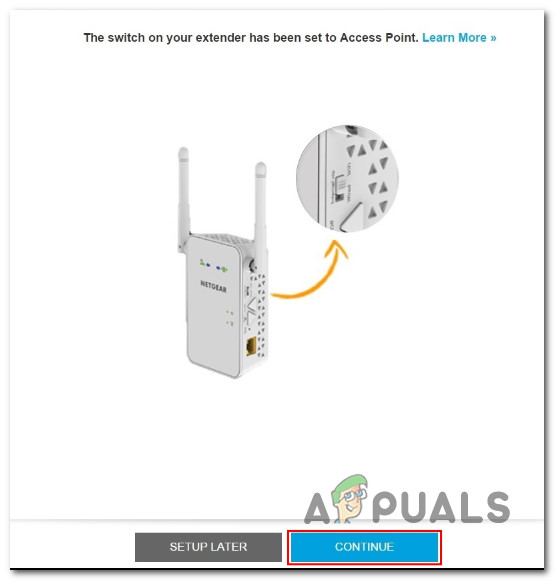
Note: If you’re not setting up a mesh extender, skip this method altogether. - Tap or click on Next once again and wait until the initial extender setup is complete. The initialization might take 5 minutes or more. At the end of this procedure, you’ll see a screen displaying the SSID (the name of Wi-Fi Network) and password for each extender band.
Setting up the extender Note: We recommend that you take none of these.
- Once the extender is set up, go on every device that you want to use the tender network, access the Wi-Fi settings, and connect to the new network you’ve just created.
- Go back to the web browser page where you’ve just set up the extender and enable the checkbox at the bottom of the page before clicking on tapping on Continue.