How to Monitor and Manage DHCP Servers in IP Address Manager
Networks are increasing in size, making them more complex by the day and thus, IP conflicts tend to arise. Both these factors are proportional to each other, a large network tends to be complex whereas a smaller network is easy to manage. Network outages are a nightmare for network administrators and by the standards set by today’s digital world, they can not be taken lightly ever. So, what can you do to prevent this from happening and ensure an always operative network? The answer is pretty obvious and lies in plain sight. You will have to keep your network performance in check and monitor your network infrastructure as well as the devices that are accessing your network. This means you will have to monitor your entire network if put simply.
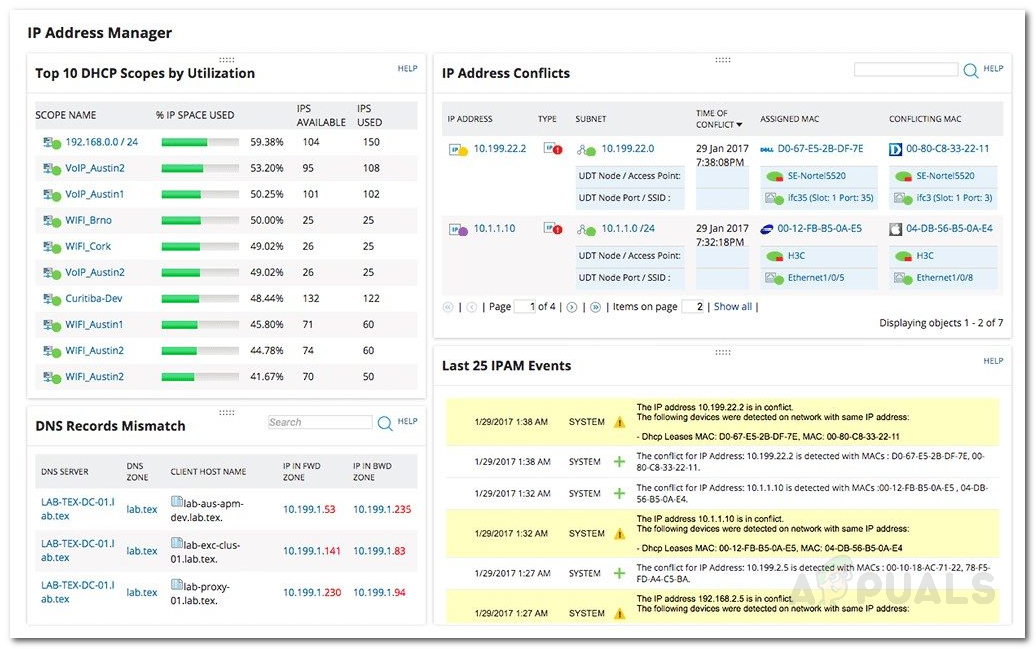
DHCP servers are present in every big network and they fulfill a really important task which is why DHCP server management is significant. When it comes down to large networks, assigning IP addresses to all the devices present in the network becomes quite the task. That’s where DHCP configuration comes in handy. However, to ensure that there are no issues with the network, you will have to monitor the Dynamic Host Configuration Protocol server as well. This can be done via the Solarwinds IP Address Manager tool. Solarwinds IPAM is a really powerful tool that lets you keep track of all the IP addresses of your network as well as it enables network admins to check which IP is being used by whom and where.
IP Address Manager (IPAM)
IP Address Manager is a really handy tool (download here) when it comes to managing vast networks as it keeps a track of IP addresses or an IP address block because every device requires an IP address to connect to the internet. Therefore, monitoring of your IP address infrastructure becomes essential as it helps you resolve IP address conflicts as well as identify unauthorized devices. IP address management tools are increasing in number, and thus, finding an efficient and effective tool can become tedious. Solarwinds has a pretty good reputation in the field of network and system management which is one of the reasons why we are using the tool.
To be able to follow through this guide, you will have to make sure you have IPAM installed in your network. We already have an article that explains tracking and monitoring networks using IPAM thoroughly. If you have not deployed the tool yet, the guide will guide you through it. Furthermore, to be able to add a DHCP server to IPAM, you will have to make sure that you have already added to IPAM as an external node. The linked guide will also walk you through it in pretty easy steps. Once you are ready to begin, follow this guide through.
Adding a DHCP Server
Now that you have already added your DHCP server to IPAM as an external node, you can add it as a DHCP server and start monitoring it. Once you have added the server to IPAM, network operators will be able to manage its scopes. Here’s how to add the node as a server:
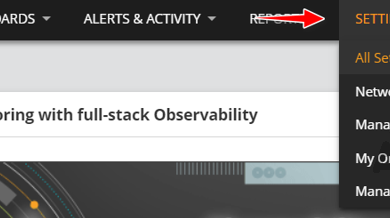
- Make your way to IPAM settings by clicking Settings > All Settings > IPAM Settings.
- There, click Add DHCP Server to start adding your node as a DHCP server.
- Now, you will have to choose the node that you have added to IPAM from the drop-down menu list.
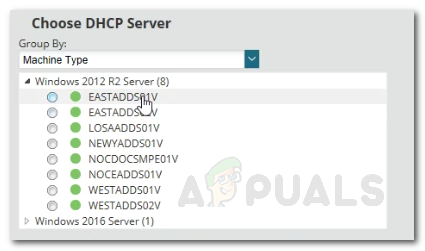
Choosing DHCP Server - After that, you will have to select a credential type or create a new credential. Please make sure that the user credentials that you are providing either belong to the DHCP User, DHCP Administrators or the Local Administrators group. Click the Test button to verify your credentials.
- Once done, move on to the DHCP Server Scan settings section.
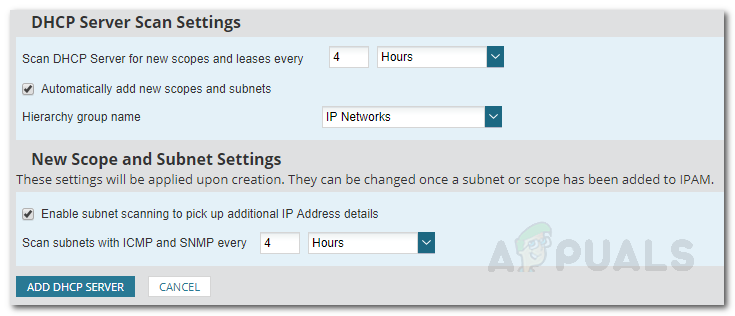
DHCP Scan Settings - By default, the scan interval is set to four hours. If you wish, you can change this per your requirements.
- If you wish for scopes to be added automatically, check the respective box.
- You can also select a hierarchy group from the drop-down menu list. This enables IPAM to assign the subnet masks that are discovered by the DHCP server to the selected hierarchy group.
- Once you have finalized everything, click the Add DHCP Server button to add the node as a DHCP server to IPAM.
Creating a scope on a DHCP Server
DHCP scopes are basically a range of IP addresses that the DHCP server can use to fulfill a request when made by a DHCP client. Whenever a request is made by a DHCP client, the server goes through the allocated scope to search for an available IP address. It’s recommended to have specified scopes so that your DHCP server can manage the assignment and distribution of IP addresses. Here’s how to create a scope:
- Go to the My Dashboards drop-down menu and then under IP Addresses click DHCP & DNS Management.
- Once there, select the server for which you want to create a scope.
- Click the Add New button and then click DHCP Scope.
- This will take you the Add DHCP wizard.
- On the Defining page, you will have to provide a name for the scope along with other details like a description and extra information. After that, click the Next button.
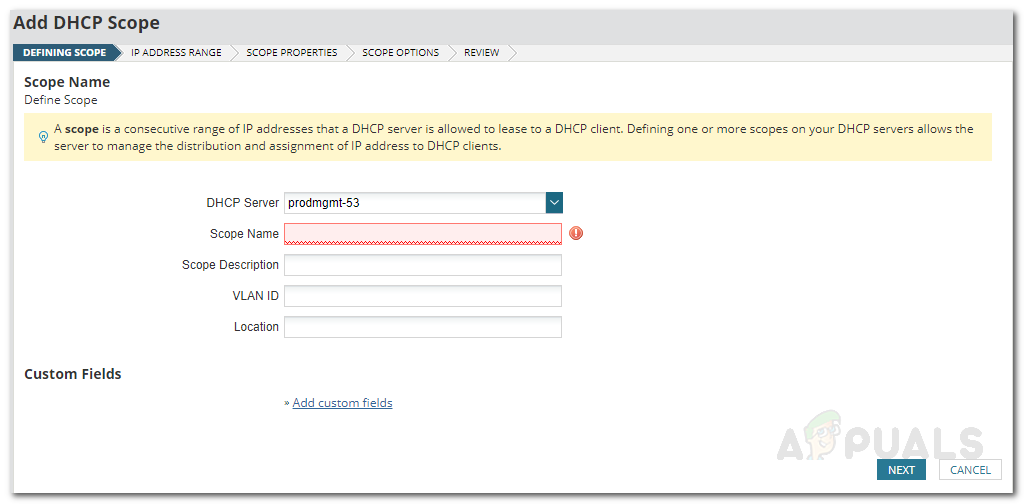
Creating a Scope - Now, you will have to provide the range of the IP addresses for the scope. You can also exclude an IP address from the range if you wish to by clicking the Add Exclusion option.
- After that, on the Define Scope Properties, you can change the DHCP Offer Delay period. Otherwise, just hit Next again.
- You can change the scope options on the Scope Options page. This is for advanced users so be careful with it. Once done, click the Next button.
- Finally, review the scope details and once you have ensured everything, click the Create Scope button to create the scope for the selected DHCP server.
Splitting a Scope
Once you have created a scope for a certain DHCP server, you can also split it between two DHCP servers to ensure better availability of DHCP services for your network. This can be done from the DHCP and DNS (Domain Name System) page. To split a scope, do the following:
- Go to the DHCP and DNS Management page by navigating through My Dashboards > DHCP and DNS Management.
- Make sure the DHCP tab is selected and then select the DHCP server on which the scope already exists.
- Click the Scopes drop-down menu and then select the Split Scope option.
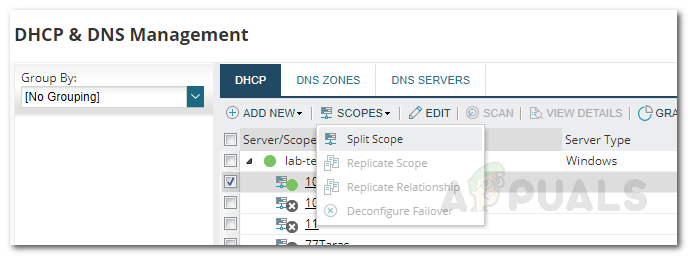
DHCP and DNS Management - You will be taken to the Define Split Scope page.
- Here, provide a name for the secondary scope that you are about to split the primary scope with.
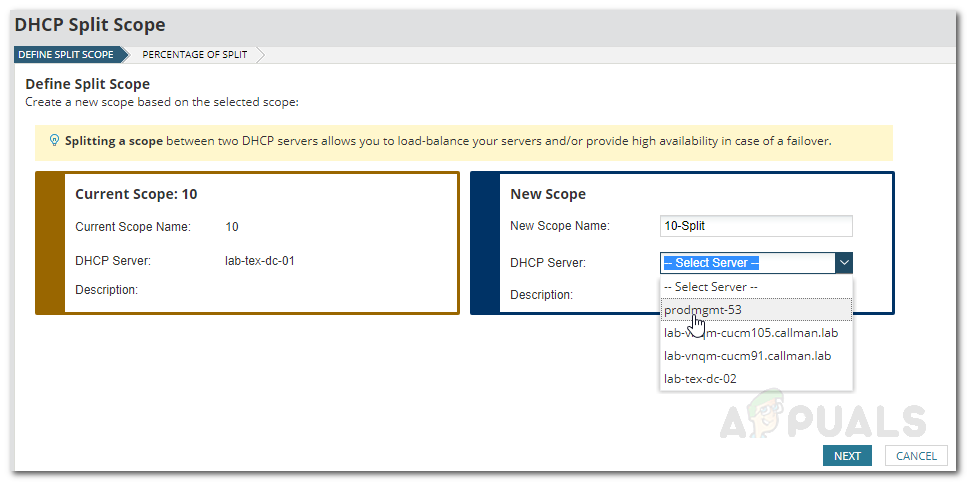
Defining Split Scope - Select the server for which you are trying to split the range and then click the Next button.
- Move the slider as per your needs. The scope is separated in percent so if you choose a 70-30 percent split, the primary scope will use the first 70 percent of the IP addresses available in the scope and the rest will be appointed to the secondary scope.
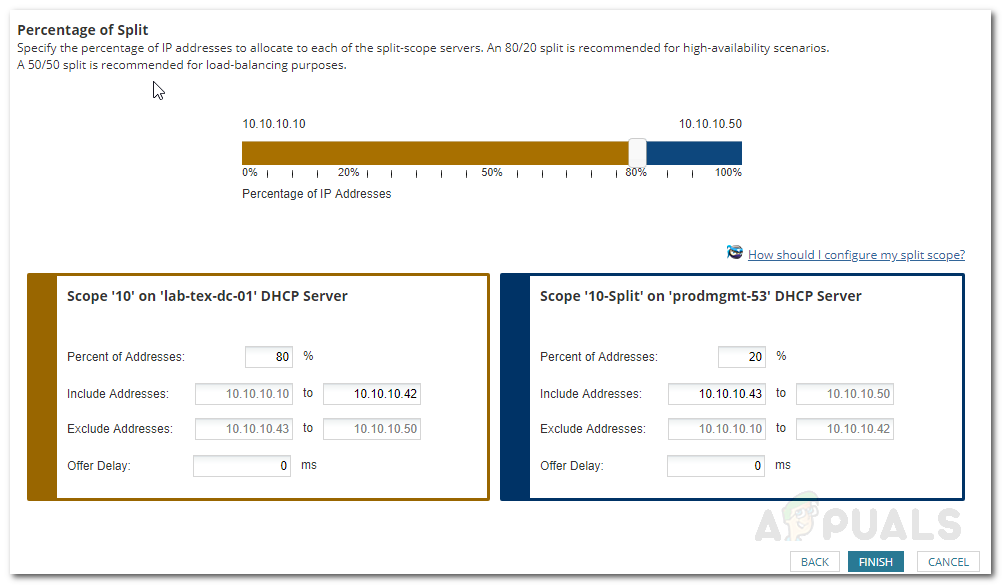
Split Scope Percentage - You can also set the Offer Delay in ms for the secondary scope. After that, click the Finish button.