How to Identify and Patch Vulnerabilities Using SolarWinds NCM?
Identifying and patching the vulnerability is essential to secure the network and the organization. Network administrators must depend on the Information Security team for the vulnerability report to perform the patching activity. Sometimes Information Security team may take more time to provide the report, which may lead to security breaches on the network.
To avoid such critical issues and to be independent, we can use Solarwinds NCM to identify the vulnerabilities in the firmware and fix them.
Solarwinds NCM has an automated Firmware Vulnerability Scanning feature and Firmware Upgrade option to apply patches with the latest Firmwares. To know more about Solarwinds NCM, click on this link.
How Firmware Vulnerability Scanning Works
NCM gets the firmware vulnerability warning data from the National Institute of Standards and Technology (NIST). NCM uses this data to compare with nodes currently monitored by Solarwinds NCM. If the vulnerability data matches any of the nodes, it will be reported in the Config Summary page of the Firmware Vulnerabilities widget.
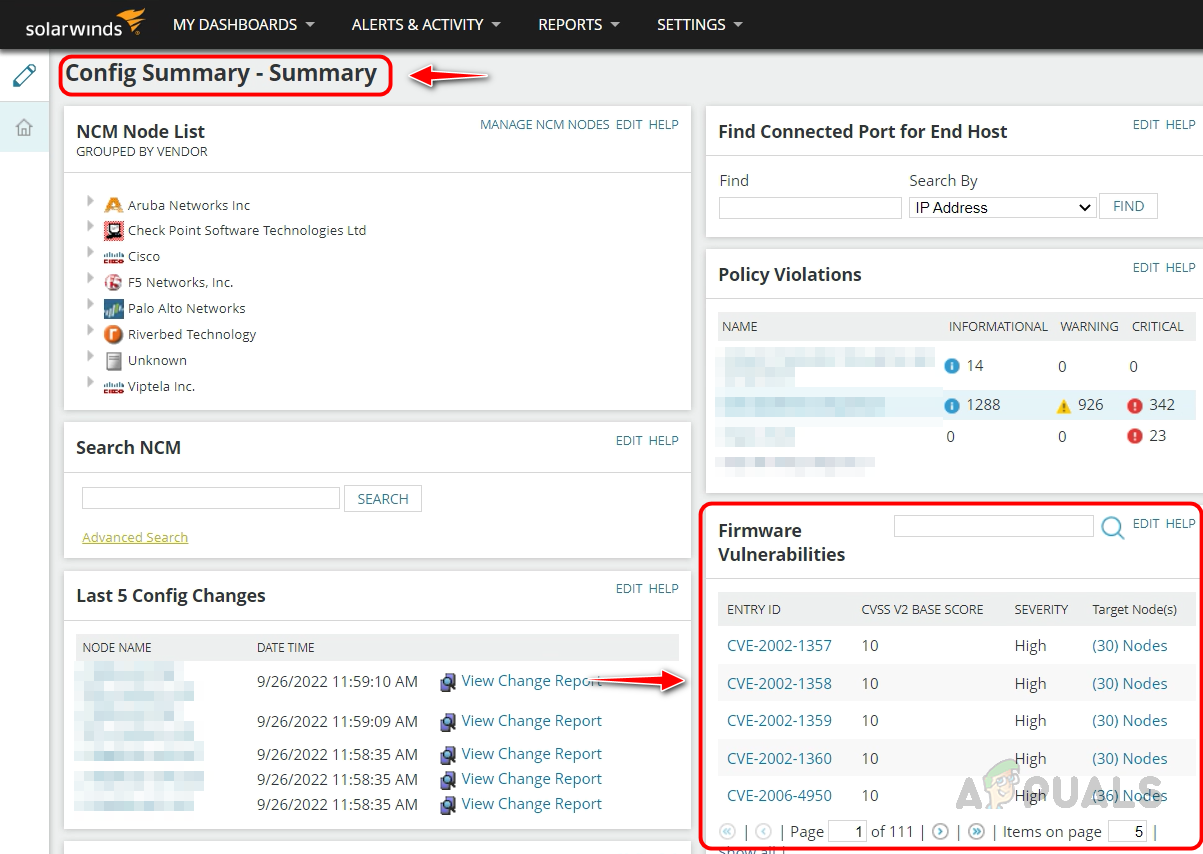
We can see CVE ID, Score, Severity, and the nodes have these vulnerabilities. If we click on the CVE ID, that will take us to the summary page where we can see the vulnerability summary.
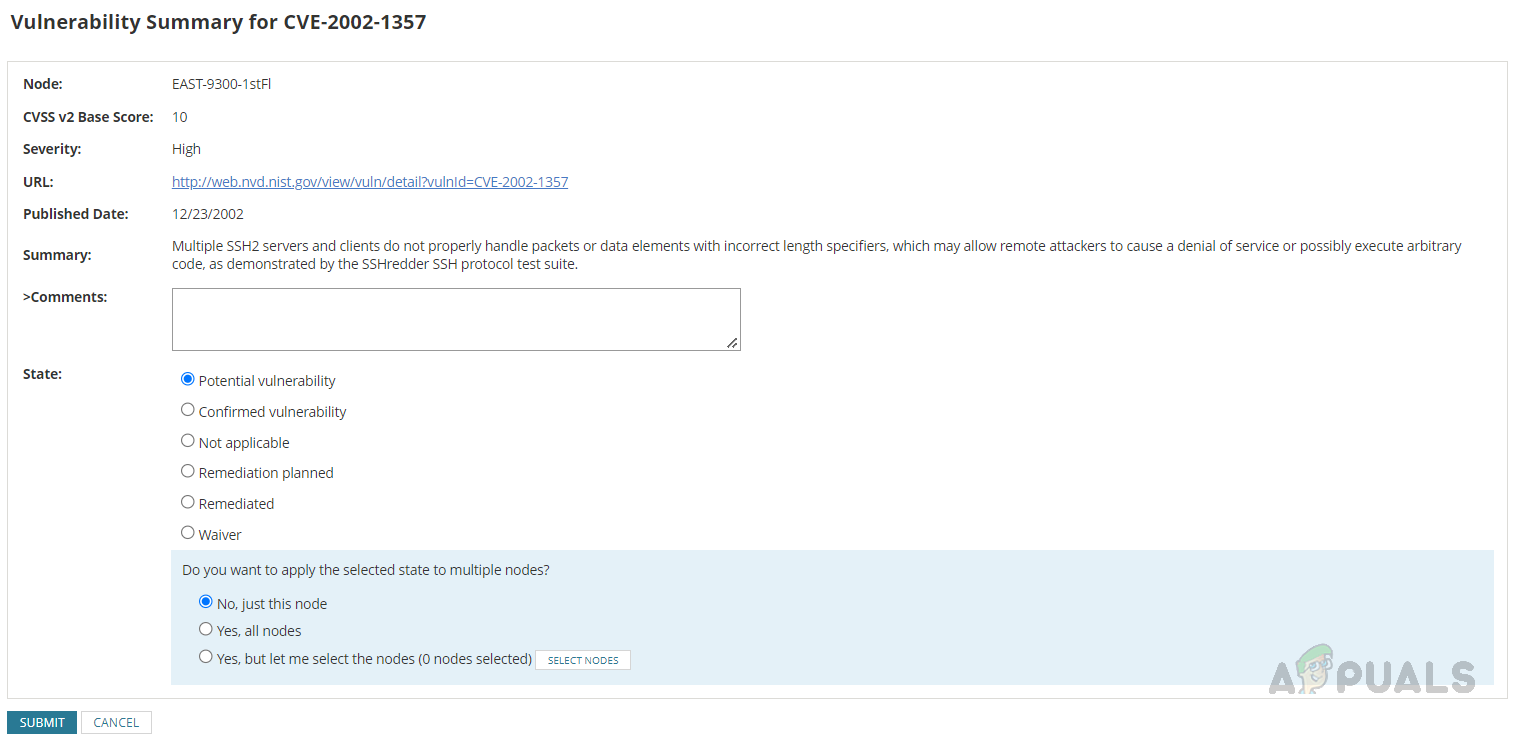
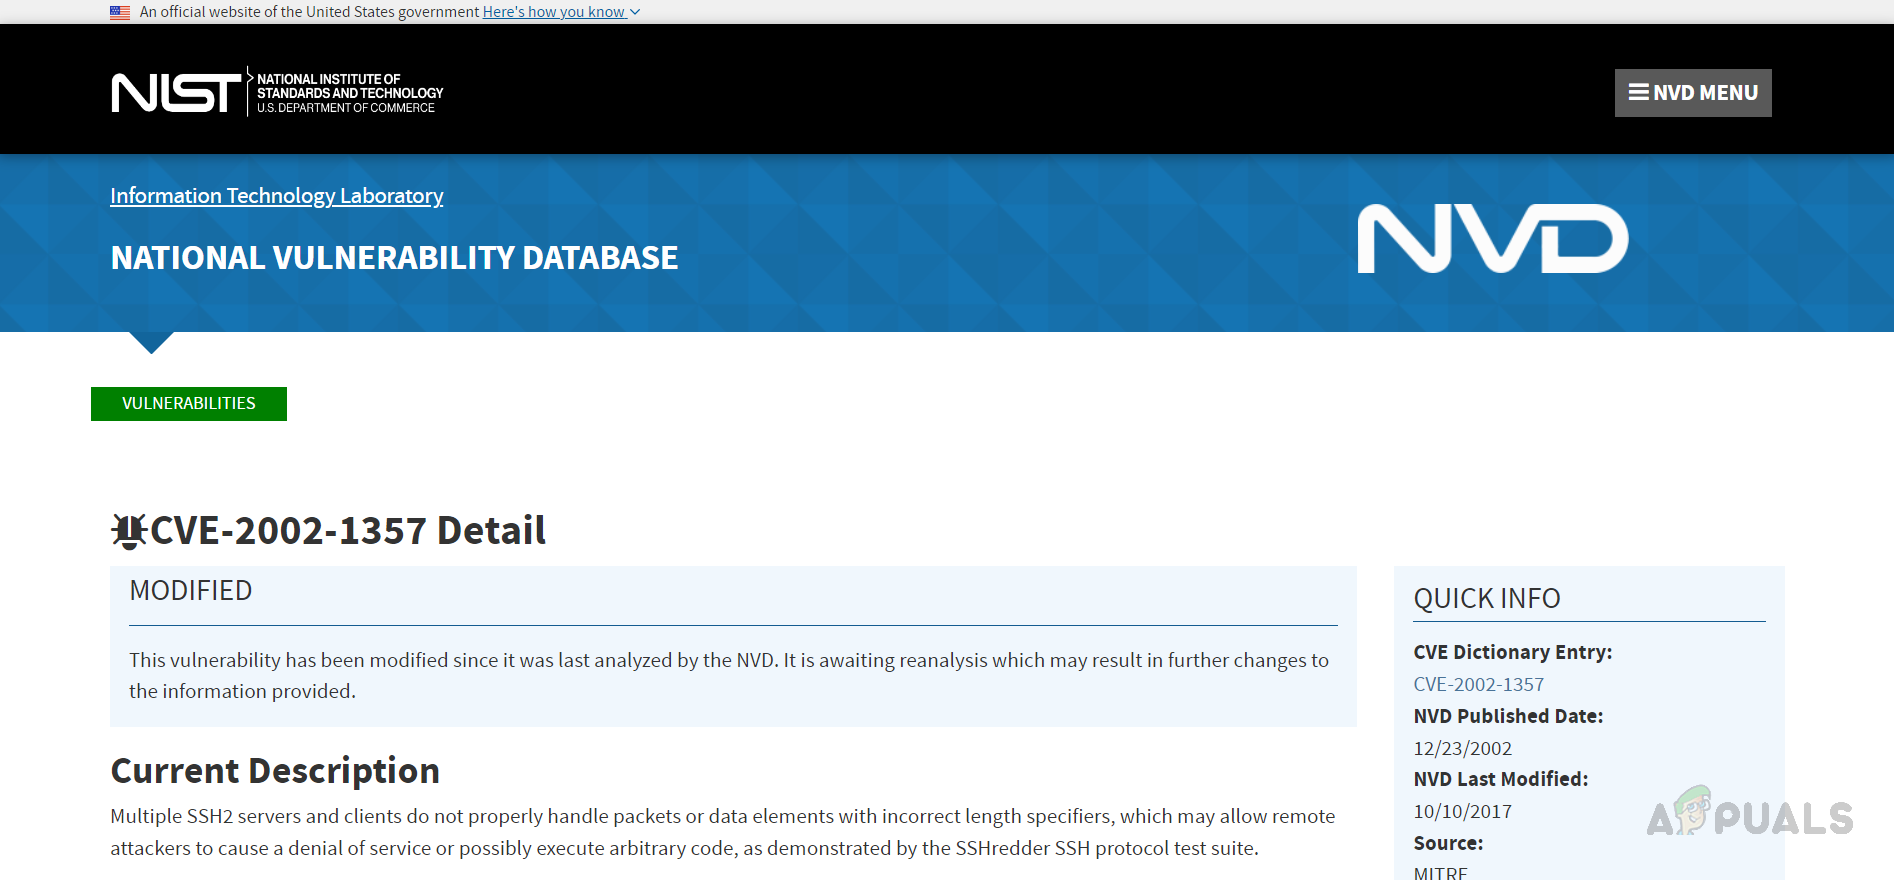
If we click on the NIST URL, it will take us to the NIST page for the vulnerability, where we can find more details about the reported vulnerability.
To get the nodes affected by this vulnerability, click on the Node(s) under Target Node(s)

Currently, Firmware Vulnerability scanning support only the following device types.
- Cisco IOS
- Cisco Adaptive Security Appliance (ASA)
- Cisco Nexus
- Juniper
We need to configure the Firmware Vulnerability settings to get the automated vulnerability reports. Let’s see how to configure the settings below.
Configuring Firmware Vulnerability Settings
Follow the below steps to configure the Firmware Vulnerability Settings, by configuring these settings, NCM can download the vulnerability data to compare with the monitored devices.
- Login into your Solarwinds NCM web console.
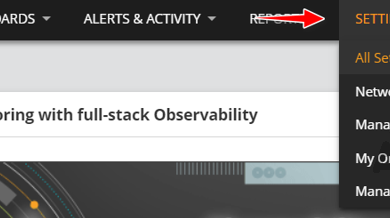
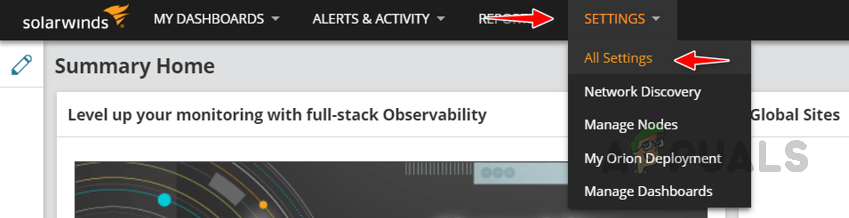
- Go to Settings and Click All Settings.
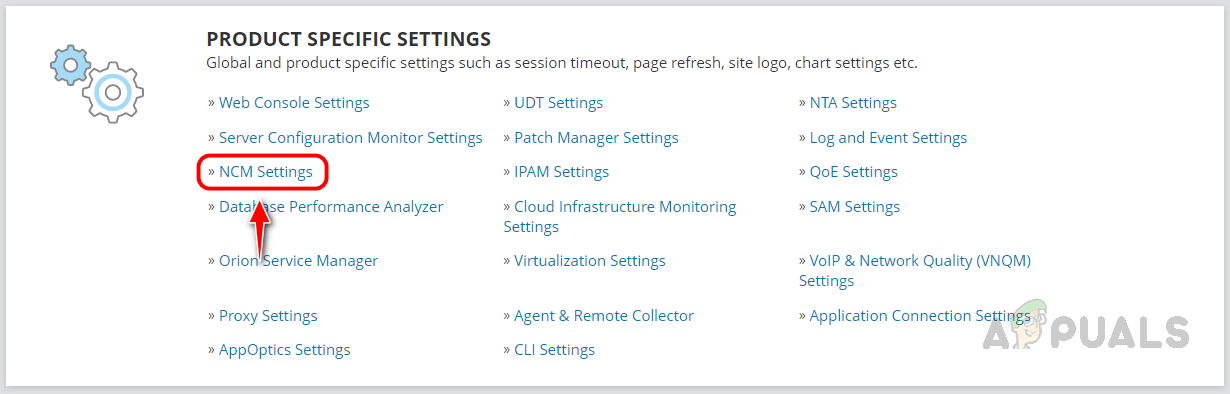
- Click on NCM Settings under Product Specific Settings.
- Click on Firmware Vulnerability Settings under Advanced.

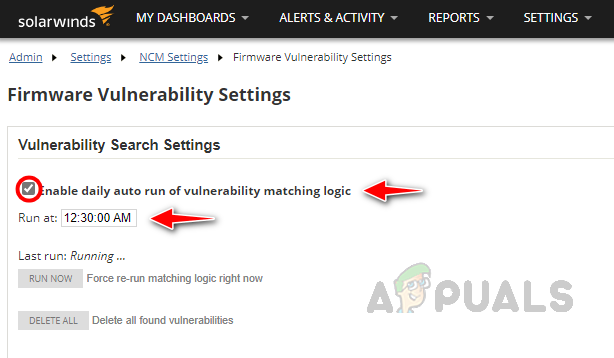
- In Firmware Vulnerability Settings, Enable daily autorun of vulnerability matching logic needs to be checked otherwise, Vulnerability Scans will be disabled. Choose the preferred time to run the scan in the Run at time box.
- Under Vulnerability Data Import Settings, the path to download and store the vulnerability data from NIST is mentioned. This is the default path. Click on validate to make sure NCM can access the path. We should get a Validation passed message as shown below. NIST URL is already available, we can add other Vulnerability Database URLs as well apart from the NIST database.
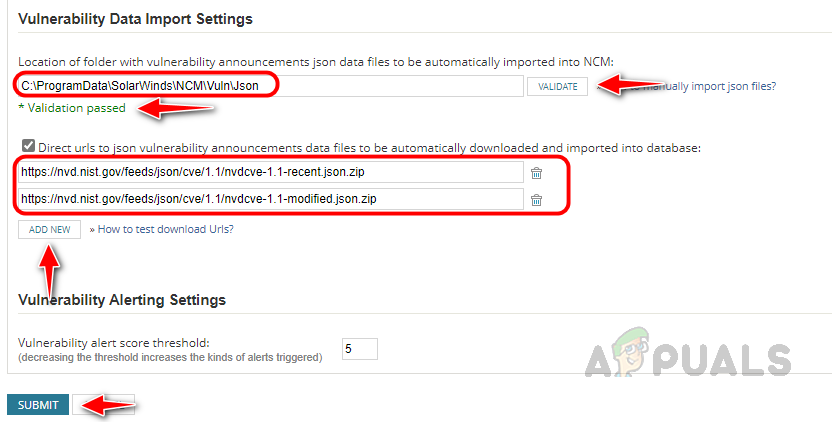 To make sure the URL is working, copy and paste the URL into any browser, and the vulnerability data file will be downloaded. If the file is not downloaded, then check the URL.
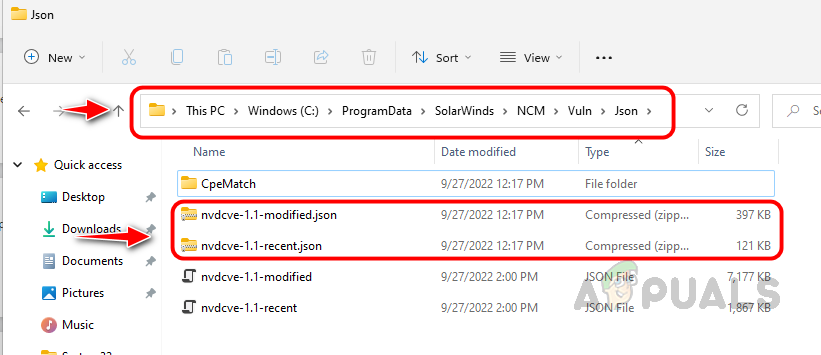
 - If your Solarwinds is in a closed environment without an internet connection, you have to download the vulnerability data using the NIST URLs and place the data in the above-mentioned path. NCM will use these files to run the vulnerability scans.
Note: If you have HA for your Solarwinds environment, then vulnerability data files need to be placed in the HA server. - Once configured, the Firmware Vulnerability Settings and click on submit to save the changes.
We have set up the scanning feature. NCM will perform the scans at the scheduled time and will show the report on the Config Summary page as shown earlier. Based on the scan report, we need to apply patches. Now let’s see how to set up the Firmware Upgrade feature to apply patches.
Configuring Firmware Upgrade Feature
The Firmware Upgrade feature in NCM can be used to upgrade the devices with the latest firmware to protect the devices from vulnerabilities. Multiple devices can be added to the firmware upgrade job and we can run multiple firmware upgrade jobs simultaneously. To configure the firmware upgrade job first we need to do some initial setup. Follow the below steps to complete the initial setup.
Step 1: Map the Storage Location of Firmware Images
- Go to Settings and Click on All Settings.
- Click on NCM Settings.
- Click on Upgrade Settings under Firmware Upgrade.

- Provide the path of network share where the latest firmware is stored, and provide the necessary credentials to access the storage path. Click on Validate to check the provided credentials are valid to access the storage path. You should get Validation Passed message on successful validation.
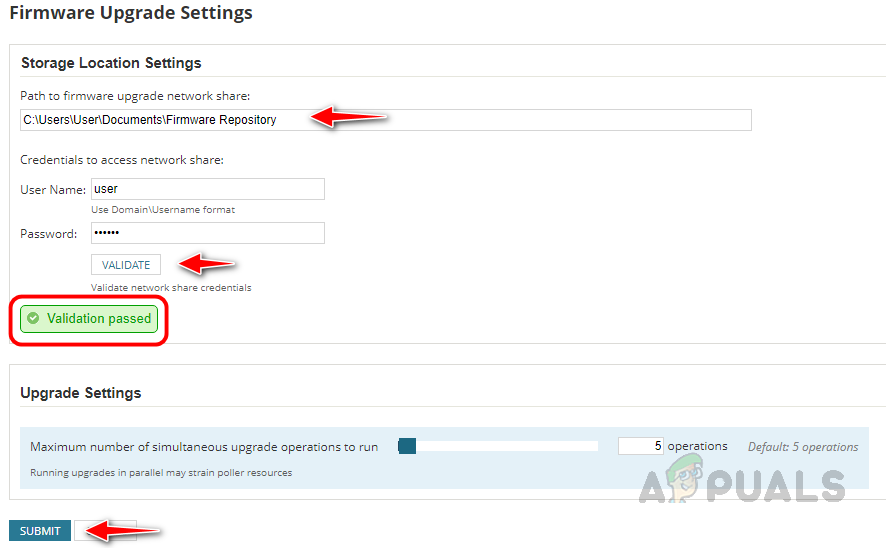 If required change the simultaneous upgrade operations to run or else keep the default settings.
Step 2: Place the Firmware Images in Storage Location
- Now we need to place the latest firmware images on the storage location we have created. Download the latest firmware images from the vendor site and place them in our created firmware repository.
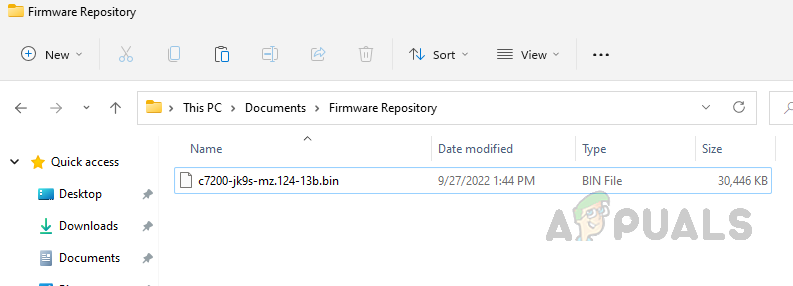
- Once the image is placed in the location, go to the NCM Settings page in the web console and click on Firmware Repository under Firmware Upgrade.

- We can see the firmware images we stored in the storage location.

Step 3: Configure Firmware Upgrade Template
This is the last step of our initial setup. Solarwinds NCM comes up with pre-configured firmware templates, we can use them in our firmware upgrade jobs based on the device and firmware version. To check the firmware upgrade templates, follow the below steps.
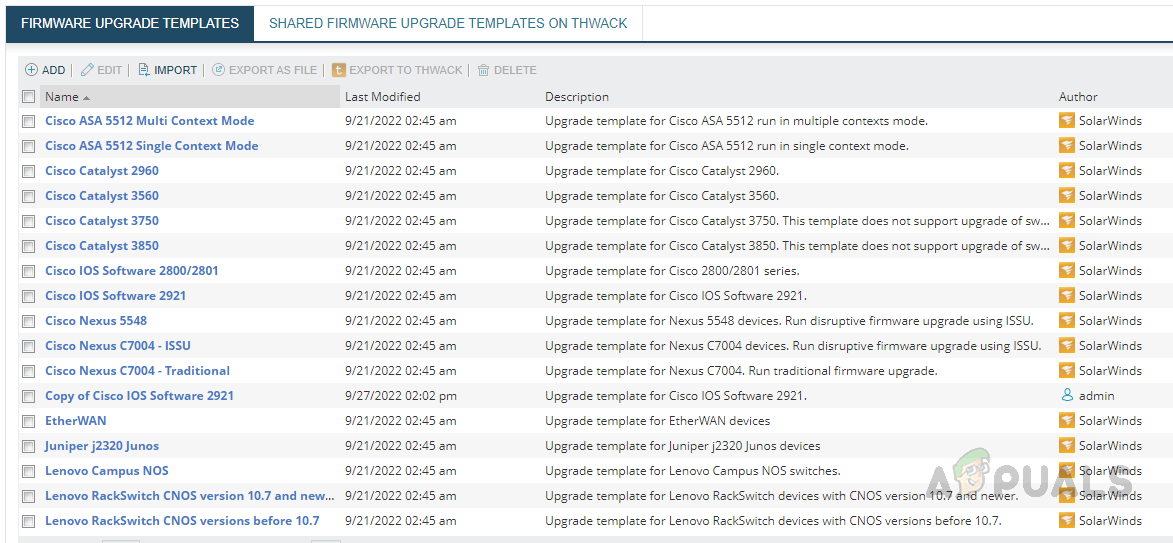
- Go to NCM Settings and click on Firmware Upgrade Templates under Firmware Upgrade.

- On the template page, we can see the default templates available in NCM. We need to map these templates in our firmware upgrade job.
We can customize any templates based on our device type or firmware version if templates are not available, also, we can download custom templates from Thwack. - This is what the firmware upgrade template looks like.
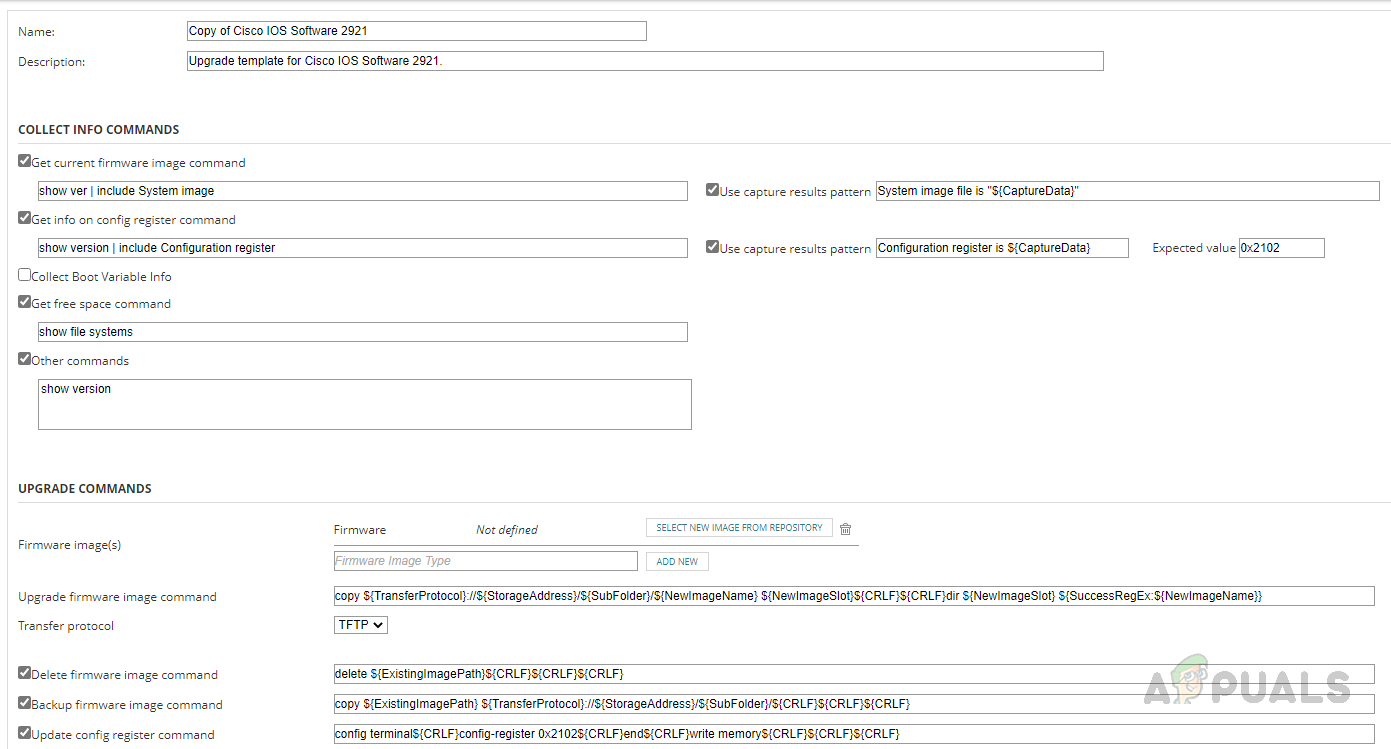
The template has CLI commands and strings used by Solarwinds NCM. Review the template and make sure it is suitable for the device that we will upgrade the firmware.
We have set up all the initial requirements to configure the firmware upgrade job. Now let’s see how to set up the firmware upgrade job.
Configuring Firmware Upgrade Job
Follow the below steps to configure the firmware upgrade job.
- Log in to your Solarwinds NCM web console.
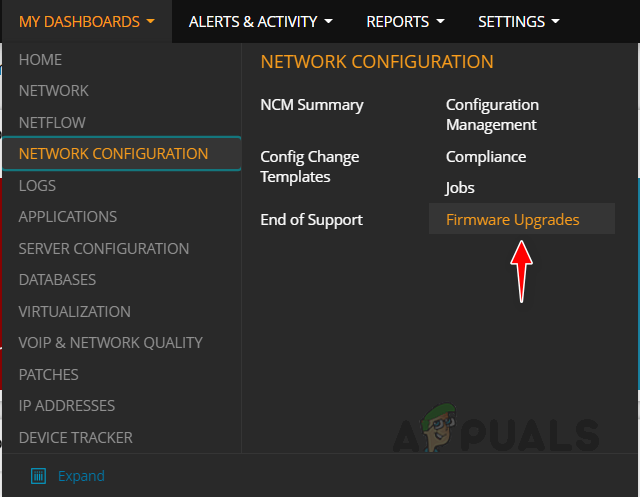
- Hover over Network Configuration and click on Firmware Upgrades in the sub-menu.
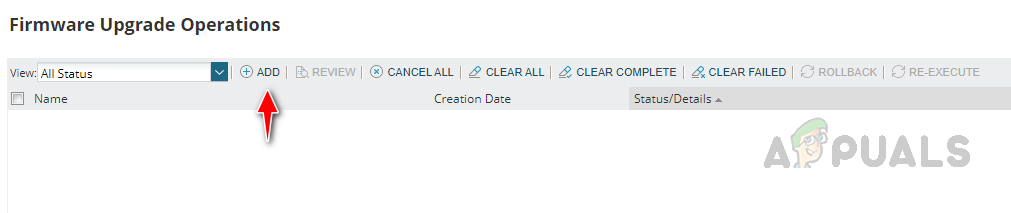
- Click on Add to create a new job.
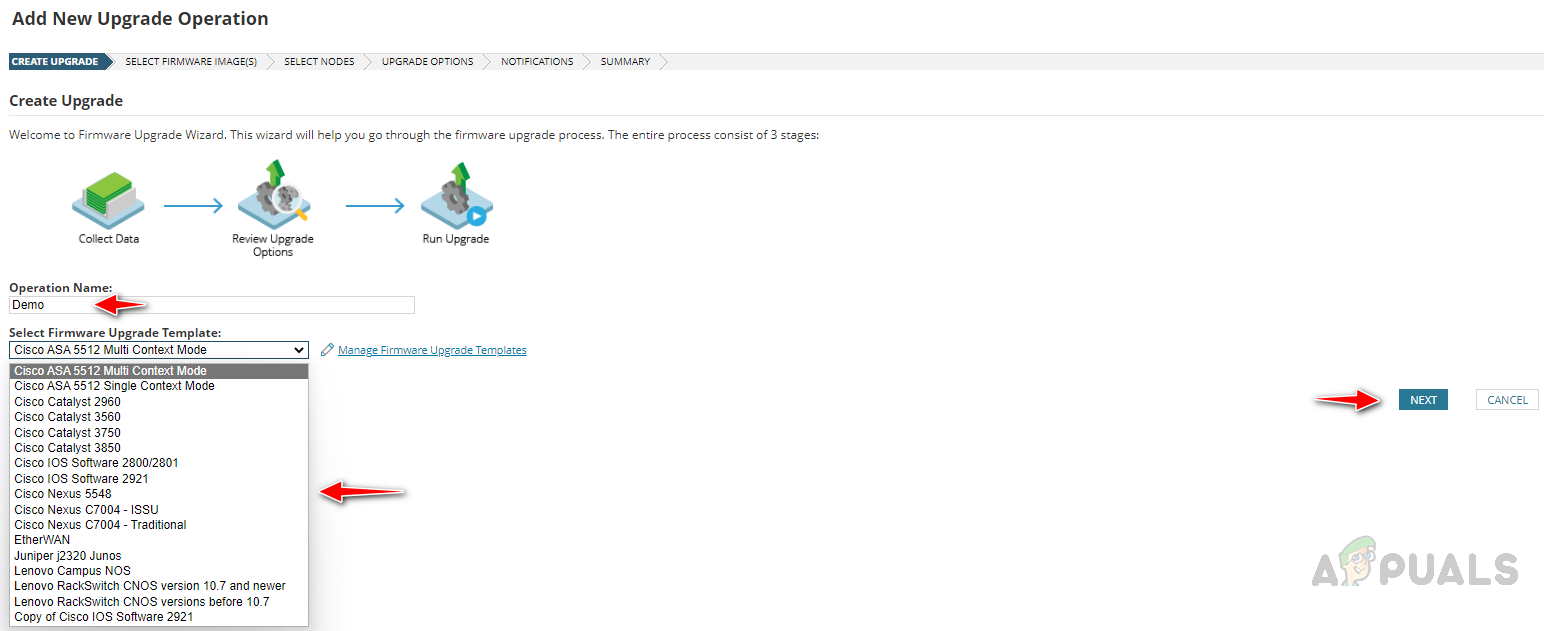
- Provide an appropriate name for the job, select the suitable firmware upgrade template, and click next.
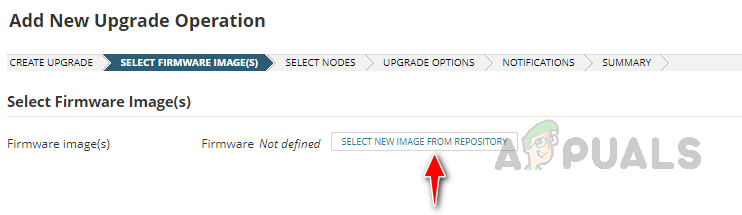
- Click on Select New Image From Repository.
- Select the suitable firmware image for the available images and click on ok.
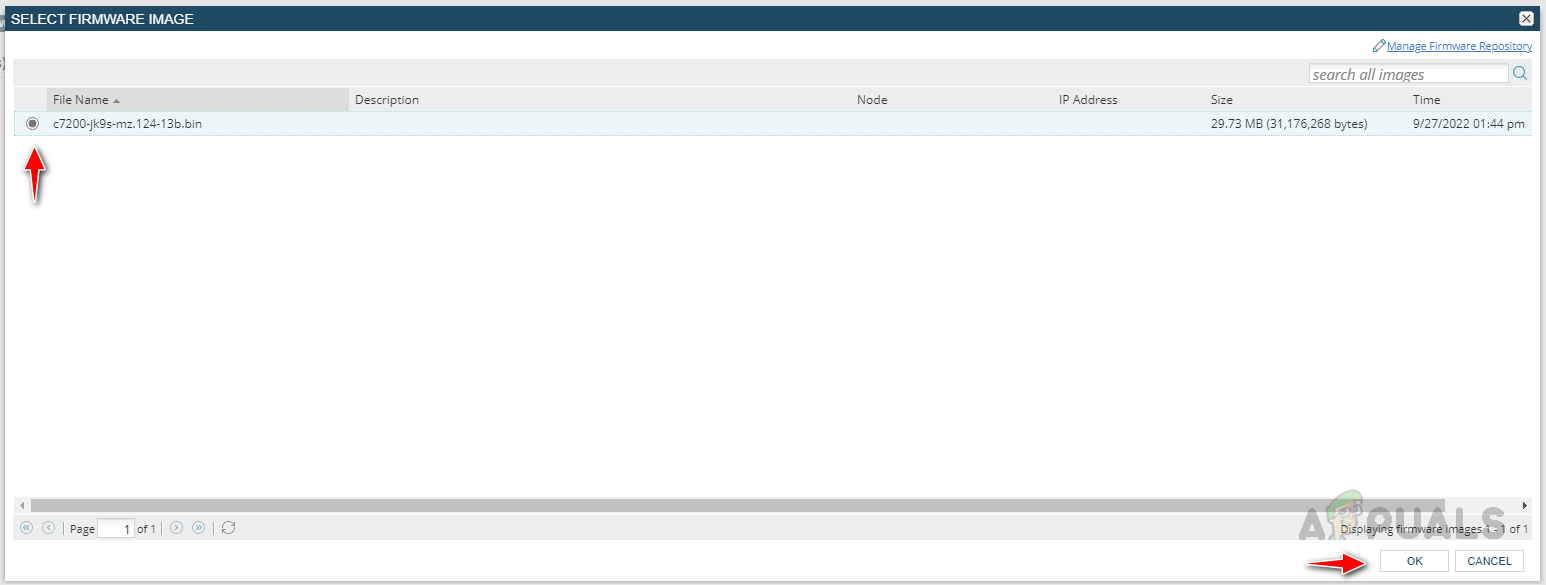 Click Next to move to the next step.
 - Select the nodes for the job and click on Start Collecting Data.
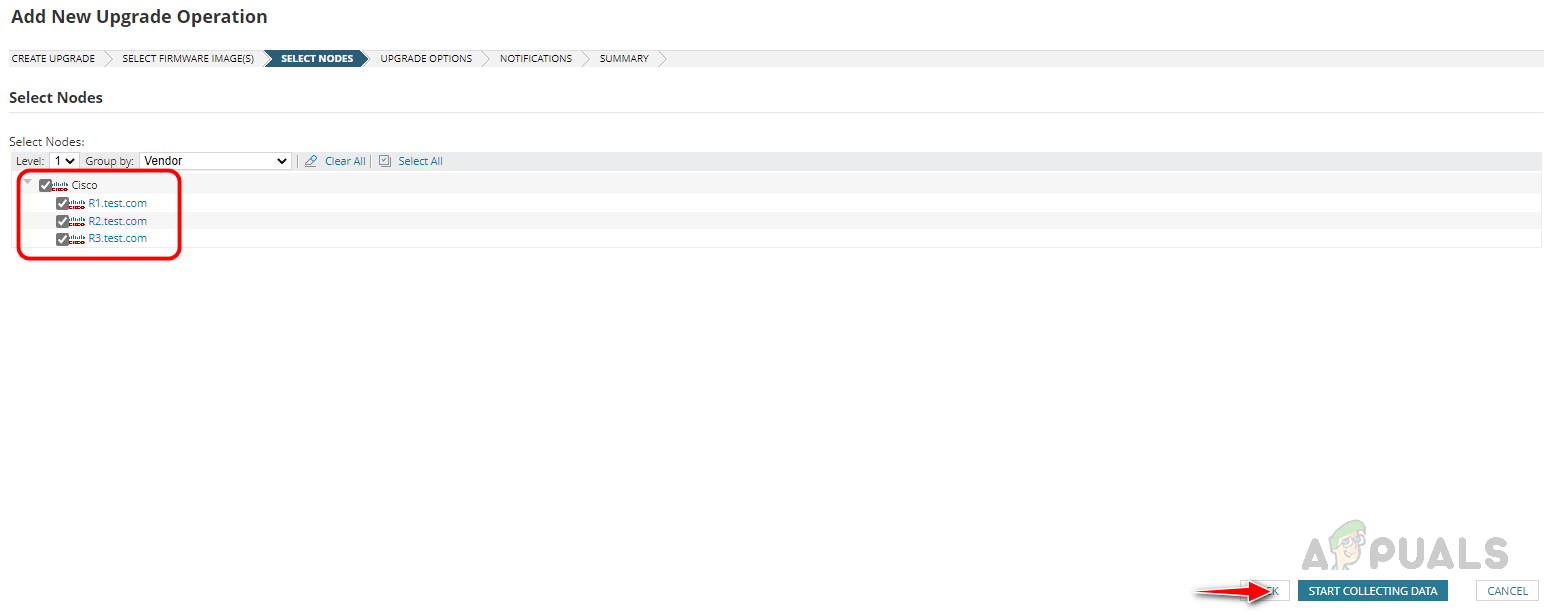
- Once click on Start Collecting Data, the data collection will be started, taking us to the Firmware Upgrade Operations page. Let’s wait for the data collection to complete.

- When the data collection is completed, click on please review and continue.

- Review the operation, select the node from the list, and click on confirm. Once confirmed, click on next.
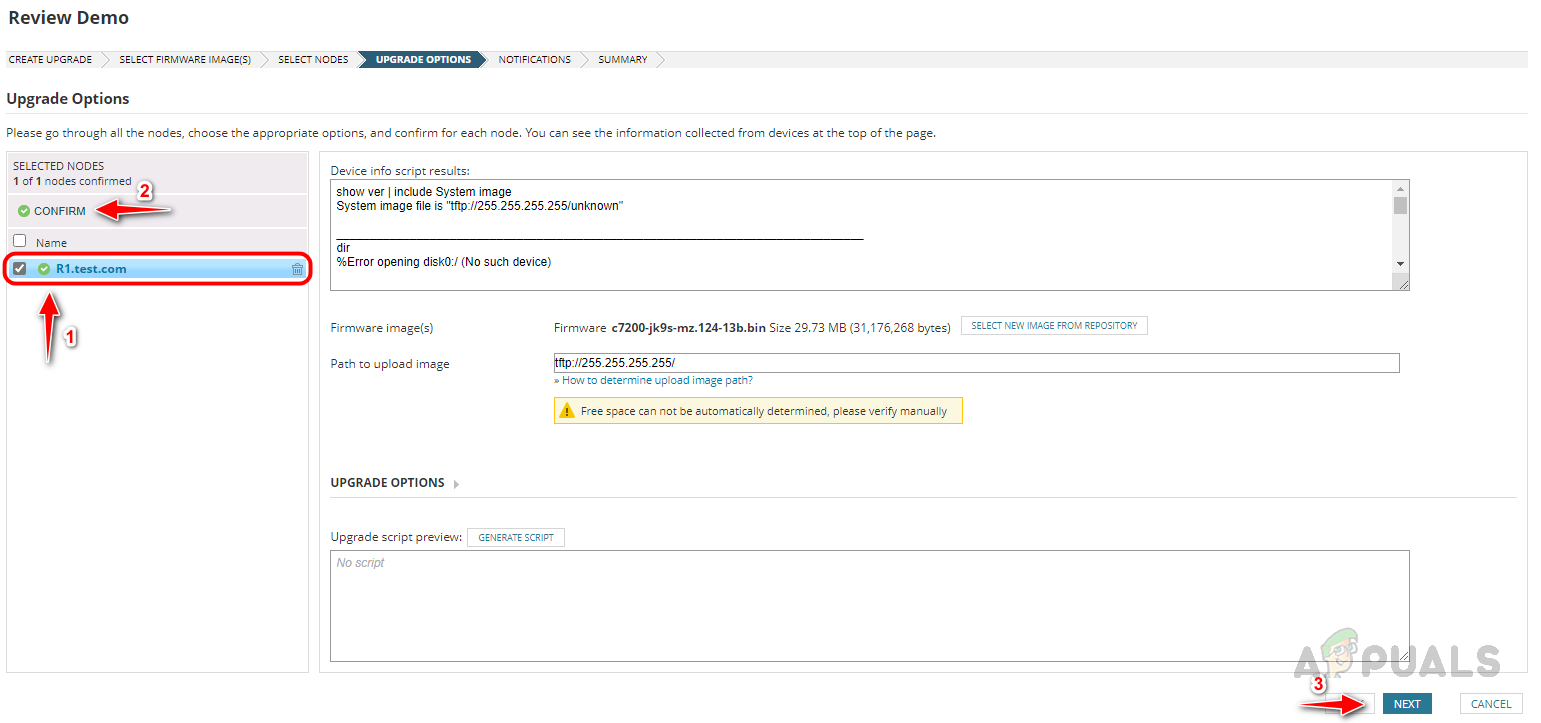
- If Solarwinds NCM is unable to determine the free space on your network device, it will ask to confirm you to delete the old firmware and update with new firmware. To confirm click on confirm. In the real world, scenario removes the unwanted firmware backup from your device to store the current backup to avoid losing the rollback option. If there is no space, backup the old firmware, store it in a backup repository, and click confirm.

- In the notification section, if you would like to receive the results in Email, select Email Result, configure the Email options, and click next. To receive Emails, SMTP settings need to be configured in Solarwinds NCM.
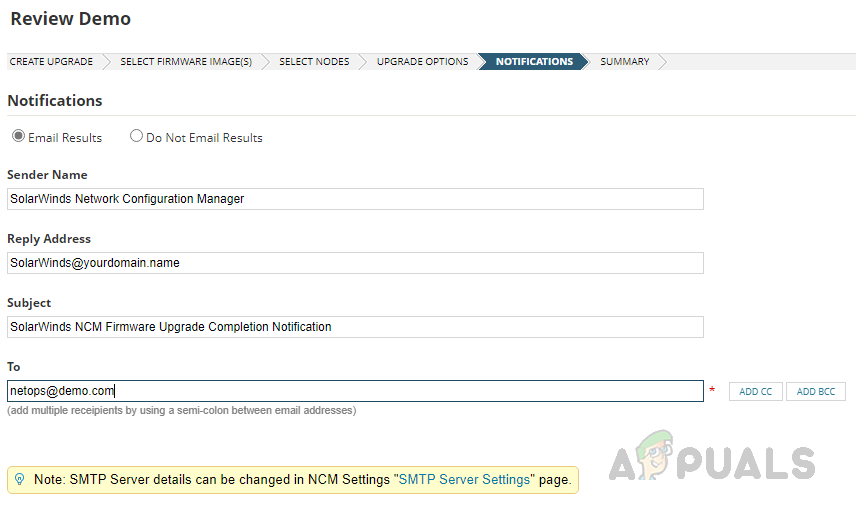
- If Email notifications are not required, select Do Not Email Results and click on Next.

- Review device details added for this firmware upgrade job on the summary page. You can reorder the devices if multiple devices are added to the job. Based on the device order, devices will be upgraded.
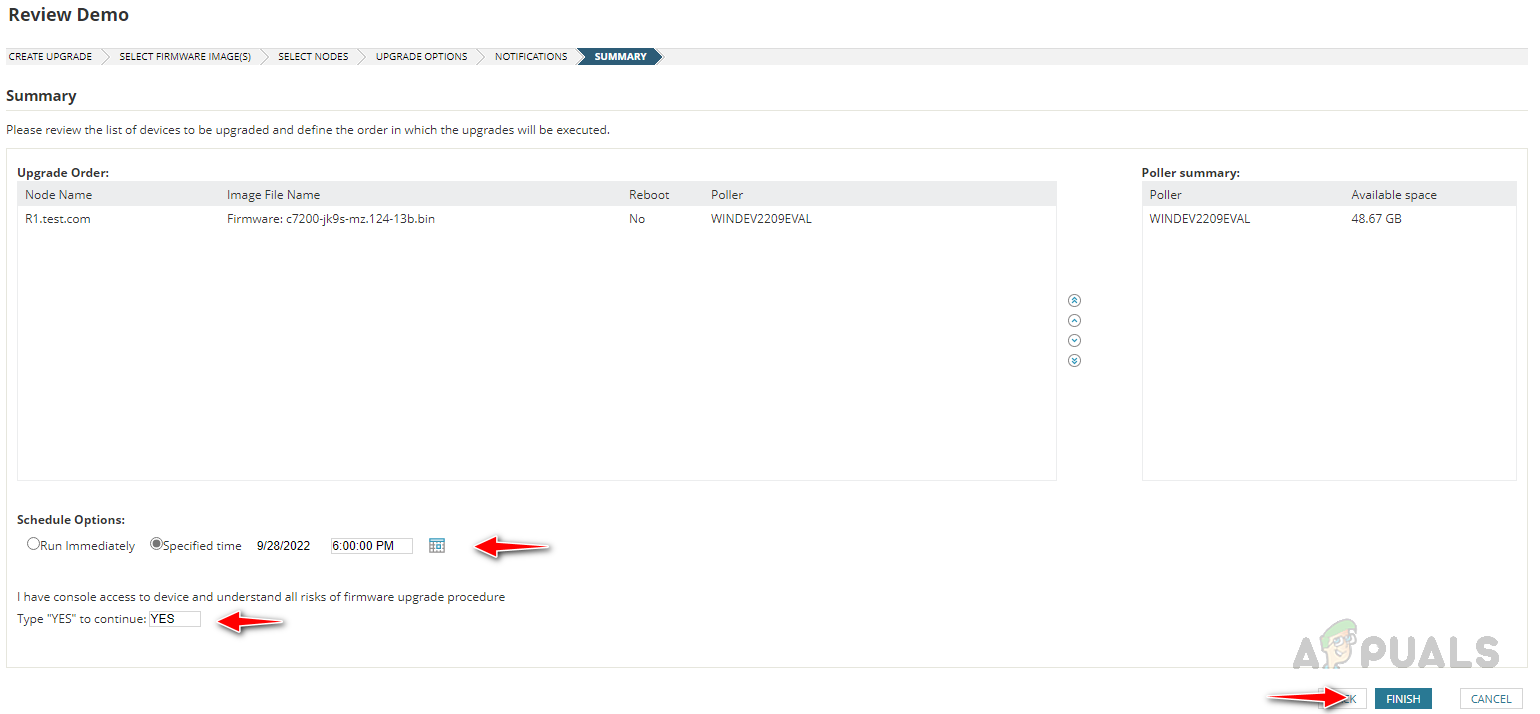 If you want to run the job immediately, select Run Immediately. If you want to schedule the job at a specific time, select Specified Time. Once done, type ‘YES‘ on the text box and click on Finish.
 - Now the firmware job is ready based on the selected schedule option upgrade job will run.
 Once the job is completed, you can see a success message in the status.
 - If you observe any issues with the latest firmware, you can roll back to the earlier version by clicking the Roll Back option. This is why we need to keep the current firmware running on the device.
This is how we can use the Firmware Vulnerability Scanning and Firmware Upgrade feature in Solarwinds NCM to detect and fix vulnerabilities with the latest firmware.