How to Find the Best WiFi Channel for Your Router?
WiFi channel is a medium through which our WiFi networks can send and receive data. Every network will be using one of the channels. The 2.4 GHz router will have 11 or 13 channels and each will be 20MHz wide. The 5GHz channels can range from 36 up to 165 depending on the router. However, most users are wondering about what WiFi channel is best for their network. In this article, we will teach you about how you can find the best WiFi channel for your router.
Finding the Best WiFi Channel for Your Router
WiFi channels matter when you live in an apartment where there are many other networks close to you. Having the same WiFi channel as the nearby networks will cause a lot of interference with their networks. It is best to find the WiFi channel that is used less by your neighbor networks. To find the WiFI channel that is less used, you need to find the WiFi channels for all the nearby networks. This will help you in figuring out which WiFi channel is used by fewer networks and that will be the best choice. We are going to show you the methods of different platforms.
Windows:
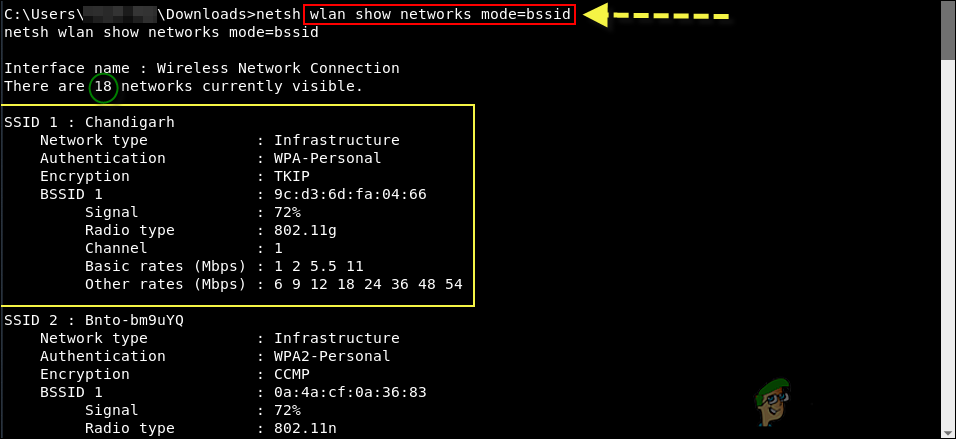
You can use this command in the command prompt to find all the nearby network’s channels.
netsh wlan show networks mode=bssid
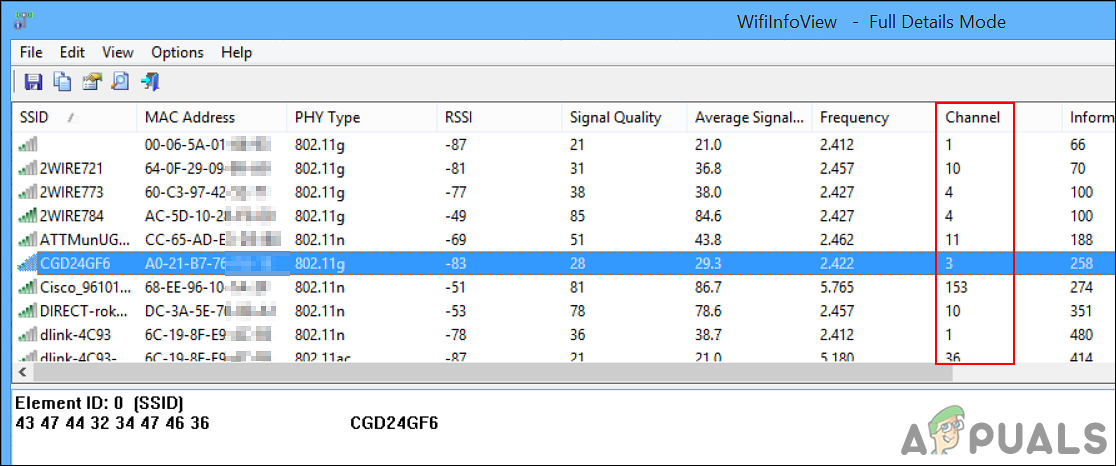
Also, there are many different programs for Windows that show the information for all the available networks, we are going to show you the result of WifiInfoView by Nir Soft.
macOS:
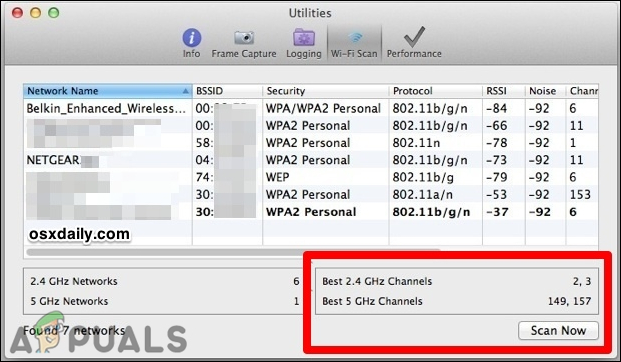
In macOS, hold the option key and click on your WiFi icon at the top. Then select the Open WiFi Diagnostics option. Ignore the wizard, click on the Window menu at the top and choose Utilities or Scan option. This will show your current WiFi channel and also recommend the best WiFi channel.
Linux:
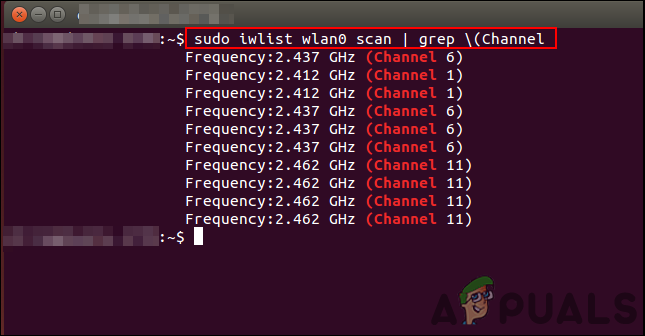
There is a command for finding the Network information in the terminal. This command can be adjusted according to the information that the user wants to retrieve. We are going to use the one that specifies channels as shown below:
sudo iwlist wlan0 scan | grep \(Channel
Android:
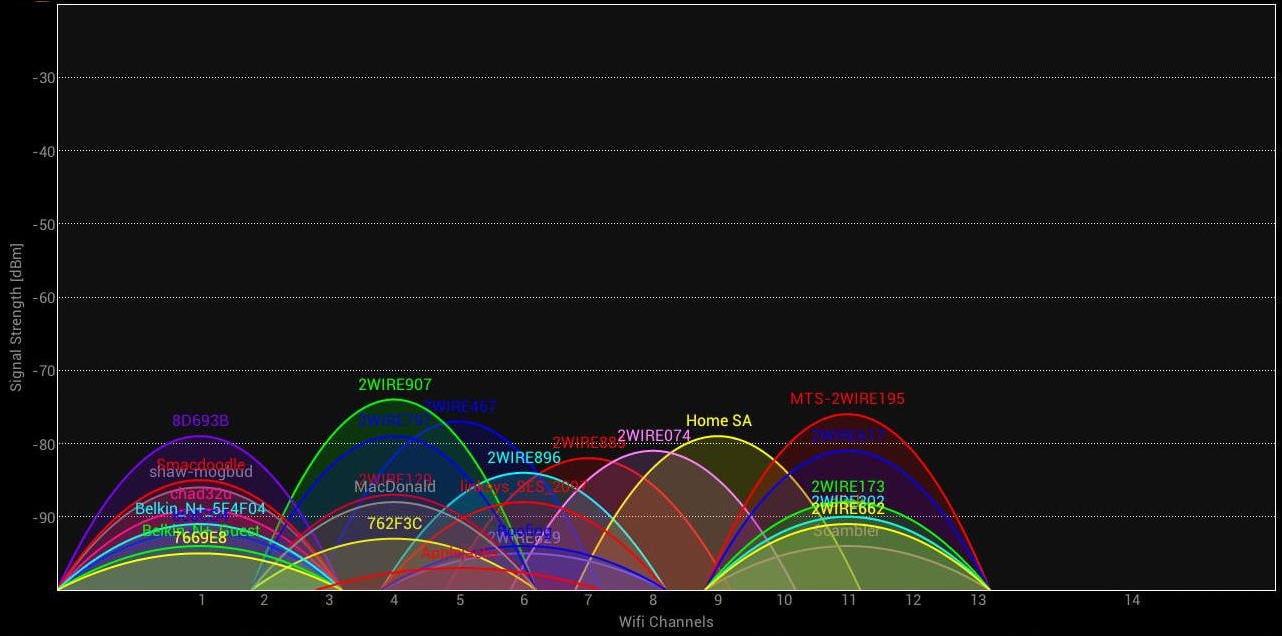
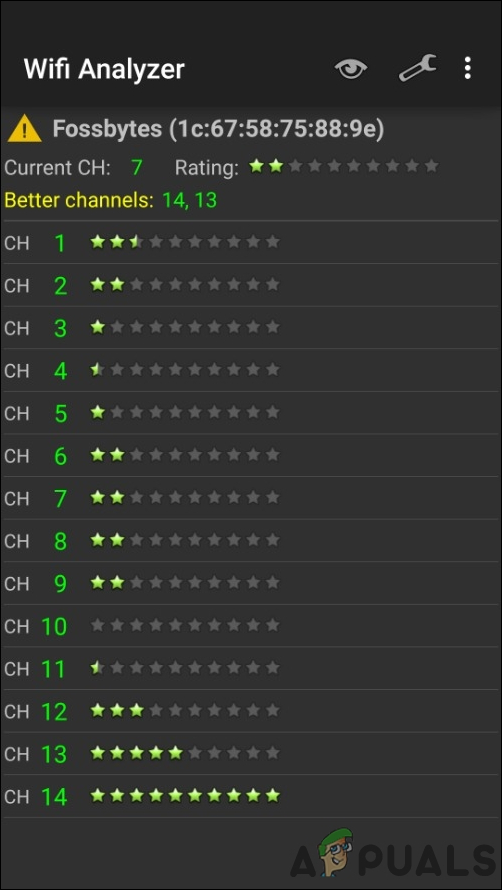
There is an application called WiFi Analyzer for Android that shows the result of the best available channel. You can simply download the application from Google Play Store. It can find the available networks and by determining that it will show you the result of best available channels as shown below:
iPhone:
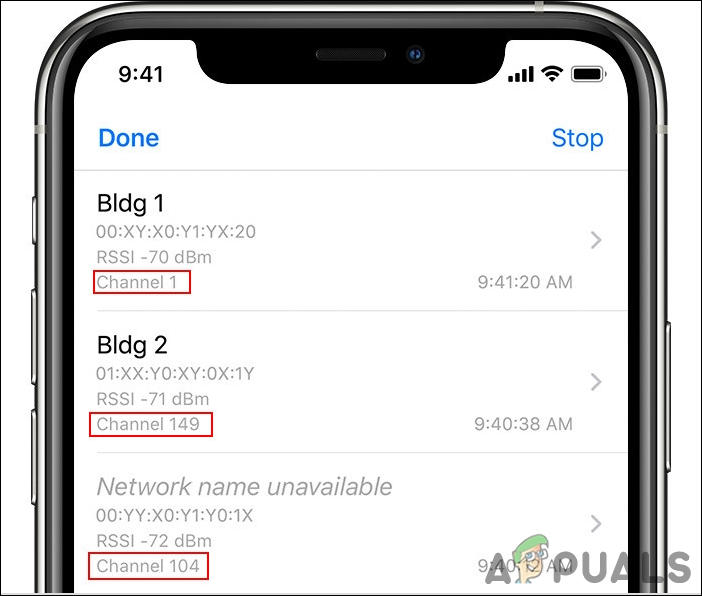
On your iPhone, go to the Settings, tap on the AirPort Utility, and then enable the WiFi Scanner. Now open the AirPort Utility app and tap on the WiFi scan. You will find all the available networks and their channels.
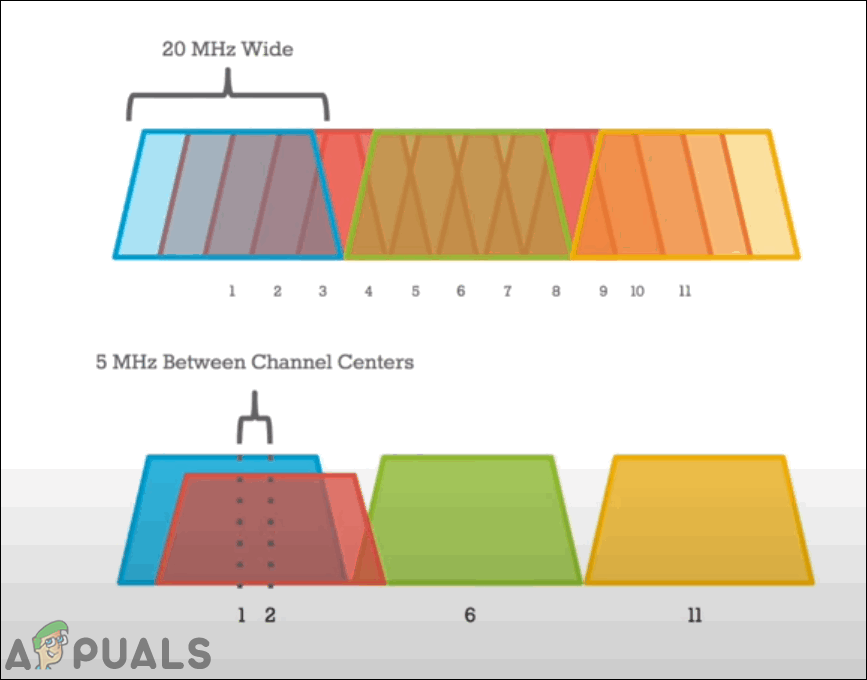
For most 2.4GHz channels, it is better to use channels 1, 6, or 11. By using one of these channels, it will make sure that it doesn’t overlap with the other channels. Also, look for the channel that has the least number of wireless networks available on it, it will be the best channel for you. Each channel is about 20MHz to 22MHz wide, but the 2.4GHz is only 100MHz. So, to include all 11 or 13 channels in this much space, they need to overlap each other. Whereas 5GHz will have much more space for channels and the channels won’t overlap with it. 5GHz has less range but has greater potential for higher wireless speeds and in general, it has less consumption than the 2.4GHz band.
Changing Your WiFi Channel in Router Settings
After analyzing and finding the least congested WiFi channel, you need to change the router’s WiFi channel. Changing the WiFi channel is very easy and simple to do in the router settings. Every router will have different settings where you can find the WiFi channel option, however, they mostly look similar. You can open your router settings in any kind of browser on any device. Follow the below steps to change the WiFi channel:
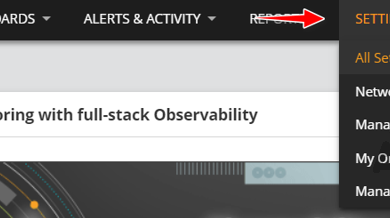
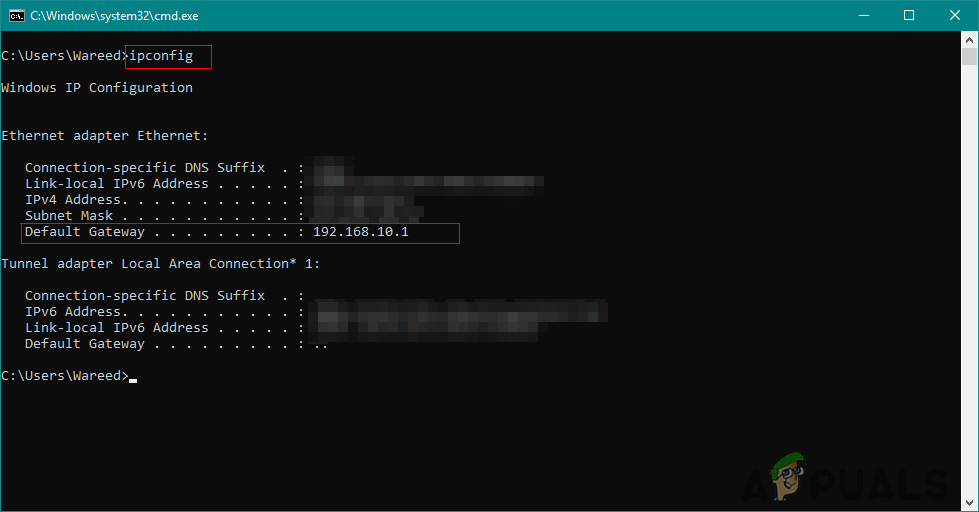
- Open your browser and type the IP address of your router. You can find the IP address on the back of the router or by opening CMD and typing ‘ipconfig‘ as shown below:
- Log into your router settings by providing the username and password. The default username/password will be admin/admin. However, you may have a different password that you can find on the back of the router.
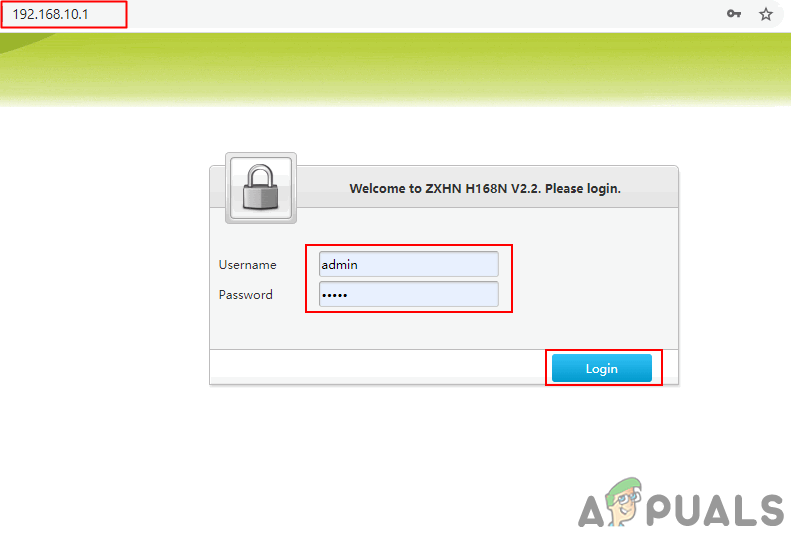
Logging in to the router page - In your router settings, click on the Wireless or Wireless Settings option and then select the Advanced settings. You will find the Channel option that you can change to whatever you want.
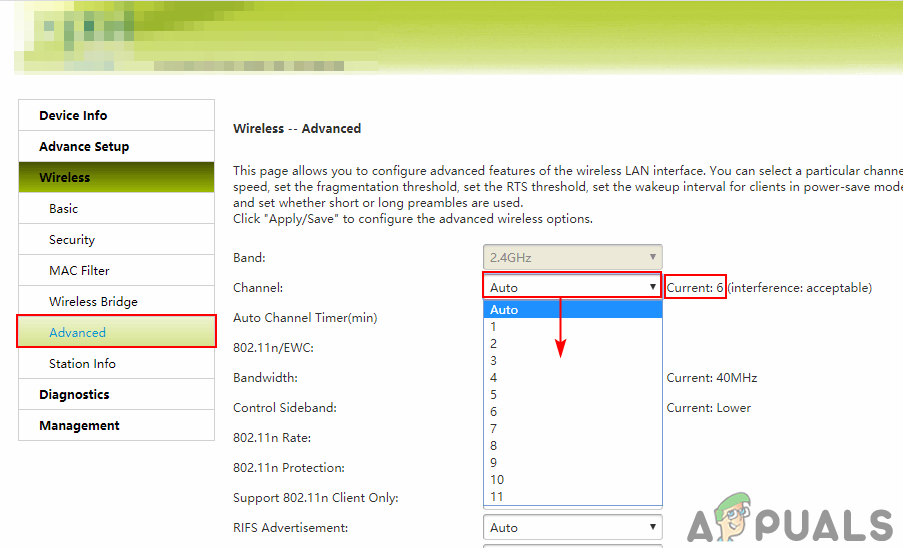
Changing channel in Wireless advanced settings - After changing the settings in your router, make sure you click the Apply/Save button to apply all the changes.
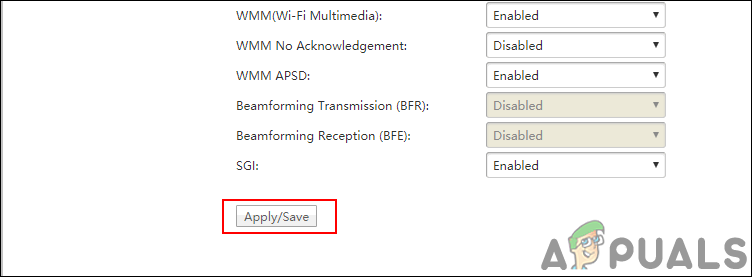
Applying/Saving all the changes