How to Clear Windows Update Cache in 7 Steps [2024]
 Reviewed by Huzaifa Haroon
- Windows Update is a system feature that keeps your device updated and secure by automatically downloading and installing updates. The Windows Update cache temporarily stores these updates to speed up the process and reduce space usage.
- Clearing the Windows Update cache can help resolve issues related to corrupt or outdated update files by removing them and allowing fresh files to be downloaded from Microsoft.
- You can clear the Windows Update cache using the Settings app by navigating through System > Storage > Temporary Files, selecting categories to delete, and confirming the deletion to free up space and improve system performance.
Have you ever felt like your computer is holding onto the past a little too dearly? Well, it’s not just nostalgia; it’s your Windows update cache! Just like us, our computers need a good spring cleaning to get rid of the old to make room for the new. Clearing the Windows update cache is like giving your PC a fresh start, and who doesn’t love a fresh start?
By the end of this article, you’ll be a cache-clearing wizard, ready to free up space and potentially speed up your system’s performance. So, let’s dive in and teach your computer that holding onto the past isn’t always a good thing—unless we’re talking about your high score in Minesweeper, of course!
Table of Contents
What is Windows Update and How It Works?
Windows Update is a feature that helps you keep your device running smoothly and securely by downloading and installing the latest updates for Windows and your apps. The Windows Update workflow has four core areas of functionality:
- Scan: Orchestrator schedules the scan. Orchestrator verifies admin approvals and policies for download.
- Download: Orchestrator starts downloads. Windows Update downloads manifest files and provides them to the arbiter. The arbiter evaluates the manifest and tells the Windows Update client to download files.
- Install: Orchestrator starts the installation. The arbiter calls the installer to install the package.
- Commit: Orchestrator starts a restart. The arbiter finalizes before the restart.
During the updating process, the Windows Update Orchestrator operates in the background to scan, download, and install updates. It does these actions automatically, according to your settings, and silently so that it doesn’t disrupt your computer usage.
One of the benefits of Windows Update is that it uses a cache to store the downloaded updates temporarily. This cache can help speed up the update process and reduce disk space usage by keeping only the necessary files on your system. You can clear the Windows Update cache manually or via File Explorer, Command Prompt, or Script if you encounter any issues or want to free up some space on your system drive.
READ MORE: [FIX]Windows 10/11 Won’t Install or Download Updates ➜
What is Windows Update Cache?
Windows update cache is a folder that stores the downloaded updates for Windows. It helps to speed up the update process by reducing the number of times that Windows needs to download the same update file from the internet.
Windows creates a Windows update cache by periodically scanning for available updates and downloading them to a specific location on your system drive. The default location for the Windows update cache is C:WindowsSoftwareDistributionDownload.

However, storing the cache files for a long time can also cause problems with your regular Windows services, such as errors, stuck updates, or performance issues. Therefore, it is recommended to clear the Windows update cache periodically to free up some disk space and fix any potential issues.
Why Even Clear Windows Update Cache?
Sometimes the downloaded update files may be corrupted or outdated, which can cause errors or issues while installing the update.
To fix these problems, you may need to clear the Windows Update cache. The Windows Update cache is a folder that stores the downloaded update files and tries to install them automatically. By clearing the cache, you can delete the old or corrupted files and download fresh ones from the Microsoft server.
READ MORE: [FIX] “Pause updates” option greyed out in Windows Update ➜
How to Clear Windows Update Cache?
You can use the Settings app to delete the Temporary Files that include the Windows Update cache files. To do this, follow these steps:
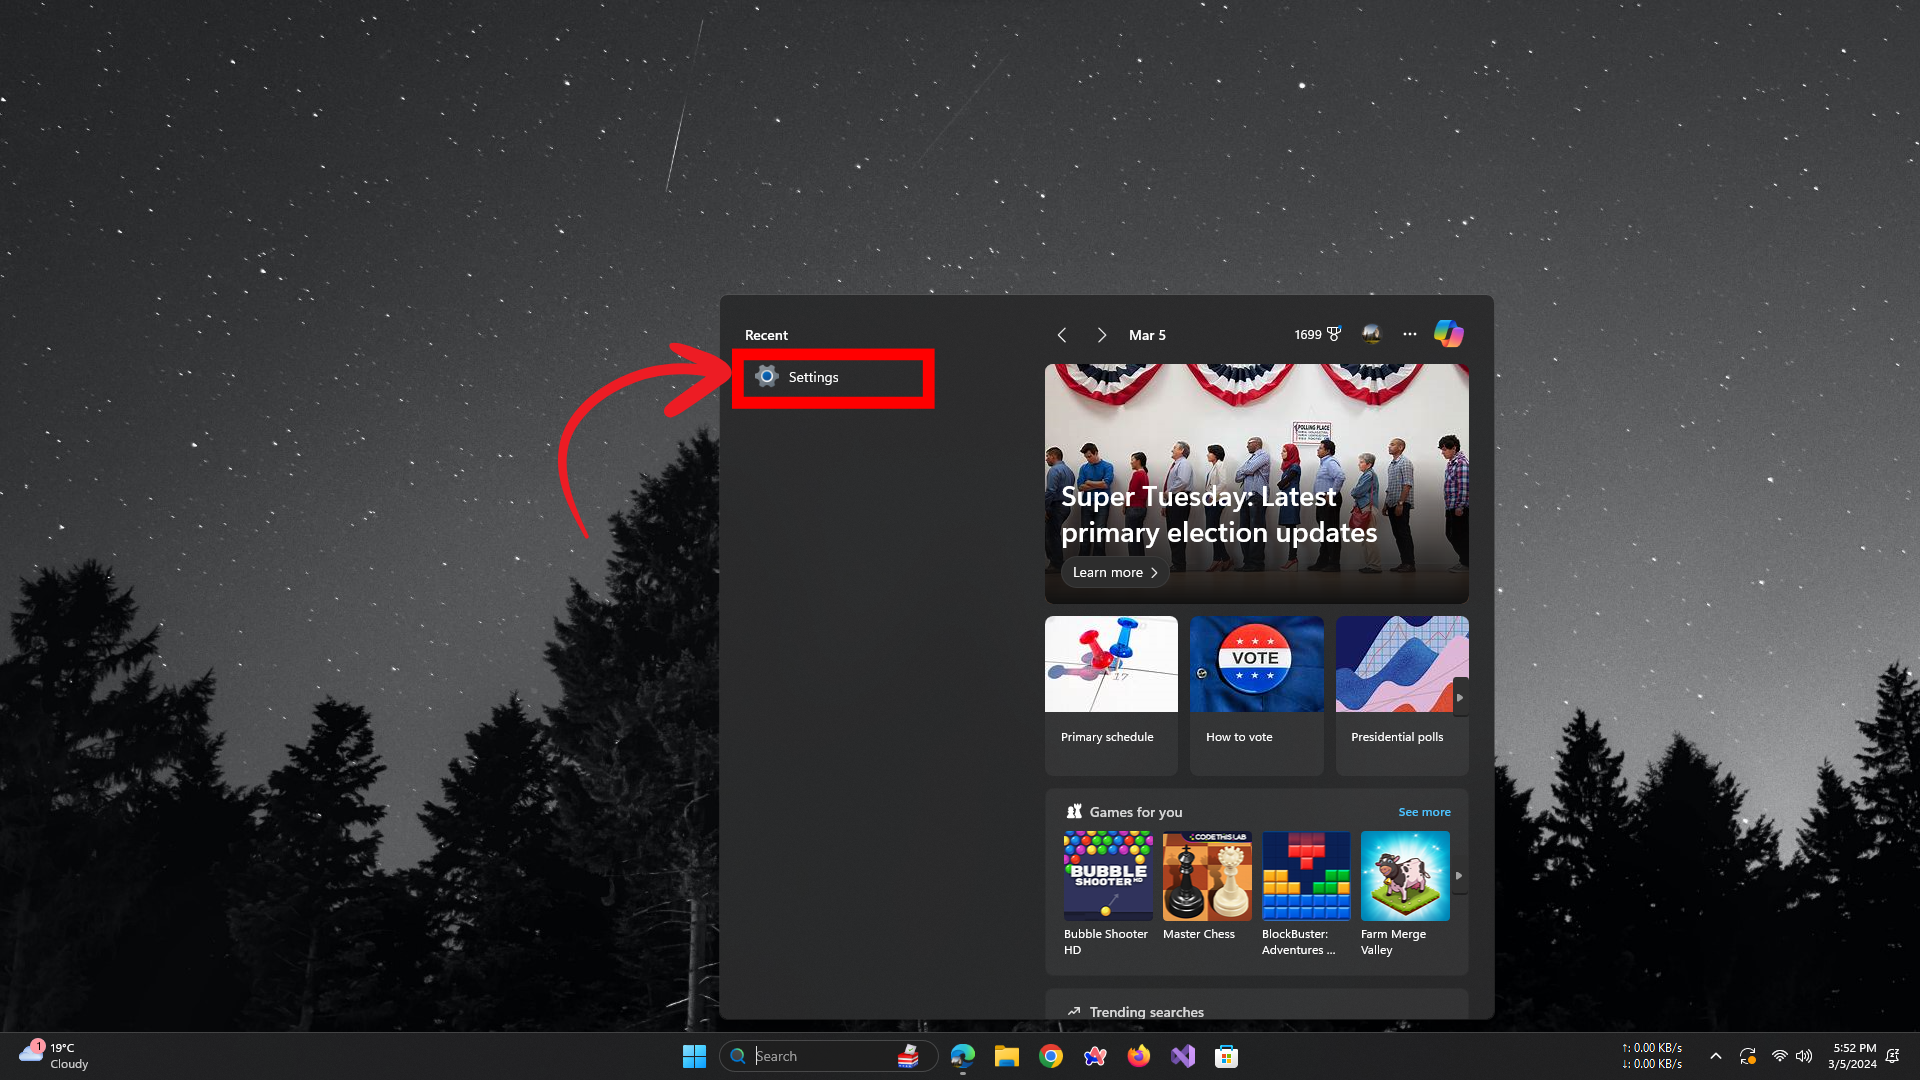
Step 1: Open Settings
Navigate to the Windows Start menu and click on the gear-shaped Settings icon.
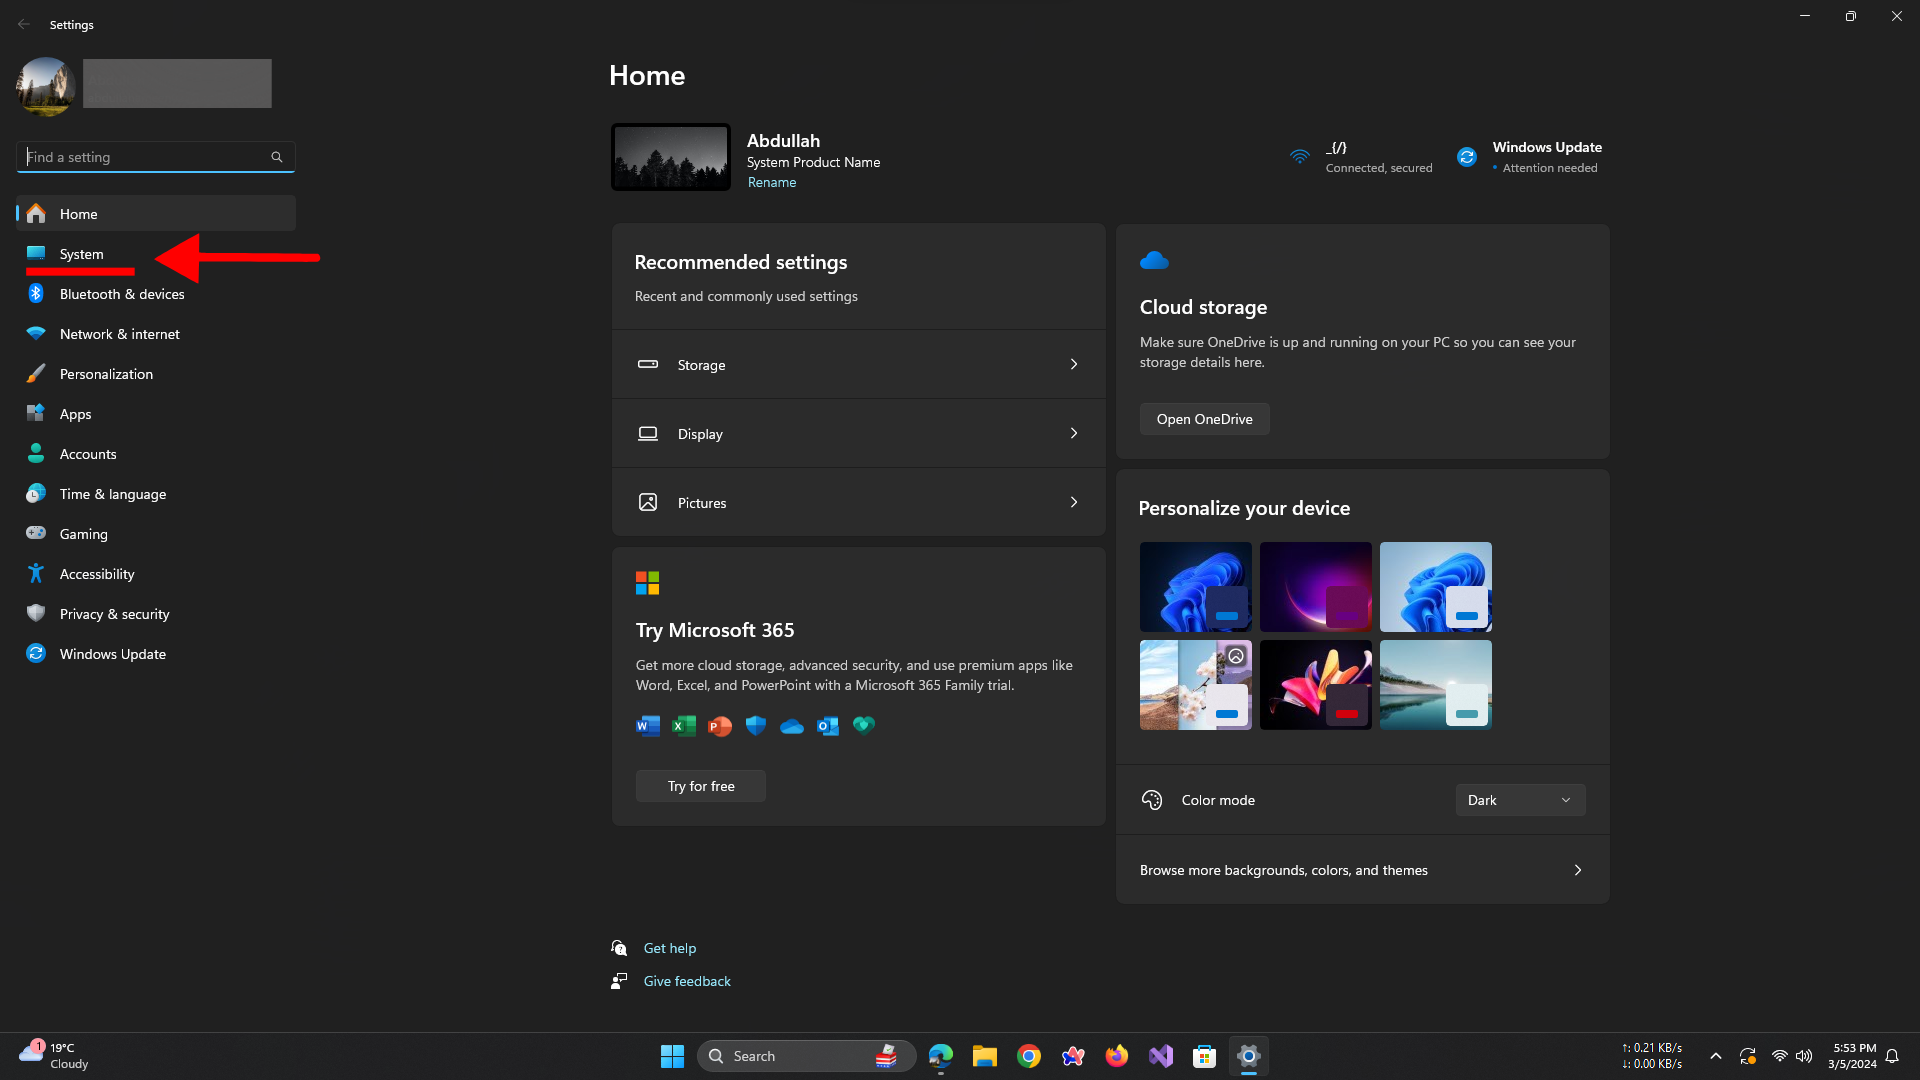
Step 2: Access System Settings.
In the Settings window, select System.
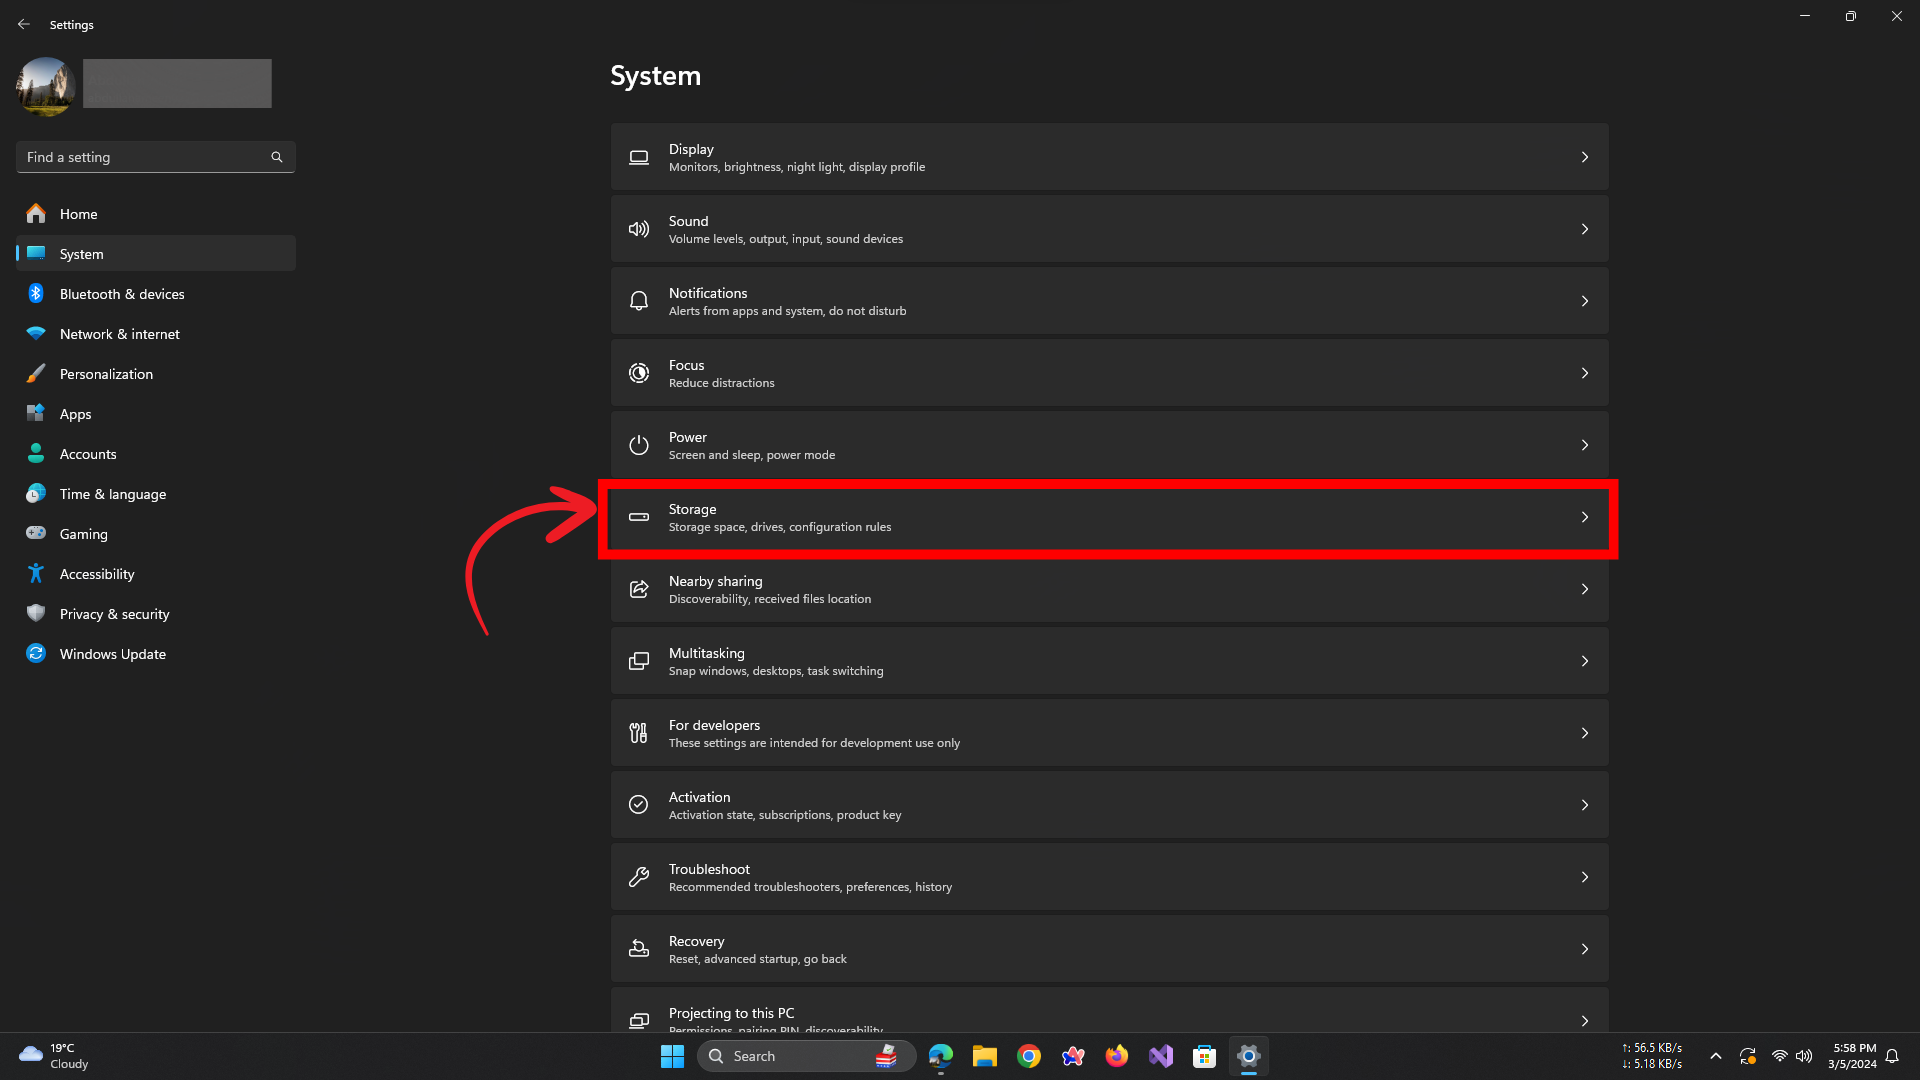
Step 3: Manage Storage
Choose Storage from the menu.
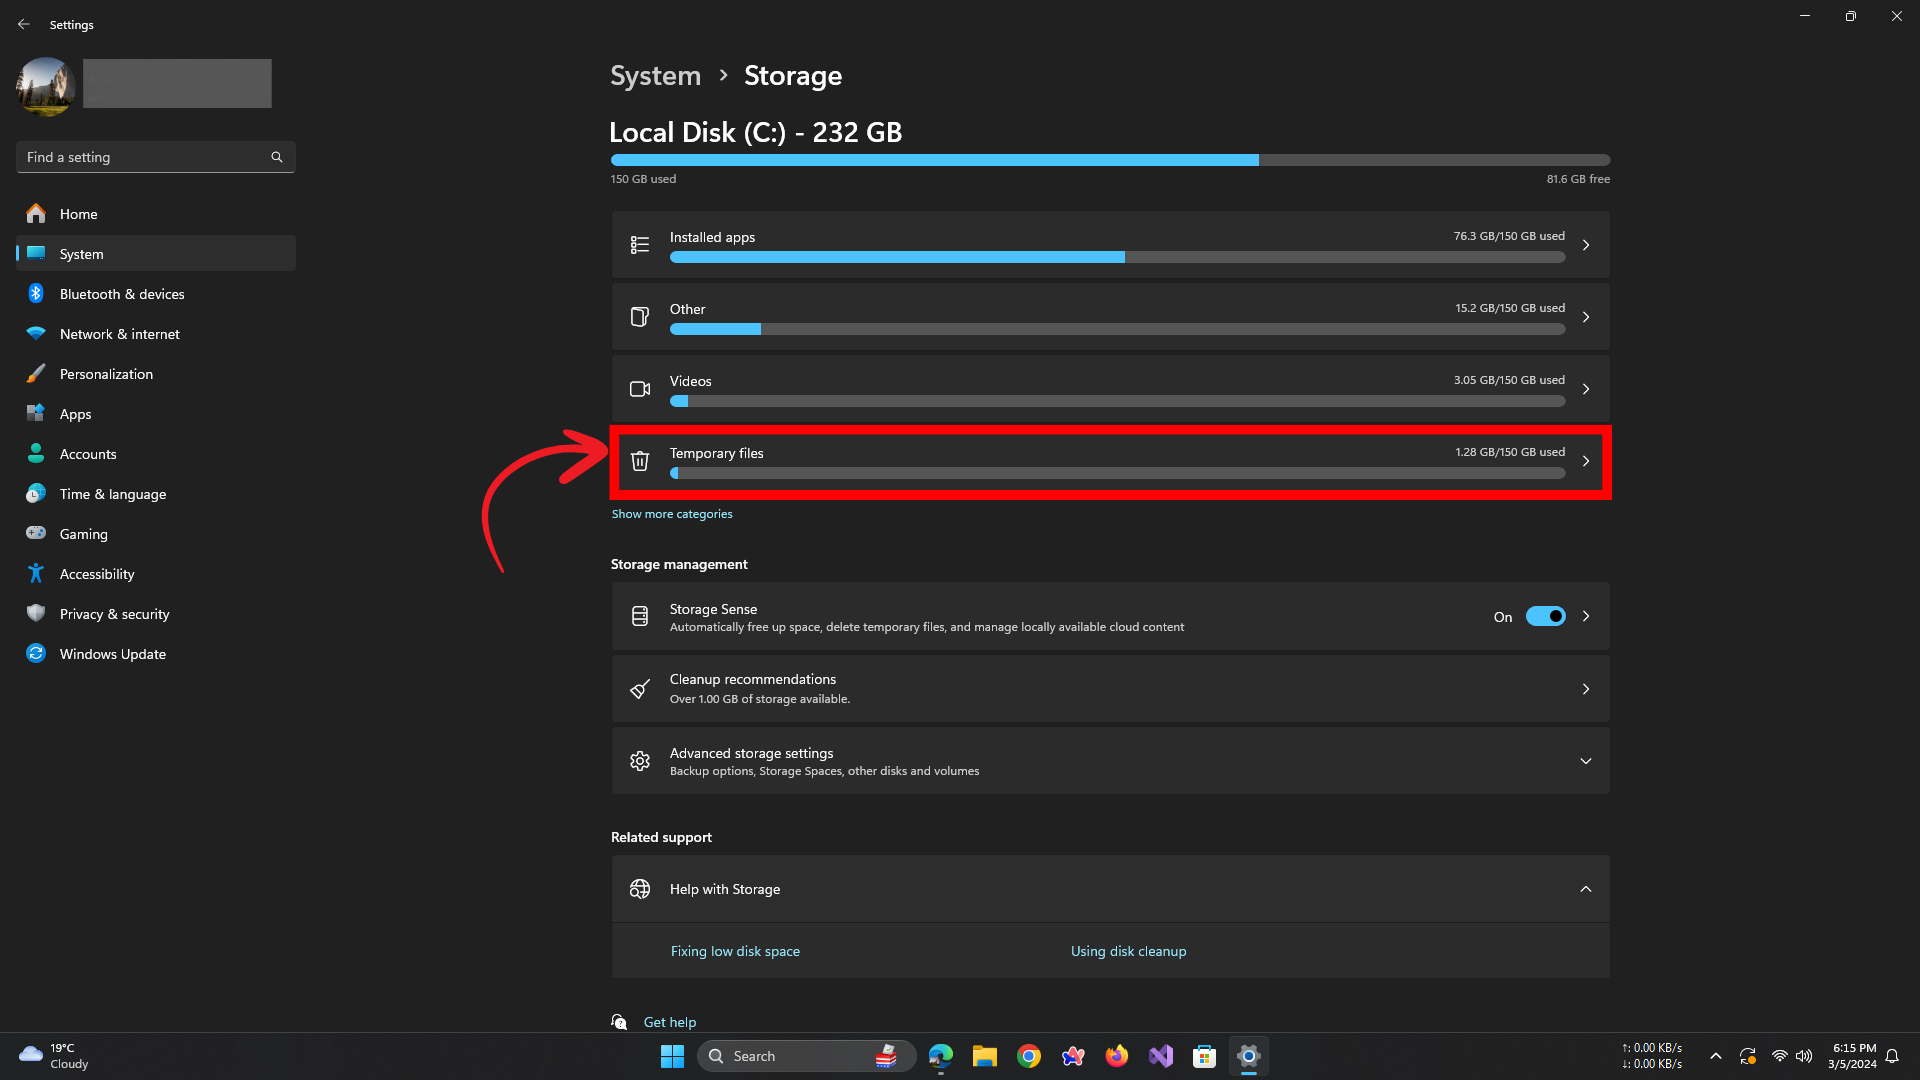
Step 4: Clear Temporary Files
Under the Storage section, locate and click on Temporary Files.
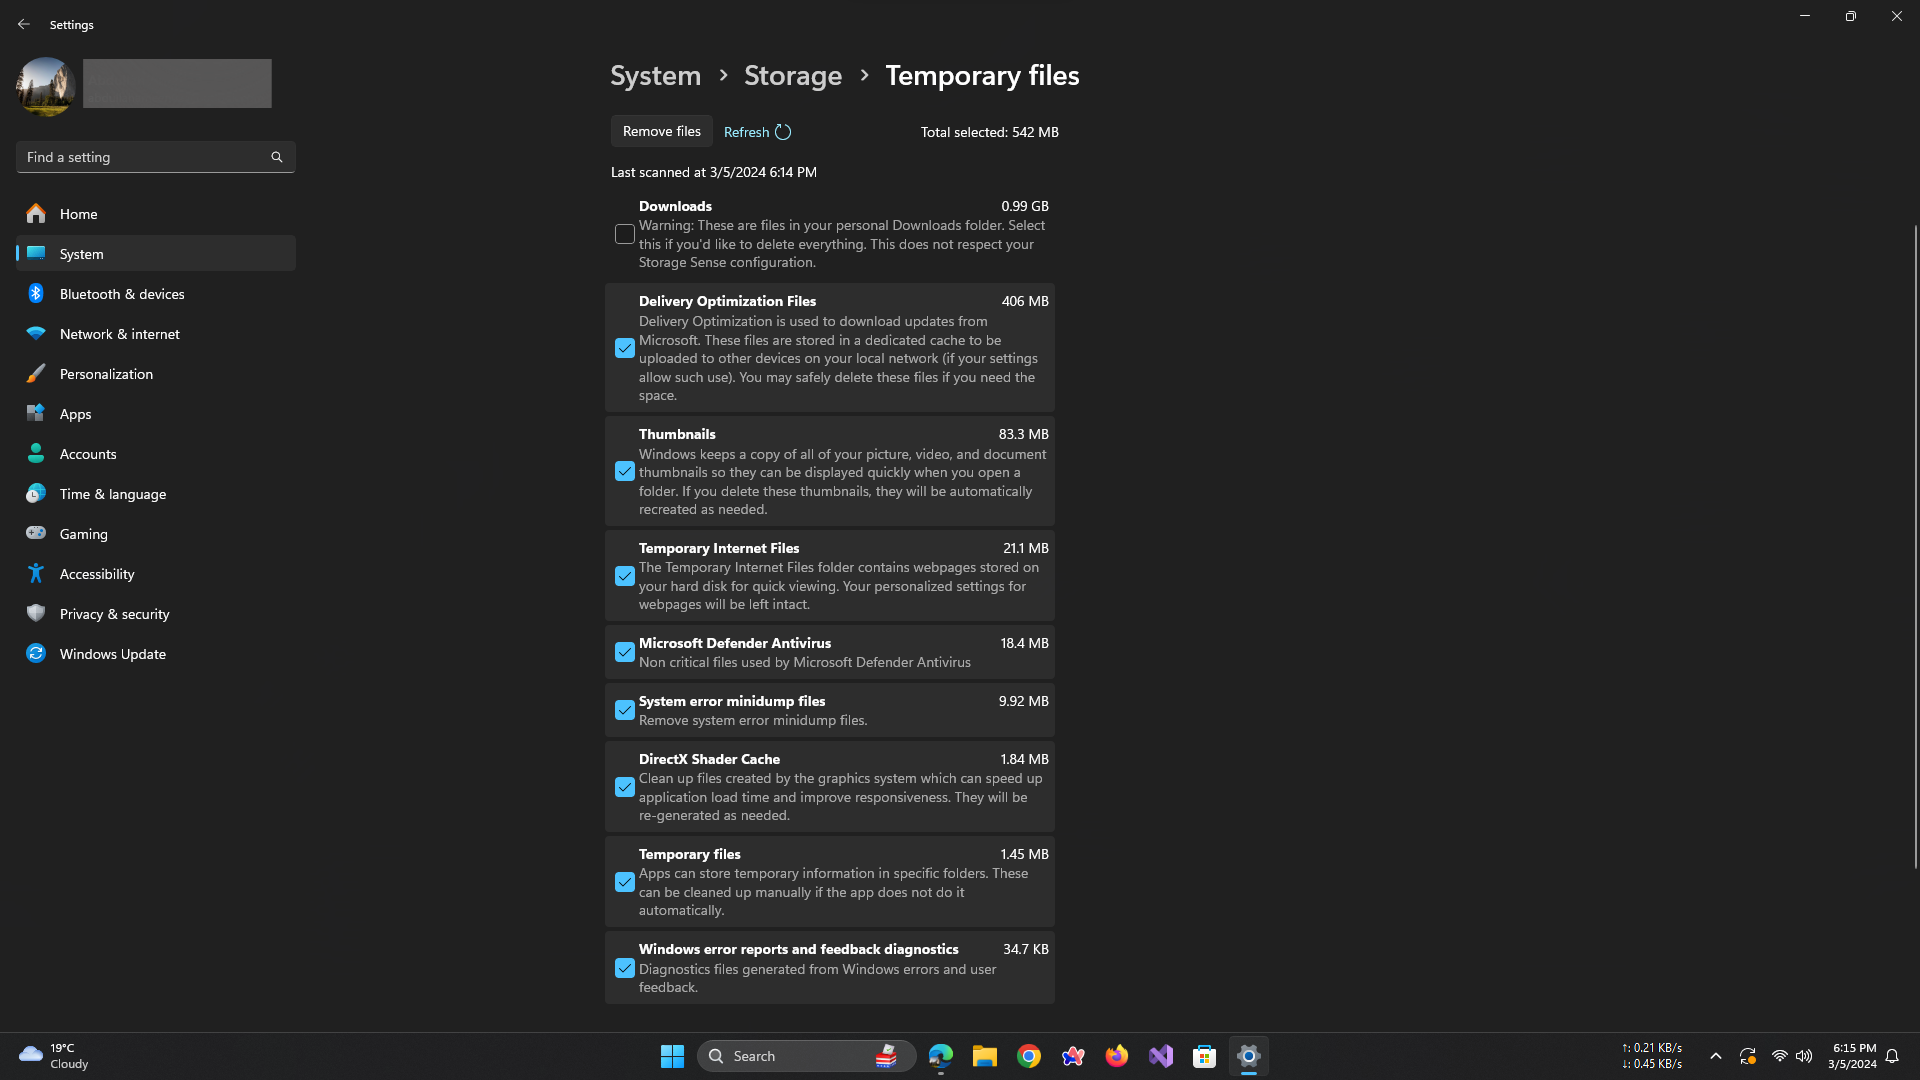
Step 5: Select Categories
Check the boxes next to the categories of temporary files you want to clear (e.g., Downloads, Recycle Bin, etc.).
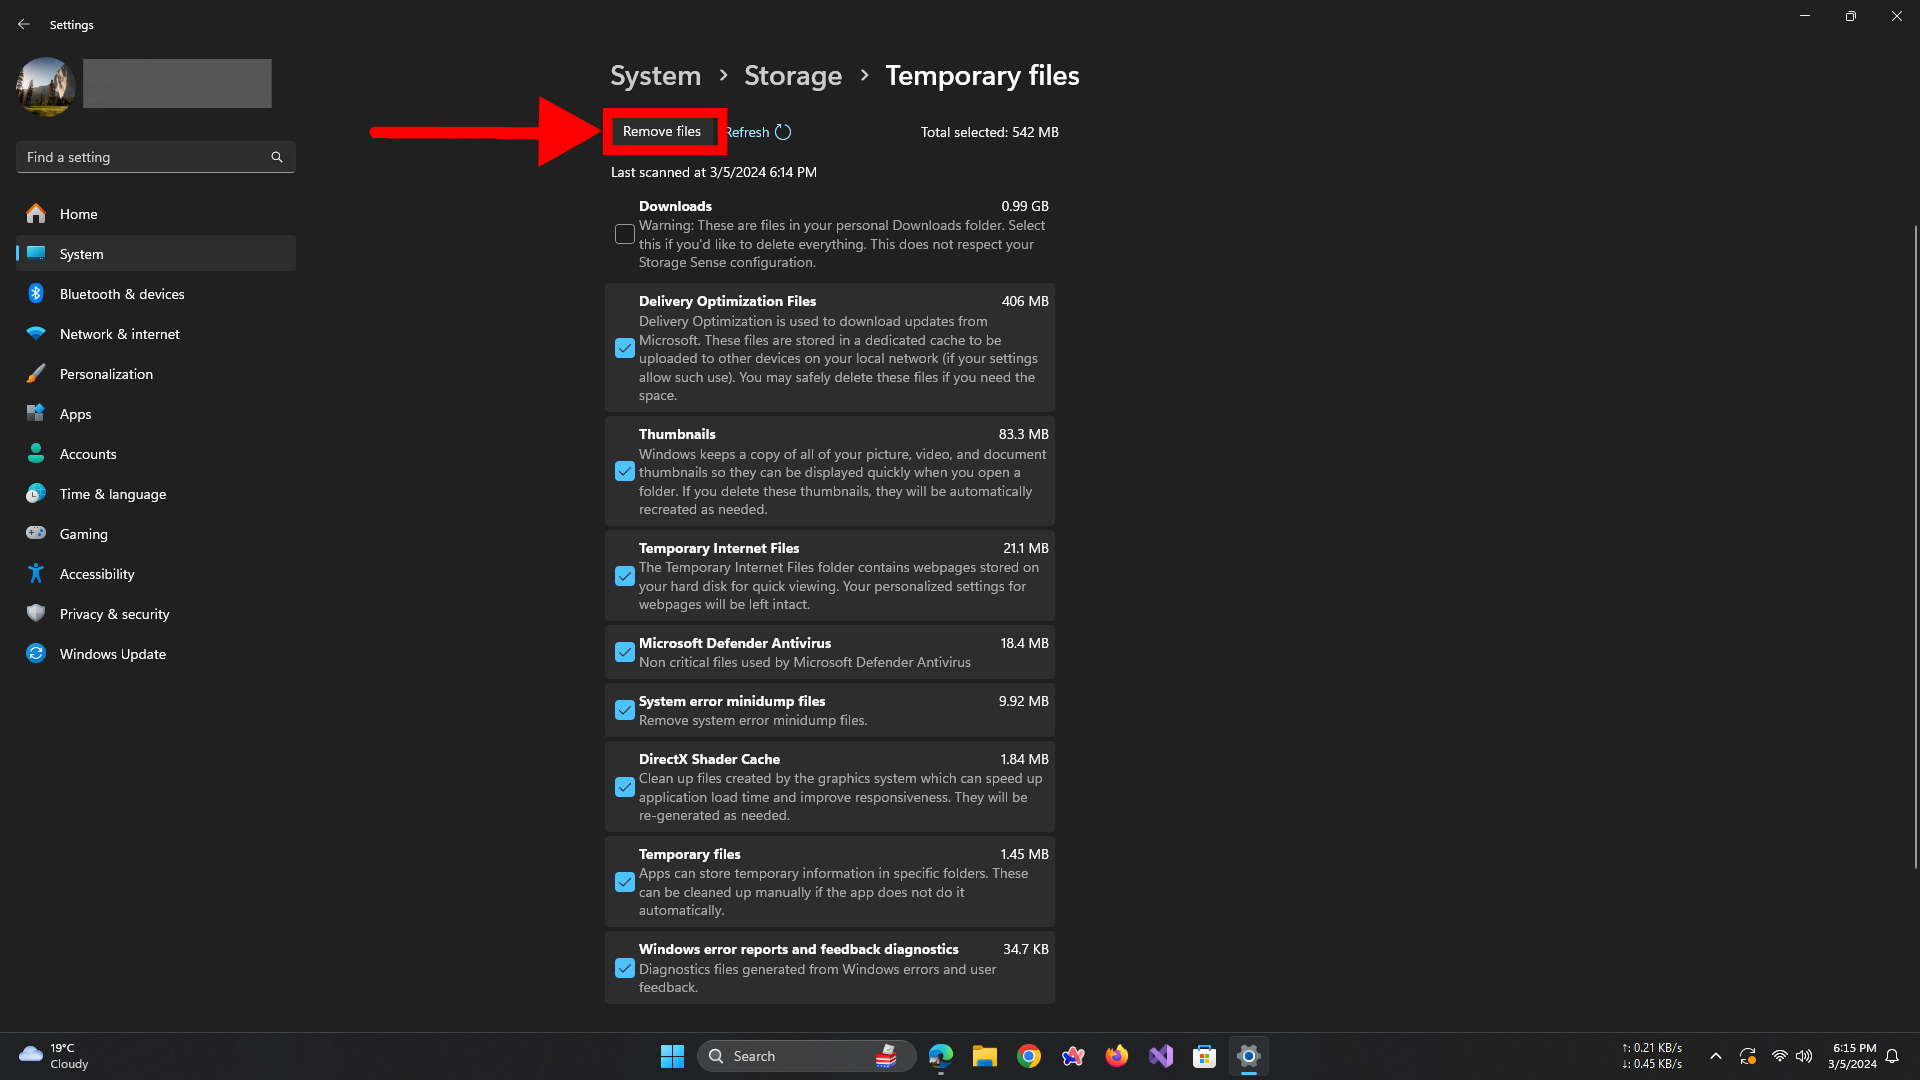
Step 6: Remove Files
Click the Remove Files button to delete the selected temporary files.
Step 7: Confirm Deletion:
Windows will prompt you to confirm the deletion. If you are sure, click Continue.
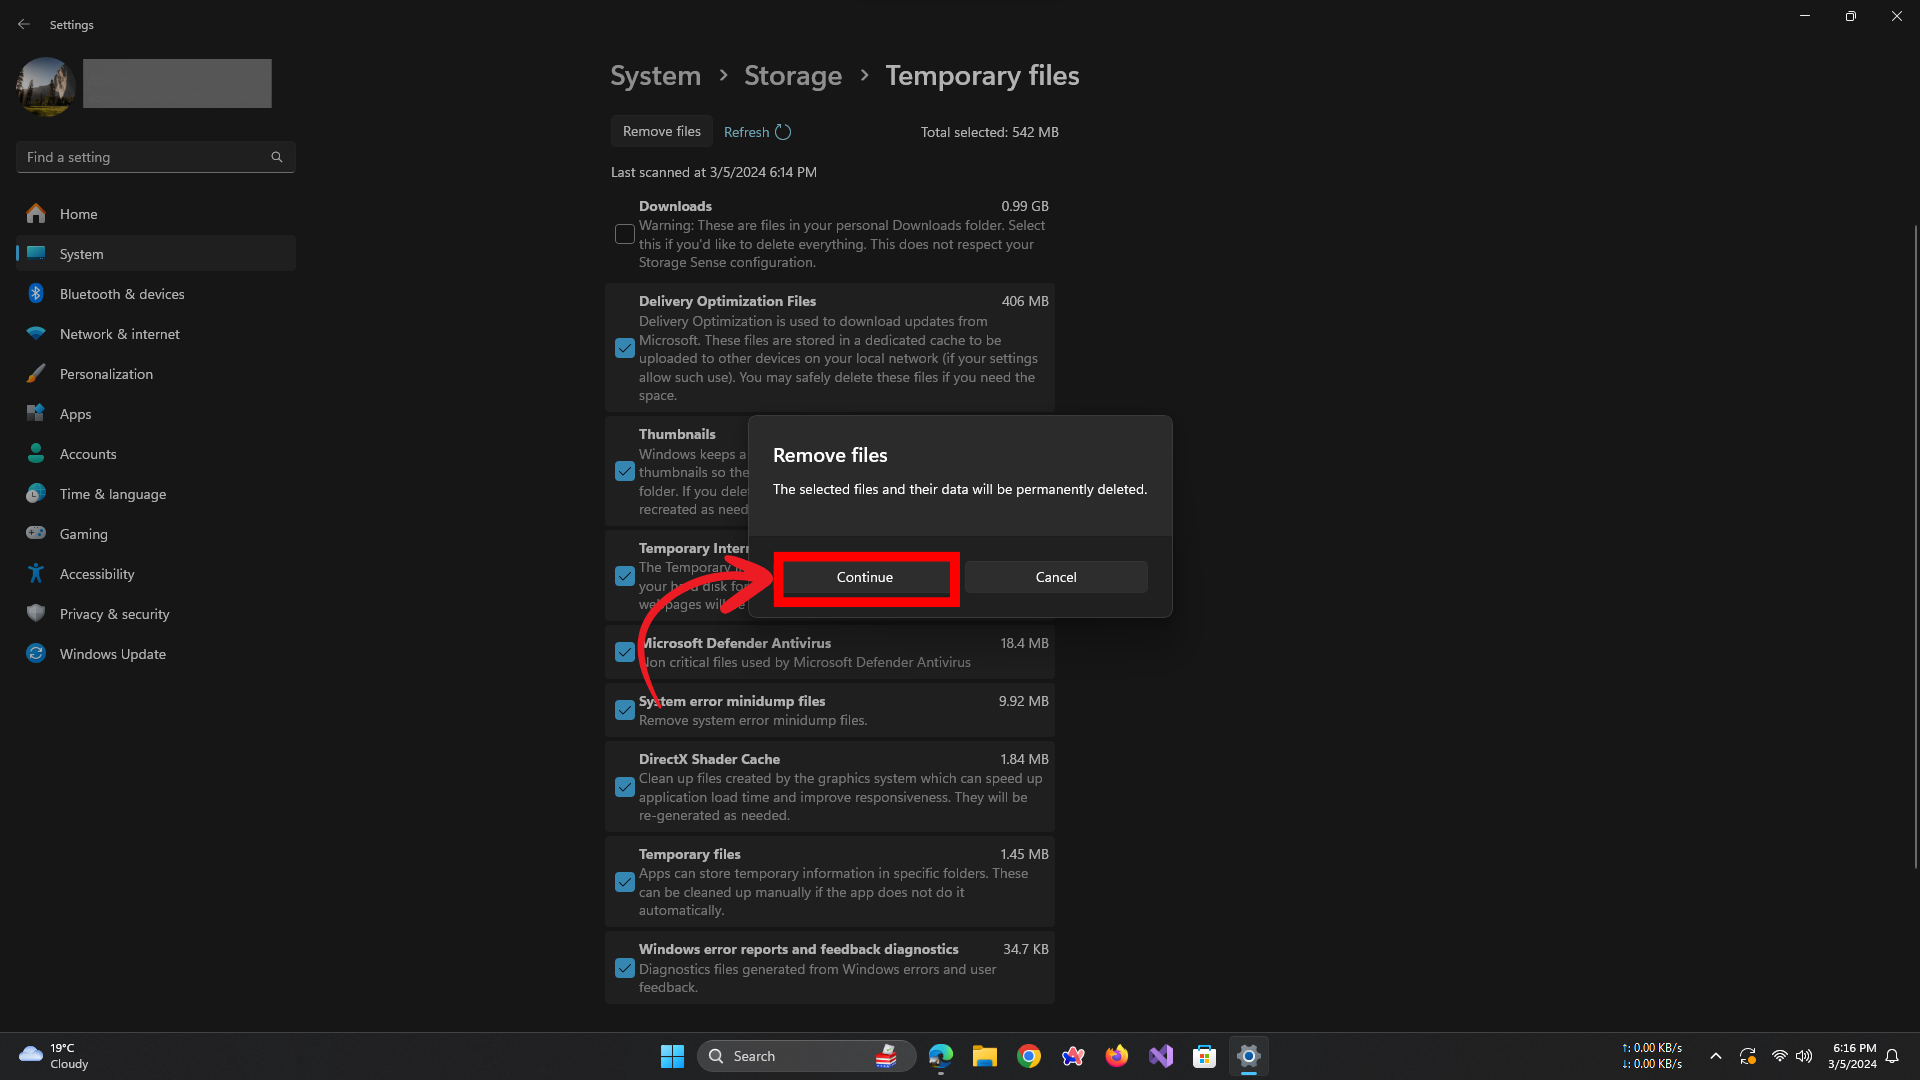
This will clear the Windows Update cache and free up some space on your system drive.
READ MORE: How To Check & Delete Usage History On Your Windows ➜
Additional Troubleshooting Windows Update in Windows 11
You can also use the Troubleshoot feature on Windows 11 to reset the Windows Update components and fix any issues. To do this, follow these steps:
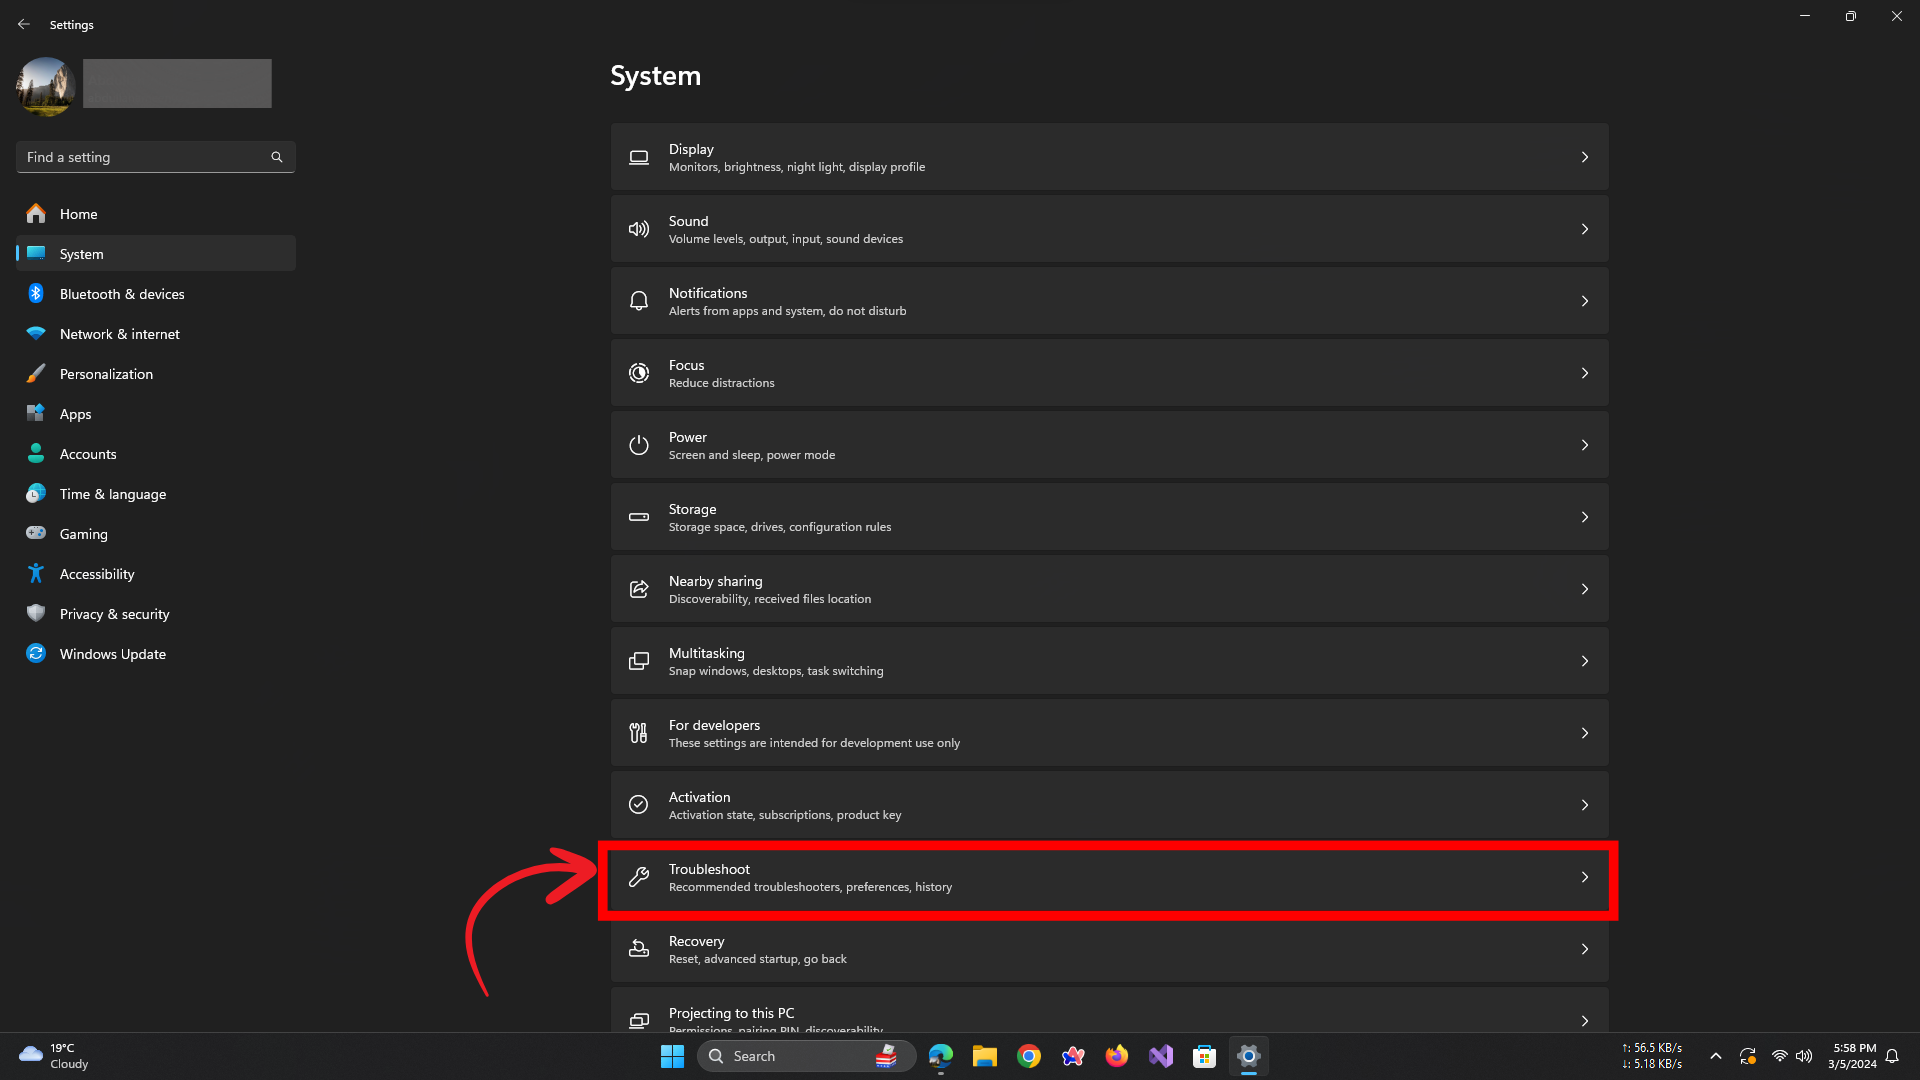
- Open Settings and click on System.
Click on System from the sidebar - Click the Troubleshoot tab.
- Click the Other troubleshooters setting.
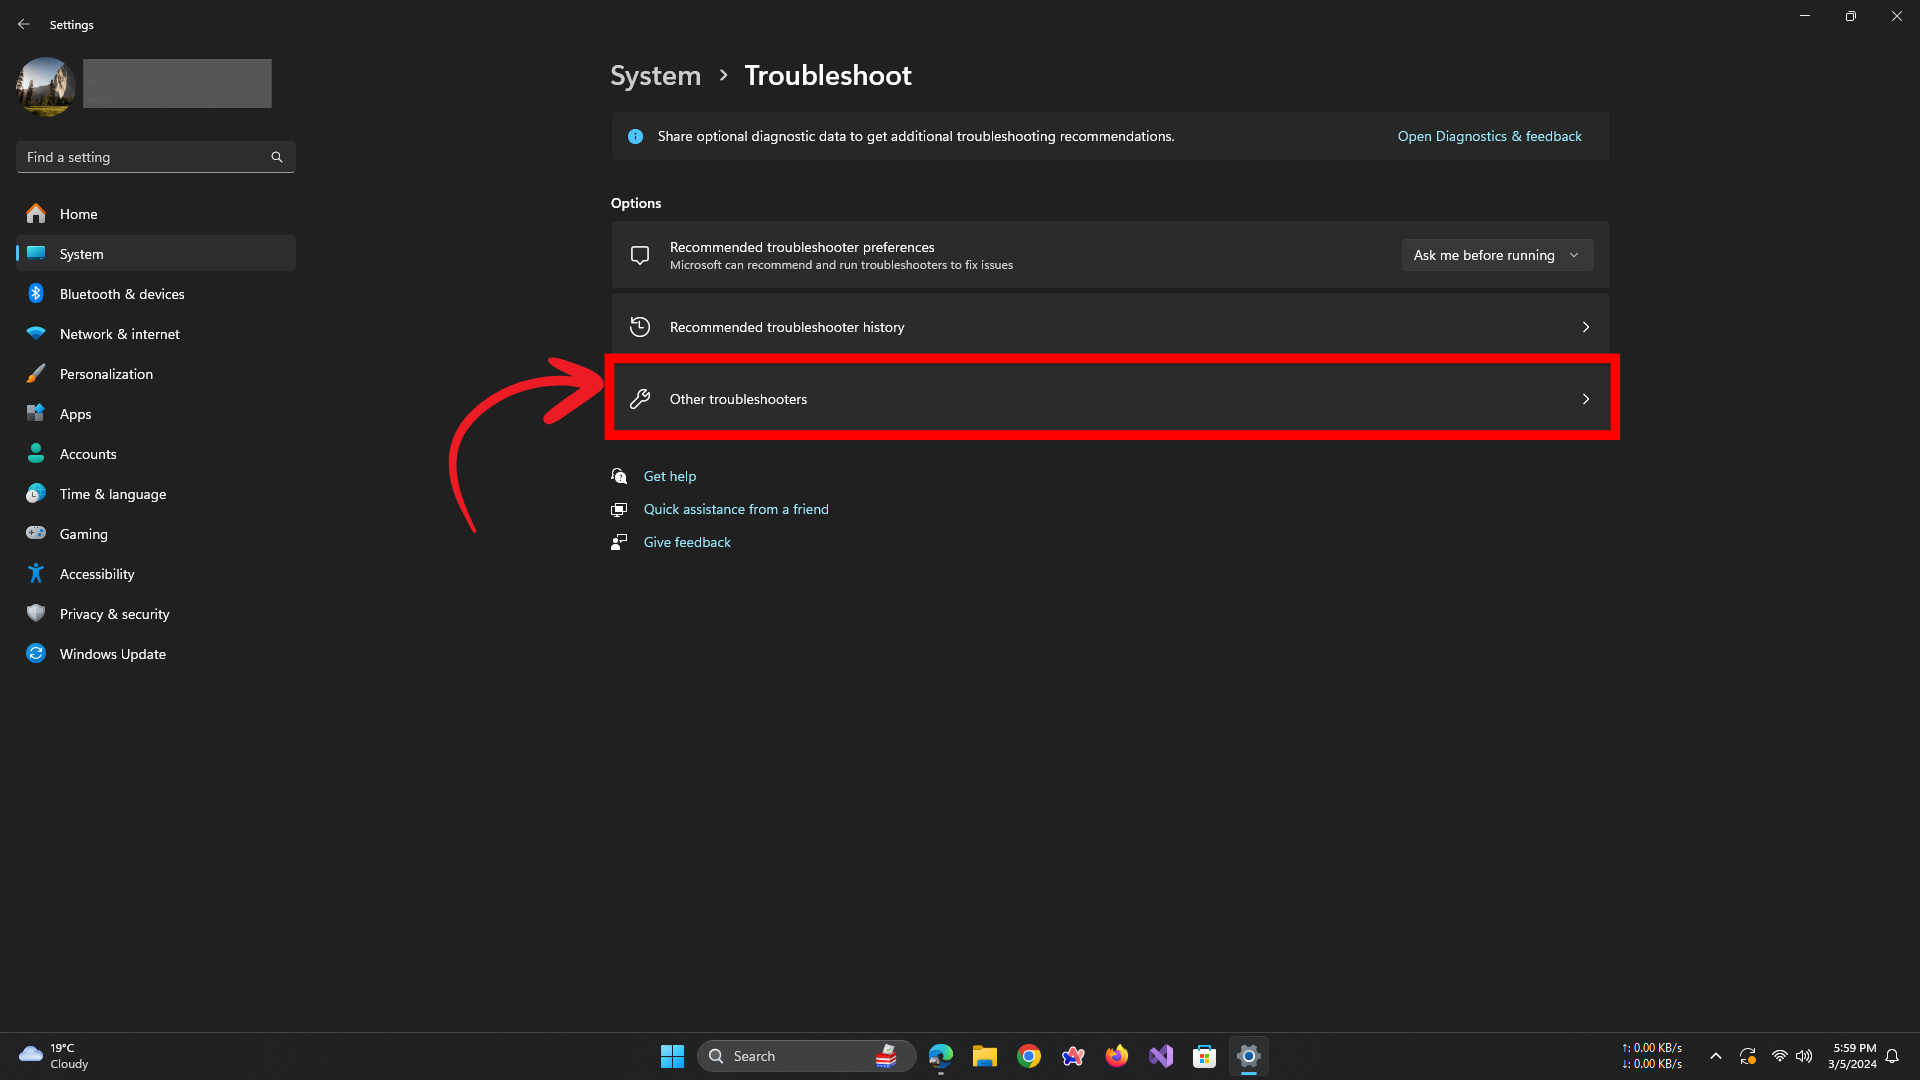
Click on Other Troubleshooters - Under the “Most frequent” section, click the Run button for the “Windows Update” setting.
Continue with the on-screen directions (if applicable).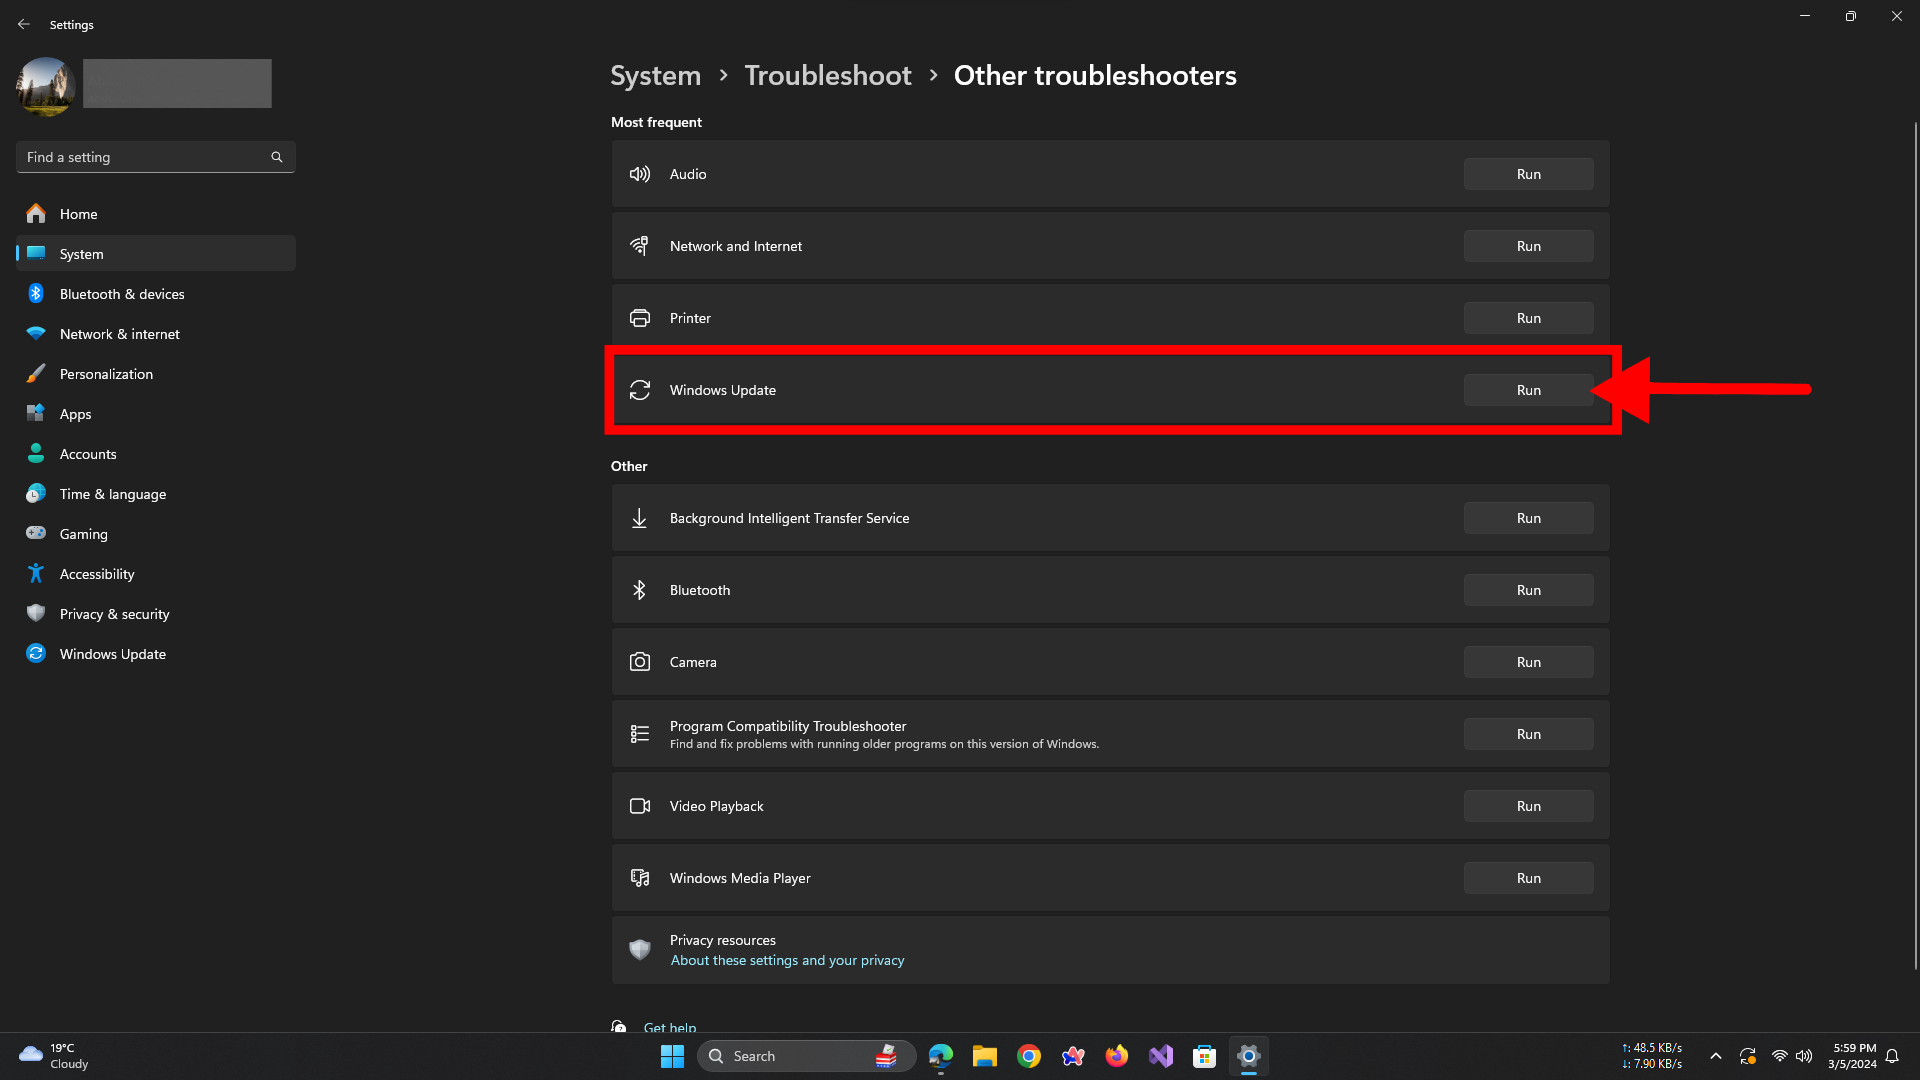
Click on Run
Once the computer restarts, the next time you try to update Windows 11, the system should work as expected.
How to Clear Different Types of Caches in Windows for Performance Boost & Optimization
Clearing the cache in Windows can help troubleshoot system issues, improve performance, and free up disk space. There are different types of cache files that you can clear, such as:
- Temporary files cache: These are the temporary files created by various apps and services. You can use Disk Cleanup to clear these files easily.
- DNS cache: This is the cache that stores the IP addresses of the websites you visit. You can clear this cache by opening Command Prompt as an admin and running the command ‘ipconfig /flushDNS’.
- Windows Store cache: This is the cache that stores the data from the Microsoft Store. You can clear this cache by running a utility from the Run box called
WSReset.exe. - Location cache: This is the cache that stores your location history. You can clear this cache by going to Settings > Privacy > Location and turning off the Location History feature.
READ MORE: Windows 11 Home vs Pro: Which One is Right For You? ➜
Conclusion
The process of clearing the Windows update cache is a critical maintenance step that ensures the optimal performance of your operating system. By regularly purging these temporary files, users can reclaim valuable disk space, resolve update-related issues, and enhance the overall functionality of their systems.
This article has provided a comprehensive guide to effectively managing your update cache, contributing to a more efficient and reliable computing experience. We hope that the information presented herein will serve as a valuable resource for maintaining the health and efficiency of your Windows environment.
FAQs
To check the size of Windows Update cache, you can use the following methods: Open File Explorer and navigate to C:WindowsSoftwareDistribution. Right-click on the folder and select Properties. You will see the size of the folder in the General tab. Or you can open Disk Cleanup and select your system drive. And then click OK and wait for the scan to complete. You will see the size of Windows Update Cleanup in the list of files to delete.
The frequency of clearing the Windows Update cache lacks a definitive answer as it hinges on individual system conditions and preferences. Nonetheless, several general guidelines exist. Firstly, it’s advisable to clear the cache when encountering errors or issues with Windows Update. Secondly, if there’s a noticeable decline in disk space or system performance, clearing the cache becomes essential. Lastly, when aiming to install the newest updates or upgrade the Windows version, clearing the cache facilitates a smoother process.
Clearing the Windows Update cache is typically safe and won’t impact your system or personal files. Nonetheless, there are potential risks to consider, including the loss of the ability to uninstall or roll back certain updates, the possibility of compatibility issues with specific programs or drivers, and the need to redownload and reinstall updates. These factors should be weighed against the benefits before proceeding with cache clearance.
Clearing the Windows Update cache offers numerous advantages, including resolving Windows Update errors and issues, enhancing the speed and performance of Windows Update processes, reclaiming disk space and memory, and mitigating the risk of malware infection and security vulnerabilities. These benefits underscore the importance of periodically clearing the cache to maintain system health and security.
There are some third-party tools that can help you clear Windows Update cache easily and safely. For example, you can use CCleaner, Disk Cleanup, or Windows Update Troubleshooter. You can download these tools from their official websites and follow their instructions to clear Windows Update cache.
To back up the Windows Update cache, you have a couple of options available. Firstly, you can manually copy the SoftwareDistribution folder to another location, such as an external hard drive or a cloud storage service. Then, when needed, you can easily restore the folder by copying it back to C:Windows. Alternatively, you can utilize backup software or tools compatible with Windows Update cache, like EaseUS Todo Backup, Macrium Reflect, or Acronis True Image. These applications enable you to create a backup image of the SoftwareDistribution folder, providing a convenient method for restoration at your discretion.
Reviewed by Huzaifa Haroon


