How to Fix Computer Restarting when Playing Games?
Computer games nowadays require a lot of processing and graphical power if you want them to smoothly run on your computer. As the games release more iterations, the requirements to run those games might go up as well. We received several reports from users where they intimated that their computer restarted randomly when they were playing games.
This is not an unusual case and is very common among the gaming community. In this article, we will go through all the reasons as to why this issue occurs and also what the possible workarounds are to solve the problem.
Note: We are assuming that you have a valid copy of the game which is updated. If you don’t, either reinstall your game or update it to the latest version available.
What causes your Computer to Restart when Playing Games?
After our initial research and feedback from our users, we got convinced that the issue occurs due to several different where some of them are the following:
- Requirements not met: If your PC doesn’t meet the minimum requirements to run the game, there will be very less we can do to run the game smoothly.
- Power settings: Sometimes, if the power settings are set to save energy, the computer might not give its utmost best and hence, you might get stranded with your game.
- Overheating: Some games are very consuming of resources and if any process starts to consume a lot of resources, the computer heats up as well. Here, we can try alternate cooling solutions.
- System failure: If at any point you experience a system failure, the computer is programmed to restart automatically. It might be the case that your computer is restarting again and again even if there is a small system failure.
- Bad PSU: Power Supply Unit is the main component which provides power to your motherboard components. If it is damaged or not working properly, your computer might restart.
- Heatsink: Heatsink is probably the most important cooling component in modern computers. It cools off the CPU as it is performing computations and working. If the heatsink is at default, you will experience several issues including the restarting of your computer.
- Overclocking: Even though this component is popular for boosting the processing power of your CPU, it can cause an unstable which may crash when ‘too’ much load is put into it.
- BIOS Settings: Your BIOS settings might be set to favor the high computation of games. This might not always be welcome by many games which prefer that you run them in default configurations.
- Bad GPU: Even though this case is rare but with the popularity of third-party Chinese GPUs, it isn’t rare to see a GPU causing the restarts because of its poor manufacturing quality or a defect.
- Bad Windows Installation: Even though this cause is mostly ruled out of any possible causes, there are chances that you are getting your restarts because of either corrupt or outdated Windows. We can perform System File Checker Scan or install a clean version of Windows itself.
Before we jump into the solutions, make sure that you are logged in as an administrator and have an active internet connection. Start the solutions from the top and work your way down accordingly as they are listed in order of difficulty and usefulness.
Pre-requisite: Checking Game Requirements
Before we start with the troubleshooting, you should first check whether your PC fulfills all the requirements of your computer to run the game at all. You should have ‘at-least’ the minimum requirements but even that doesn’t guarantee that you will not have any problems.
You can check the requirement of any game by Googling the name. We recommend that your PC should at-least be compliant with Recommended Requirements (not minimum).
Solution 1: Checking Power Settings
Power settings of any computer determine how much power to modules on your motherboard will be provided. These settings might hold even if the requirement is way above the maximum threshold. If these two things are inconsistent, you might experience numerous issues. In this solution, we will navigate to the power settings using the control panel and change the settings manually.
- Press Windows + R to launch the Run application. In the dialogue box type “control panel” and hit Enter. This will launch your computer’s control panel. Make sure that View by: is set as small icons present at the top-right side of the screen.
- Once in the control panel, click on Power Options.
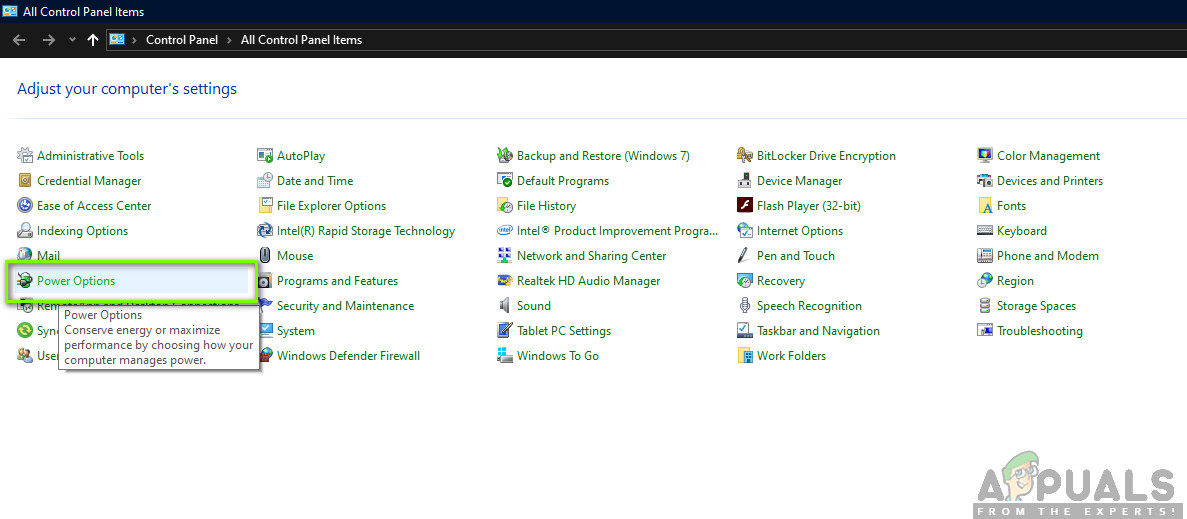
Power Options – Control Panel - Here you will see the mode of power set currently. If it is set as Power saver, change it either to High performance or Balanced.
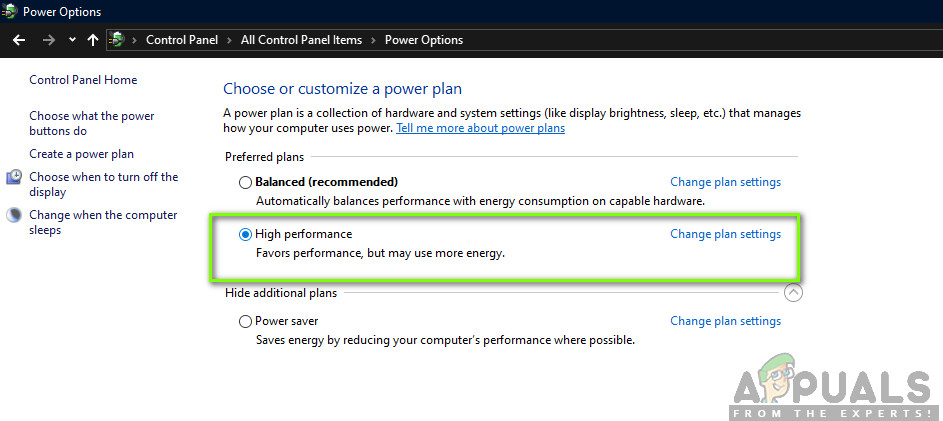
Power Plans – Windows - If you have in the past changes some internal settings of each plan, click on Change plan settings and select Restore default settings to this plan.
Save changes and exit. Restart your computer and check if the issue is resolved.
Solution 2: Checking your GPU
Normally, every user who experienced this issue had a third-party GPU installed (like NVIDIA or AMD) on his computer. Even though these are far superior to normal in-build GPUs, there are instances where they might not be compatible with the system or having issues on their own. In this article, we will navigate to the device manager and disable the third-party GPU and see if this fixes the issue.
- Press Windows + R, type “devmgmt.msc” in the dialogue box and press Enter.
- Once in the device manager, look for Display adapters, right-click on the graphics card and click Disable device.
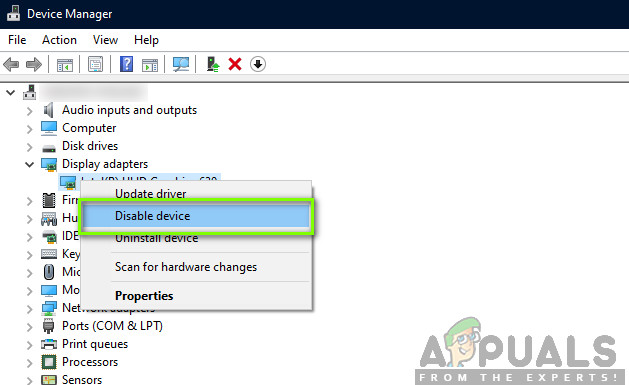
Disabling GPU - After disabling the device, restart your computer and check if the issue still persists.
Solution 3: Disabling Overclocking
Overclocking is considered a vital element in any gaming rig or PC. In this mode, the processor performs burst computations until its temperature exceeds the threshold temperature. When it reaches the temperature, it reverts back to the normal CPU speed. We received several reports from users who reported that they were able to stop the random restarts when they were playing games by disabling overclocking.
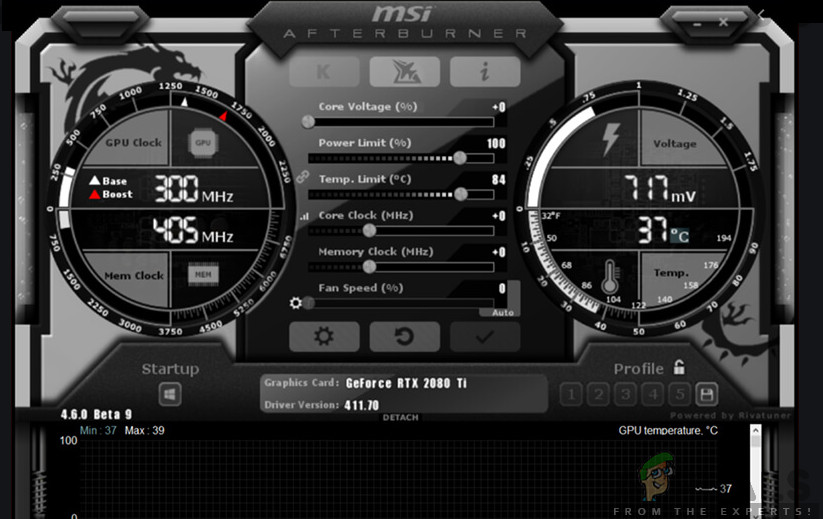
Here, we will recommend that you disable all type of overclocking and get your CPU running at the factory speed. On top of this, make sure that there are no computer enhancing programs running in your computer. These programs are known to conflict with the OS and graphics when trying to ‘optimize’ the computer by eliminating several important processes.
Solution 4: Updating Windows to the Latest Build
Microsoft is known to release frequent updates for Windows to introduce new features or fix existing bugs. If there are still updates pending, you should definitely download and install them. There are sometimes misconfigurations in your operating system’s core files as well which this will fix automatically.
Make sure you are logged in as an administrator before continuing.
- Press Windows + S, type “update” in the dialogue box and open the application.

- Now Settings will be opened up. Click the button Check for updates. Now your computer will automatically check for any latest updates available and install them on your computer.
Note: An active internet connection will be required to apply the updates. Also, it might take some time depending on the size of the update.
Solution 5: Updating Graphics Drivers
Graphics drivers are the main components in play when you are playing games on your computer. They have the job of relaying the information from the motherboard to your graphics hardware. If the graphics drivers themselves are having issues, it is recommended that you update them as soon as possible and see where things go.
In this solution, we will first try installing default drivers and see if this fixes the problem.
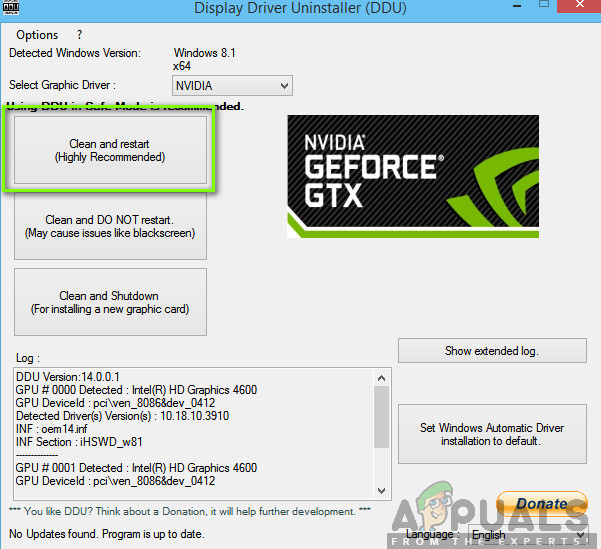
- Download and install DDU (Display driver uninstaller) from its official website.
- After installing Display Driver Uninstaller (DDU), launch your computer in safe mode. You can check our article on how to boot your computer into safe mode.
- After launching the DDU, select the first option “Clean and restart”. This will uninstall the current drivers completely from your computer.
- Now after the uninstallation, boot your computer normally without safe mode. Press Windows + R, type “msc” in the dialogue box and press Enter. Right-click on any empty space and select “Search for hardware changes”. The default drivers will be installed. Try launching the game and check if this solves the problem.
- In the majority of the cases, the default drivers will not work for you so you can either install the latest drivers through Windows update or navigate to your manufacturer’s website and download the latest ones.
- After you have installed the drivers, restart your computer and check if the problem is solved.
Solution 6: Checking your PSU (Power Supply Unit)
PSU is one of the main components in any computer (especially in gaming) because it provides the required voltages to the individual components present. For example, SATA connections might require more power than the motherboard. Here, if your PSU is damaged or not transmitting power properly, you will experience numerous problems ranging from your system hangs to restarts.
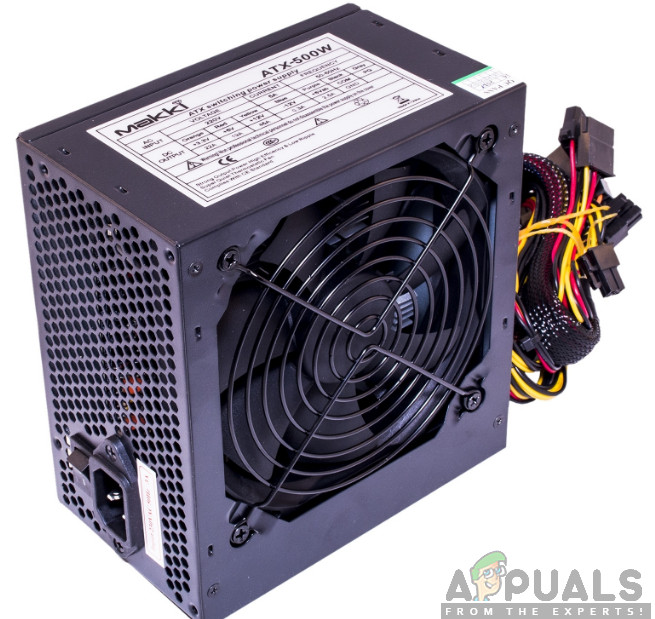
What you can do here is trying another PSU temporarily. Check if the issue also occurs when using that hardware. Also, make sure that you change the cable connecting the PSU to your mains electricity outlet. If the issue doesn’t persist there, it means that you should get your PSU checked. If it does, you can continue with the other troubleshooting methods listed down below.
Solution 7: Checking Processor and Heatsink
Before we resort to more troubleshooting techniques, it may be wise to check the cooling system, the heatsink and the processor on your computer. Normally, if your computer restarts when playing a game, it is automatically assumed that the computer overheats to such an extent that it performs an emergency restart.
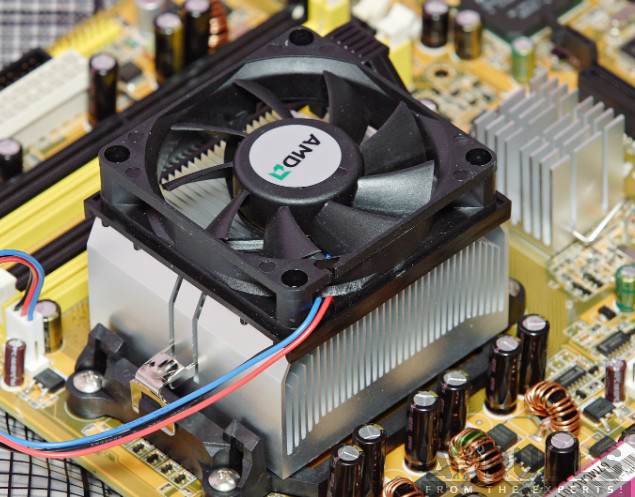
In addition to checking the heatsink, make sure that your entire computer is cooled. If you have a laptop, you can clean the grill and make use of a cooling pad. Only proceed forward if you are absolutely sure that your computer’s cooling is on-spot.
Solution 8: Performing a System Restore
If the random restarts don’t work and you are still unable to fix the issue, we will try performing a system restore on your computer. This will rollback your OS to a point where the problem didn’t exist. This is provided that you have a restore when it didn’t exist.
Note: If you have installed any software or changed any configurations after the restore point, they will be lost.
Here is the method on how to restore Windows from the last restore point.
- Press Windows + S to launch the start menu’s search bar. Type “restore” in the dialogue box and select the first program which comes in the result.
- One in the restore settings, press System Restore present at the beginning of the window under the tab of System Protection.
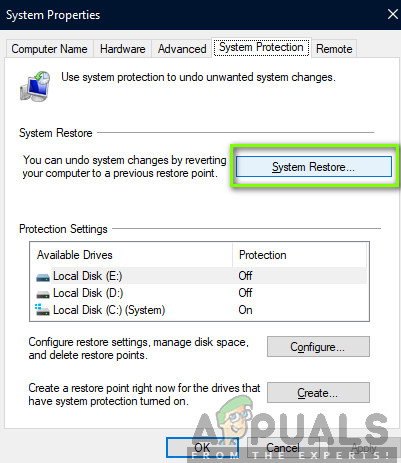
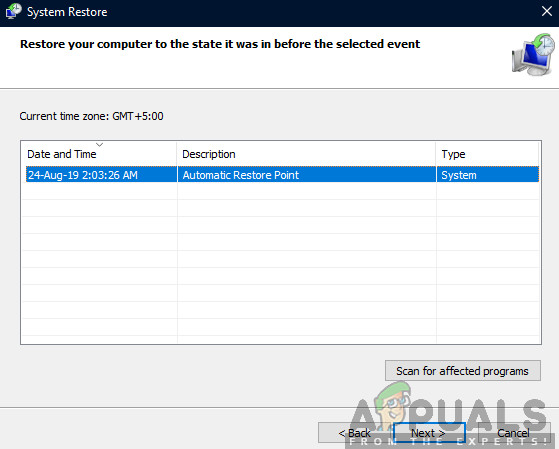
- Now a wizard will open navigating you through all the steps to restore your system. You can either select the recommended restore point or choose a different restore point. Press Next and proceed with all the further instructions.
- Now select the restore point from the list of options available. If you have more than one system restore points, they will be listed here.
- Now windows will confirm your actions for the last time before it starts the system restore process. Save all your work and backup important files just in case and proceed with the process.
- Once you have restored successfully, log into the system and see if you still get the blue screen of death.
Solution 9: Clean installing Windows
If none of the above methods work and you are still unable to stop the random restarts from happing, it would seem that there is an issue in your operating system with corrupt installation files. Here, we will install Windows from scratch which will remove any discrepancies and fix the problem.
Note: All your programs and data will be lost so make sure you back them up safely before proceeding.
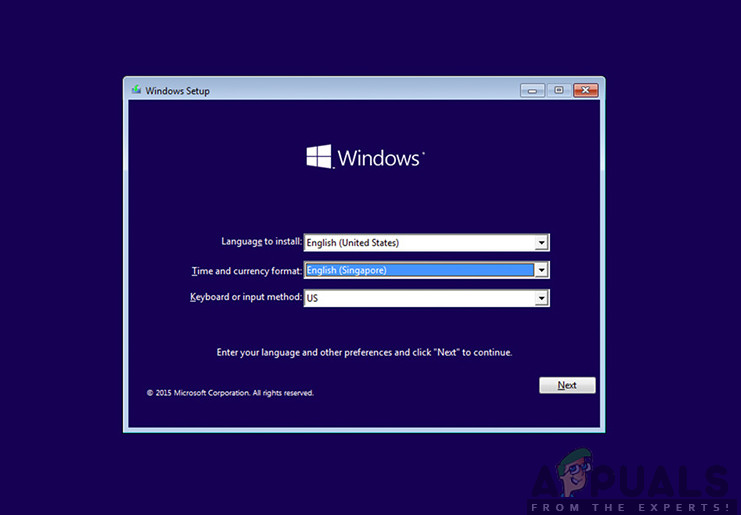
You can read our article on how to install Windows 10 on your computer. You can use Windows creation tool or Rufus according to your own preference. Make sure that you backup all of your data before proceeding.
Solution 10: Updating/Resetting BIOS to Default Settings
Resetting/Updating the BIOS is a tedious and technical task which is why we have kept it at the end of our article. BIOS is the main component of your computer which gets loaded up first when you start your computer. It connects and loads all the input-output devices. After it has done this, it loads the OS.
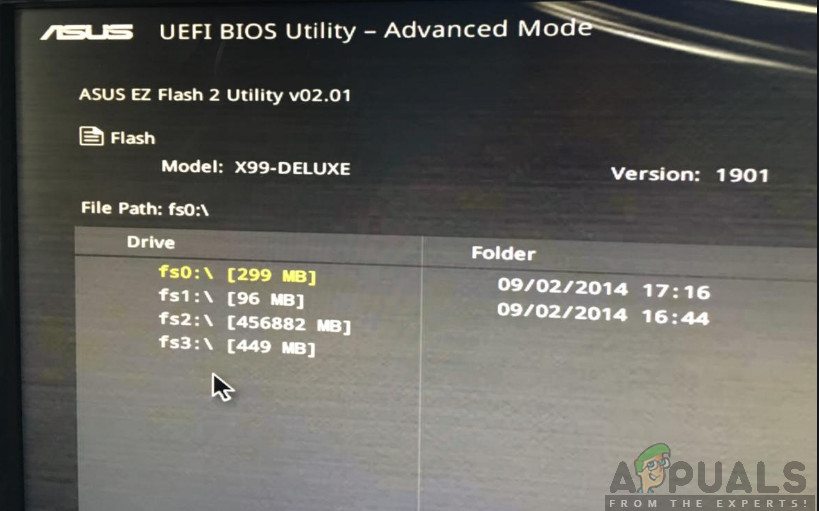
We noticed that after updating BIOS or resetting it, the issue went away completely. Hence we recommend that you update the BIOS but if you know what you are doing. Otherwise, get a more technical friend do it.
Note: It should be noted that interrupting or failing the update at any point might render your computer useless so proceed with caution. Here are some articles to help you:
How to Update Gateway Desktop or Laptop BIOS
How to Update BIOS On A HP Desktop/Laptop


