How to Update BIOS on A HP Desktop/Laptop
BIOS stands for Basic Input Output System. It’s a set of code that resides on a chip on your system’s motherboard. When a computer boots up, it looks in the chip for BIOS for instructions on where to find the operating system and, among many other things, BIOS also facilitates further communication between the operating system and the hardware.
Updates for the BIOS may fix or enhance features and improve aspects of your system’s performance. However, installing an incorrect update or the wrong version can render your system unusable. Therefore, it’s crucial to carefully follow this guide.
Hold the Windows key + R. In the run window, type msinfo32 and press Enter. A System Information window will open. In the window, make sure System Summary is selected in the left pane. In the larger right pane, locate BIOS Version/Date. The value against it will be your BIOS version. Note it down.
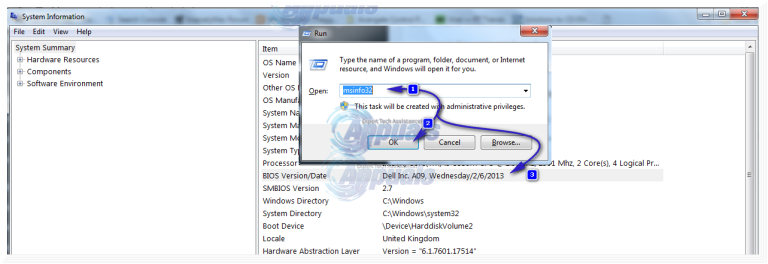
The value against ‘OS’ refers to your operating system. The value against ‘System Type’ indicates its bitness. If it’s ‘x64’, you have a 64-bit Windows system. If it’s ‘x86’, you have a 32-bit Windows system. The value against ‘System Model’ indicates your exact system model. Take note of all this information; you will need it in the subsequent steps.
Method 1: Updating Through Windows,
You can try the following to update Bios through Windows.
- Go to HP Software & Driver Downloads
- Under ‘Enter my HP model number’, type the system’s model name that you noted earlier, and then press Enter.
- In the search results, click on the model that exactly matches yours. The support page for your model will open.
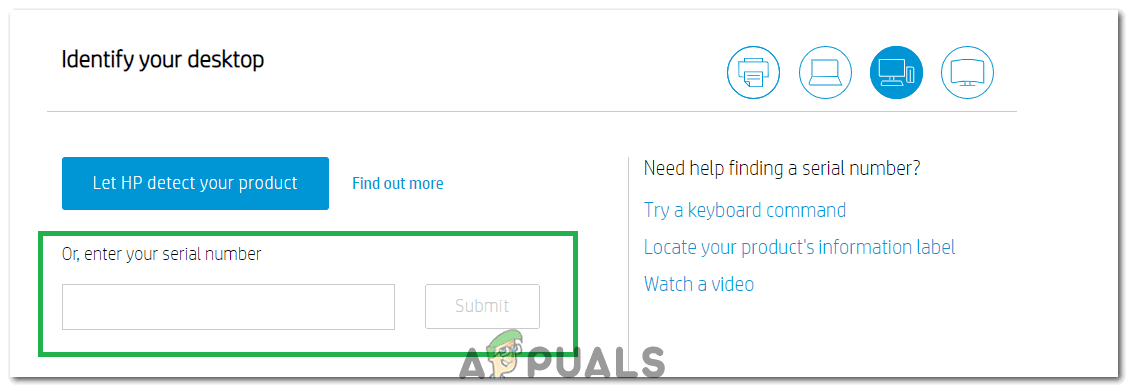
Entering out Serial Number - Click on the “Operating systems in English:” option and select the operating system you noted down earlier.
- In the result list below, click on the (+) sign beside the BIOS category to expand it if you can see one. If not, then the original BIOS version is the only one available for your model.
- Click the BIOS category and compare the available versions. If a newer version is available, click the ‘Download’ button. If the versions are the same or older, you already have the latest BIOS version.
- Save and close all other applications. It is also recommended that you temporarily disable your antivirus for this activity. Now run the downloaded updated BIOS setup.
- Click next. Accept the EULA agreement. Click next, and the setup will begin extraction. Copy the extraction path, which should be something like C:\SWSetup\SP73917. Click next.
- When the extraction is complete, press the Windows key + E. In the explorer window, paste the previously copied path into the address bar above and press Enter to navigate to it.” is grammatically correct. Please note that I added the word ‘the’ before ‘Windows key + E’ for better clarity.
- Please open the folder named ‘hpqflash.’
- Run the file, which will appear similar to something like ‘SP73917_E‘. The numbers in your filename might change, but the ‘E’ character at the end will remain the same.
- Select the option “Initiate BIOS update on this system,” then click OK. Follow and confirm the on-screen instructions, and patiently wait for the installation to complete. Do not turn off your laptop under any circumstances during the updating process. Ensure the battery is present in the laptop and the AC adapter is connected the entire time. Do not interrupt the updating process once it has started. Reboot when prompted, and you will have the latest BIOS version available.
Method 2: Using a Bootable USB
To update BIOS through a USB, the USB needs to be of 1 GB or less. Any more than that won’t work.
- Keep tapping the F10 key to enter the BIOS settings menu. On some systems, the BIOS settings menu can be accessed by pressing the F2 or F6 key. You may need to try them all or search for your system model on the HP webpage. Once in the setup, you can see your BIOS version under BIOS Revision in the Main menu.
- Go to ‘HP Software & Driver Downloads‘ on any other PC to which you have access, provided it has an internet connection.
- Below the section labeled “Enter my HP model number”, type your system’s model name. This should be written somewhere on the body of your CPU or laptop. Then press Enter.
Entering out Serial Number - In the search results, click on the model that exactly matches yours. The support page for your model will open.
- Click on the option labeled ‘Operating Systems in English:’ and select your operating system.
- In the result list below, click on the (+) sign beside the BIOS category to expand it if you can see one. If not, then the original BIOS version is the only one available for your model.
- After selecting the BIOS category, if the BIOS version available is more recent than what you currently have, proceed by clicking the ‘Download’ button. However, if the available BIOS versions are the same or older, then you already possess the latest version of BIOS.
- Save and close all other applications. It is also recommended that you temporarily disable your anti-virus for this activity. Now run the downloaded updated BIOS setup.
- Click ‘Next’. Accept the EULA agreement. Click ‘Next’ and the setup will first extract. Copy the extraction path, which will be something like ‘c:\\SWSetup\\SP73917′. Click ‘Next’.
- When the extraction is complete, press Windows key + E. In the explorer window, paste the previously copied file path on the address bar above and press Enter to navigate to it.
- Open the ‘hpqflash’ folder.
- Run the file similar to SP73917_E now. The numbers may change in your filename, but the last character, ‘E’, will always remain the same.
- Make sure no USB is attached now.
- Select the option “Create a bootable USB disk on key” and click “OK”. Attach a USB and back up the data from it when prompted to “Insert the USB to be formatted”, then click “OK”. Press “Yes” to format the USB. In the HP USB Disk Storage Format Tool window, select “FAT32” from the dropdown menu of the File System and click “Start”. When completed, a confirmation message will be displayed. Confirm and close all windows. Note: You may also choose the USB as a boot device from the BIOS.
- Now, attach the USB to the target system and power it on. Press the ‘Esc’ button to access the Startup Menu and select ‘Boot device options.’ From the list, highlight and select your USB drive.
- Follow and confirm the on-screen instructions, then wait patiently for the installation to complete. Under no circumstances should you turn off your laptop during the updating process. Ensure that the battery is in the laptop and that the AC adapter is connected throughout the entire process. Do not interrupt the updating process once it has started. When prompted, reboot your machine, and you will have the latest BIOS system up and running on your device.
Hi Kevin. I am using Method 2 of how to update/reinstall a bios on an HP laptop. I am frazzled and this is not going well. I get hung up when I go to the install file path and there is no hpqflash file folder. There is nothing but a crisis folder, and other other files, none of which resemble the next steps I need to create this on a USB. Please advice.