Fix: Windows Explorer Uses 80-100% GPU on Windows 11
There have been several reports by Windows 11 users that, upon looking in the Task Manager, they notice that Windows Explorer is using maximum GPU on their computer. This issue even occurs when the Explorer is not actively running as a background process, and when the users try to restart the program, the system crashes with a ‘Critical process died’ error code.

Our team had a look into the issue and discovered that one or more of the following reasons may be causing this to happen:
- System file corruption – the critical files on your system may be dealing with a corruption error or inconsistency, causing the system components to act up and cause the issue. The best way to deal with such file corruption is by running the built-in troubleshooting utilities developed by Microsoft.
- Outdated drivers – this error is specifically linked to the graphic card drivers on your system. If they are outdated or corrupt, you will have issues with the GPU usage on the system. To fix issues related to the drivers, you can update or reinstall them.
- Background applications – a background application may interfere with the system’s processes, leading to issues like the one at hand. To determine if this is the case, you can boot into Safe Mode by following the steps mentioned later in this guide.
- Outdated Windows – if you haven’t updated your Windows to the latest version available, an outdated and incompatible operating system may also cause high GPU usage. If this scenario applies, you can install the latest updates to resolve the problem.
- Malware – your system may also be infected with malware or a virus, causing issues like the one at hand. You can try using a reputable security program to rule this kind of issue out.
Now that you know all the possible causes behind high GPU usage caused by Windows Explorer, let’s look at the troubleshooting methods that will help you resolve the problem for good in no time.
1. Run the System Scans
Your critical system files can deal with a corruption error, causing the issue. We suggest you begin your troubleshooting journey by scanning the system for the potential culprit.
The best way to move forward in this scenario is by using the built-in troubleshooting utilities developed by Microsoft. The most appropriate tools, in this case, will be the System File Checker (SFC) and Deployment Image Servicing and Management (DISM).
Both tools will scan the system for issues; if any problems are identified, they will fix them without input from your side. We will start by running the SFC tool in Command Prompt. Once the command executes, we will proceed with running the DISM tool, which is more powerful than SFC in several regards.
Here is how you can proceed:
- Type cmd in the search area of the taskbar and click on Run as administrator.
- Click Yes in the User Account Control prompt.
- In the following window, type the command below and hit Enter to execute it.
sfc /scannow
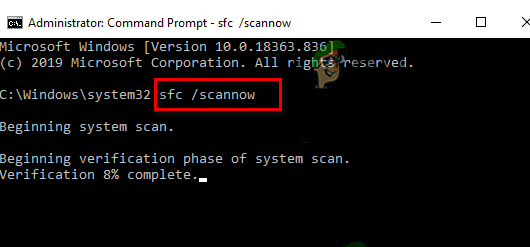
Deploy SFC - Wait for the process to complete and once it’s done, restart your computer.
- Upon reboot, launch Command Prompt with administrative privileges once again, and this time, execute the following command:
DISM /Online /Cleanup-Image /RestoreHealth
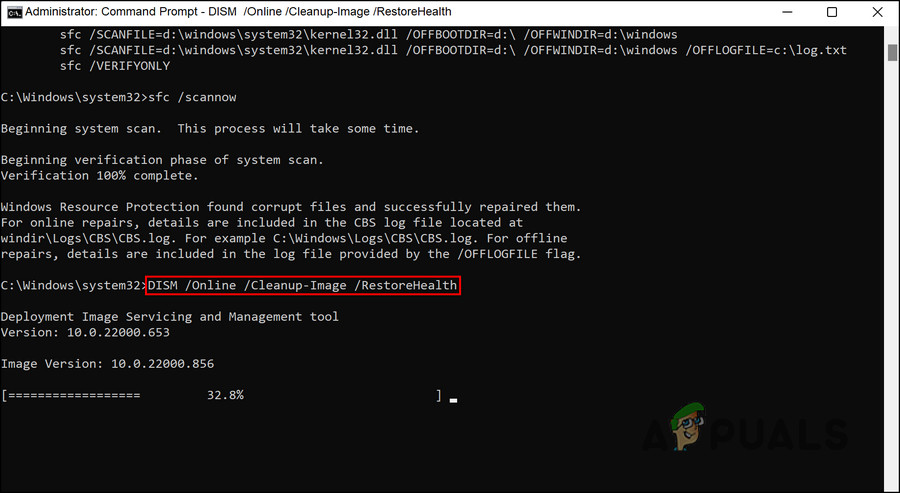
Run the RestoreHealth commands - Finally, restart your PC again. Hopefully, upon reboot, you will no longer face the high GPU issue caused by Windows Explorer.
2. Run the System Maintenance Troubleshooter
This is an extension of the method we just discussed above.
If running the SFC and DISM commands did not fix the problem for you, then we suggest the next thing you do is run the System Maintenance troubleshooter, which is another similar utility that comes built-into Windows.
If the troubleshooter identifies any issues, it will suggest the fixes accordingly. You can use the troubleshooter to apply the fixes.
Here is what you need to do:
- Press Win + R to open Run.
- Type control in the text field of Run and click Open.
- In the following window, type Troubleshooting in the search bar and click Enter.
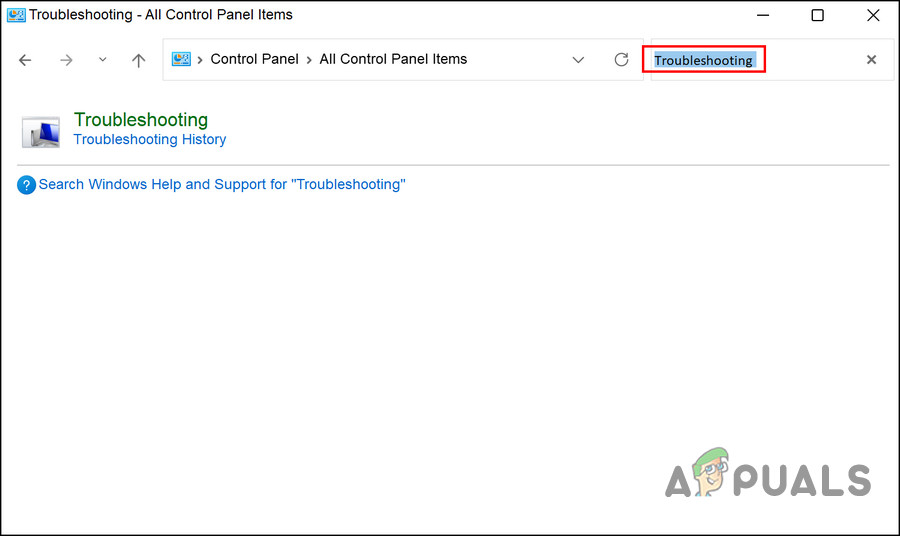
Find the Troubleshooting option in the Control Panel - Choose the most appropriate result.
- Now, click on View all from the left pane.
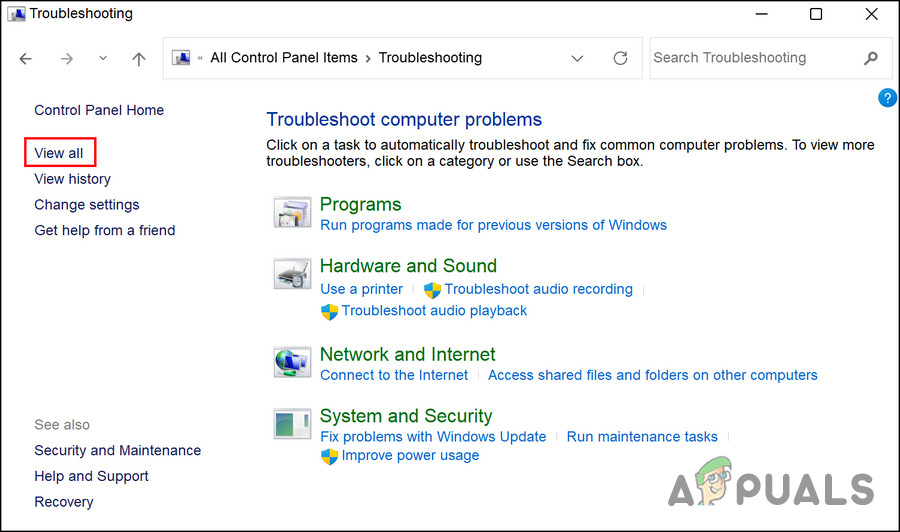
Click on the View all option - You should see a list of troubleshooters available on the system. Locate the System Maintenance troubleshooter and double-click on it.
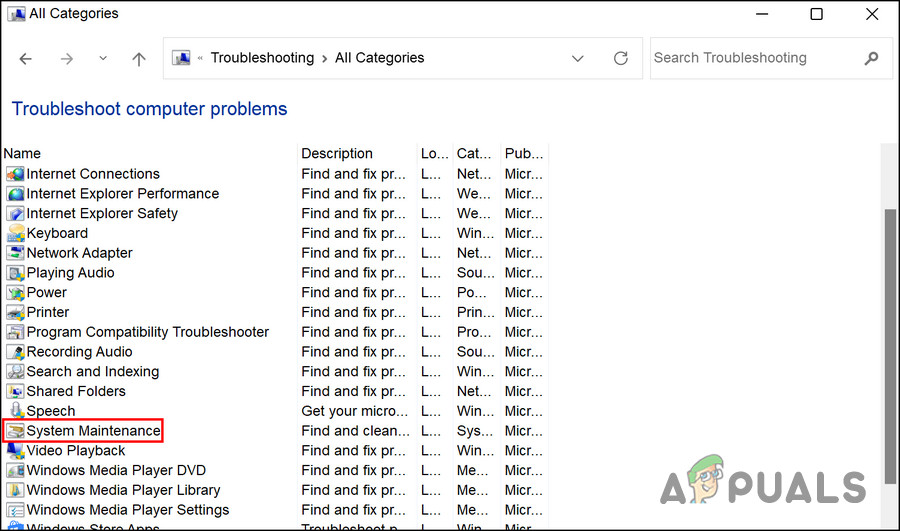
Find the System Maintenance troubleshooter - Click Next and wait for the troubleshooter to complete its process. If the troubleshooter finds any issues, it will suggest relevant fixes. In that case, click on Apply this fix.
- If the troubleshooter fails to identify any issues related to the Windows explorer issue, click on Close the troubleshooter.
3. Update Graphics Drivers
Another fix that helped users was updating/reinstalling their graphics drivers.
It is not uncommon to run into GPU errors due to outdated or corrupt drivers on Windows now and then. Fortunately, there is an easy way to fix it; you can first attempt to update the driver software and check if that makes any difference. If that does not help, you can uninstall the driver and reinstall the latest version from the manufacturer’s website.
In this method, we will first walk you through the steps of updating the problematic driver. If that fails to do the trick, we will uninstall and reinstall the latest build. You should, however, boot into Safe Mode before proceeding.
Here is how you can proceed:
Once you are in the Safe Mode, here is all that you need to do:
- Type Device Manager in Windows search and click Open.
- In the Device Manager window, expand the Display adapters section and right-click on your graphics driver.
- Right-click the targeted driver and choose Update driver.

Choose the Update driver option - Now, click on Search automatically for drivers. Follow the instructions on the screen to proceed.
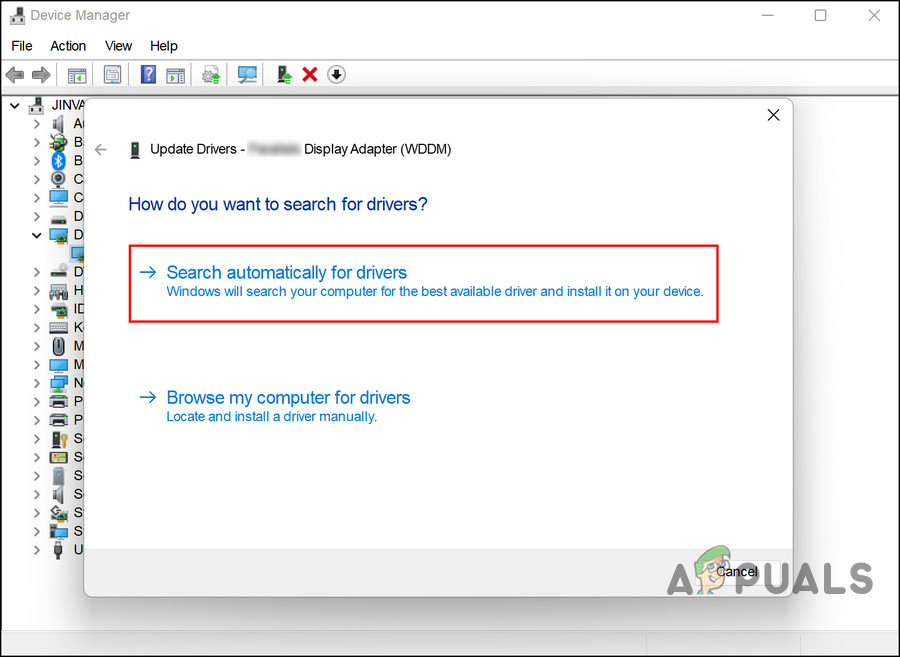
Allow the system to search for drivers automatically
Once the driver is updated, check if the Windows explorer issue is resolved.
In the event that updating the drivers does not resolve the issue, try reinstalling them from scratch. Follow the steps below for that:
Here is what you need to do:
- Boot into Safe Mode and launch your default browser.
- Navigate to Display Driver Uninstaller and install the tool.
- Once the installation is complete, download the file and extract it.
- Launch the 7-zip file on your screen and wait for it to extract itself again. Once that is done, your uninstaller is ready for use.
- Launch the uninstaller as an administrator.
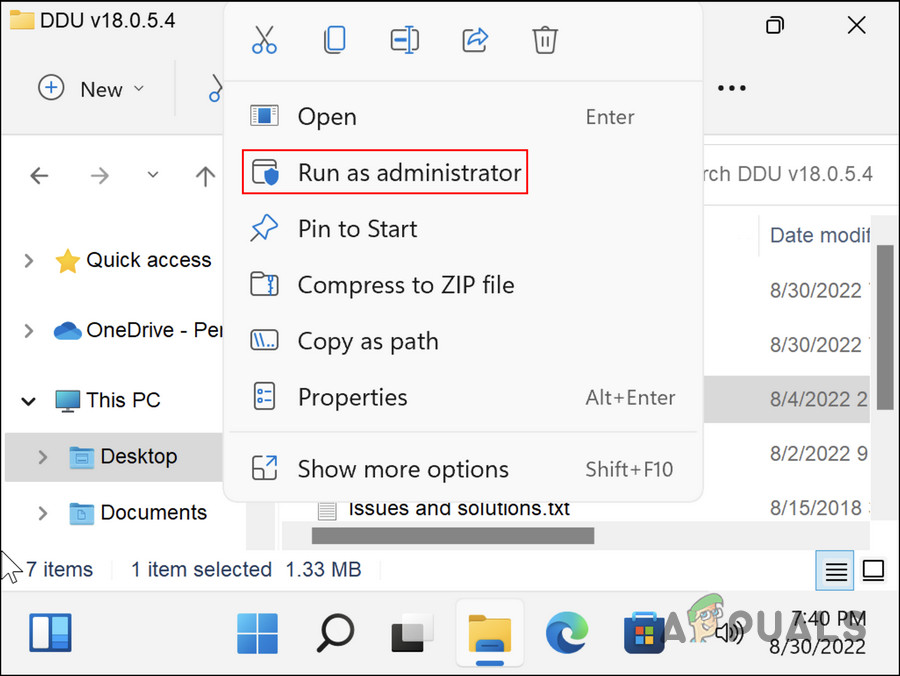
Launch the uninstaller as an administrator in Safe Mode - Choose your graphics driver from the Select Graphics Driver dropdown menu.
- Click on Clear and Restart and wait for the process to complete.
- Following a reboot, you will need to reinstall the driver. You can head over to the manufacturer’s official website for that purpose and install the latest build according to your device. Once done, check if the Windows explorer issue gets resolved.
4. Update Windows
Have you been putting installing the latest Windows updates on hold? If so, the high GPU usage issue can also arise due to an outdated operating system.
The best way to move forward in this scenario is by updating Windows to the latest build available. We recommend installing all the available system and driver updates via the Settings app.
Follow these steps to proceed:
- Press the Win + I keys together to open the Settings app.
- Choose Windows Update from the left pane.
- Move to the right side of the window and click on the Check for updates button.
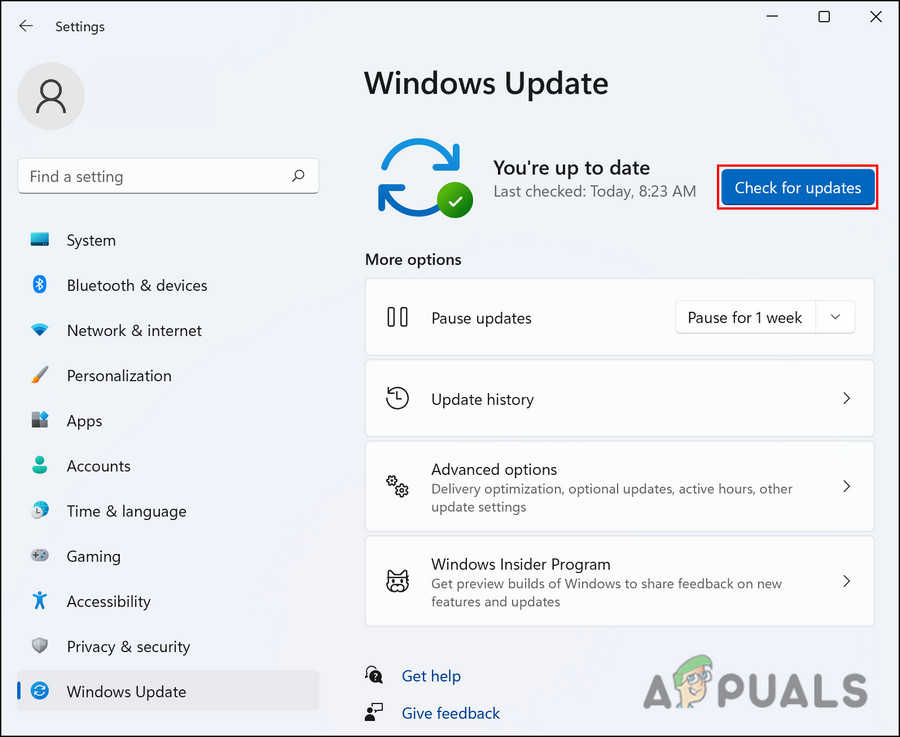
Check for updates button - Wait for the system to scan for the pending updates, and then take your time to install all the ones available. This is a time-consuming process, so we recommend only moving forward with it when you have some free time on your hands.
- Once the updates are installed, restart your PC and check if the issue is resolved.
5. Perform a Clean Boot
The Windows explorer issue can also be caused due to a third-party program installed that is interfering with the system’s process. If the issue started occurring right after you installed a new program on the system, then that program can be the culprit.
The most effective way of identifying the problematic application is by performing a Clean Boot, which launches the system with only the critical drivers and programs. If the issue does not occur in the Clean Boot state, then it implies that a third-party program is indeed causing the problem.
Here is how you can perform a Clean Boot in Windows. If a third-party app is causing the problem, this method should help you identify the culprit and get rid of it.


