How to Fix the Windows Update Error 8024402F
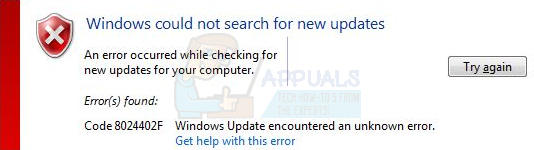
Error 8024402F is a Windows update error. Usually, it is not noticeable, and most users notice it when they try to install or run Windows updates manually.
You must know that in production environments, Windows updates should always be turned off. For home and personal use, they are fine, but not if you have important data without a backup.
Techs like us prefer keeping the updates off unless we test them on staging systems. If all goes well, then we perform the update. The reason why I am writing this is to make you aware that updates are not always successful and do not always go with the flow.
The update error 8024402F is quite common among Windows users. This error prevents you from updating your Windows and can occur on Windows 7, 8, 8.1, and 10.
Method 1: Checking Update Logs
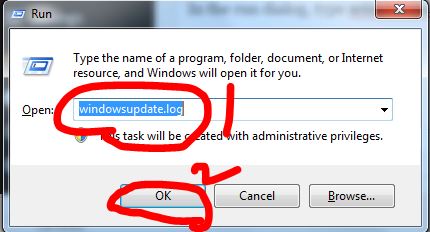
In order to fix this issue, we need to check the update logs file. To open the logs file, the easiest way is to press and hold the CTRL key and press R (this works on almost all versions of Windows, including Windows 10).
In the Run dialog, type “windowsupdate.log” and click OK.
After you click ‘OK,’ a Notepad file will open. The first column/field represents the date; scroll down to the bottom to see the latest entries in the log file. Each time you run Windows Update, a record/entry is added to the log file.
See the sample log below, and locate the line in bold in your Windows Update logs.
WARNING: Send failed with hr = 80072efe.
WARNING: SendRequest failed with hr = 80072efe. Proxy List used: <(null)> Bypass List used : <(null)> Auth Schemes used : <>
WARNING: WinHttp: SendRequestUsingProxy failed for <http://download.windowsupdate.com/msdownload/update/common/2009/06/2803268_2cf7737e73bd31ae709b14a95c8d2ecb7eccfbf3.cab>. error 0x80072efe
WARNING: WinHttp: SendRequestToServerForFileInformation MakeRequest failed. error 0x80072efe
WARNING: WinHttp: SendRequestToServerForFileInformation failed with 0x80072efe
WARNING: WinHttp: ShouldFileBeDownloaded failed with 0x80072efe
Notice the URL/link above, which I copied as
2803268_2cf7737e73bd31ae709b14a95c8d2ecb7eccfbf3.cab>. error 0x80072efe
And it indicates that the update has failed. Now, we’re going to begin troubleshooting this. A general idea here is that your firewall, router, antivirus, or malware on your PC could be blocking this file from being downloaded.
To test, copy and paste the URL of the update into your browser, attempt to download it, and see if it works.
If it does, you can install the update manually by opening the command prompt in administrator mode.
A) Click Start.
b) Type “CMD.
c) Right-click “CMD” and select “Run as Administrator.
In the black command prompt, execute the following command:
dism /online /add-package /packagepath:C:\update\myupdate.cab
Where ‘C:\update\myupdate.cab‘ is the location of your file. If it was downloaded in the Downloads folder, then it should be ‘C:\Users\Username\Downloads\updatefile.cab‘.
When you execute the above command in command prompt, the update will be installed. You can then re-run windows updates.
If it doesn’t work, perform these general checks, then try the following:
a) Turn off the anti-virus
a) Turn off the firewall.
c) Disable router firewall, make sure no activex filters are setup.
d) Make sure you can access the internet (if not, check the router, modem, and DNS settings). I have another article on setting up public DNS servers, which you can search on Google by typing ‘dns_probe_finished_nxdomain Appuals‘.
e) Reset Internet Explorer (Win Key + R -> type inetcpl.cpl -> Advanced Tab -> Reset -> Delete Personal Settings)
f) Try a different web browser.
If it still doesn’t work, then “.
- Click “Start” -> and type “Services.msc”.
- Locate and stop the ‘Background Intelligent Transfer‘ and ‘Windows Update‘ services.
- Then, click ‘Start‘ and open ‘CMD’ as an administrator.
- Type rd %systemroot%\softwaredistribution /s
Method 2: Update Time Settings.
- Hold the Windows key and press X, then select Control Panel on Windows 10, 8, and 8.1. For Windows 7, click Start and select Control Panel.
- Click Clock, Language and Region > Click Set the time and date > Select Internet Time tab > Click Change settings > Click Update Now > Click ok > Click apply then select ok
Now, try to update your Windows.
Method 3: Changing Windows Update Settings.
For Windows 8 and 8.1.
- Move your mouse to the bottom right corner of your desktop screen, then move your mouse upwards. Click ‘Settings‘ from the newly appeared options.
- Click ‘Change PC Settings‘ > Click ‘Update and Recovery‘ > Click ‘Choose How Updates Get Installed‘.
- Uncheck ‘Give me recommended updates the same way I receive important updates,’ and check ‘Give me updates for other Microsoft products when I update Windows.’ You can select or deselect an option by clicking it once.
For Windows 7.
- Click “Start,” and then type “Windows Update” in the “Start Search.” Click on “Windows Update” from the program list.
- Click ‘Change Settings‘.
- Uncheck ‘Give me recommended updates the same way I receive important updates‘ and check ‘Give me updates for other Microsoft products when I update Windows.’ You can select or deselect an option by clicking it once.
If there is no ‘Give me updates for other Microsoft products when I update Windows‘ option, then simply uncheck the ‘Give me recommended updates the same way I receive important updates‘ option.
Method 4: Disabling Windows Firewall and Third-Party Applications
If you have any antivirus software or other applications related to boosting internet speed, please shut down or disable them.
- Hold the Windows key and press X, then select Control Panel on Windows 10, 8, and 8.1. For Windows 7, click Start and select Control Panel.
- Select “System and Security” > Click “Windows Firewall” > Click “Turn Windows Firewall On or Off.
- Select the ‘Turn off Windows Firewall (not recommended)‘ option in both the Private Network Settings and Public Network Settings sections, and click ‘OK’.
Method 5: Checking Windows Update Services.
- Hold the Windows key and press R.
- Type “msc” and press Enter.
- Locate Windows Update and double-click it.
- Select the General tab and choose Automatic from the Startup Type dropdown list.
- Click the Start button in the Service Status section.
- Repeat the same method for the Background Intelligent Transfer Service in the Services Window.
Method 6: Renaming the SoftwareDistribution Folder.
- Hold the Windows key and press X, then select Command Prompt (Admin) in Windows 10 and 8. For Windows 7, click Start, type ‘cmd‘ in the Start Search box, and simultaneously press Ctrl, Shift, and Enter (Ctrl + Shift + Enter).
- Type “net stop WuAuServ” and press Enter. Wait until it says “successfully stopped,” but do not close the command prompt window.
- Hold the Windows key and press R. Type %windir% and then press Enter in Windows 10 and 8. For Windows 7, click Start, type %windir% in the Start Search box, and press Enter.
- Locate the SoftwareDistribution folder, right-click it, and select ‘Rename.’ Then, type ‘SoftwareDistribution.old‘ and press ‘Enter.’
- Type “net start WuAuServ” and press Enter in the command prompt window. Wait until it says “successfully started.
Method 7: Resetting Windows Update Components
Go to this link, https://support.microsoft.com/en-us/kb/971058, and download the Windows Update Troubleshooter for your Windows version. After the download is complete, run the downloaded file and click ‘Nex
Possibly?