Printed Documents History feature on Windows 10: All that you need to know
The Printed Documents History is defined as the log of all the documents that you have printed as well as the ones that are currently present in the Print Queue. This history also includes a list of failed as well as successful printing attempts. In this article, we will explain to you the method through which you can enable and check the printed document’s history on Windows 10.
How to Check the Documents in Print Queue in Windows 10?
In order to check the documents in the print queue, you will need to perform the following steps:
- Type Settings in the search section of your taskbar and click on the result in order to launch the Settings window as shown in the image below:

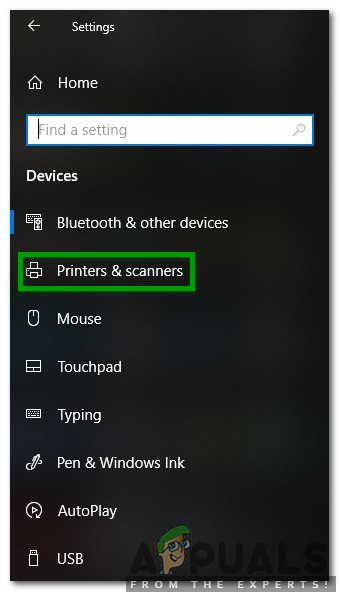
Click on the Devices tab in the Settings Window - In the Settings window, click on the Devices tab as highlighted in the image shown above.
- Now click on the Printers and Scanners tab in the Devices window as highlighted in the following image:
Go to the Printers and Scanners tab by Clicking on it - Scroll down to the Printers and Scanners section. Here you will find a list of different printers and scanners that are installed on your machine. Select the printer whose print queue you want to view by clicking on it.

Select your Desired Printer and Click on the Open Queue Button - Then click on the Open Queue button as highlighted in the image shown above.
- As soon as you will click on this button, your Print Queue will appear on your screen as shown in the image below:
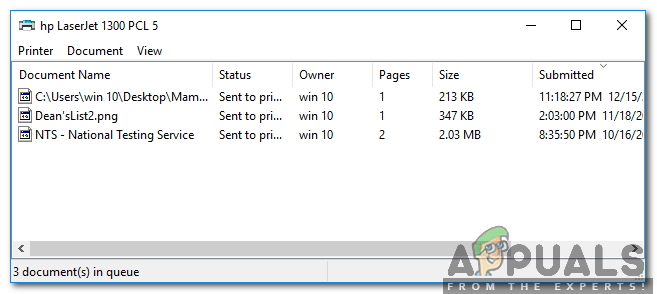
The Print Queue NOTE: This method will only show you the documents that are currently present in your print queue and not the ones that have already been printed
How to Enable and Check the Printed Documents History on Windows 10?
In order to enable and check the history of the printed documents on Windows 10, you will need to perform the following steps:
- Go to the Print Queue window as described in the method discussed above and then click on the Printer tab on this window in order to launch a menu as shown in the image below:
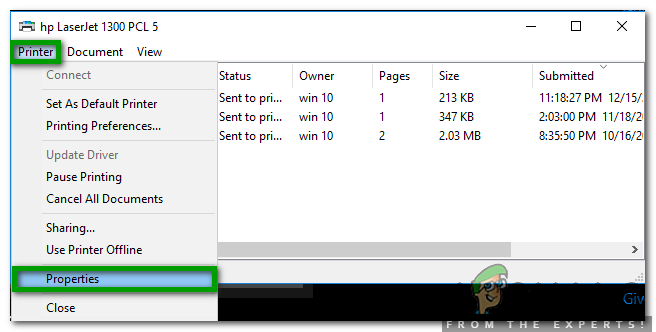
Click on the Printer tab in the Print Queue window in order to launch a menu - Now click on the Properties option from this menu as highlighted in the image shown above.
- As soon as you will click on this option, the Properties window for your particular printer will appear on your screen.
- Switch to the Advanced tab in this window as highlighted in the following image:
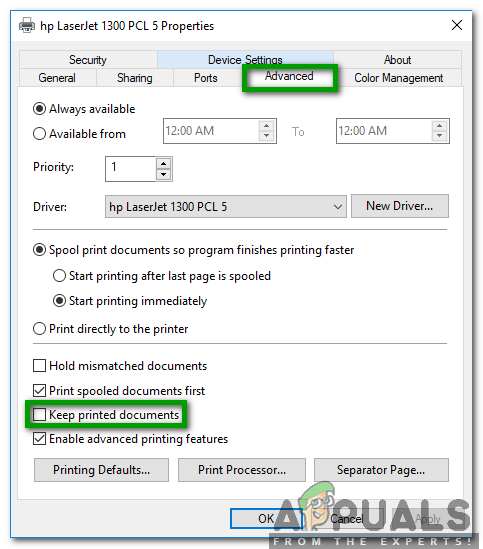
Switch to the Advanced tab in the Printer Properties window and enable the Keep Printed Documents option in order to maintain the history of your printed documents in Windows 10 - Check the checkbox corresponding to the field saying, Keep Printed Documents as highlighted in the image shown above.
- Click on the Apply button and then click on the OK button in order to save your settings.
- Now whenever you will check the Print Queue of your respective printer, you will be able to see the documents currently present in the print queue as well as the ones that have already been printed.
NOTE: The print queue only has a limited amount of space, therefore, it cannot show an unlimited number of your documents at once. Whenever the number of your documents grows beyond its capacity, it replaces the older ones. In order to keep a long term history of your printed documents, you will need to follow the method discussed below.
How to Enable and Check the Long Term Printed Documents History on Windows 10?
In order to enable and check the long term printed documents history on Windows 10, you will need to perform the following steps:
- Right-click on the Windows icon located on your taskbar in order to launch a cascading menu and then click on the Event Viewer option from this menu as highlighted in the image shown below:
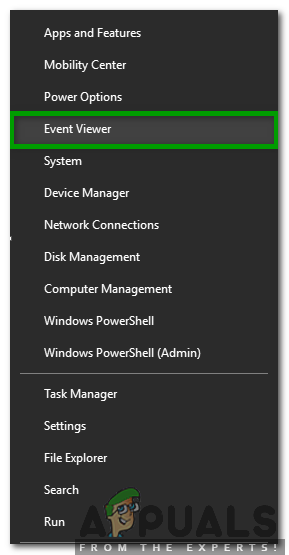
Click on the Event Viewer option - As soon as you will click on this option, the Event Viewer window will appear on your screen. Click on the Applications and Services Logs folder in order to expand it as highlighted in the following image:
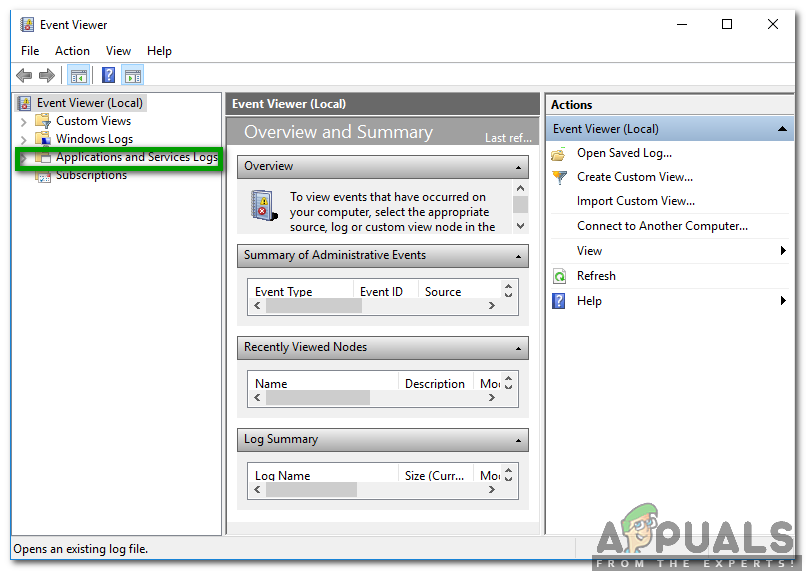
Expand the Applications and Services Logs folder by clicking on it - In the Applications and Services Logs tab, click on the Microsoft folder.
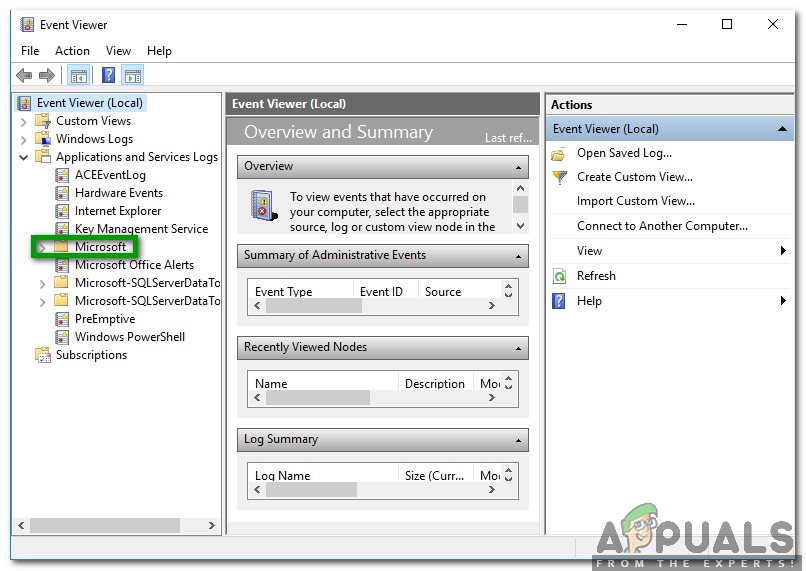
Click on the Microsoft folder - Now click on the Windows folder as highlighted in the image shown below:
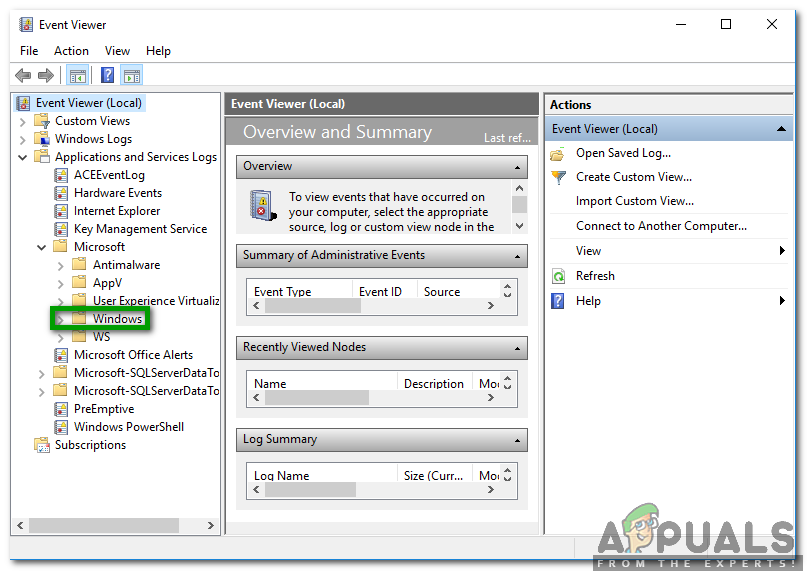
Select the Windows folder - In the Windows folder, double click on the Print Service folder.
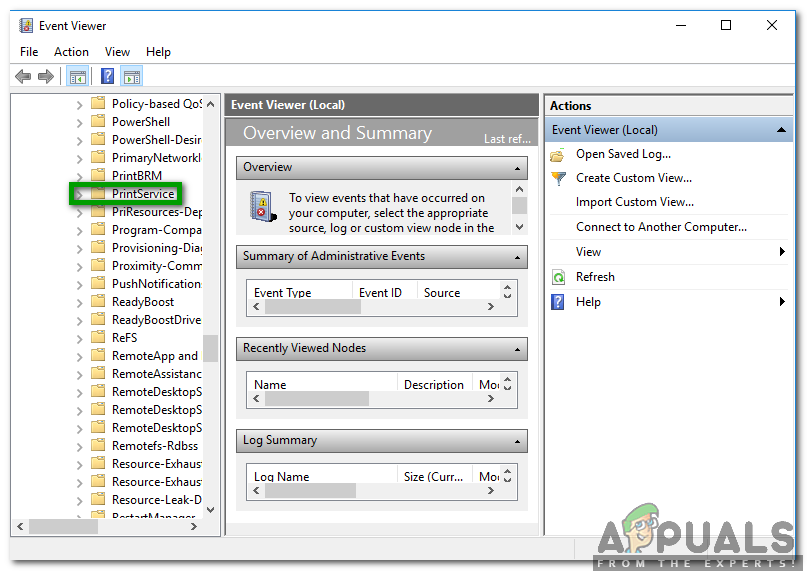
Double Click on the Print Service folder in order to open it - In the central pane of the Print Service window, right-click on the Operational service in order to launch a menu as shown in the following image:
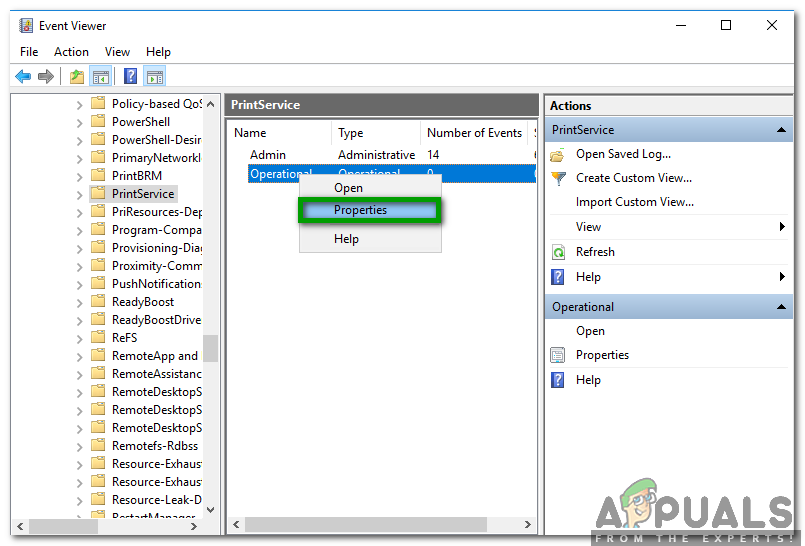
Right-click on the Operational Service and then select the Properties option from the menu that pops up - Now click on the Properties option as highlighted in the image shown above.
- As soon as you will click on this option, the Operational Log Properties window will appear on your screen.
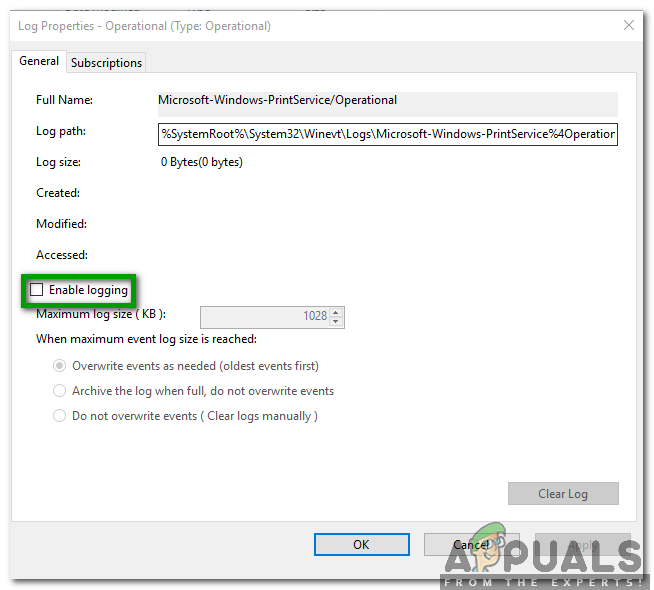
In the Operational Log Properties window, check the Enable Logging option in order to keep a long term history of your printed documents - In the General tab of this window, check the checkbox corresponding to the field saying, Enable Logging as highlighted in the image shown above.
- Click on the Apply button and then click on the OK button in order to save your settings.
- Now, in order to check your long term printed documents history on Windows 10, you will have to repeat the steps from 1 to 5 and then double click on the Operational service. Here, you will be able to see your long term printed documents history.
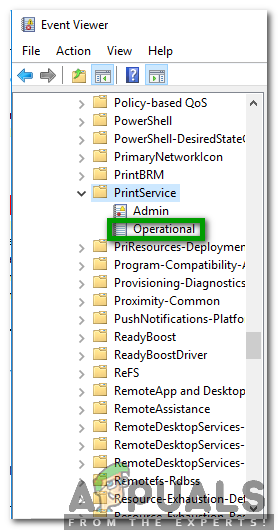
For checking the long term history of your printed documents, just go to the Operational service and you will be able to see a history of all your printed documents NOTE: By making use of this method, you will be able to keep a long term track of your printed documents without running out of logging space.


