How to Make Your YouTube Music Playlists Private [Guide]
 Reviewed by Huzaifa Haroon
- YouTube Music playlists are public by default. Users can change this setting to unlisted or private, with the private option restricting access to only the creator.
- To make a playlist private on YouTube Music, users can edit the playlist's settings on both desktop and mobile platforms, selecting the private option under privacy settings.
- When creating a new playlist on YouTube Music, users have the option to set the privacy to private during the creation process, both on desktop and mobile devices.
Creating music playlists can be a great way to organize your favorite songs and listen to them according to your mood and vibe. However, a lot of people aren’t aware of the fact that YouTube Music Playlists are set to Public by default which means they can be accessed by anyone.
While some people might not find this concerning, a few listeners can be a little hesitant when sharing their music habits as people often like to gatekeep their favorite songs and artists to keep something just for themselves. That is why in this article, we will learn how to make your YouTube Music playlists private and make them available only to you. So let’s jump in!
Table of Contents
YouTube Music Playlists Privacy Settings
Playlists whether they are on YouTube or YouTube Music are a collection of videos and songs that help users organize them by specific themes or topics. When you are making a YouTube Music playlist you have three different options to choose your privacy settings from.
- Public: Available for anyone to watch and share your music playlist.
- Unlisted: Only available to people with the video link.
- Private: Can only be accessed by you.
If you didn’t come across the option to set your privacy settings when making a new playlist, there’s nothing to worry about as these settings can also be changed after you create a music playlist.
READ MORE: How to See Your Subscribers on YouTube – Desktop & Mobile ➜
How to Make YouTube Music Playlists Private
Now that you know what setting your music playlist to private means, it’s time to look into how you can make your music playlists only viewable to yourself. Whether you are on the YouTube Music website or the mobile app, you can make YouTube Music playlists private by following these steps:
1. On Desktop
If you are using the YouTube Music browser website, you’ll first need to log in to your account, and from there you can follow these steps:
- Open up the YouTube Music website on your browser.
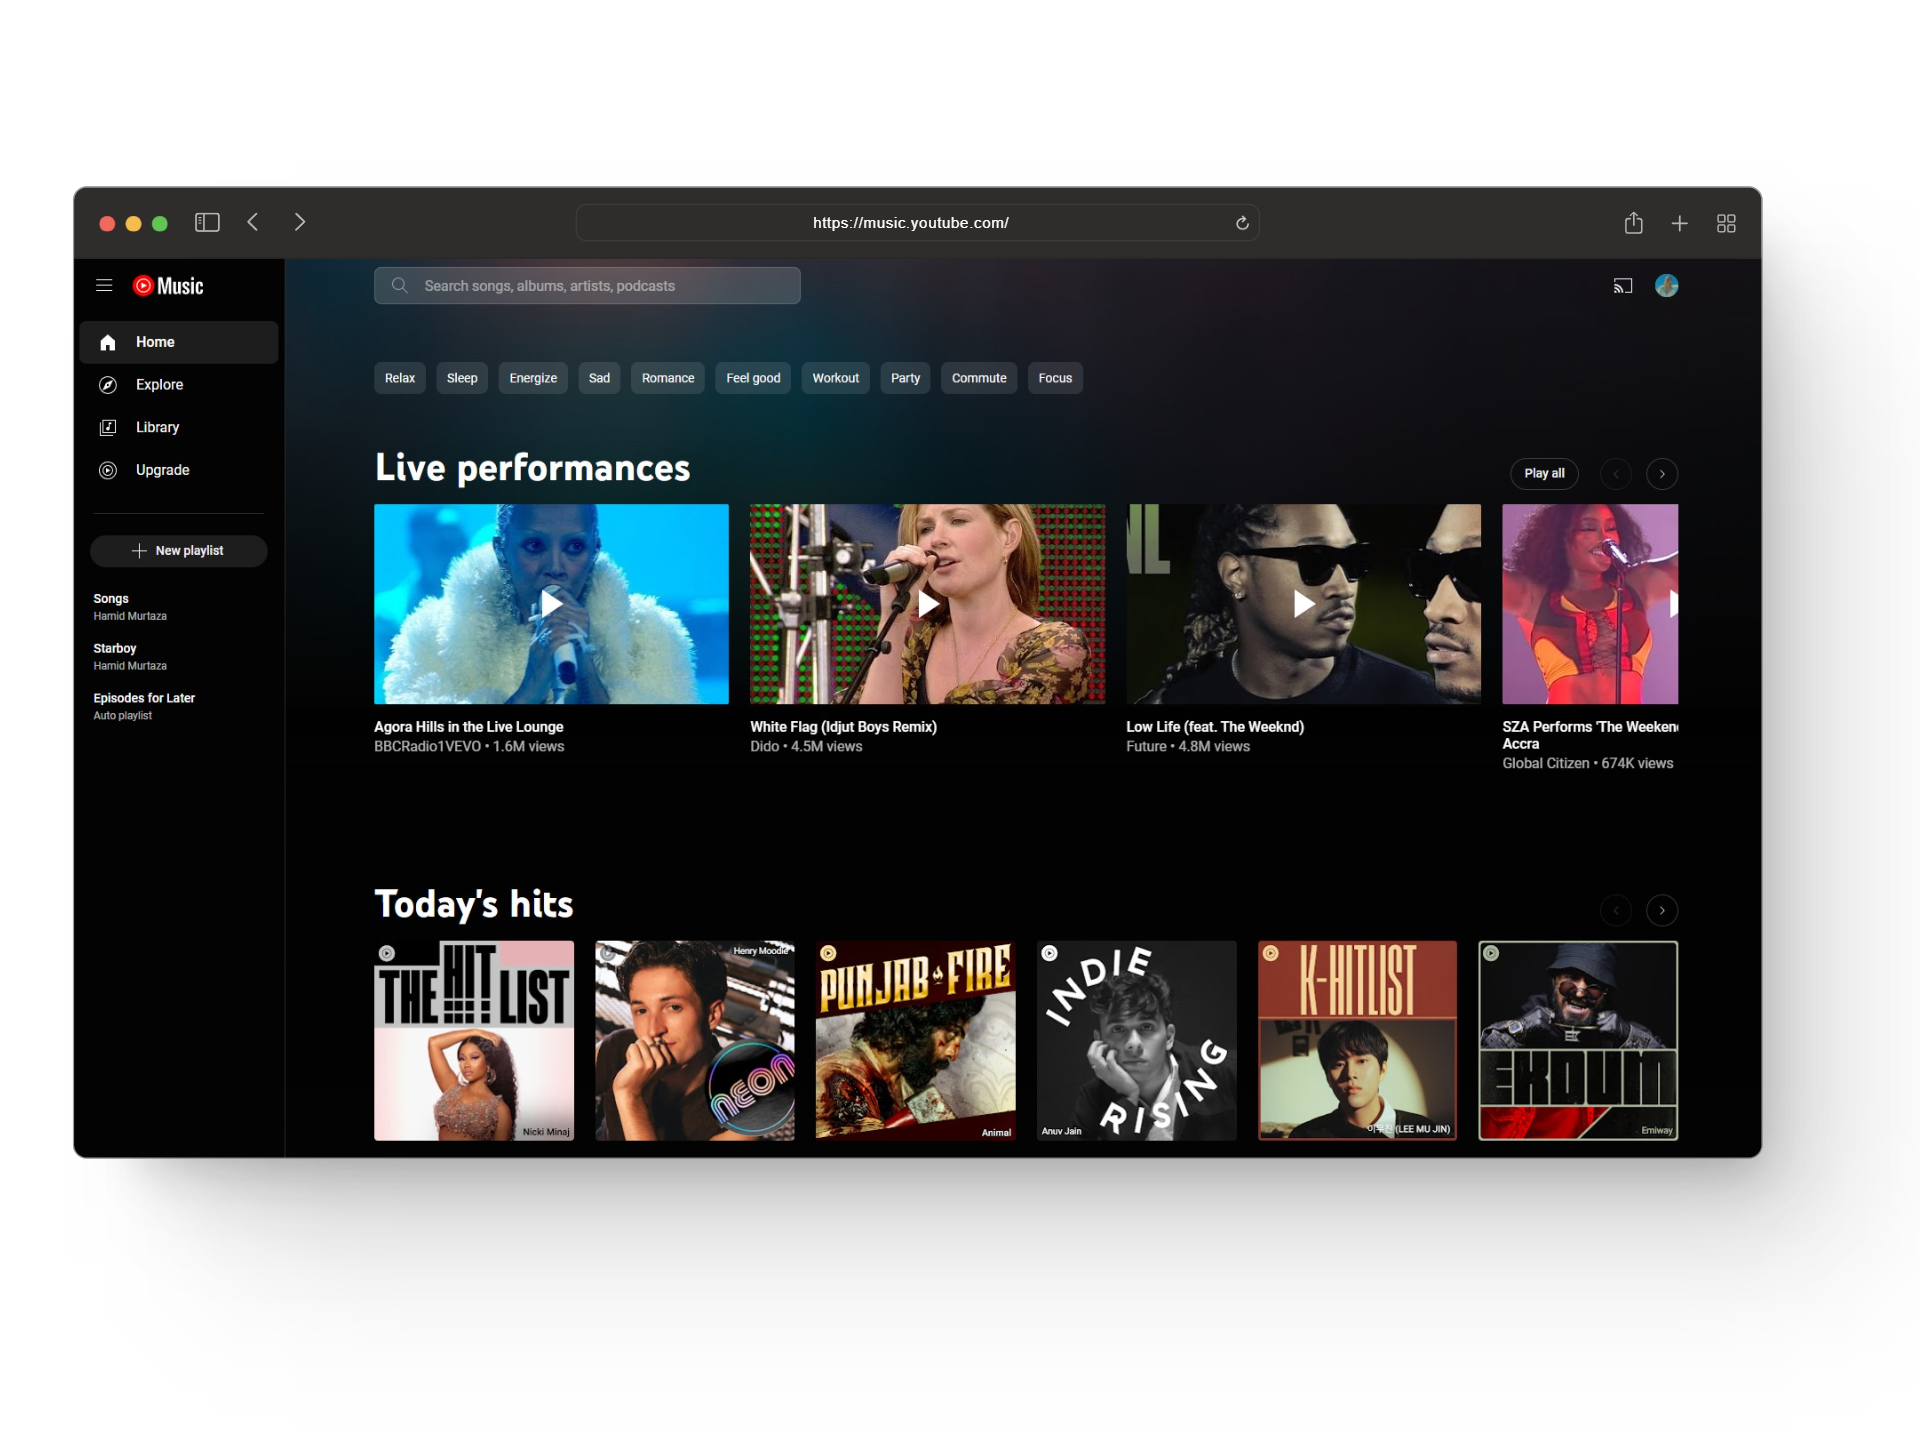
Open up YouTube Music - From here, click on the Library tab.
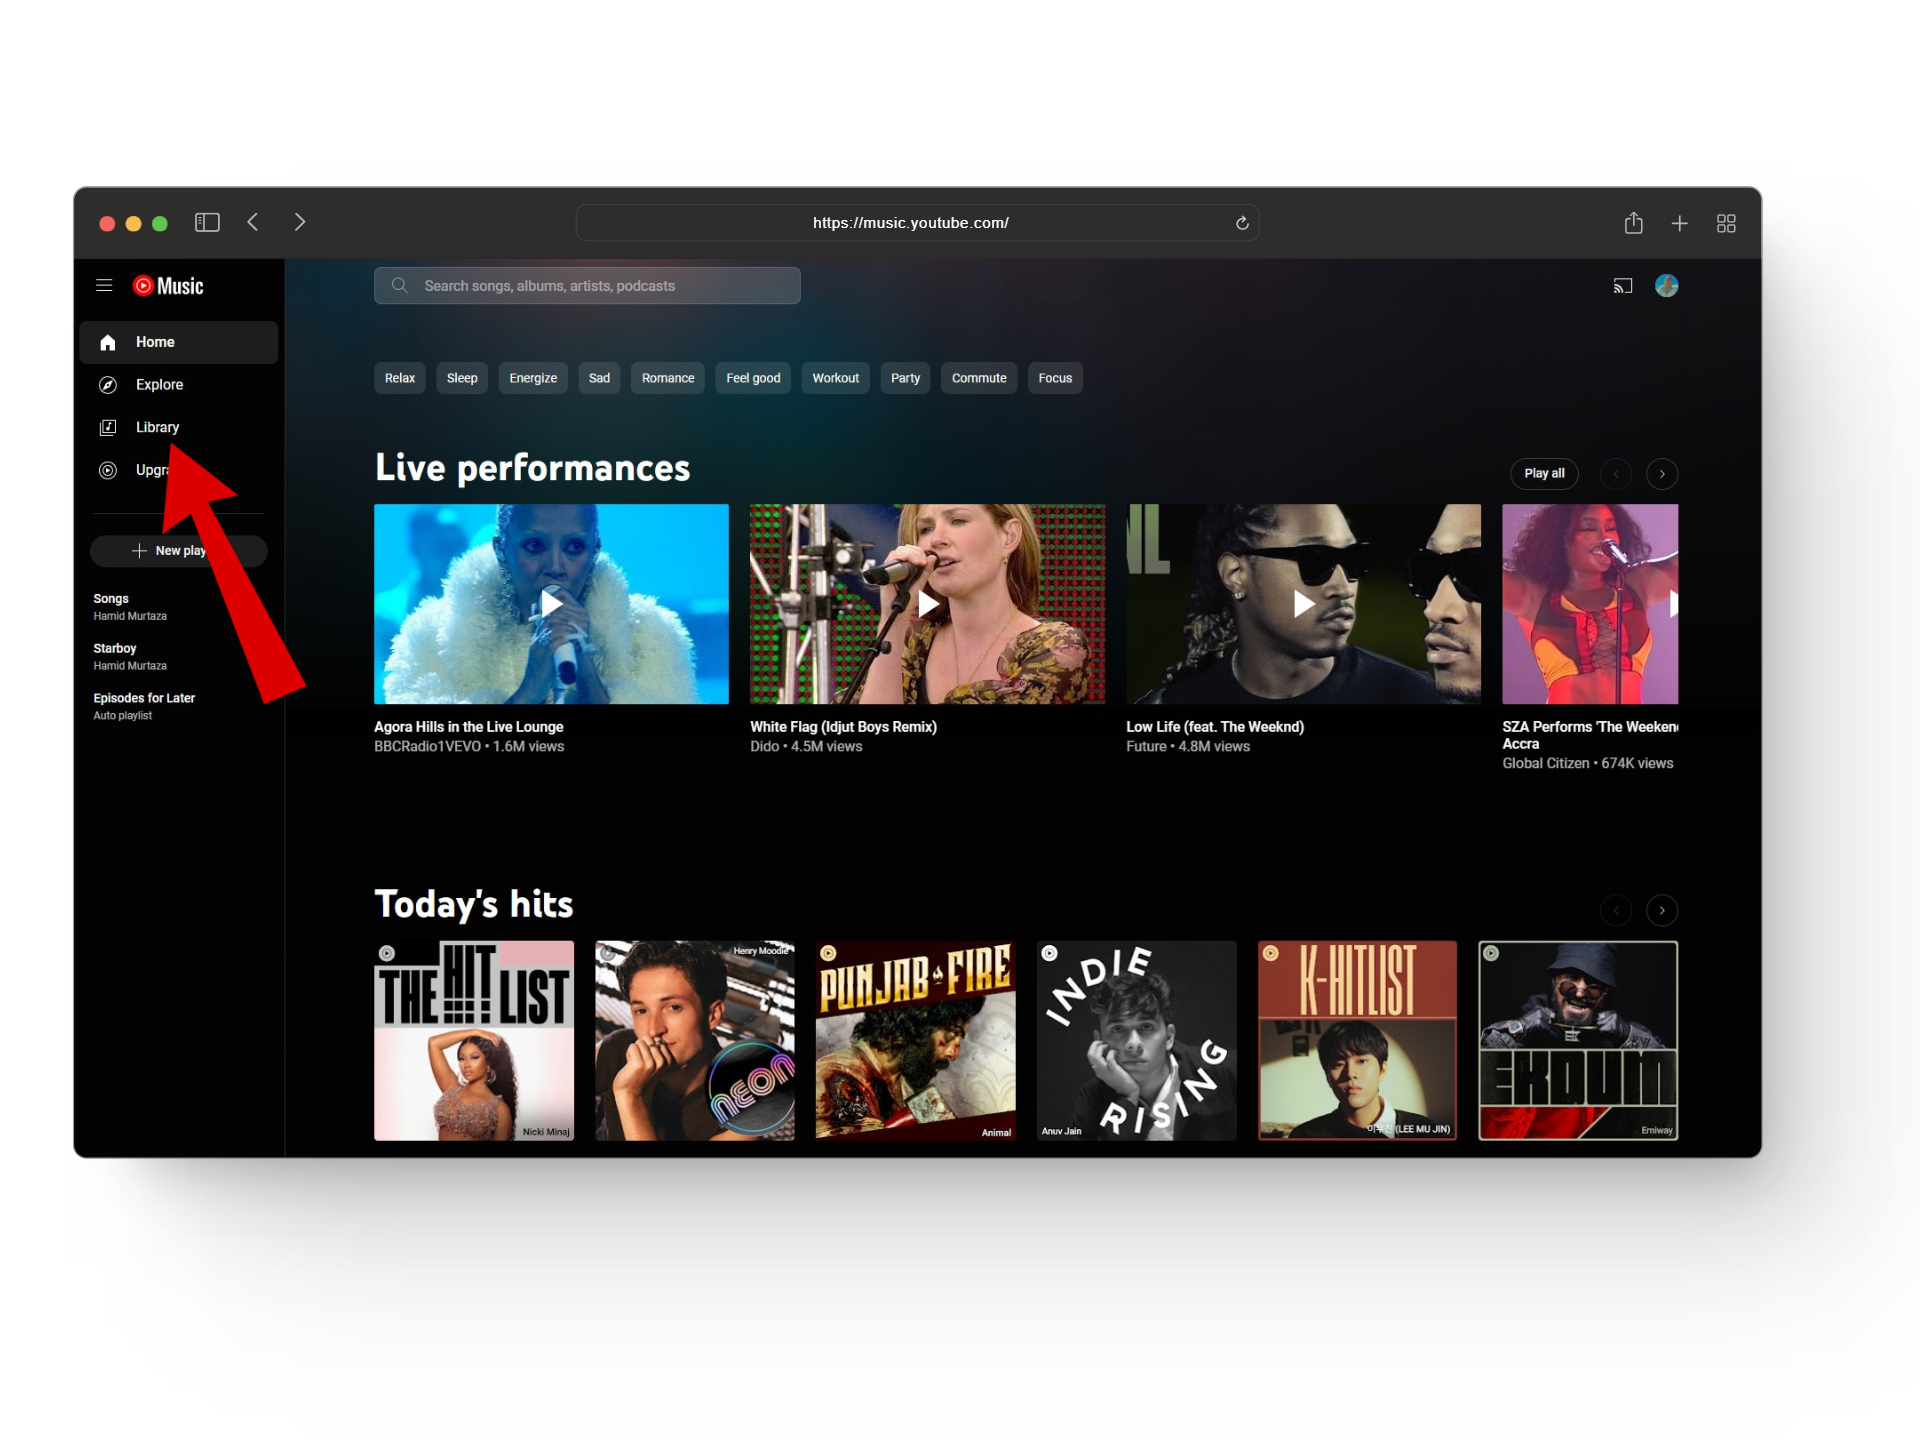
Click on library - This will open your library along with artists, playlists, albums, and more. Here, you’ll need to open up the playlist you want to make private.
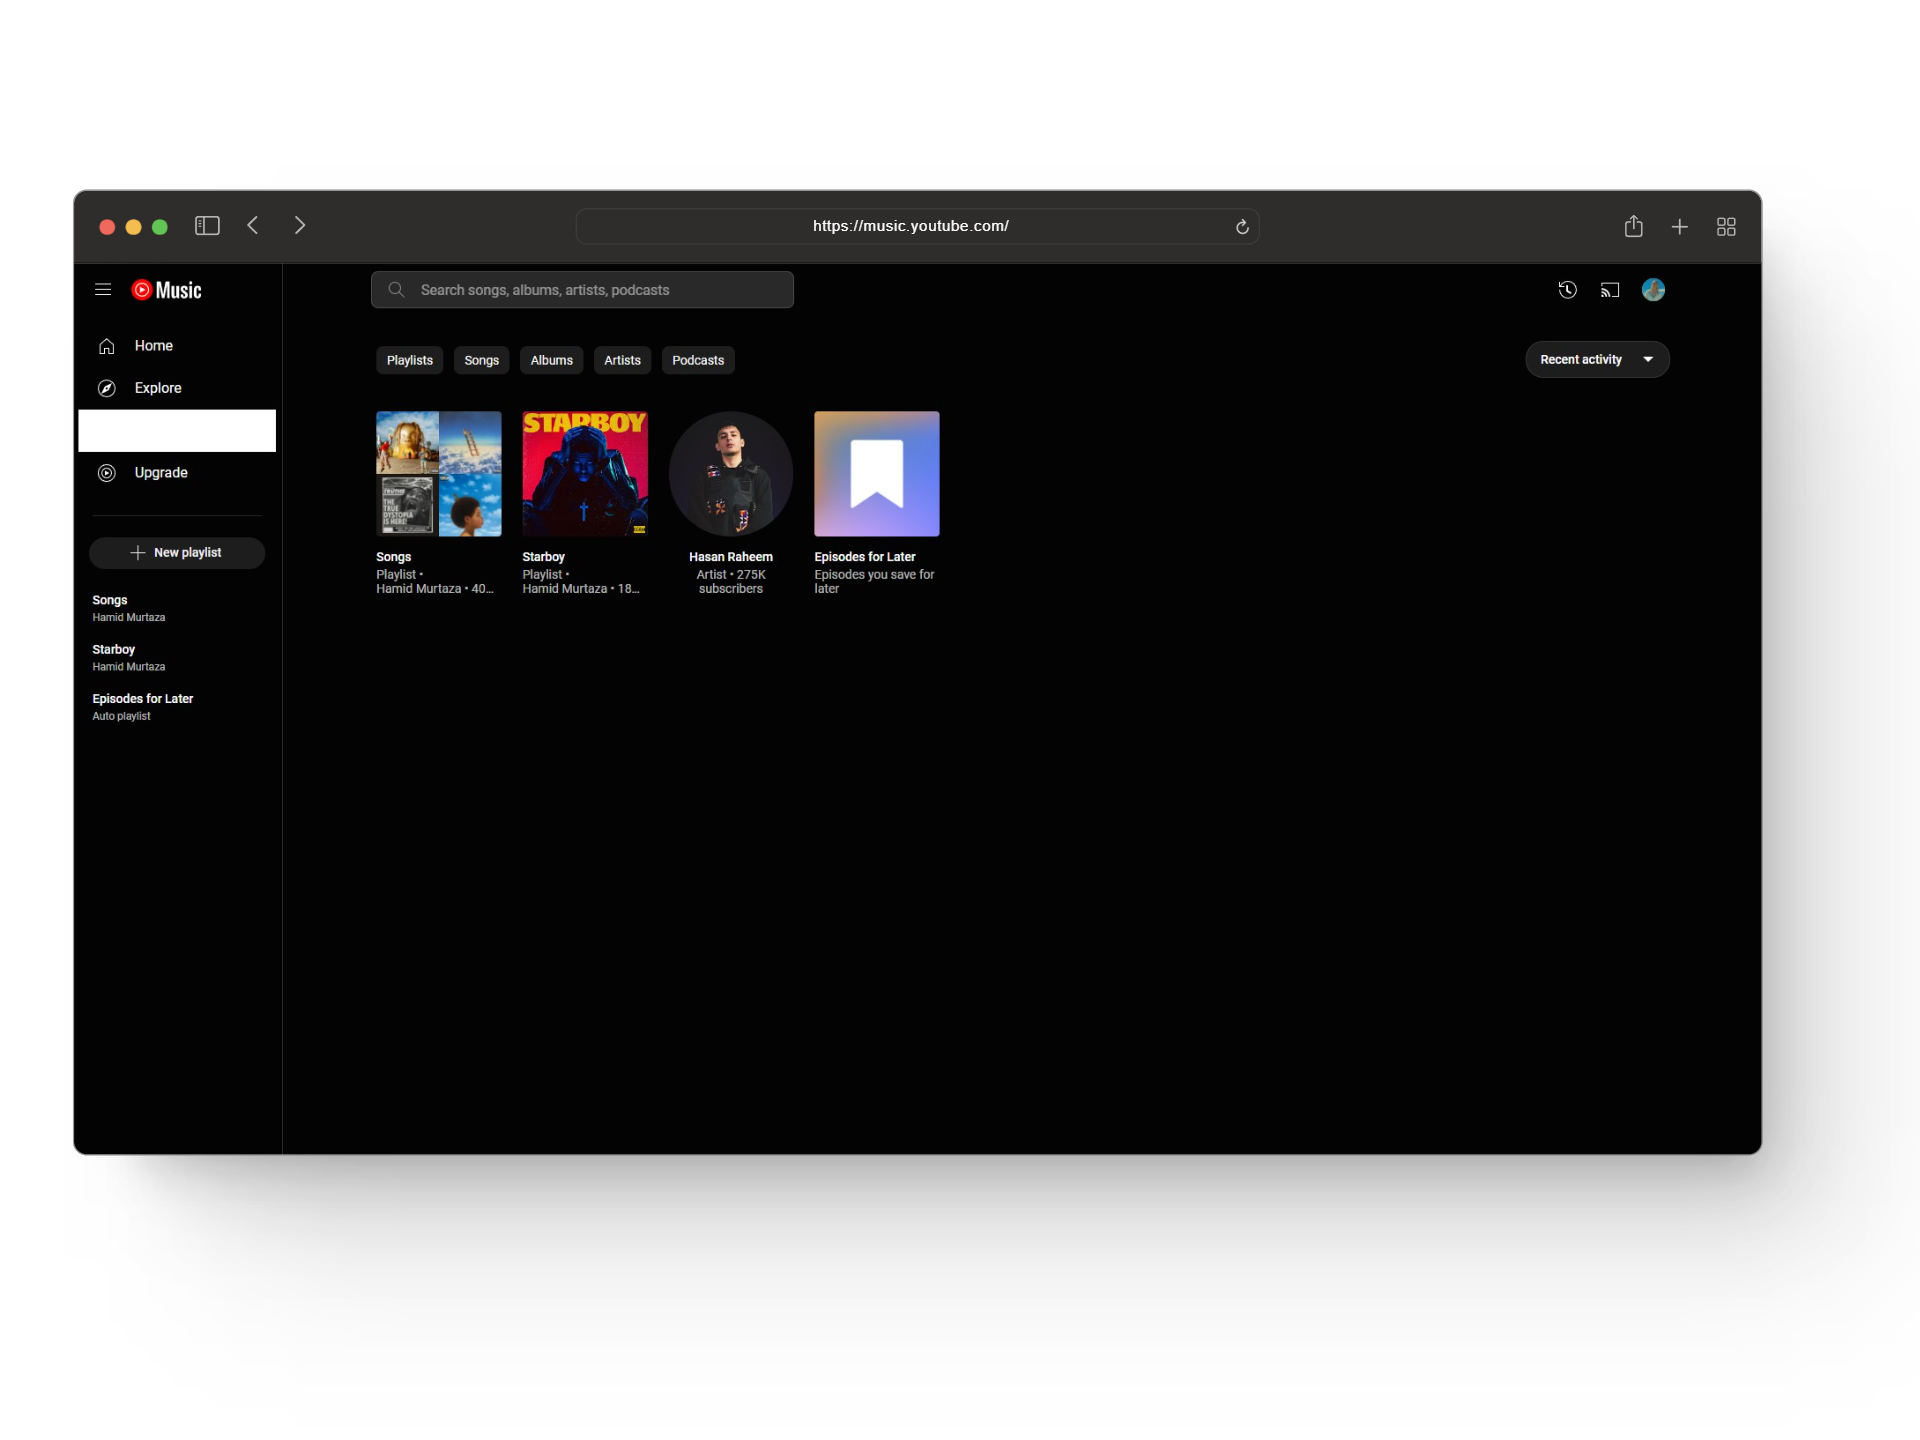
Library tab - Once that loads up, click on the Edit playlist button right next to your playlist’s name.
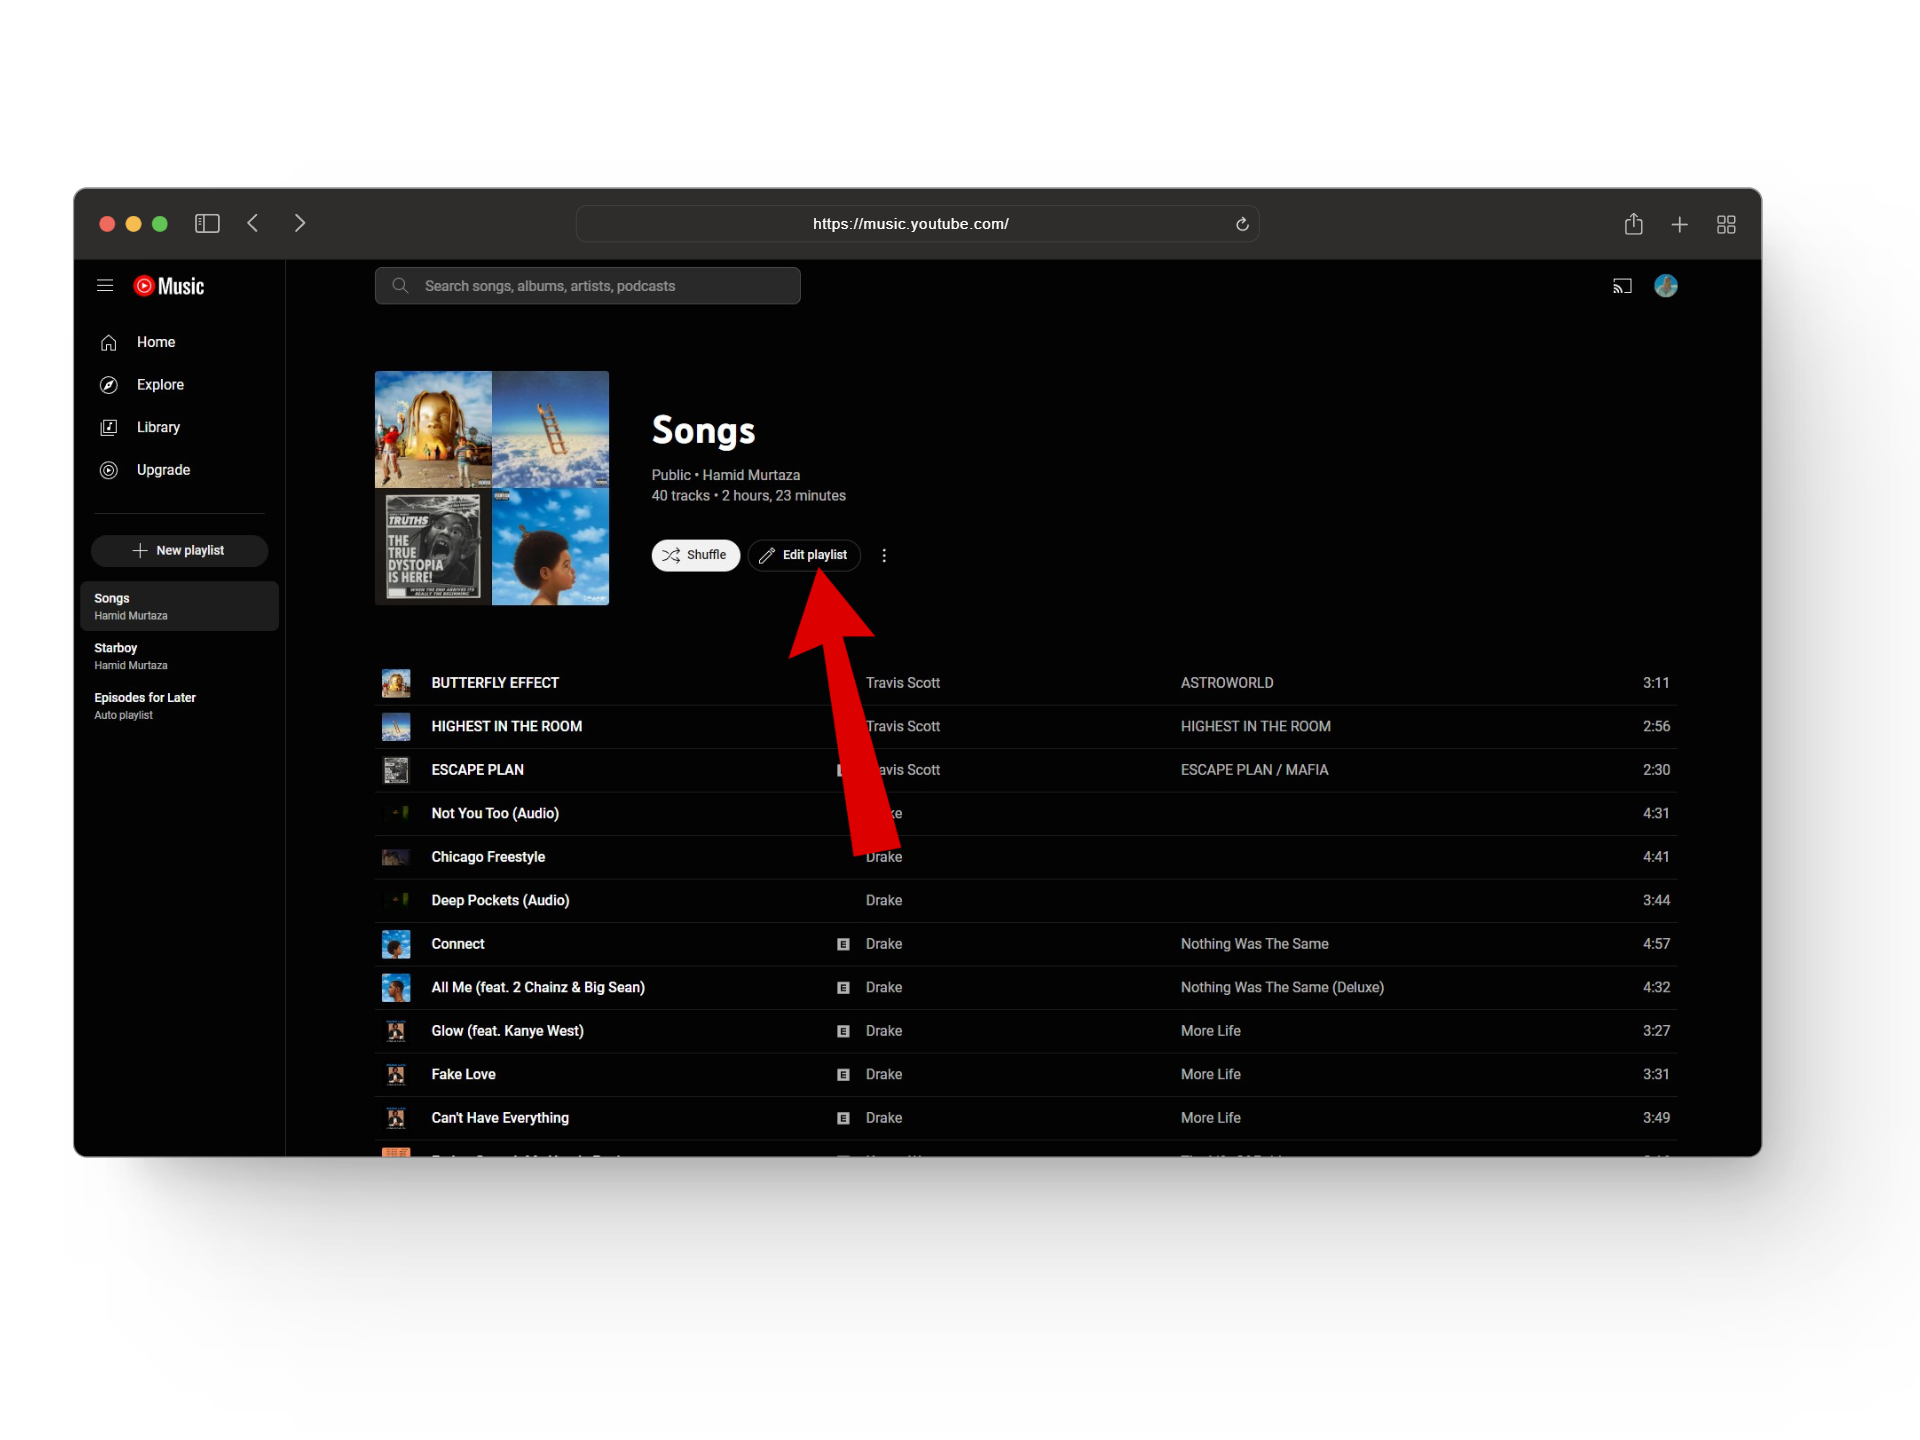
Click on Edit playlist - This will open up a small menu with options to change your playlist’s title, add a description, or change privacy.
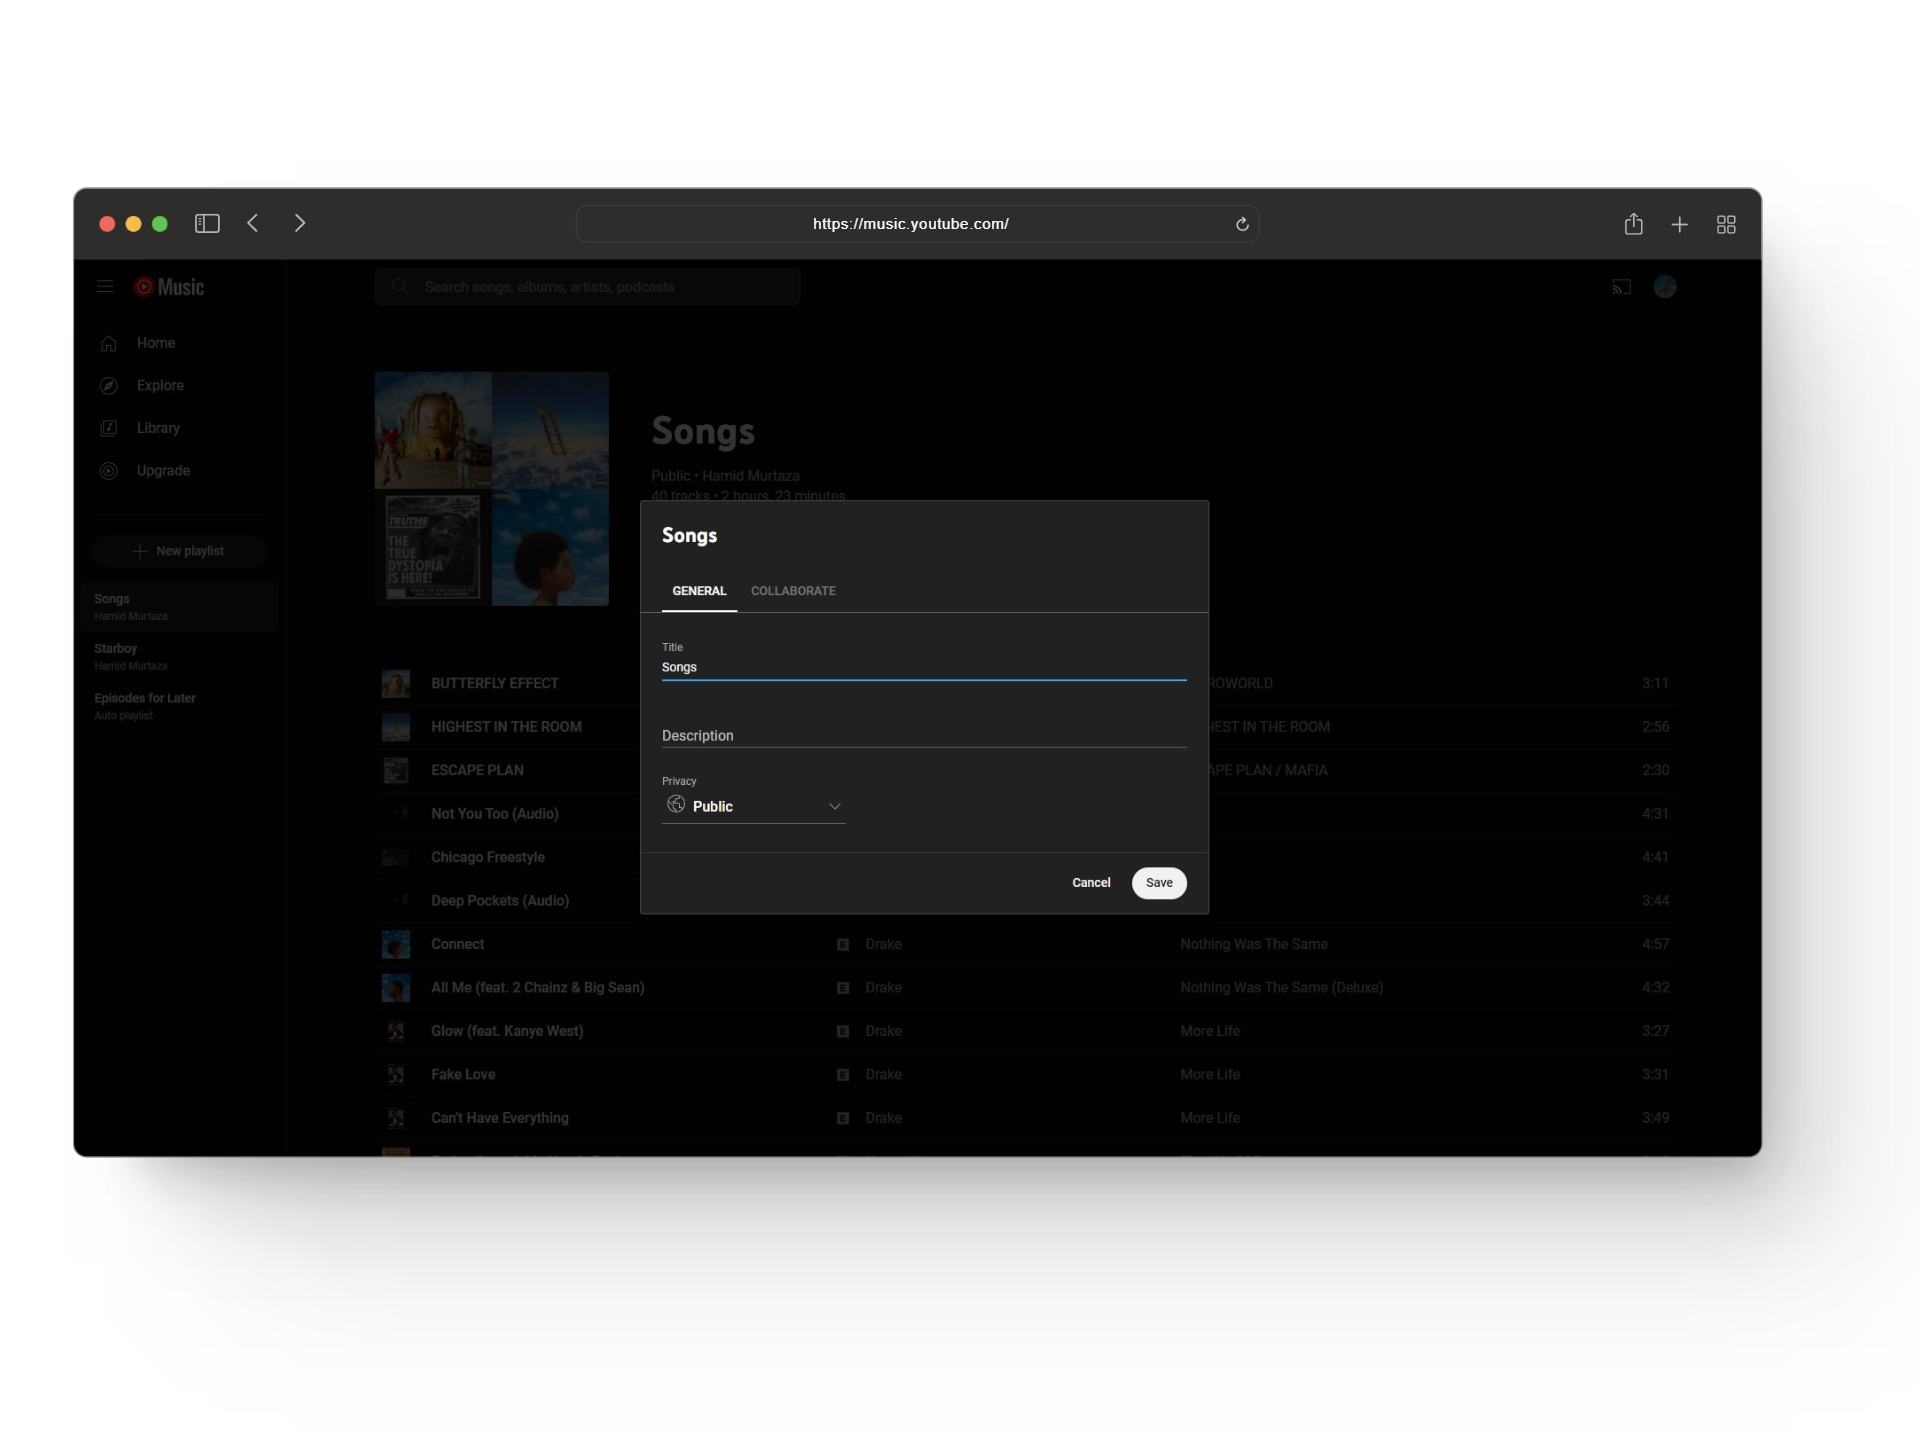
Adjust your playlist settings - Next, click on the arrow next to the Public option.
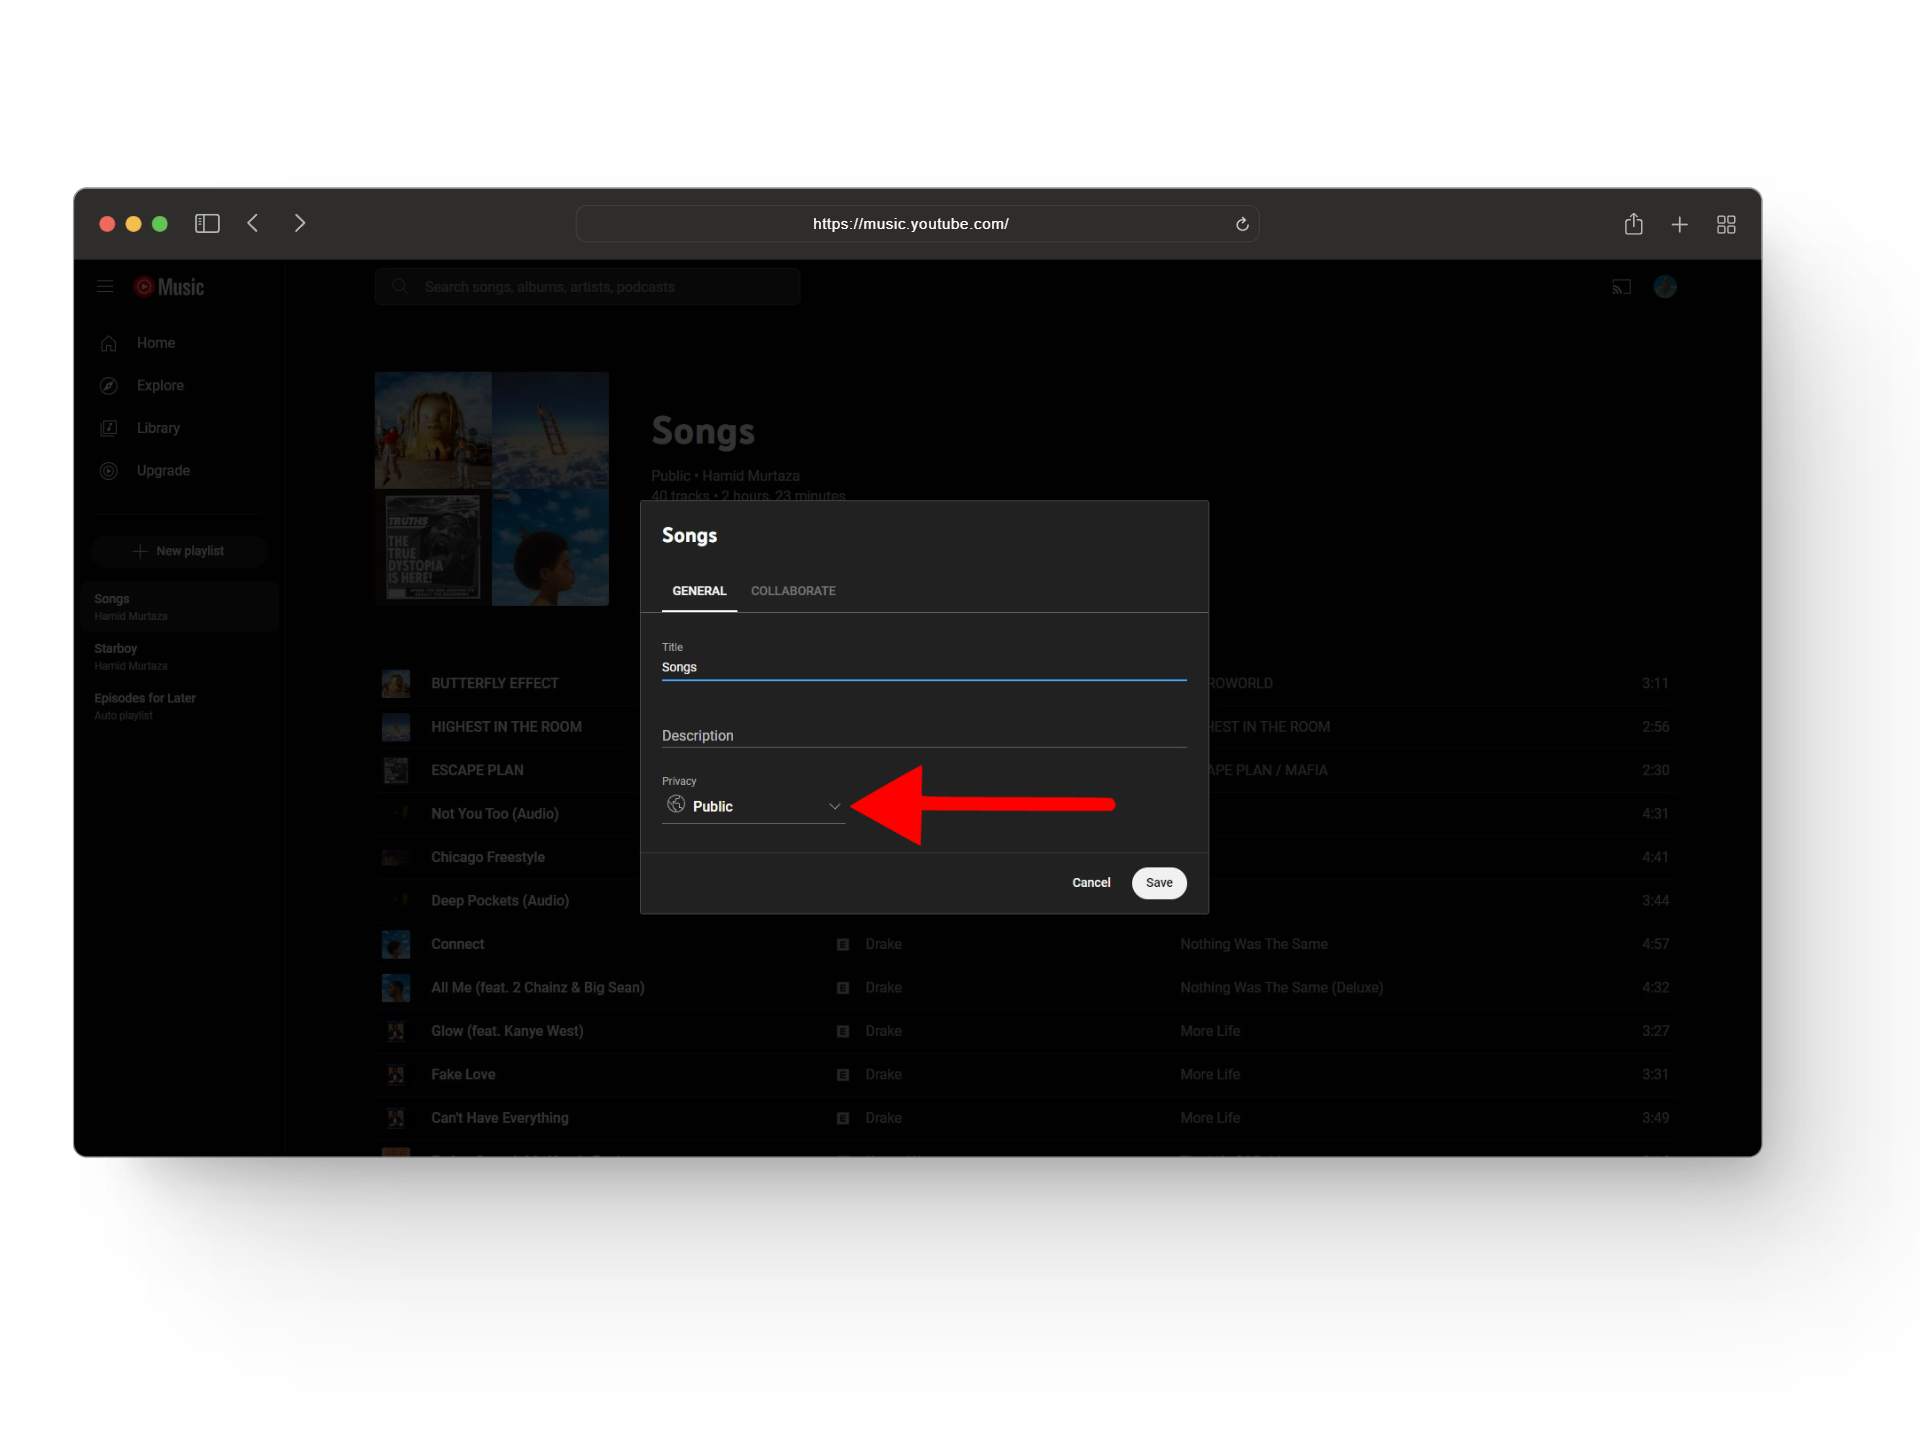
Click on the arrow - Now, select the Private option.
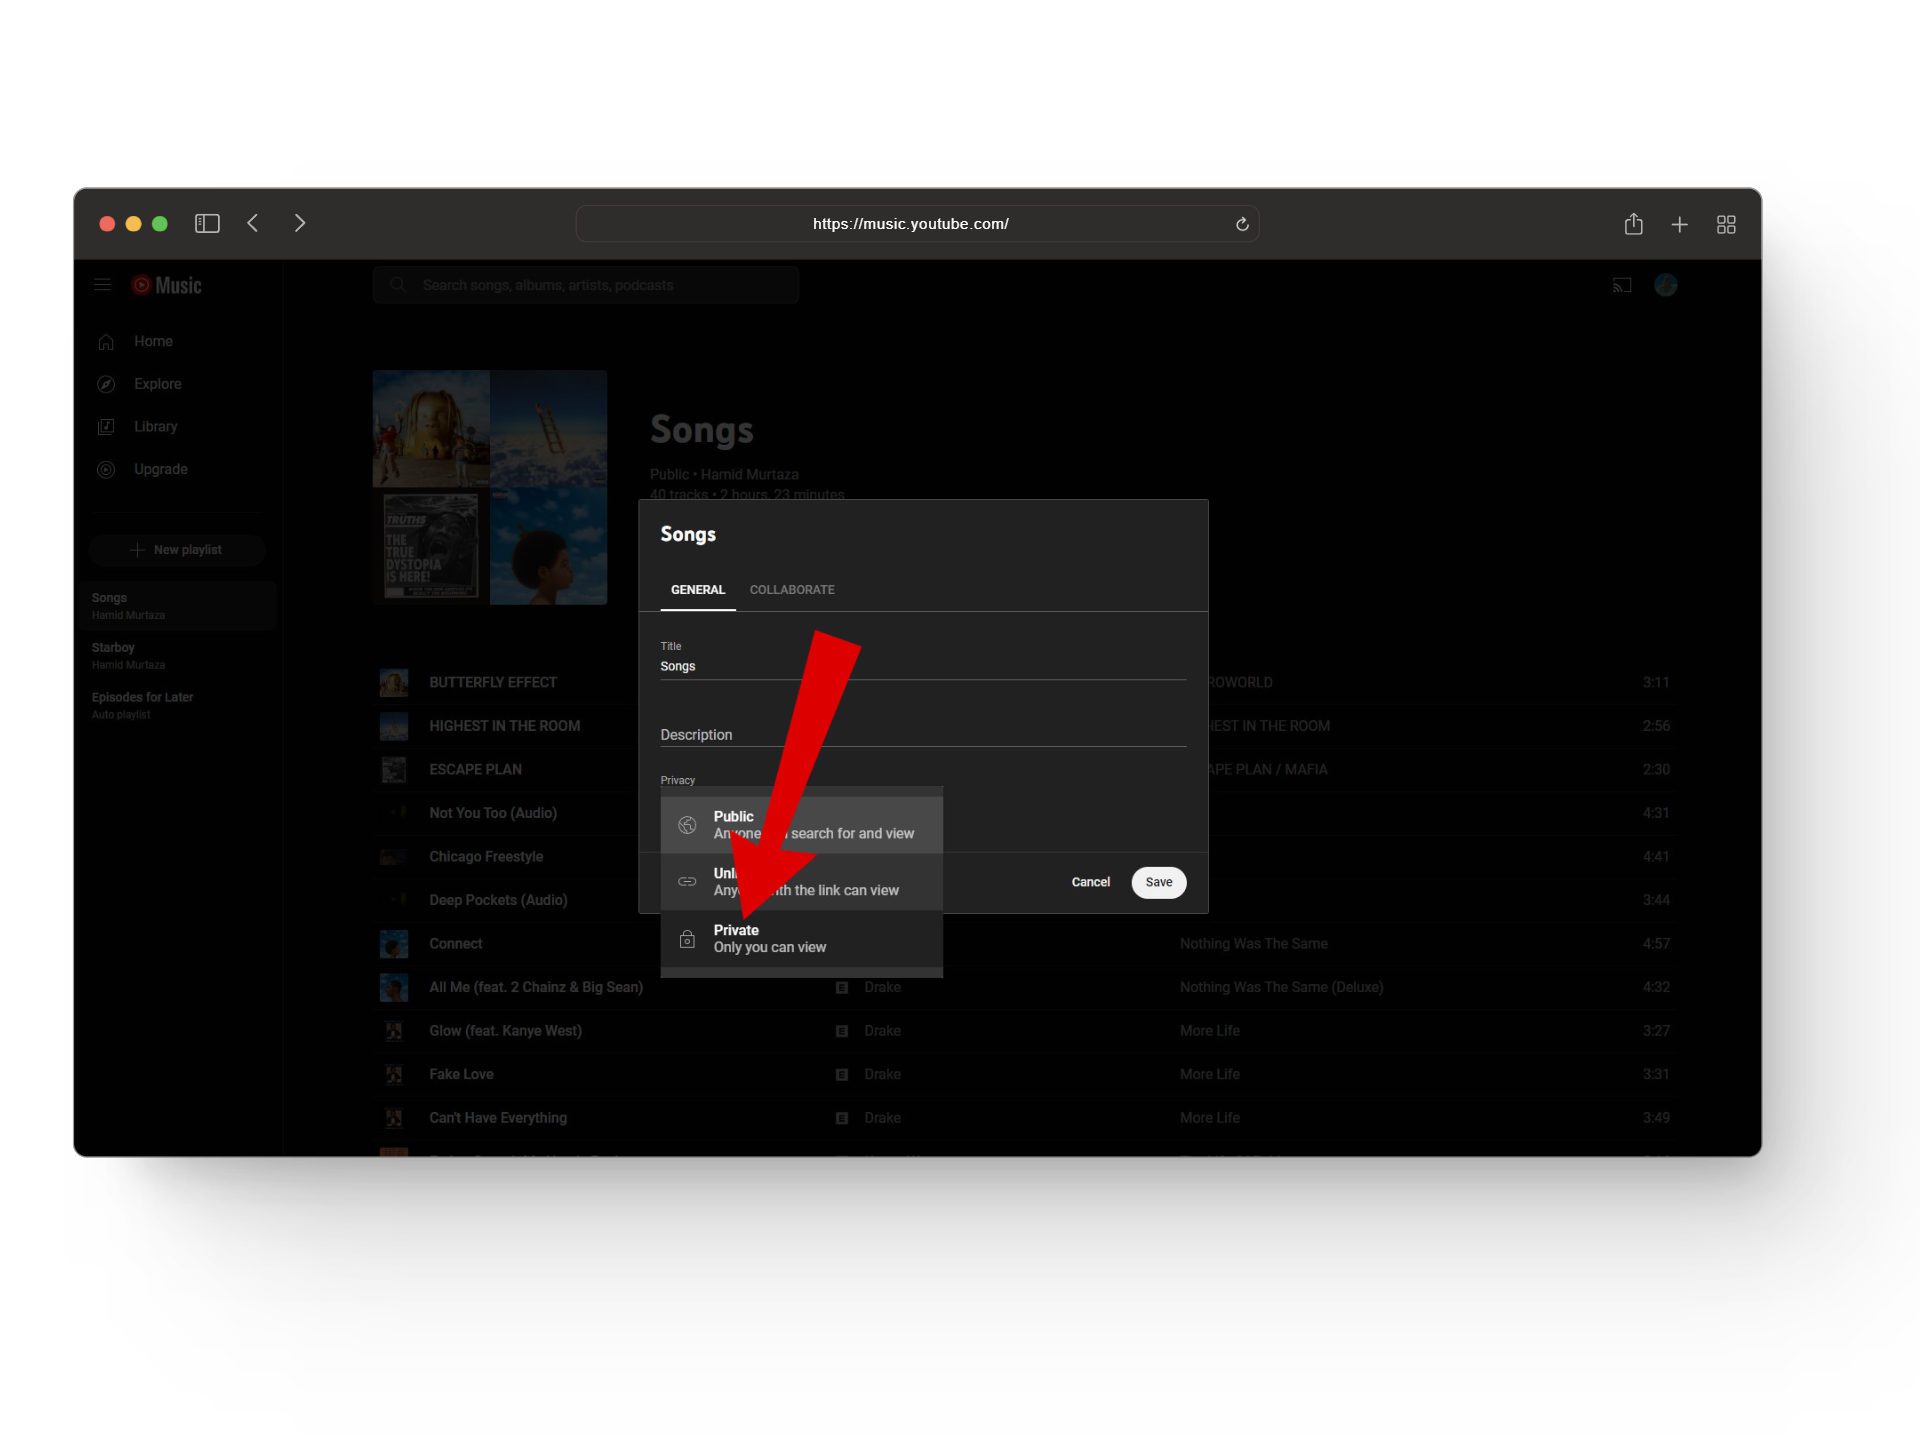
Select the private option - Finally, click the Save button to make your music playlist available to yourself.
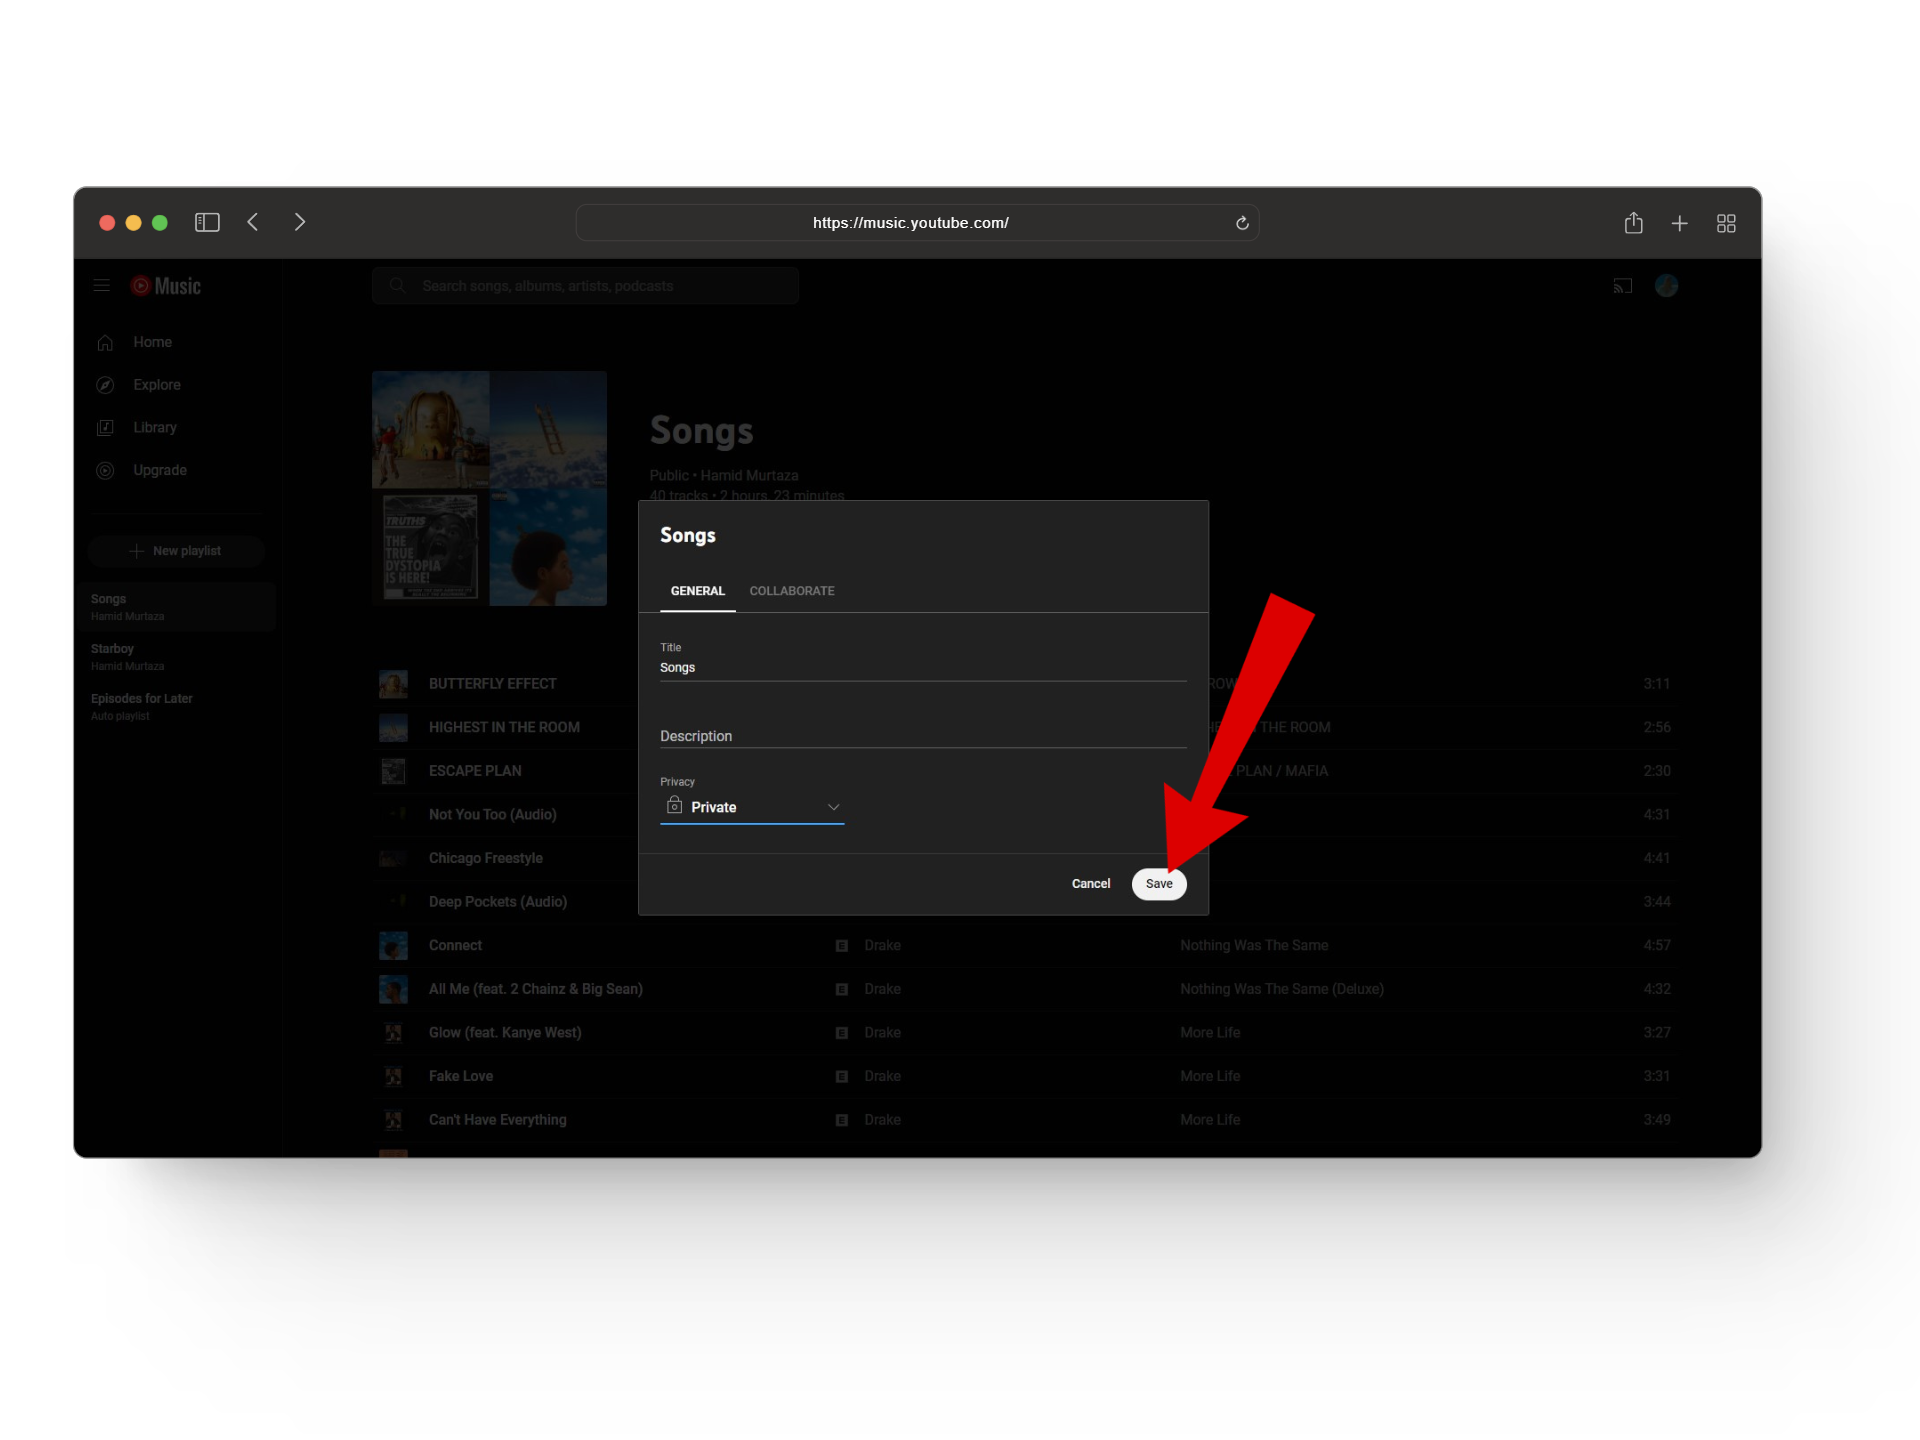
Hit save
READ MORE: How to Fix ‘Open in New Tab’ Not Working in YouTube? ➜
2. On Mobile
Whether you are an iPhone user or an Android, the steps to make your YouTube music playlists are entirely the same.
Here’s how to make your YouTube Music playlists private:
- Open up the YouTube Music app and tap on the Library tab at the bottom.
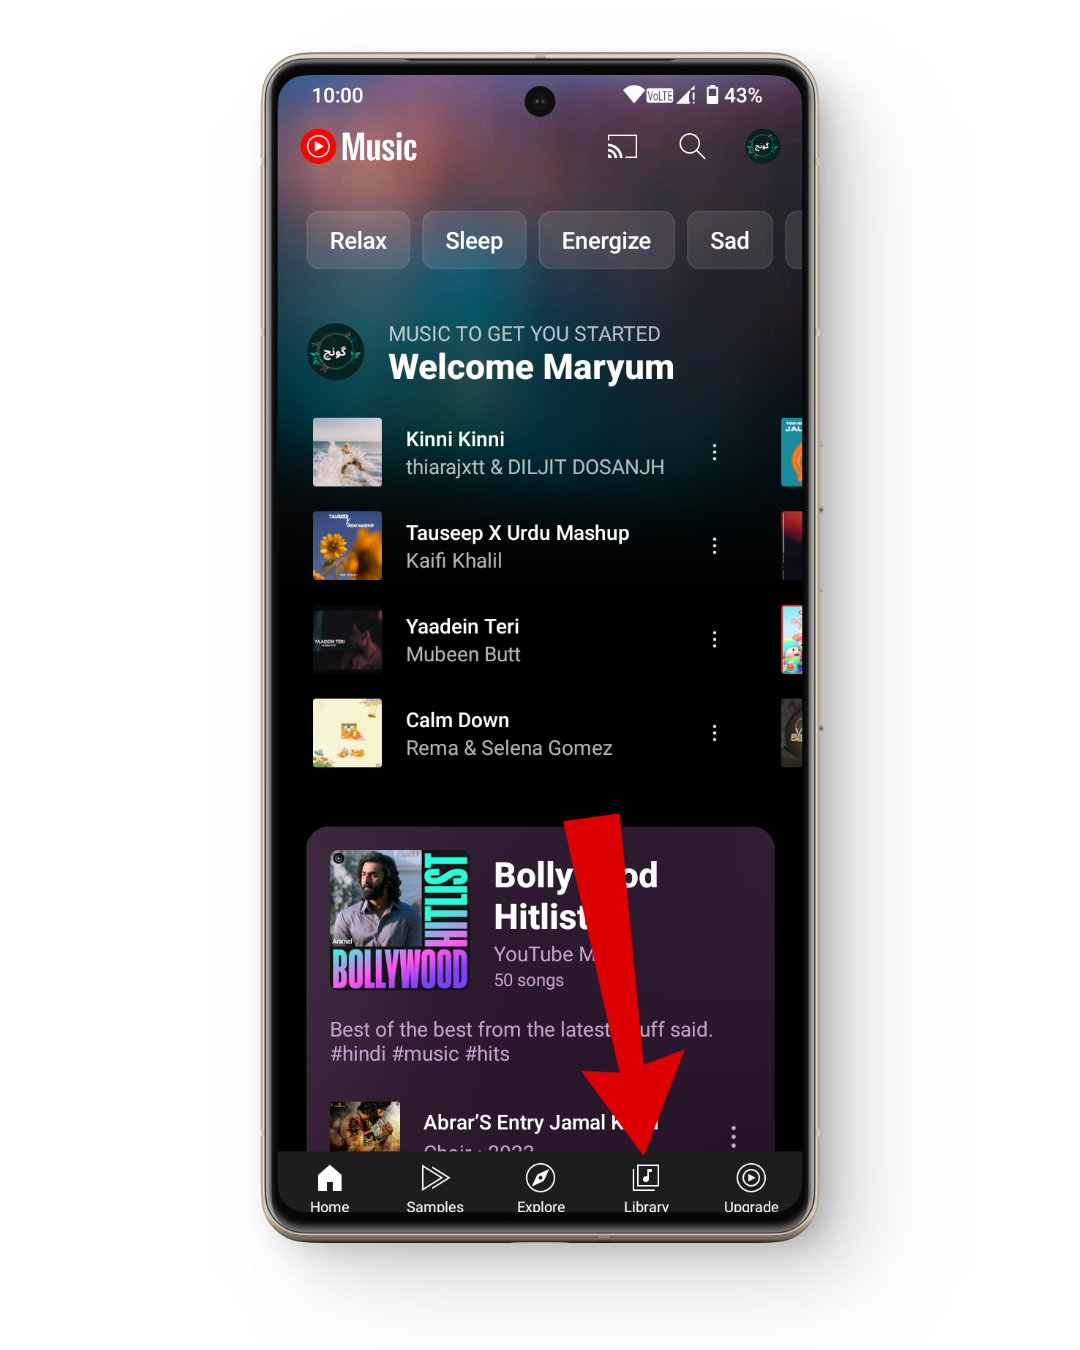
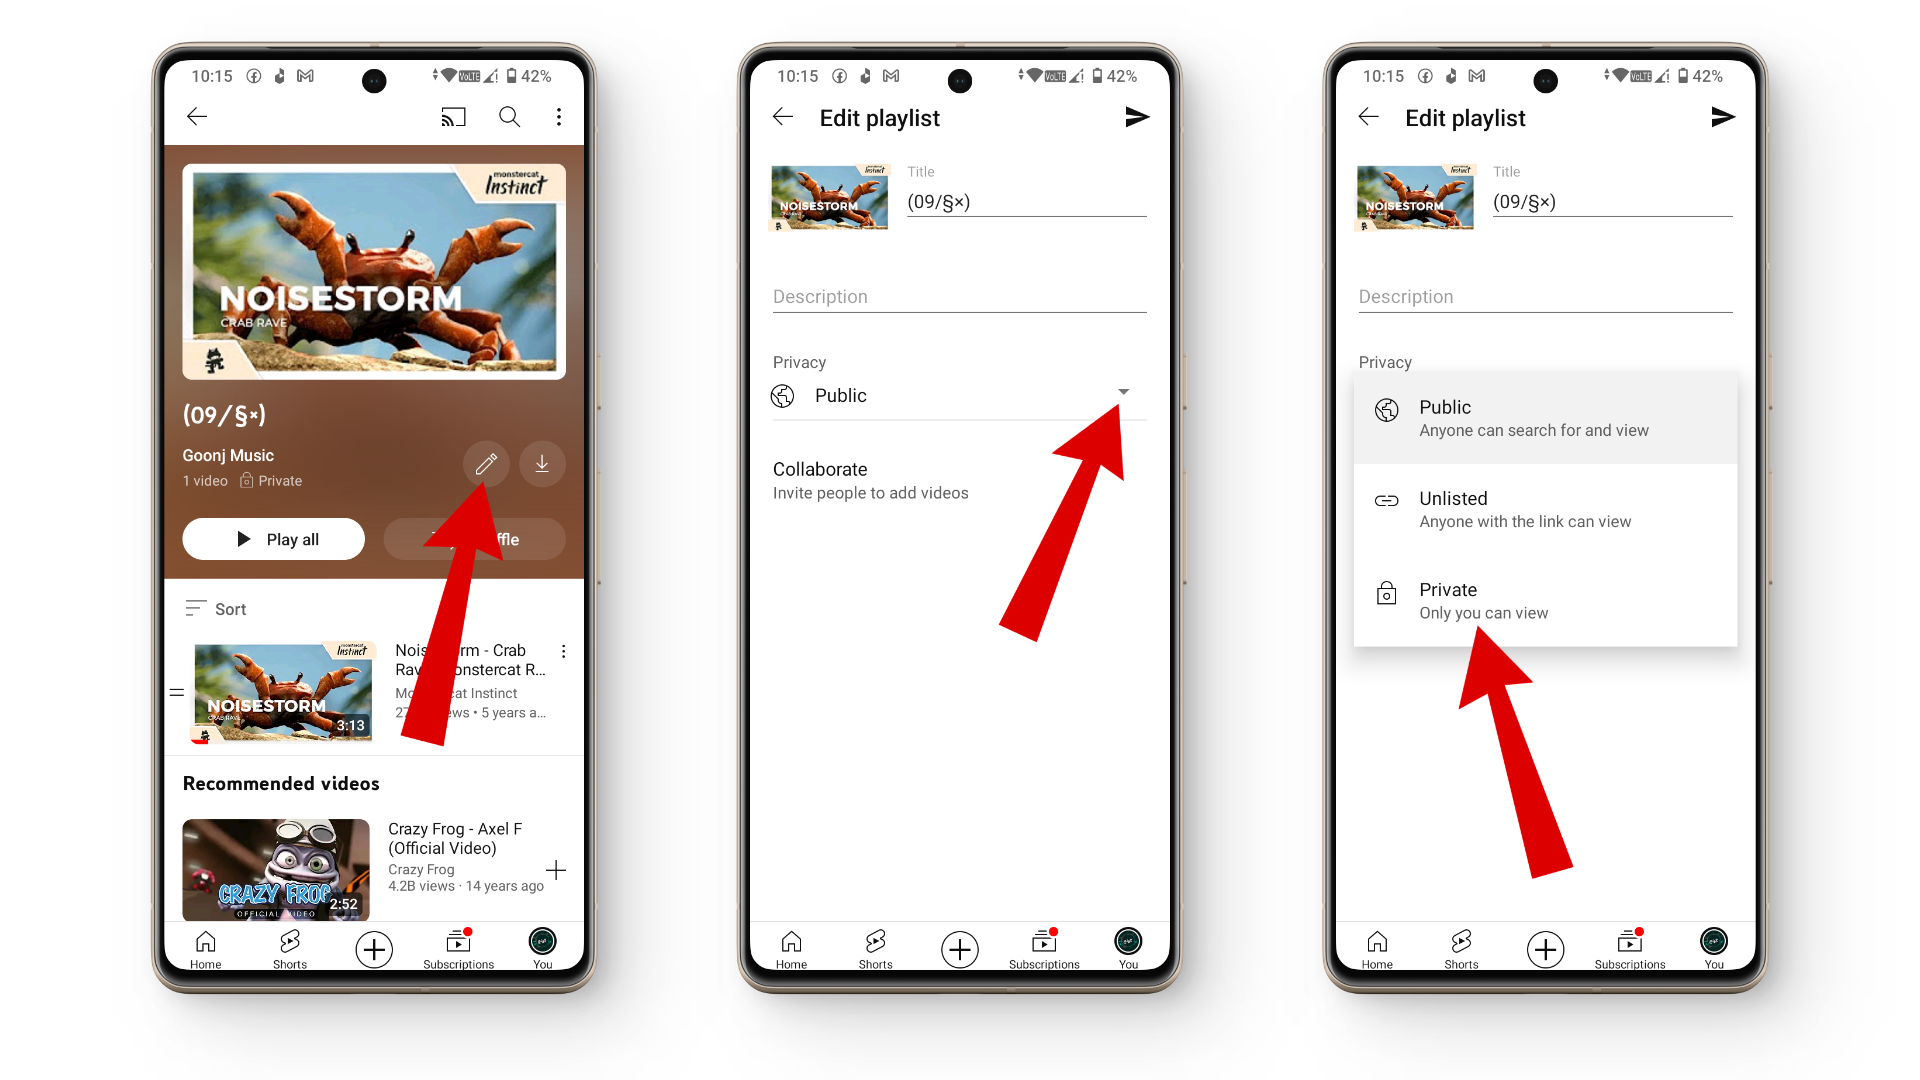
Tap on the library tab - From here, tap on the Playlist you want to make private.
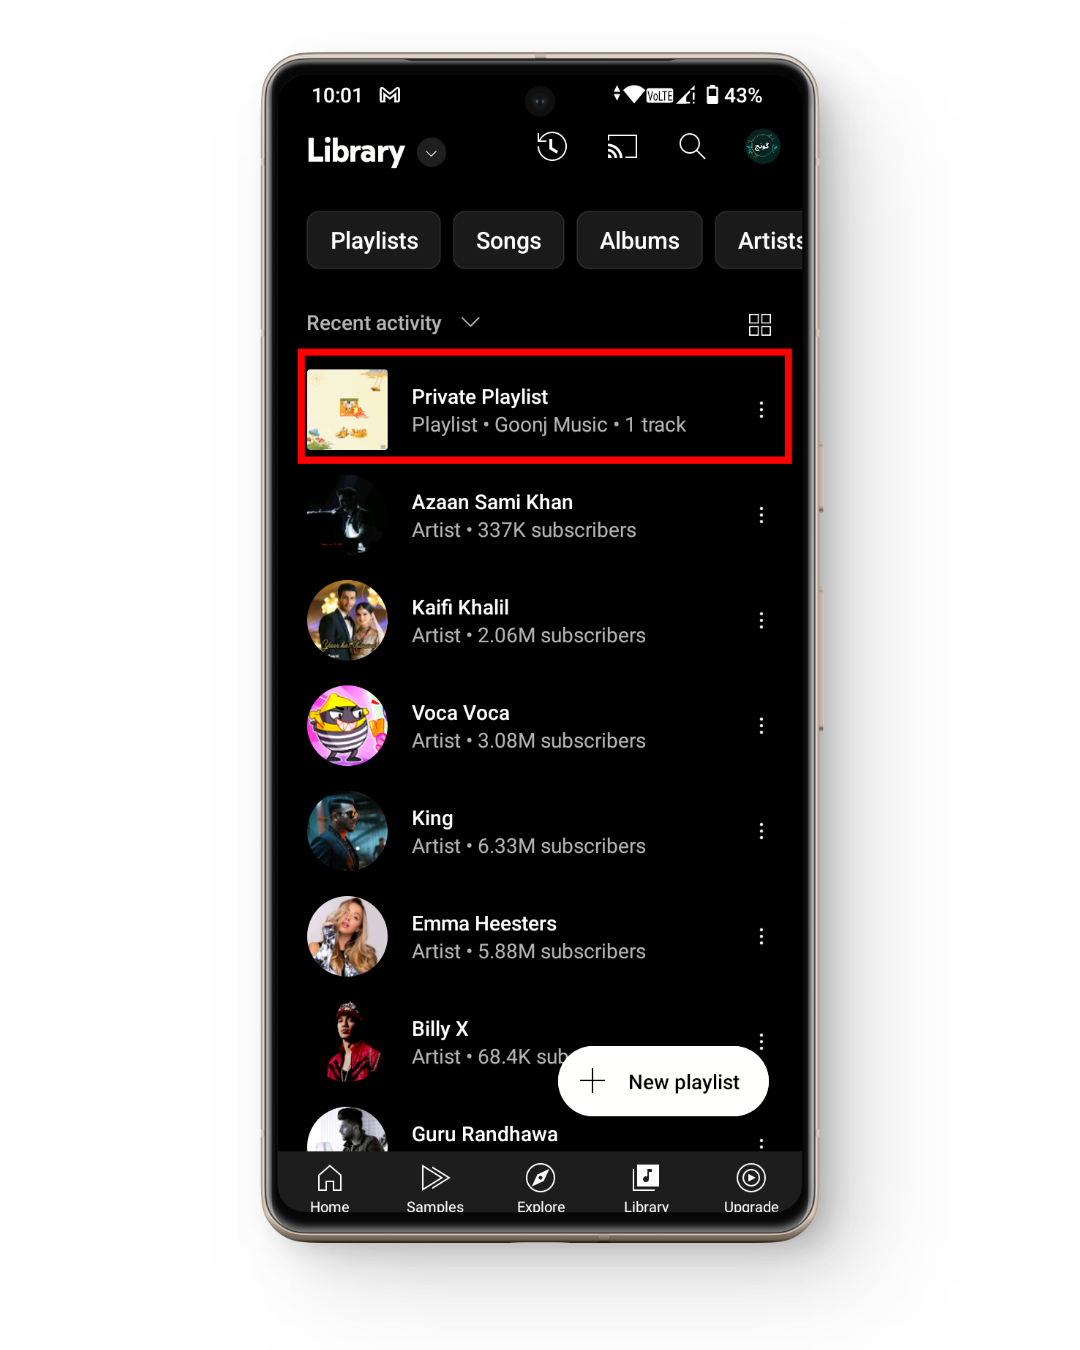
Select your playlist - Next, tap on the pencil icon to open up the settings menu.
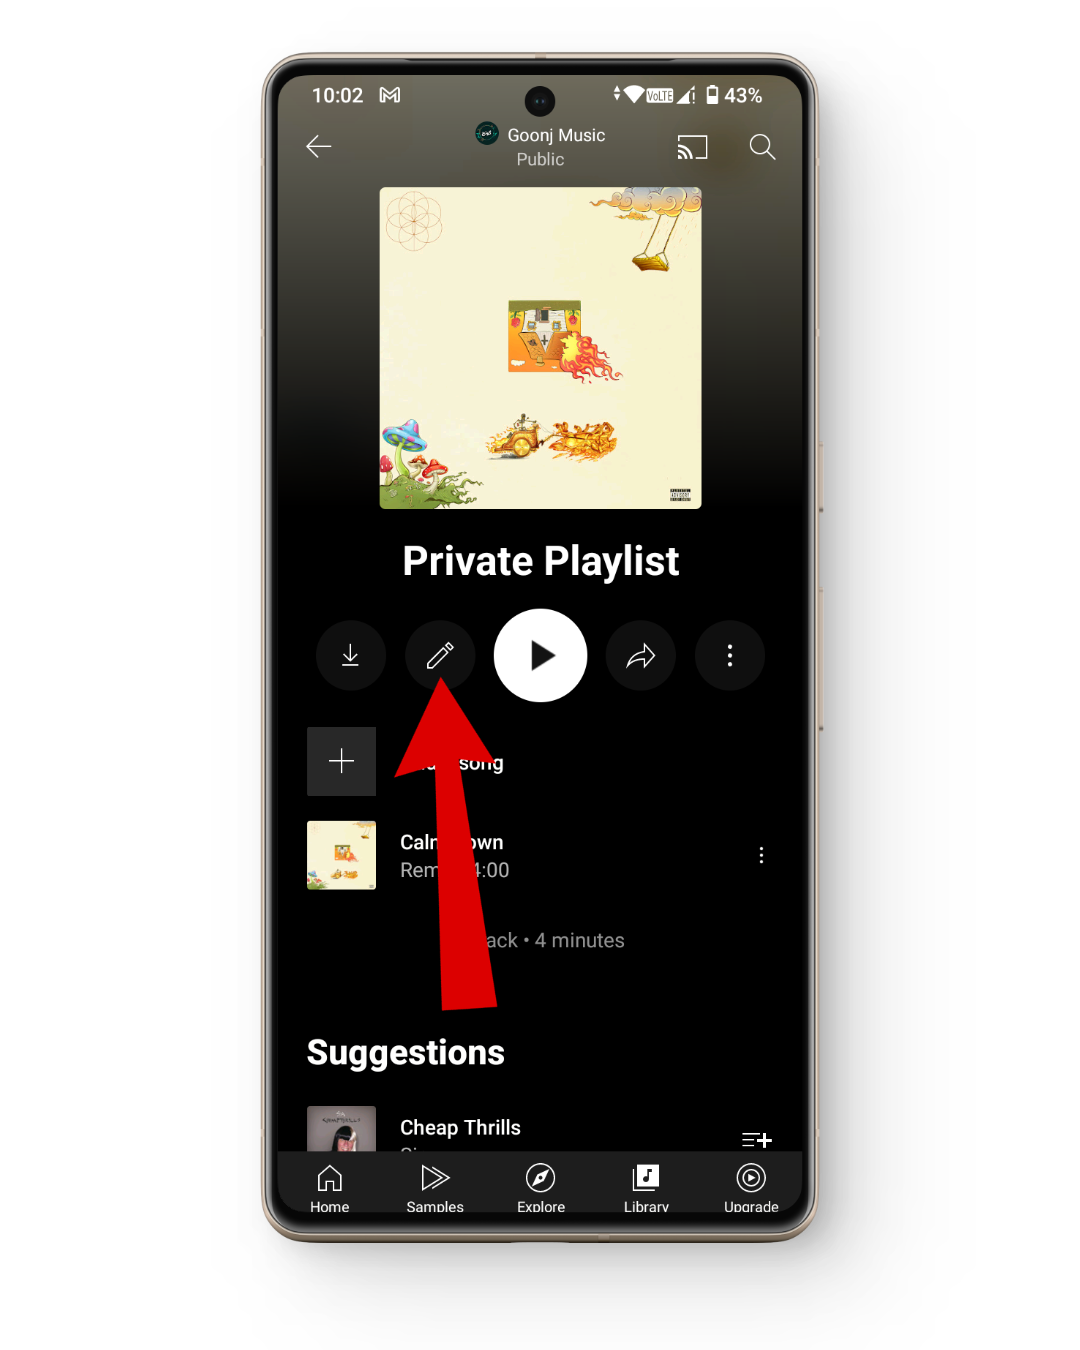
Tap on the pencil icon - Under the Privacy tab, tap on the option that shows Public. From here, select the Private option.
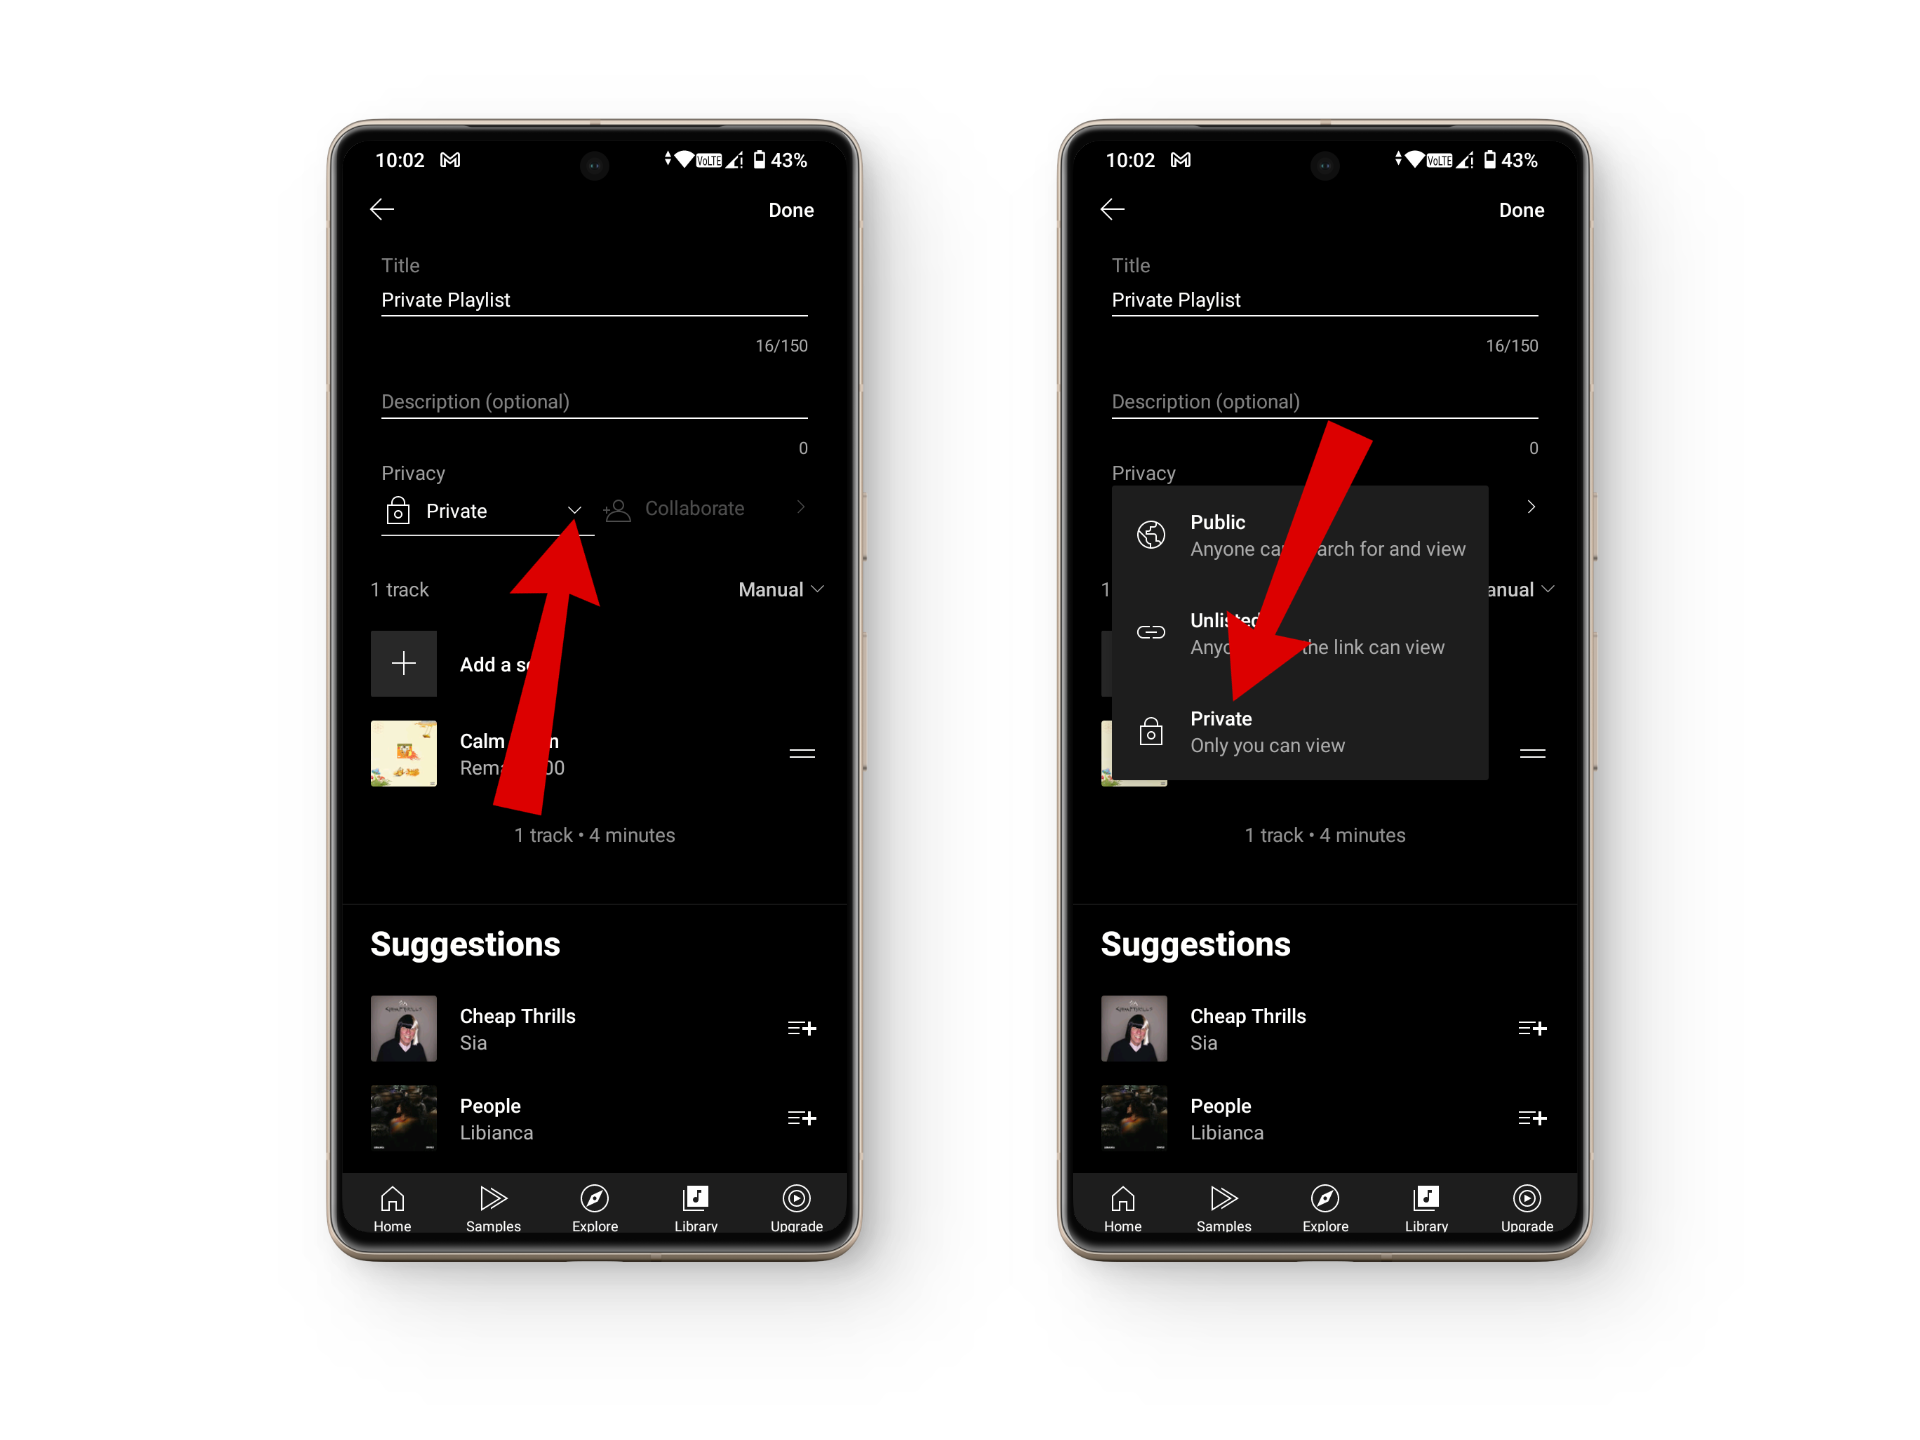
Change privacy settings - Finally, tap the Done button to change your music playlist’s privacy settings.
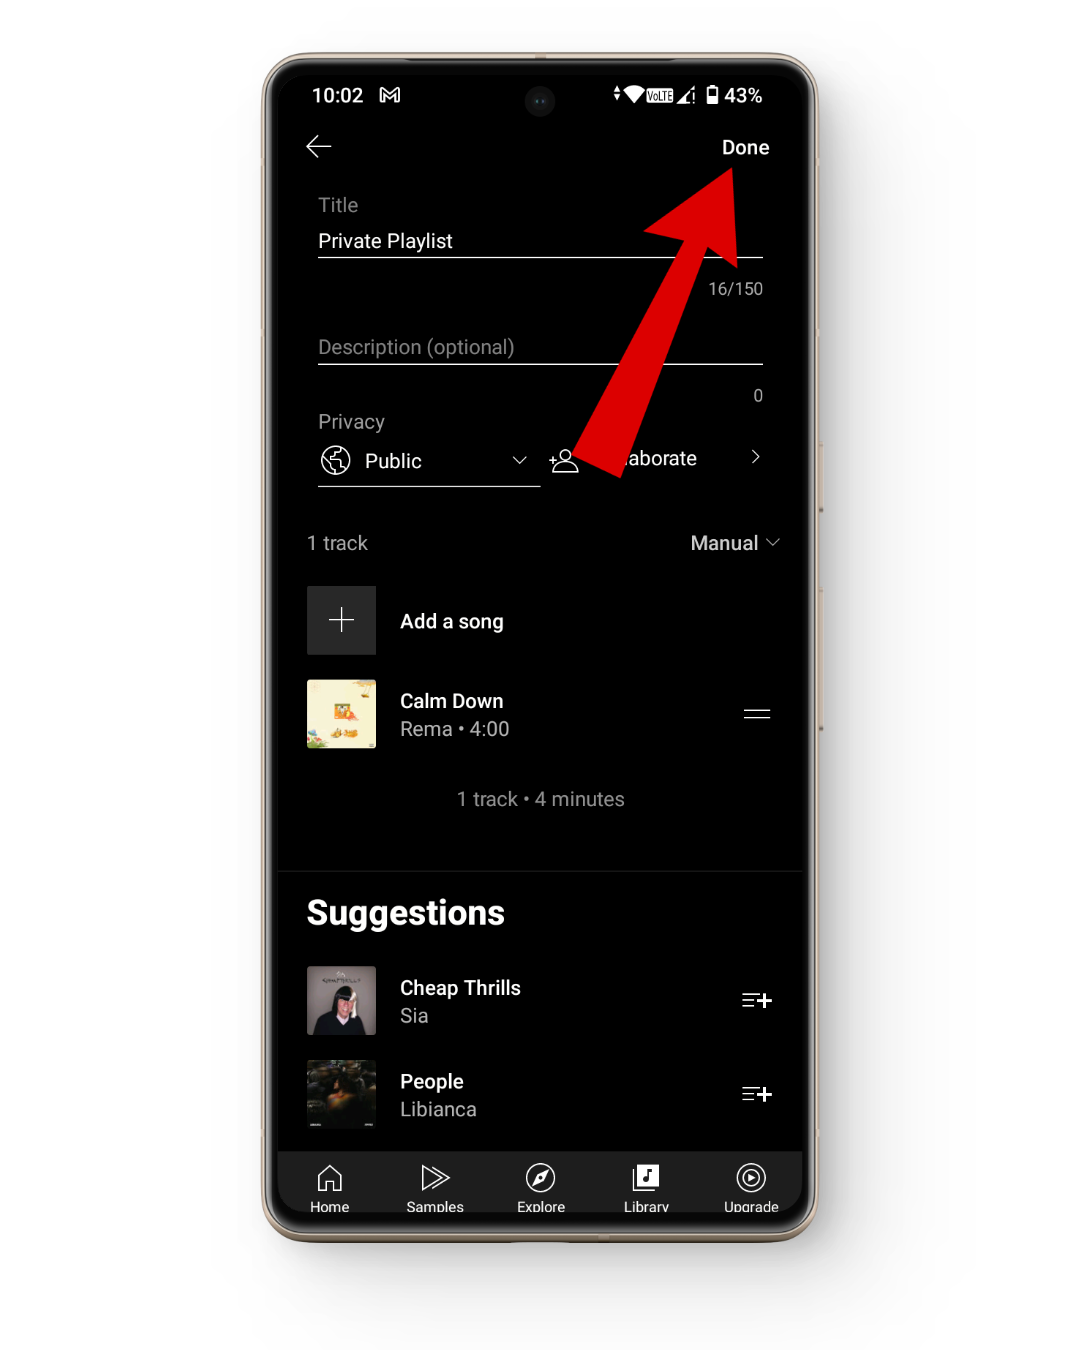
Tap on done
READ MORE: 6 Ways to Disable YouTube Shorts on Web, Android & iPhone ➜
Alternative: Set Privacy Settings When Making YouTube Music Playlists
Making your current music playlists private is one thing but ensuring your future playlists are set to private upon creation is another thing. Setting your YouTube Music playlist to private when you are making them can help you save time and effort of going through the privacy settings process again.
1. On Desktop
Here’s how to set privacy settings when making YouTube Music Playlists on a desktop:
- Head over to YouTube Music and choose the song you want to add to a playlist.
- From here, hover over to your song and click on the three vertical dots.
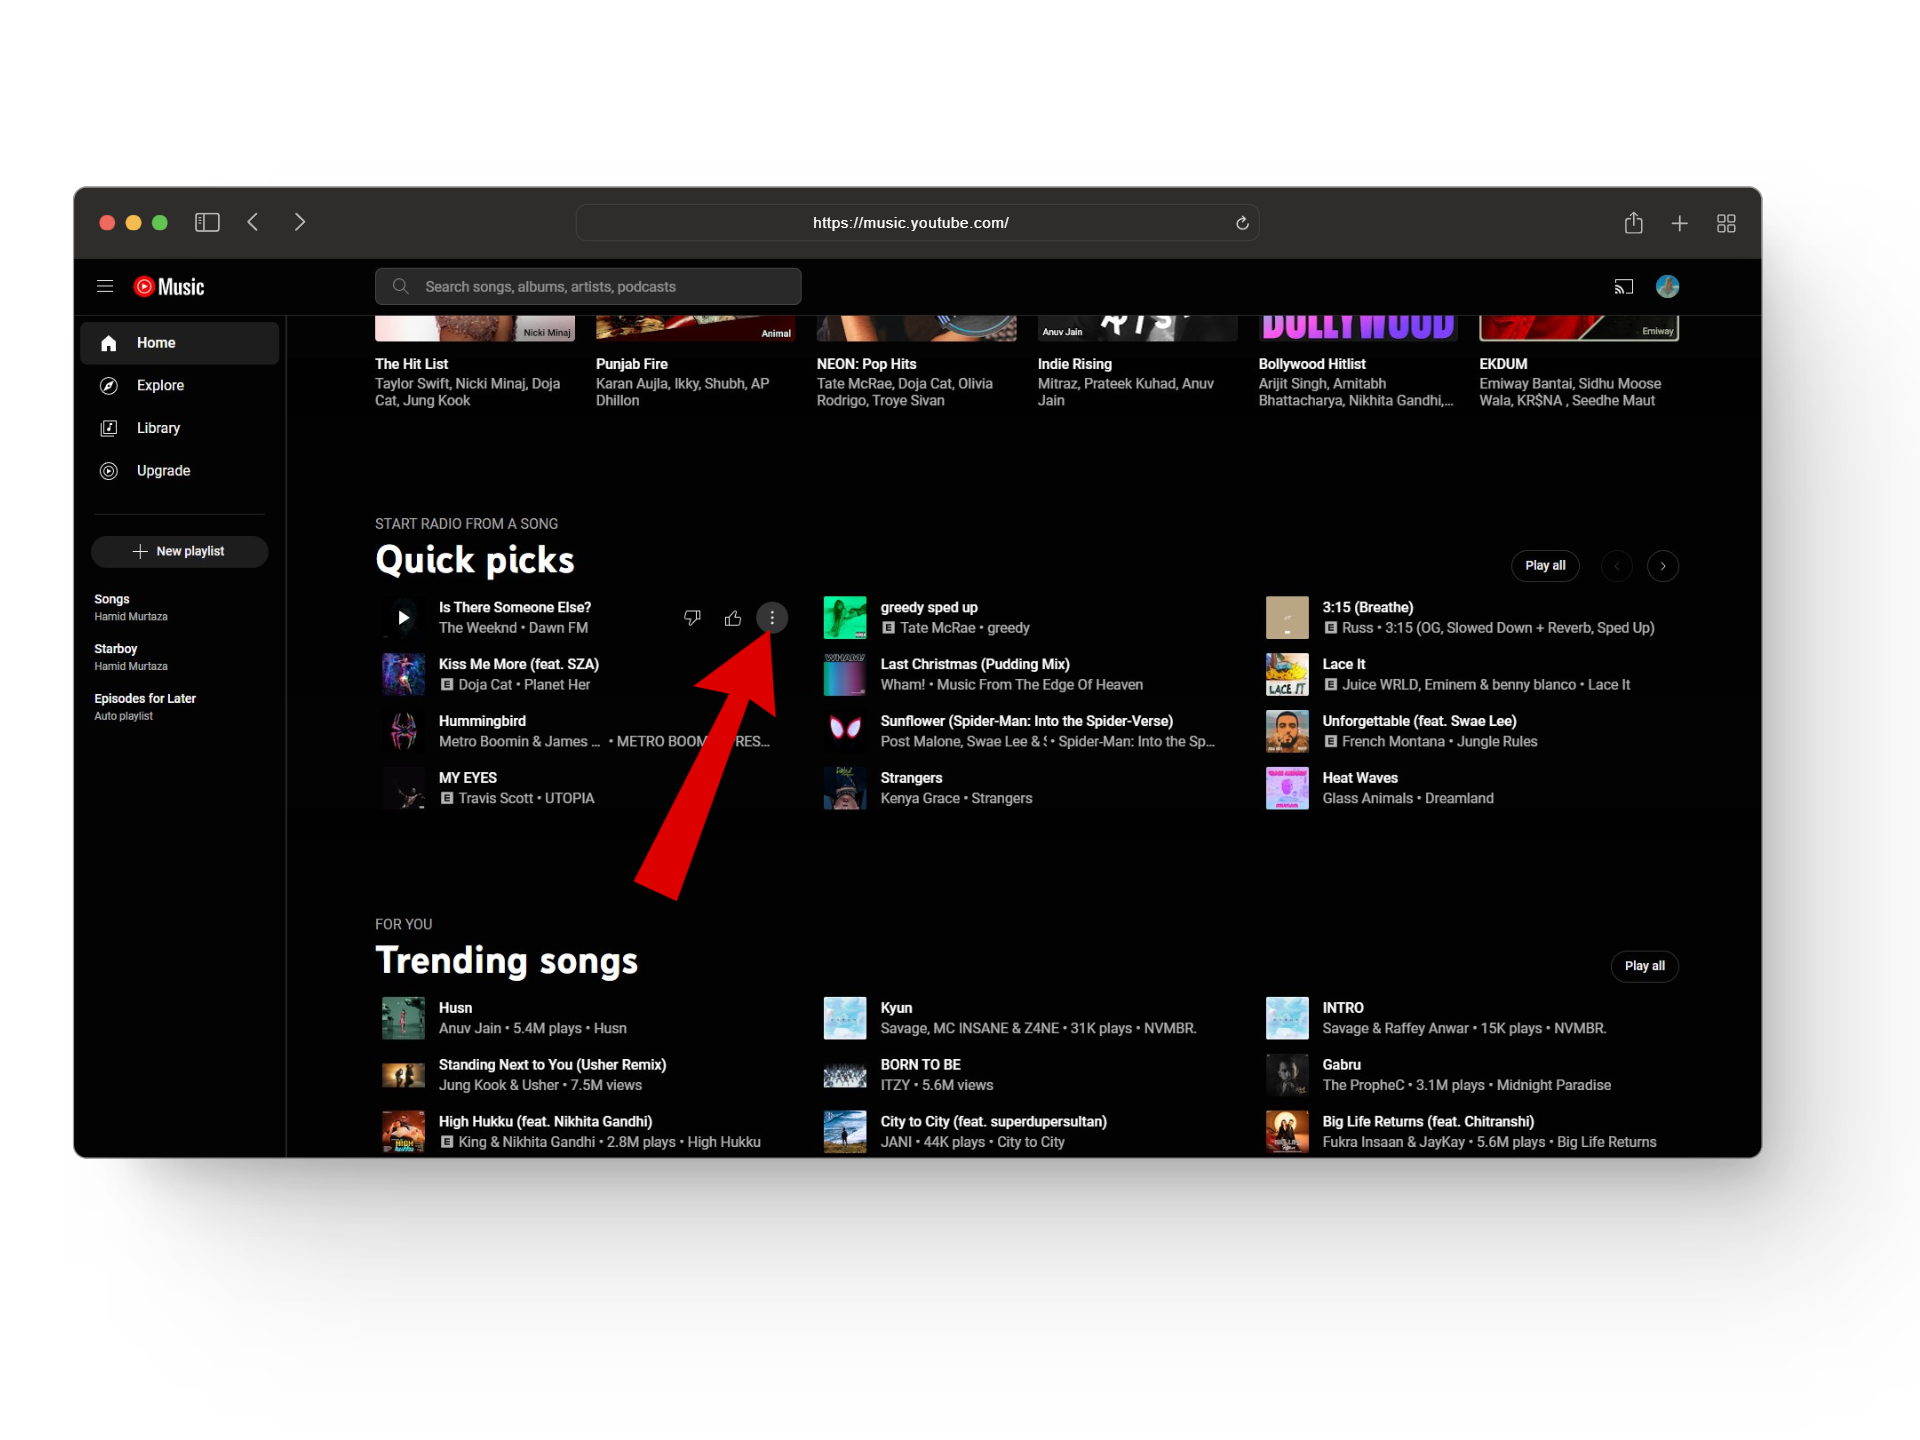
Click on the three dots - This will open up a small menu where you’ll need to click on the Save to playlist option.
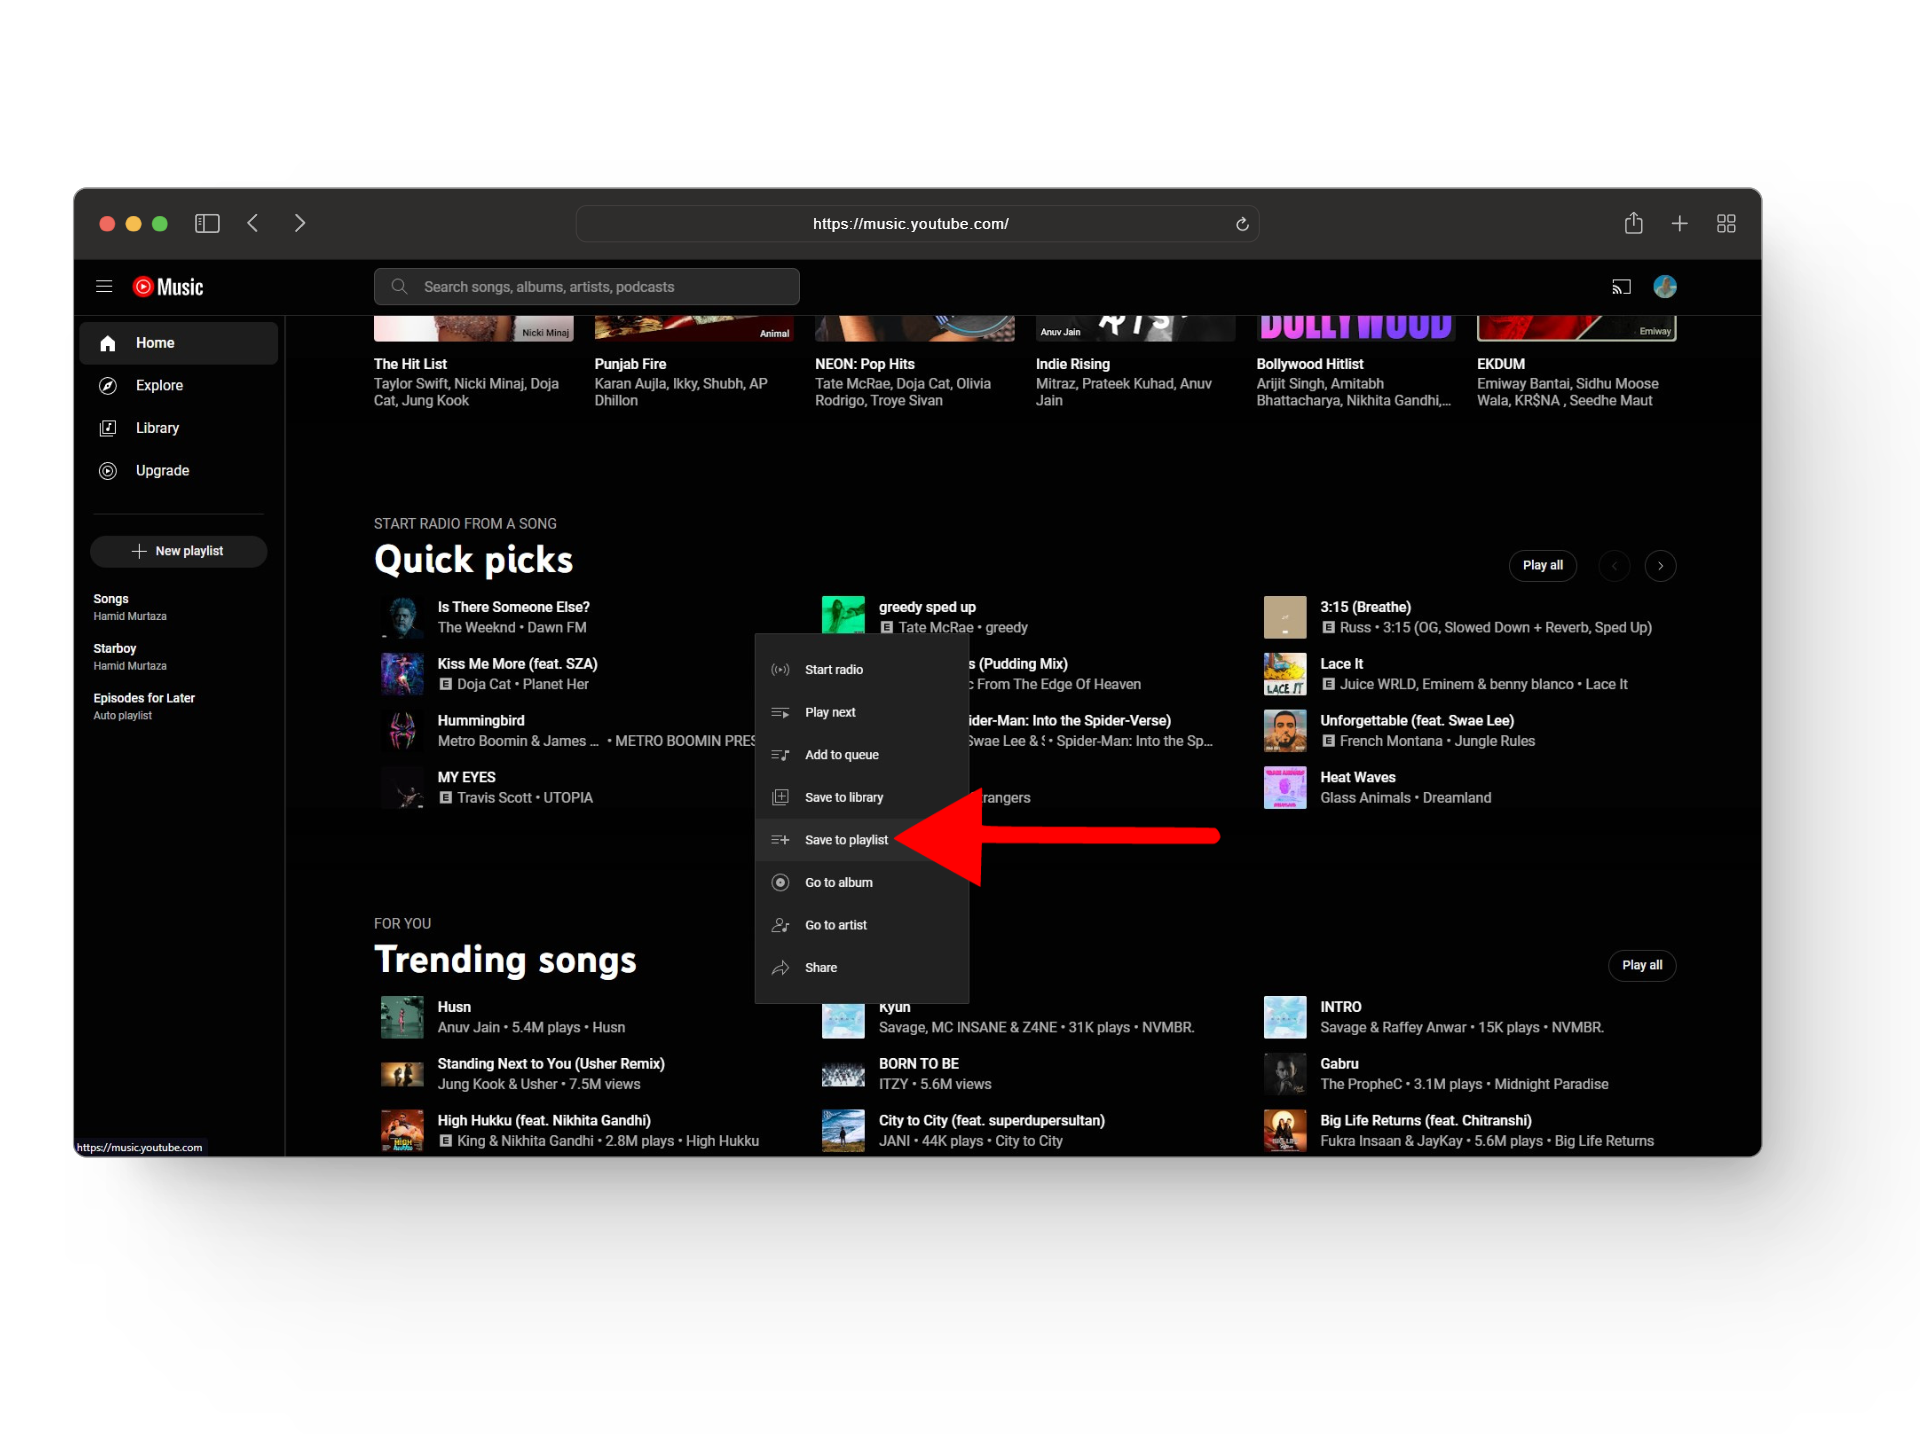
Press save to playlist - As and when you do this YouTube Music will not give you the choice to either add the song to an existing playlist or make a new one. If you want to create a new playlist from scratch click on the New playlist option.
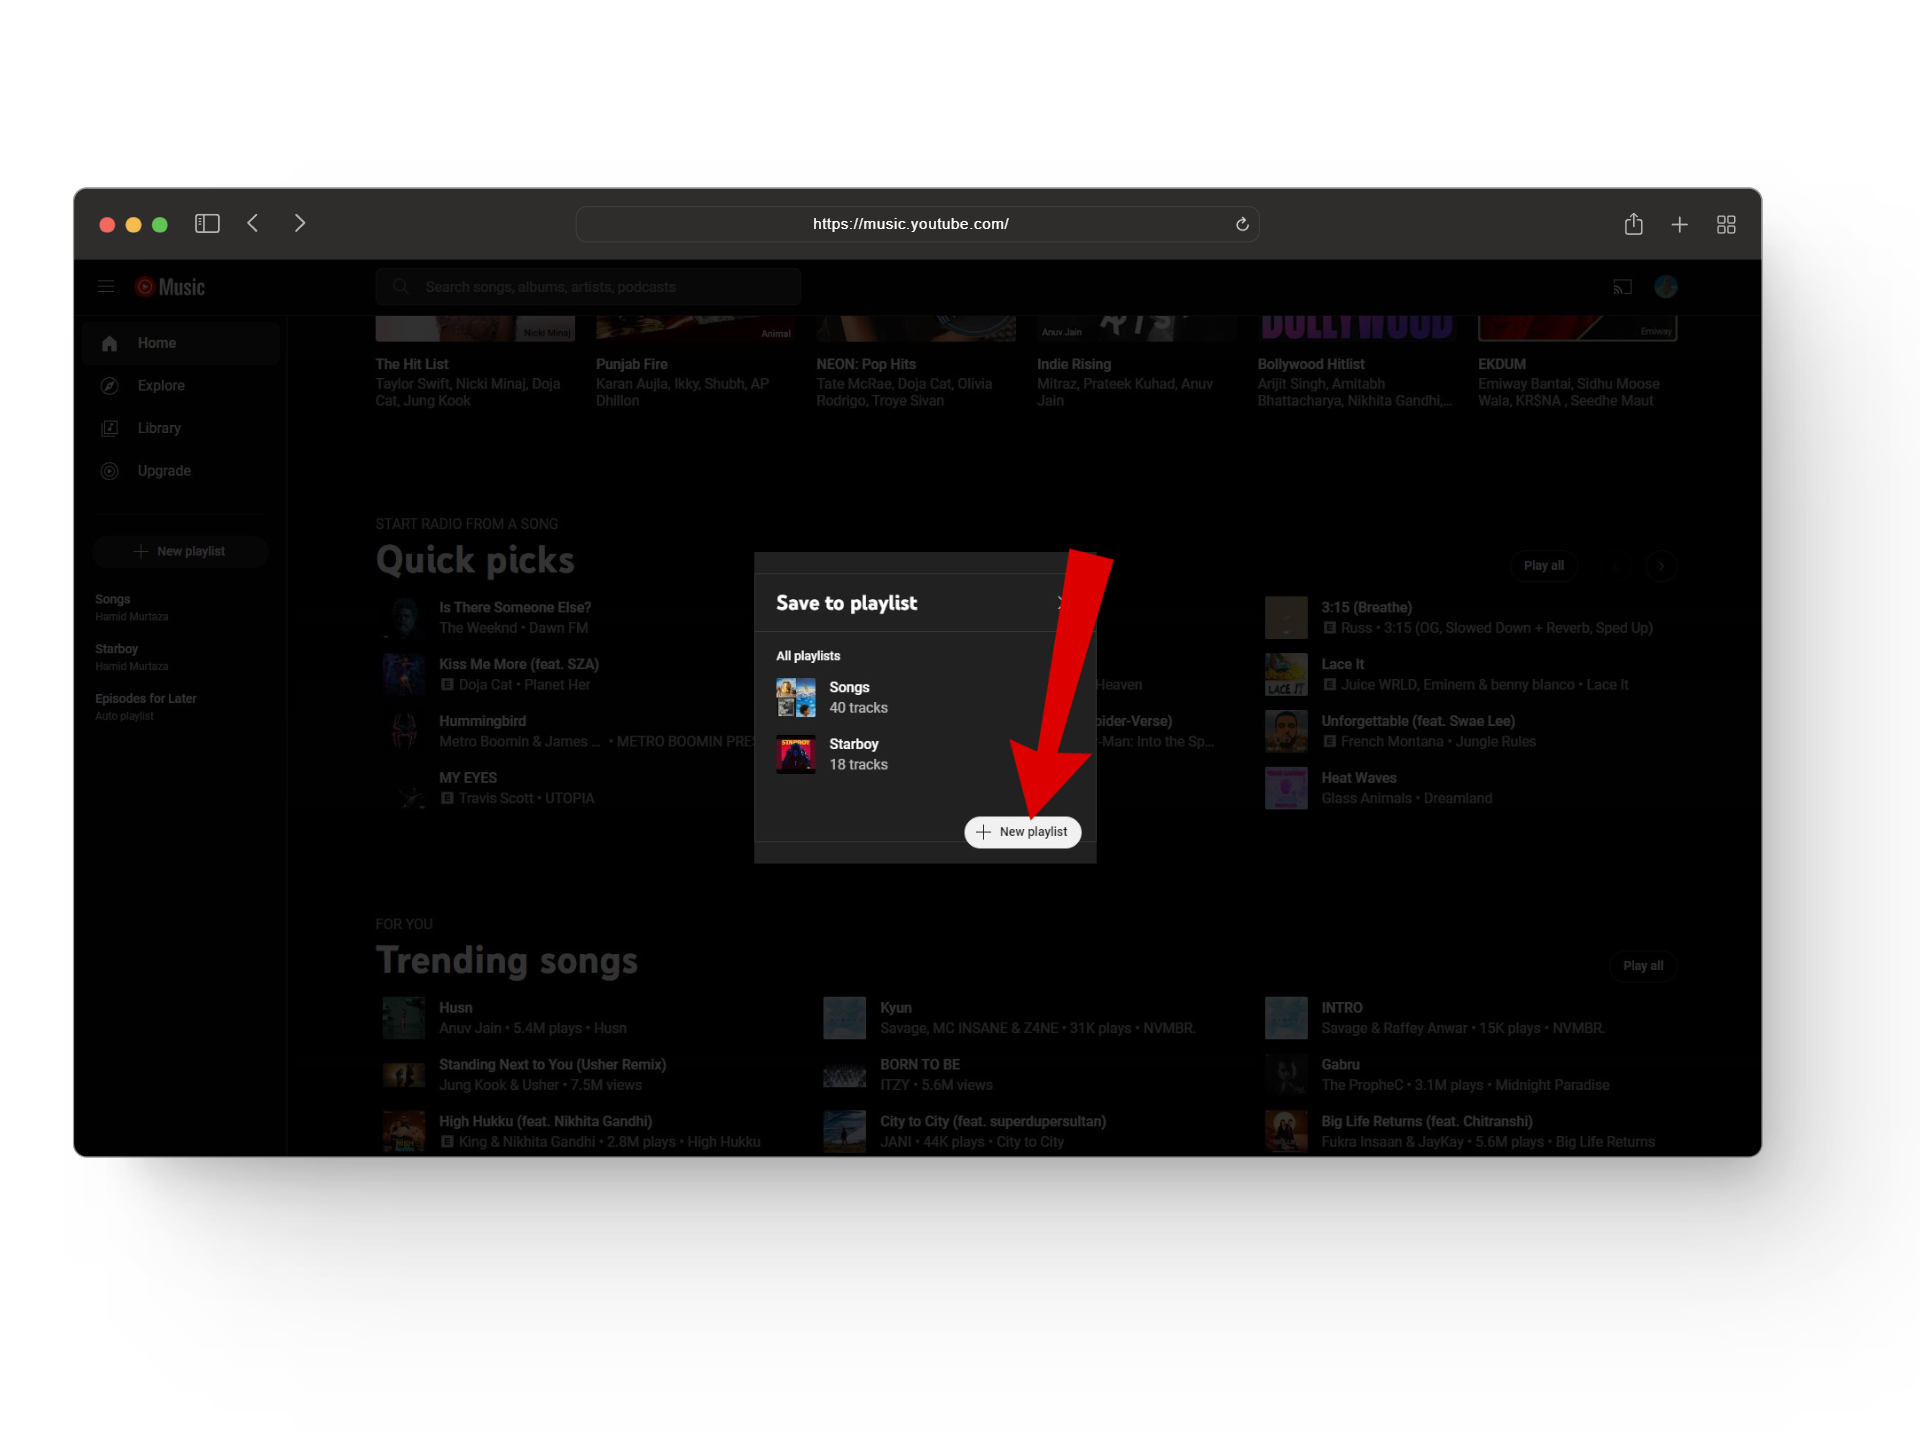
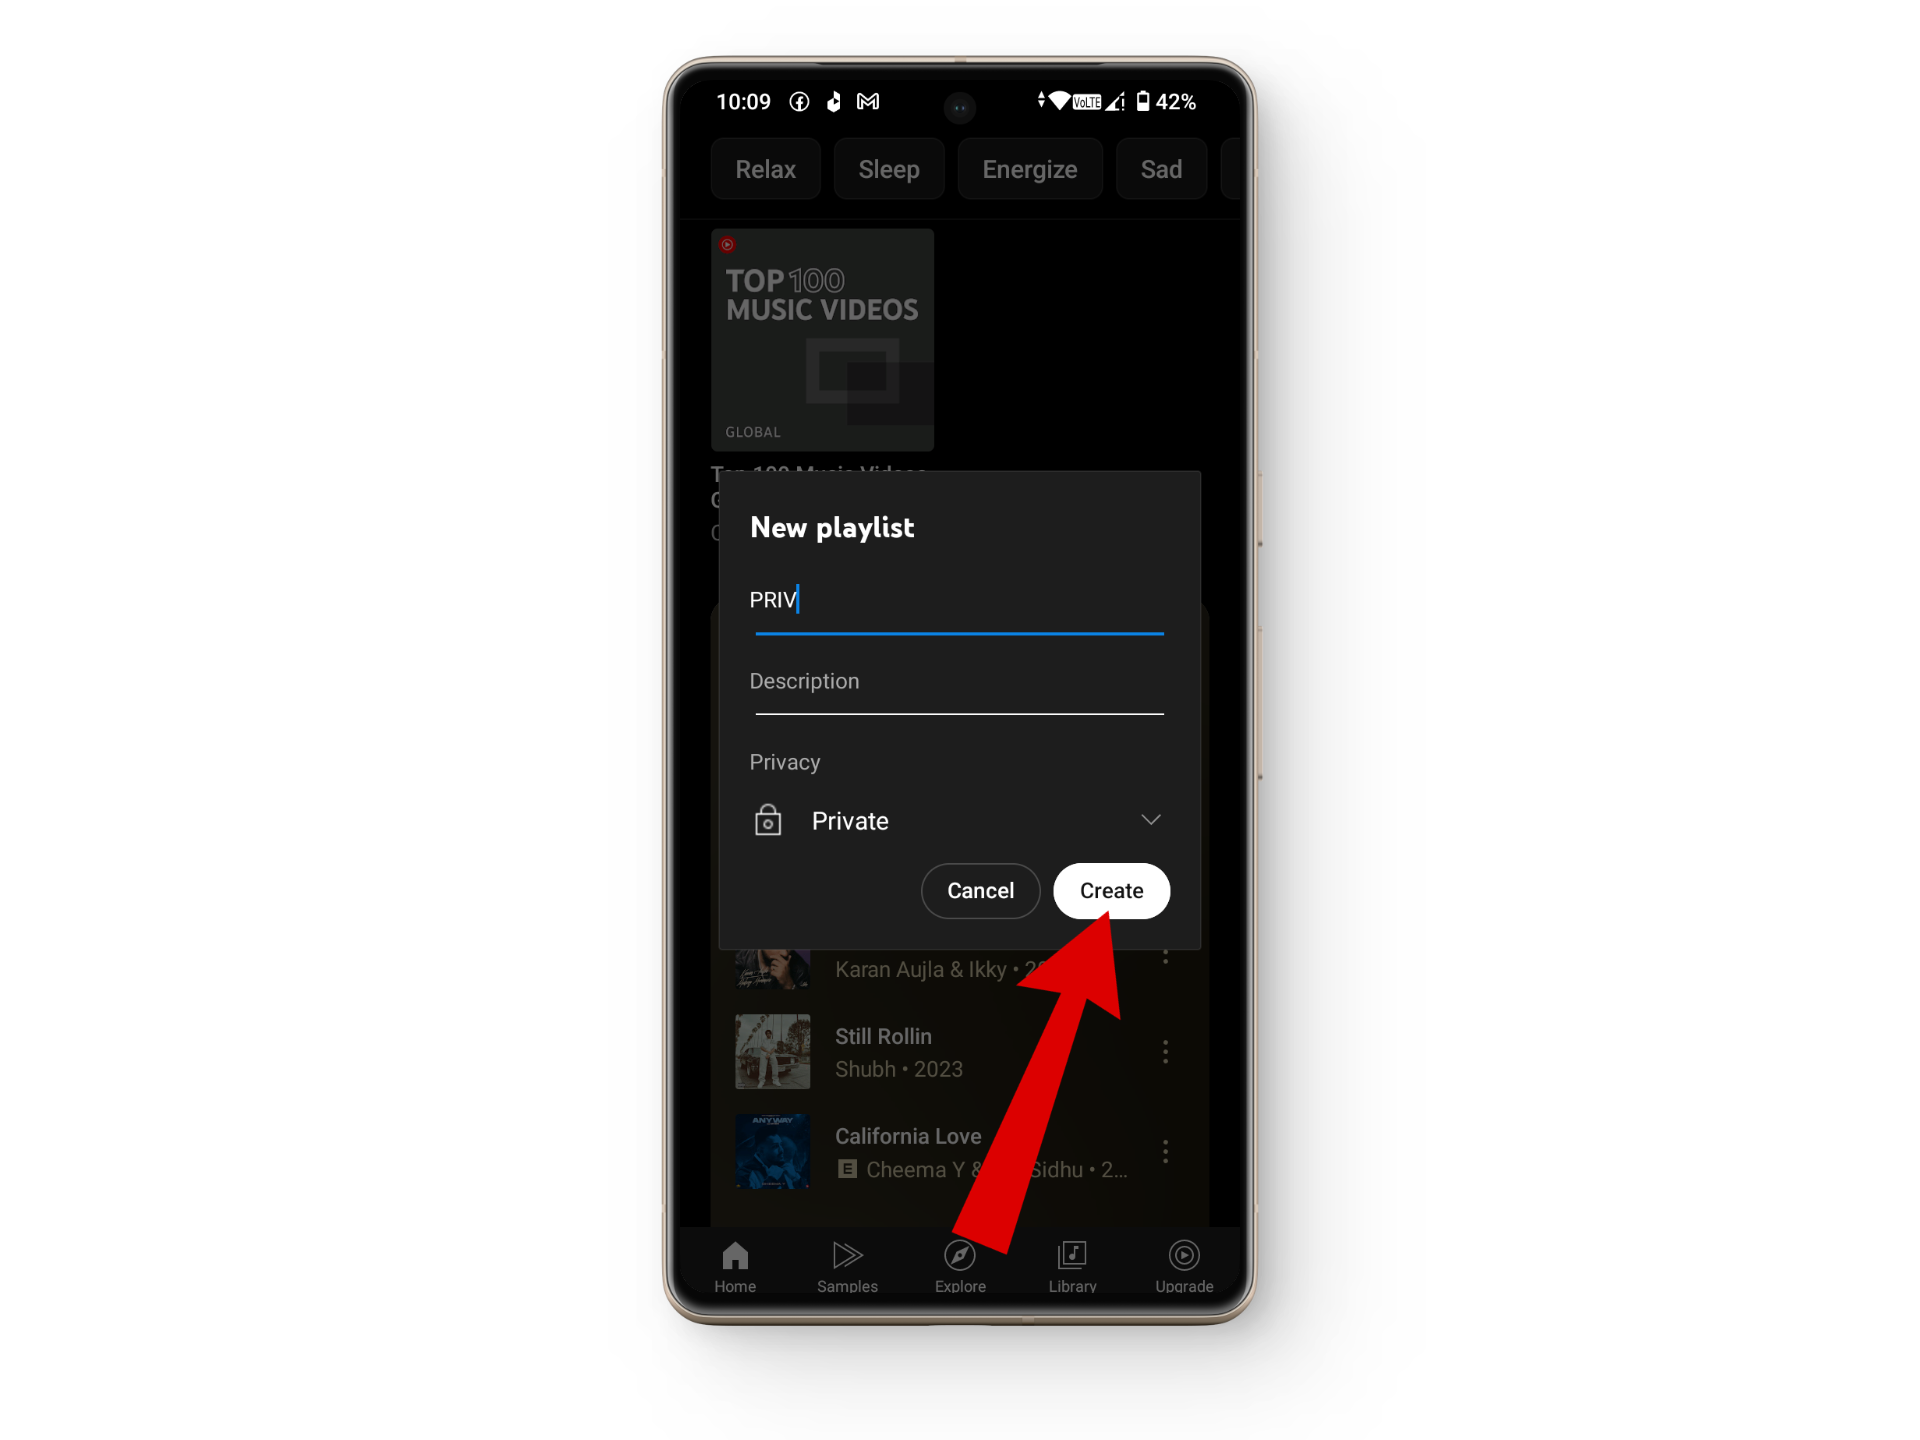
Click on new playlist - Next, you’ll need to give your playlist a title and add some description if you want to. Once that’s done, the last option you’ll have is the Privacy tab.
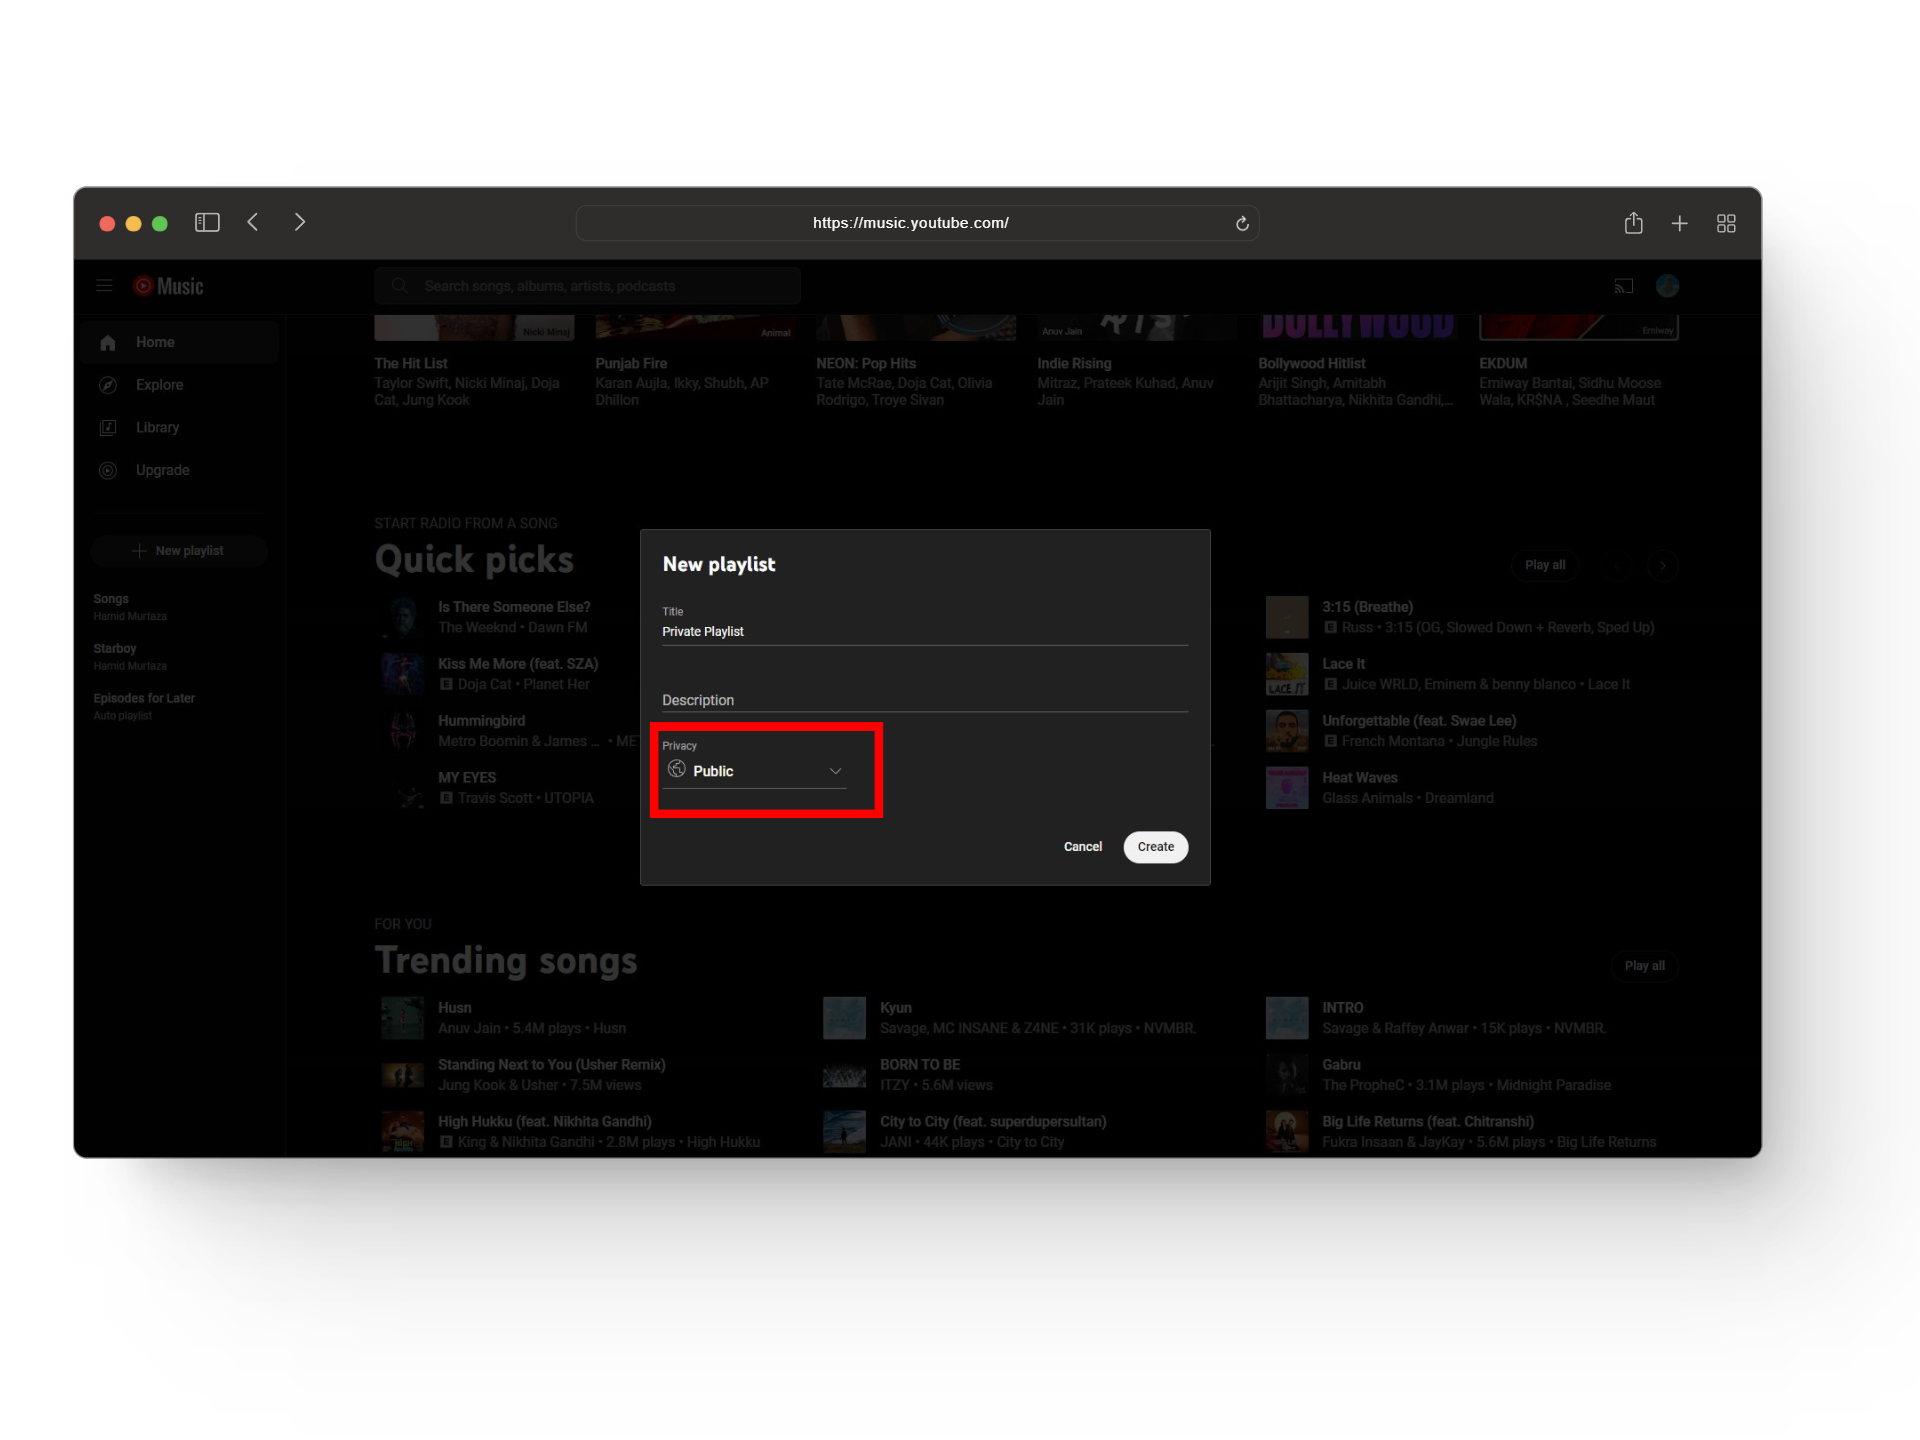
Playlist privacy options - Here, you’ll need to click on the arrow next to Public.
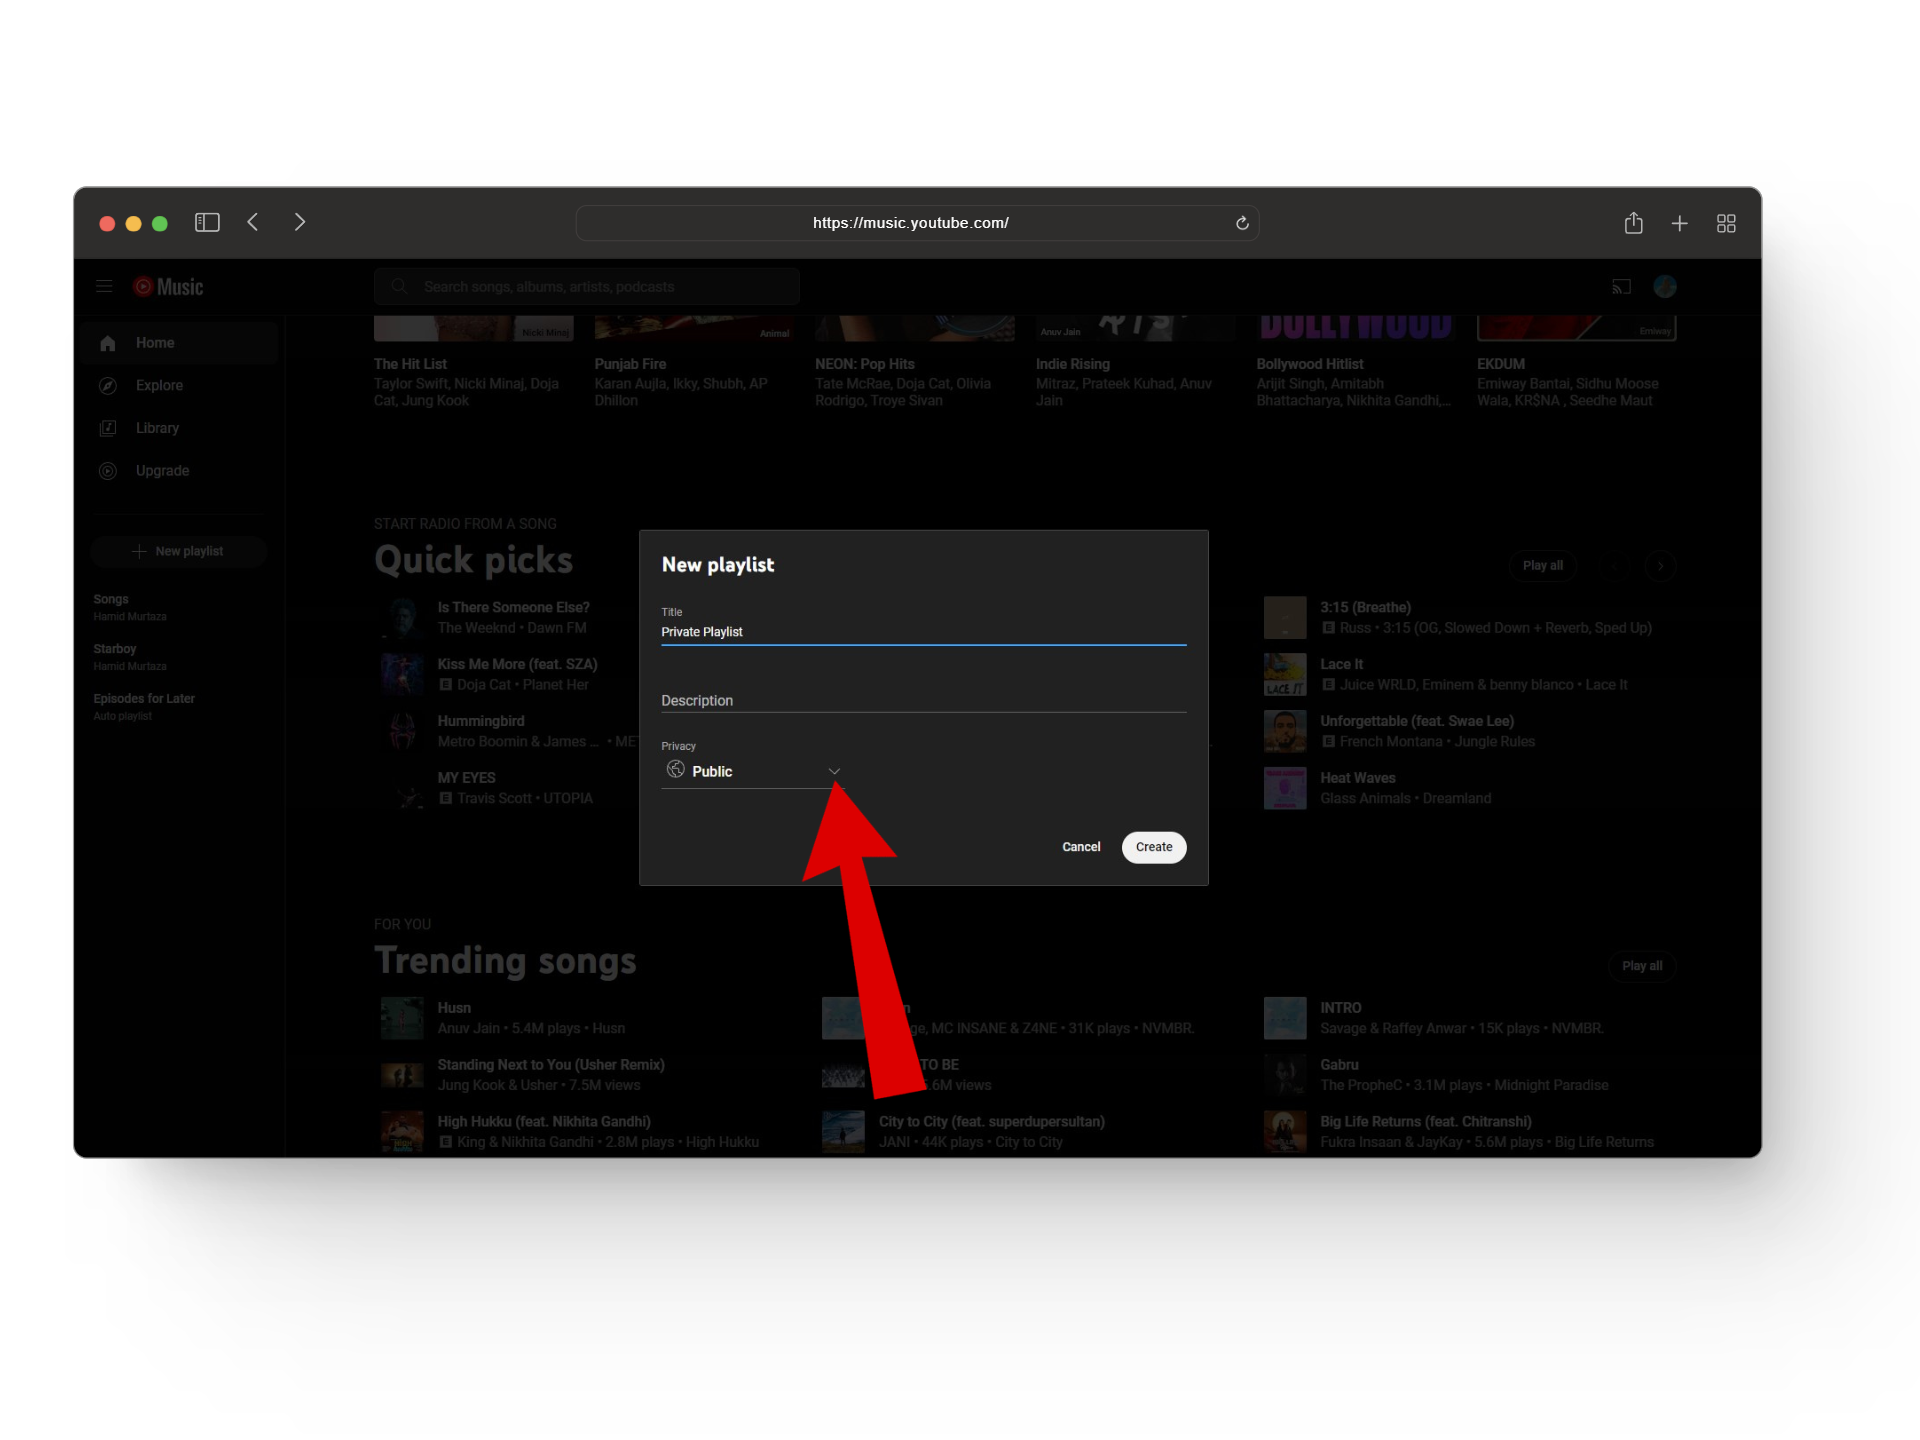
Click on the small arrow - Now, click on the Private option to make your music playlist private.
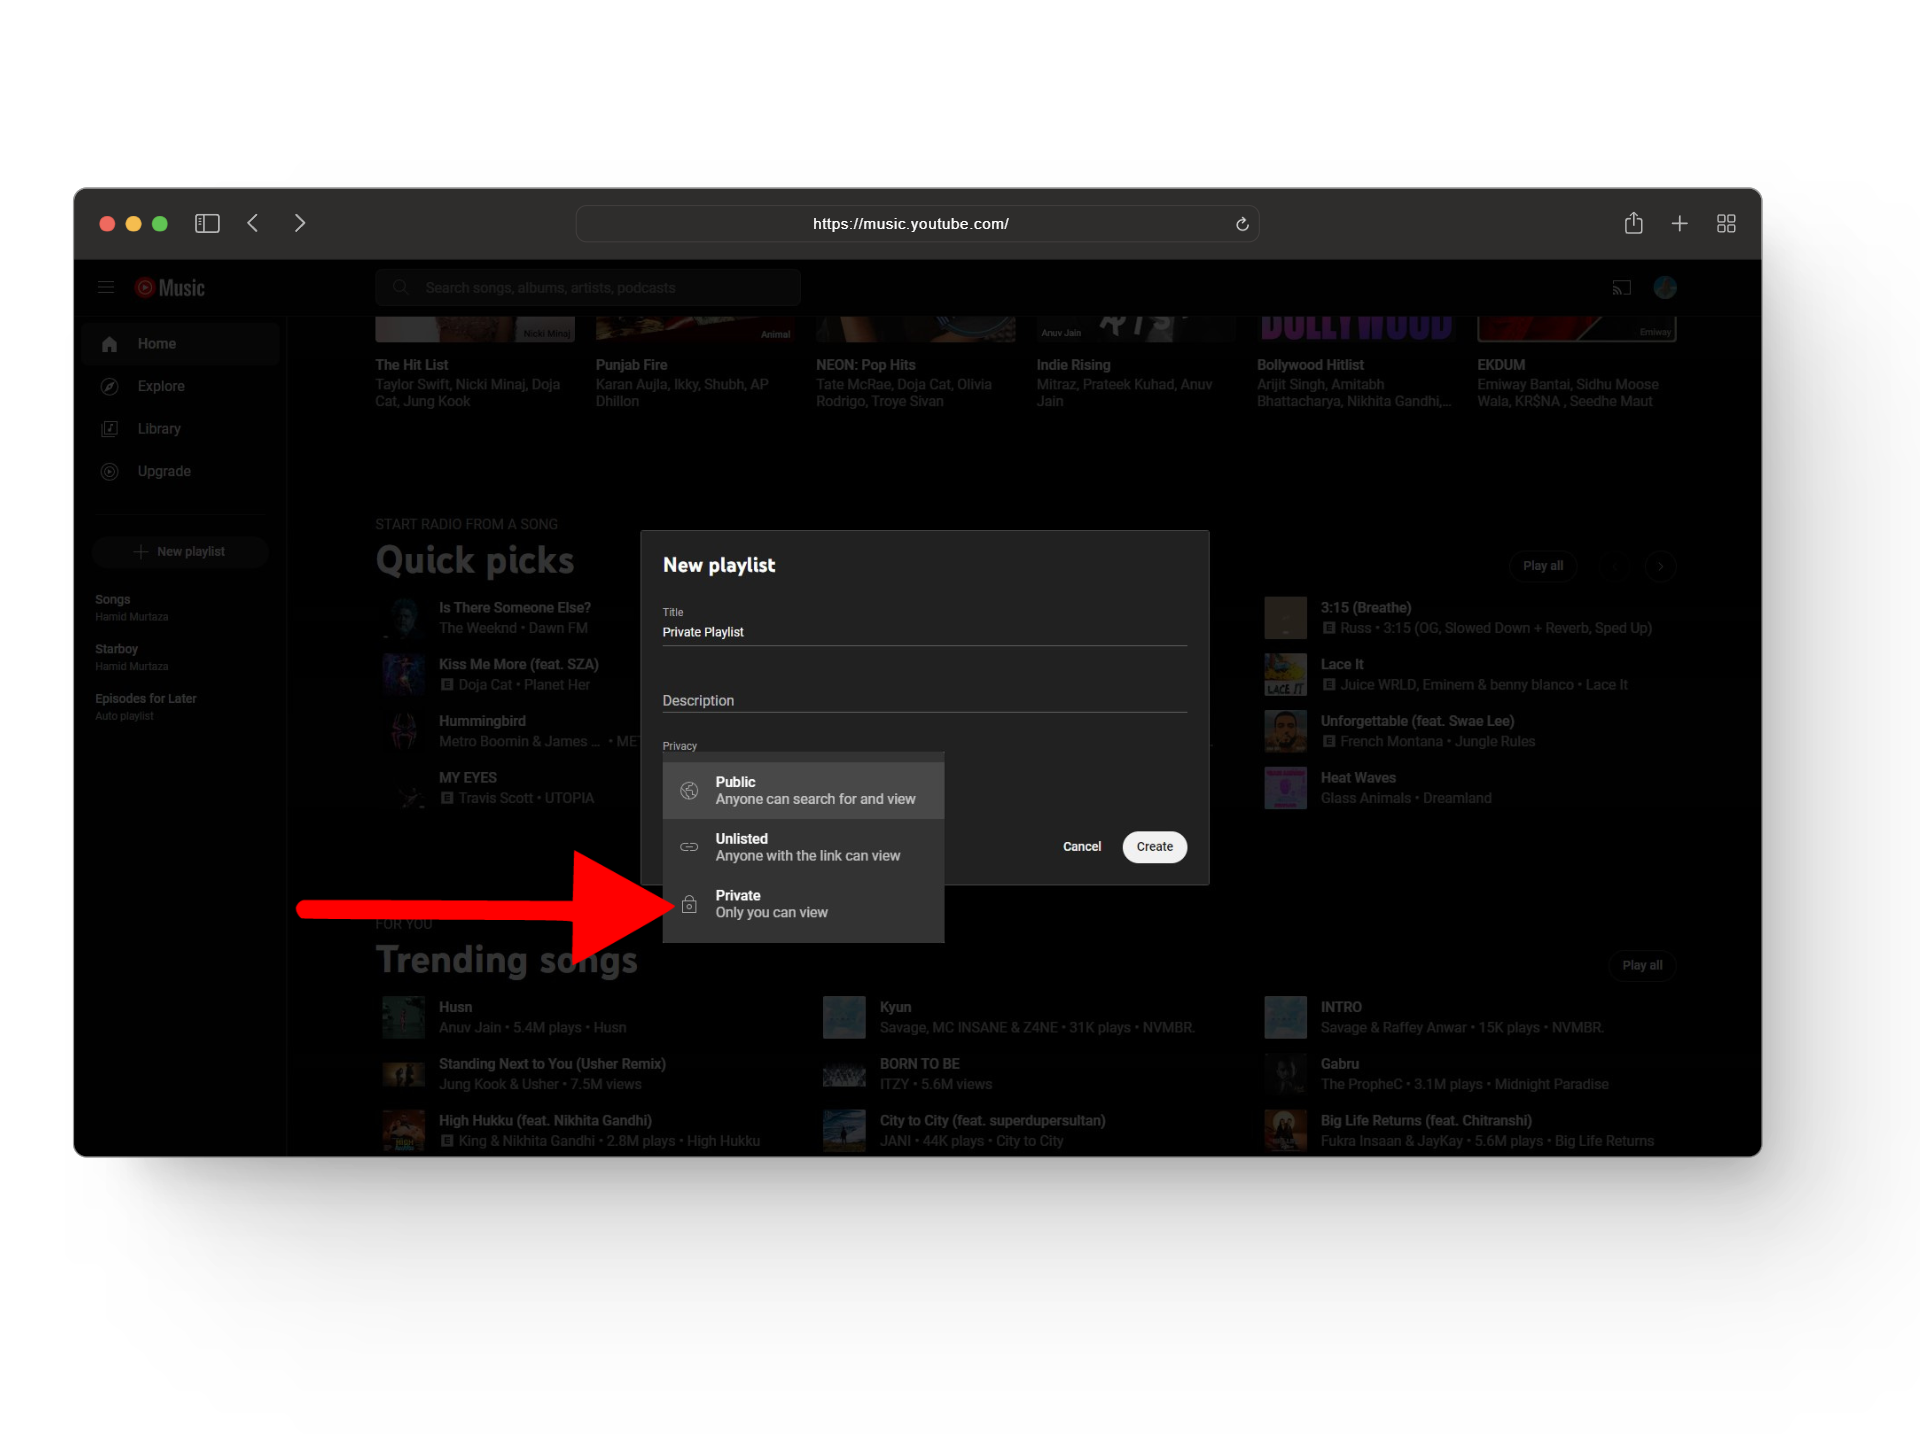
Select private - Finally, click on the Create button to finish up the process.

Click on create
READ MORE: Fix: “Song is unavailable” Issue in YouTube Music ➜
2. On Mobile
Here’s how to set privacy settings when making YouTube Music Playlists on an iPhone or Android:
- Open up the YouTube Music app and select the song that you want to add to a playlist.

Open up YouTube Music - Next, tap on the three vertical dots next to your song to open up a menu.

Tap on the three dots - From here, tap on the Save to playlist option.
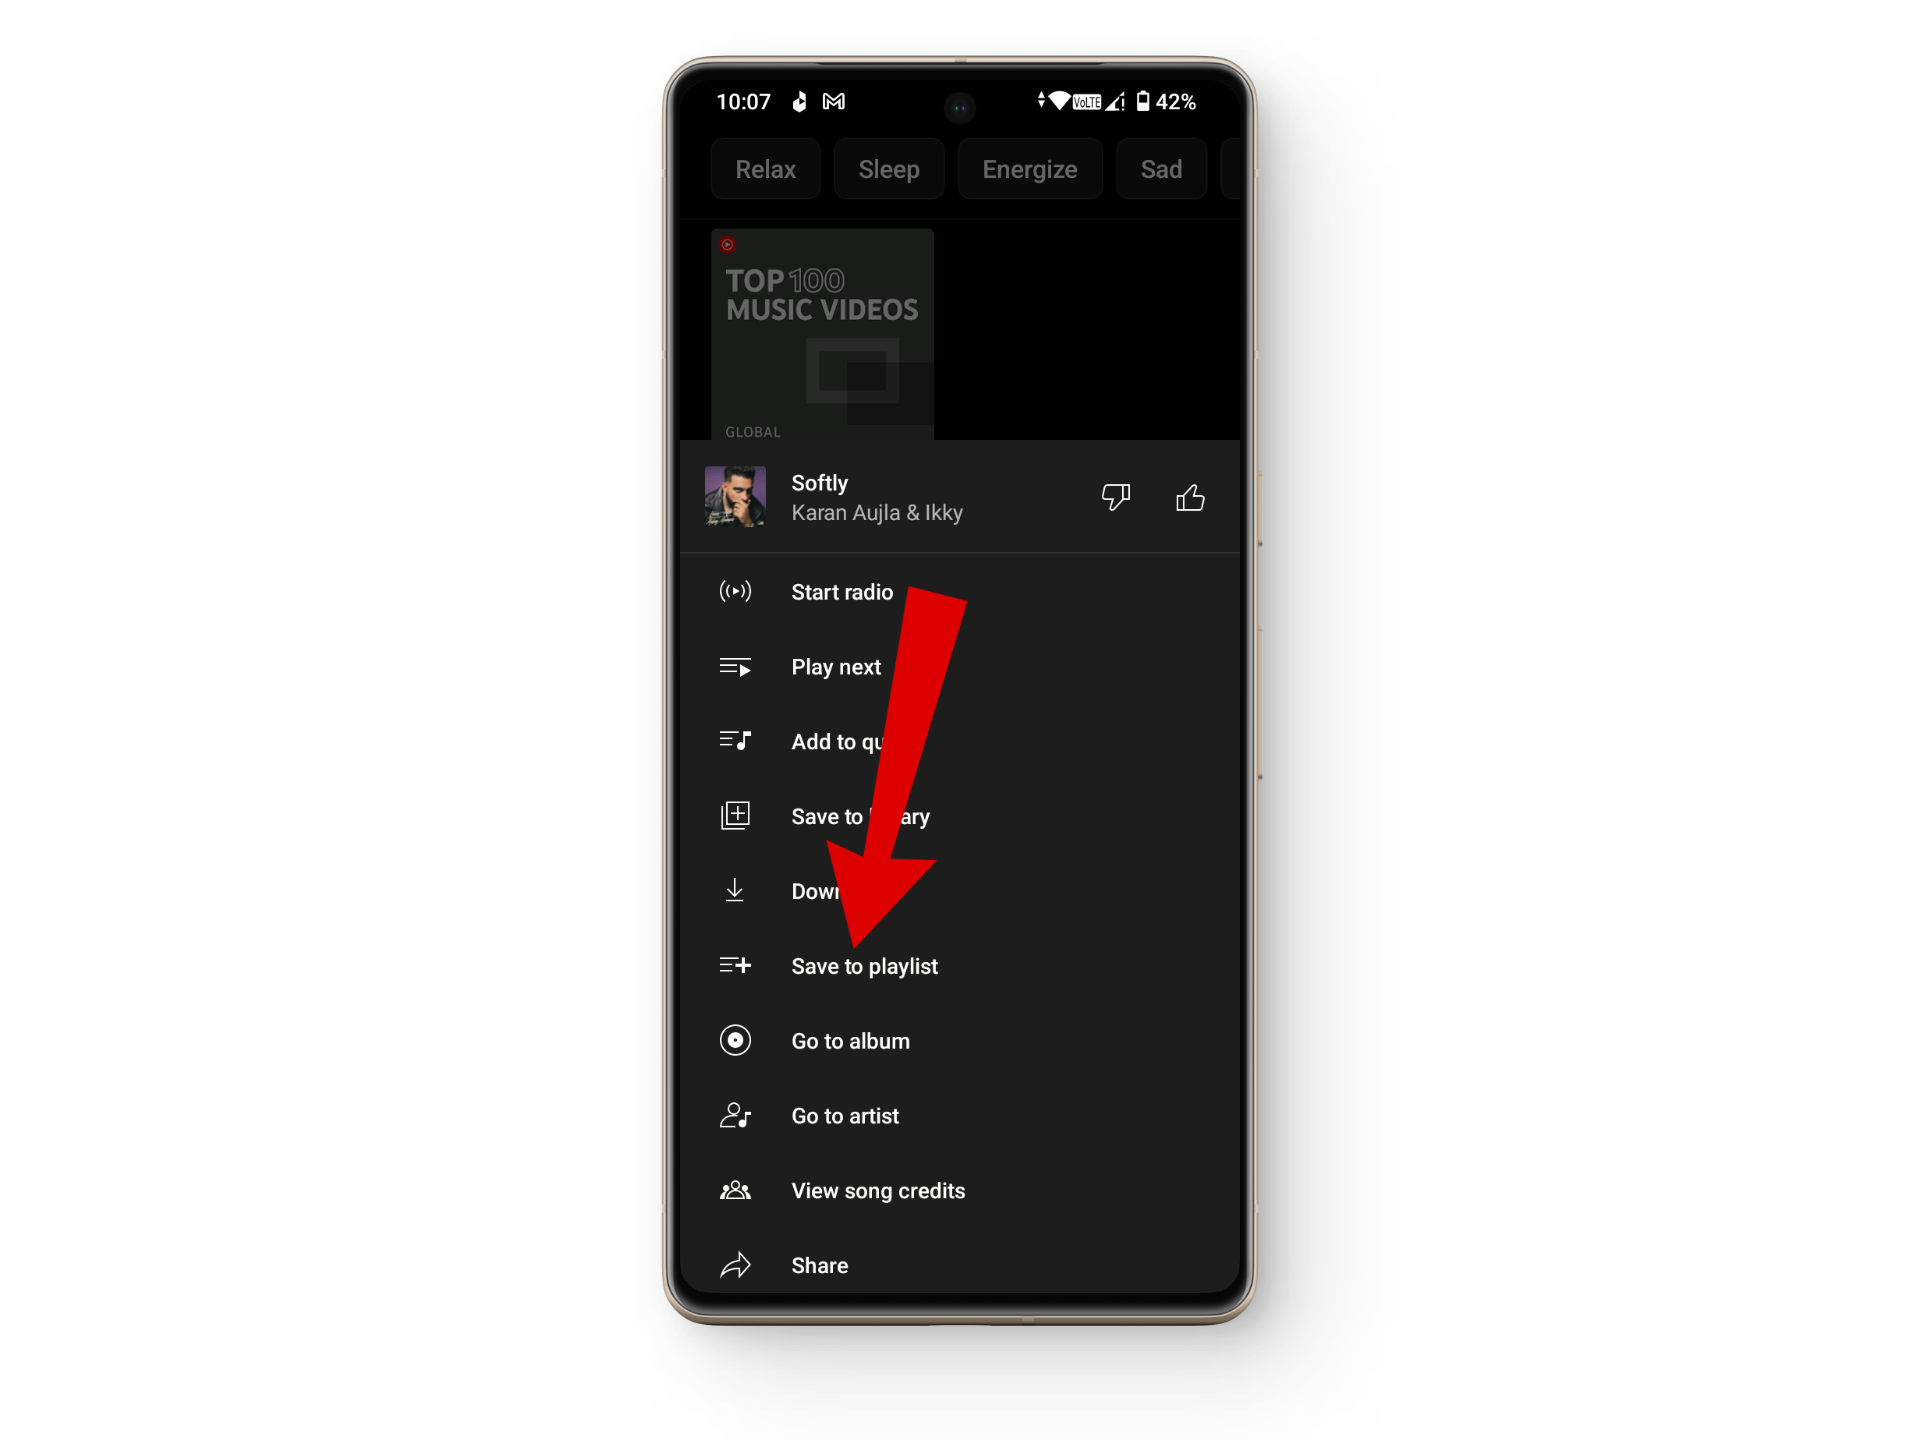
Tap on Save to playlist - Now, tap on the New playlist option to make another playlist from scratch.
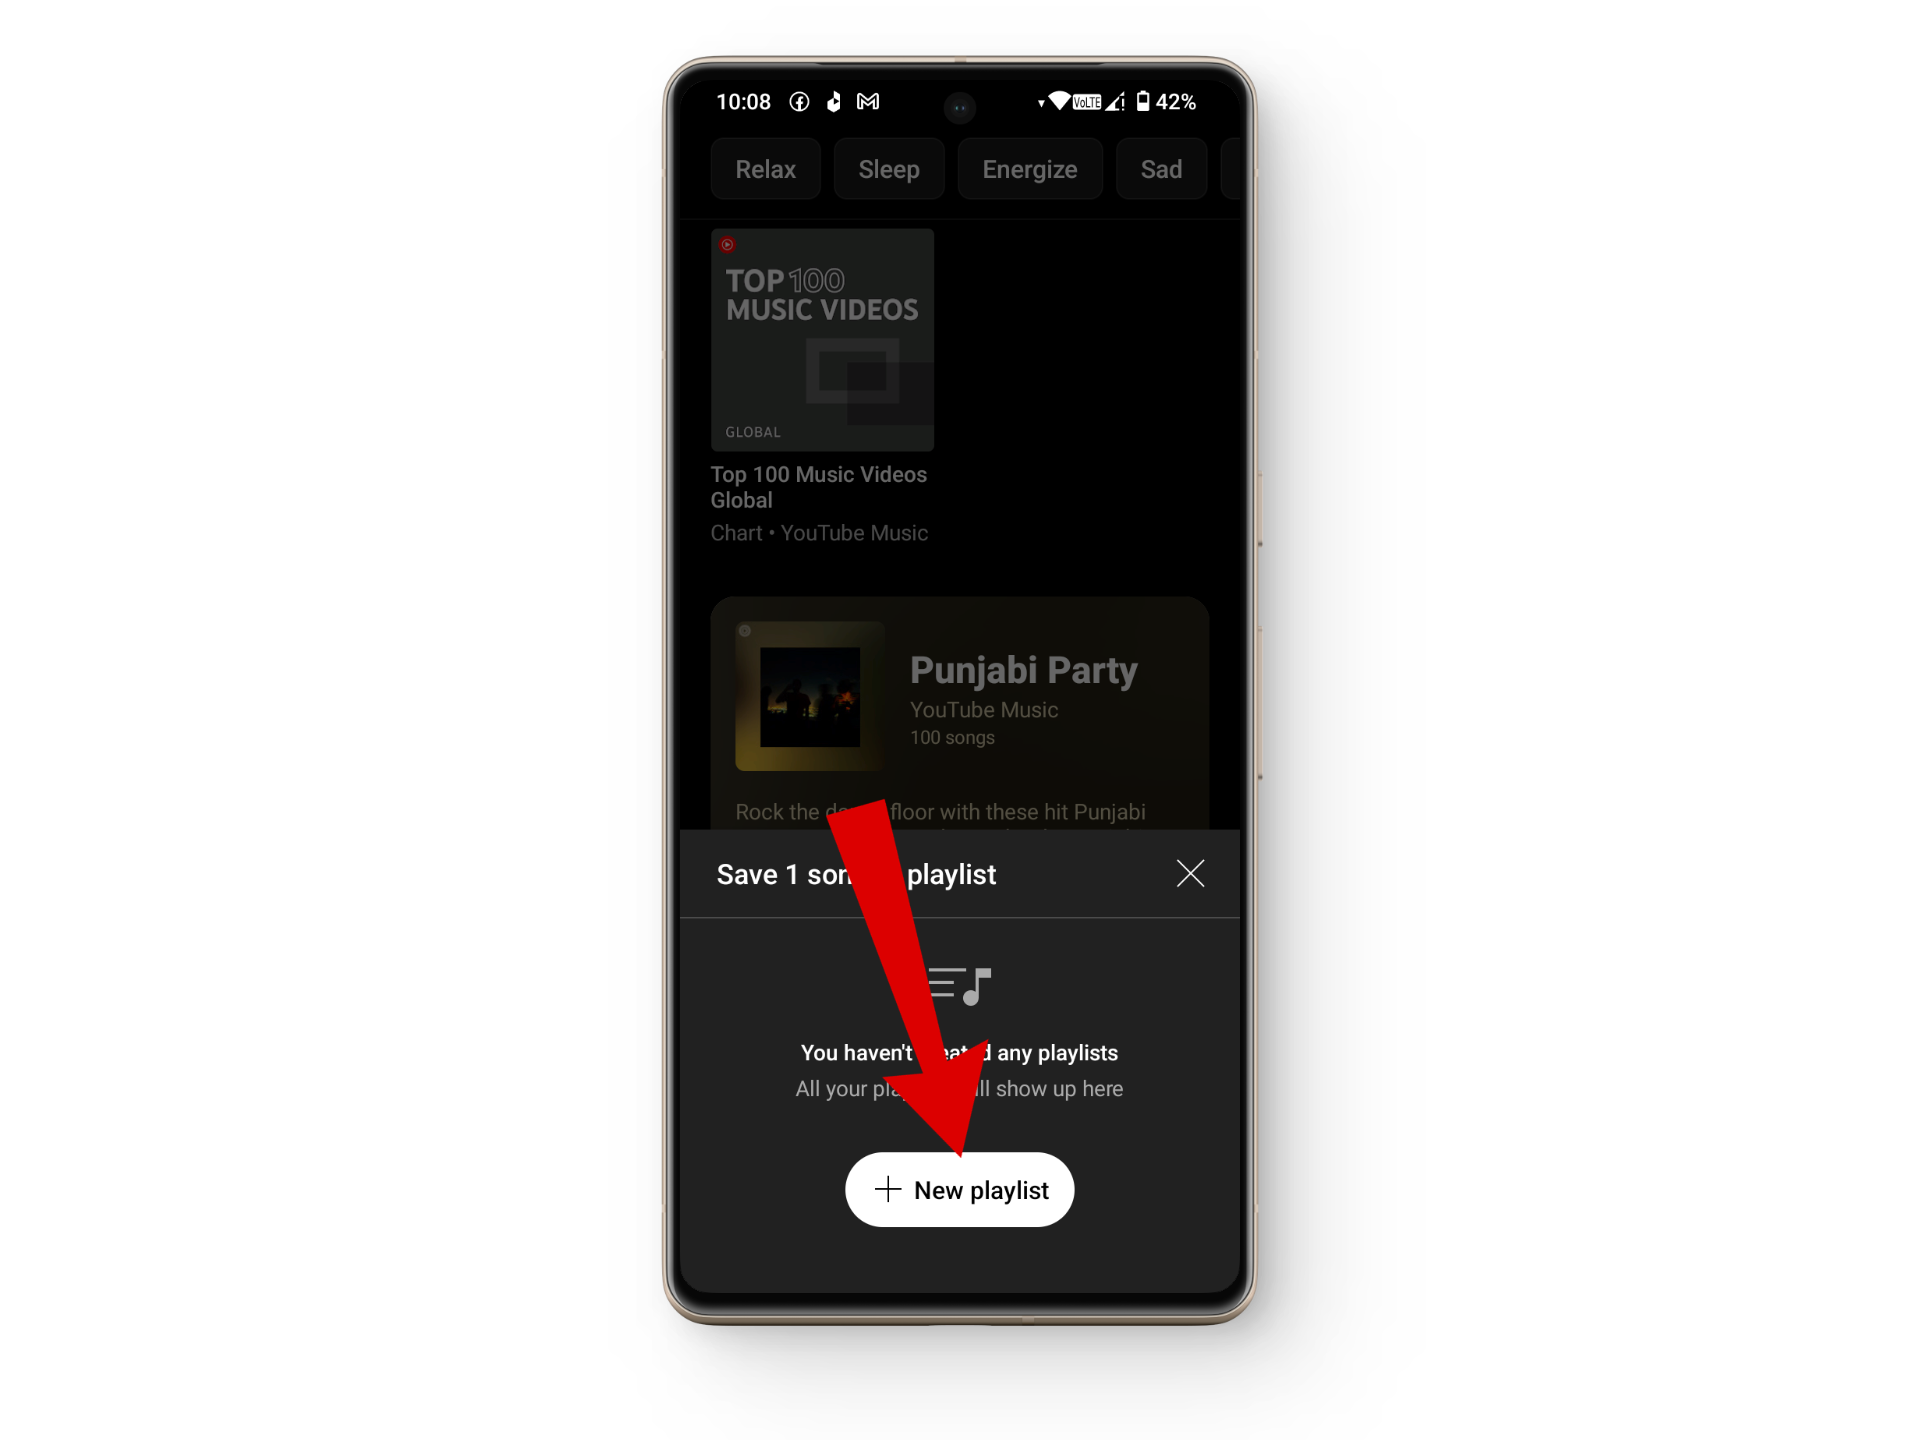
Create a new playlist - After giving your playlist a name, tap on the Public button under the Privacy tab.
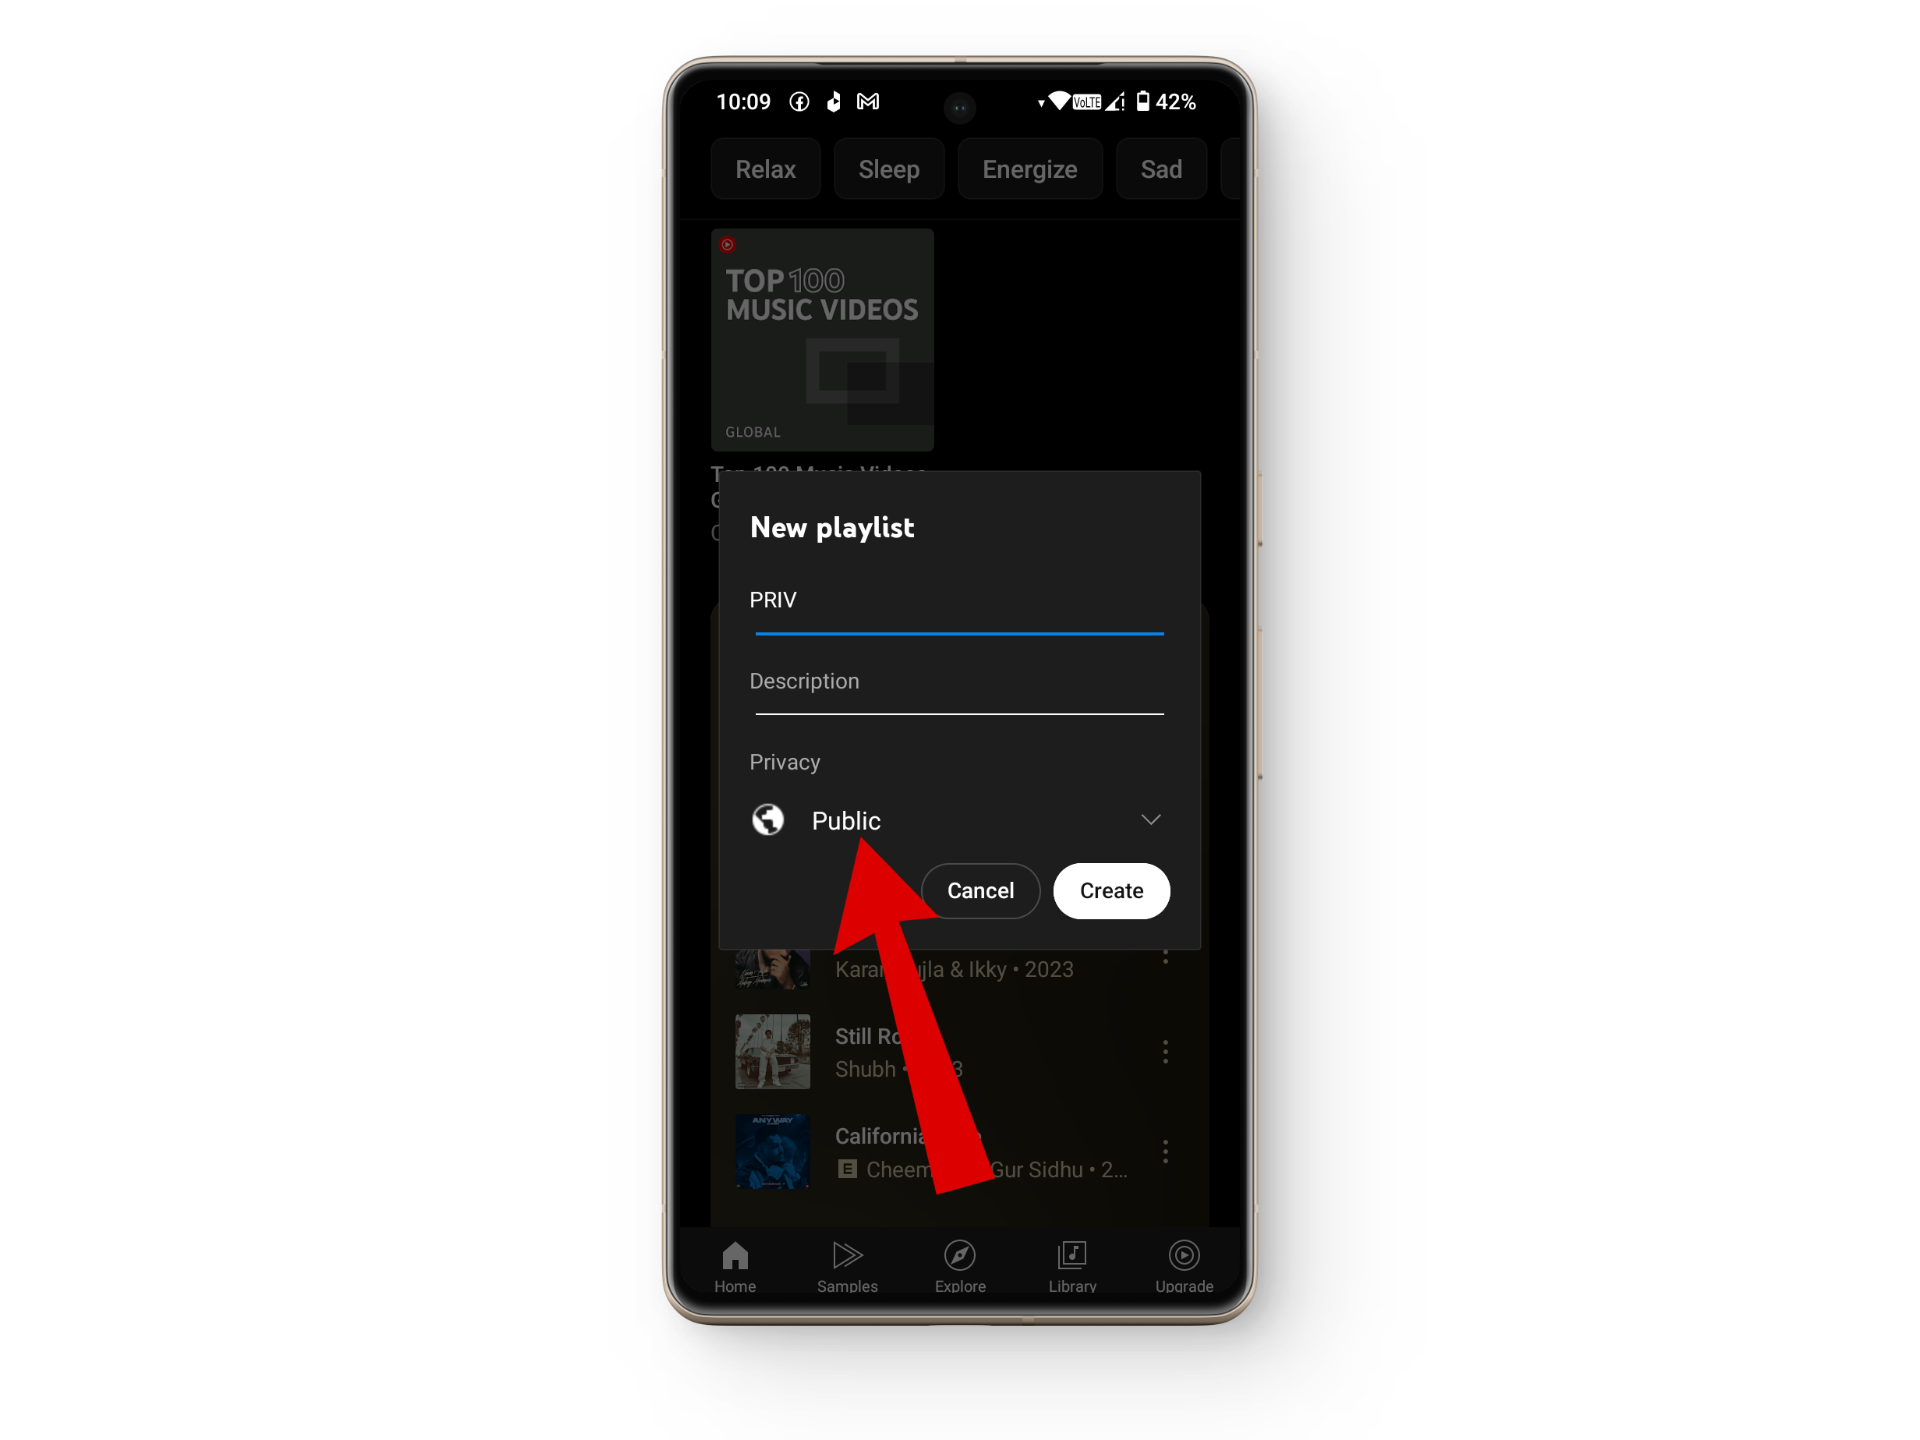
Click on the Public button - From the drop-down menu, tap on the Private option.
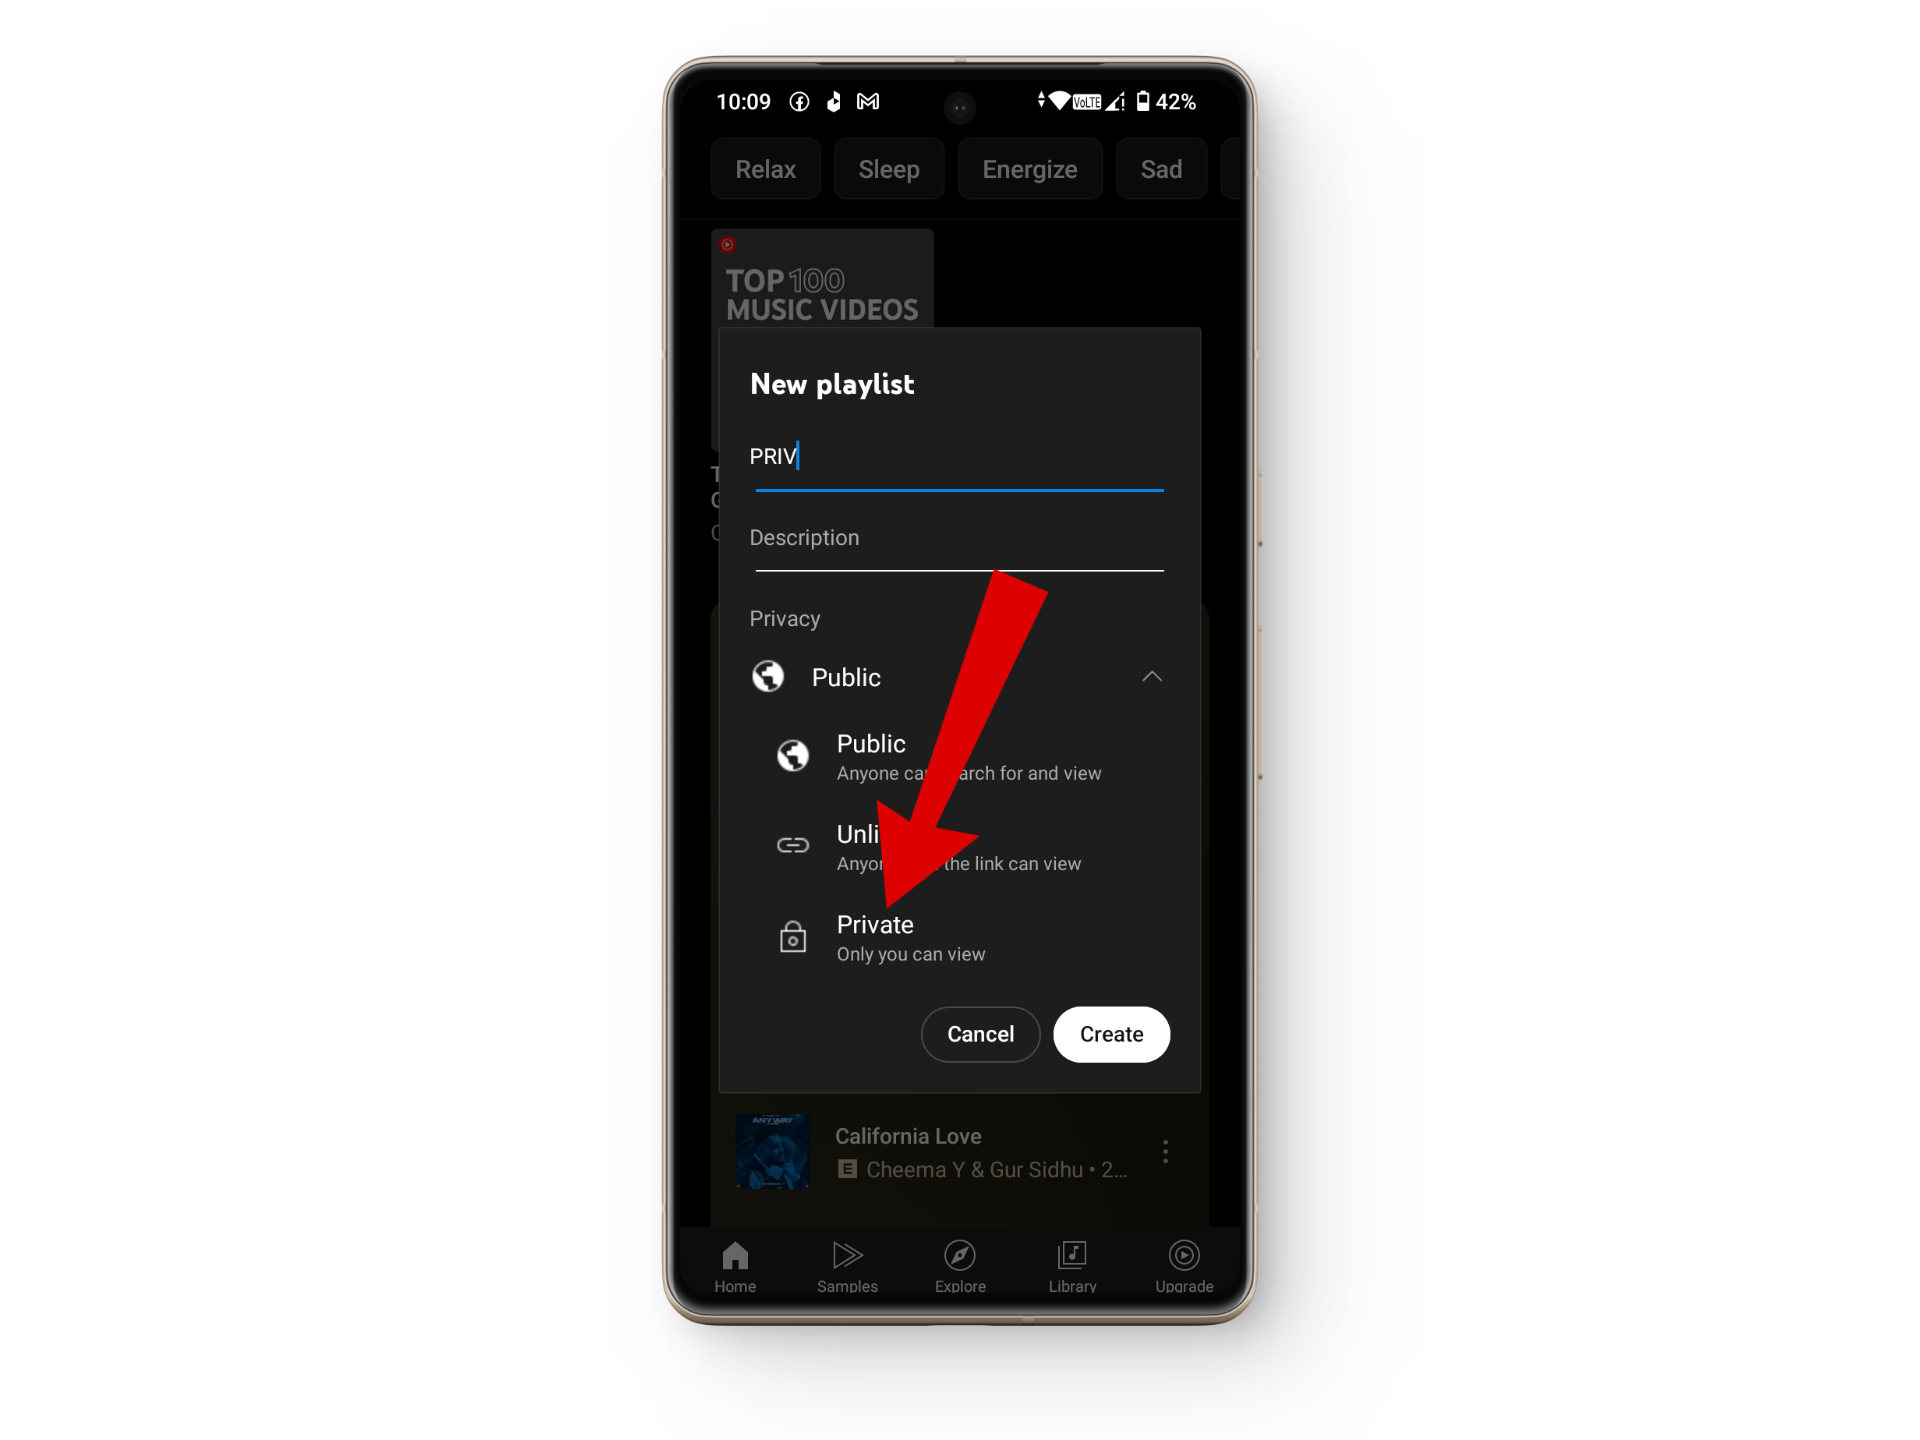
Tap on the private option - Finally, click on the Create button to finish making up a private playlist.
Click on create
READ MORE: Why is YouTube TV Audio Out of Sync? (and How to FIX it?) ➜
Bonus: Make Your YouTube Playlists Private
While some people use YouTube Music to listen to songs some of us still have our few favourite tunes saved on YouTube. Whether it is a YouTube Music playlist or a YouTube playlist the process of making them private is entirely the same just with a few interface differences. Let’s have a quick look at how you can make your YouTube playlists private.
- Open up YouTube on your web browser and log into your account.
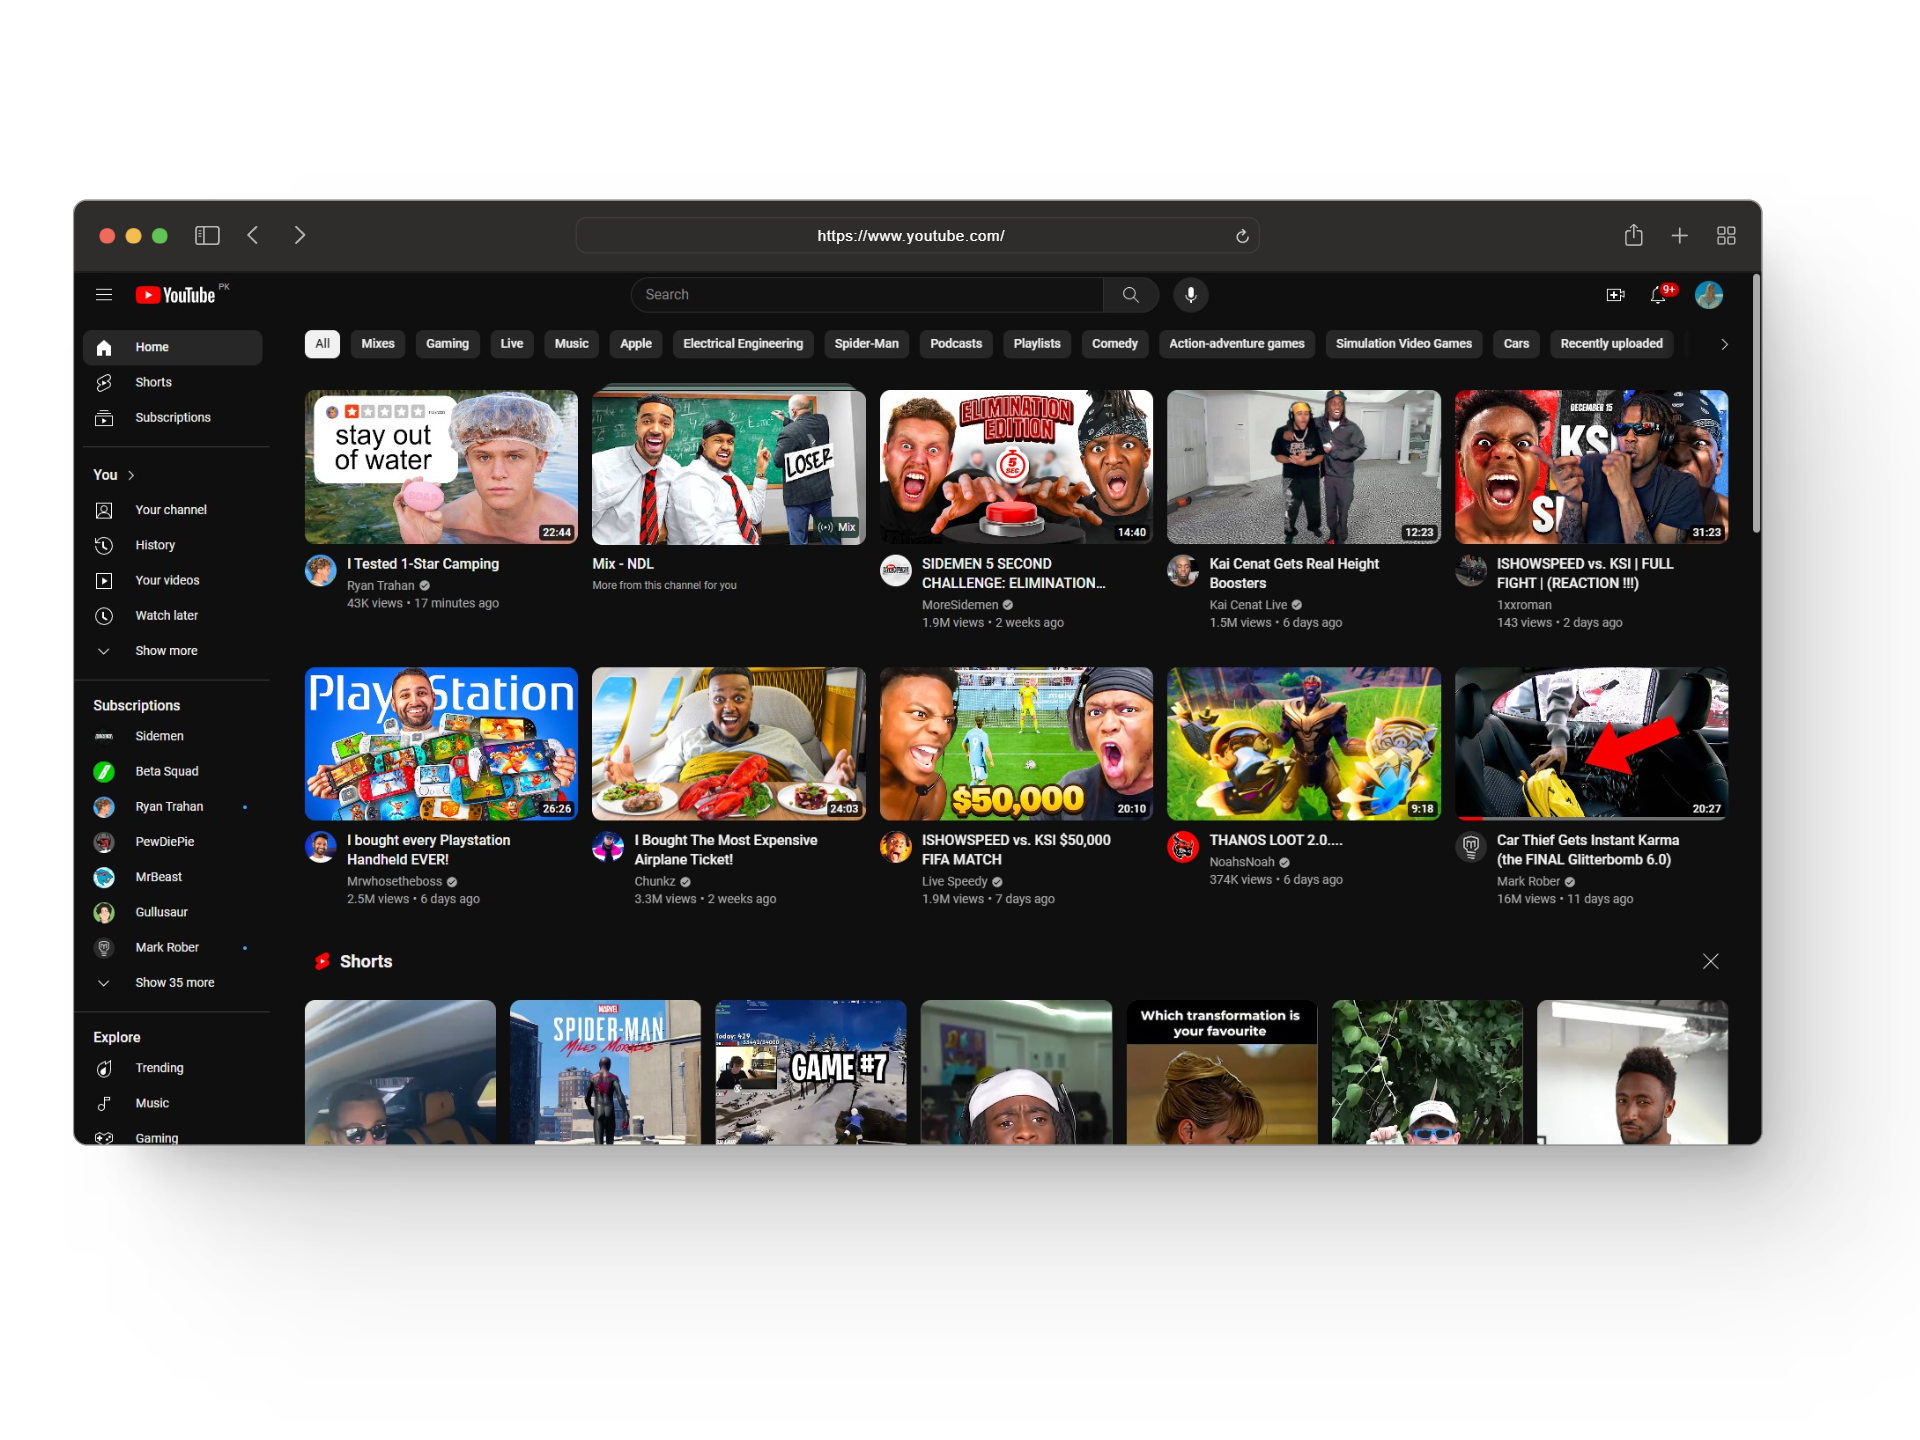
Open up YouTube - Once that’s done, you’ll need to head over to the You tab in the sidebar.
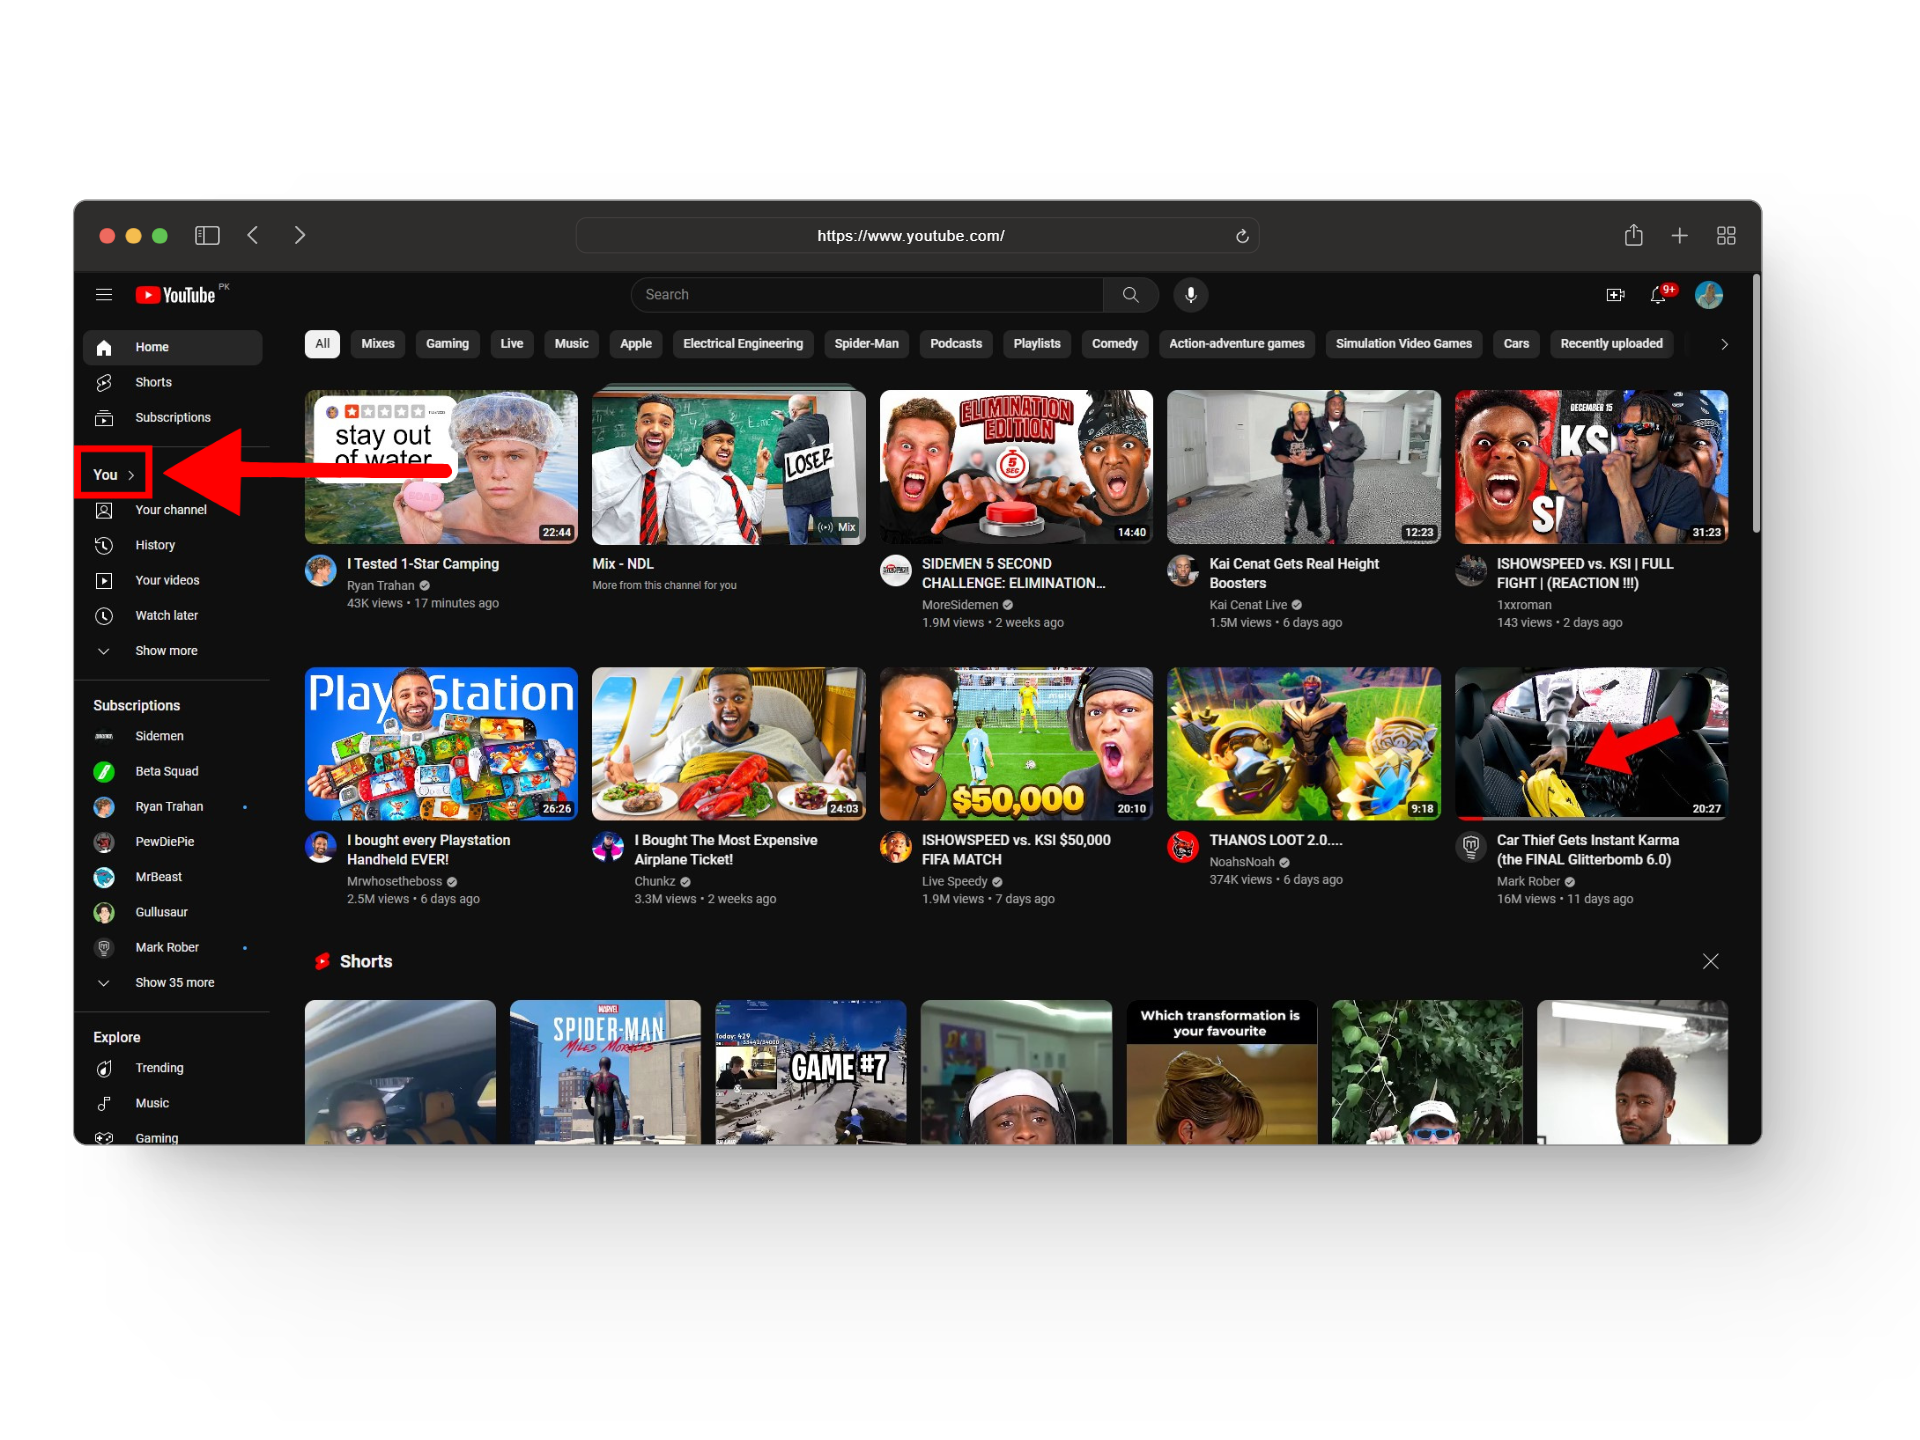
Head over to the You tab - If your playlist isn’t showing up, click on the Show more button to expand the section.
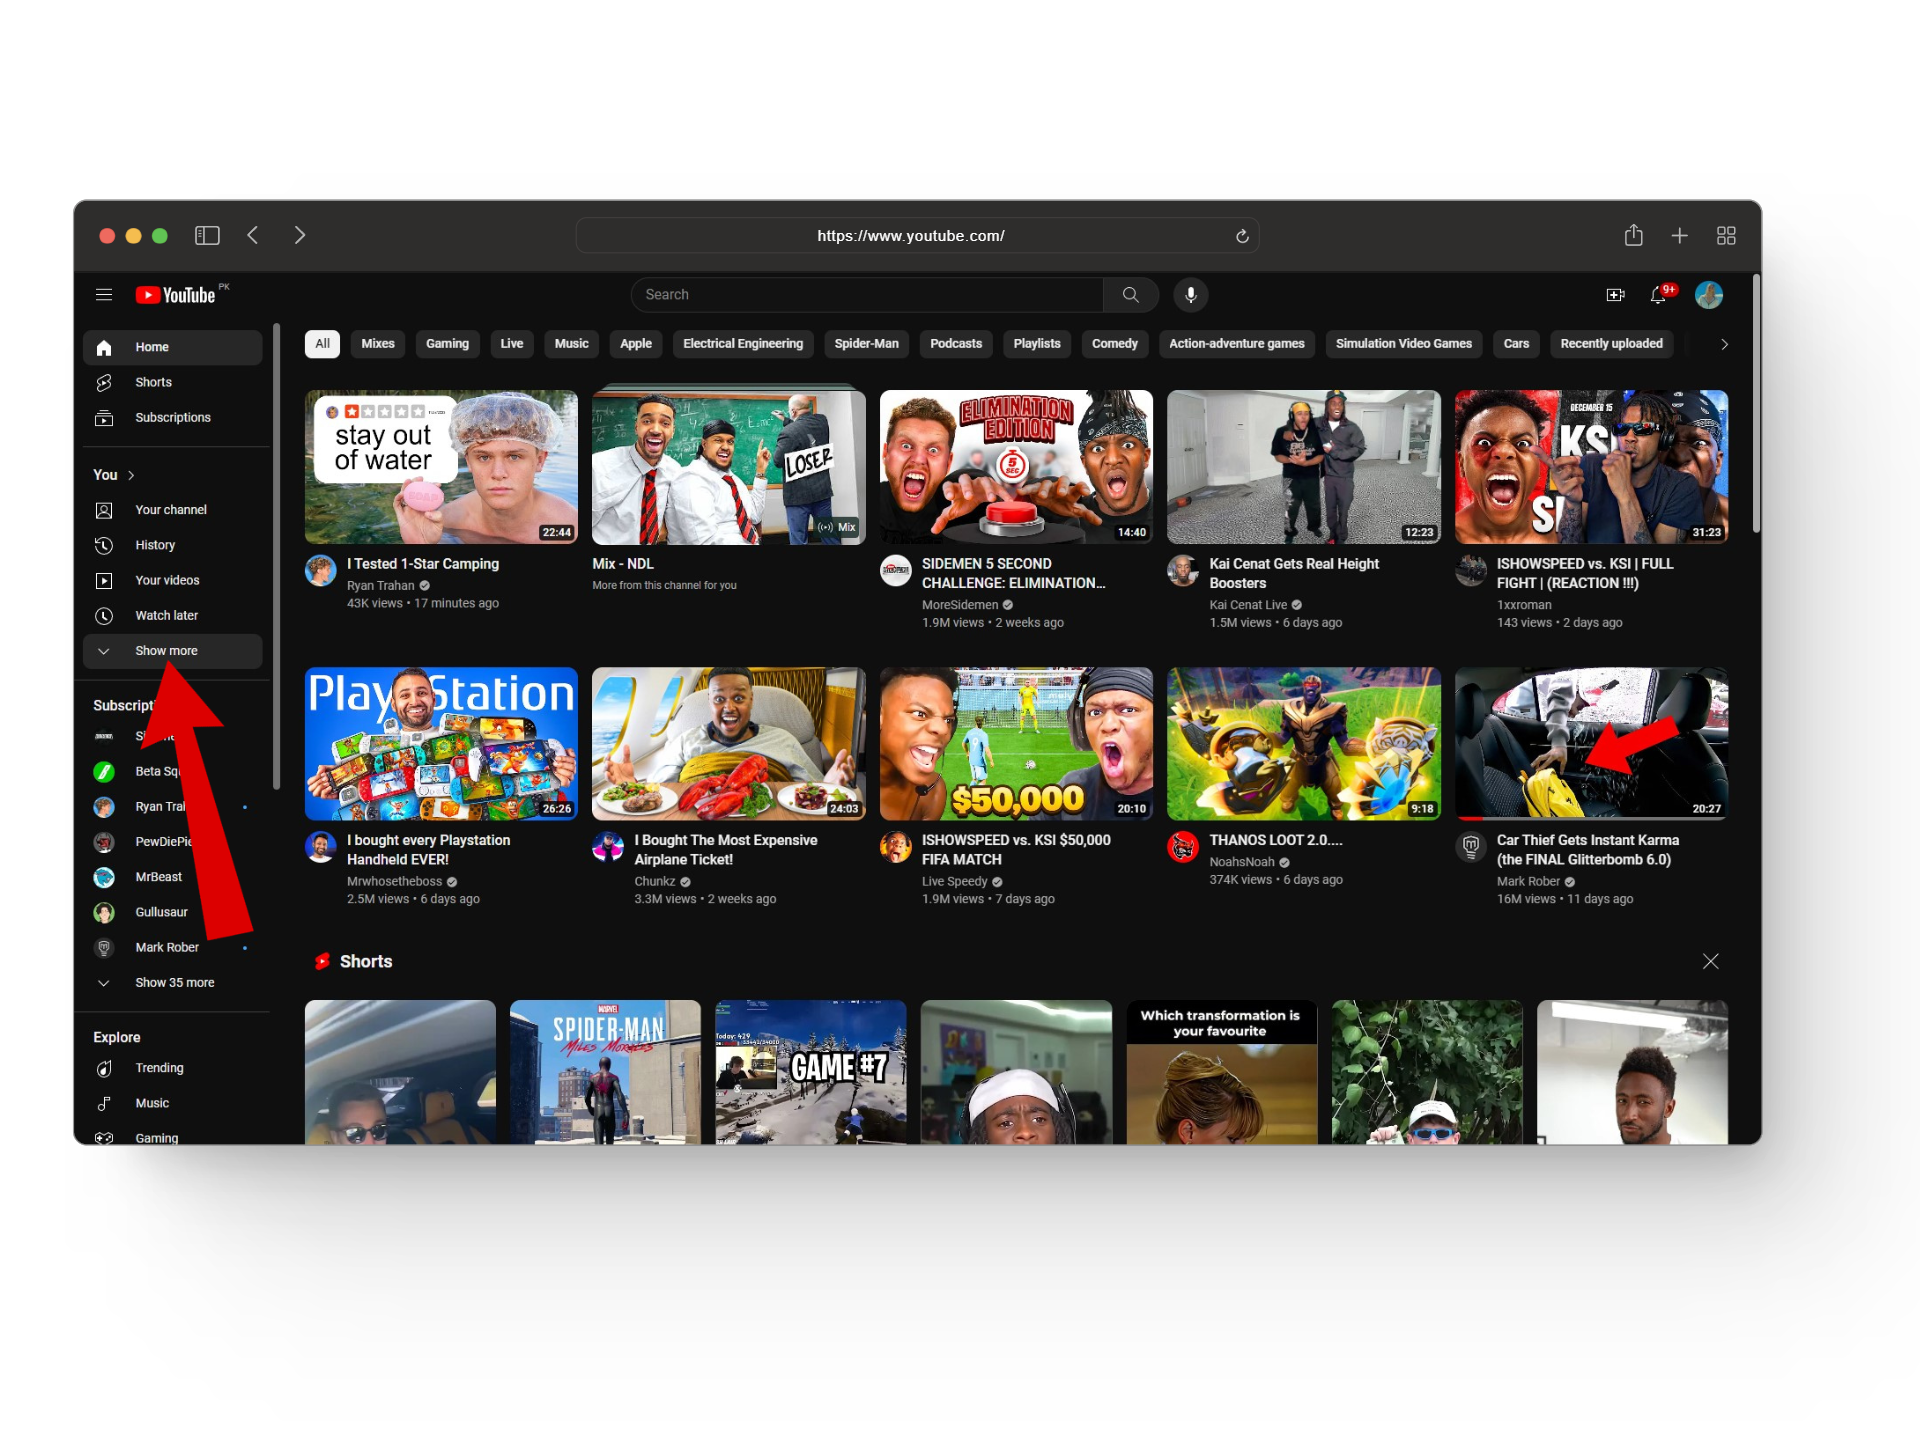
Click on show more - From here, you’ll need to select the one you want to make private.

Select a playlist - This will open up the playlist in full view. Here, right under your account name, you’ll have the privacy settings option. Here, click on the arrow next to it.
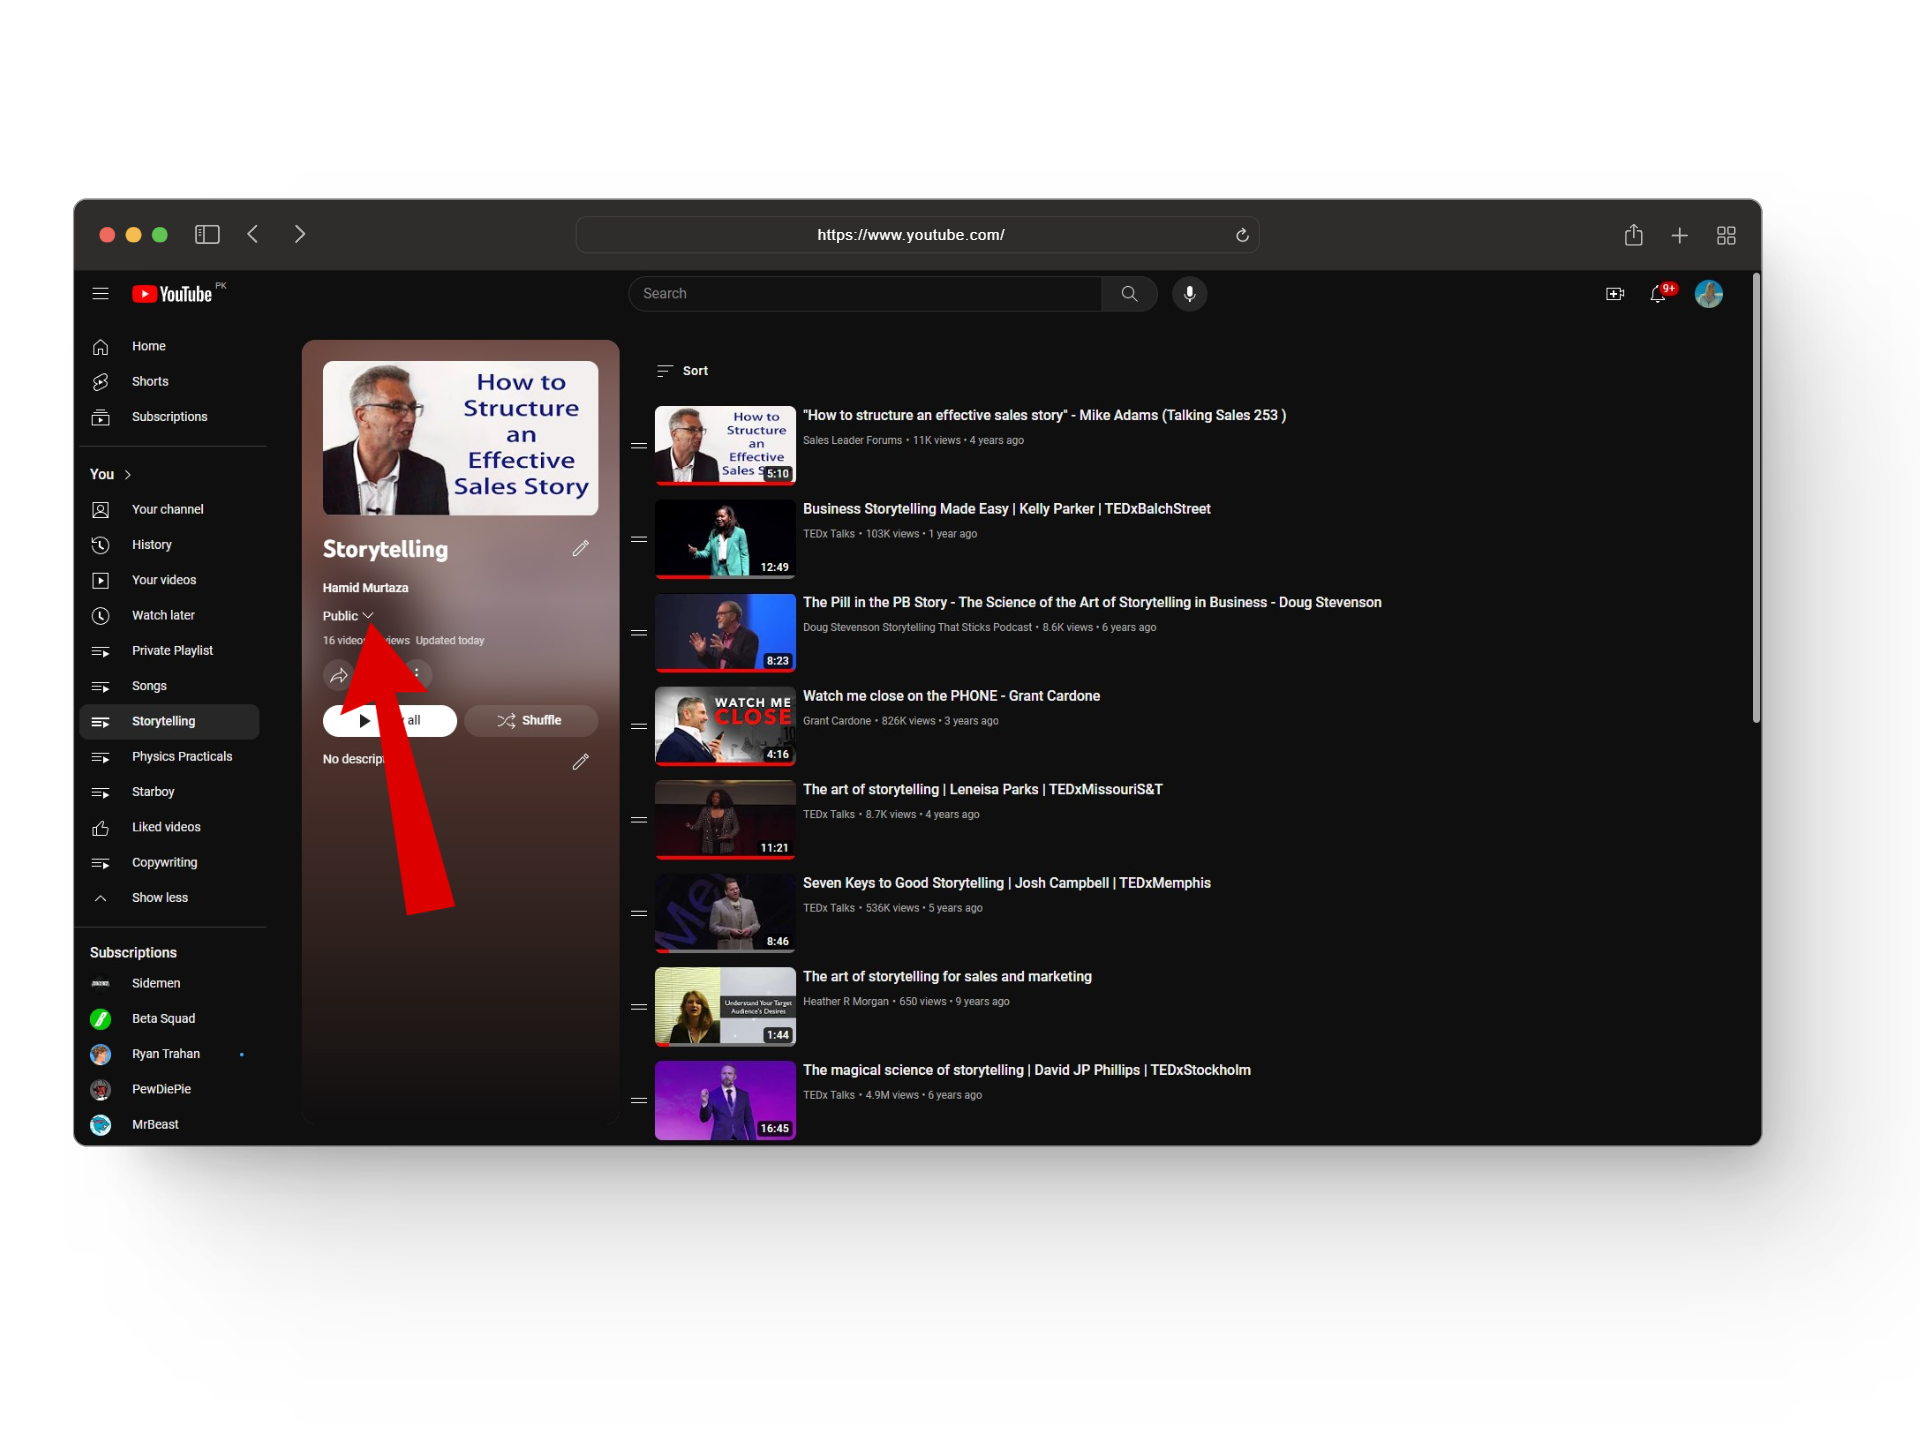
Click on the small arrow - From the menu, click on the Private option to change your playlists from public to private.
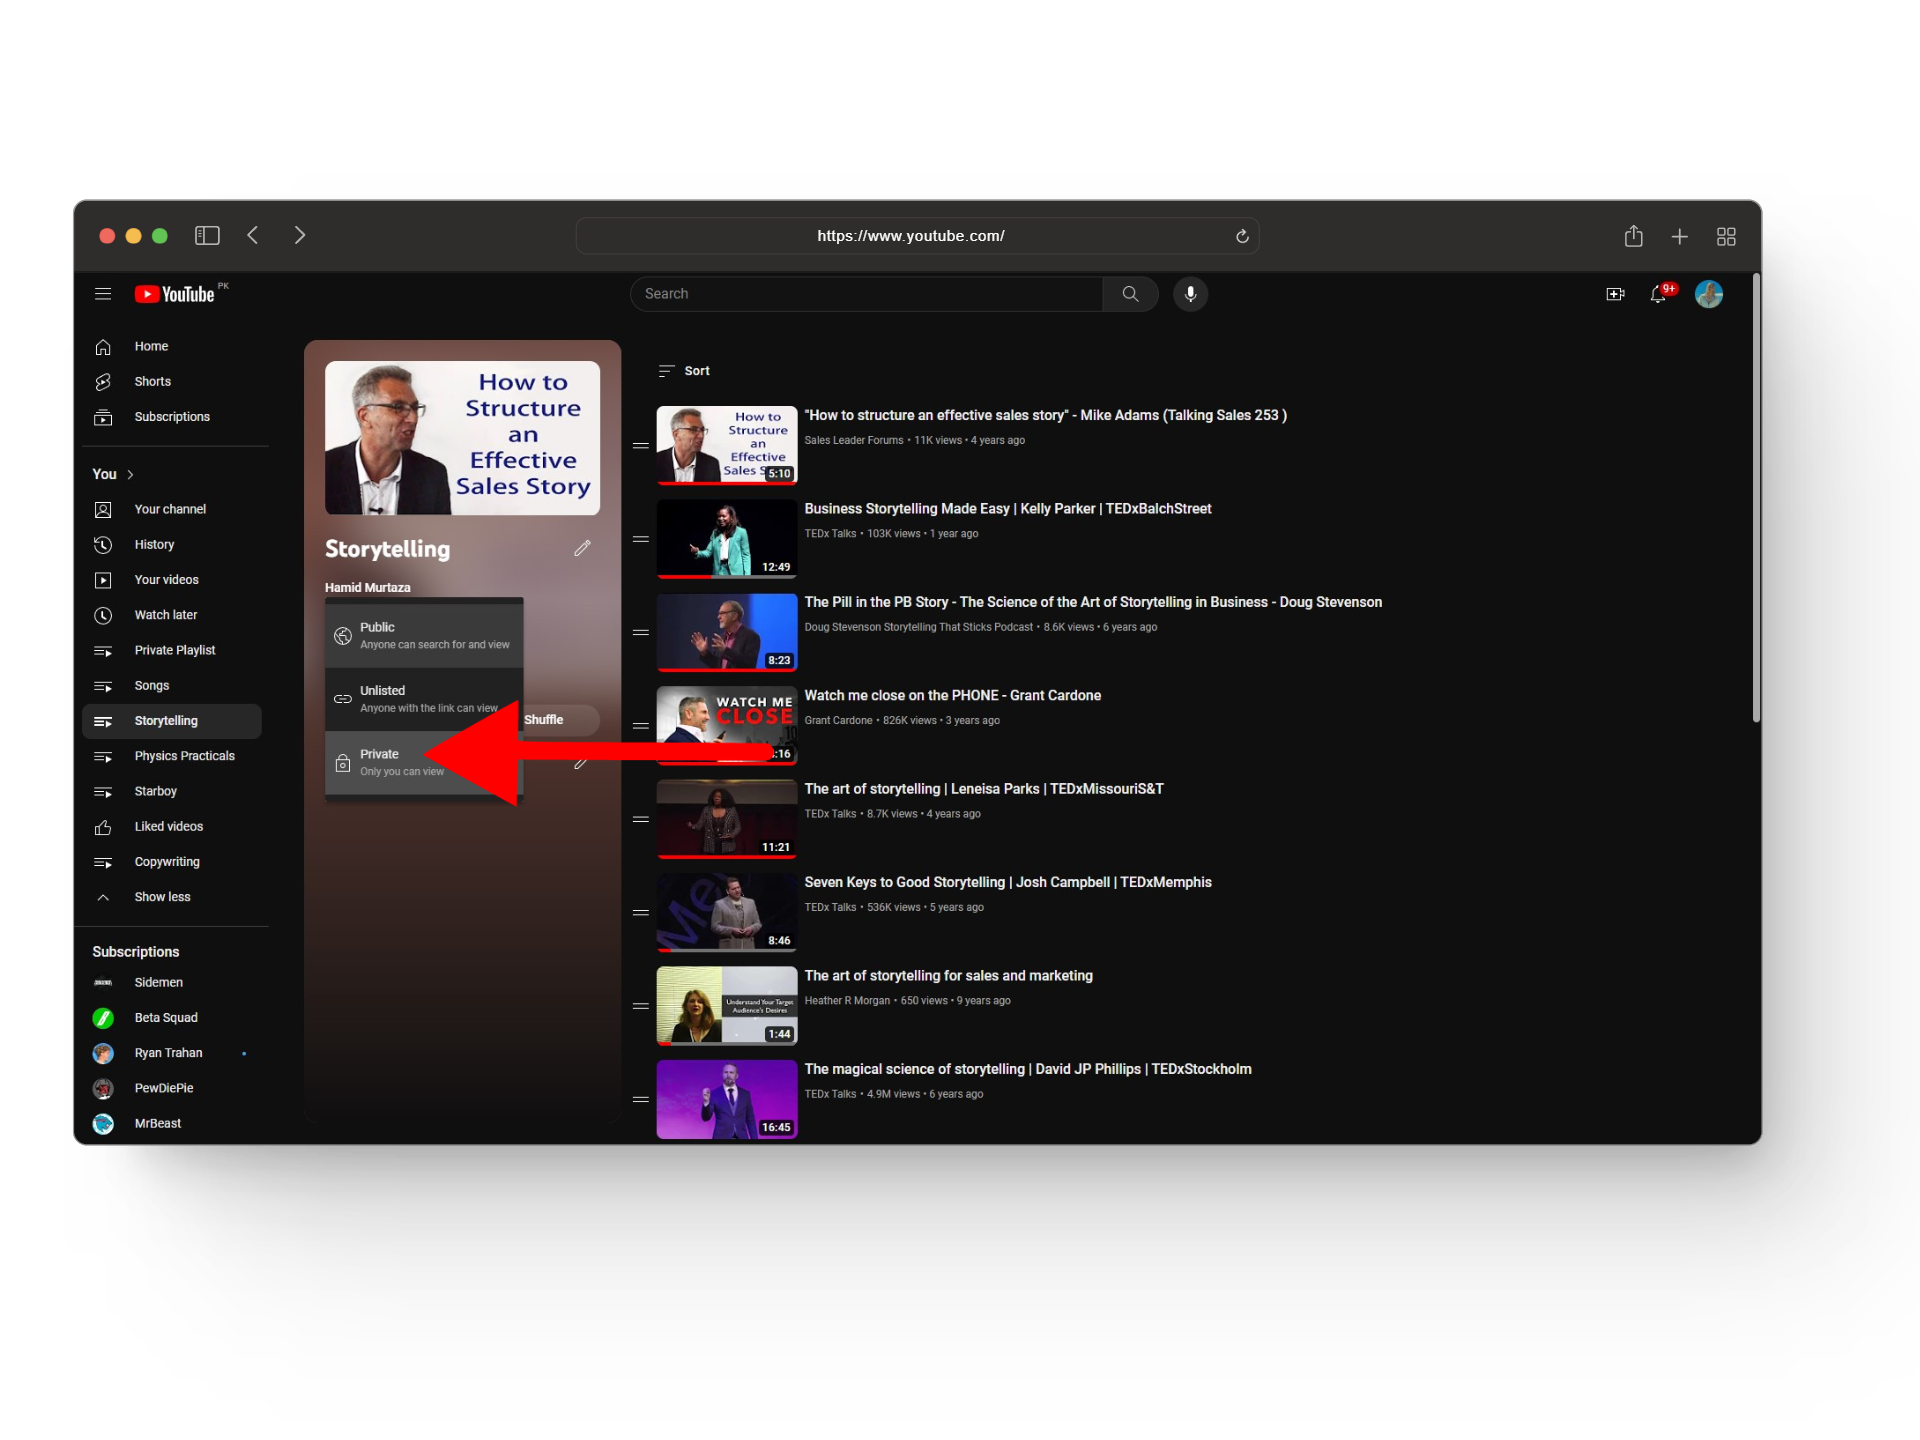
Change it to private
READ MORE: YouTube Music Keeps Stopping? 10 Easy Methods to Fix It ➜
YouTube Music Private Playlists vs. Spotify Private Playlists
YouTube Music and Spotify both offer their users the ability to not only make playlists but also set privacy settings according to their preferences. Although both of these services give users a clear option to make their playlists private, there’s one key difference in how these private playlists operate.
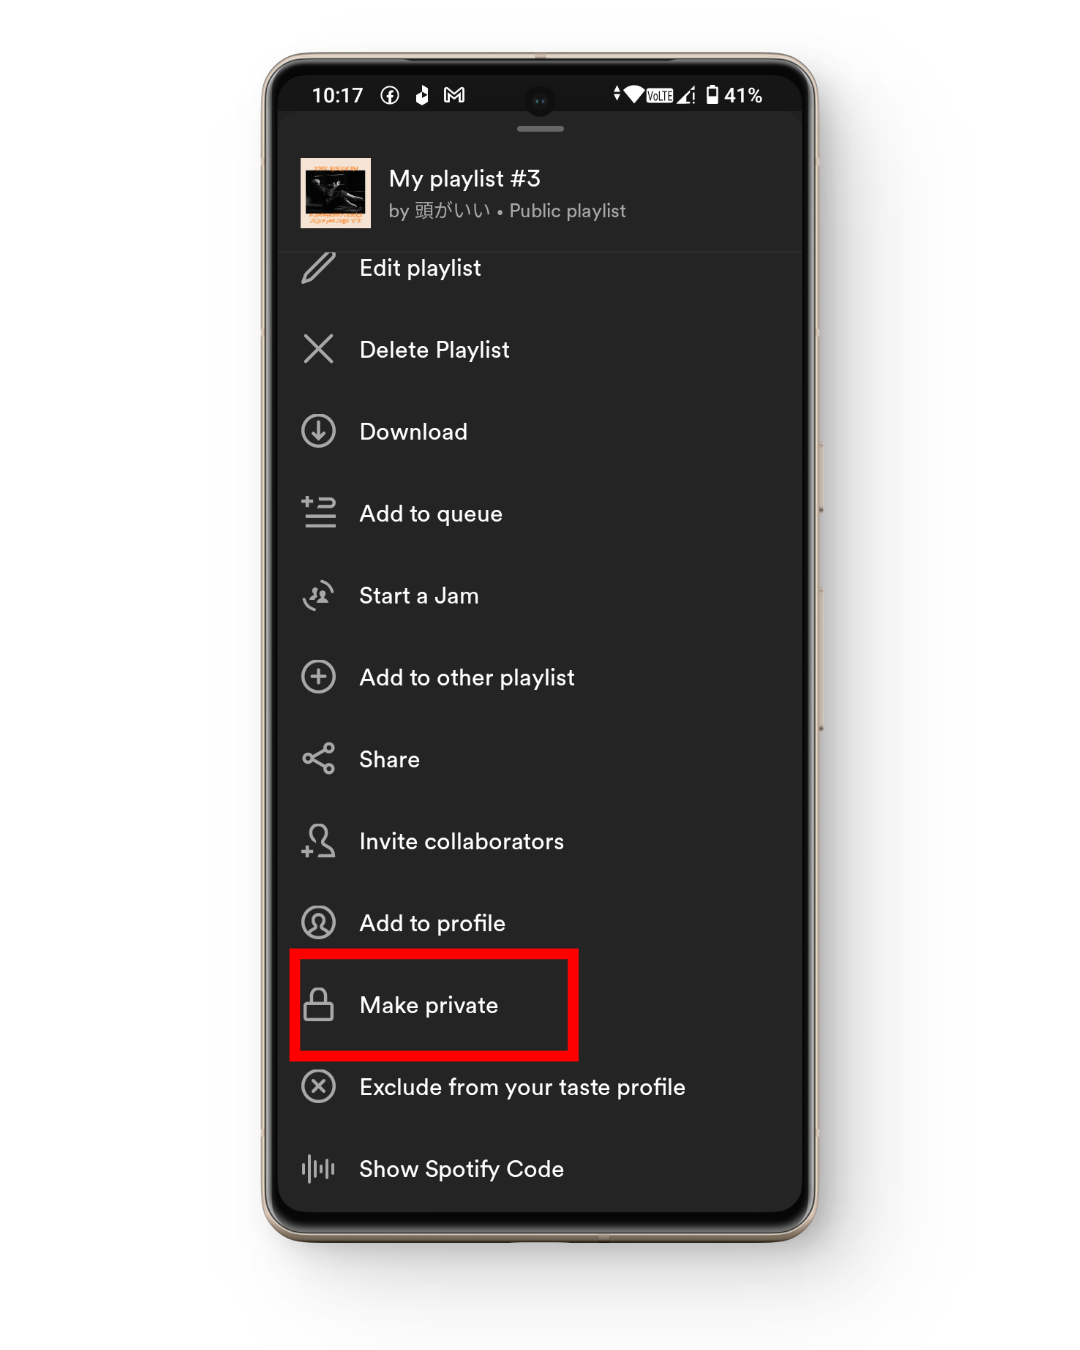
For YouTube Music setting a playlist to private means that it can only be viewed by you. This means that even if you send someone the link to your playlist they won’t be able to access or open it. On the other hand, Spotify’s private playlist acts similarly to YouTube Music’s “Unlisted” option which makes the playlist private but also gives users the option to share them to others through a link.
READ MORE: 8 of the Best Unblocked Music Apps and Websites [Guide]
Start Your Private Listening Sessions
When it comes to making YouTube Music playlists private, YouTube offers users a straightforward process to make their playlists private to themselves by simply switching up the privacy settings from public to private. So what are you waiting for? It’s time to make your break-up playlists private.
FAQs
You can add up to 5000 videos to a private playlist, and this limit also applies to regular playlists on the platform.
Apart from serving a similar purpose of making your playlist disappear from YouTube searches, unlisted and private playlists are quite different from each other. Firstly, unlisted playlists can be shared with others, whereas private ones can’t. Secondly, unlisted playlists can also be added to a channel section, whereas private ones can’t.
Yes, you can make your YouTube Music playlists private from YT Studio by heading to the Content tab and selecting the playlist you want to make private. From here, go to the Details section and change the visibility to Private.
Reviewed by Huzaifa Haroon