How to Install AtlasOS on Your Windows PC? [8 Easy Steps]
 Reviewed by Huzaifa Haroon
- AtlasOS is a debloated Windows version tailored for gamers, focusing on improved performance, reduced latency, and enhanced privacy by removing unnecessary components and bloatware.
- The installation process involves data backup, downloading required software, creating a bootable USB, and following detailed steps for Windows and AtlasOS installation.
- The choice between AtlasOS, ReviOS, and Tiny11 depends on individual needs: AtlasOS is best for gaming, ReviOS offers balanced performance, and Tiny11 suits older hardware or minimal setups.
Installing a new operating system can sometimes feel like trying to solve a Rubik’s Cube—it’s colorful and can be a bit puzzling, but oh-so-satisfying once everything lines up. This is a straightforward, no-nonsense guide that’ll help you align all those digital blocks with ease.
In this article, we’ll guide you through the step-by-step installation process of AtlasOS on your Windows machine, ensuring that you won’t need to be a tech wizard to complete it.
So, let’s keep things light and simple, shall we? By the time we’re finished, you’ll not only have a new OS installed, but you’ll also become the go-to person in your circle for tech advice. But first, let’s explore what sets AtlasOS apart from other Debloated versions of Windows.
Table of Contents
What is AtlasOS?
AtlasOS stands out as a unique modification of Windows, tailored specifically for gamers who seek to maximize their system’s performance and minimize latency. Here’s what sets AtlasOS apart:
- Performance Optimization: By stripping away unnecessary components and disabling power-saving features, AtlasOS ensures a smoother and more responsive experience, with higher frame rates compared to standard Windows.
- Latency Reduction: By fine-tuning processes and optimizing networking, AtlasOS aims to deliver a noticeable difference in responsiveness.
- Enhanced Privacy: AtlasOS takes privacy seriously by eliminating tracking, pre-installed apps, and bloatware, giving you a more secure environment.
- Resource Efficiency: It significantly reduces background CPU usage and frees up RAM, allowing more resources for your tasks and games.
- Open Source: As an open-source project under GPL-3.0, AtlasOS encourages community involvement and transparency.
- Community Support: With a strong community backing and positive feedback, users can connect with like-minded individuals and seek expert advice.
These features are designed to provide an optimized Windows experience that is both powerful and user-friendly, especially for those in the gaming community.
READ MORE: How to Install Complete Android OS on a PC ➜
↪ What are Debloated Versions of Windows?
Debloated versions of Windows are modified editions of the operating system that have been stripped of certain features, apps, and services deemed unnecessary by the creator of the debloated version. These versions aim to provide a more streamlined and efficient user experience, particularly on systems with limited resources.
Popular Debloated Versions:
- Tiny11: A lightweight version of Windows 11 that requires only 8GB of disk space and can run on systems with as little as 2GB of RAM. It includes the bare minimum apps and allows for the use of offline accounts by default.
- Tiny10: Similar to Tiny11, this version applies the same concept to Windows 10, aiming to provide a comfortable computing experience without the bloat and clutter of a standard Windows installation.
Advantages Over Native Windows:
- Reduced Resource Usage: Debloated versions often consume fewer resources, which can be beneficial for less powerful computers.
- Performance: They may offer better performance, especially on older hardware, by removing unnecessary components that could slow down the system.
- Simplicity: With fewer pre-installed apps and services, these versions can offer a simpler and more straightforward user experience.
Potential Drawbacks:
- Compatibility: Some debloated versions may not be serviceable, meaning they cannot receive new features or language packs through Windows Update.
- Stability: Removing certain components can sometimes lead to instability or the loss of functionality that some users may require.
- Security: There is a risk that debloated versions may not receive all the necessary security updates, potentially making them less secure than the native versions.
It’s important to note that while debloated versions can offer benefits, especially for specific use cases, they may not be suitable for everyone. Users should weigh the pros and cons and consider their specific needs and the potential risks before deciding to use a debloated version of Windows.
Now that you know all the nooks and crannies of debloated versions of Windows, let’s dive straight into how to install AtlasOS on your system.
READ MORE: Fix: AtlasOS Playbook Stuck at “Reticulating Splines” ➜
How to Install AtlasOS?
Installing AtlasOS is a process that involves several steps, from preparing your system to post-installation setup. Here’s a comprehensive guide to help you through the process:
Step 1: Preparation
- Backup Your Data: Ensure all important data is backed up to an external drive or cloud storage.
- Check Compatibility: Ensure your system meets the requirements for Windows 11 or Windows 10, as AtlasOS is built upon these platforms.
- Windows Activation: Confirm that your current Windows installation is activated, as AtlasOS requires it.
Step 2: Downloading Required Software
- Download Windows 10/11 ISO: Go to the official Microsoft website and download the Windows 10/11 ISO file.
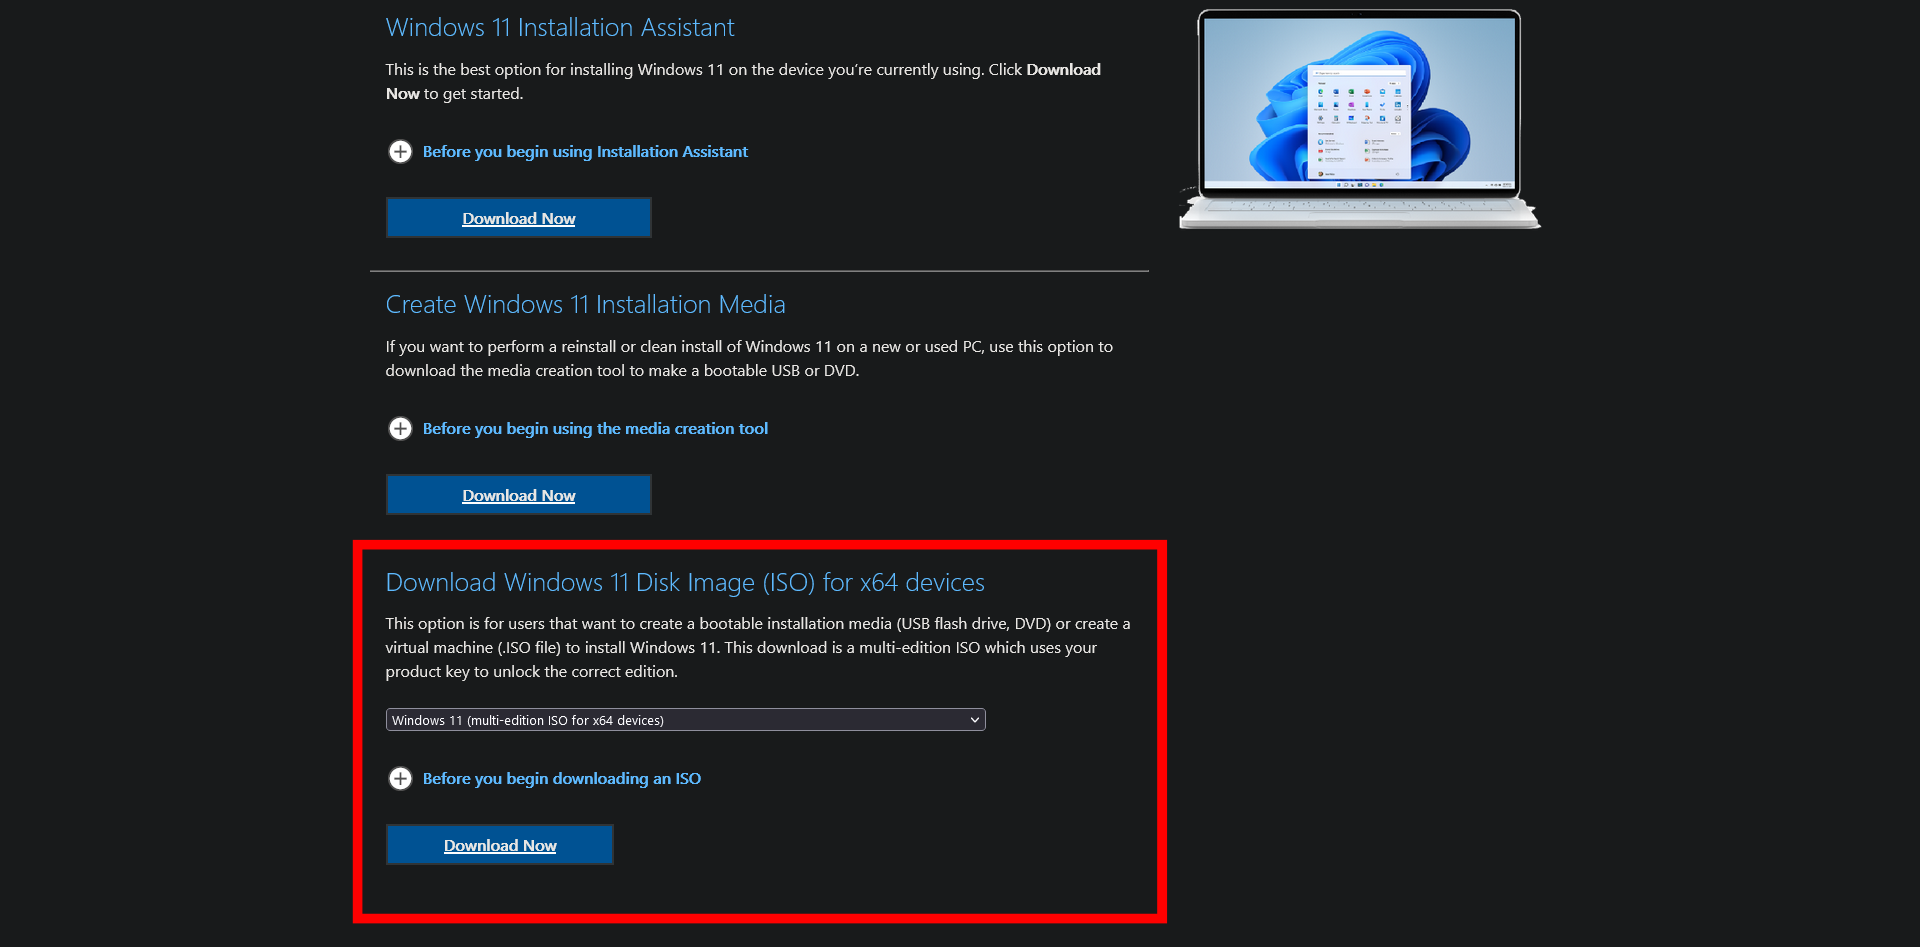
Download Windows 11 ISO - Download Rufus: Rufus is a free, open-source software used to create a bootable USB drive. Download it from the official Rufus website.
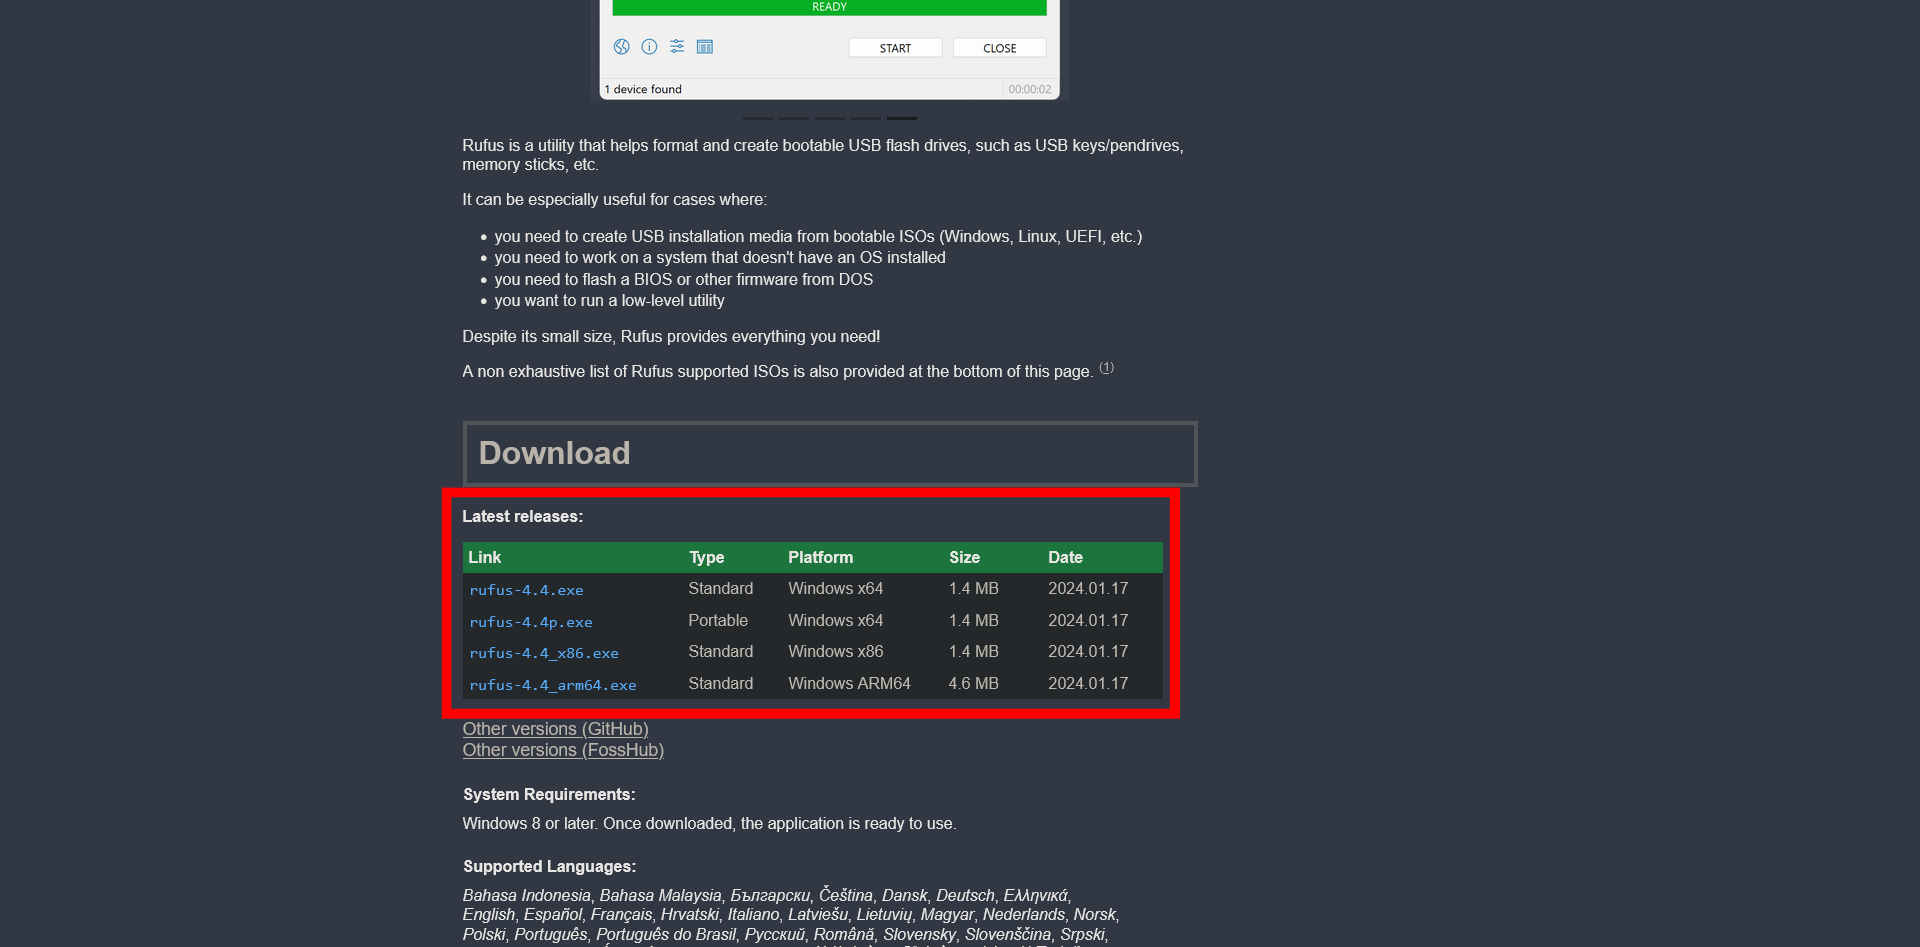
Choose the Platform According to Your System Architecture | Portable Version Does Not Require Installation
Step 3: Creating Bootable USB Drives
- Insert a USB Drive: Plug in a USB drive with at least 12GB of space.
- Open Rufus: Launch the Rufus application.
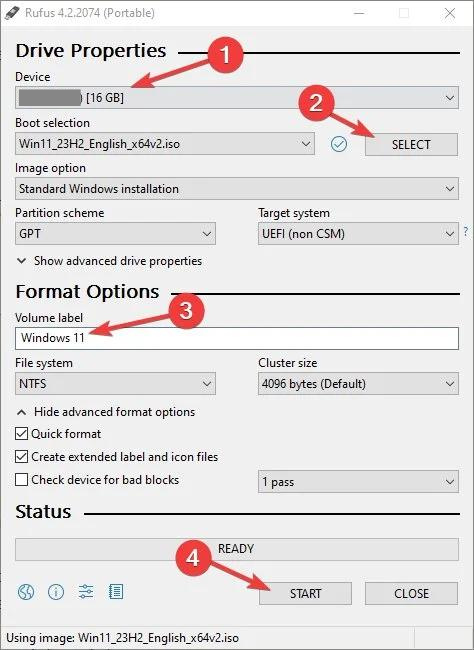
- Select USB drive: In Rufus, select your USB drive from the ‘Device’ dropdown.
- Choose ISO: Click ‘SELECT’ next to ‘Boot selection’ and find the Windows ISO file you downloaded.
- Start the Process: Press ‘START’ in Rufus and wait for the bootable USB drive to be created.
Step 4: Installing Windows
- Boot from USB: Restart your PC and enter the boot menu (usually by pressing F12 or ESC).
- Select USB Drive: Choose the USB drive as the boot device.
- Install Windows: Follow the on-screen instructions to install Windows. Choose ‘Custom: Install Windows only (advanced)’ when prompted.
Step 5: Preparing for AtlasOS
- Update Windows: Ensure that the newly installed Windows is fully updated via Windows Update.
- Download AtlasOS: Visit the official AtlasOS website and download the latest versions of Atlas Playbook and AME Wizard.
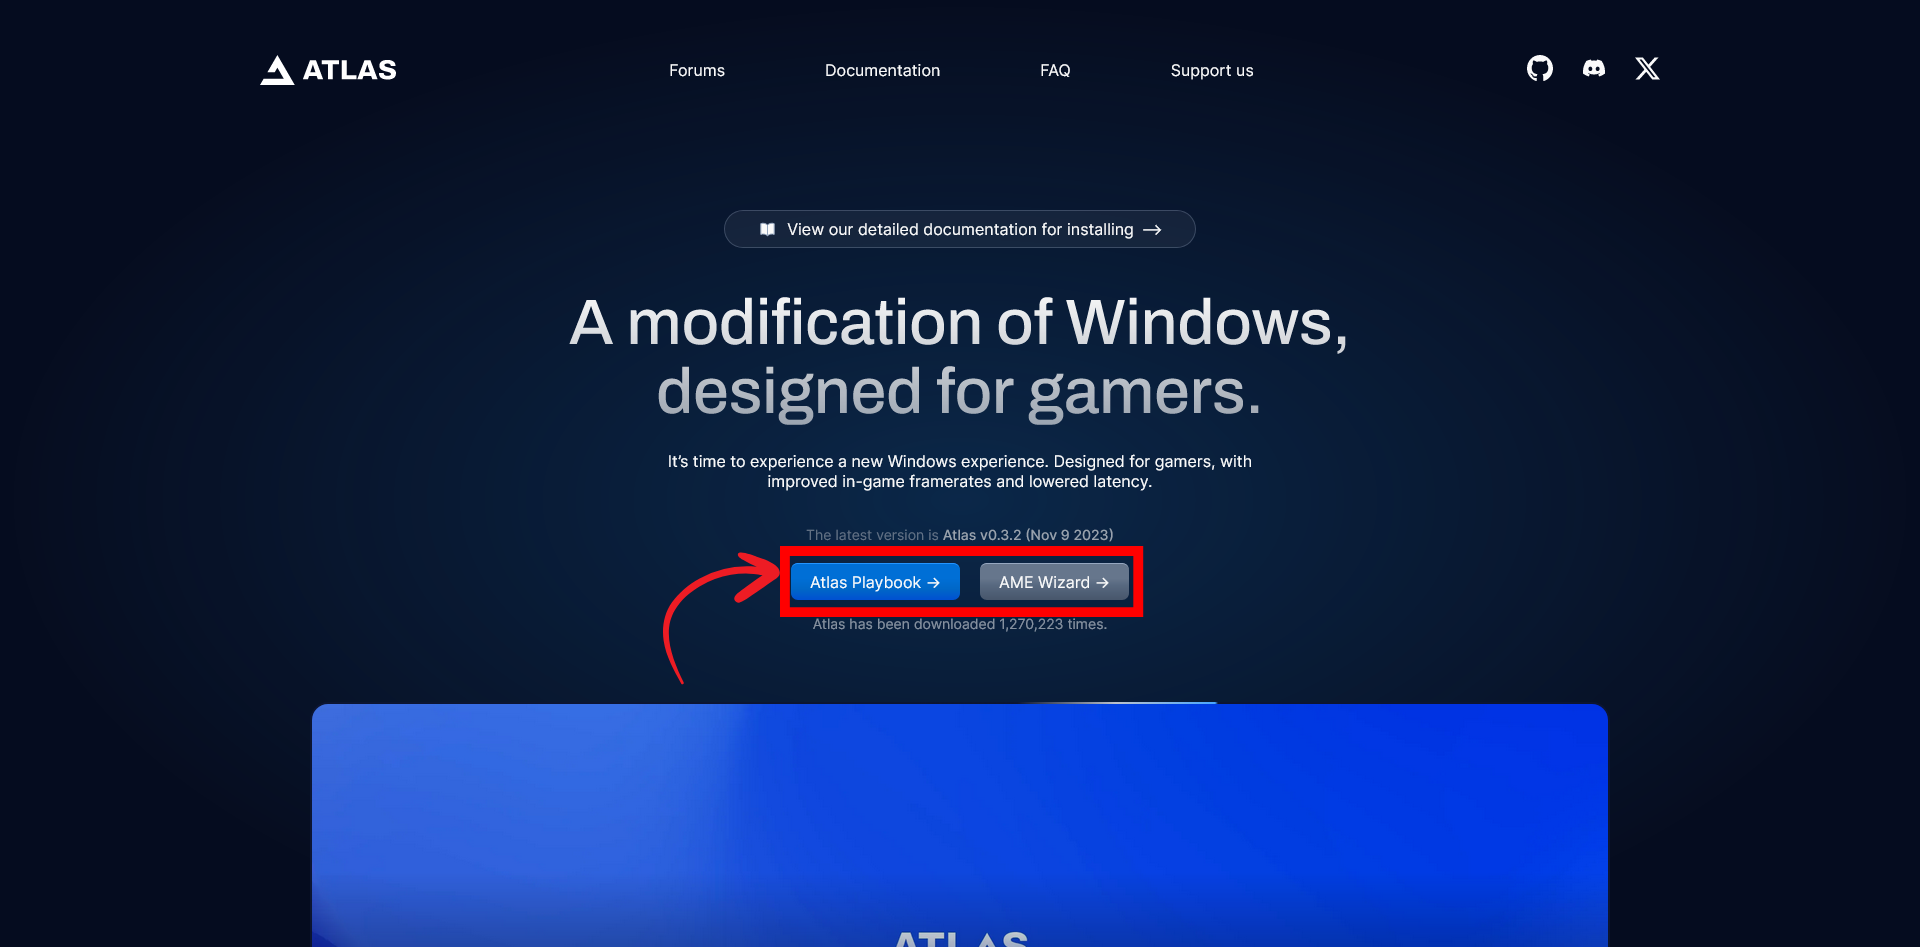
Download Both the ZIP files
Step 6: Installing AtlasOS
- Extract both files to your desktop.
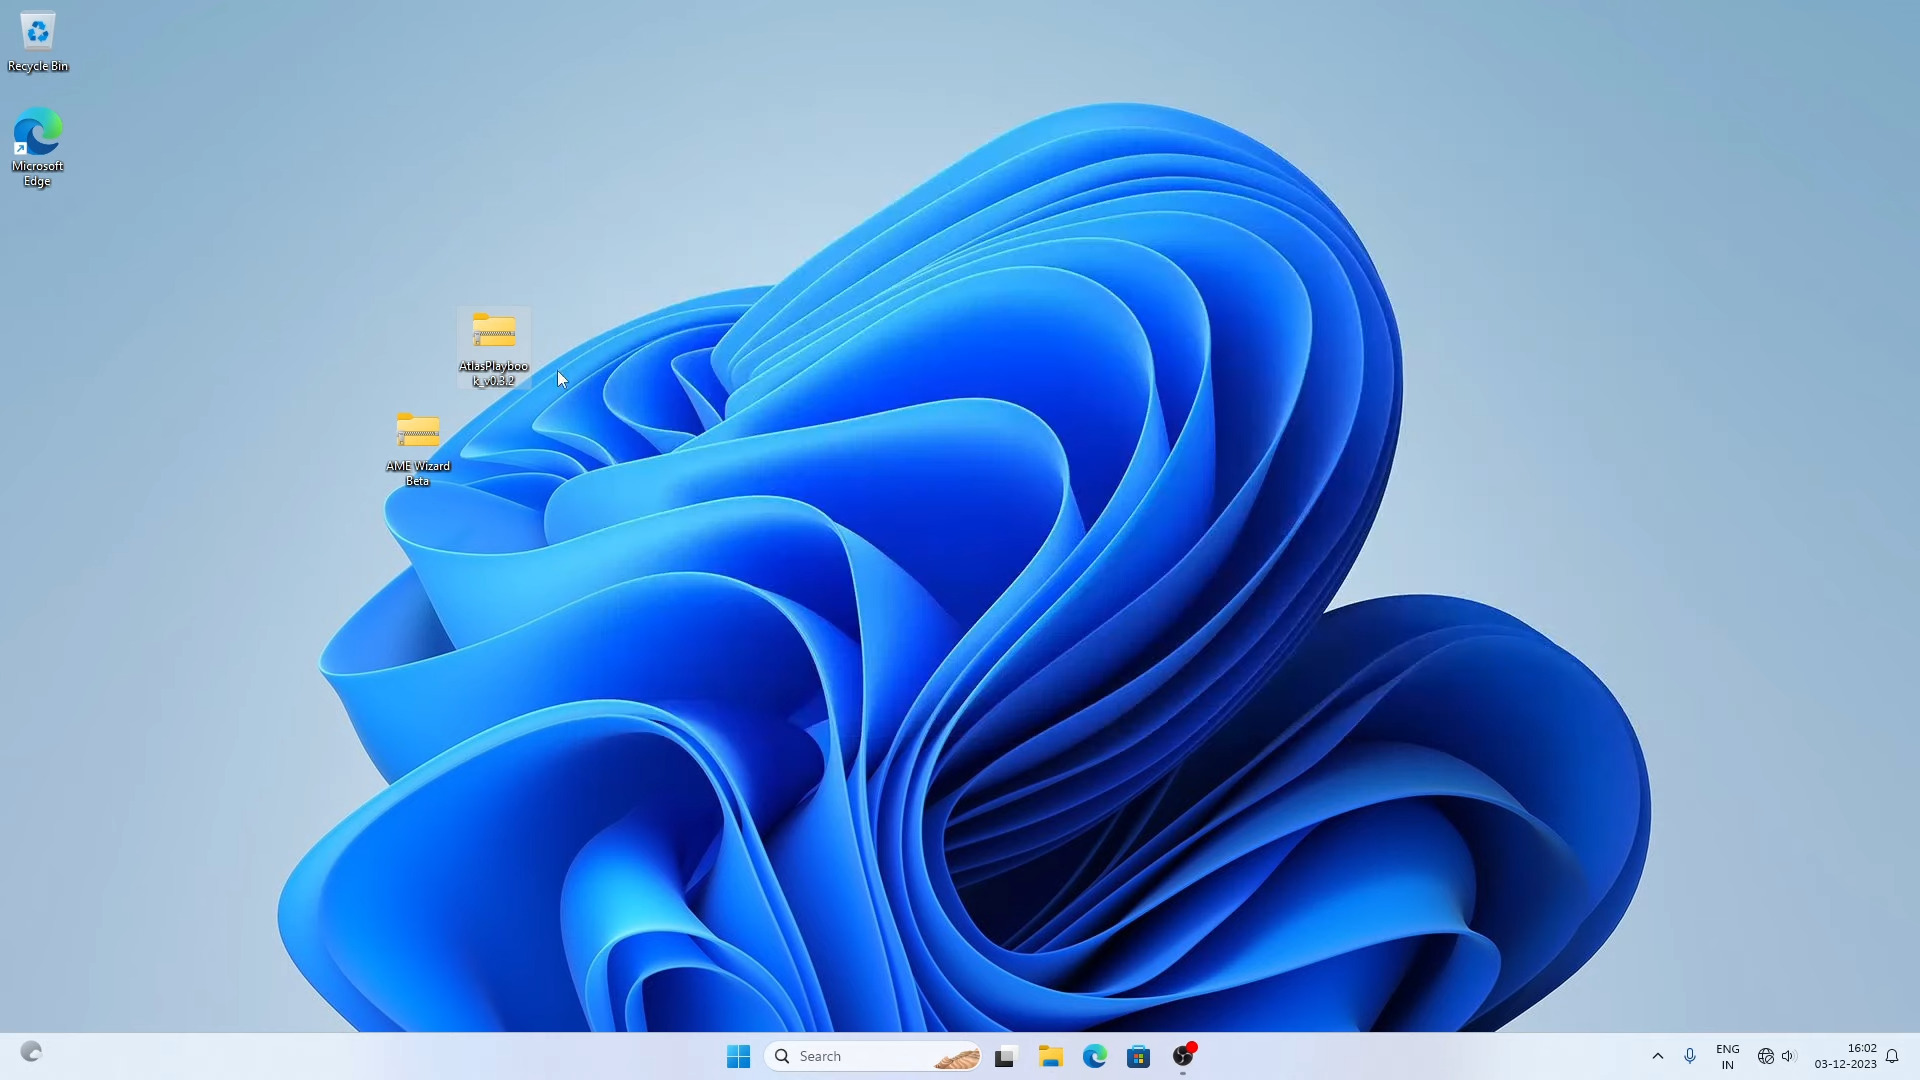
Place the ZIP files on your Desktop for easy access - Before proceeding with the installation process, run the ‘Disable Automatic Driver Installation’ file within the Atlas Playbook folder to prevent the installation of new drivers on your freshly installed copy of Windows 11.
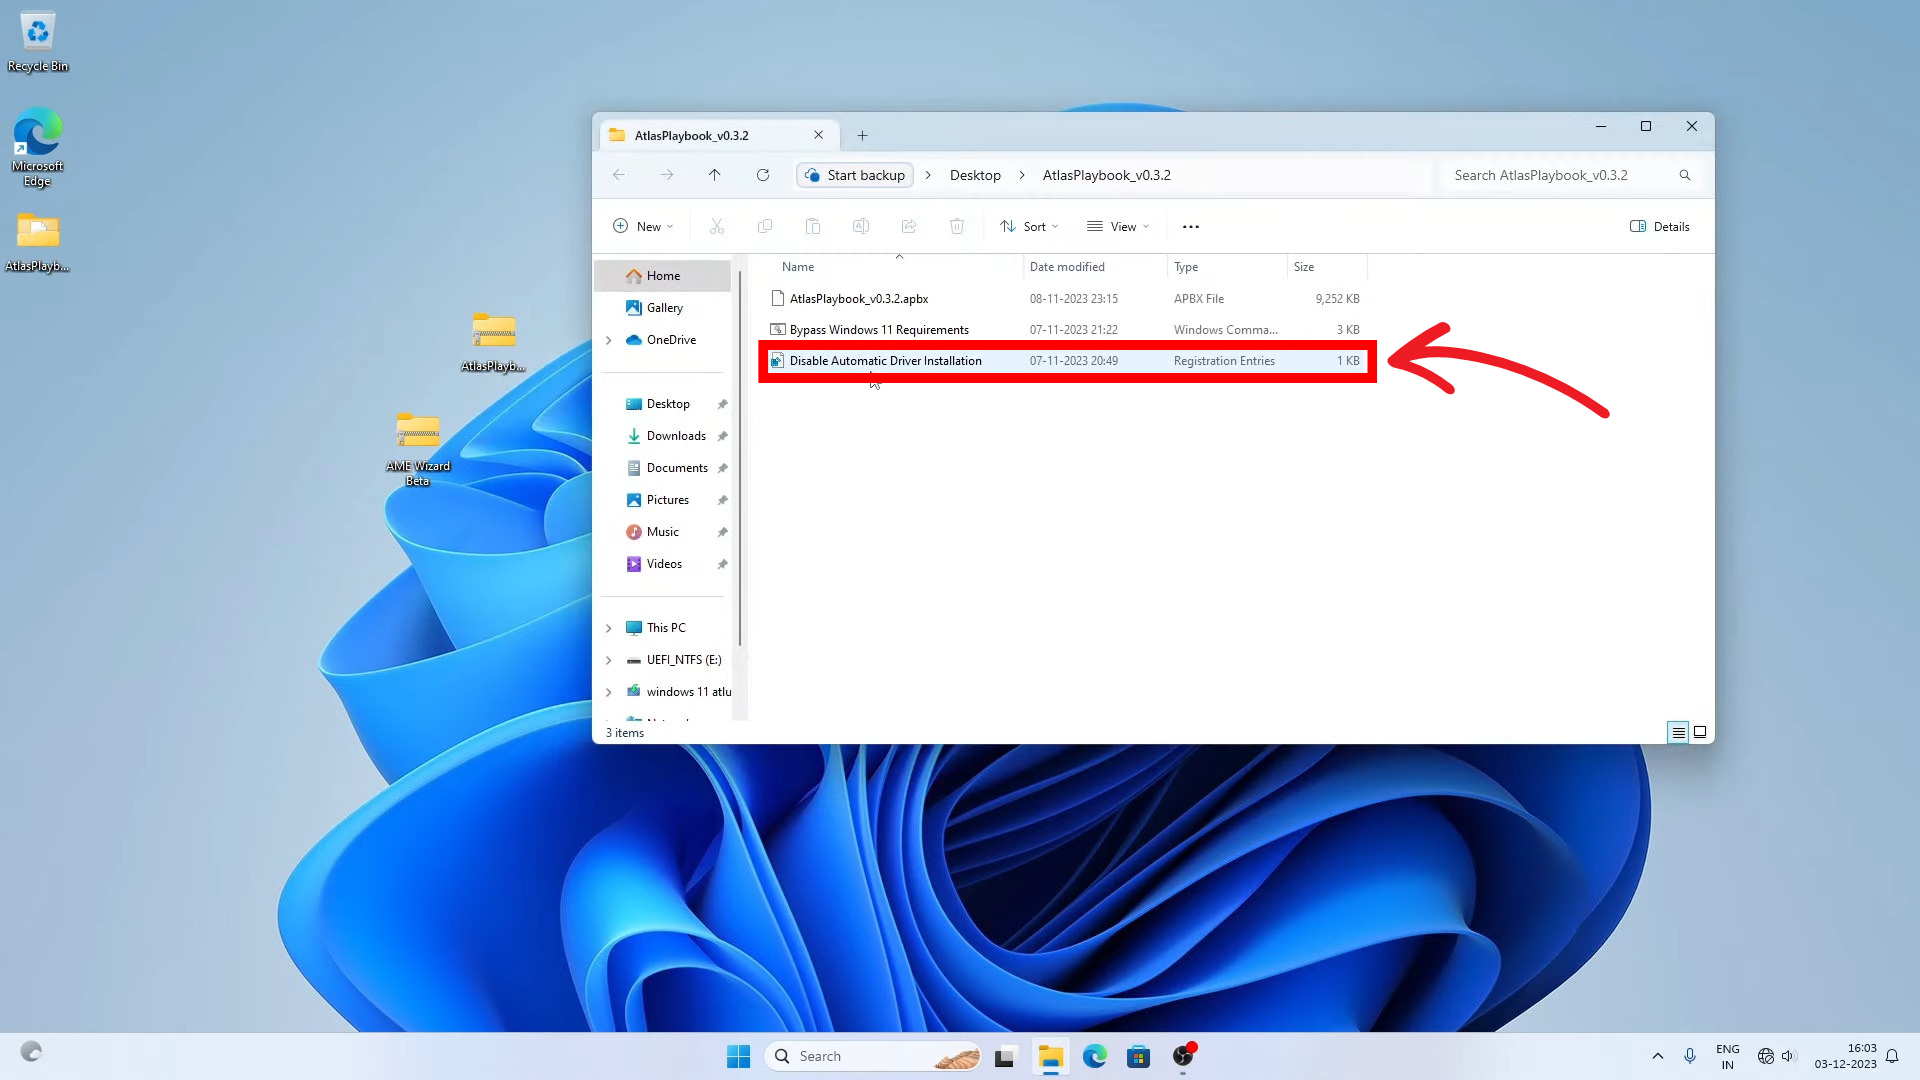
This will prevent the installation of unwanted Windows drivers which could hinder the process of installation of AtlasOS - Launch AME Wizard Beta.
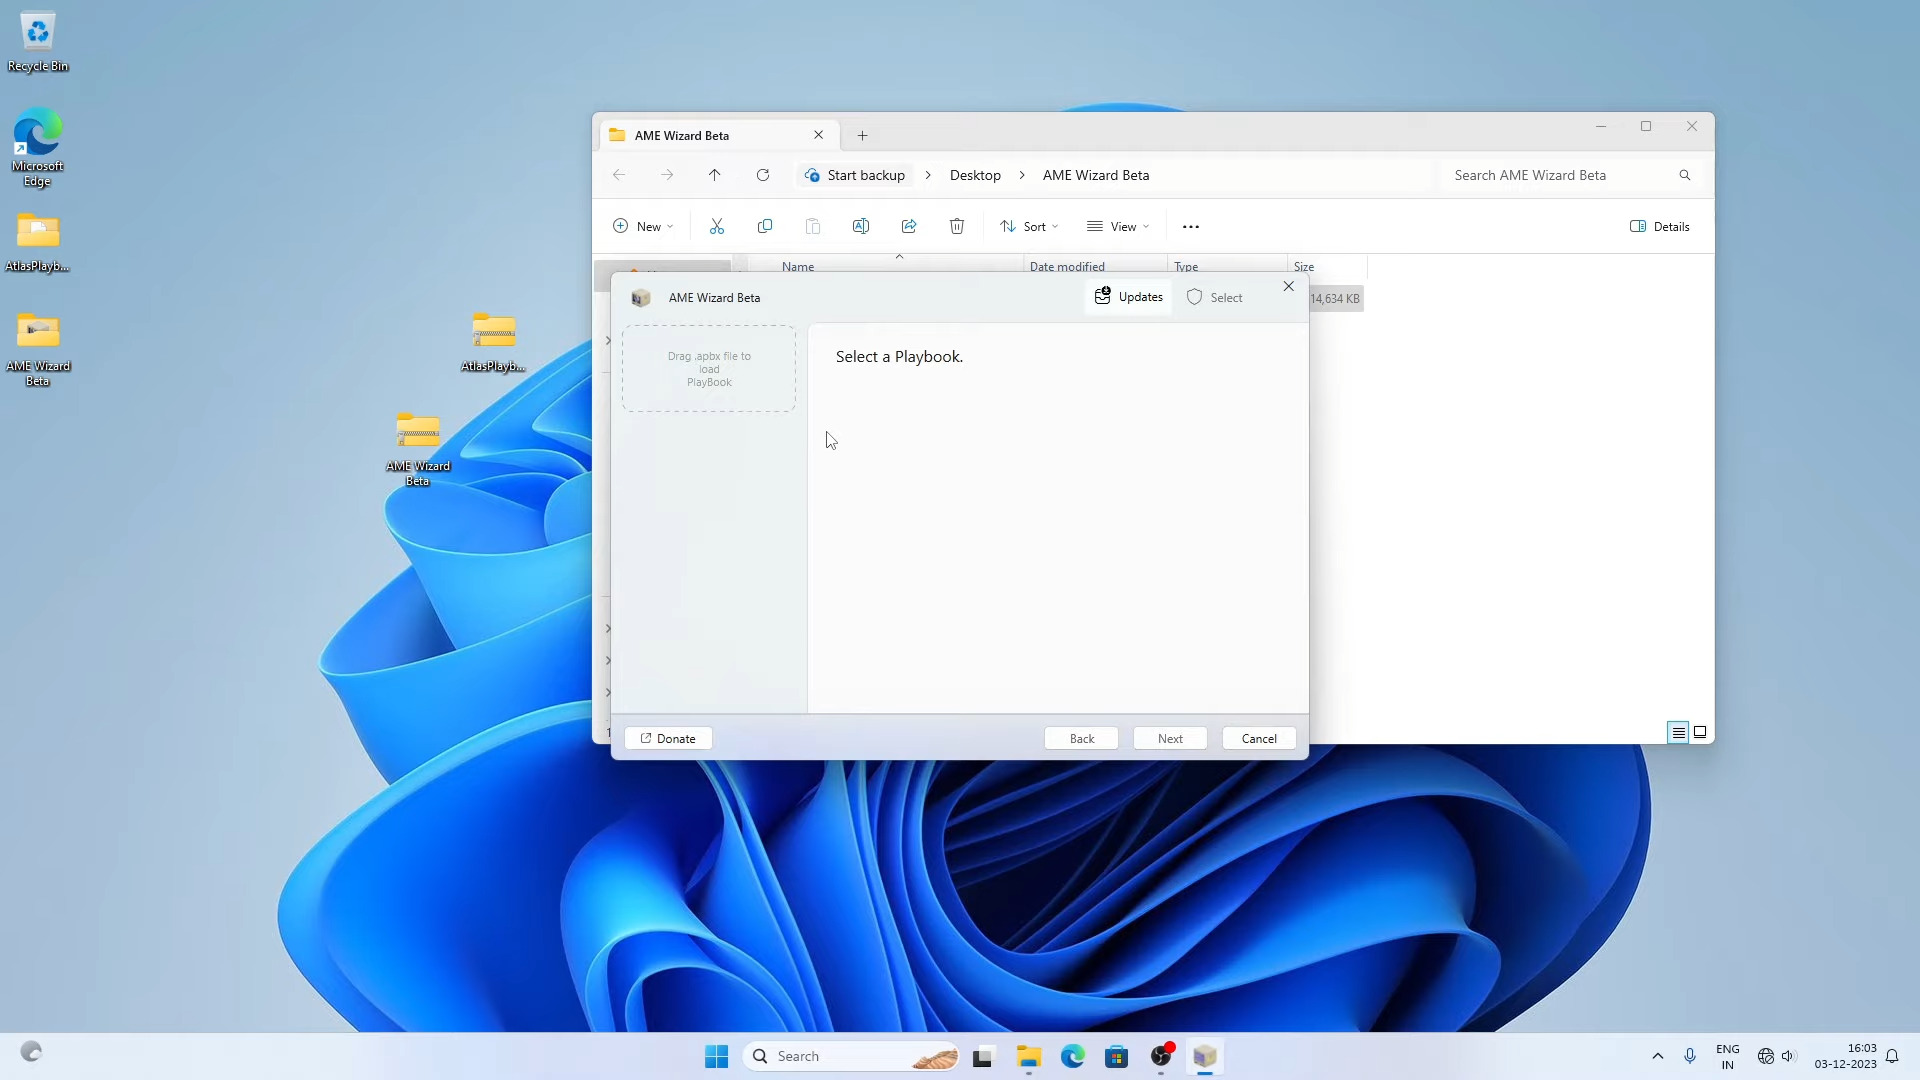
AME Wizard Beta - Drag the .apbx file onto the PlayBook or browse your computer to open the .apdx file with AME Wizard.
- Open “AtlasPlaybook” (the file you extracted earlier).
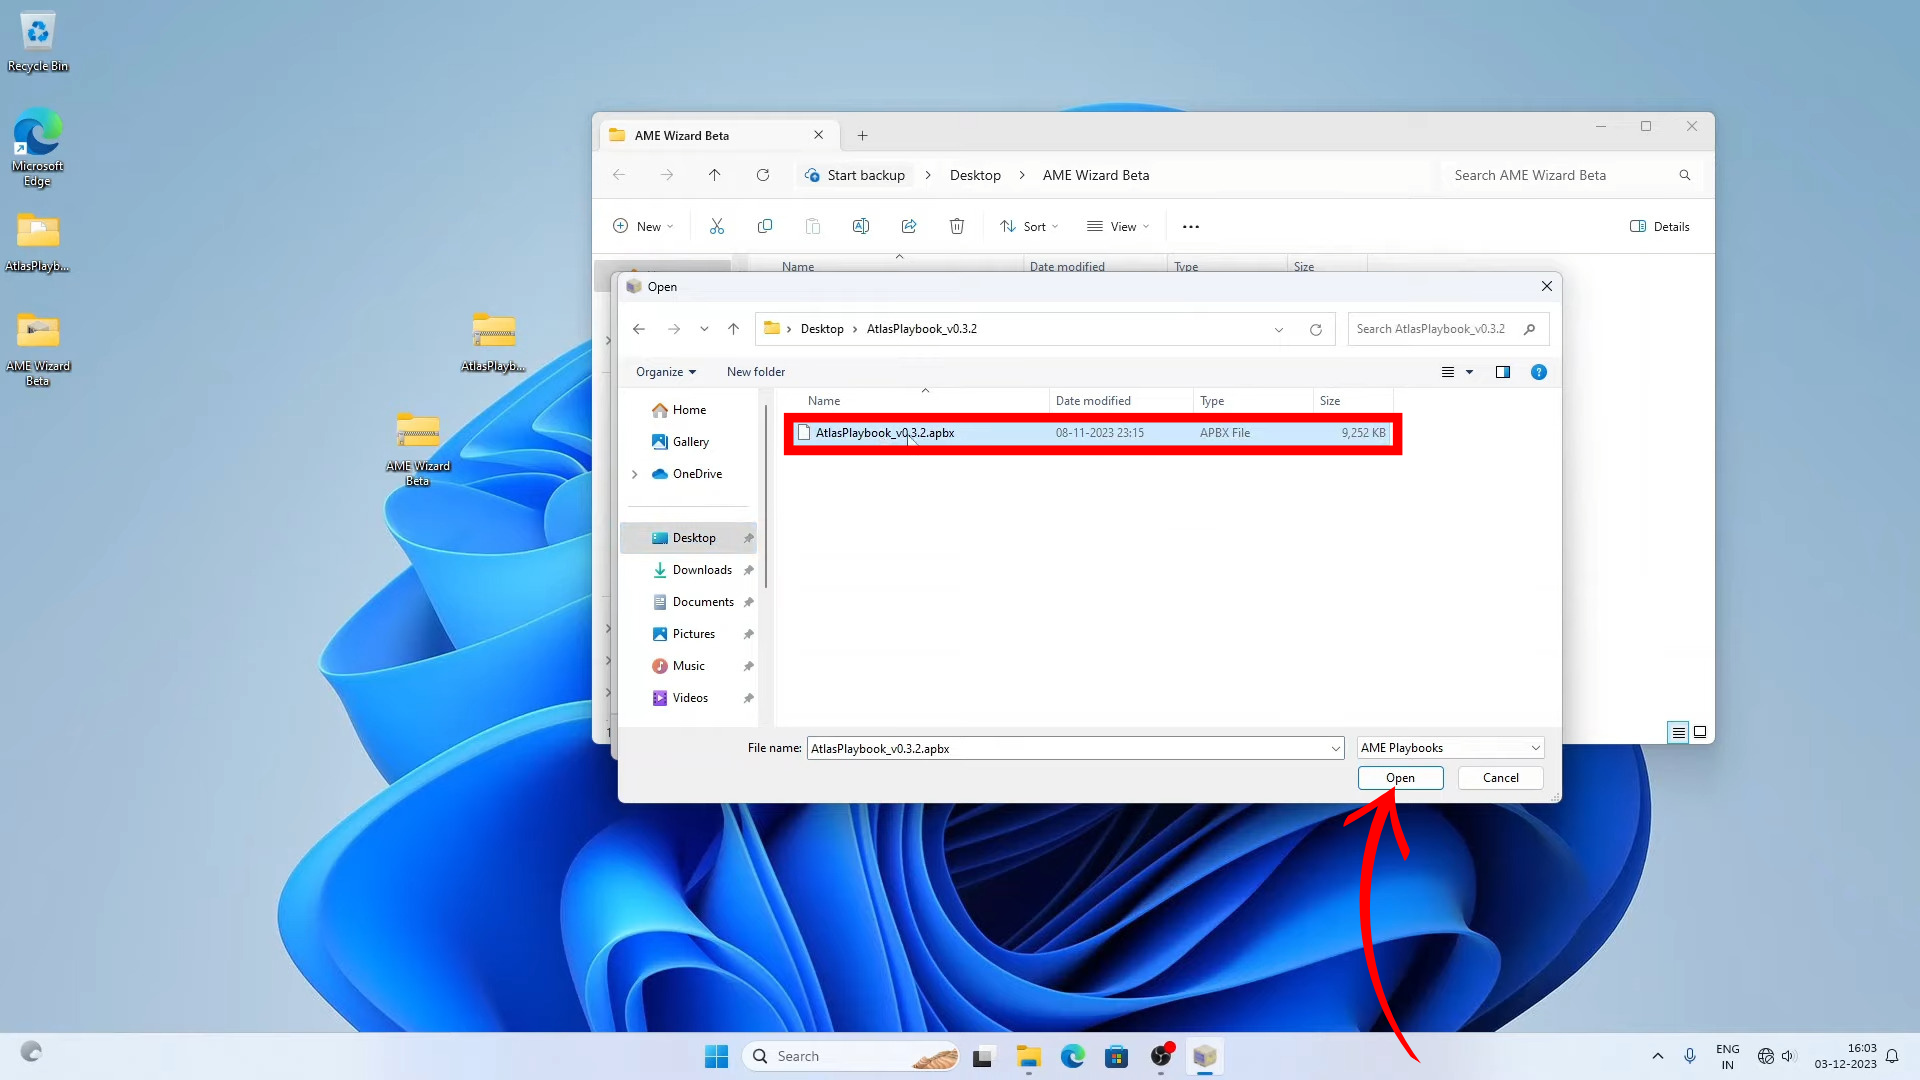
Open the Atlas Playbook .apdx file - Load the Atlas Playbook in the wizard.

Load the Atlas Playbook - Make sure the installation requirements are met before you start the installation process.

The AME Wizard will automatically check if your settings meet the installation requirements and will prompt you accordingly to correct them if they do not - Carefully configure options at each step, and make sure that all the recommended configuration options are selected.

Select all the recommended options - Click Next and follow the on-screen instructions to start the installation process.
- Your computer will restart once the installation is complete.
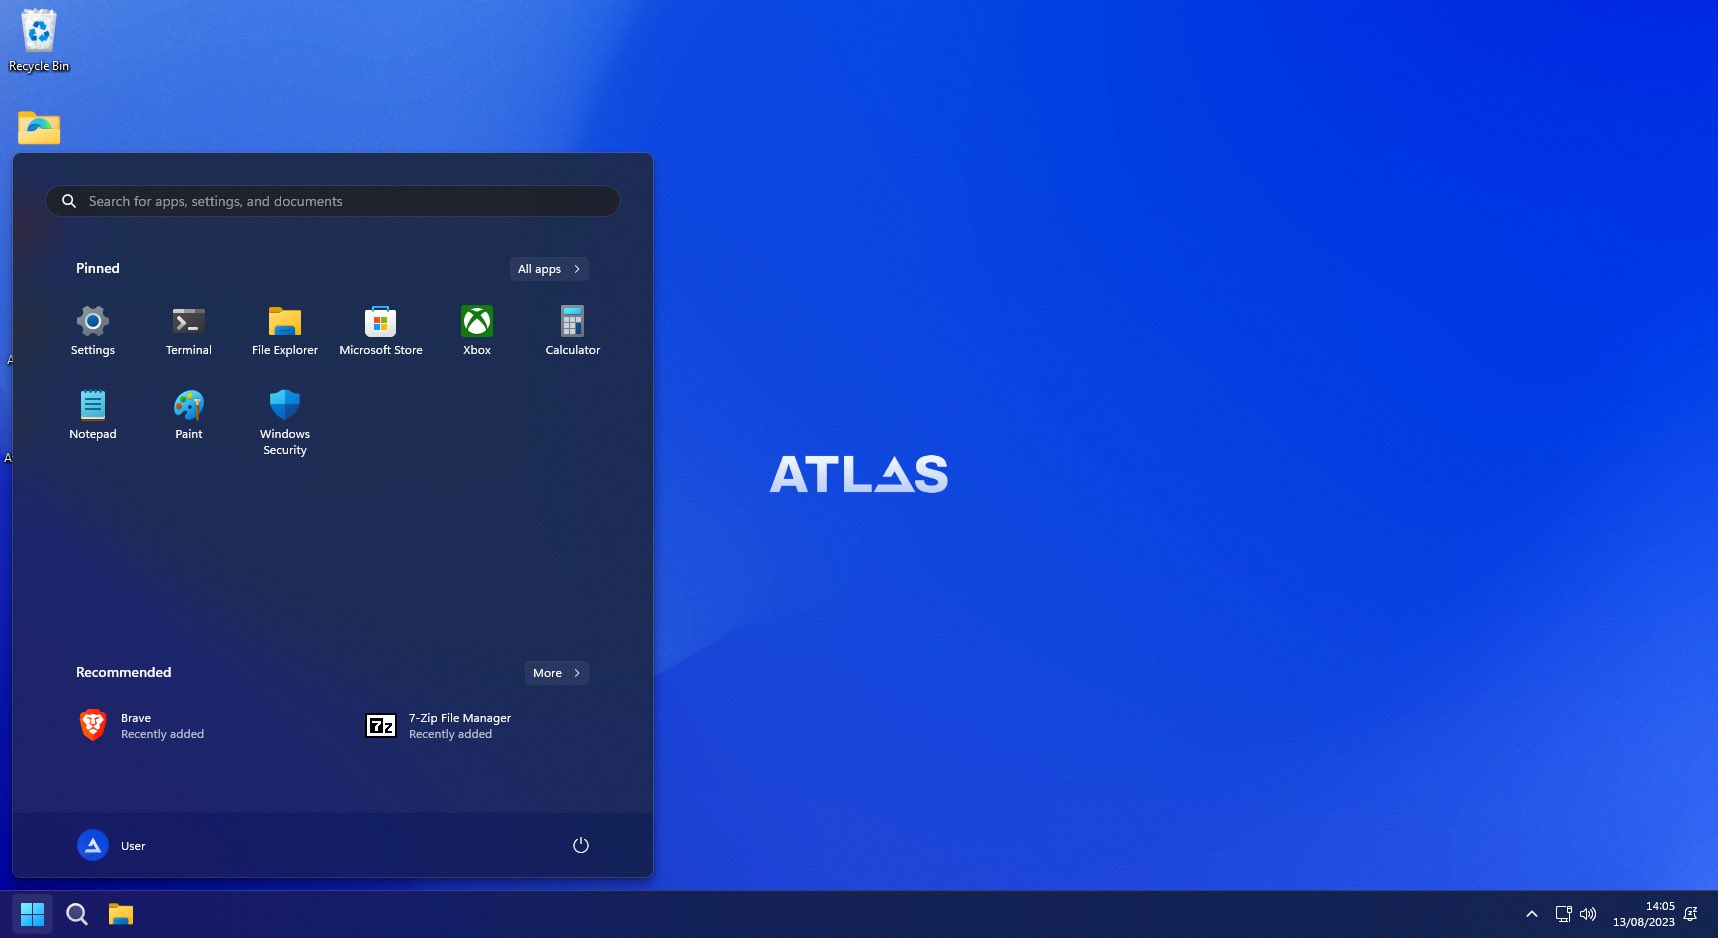
- Congratulations! You’ve successfully installed Atlas OS on Windows 11.
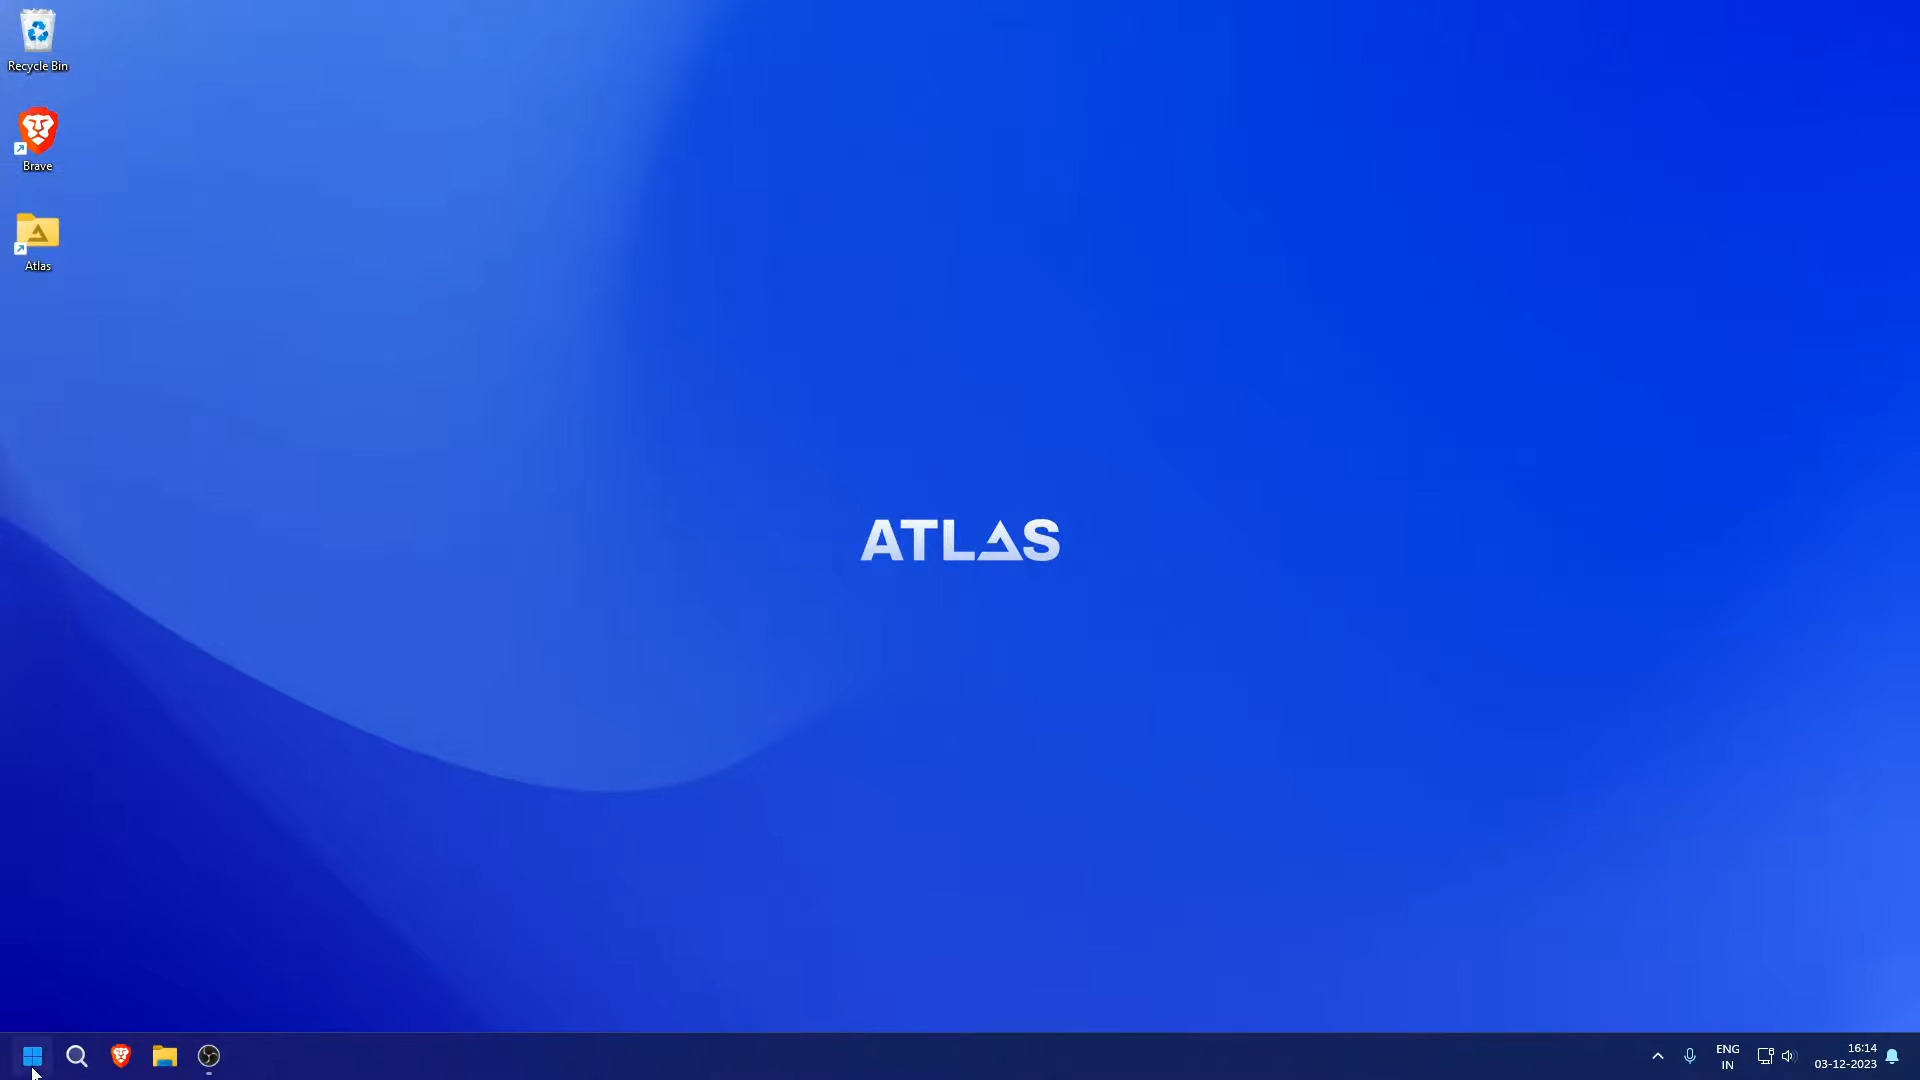
AtlasOS
Step 7: Post-Installation
- Driver Installation: If necessary, install any missing drivers using the previously downloaded network drivers or a tool like Snappy Driver Installer Origin.
- AtlasOS Configuration: Configure AtlasOS settings to your preference.
Step 8: Final Steps
- Check for Updates: Run the AtlasOS update tool to ensure all components are up to date.
- Restore Data: Move your backed-up data back onto your PC.
Remember to follow each step carefully and consult the AtlasOS official documentation or support forums if you encounter any issues.
READ MORE: How to Setup and Install Windows 11 Without the Internet? ➜
AtlasOS vs ReviOs vs Tiny11: What’s the Best?
When comparing AtlasOS, ReviOS, and Tiny11, several factors should be considered to make an informed decision. Here’s a detailed comparison based on the available information:
↪ AtlasOS:
- Purpose: Designed primarily for gamers, focusing on reducing system and network latency, and input lag.
- Features: It follows the proverb “less is more” by stripping away most telemetry and offering the choice to disable security features. It prioritizes performance and system privacy, while also allowing users to customize the interface and block advertisements.
- Installation: Requires a fresh Windows install, then running a file to delete or disable apps/features.
- System Requirements: Similar to Windows 11, but optimizes to reduce background CPU usage and RAM usage from boot.
↪ ReviOS:
- Purpose: Known for being a lightweight, user-friendly version of Windows, aimed at improving system performance.
- Features: It optimizes Windows settings, removes bloatware, and focuses on stability and performance. ReviOS strikes a balance between functionality and resource usage for an efficient system.
- Installation: Can be installed directly, with options to customize the installation process.
- System Requirements: Not explicitly mentioned, but generally lower than standard Windows 11 due to optimizations.
↪ Tiny11:
- Purpose: Aims to run on older PCs that don’t meet Windows 11’s strict system requirements.
- Features: Strips down Windows 11 to essential features, removing apps like Clipchamp, News, Weather, Xbox, and more. Tiny11 significantly reduces the installation size.
- Installation: Can be downloaded as an ISO or created using Tiny11Builder.
- System Requirements: Requires as little as 2GB of RAM and 8GB of storage space, no TPM needed, and supports both 32-bit and 64-bit processors.
| Factors | AtlasOS | ReviOS | Tiny11 |
| Performance | Focuses on reducing resource usage, tailored more towards gaming performance. | Balances performance and usability. | Best for older hardware or a minimalistic Windows 11 environment. |
| User Experience | Gaming-centric experience with performance tweaks. | Offers a balance between performance and usability. | Ideal for those with older hardware or minimalistic needs. |
| Support & Community | Open-source, transparent approach with community support. | Communities exist, but support level may vary. | Also has communities, but support may vary. |
| Security | Allows users to disable some security features (potential concern). | No explicit mention of security features, but modifications could impact security. | Not explicitly stated, but modifications may affect security. |
| Updates | No automatic updates; focuses on stability over new features. | Update policies not clearly stated; modified systems may have different mechanisms. | Update policies not clearly stated; modified systems may have different mechanisms compared to standard Windows. |
Ultimately, the choice between AtlasOS, ReviOS, and Tiny11 depends on your specific needs. If gaming performance is a priority, AtlasOS might be the best choice. For a balance between performance and usability, ReviOS could be suitable.
Tiny11 is ideal for older hardware or minimalistic setups. Always consider the trade-offs, especially regarding system security and updates, when choosing a custom OS. For more detailed information and user experiences, you may want to explore community forums and reviews.
READ MORE: What is Tiny11? (Installation Guide) | is it safe to Install? ➜
Conclusion
You’ve reached the end of this guide, and AtlasOS should be up and running on your device. We’ve outlined the necessary steps for a hassle-free installation. For any further queries or support, the AtlasOS community forums are a helpful place to turn to.
FAQs
AtlasOS requires a 64-bit processor, 4 GB of RAM, and at least 25 GB of free disk space.
Yes, you can set up a dual-boot configuration with AtlasOS and another operating system.
It’s recommended to disconnect from the internet during installation to prevent unauthorized changes that could affect the AtlasOS installation process.
Typically, the installation takes about 30 minutes, depending on your system’s speed and the installation options you select.
No, AtlasOS complies with the Windows EULA and does not modify Windows activation.
AtlasOS is free to download and use, but always ensure to download it from the official source to avoid unofficial versions.
Reviewed by Huzaifa Haroon


