How to Disable Security Questions for Local Account on Windows 10?
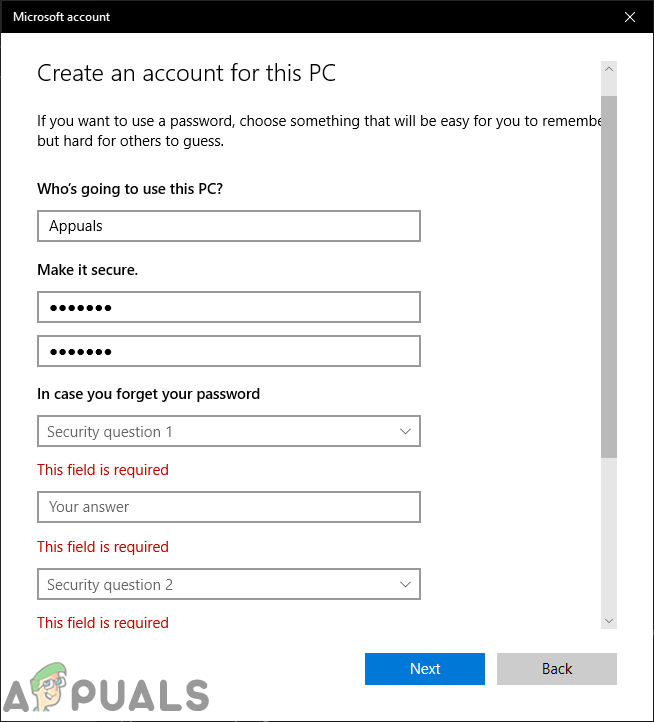
Whenever you create a new local account, you must provide the three security questions. The security questions are required in case you forget your password for the account. These options were added since the Windows version 1803. This feature is pretty useful in recovering the forgotten password and providing an extra layer of protection for local accounts.
However, it also makes your device vulnerable and someone can easily access the account by having the answers to your security questions. Some other users will not like having this feature for their account. In this article, we will show you methods through which you can successfully disable the security questions for local accounts.
Security Questions for Local Account
Most likely, everyone uses the real answers to those questions so that they will remember them. However, those questions aren’t pretty strong to keep the account safe. Someone can access the account by collecting the information related to those questions. When you are installing new Windows 10 or creating a new local account, if you add a password then you must provide the security questions. However, if you disable the security questions, then the user will be unable to set up or use security questions to reset their passwords.
The security questions can not be disabled through the Windows Settings or Control Panel. With the Windows 10 build 18237, a group policy was added for disabling the security questions. However, the policy requirement says that your system should be at least Windows Server 2016 or Windows 10 Version 1903. You can disable this through the Local Group Policy Editor or Registry Editor.
The Local Group Policy Editor is not available in the Windows Home Edition, so we are including the Registry Editor method too.
Disabling Local Account Security Questions through Local Group Policy Editor
Most settings that are not available in Windows Settings can be found in the Local Group Policy Editor. The Group Policy Editor allows users to configure different types of settings for their computer or network. An administrator can use it to manage the settings for their computer or users. Users can easily access this with admin rights.
Skip this step if you are using the Windows Home Editions. If you are using any other version of Windows 10, then follow the below steps:
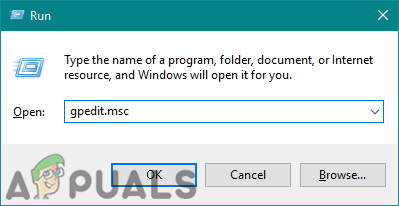
- Press the Windows + R keys to open a Run dialog, type “gpedit.msc” in it and press Enter to open the Local Group Policy Editor.
Opening Local Group Policy Editor - Navigate to the following path in the Local Group Policy Editor:
Computer Configuration\Administrative Templates\Windows Components\Credential User Interface
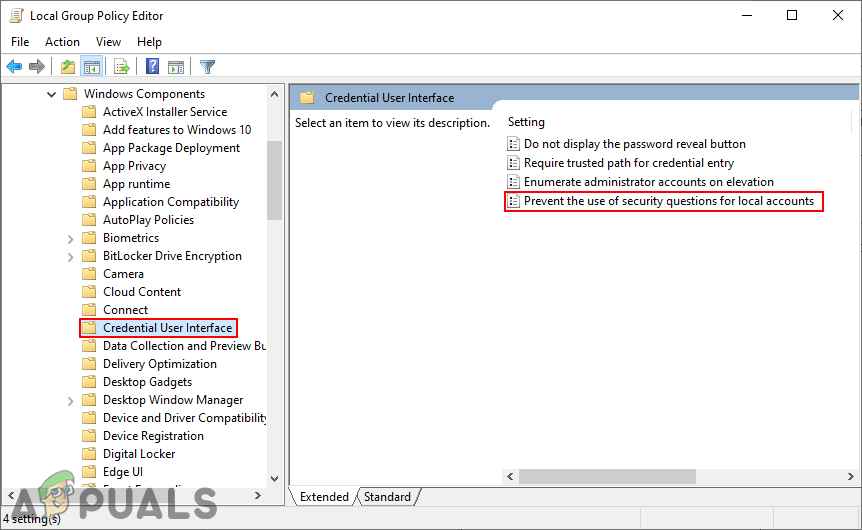
Navigating to policy - Double-click on the policy named “Prevent the use of security questions for local accounts“. This will open a new window, now change the toggle to Enabled option. Finally, click on Apply/Ok button to save the setting.
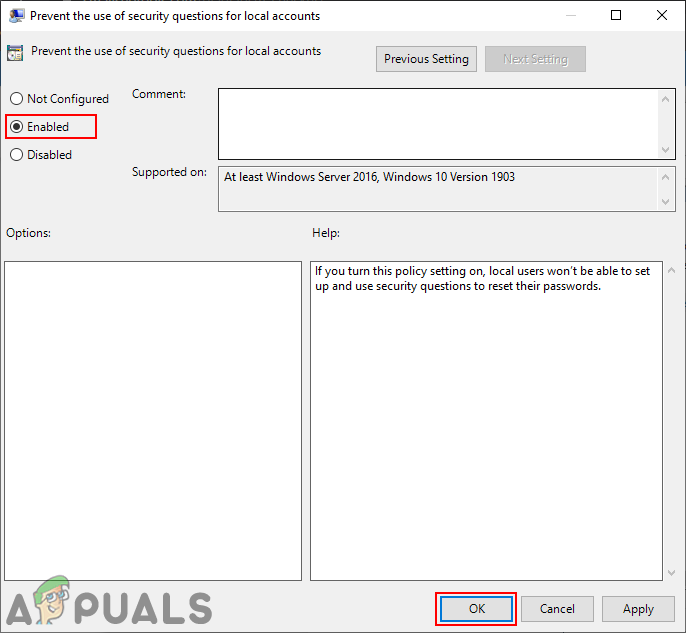
Enabling the policy - This will disable the security questions for local accounts.
Disabling Local Account Security Questions through Registry Editor
If you used the Local Group Policy Editor, then it will automatically update your registry. However, if you don’t have the Local Group Policy Editor on your system, then you can use the Registry Editor to configure that specific setting. Some of the keys or values will be missing in the Registry Editor and the users are required to create them manually. By following the below steps, you can easily disable security questions through the registry editor:
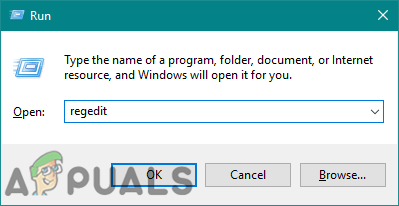
- Hold the Windows key and press R to open the Run dialog, then type “regedit” and press Enter to open Registry Editor. Choose Yes for the UAC (User Account Control) prompt.
Opening the Registry Editor - Navigate to the following key by using the left pane of the Registry Editor:
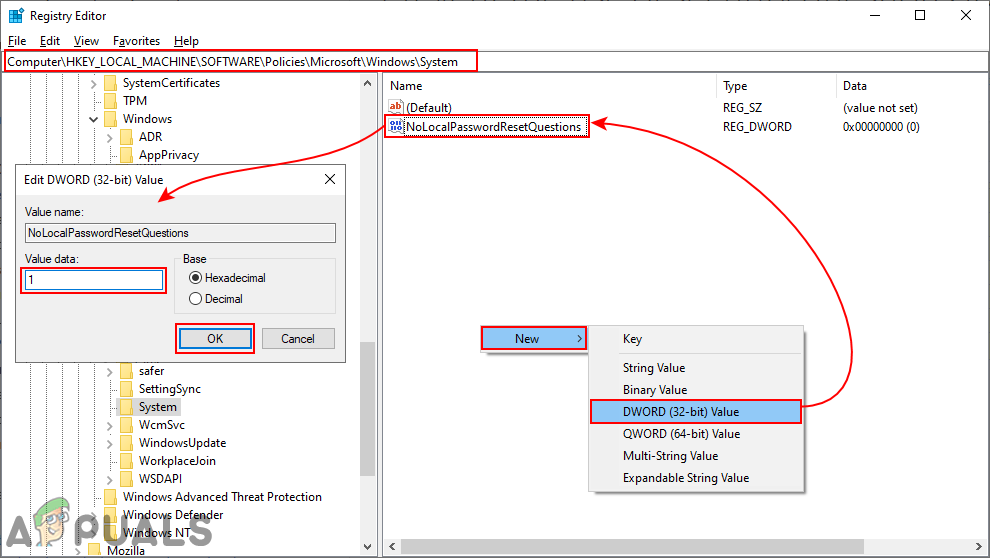
HKEY_LOCAL_MACHINE\Software\Policies\Microsoft\Windows\System
- If the key is missing, you can simply create it by right-clicking on the available key and choosing New > Key option.

Creating missing key - In the System key, right-click on the right pane and choose New > DWORD (32-bit) Value. Name the value as “NoLocalPasswordResetQuestions“. Double-click on the value and set the value data as 1.
Creating value and enabling it - Save the settings and make sure to restart the Windows to apply the registry settings.


