Fix: Games Stuttering & Freezing in Windows 11 22H2?
Windows 11 2022 Update has severe compatibility issues with NVIDIA Graphics Card, causing significant stutters, freezes, and frame rate drops in games. These performance issues seem to happen due to low CPU power utilization, which directly results from these compatibility issues.
So if you’re experiencing severe performance issues after installing the Windows 11 22H2 update, you are not alone. To resolve these performance issues, we need to determine the different factors causing these issues. So below, we’ve listed all the possible causes of the Windows 11 22h2 performance errors.
- Corrupted system files: While installing the new update for Windows 11, some of your system files may have gotten corrupted in the process, which could be why you’re experiencing these performance errors.
- NVIDIA Frameview SDK Service: If you have the NVIDIA Frameview SDK Service active on your system, it will cause issues with the new 22h2 update of Windows 11, leading to performance errors such as stutters and constant freezes.
- NVIDIA GeForce Experience: The NVIDIA GeForce Experience app (especially its overlay feature) seems incompatible with the 22h2 update of Windows 11. So if the app is active on your system, it can significantly cause the stutters you’re experiencing in games.
- Incompatible GPU Drivers: The stuttering issue could result from incompatible GPU drivers. Driver Updates can resolve this issue.
- Holographicshell Service: If the HolographicShell service is installed and active on your PC, it could be the leading cause of the stuttering issue.
- Windows Network Data Usage Monitoring Driver: The Windows Network Data Usage Monitoring Driver, also known as the NDU Service, is reportedly causing issues in the Windows 11 22h2 update. So if this service is active on your PC, it could be one of the main causes of the performance issues.
1. Perform an SFC Scan
While Windows was downloading and installing the new 22h2 update on your system, some system files may have been corrupted during the process. This could’ve resulted from many factors, such as a slow/unstable internet connection, power fluctuations, disk drive issues, etc.
So if you’re experiencing game performance issues with Windows 11 22h2, such as stutters and freezes, the first step is to repair your system files. To do this, you’ll need to perform an SFC scan.
The System File Checker (SFC) scan is a native feature of Windows which scans the user’s system and looks for any missing/corrupted system files. If it finds such files, it quickly replaces/repairs them and fixes whatever issue the user faces.
Performing an SFC scan is a quick and easy task, and the scan only takes around ~10 minutes to complete. To perform an SFC scan on your system, follow the steps we’ve listed below:
- Press Windows Key and type cmd in the search bar.
- Click on “Run as administrator.”
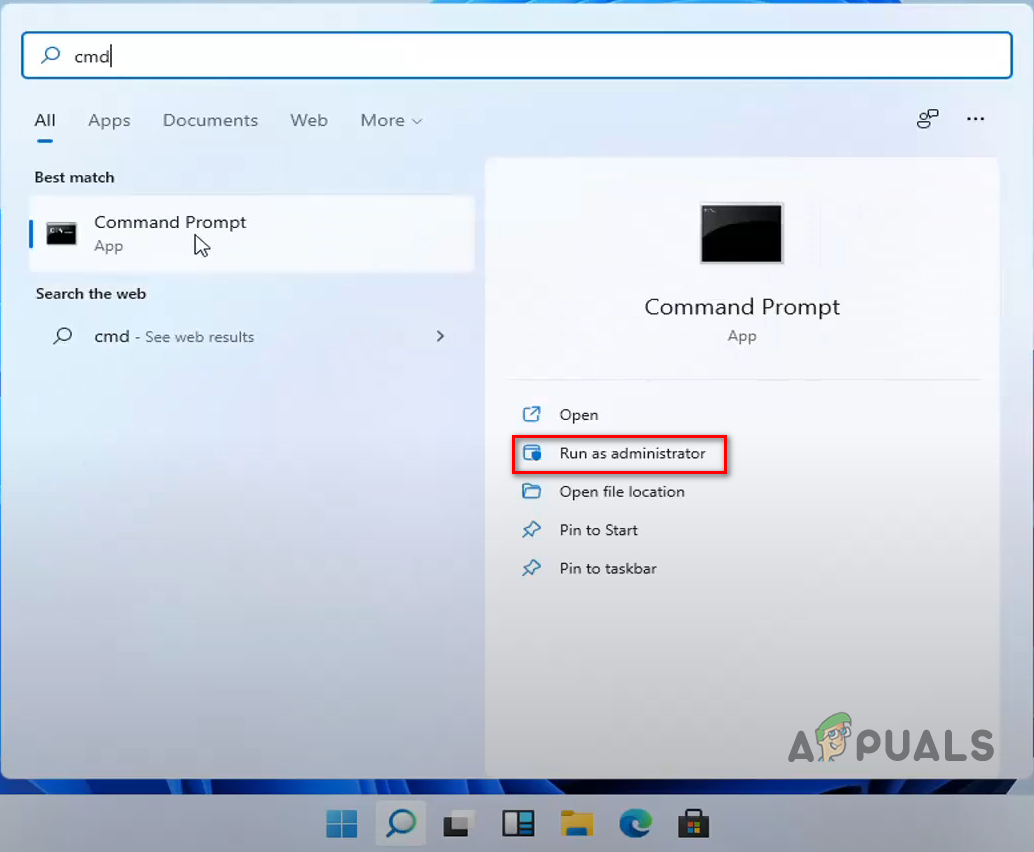
Opening Command Prompt as administrator - In the Command Prompt window, type the command below and press enter.
sfc /scannow
- Wait for the SFC scan to finish.
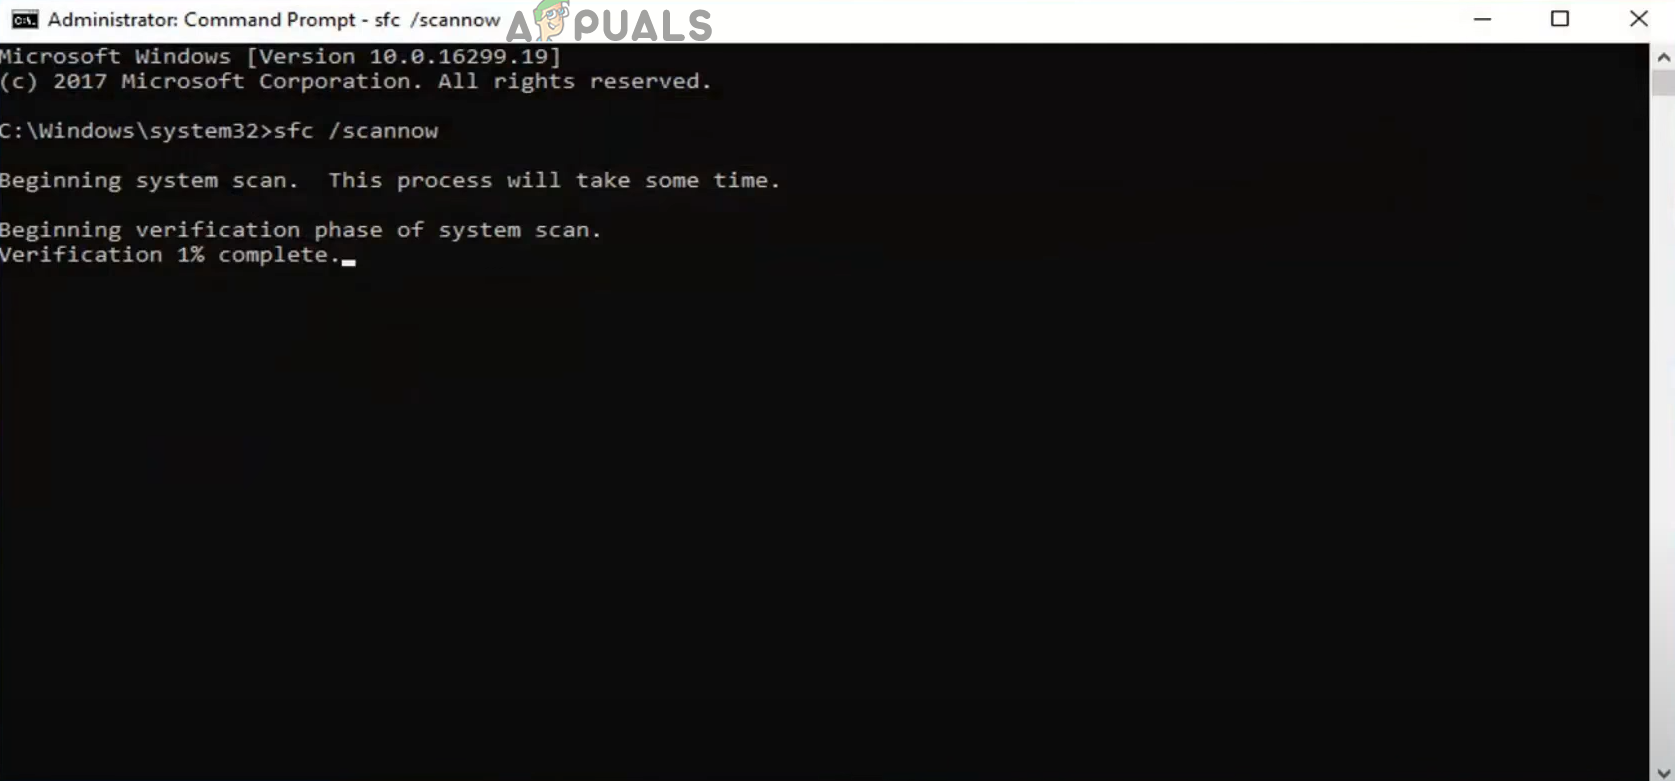
Running an SFC Scan
After the SFC scan finishes, it will notify you whether it found and repaired any corrupted system files or not. If it found and successfully repaired corrupt system files, a message will show up, saying, “Windows Resource Protection found corrupt files and successfully repaired them.” If you see this message, restart your PC and check if the stuttering issue has been resolved.
If no corrupt system files are found, a message in Command Prompt will appear, saying, “Windows Protection did not find any integrity violations.” In this case, move on to the next solution listed below.
2. Run a DISM Scan
If the SFC scan finds no corrupted files in your system or does find corrupted system files but says, “Windows Resource Protection found corrupt files but was unable to fix some of them,” there’s an issue with your Windows system image.
The Windows System image is a copy of your entire drive, which the SFC scan uses to determine if any files in your actual drive have corrupted or not. So if there’s corruption in the system image itself, then the SFC scan will be unable to repair the corrupted files in your PC.
You’ll need to perform a DISM (Deployment Image Servicing and Management) scan to fix this issue. The DISM scan will examine your system image and look for any corrupted files. If it finds any, it will completely repair them. And once the system image has been repaired, the SFC scan will be able to repair the corrupted system files.
The first step to a DISM scan is to run a simple CheckHealth scan of the system image file. Follow the steps listed below to do so:
Note: This requires an internet connection.
- Press Windows Key and type cmd in the search bar.
- Click on “Run as administrator.”
Opening Command Prompt as administrator - In the Command Prompt window, type the command below and press the enter key.
Dism /Online /Cleanup-Image /CheckHealth
- Wait for the scan to finish.

Running the CheckHealth command.
This scan will take a few minutes to finish, allowing you to quickly determine if there’s any corruption in the system image. If the scan finds corrupted system image files, you must perform a DISM scan to repair them.
But if the scan shows a message saying, “No component store corruption detected.”, it means that the scan found no issues with the system images. This message implies that the system image is likely not corrupted. This will save you time as you won’t need to perform a DISM scan.
However, if you receive any error such as “Component Store has been corrupted”. It means that your System Image is corrupted; if that’s the case, you can follow the repair command below.
But even if the CheckHealth command finds no issues with the system image, it’s a good idea also to run the ScanHealth command, which performs a more thorough examination of the system image. If the ScanHealth command finds no issues with the system file, the system image is not corrupted, and there’s no need to run the DISM scan.
To perform the ScanHealth command, follow the steps listed below:
- Press Windows Key and type cmd in the search bar.
- Click on “Run as administrator.”
Opening Command Prompt as administrator - In the Command Prompt window, type the command below and press the enter key.
Dism /Online /Cleanup-Image /ScanHealth
- Wait for the scan to finish.
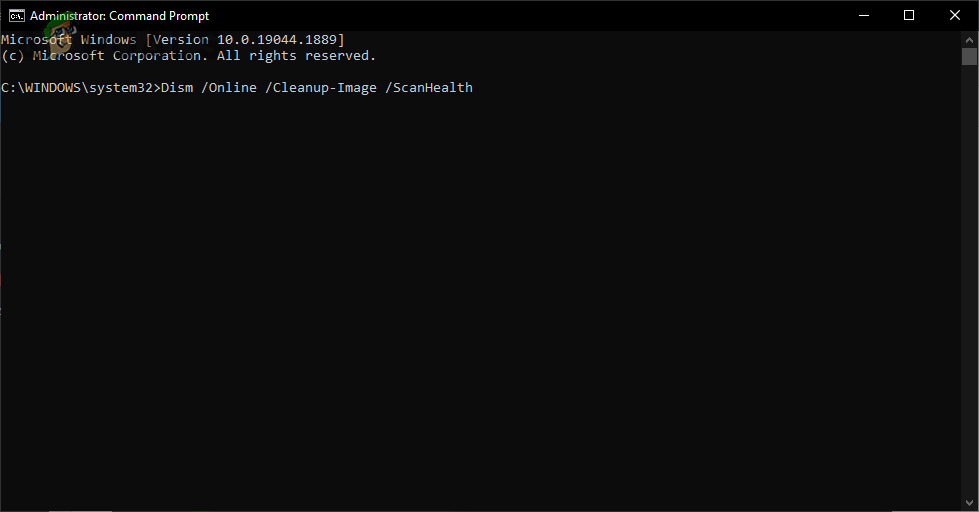
Running the ScanHealth command
Since the ScanHealth command does a significantly more thorough examination than the CheckHealth command, it will take considerably longer to finish.
The time it takes for this scan to finish entirely depends on your system’s hardware. It can take up to 4 hours to finish if you have a weak PC. But if you have a PC with powerful hardware, it can be completed within 20 minutes.
After the ScanHealth check finishes, it will inform you whether it found any corruption or not. If it didn’t, it would show the exact message you saw before: “No component store corruption detected.” If you see this message, it’s confirmed that you don’t need to perform the DISM scan. If this is the case, you can skip the remaining part of this solution listed below and move on to the next solution.
But if the ScanHealth check found corruption in the system image, the final step is to run the DISM RestoreHealth command to fix this issue.
To perform the RestoreHealth command, follow the steps we’ve listed below:
- Press Windows Key and type cmd in the search bar.
- Click on “Run as administrator.”
Opening Command Prompt as administrator - In the Command Prompt window, type the command below and press the enter key.
Dism /Online /Cleanup-Image /RestoreHealth
- Wait for the scan to finish.

Running the RestoreHealth command.
The DISM RestoreHealth scan will take a while to complete, but it won’t take as long as the ScanHealth command you ran.
After the DISM scan finishes, the corrupt system image files will be repaired. This will now allow you the SFC scan to repair the system files that it could not have before.
So all you need to do now is run the SFC scan once more by running Command Prompt as administrator and typing this command:
sfc /scannow
SFC scan will now fix your corrupted system files. After it finishes repairing the files, remember to restart your PC. This should finally resolve the stuttering issues that you’ve been facing.
3. Disable NVIDIA Frameview SDK Service
NVIDIA Frameview is an app that allows users to track their hardware performance while playing games. It shows different statistics, such as FPS, CPU/GPU utilization, power usage, etc. If you downloaded the NVIDIA GeForce Experience program, this service was likely automatically downloaded onto your system.
There’s no problem with the NVIDIA Frameview app itself, but many users on online forums have reported that there seems to be a major conflict between this app and the 22h2 update of Windows 11. For most users, the NVIDIA Frameview app is the root cause of this stuttering/frame drop problem.
So, if you’re experiencing game performance issues with the new Windows 11 update, ensure that the NVIDIA Frameview SDK Service is disabled on your system.
To disable this service, follow the steps listed below:
- Press Windows Key + R simultaneously to open the Run dialog box.
- In the small window that appears on the bottom-left corner of your screen, type appwiz.cpl, and press enter.
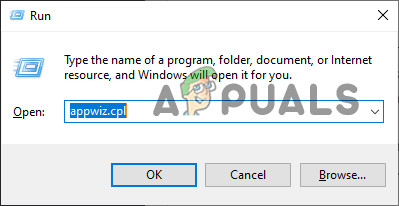
Opening the Programs and Features menu through the Run dialog box - In the Programs and Features window, scroll through the list of apps until you find NVIDIA Frameview SDK Service.
- Right-click on NVIDIA Frameview SDK Service and select Uninstall.


After disabling the NVIDIA Frameview SDK Service, restart your PC and launch a game. The stuttering problem should now be fixed. But if you’re still experiencing stutters even after disabling the NVIDIA Frameview DSK Service, try the next solution we’ve listed below.
4. Disable Overlays
Steam, Discord, NVIDIA GeForce Experience, MSI Afterburner, and many other programs have an overlay feature. This overlay allows users to use program features while using different applications. This increases productivity as it eliminates the need to open the program itself.
But though these overlays can be very useful, it’s generally unwise to have them active if you want to get the maximum game performance. If you have overlays active, they will consume CPU, GPU, and RAM power even if you don’t have them open.
Do note that if you have only 1-2 overlays active simultaneously, chances are that they will not significantly affect your system’s performance, as these overlays usually don’t consume that many resources individually. However, having 3 or more overlays active at once can severely impact your system’s performance.
Another downside of having overlays active is compatibility issues. These overlays tend to clash with different applications and even with each other. If such a conflict happens, it can lead to stutters, freezes, and even crashes.
Therefore, the next solution to the Windows 11 stuttering problem is to disable all overlays that you have installed on your system.
The first overlay you should disable is the NVIDIA GeForce Experience Overlay. Since the 22h2 update of Windows 11 conflicts the most with NVIDIA hardware and software, the NVIDIA GeForce Experience overlay could be the main cause of the issue.
To disable the NVIDIA GeForce Experience overlay, follow the steps listed below:
- Press Windows Key, type GeForce Experience, and press enter.
- In the GeForce Experience window, click on the gear icon near the top-right corner.
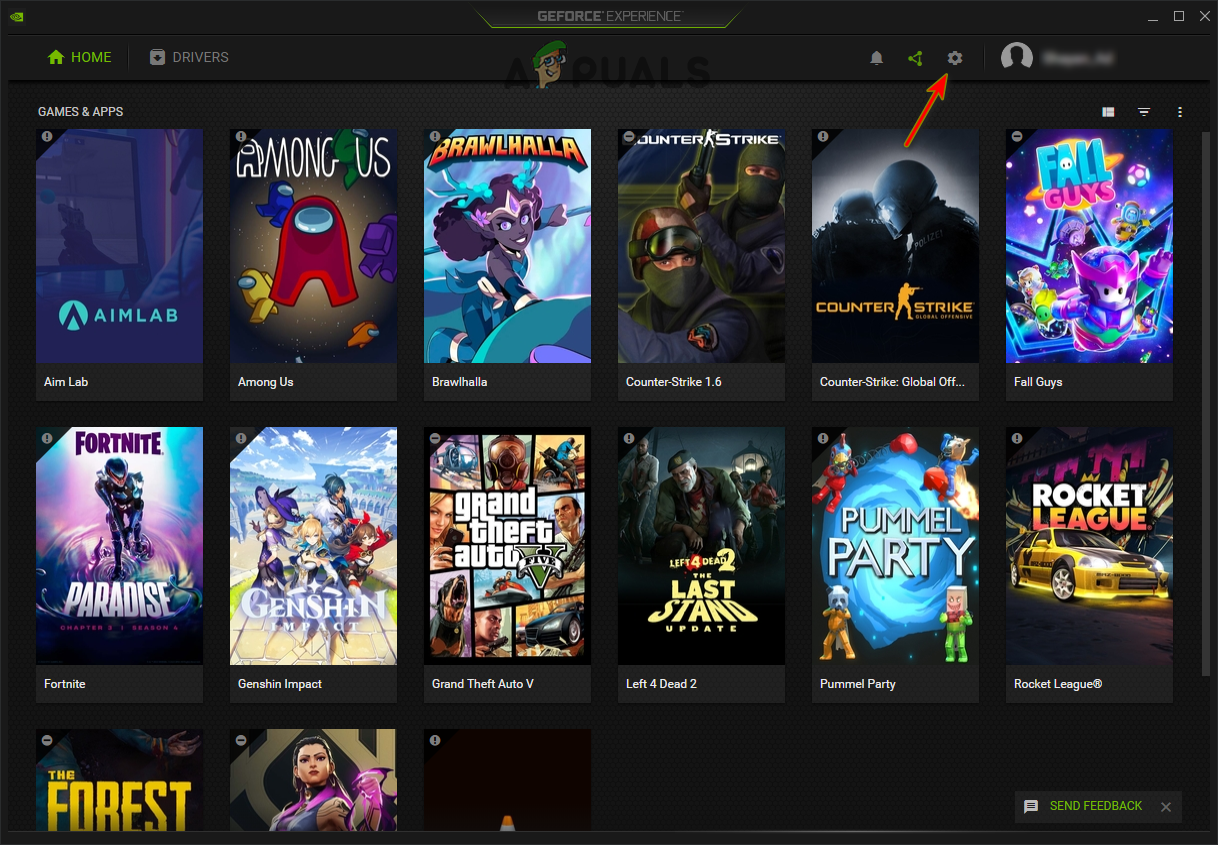
Opening NVIDIA GeForce Experience Settings - In the General tab, disable the In-Game Overlay.
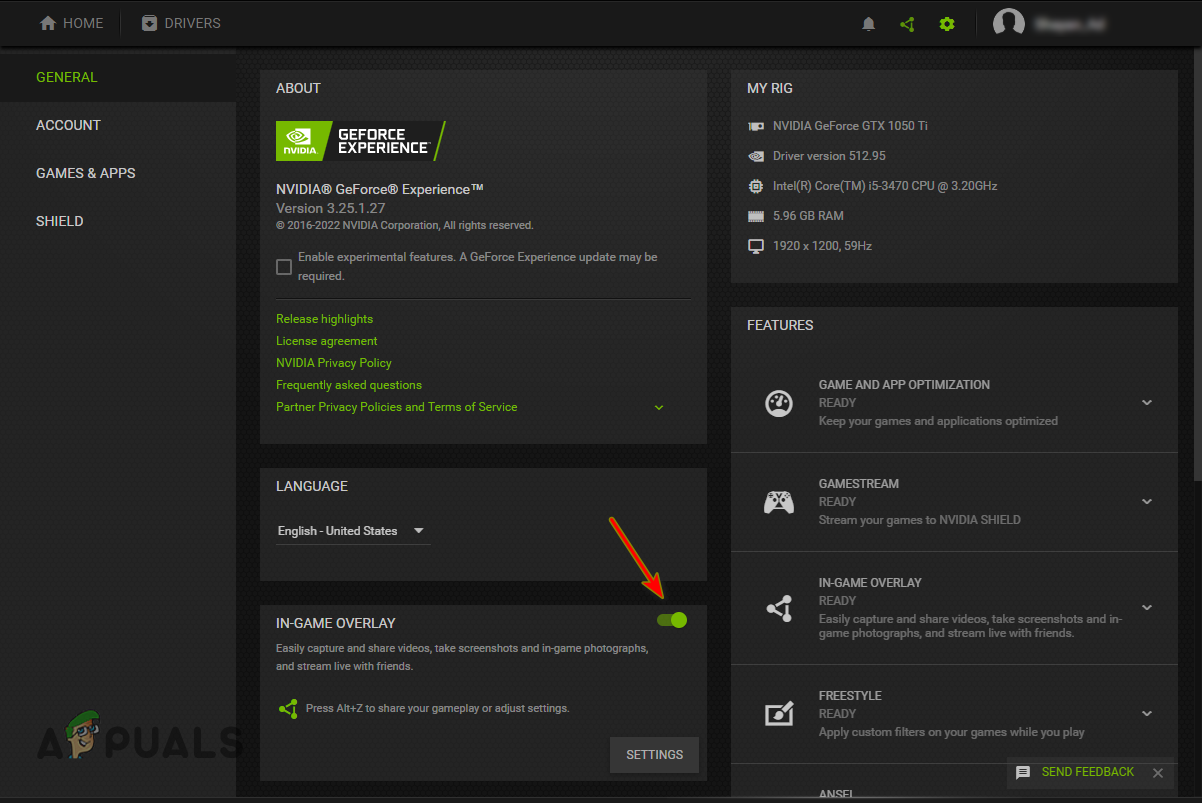
Disabling GeForce Experience In-Game Overlay
After disabling the NVIDIA GeForce Experience overlay, relaunch the game where you were experiencing performance issues. The stutters/freezes should now be resolved.
But if the stutters are still occurring, you should also disable all other overlays. The overlay you should start with is the Steam Overlay, as it is known for causing performance issues in many games.
To disable the Steam Overlay, follow the steps we’ve listed below:
- Launch Steam.
- Select the “Steam” option in the top-left corner.

Opening Steam Settings - Click on Settings.
- Select the “In-Game” category.
- Click on “Enable the Steam Overlay while in-game” to remove the checkmark from it.
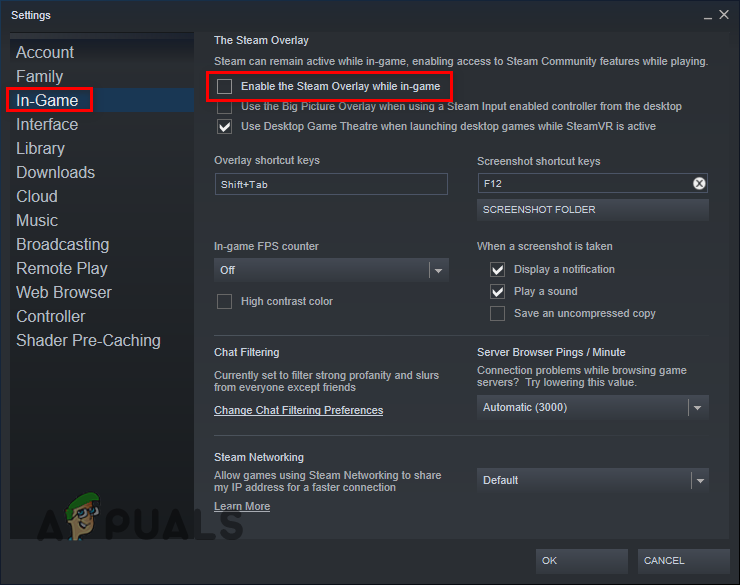
Disabling the Steam Overlay Click OK.
The Steam Overlay will now be disabled. This will potentially fix the stuttering problem, but if it doesn’t, continue disabling the other overlays.
5. Uninstall NVIDIA GeForce Experience
If uninstalling the NVIDIA Frameview DSK Service and disabling the GeForce Experience Overlay didn’t fix the issue, the next step is to uninstall the GeForce Experience program entirely. Many users have reported that the GeForce Experience program was the root cause of the stuttering issue with the 22h2 Windows 11 update.
So before you try any other troubleshooting methods, disable the NVIDIA GeForce Experience program by following the steps listed below:
- Press Windows Key + R simultaneously to launch the Run dialog box.
- In the small window on the bottom-left corner of your screen, type appwiz.cpl, and press enter.
Opening the Programs and Features menu through the Run dialog box - In the Programs and Features window, scroll through the list of apps until you find NVIDIA GeForce Experience.
- Right-click on NVIDIA GeForce Experience and select Uninstall.
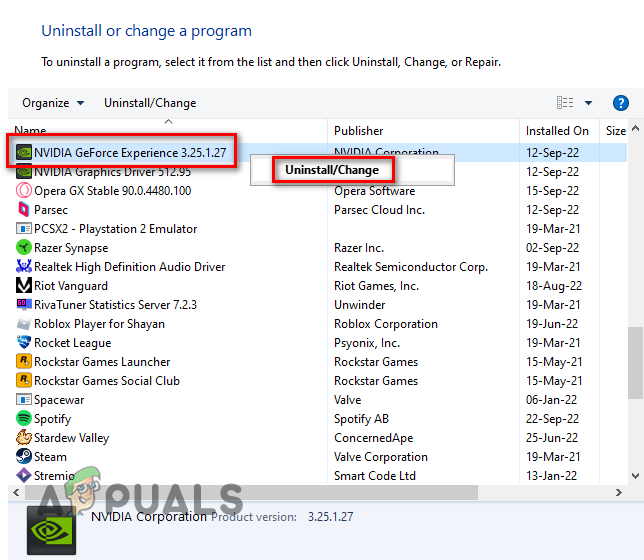
Uninstalling NVIDIA GeForce Experience
After uninstalling the NVIDIA GeForce Experience program, restart your PC and see if the stuttering problem is still present in games. If it is, the cause of the problem might be your NVIDIA GPU drivers.
6. Update GPU Drivers
The next solution to the Windows 11 22h2 stuttering issue is to update the drivers of your Graphics Card (GPU), especially if you have an NVIDIA GPU. There could be a compatibility issue between Windows 11 22h2 and your current GPU drivers, which would explain why the stutters are occurring. The drivers installed on your system could also be corrupt or missing entirely.
Therefore, you will need to upgrade your GPU drivers to the latest version to resolve this issue. The latest GPU drivers will be optimized to perform better with the new version of Windows. This will help fix the stuttering problem in games.
To update your Graphics Card’s drivers, you simply need to head to the official website of your GPU’s manufacturer and download the drivers for the GPU installed in your system.
But if you don’t know what GPU you have installed on your PC, you’ll have to figure it out by opening Device Manager. Follow the steps listed below to determine the exact brand and model of your GPU:
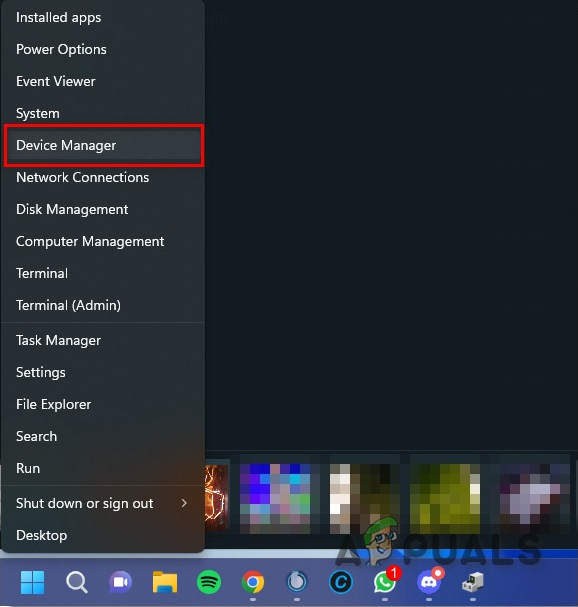
- Press Windows Key + X simultaneously, and select the “Device Manager” option.

Opening Device Manager in Windows 11 - Click on the arrow next to the “Display Adapters” option.
- Take note of the name of the device that appears.
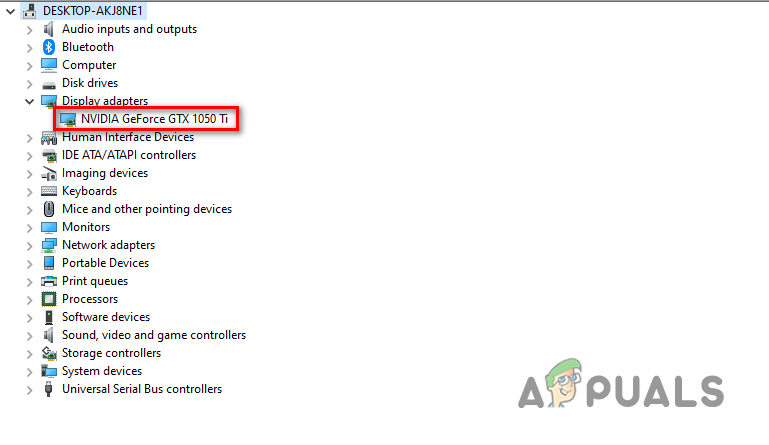
Identifying GPU model using Device Manager
The device which appears under the Display Adapter section is your Graphics Card. So in this way, you’ll be able to quickly determine the brand name and model of the GPU installed on your PC.
But do note that if the GPU’s name appears as “Microsoft Basic Display Adapter”, or your GPU’s name can also be shown as “Unknown Device,” it is not the actual name of your GPU. This name appears when there’s an issue with the GPU drivers installed in the system. Device Manager shows the GPU’s name as Microsoft Basic Display Adapter if these drivers are corrupt or missing.
So if you see this name in Device Manager, you’ll have to determine the actual name of your GPU through another method. For this method, follow the steps we’ve listed below:
- Press Windows Key + X simultaneously, and select the “Device Manager” option.
Opening Device Manager in Windows 11 - Click on the arrow next to the “Display Adapters” option.
- Right-click on Microsoft Basic Display Adapter and click on the Properties option.
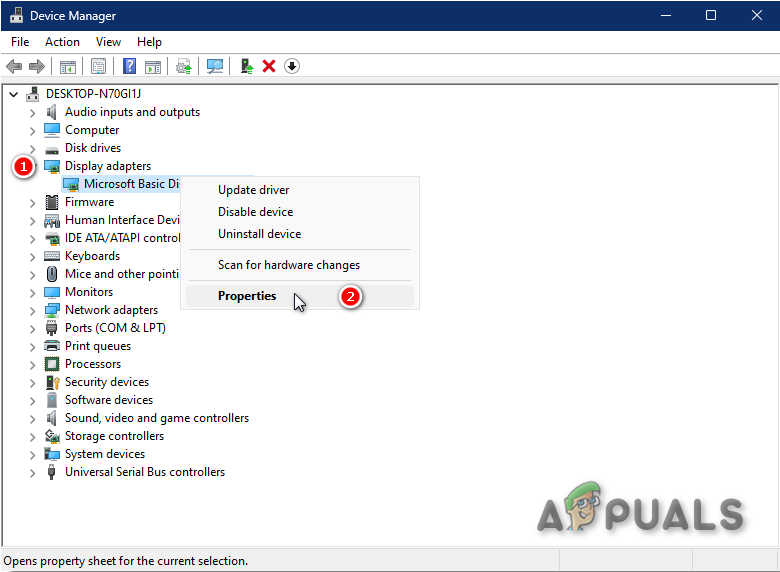
Opening Properties of Microsoft Basic Display Adapter - Navigate to the Details section.
- Expand the drop-down list present under Property.
- Click on Hardware Ids.
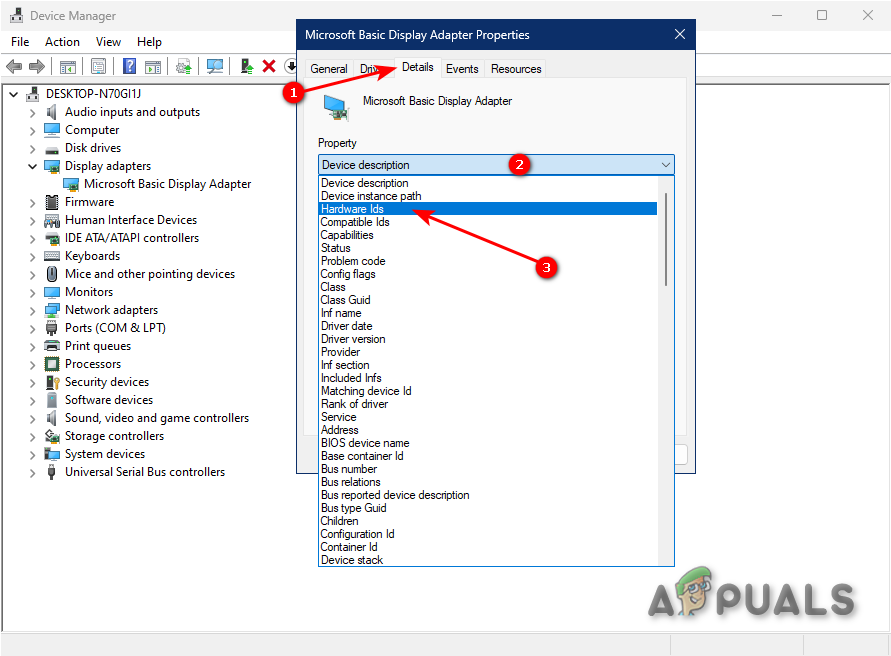
Selecting Hardware Ids - Right-click on the first line of text written under Value.
- Select Copy.
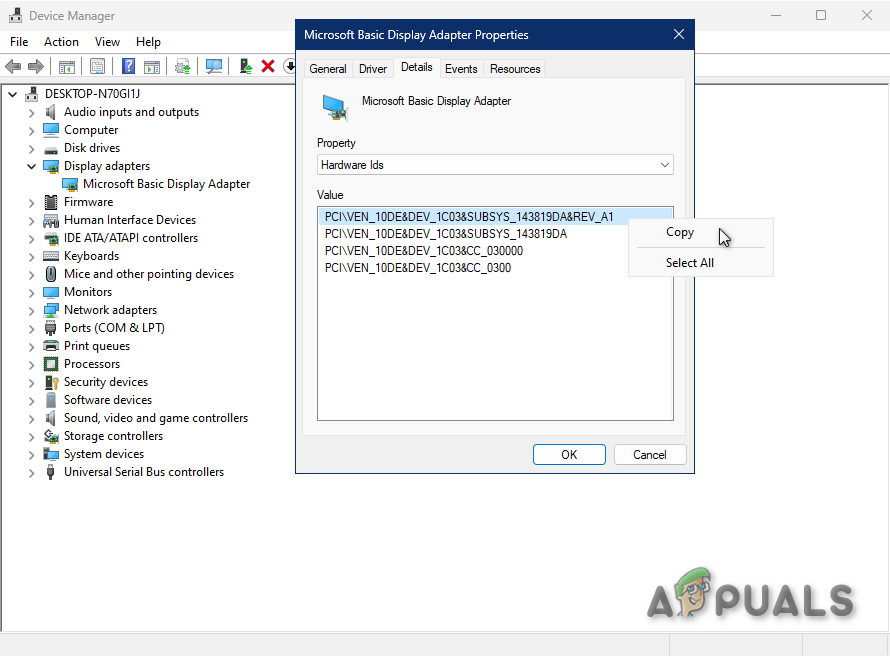
Copying Hardware Id of GPU - Open a browser.
- Paste the text into the search bar and press enter.
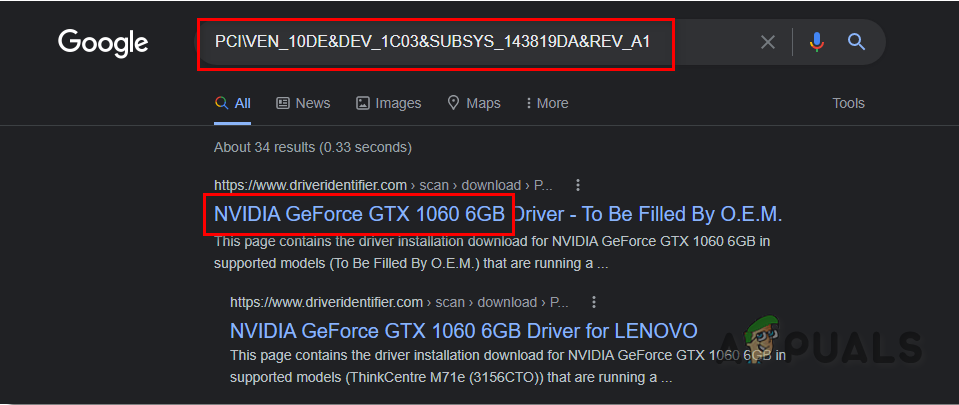
Finding GPU brand and model through Google
The top search results will contain your GPU’s brand and exact model in their title. So in this way, you’ll be able to determine what GPU you have even if the drivers are missing/corrupt.
After determining the GPU’s model, the next step is to delete the current drivers in your system. The reason you must do this is to avoid any sort of conflict with the new drivers you’ll be installing shortly. If you don’t delete these drivers and they end up conflicting with the new drivers, it will lead to even more performance issues.
To uninstall the current GPU drivers, you must use the application Display Driver Uninstaller (DDU), which you can download from this website. DDU is a safe, trusted, and useful driver uninstaller program which is significantly better than the default Windows driver uninstaller.
DDU will completely uninstall your current GPU drivers, ensuring no traces of the drivers are left behind. Windows will likely leave behind such traces, leading to problems with the newer drivers.
Once you’ve installed DDU, you must boot your system into Safe Mode before you use it to delete the drivers. When you boot your system into Safe Mode, only the most essential drivers and applications will be active. This will ensure that the driver removal process goes as quickly and smoothly as possible.
Follow these steps to boot your PC into Safe Mode:
- Press the Windows Key, and right-click on the Power icon in the bottom-left corner.
- Press and hold the Shift Key on your keyboard and click on the Restart option.
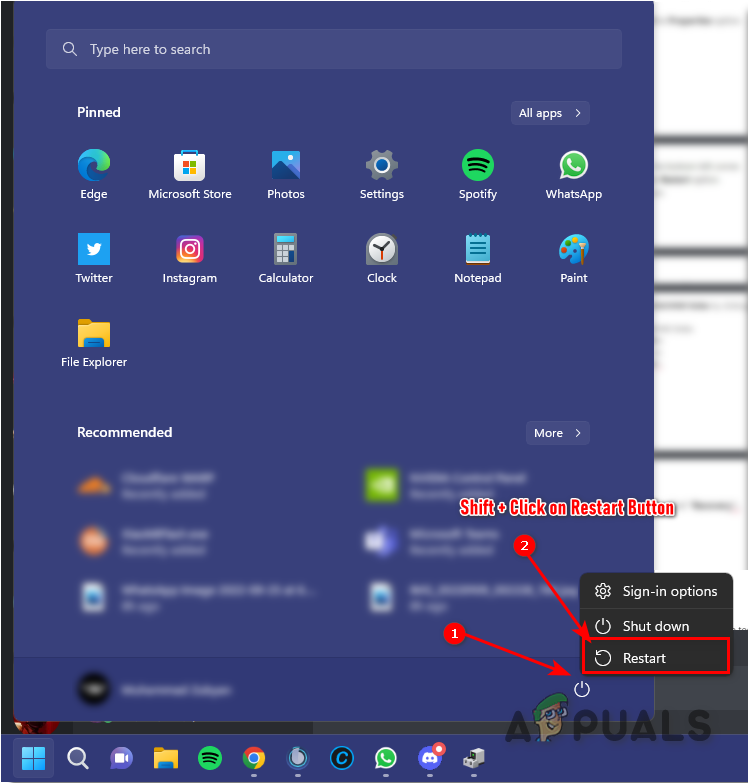
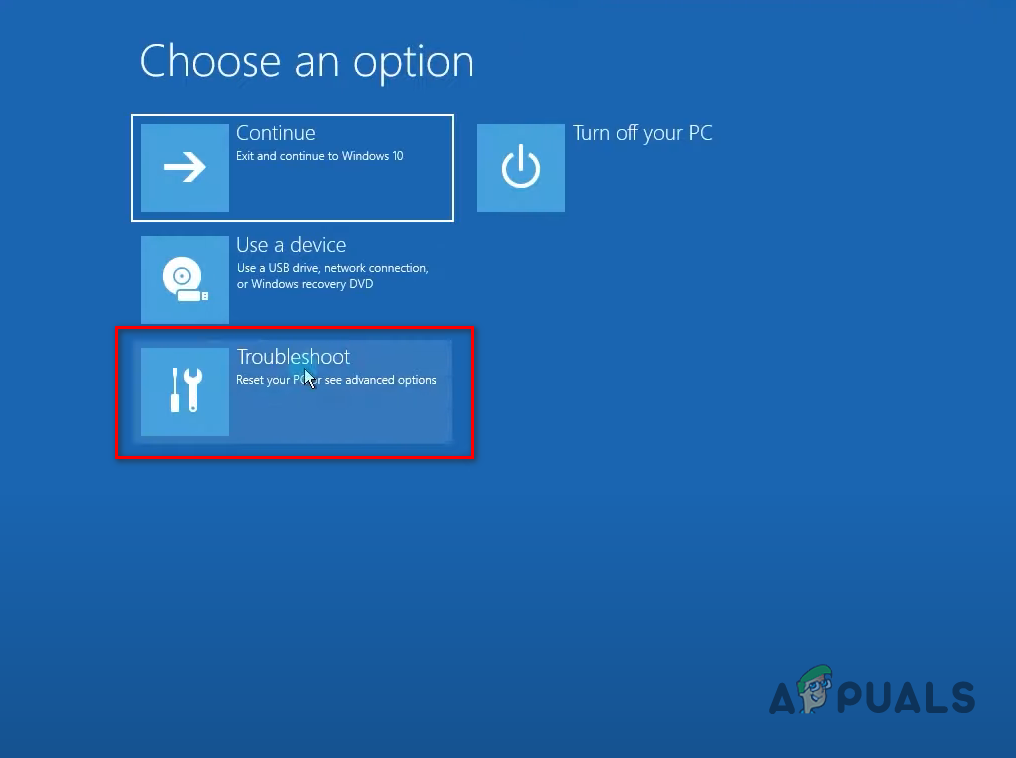
Restarting your PC to get into Safe Mode - Wait for your PC to restart, then select the Troubleshoot option.
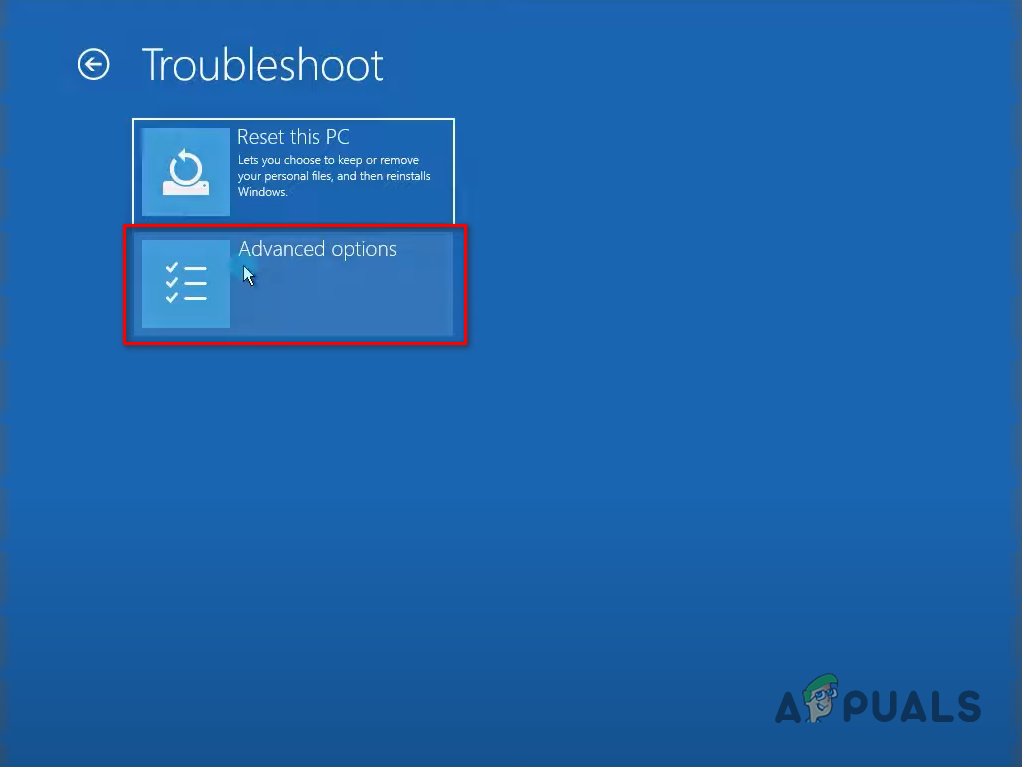
Selecting the Troubleshoot option - Select Advanced Settings.
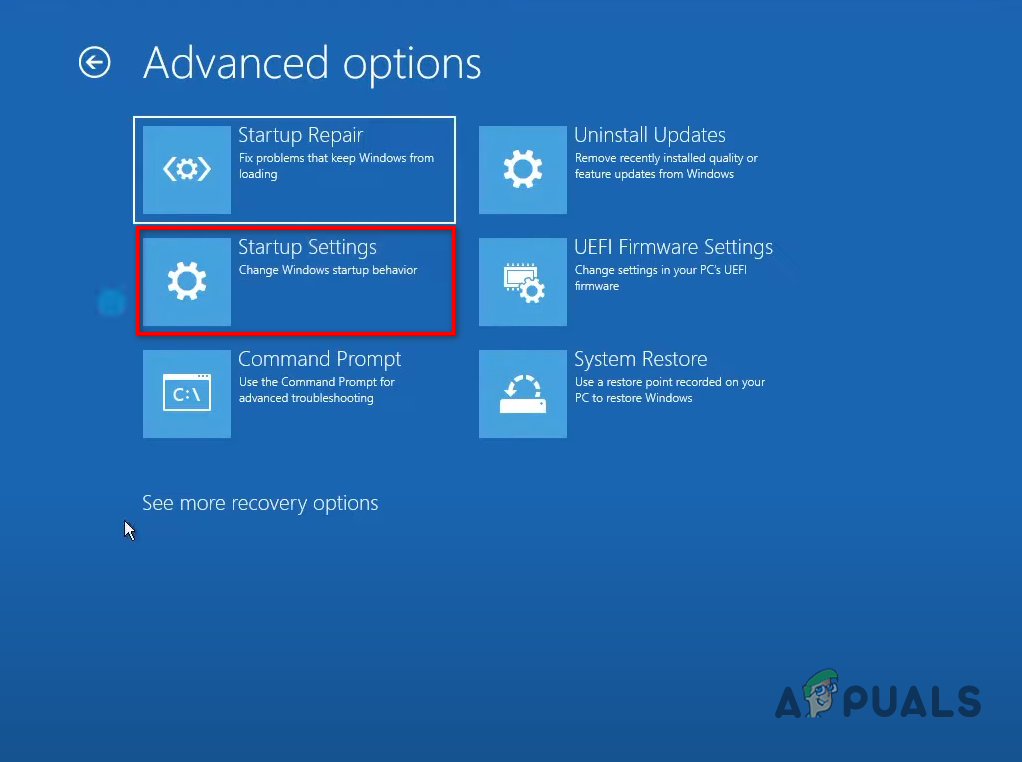
Selecting Advanced Options - Select Startup Settings.
Selecting Startup Settings - Press F4.
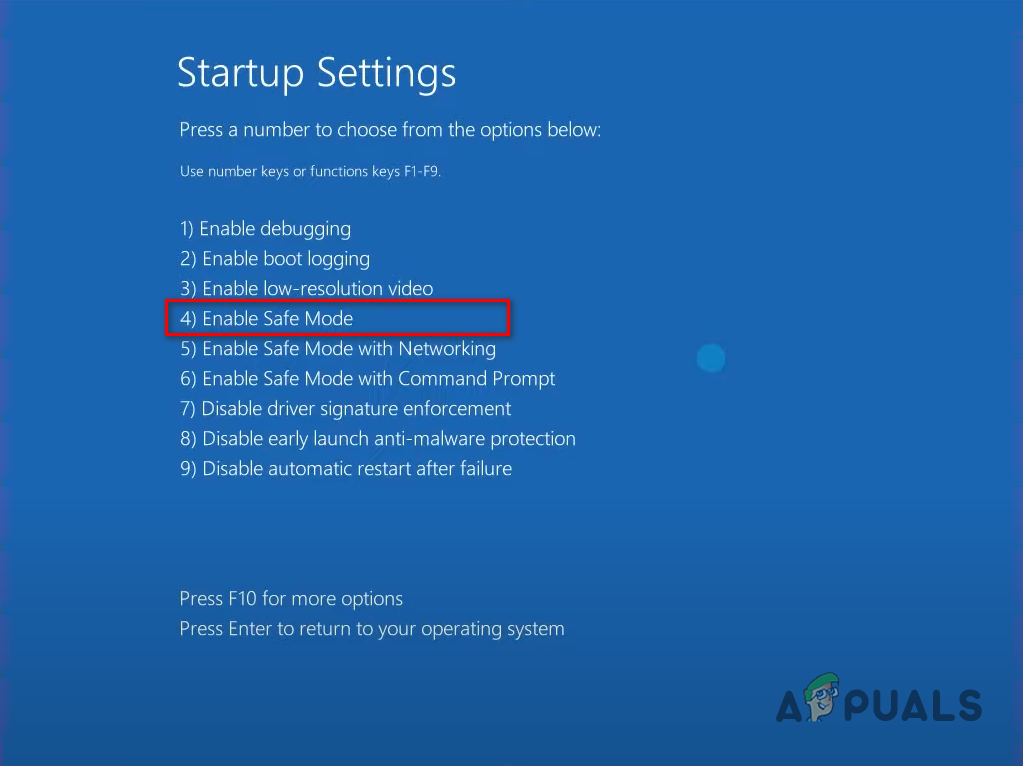
Booting system into Safe Mode
Your PC will then restart one more time. Once it boots up, your system will be in Safe Mode. So now, you can safely use DDU to uninstall the current GPU drivers.
Open the Display Driver Uninstaller application and select the Device Type (GPU) and Device (NVIDIA/AMD). After that, select the “Clean and restart” option present near the top-left corner of the window.
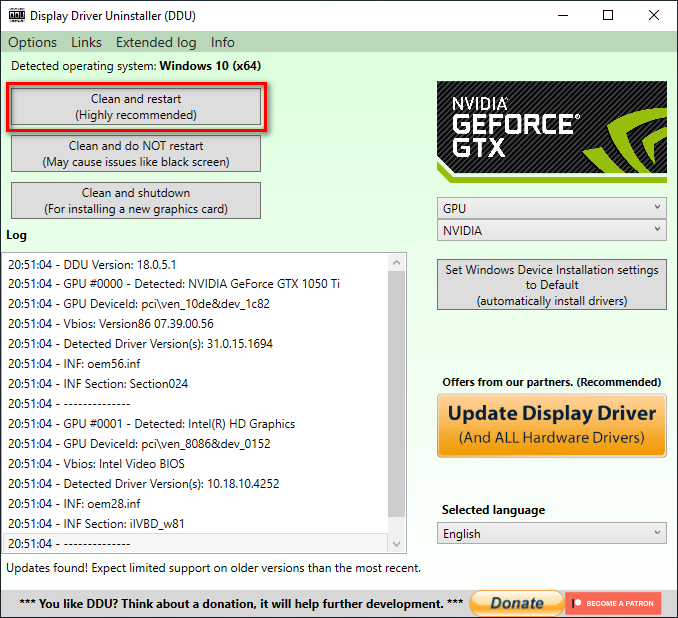
After you click the Clean and restart option, DDU will start deleting your current GPU drivers. This process will finish within a few minutes. When DDU successfully deletes the drivers, it will restart your PC one last time. After your PC restarts, you can download and install the latest drivers for your GPU.
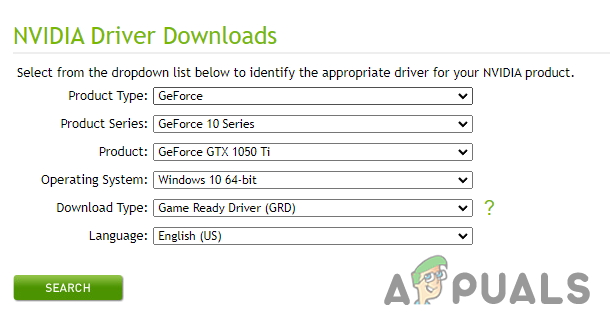
For NVIDIA GPU drivers, head to their official driver website. Under the NVIDIA Driver Downloads section, use the drop-down lists to select the exact model of your GPU. Once you’ve done that, click the SEARCH button to find the latest drivers.
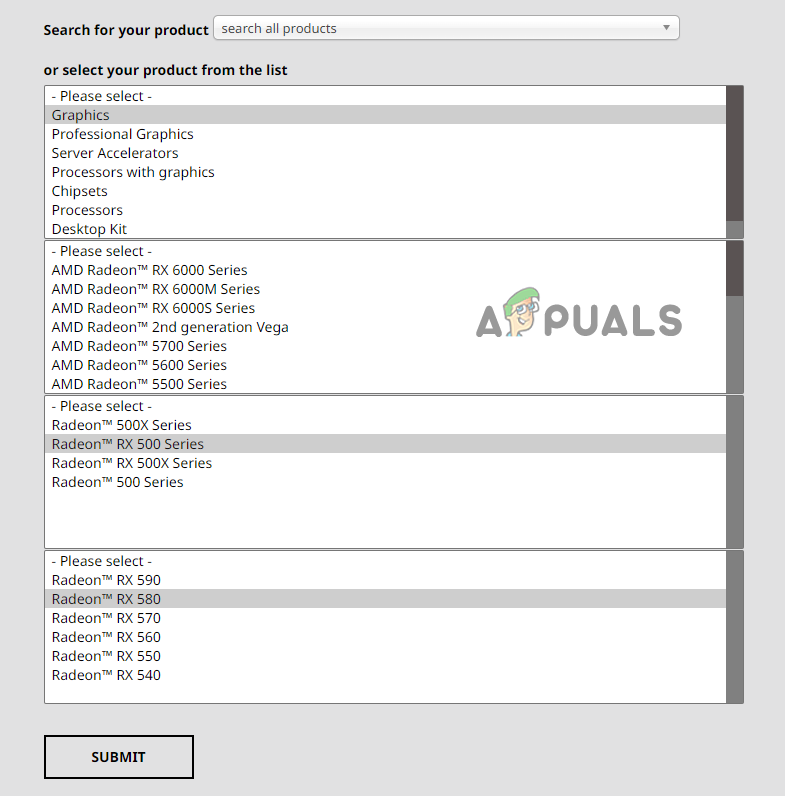
For AMD GPU drivers, head to their official driver website. Use the lists to select the exact model of your GPU. Then, click on the SUBMIT button to find the latest drivers.
The driver file will be around 500 MB in size. After it’s downloaded, double-click on it and allow it to make changes to your PC; in the installer menu, select the “Express” option instead of “Custom” for the safest driver installation. The driver installation process should only take a few minutes to finish.
7. Stop HolographicShell Service
According to many user reports online, a service called “HolographicShell” is one of the leading causes of the 22h2 stuttering issue. This service is related to VR games, so if you play any VR games, such as Microsoft Flight Simulator, this service is likely installed and active on your system.
And the HolographicShell service seems to have no noticeable effect on the VR games’ performance when it is disabled. So it’s not necessary to have this service active to be able to play these games.
To disable the HolographicShell service, follow these steps:
- Press Windows Key, type Computer Management, and press enter.
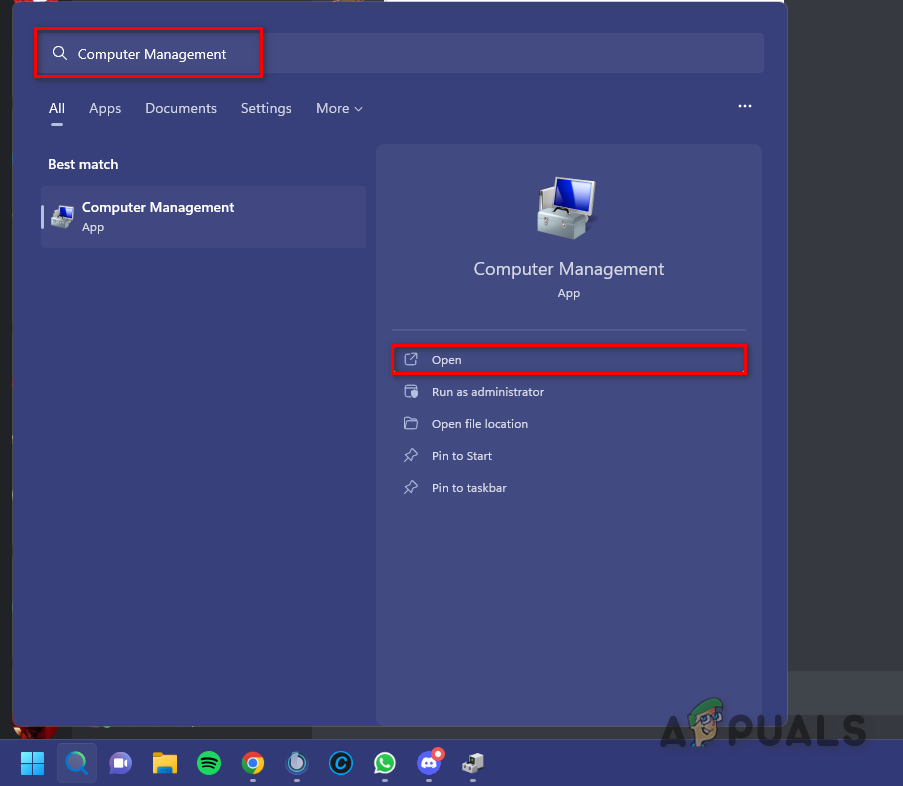
Opening Computer Management - In the section on the left side of the screen, click on the small arrow next to Performance.
- Click on the Data Collector Sets folder.
- Click on the Event Trace Sessions folder in the middle of the window.
- Right-click on the HolographicShell service and select “Stop.”
The HolographicShell service will now be disabled. You can now relaunch the game and check whether the stuttering/freezing error has gone away or not.
If this method does not fix the stuttering issue, you should re-enable the HolographicShell service in the same way so it does not cause any issues in the future.
8. Disable Windows NDU Service
The Windows NDU (Network Data Usage) monitoring tool is a default Windows driver installed in your system’s kernel, which is the core of your system. As you can tell from its name, it allows the user to monitor data usage on their network.
The NDU driver is one of the services that boots automatically when you start your PC. This means that this driver is always active on your system.
After a lot of testing from the Windows community, people have realized that the NDU driver seems to consume a highly unnecessary amount of system resources (especially RAM), probably due to some sort of error in its code.
And after the Windows 11 22h2 update, many users have reported that his service is directly linked with the stutters and other game performance errors they’ve been experiencing. Therefore, disabling the Windows NDU service has a high chance of fixing your game performance errors.
To disable the Windows NDU service, follow the steps we’ve listed below:
- Press Windows Key and type cmd in the search bar.
- Click on “Run as administrator.”
Opening Command Prompt as administrator - In the Command Prompt window, type the command below and press the enter key.
REG ADD HKEY_LOCAL_MACHINE\SYSTEM\ControlSet001\Services\Ndu /v Start /t REG_DWORD /d 00000004 /f
- Close Command Prompt.
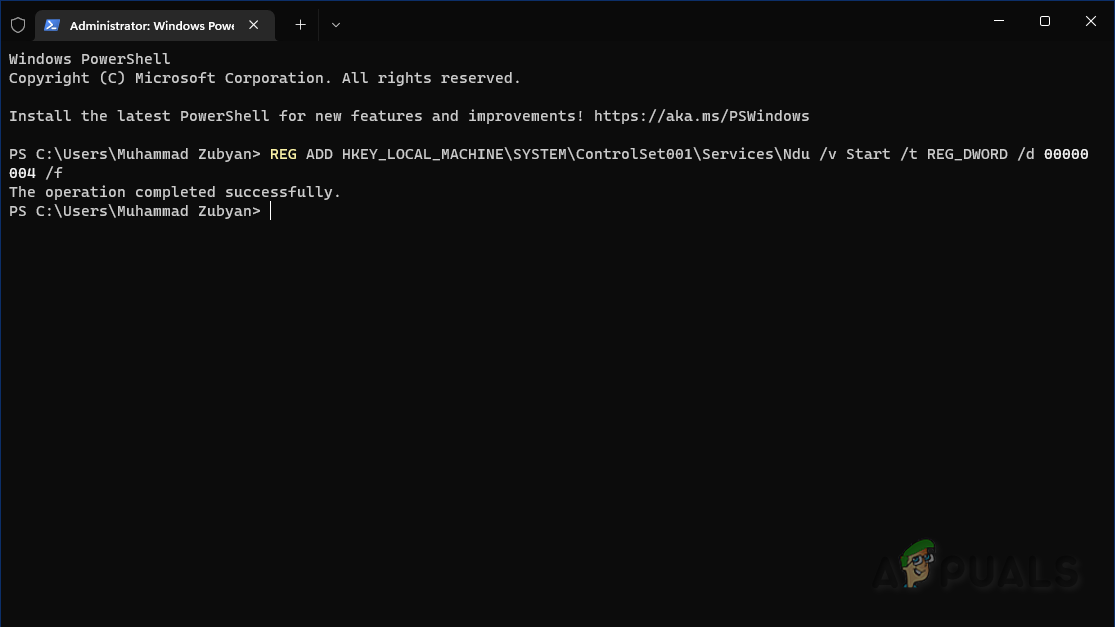
Disabling NDU Service using Command Prompt
This command will set the Value data to 4. After running the command, restart your PC. The Network Data Usage service will now be disabled on your system. This will give you an instant boost in performance, especially in the RAM department, and it’ll most likely fix the Windows 11 stuttering issue.
9. Uninstall the Windows 11 22h2 Update
If you’ve tried all the solutions listed above, but you’re still experiencing the stuttering issue in games, you should uninstall the Windows 11 22h2 update. The root cause of the issue is the update itself, so reverting back to your older Windows will solve the stuttering issue.
Do note that when you uninstall the Windows 11 22h2 update, any applications installed on your system will also be installed after updating to this version of Windows. However, no files or documents will be deleted.
Luckily, uninstalling the update is a very quick and easy task. To do so, follow the steps listed below:
- Press the Windows Key + I simultaneously to open the Settings menu.
- In the System section, scroll down in the list of settings until you find “Recovery.”
- Click on Recovery.
- Click on the “Go Back” option.
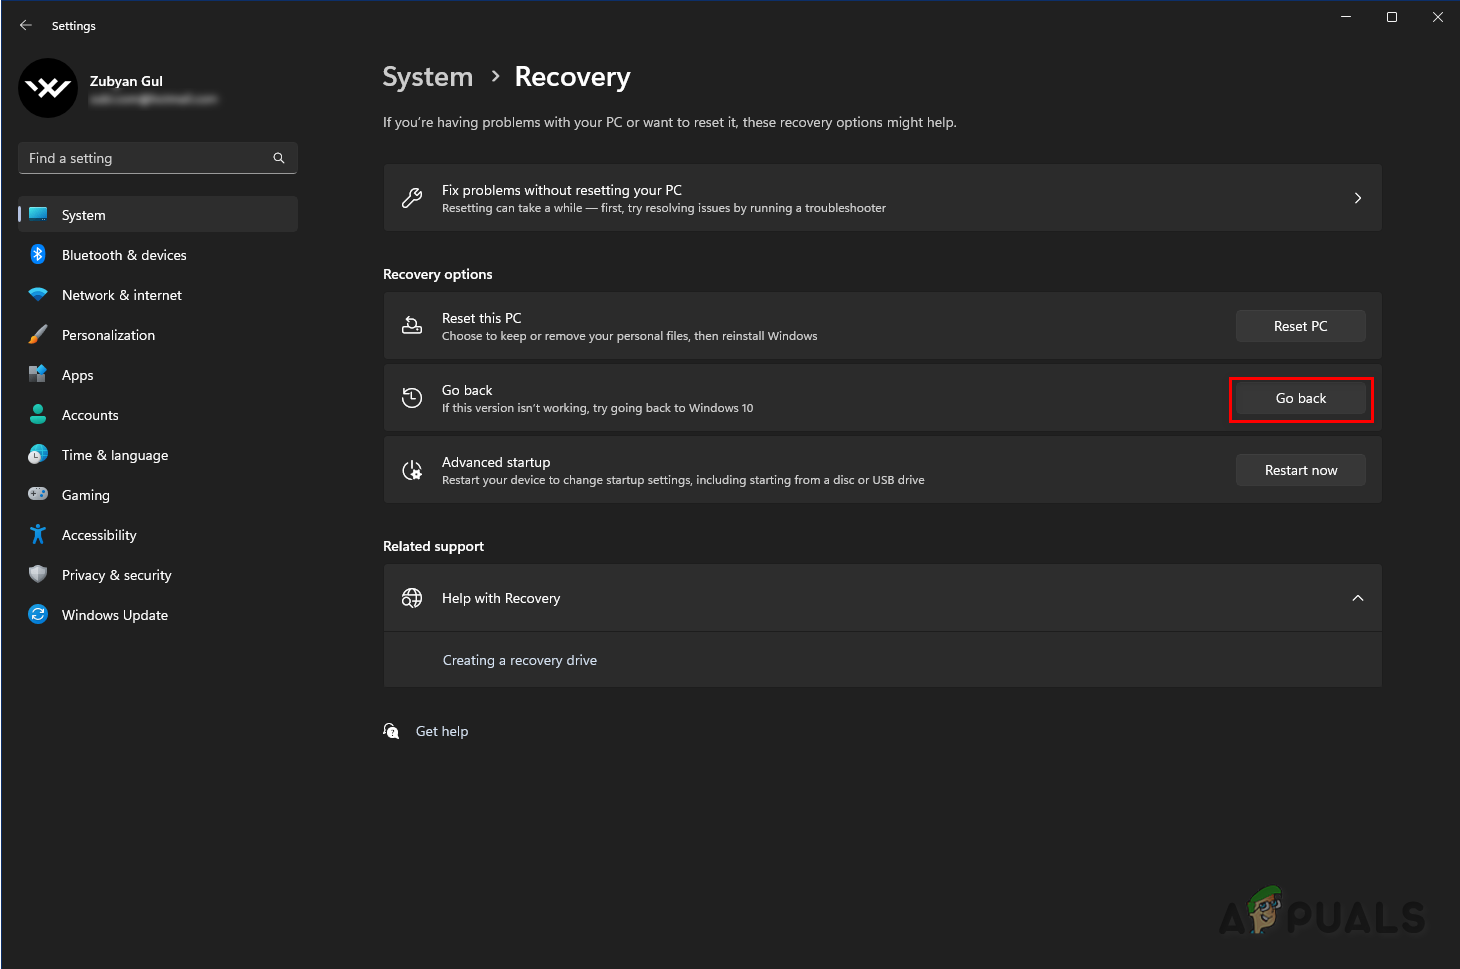
Select the Go back option - Select the appropriate reason (you don’t need to fill the “Tell us more” section).
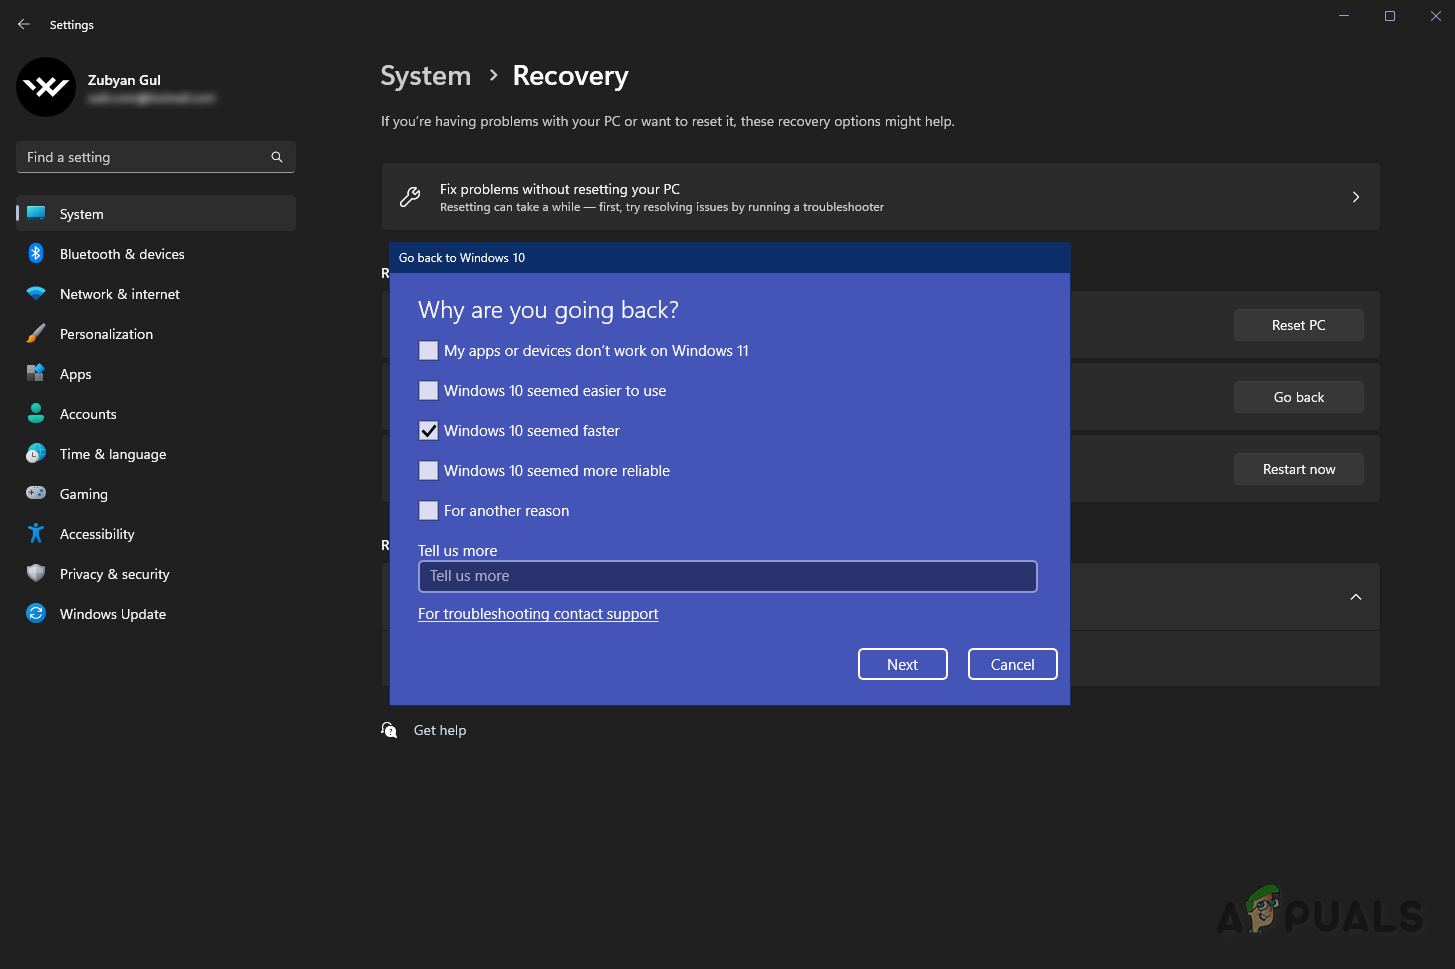
Select the relevant reason 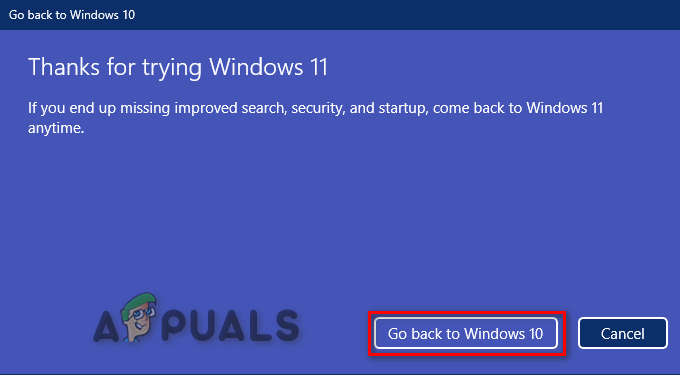
Uninstalling Windows 11 - Click Next.
- Click “No thanks” when asked to check for updates.
- Click Next again.
- Click “Go back to earlier build.”
The speed of the uninstall process depends on your hardware, but it should not take too long to finish. Once the update has been uninstalled, your system will restart, and you will return to the Windows version you used. This will finally fix the game stuttering/freezing error.


Thanks a lot! Disable NVIDIA Frameview SDK Service is workong for me.