6 Fixes for “Video Memory Management Internal” BSOD
 Reviewed by Huzaifa Haroon
- The Video Memory Management Internal error points to trouble with how your PC handles GPU memory, often causing a Blue Screen of Death due to hardware or software issues.
- You can try removing and reinstalling your GPU drivers using Display Driver Uninstaller (DDU), reseating your RAM, or resetting your operating system. If certain apps or games trigger the error, updating or rolling back your graphics drivers might help.
- If the problem persists, test your GPU in another computer to see if the issue is with the hardware. If it is, consider underclocking the VRAM for a short-term fix or look into a warranty replacement if possible.
The Video Memory Management Internal error is a common issue that may occur in Windows-based PCs. This error implies a problem with your GPU’s memory manager which it is unable to recover from. It basically means that an issue has occurred with the memory handling and allocation sector of the GPU.
There are numerous causes for this BSOD (Blue Screen of Death) error message. The issue may occur at the hardware level or the software level, depending on the conditions. In this guide you’ll learn how to quickly and easily get to the bottom of this BSOD.
Table of Contents
How to Fix Video Memory Management Internal BSOD Error
We will start with the most convenient solution, leading up to the most uncomfortable revelation. Here are a few possible fixes if you happen to face this problem:
1) DDU and Re-Install Your GPU Drivers
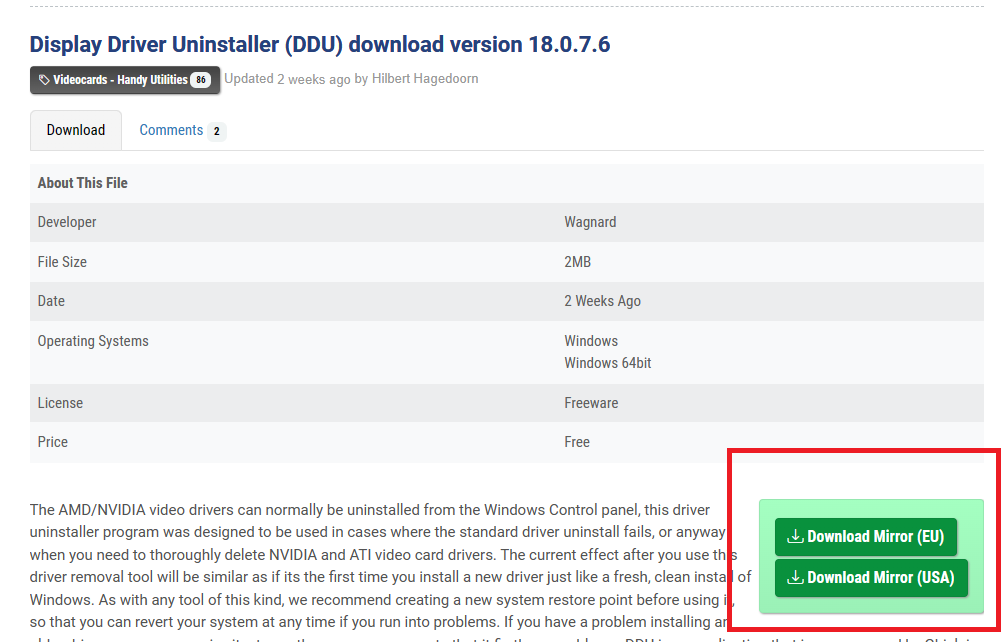
DDU stands for Display Driver Uninstaller. It is a type of Freeware software that allows users to completely remove their Graphics Card’s drivers and all related files from their PC. Follow these steps to properly remove your GPU drivers and update them:
- Download DDU from Guru3D (DDU’s Official Distributor Partner) and install it.
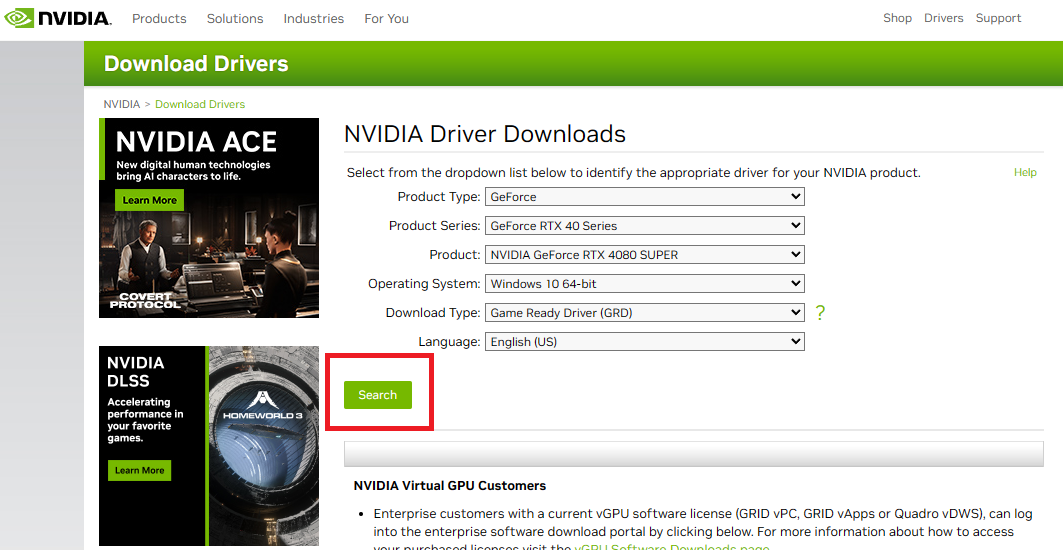
- Download a copy of the drivers you want to install, preferably the latest and most stable releases from AMD/NVIDIA.
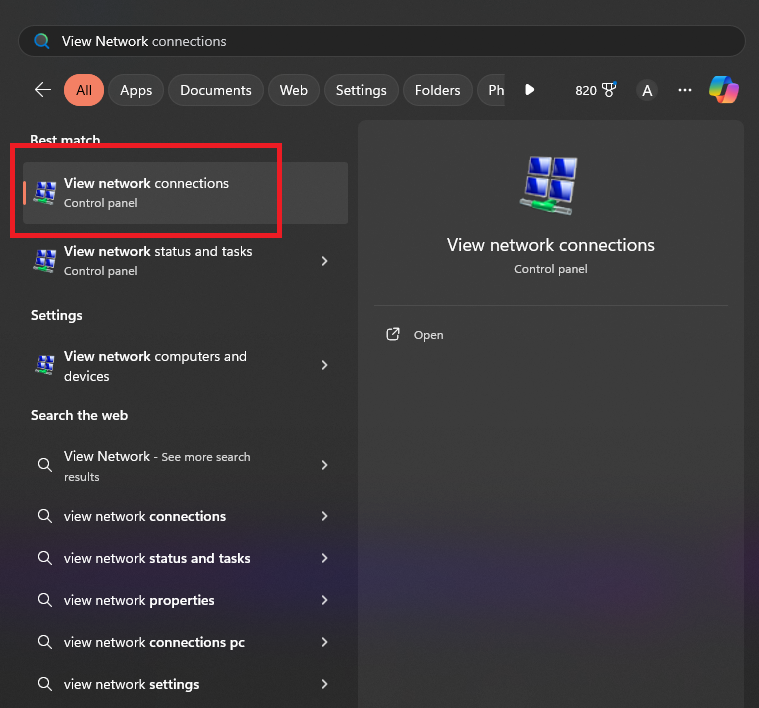
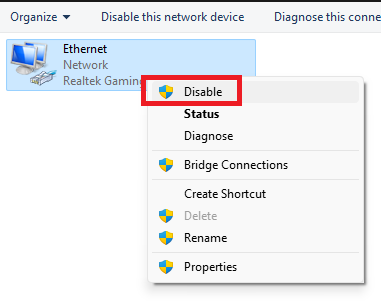
- Disable your Network Adapters to make sure Windows Updates do not interfere with this process. Type ‘View Network Connections‘ in the Windows Search Bar. Find your Network Connection, ‘Ethernet’ in our case, right-click and press ‘Disable.
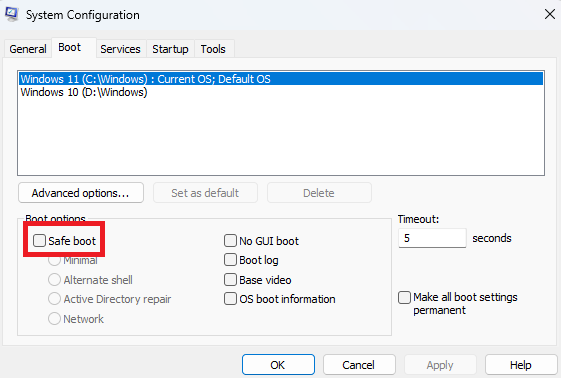
- Start your PC in Safe Mode. In order to do this, press the Windows logo key + R. Type msconfig in the box and press ‘Enter‘ or select OK. Select the Boot tab and click on the Safe boot option.
- In Safe Mode, open DDU and extract it to a location of your choice. Once done, open the extracted folder and double click on ‘Display Driver Uninstaller‘. Only change those options that you know about. It is recommended you keep the default settings as are.
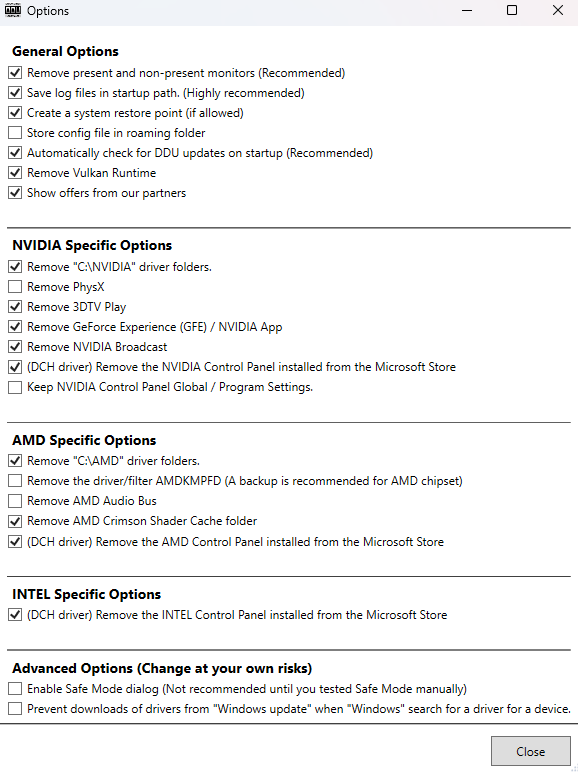
AMD users may need to reinstall their Motherboard Chipset Driver, so keep that in mind. - In the ‘Select device type‘ drop-down menu, select GPU. In the ‘Select device‘ drop-down menu, select your respective GPU manufacturer i.e. NVIDIA, AMD or Intel. Select ‘Clean and restart‘.

- On restarting, your PC will boot normally. Now double-click on the drivers you installed in Step 2. Install your drivers and restart the PC.
- Lastly, re-enable the Network Adapter by following Step 3 until the last step where you simply press ‘Enable‘ on the greyed out Network Connection.
2) Reseat Your RAM and Disable XMP
While RAM isn’t directly related to VRAM, sometimes the solution may require a simple RAM reseating. Moreover, you can also try disabling XMP profiles.
- Shut Down your PC and pull the plug from the wall.
- Open the case and locate the memory modules, typically beside the CPU cooler.
- Disengage the RAM retaining mechanism (clips) on either side.
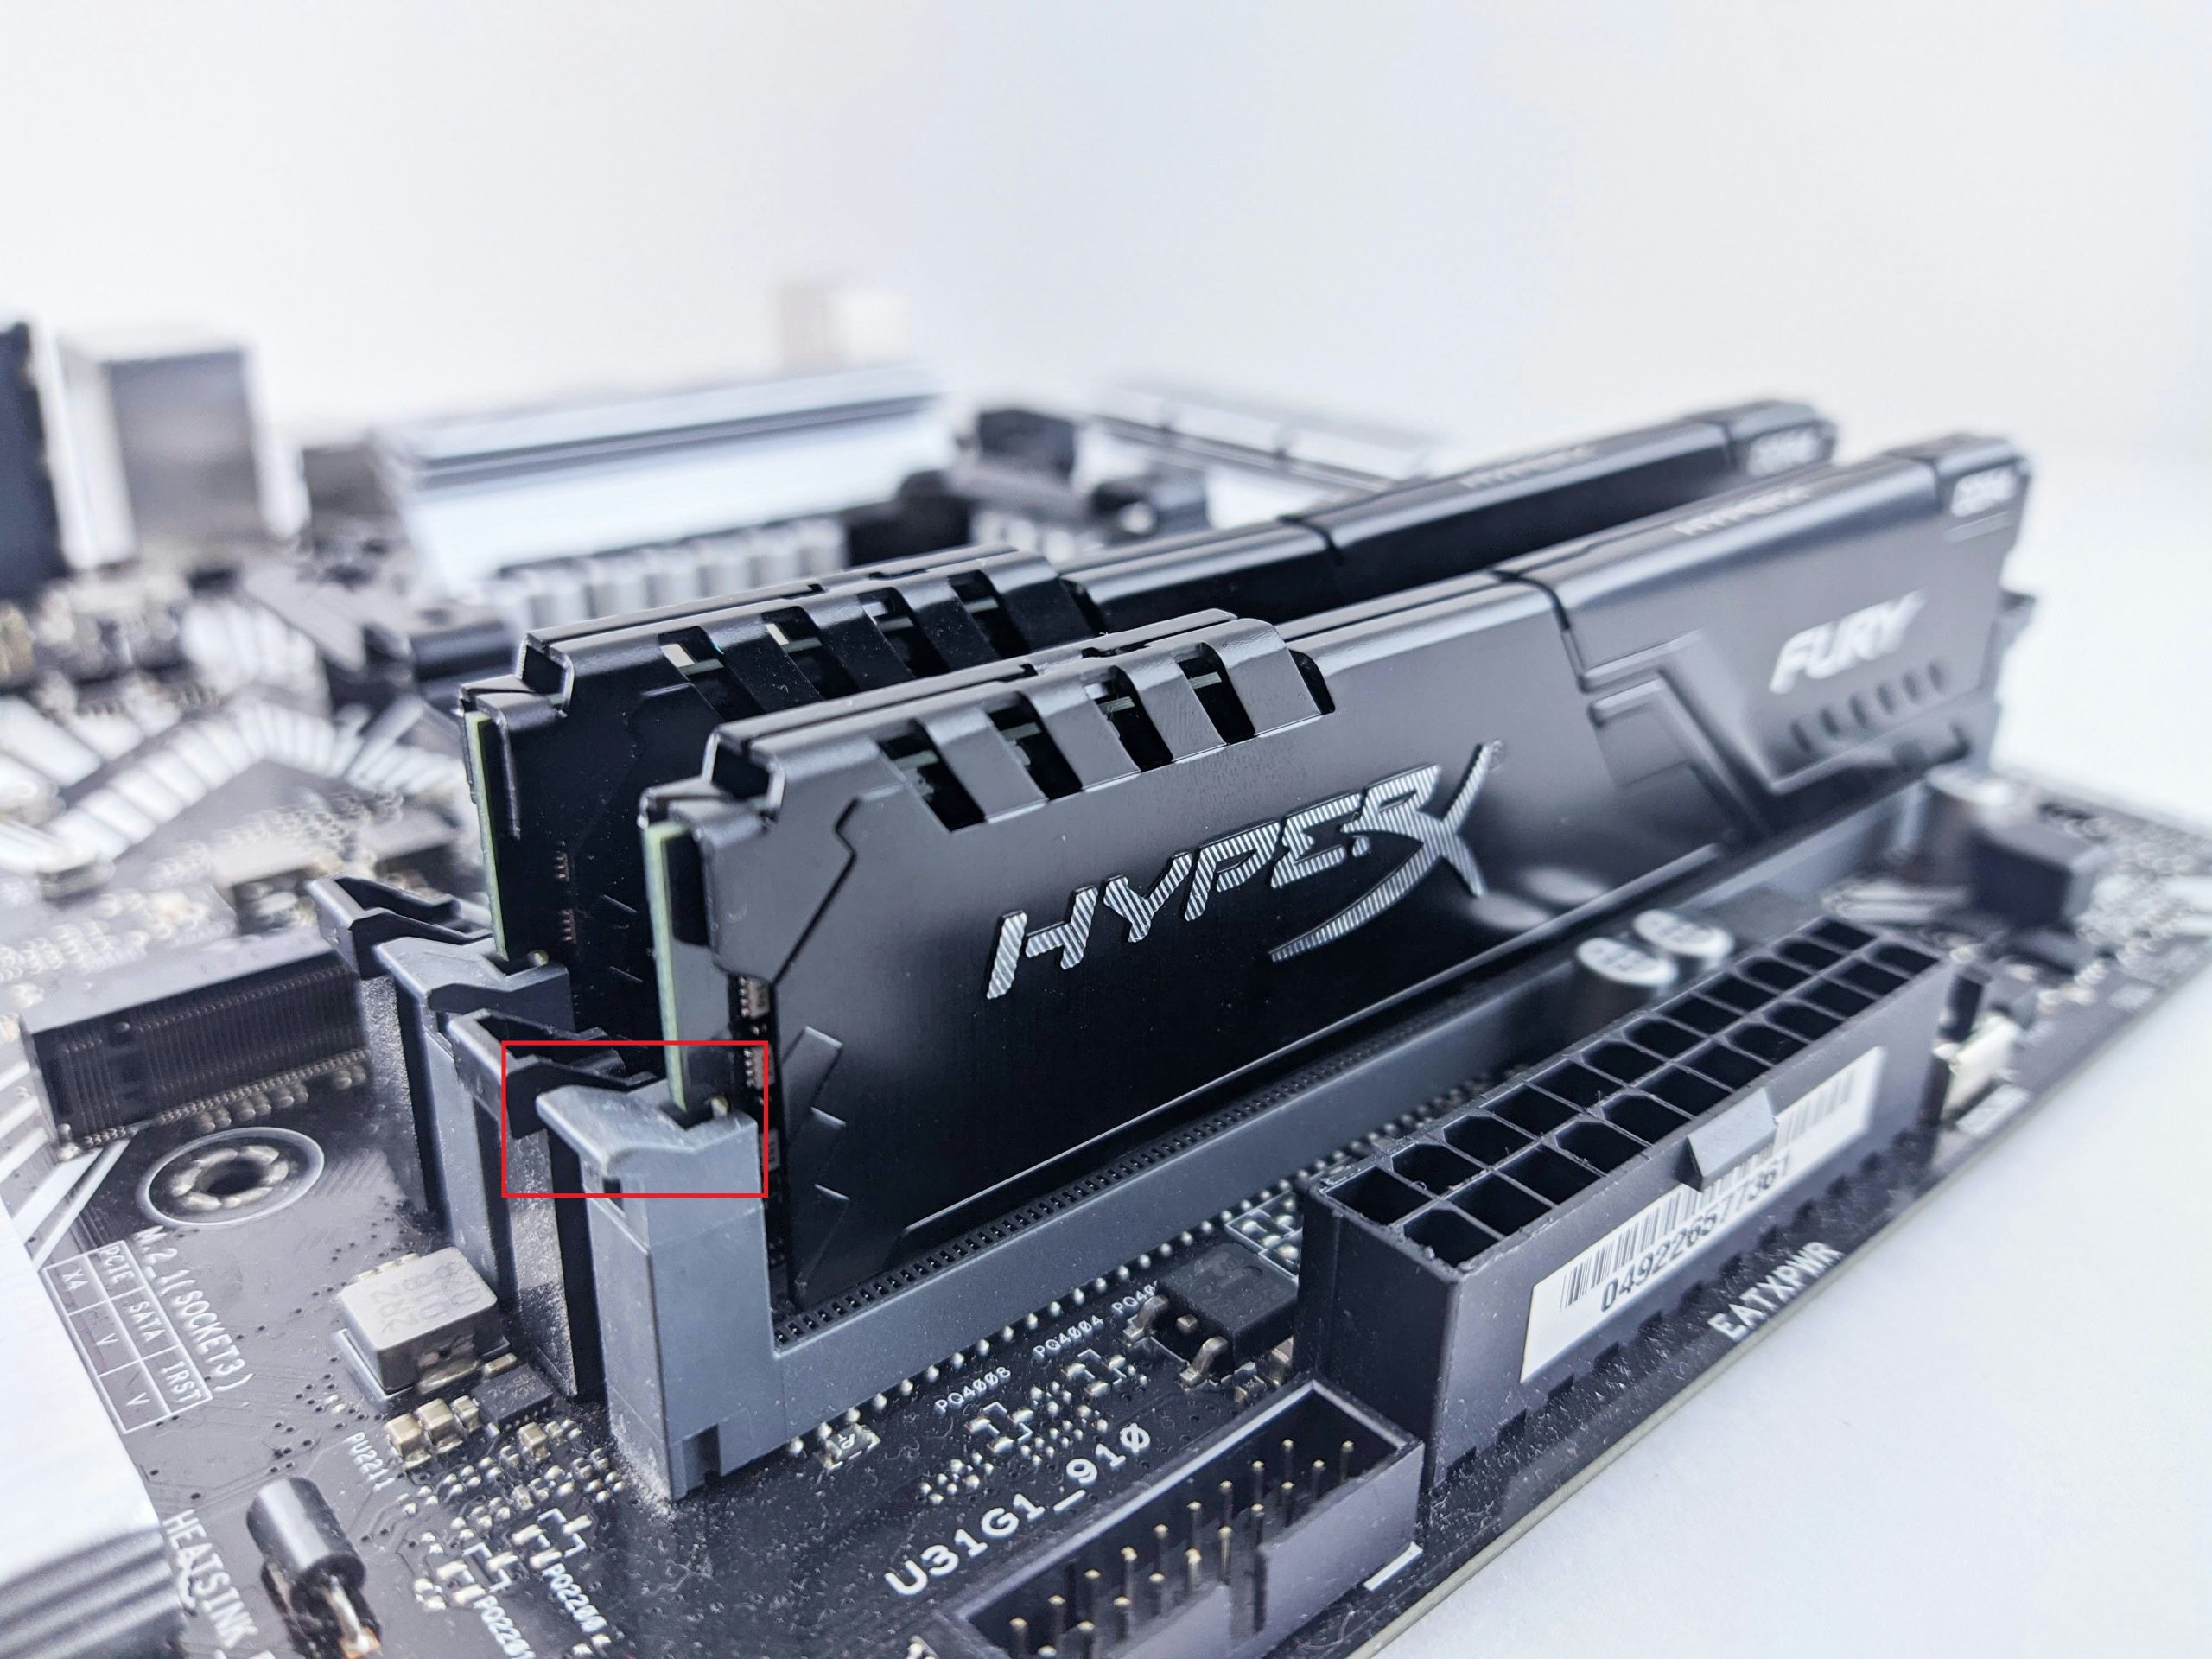
- Take out the DIMMS and re-seat them in the A2 and B2 slots for optimal results.
XMP offers a set of pre-configured and tested settings for your RAM, quite important for DDR5 builds. In order to disable XMP, follow these steps:
- Shut Down your PC and open the BIOS by pressing the F5 key (may vary).
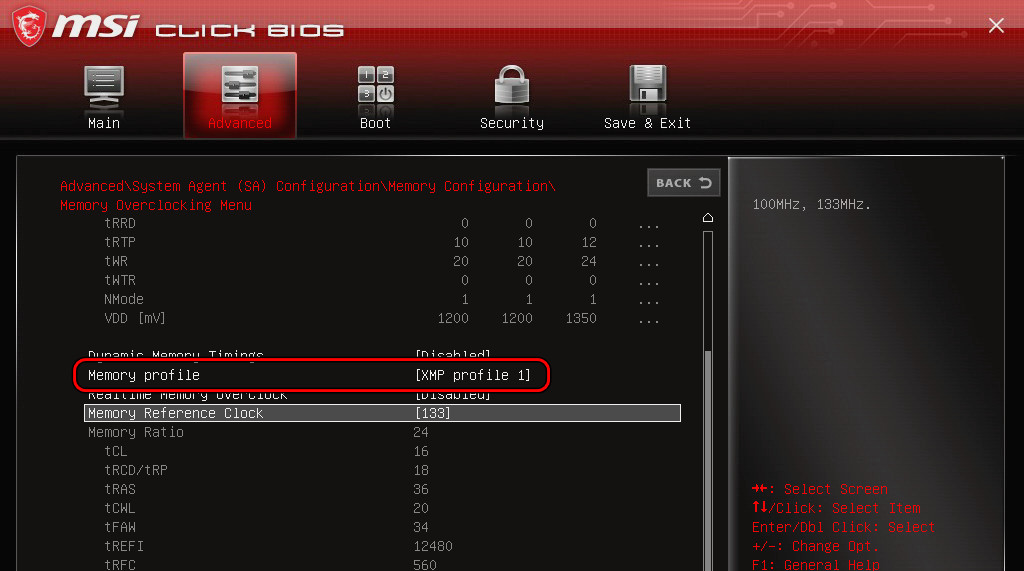
- Depending on your manufacturer, locate the XMP Settings, often found under the Overclocking section.
- Set the Memory/XMP profile to ‘Disable‘.
- Alternatively, you can also reset your BIOS but doing so will cause other settings to be lost as well.
READ MORE: How to Resolve XMP Not Working Issue ➜
3) Software Induced BSODs
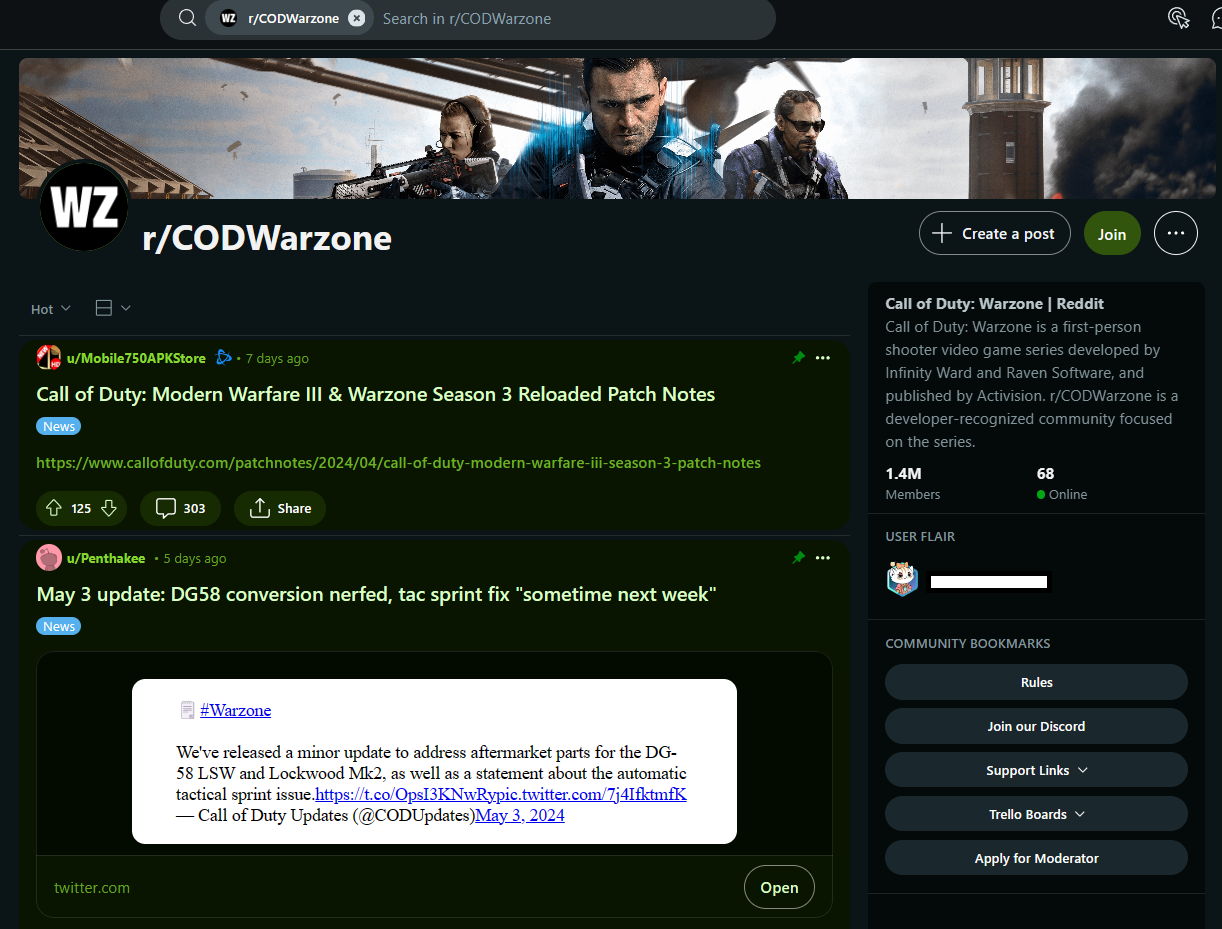
More often than not, such errors are caused by the specific applications you may use. We have seen countless examples of software from the Adobe Suite, games like Halo, Call of Duty: Warzone and New World causing a Video Memory Management Internal BSOD. The solution is to update your Graphics Driver or downgrade it since the problem in this case stems from poor code and optimization.
- You can use the respective sub-Reddit communities of the game in question to make sure you are not the only person facing these crashes.
- Check to see if your GPU is supported by the game. Also, try disabling installed mods, if any.
- Beta/Test drivers are often unstable and could be the culprit, so it is best to avoid them.
4) Try Resetting/Formatting Your System
One of the easiest and quickest ways to resolve any Windows error is to simply format the PC. Luckily for us, Windows allows us to retain our personal data and just reinstall the core system files and programs. Alternatively, you could opt for a full-on fresh reset. We recommend the latter, though your mileage may vary if you have a lot of data to back up.
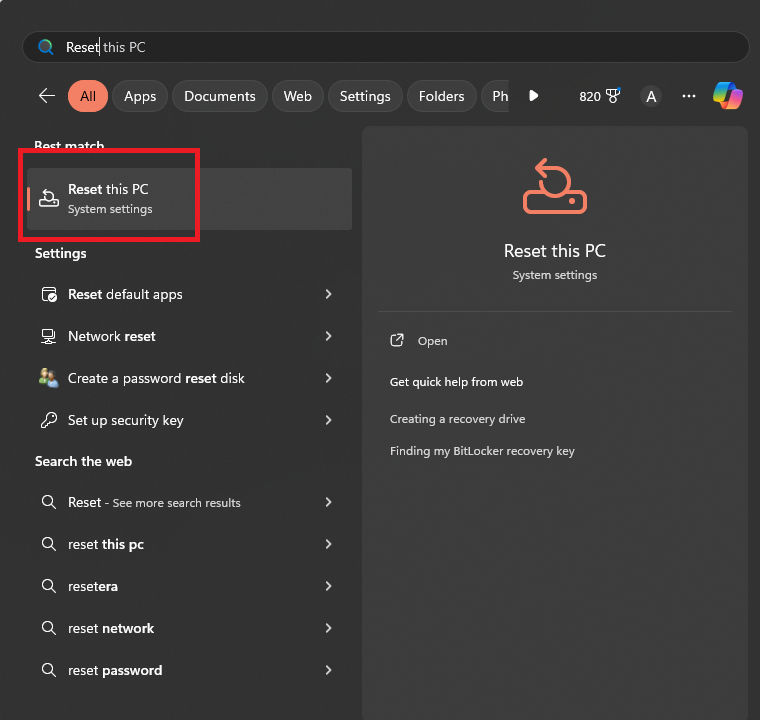
- Open the Windows Search Bar and type ‘Reset. Open the ‘Reset this PC‘ page.
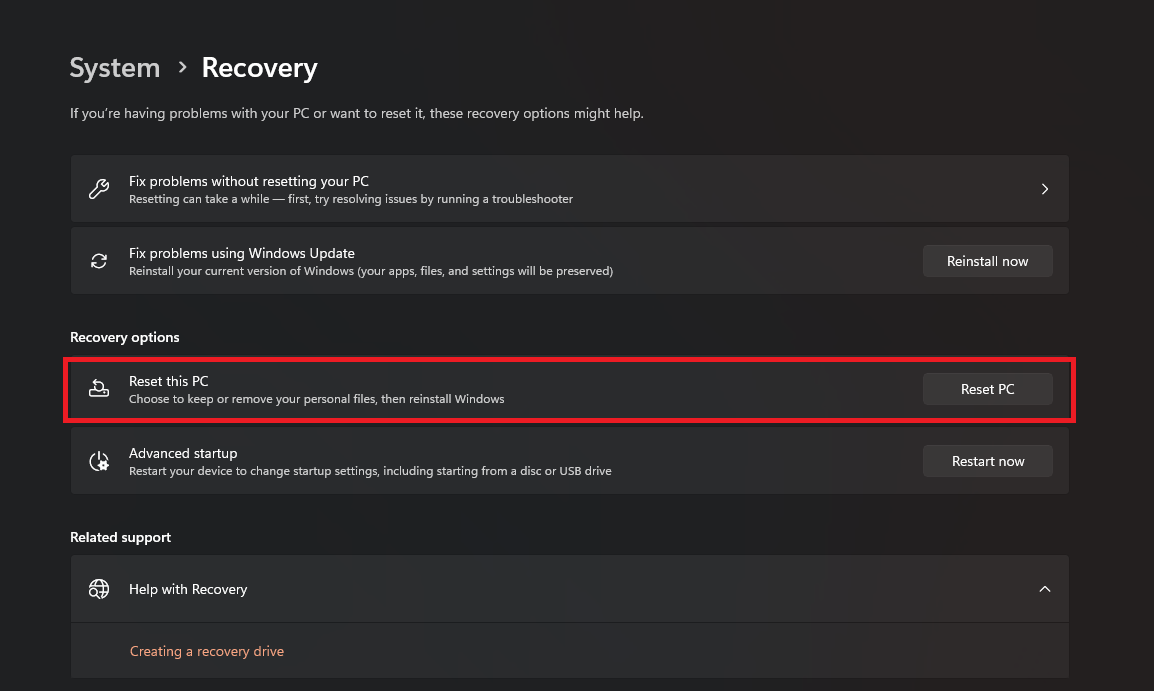
- Afterwards, select the ‘Reset this PC‘ option, which will prompt you to either keep your files or remove everything.
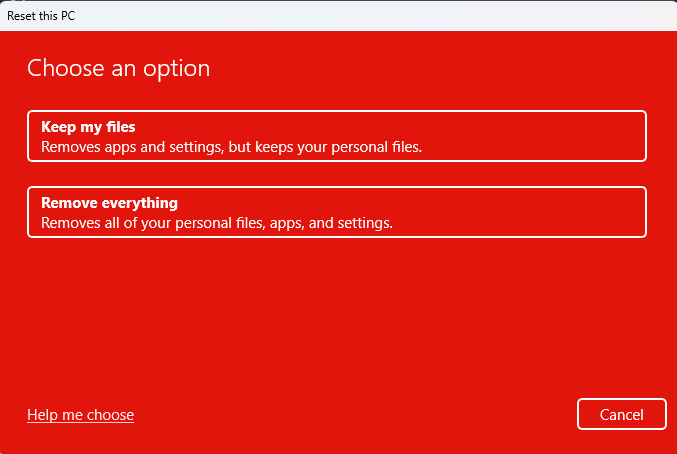
- Choose ‘Keep my Files‘ if you want to retain your documents, videos, and images. Likewise, you can choose ‘Remove everything‘ for a fresh reinstall.
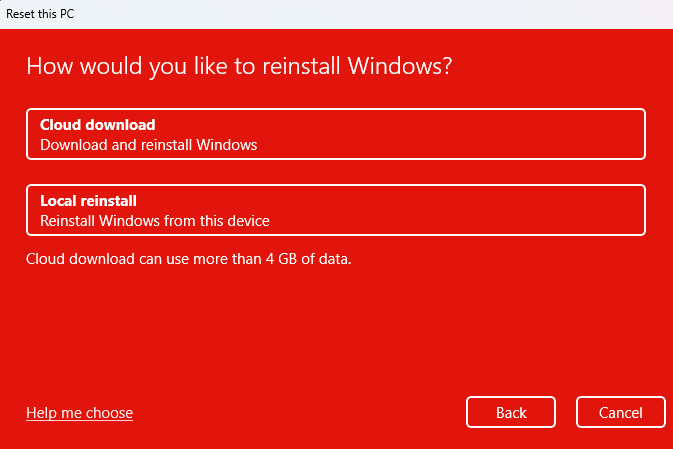
- Select Cloud Install if you have an Internet Connection, or you could opt for a Local Install as well. Do note that Local Installs often fail if your current Windows is corrupted, whereas Cloud gets the clean files from Microsoft’s servers.
- Just sit tight and wait for the OS to be reinstalled and check to see if the error persists.
- For the tech nerds here, you can absolutely create a bootable USB Drive or mount the Windows ISO, tweak the BIOS and install Windows in the old school fashion.
READ MORE: 6 Fixes to Resolve BSOD After System Reset in Windows ➜
5) Try Using your GPU in Another PC
If none of these solutions thus far, even the Windows format worked for you, the issue may lie at the hardware level. If you have another PC lying around, or have a friend’s rig available, try using your GPU in that system. To ensure compatibility, redo Step 1 on the other PC so that no driver conflicts arise.
(Reference Images are taken from ASUS)
- Take all ESD and other precautionary measures to avoid electrostatic buildup.
- Turn off the Power Supply and remove the plug from the wall.
- Unplug the Power Connector(s) from the GPU.
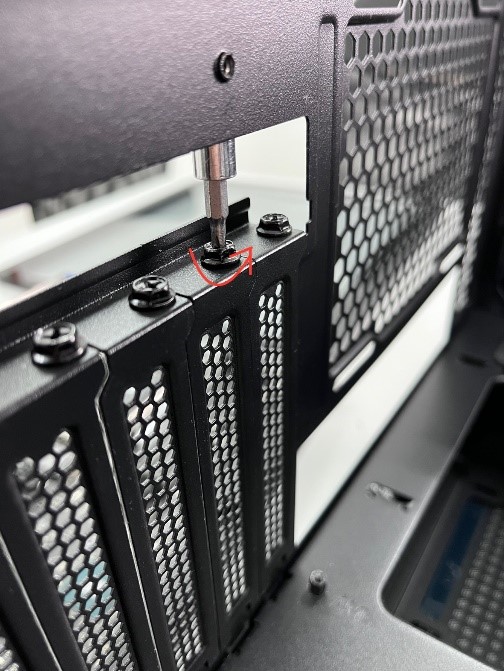
- Unscrew the I/O Shield support, and make sure to keep the screws secured in a safe place.
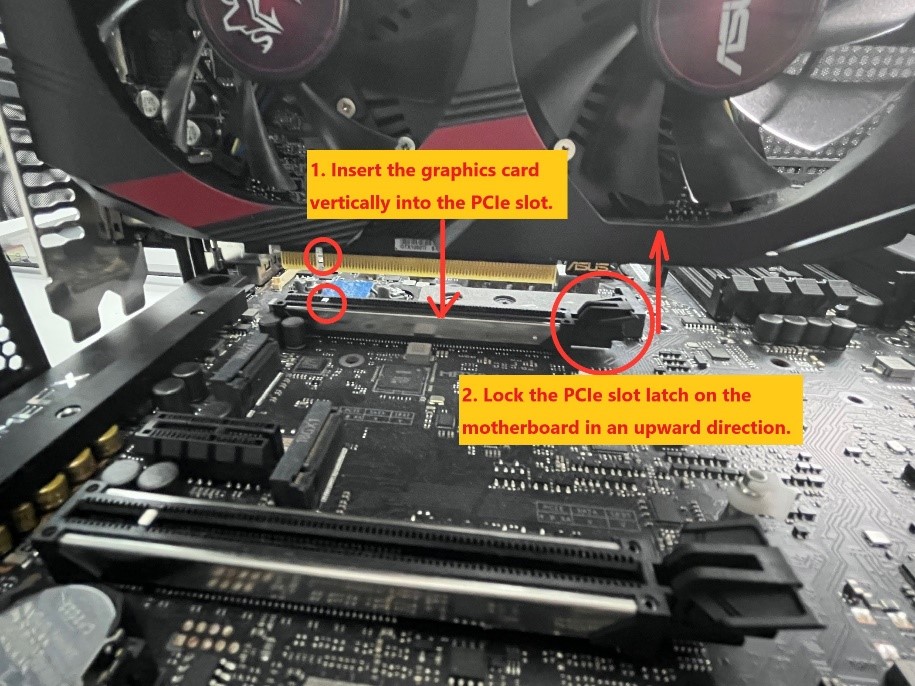
- Press the clip, next to the PCIe Slot on the motherboard, gently until you palpably feel the disengaging mechanism.
- Gently take the GPU out of the case.
- Now slot the GPU, carefully in the other PC, first aligning the PCIe slots and the I/O shield screws.
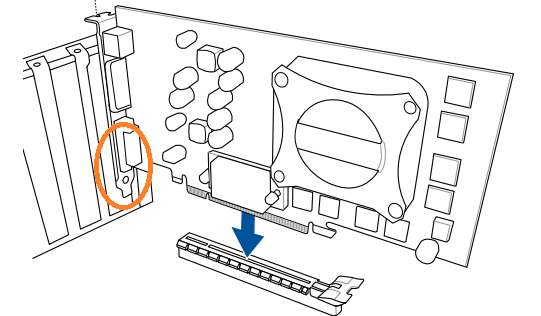
- Once you hear a click, screw in the I/O Shield support and plug in the Power Connector(s).
- Turn the PC on and install drivers as explained in Step 1.
6) Your GPU Might be Faulty
If you’ve gone through the hassle of trying out all the above solutions, the problem just boils down to your GPU’s VRAM, we mean the physical modules. A popular approach by miners was and still is to underclock the GPU’s memory to ensure stability.
Memory underclocking is basically, lowering the clock speed of your VRAM. You can try using MSI Afterburner and set an offset to see the stability. However, it is strongly recommended you RMA your GPU quickly. Once VRAM becomes faulty, it is inevitable that it stops working. You will just make this degradation slower. (Reference Image is taken from ASUS)
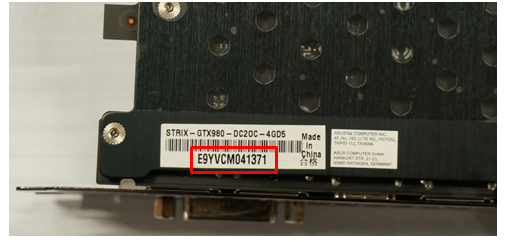
- Check to see if your GPU is still under warranty. If you’ve purchased from an official distributor, check the receipt. If you’ve purchased second-hand, find the Serial Number and check the warranty status from the AIB’s website or support.
- You might need to send in your GPU to see if the AIB will entertain your claim or not.
- In the case your warranty has expired, it is still worth trying to contact support.
READ MORE: How To Determine If A GPU Has Been Used In Mining Or Not ➜
Conclusion
The Video Memory Management Internal BSOD can be related to a myriad of problems. While most can be resolved by simply reinstalling/updating or even rolling back your drivers, you may need to go the extra mile of formatting Windows. In the worst-case scenario, you can try and RMA your GPU or sell it for parts on online marketplaces.
Some drivers may introduce this crash in a few programs or games. Alternatively, game/software developers may also lie at fault owing to insufficient optimization.
FAQs
VIDEO_MEMORY_MANAGEMENT_INTERNAL is a Blue Screen Of Death (BSOD) error message that is more often than not a software or driver related incident. In some rare cases, it could be caused be faulty or incorrectly installed hardware.
It depends. Blue Screens Of Death don’t usually corrupt data, unless if you were installing an important update, copying files and such. Use the ‘sfc /scannow’ command in an elevated Command Prompt Window to scan your system files.
This BSOD can occur on systems equipped with NVIDIA, AMD or even Intel GPUs. It is not specific to any GPU manufacturer.
In such cases, the issue may be caused by lack of proper drivers or poor software optimization. Rolling back your drivers is a good solution, or you can wait for the devs to address this issue / your GPU manufacturer to roll out a new driver update.
Reviewed by Huzaifa Haroon


