How to Increase a Dedicated Video RAM (VRAM) in Windows?
If you have a low-VRAM Graphics card, consider upgrading it to handle tasks that require more graphical resources, such as video editing and playing high-graphics games. A lack of VRAM can lead to graphical memory errors during various computer games. Unfortunately, aside from making advanced settings adjustments, there’s no fix besides upgrading the Graphics card.
Before attempting to increase VRAM, it’s highly recommended to understand what VRAM does and when its expansion is beneficial.
How to Increase Dedicated Video RAM?
To increase VRAM, you can follow one of two methods: through BIOS settings or via the registry editor.
Both methods may help run games that require more VRAM. However, it’s often more effective to purchase an affordable GPU.
Check the Amount of VRAM
Before increasing Video RAM, you should verify the current amount of VRAM on your system:
- Click the Start Menu and type Settings.
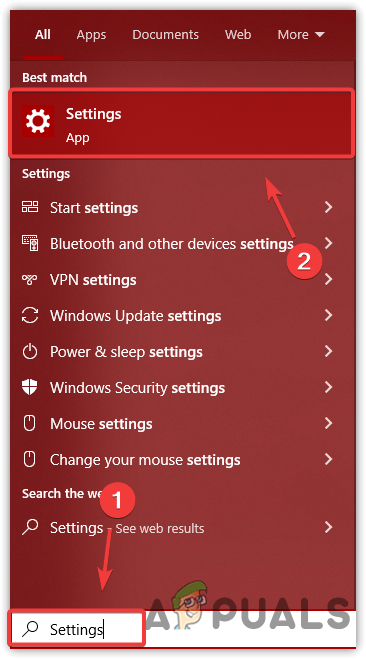
Launching Settings - Open Settings, and navigate to the System section.
- Under Display, scroll down and click on Advanced Display Settings.
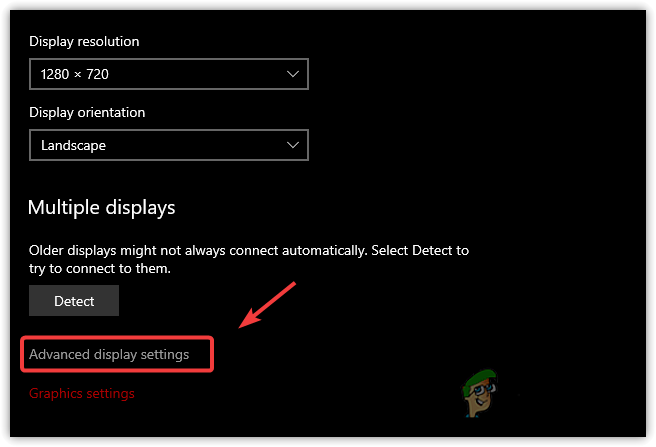
Opening Advanced Display Settings - Click on Display Adapter Properties For Display 1.
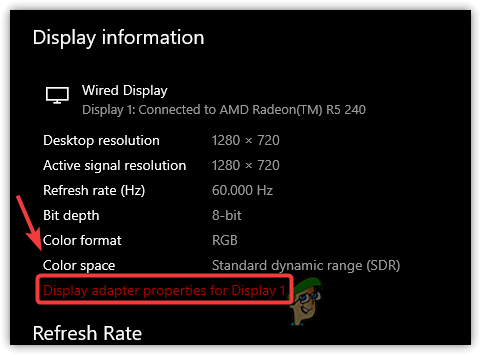
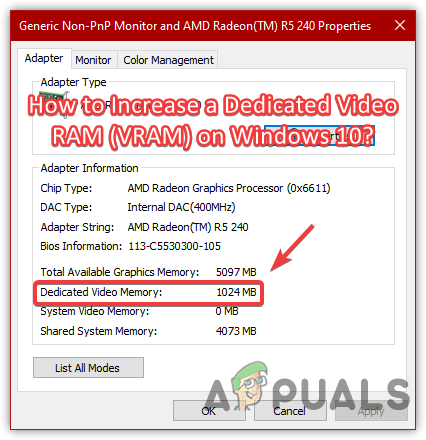
Navigating to Display Adapter Properties - Here, information related to your Graphics Card, including VRAM, will be displayed.
- For example, a 1GB Graphics card will show a Dedicated Video Memory of 1024 MB.
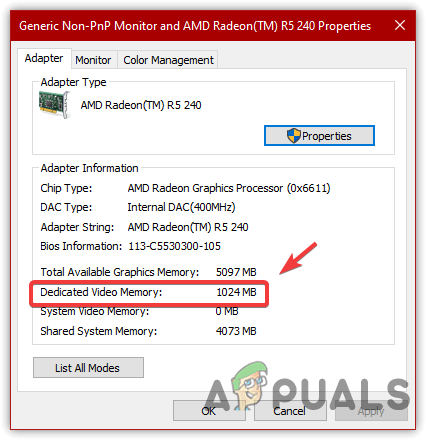
Checking Graphics Card Information
1. Increase VRAM From Motherboard BIOS Settings
Some computers offer a feature called Dynamic Video Memory Technology (DVMT) within the BIOS settings, which allows users to allocate more VRAM. This could reduce your physical RAM because the increase in Pre-Allocated VRAM is taken from system memory.
Some BIOS settings may also enable you to specify a custom amount of memory to allocate. However, use caution to avoid system instability. If your system doesn’t support this option, you could use the registry editor method to simulate increased VRAM.
- Start your computer and press F2, F5, F8, or Del as the logo appears to access BIOS settings. Refer to your motherboard’s manual or website if you’re unsure which key to press.
- Look for options like Graphics Settings, Video Settings, or VGA Share Memory Size.
- Adjust the Pre-Allocated VRAM to a higher value. This may be found under the advanced settings of your BIOS.

Increasing VRAM From BIOS Settings - Save the BIOS settings and restart the computer.
2. Increase VRAM Via Registry Editor
Using the registry editor, you can create a DedicatedSegmentSize entry that tricks the system into reporting more VRAM than actually present. This can sometimes enable a game with high VRAM requirements to run on a system with less VRAM.
- Press Win + R to open the Run dialog.
- Type regedit and hit OK.
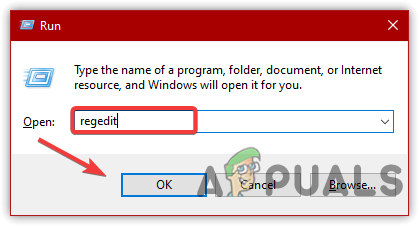
Opening Registry Editor - Navigate to the following path:
Computer\HKEY_LOCAL_MACHINE\SOFTWARE\Intel
- Right-click on the Intel folder, choose New > Key, and name it GMM.

Creating A New Key - With the GMM folder selected, right-click in the right pane, select New, and then click Dword (32-bit) Value.
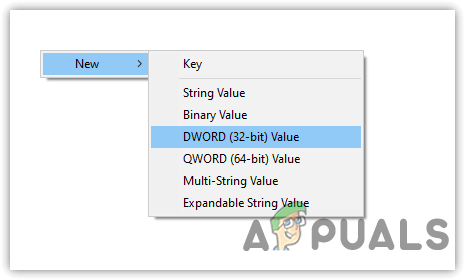
Creating An Entry - Name it DedicatedSegmentSize.
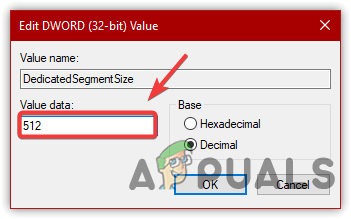
- Double-click on DedicatedSegmentSize, set the base to Decimal, and enter 512 as the value data.
- Click OK and restart your computer.
Increasing VRAM - If previously encountering errors, try launching the game again to see if the issue has been resolved.
- If you wish to revert the changes, return to the registry editor and delete the GMM folder.
3. Upgrade System RAM (Integrated GPUs)
Stepping up your RAM could be a strategic move, particularly if you’re using an integrated GPU that relies on shared system memory. When you increase your computer’s total RAM, you proportionally boost the memory available for the GPU to use as VRAM. This can lead to improved performance for graphically intensive tasks and gaming, especially in systems where the graphics chip doesn’t have its own dedicated memory.
When I changed my windows to windows 10 pro, my dedicated vram dropped to 0 and I have tried to fix it but no solution please help me