How to update graphics driver in Windows? (AMD, Nvidia, Intel)
A graphics driver also known as a display or video driver, is a software program that allows your computer to communicate with your graphics card, operating system and other software components. It is essential for proper display functionality.
It is responsible for translating the instructions from your computer into commands that the graphics card can understand. Without a graphics driver, your computer would not be able to display anything on the screen.
If you are experiencing problems with your graphics card, such as poor performance, crashes, or graphical glitches, updating your graphics drivers will fix the problem.
Here are some of the benefits of updating your graphics drivers:
- Improved performance: Newer drivers can often improve the performance of your graphics card, especially in newer games and applications.
- Bug fixes: Driver updates can also fix bugs that can cause problems with your graphics card, such as crashes or graphical glitches.
- New features: New driver updates can also add new features to your graphics card, such as support for new resolutions or features.
You can update your graphics driver manually or automatically. To update your graphics driver manually, you will need to download the latest driver from the manufacturer’s website. And to update it automatically, you can use Windows Update, Graphics card manufacturer’s update applications or a third-party driver updater program.
Before you start updating your graphics driver, you have to figure out which graphics card do you have in your system. To do this, please visit our detailed guide on ‘How to Identify which Graphics Card you have without opening case‘.
Once you figure out which graphics card is installed in your computer, you can continue following the process of driver installation of your dedicated graphics card.
How to update driver if you have Nvidia Graphics Card?
Updating a Nvidia Graphics driver is pretty straight forward and can be done in three different ways:
- Using Nvidia GeForce Experience.
- Using Windows Update.
- Using Nvidia’s Website.
Through Nvidia GeForce Experience
Nvidia GeForce Experience is a free application that allows you to automatically update your Nvidia graphics driver, as well as optimize your games for the best possible performance. To use Nvidia GeForce Experience, you will need to download and install the application from the Nvidia website. To do that, follow these steps:
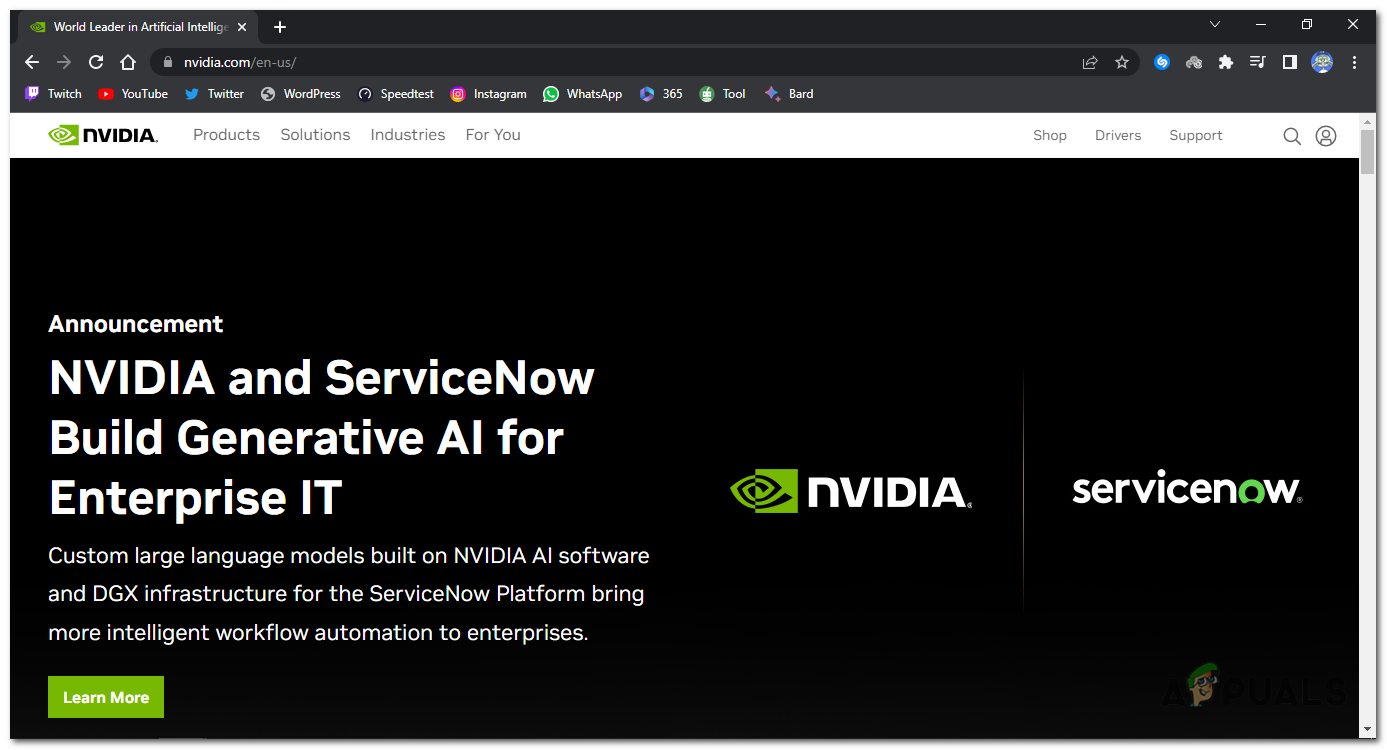
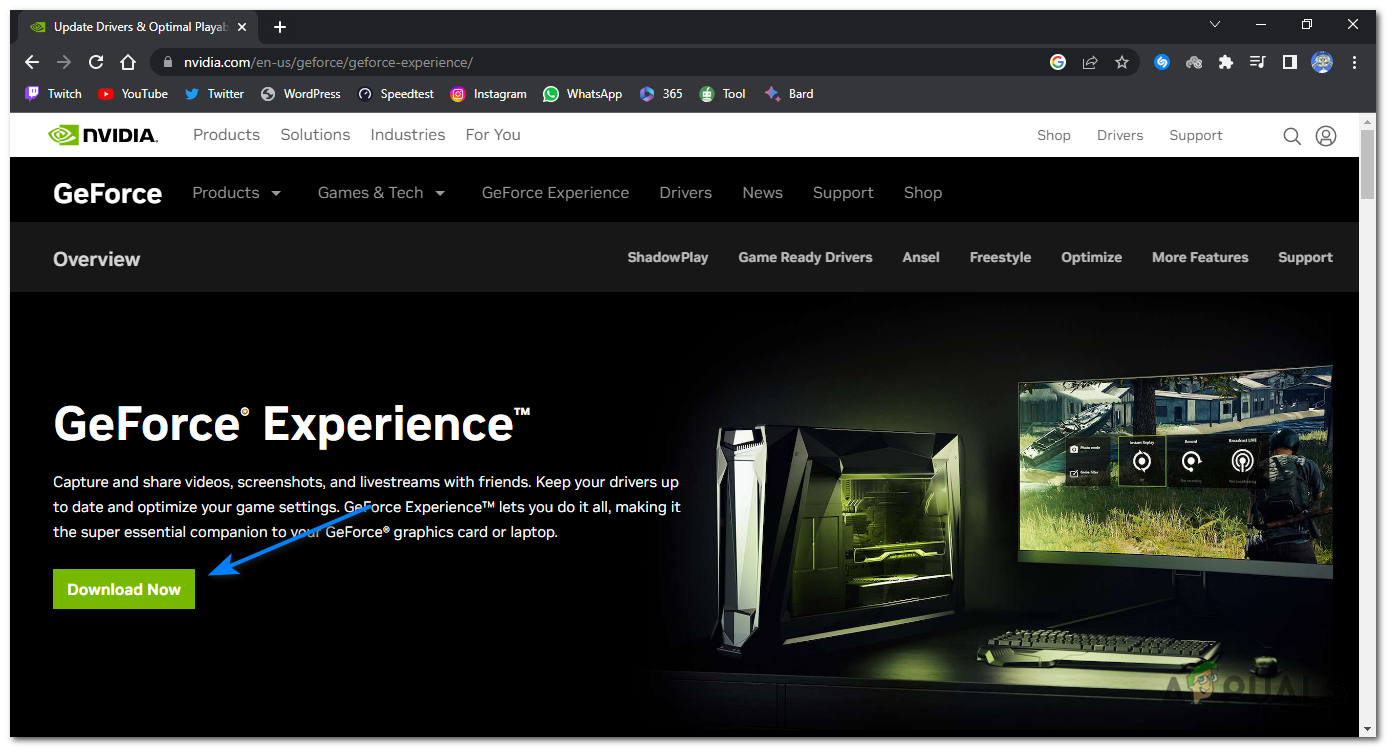
- Go to the Nvidia website at www.nvidia.com.
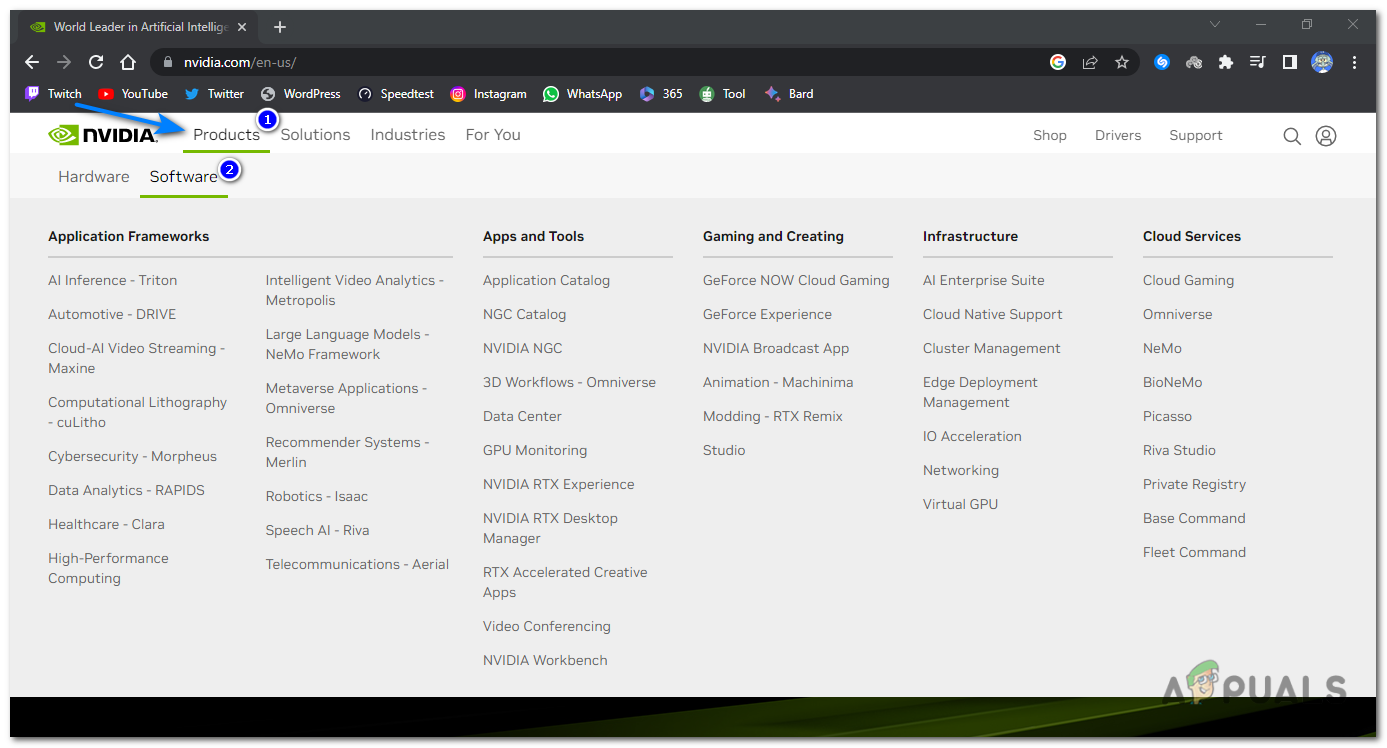
go to the Nvidia website - Click the Product button at the top left of the website, then click Software under the Product area.
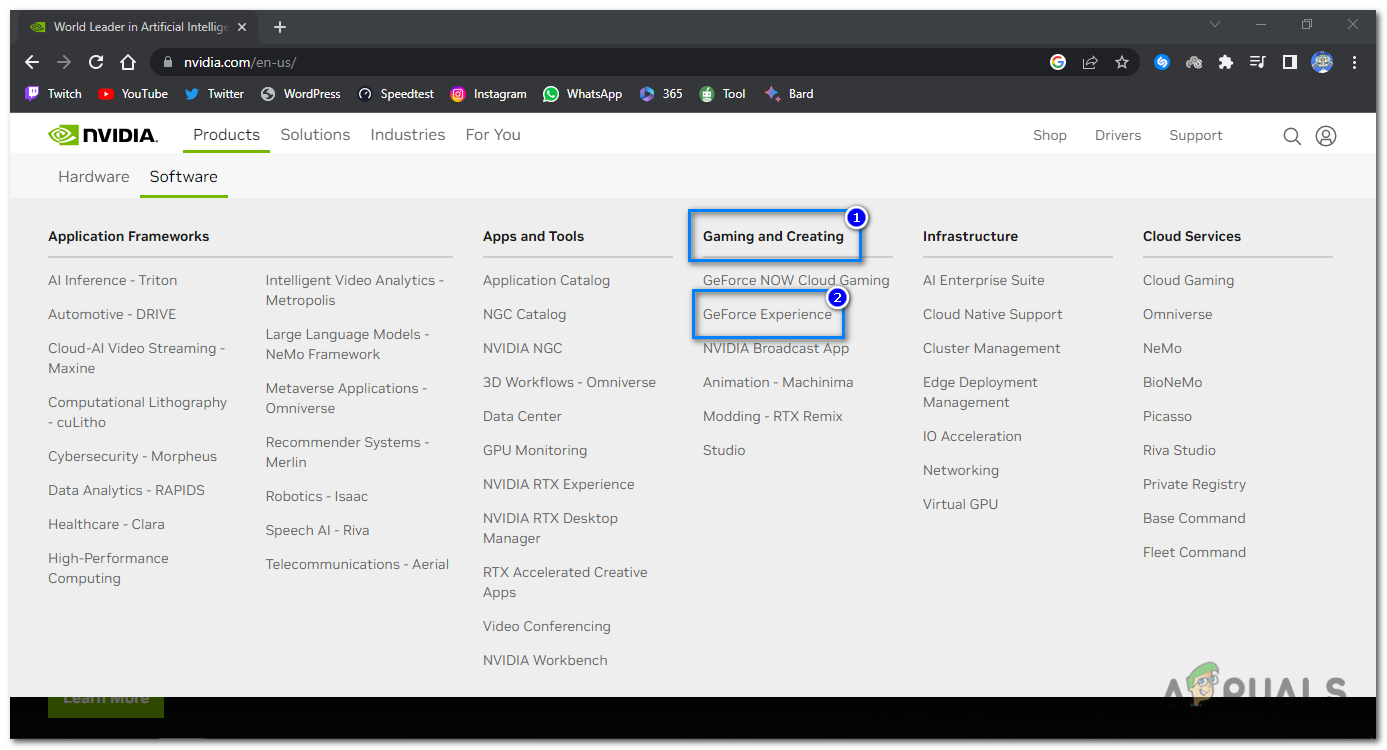
Click the Product button at the top left of the website, then click Software under the Product area. - Navigate to “Gaming and Creating” and click on “GeForce Experience“.
Navigate to “Gaming and Creating” and click on “GeForce Experience”. - Now click on the “Download Now” button under “GeForce Experience” and it should start downloading the application.
click on the “Download Now” button under “GeForce Experience”. - Locate the downloaded file and double-click on it to run the installer.
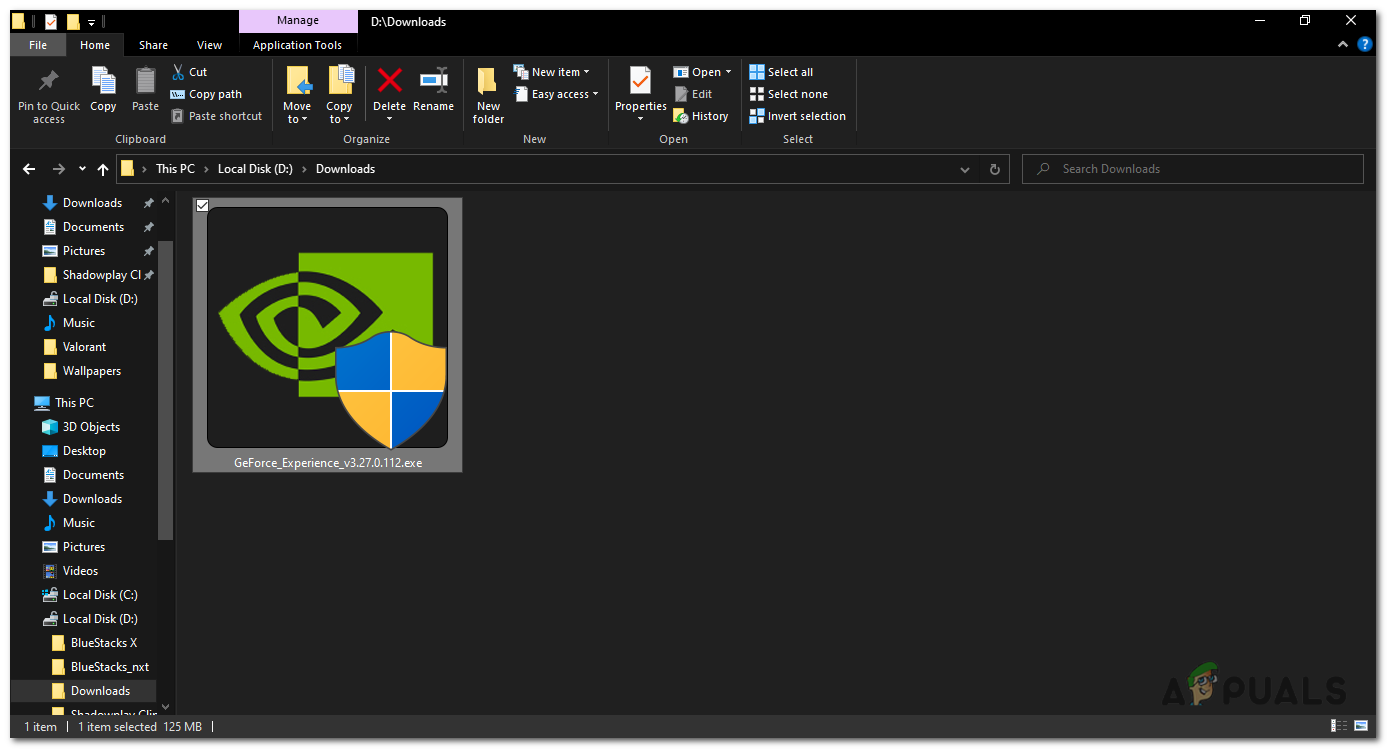
Locate the downloaded file - Follow the on-screen instructions to proceed with the installation.
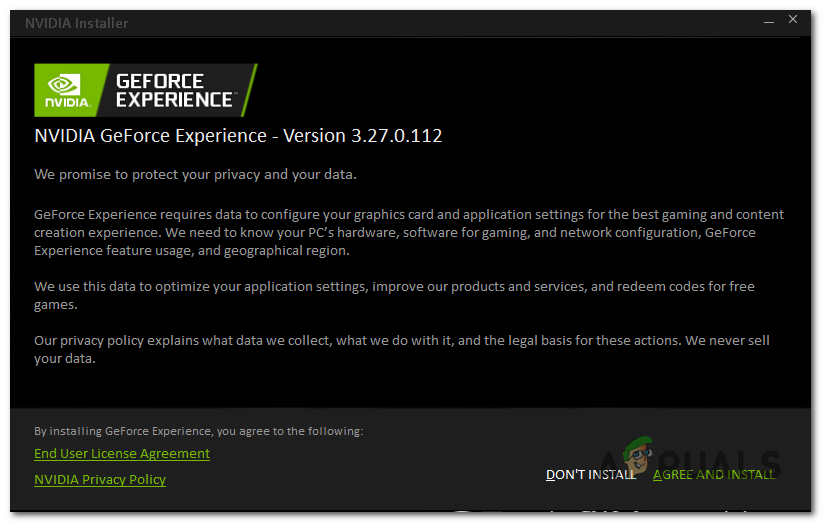
Follow the on-screen instructions to proceed with the installation. - After the installation is complete, launch the Nvidia GeForce Experience software from the desktop or Start menu.
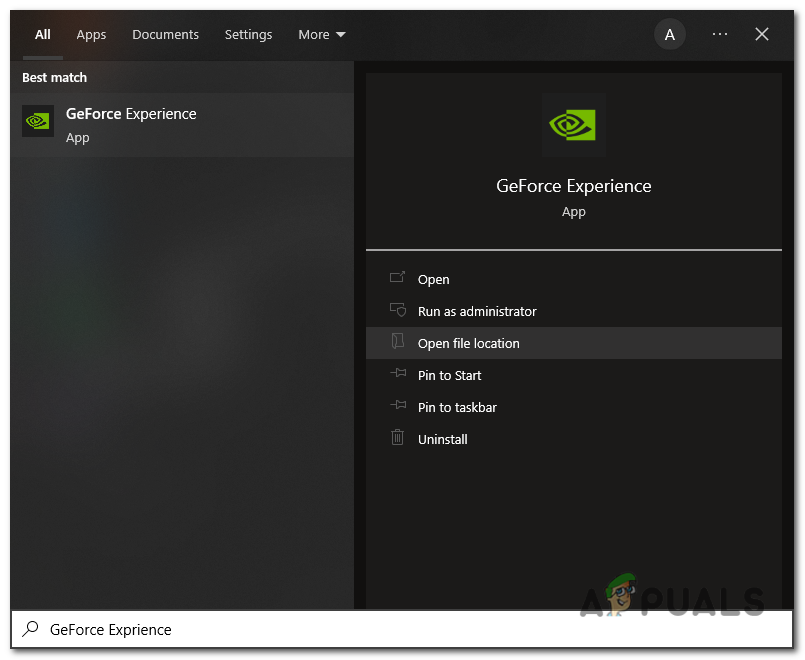
launch the Nvidia GeForce Experience software - You will be prompted to log in to your Nvidia account. If you don’t have an account, you can create one for free.
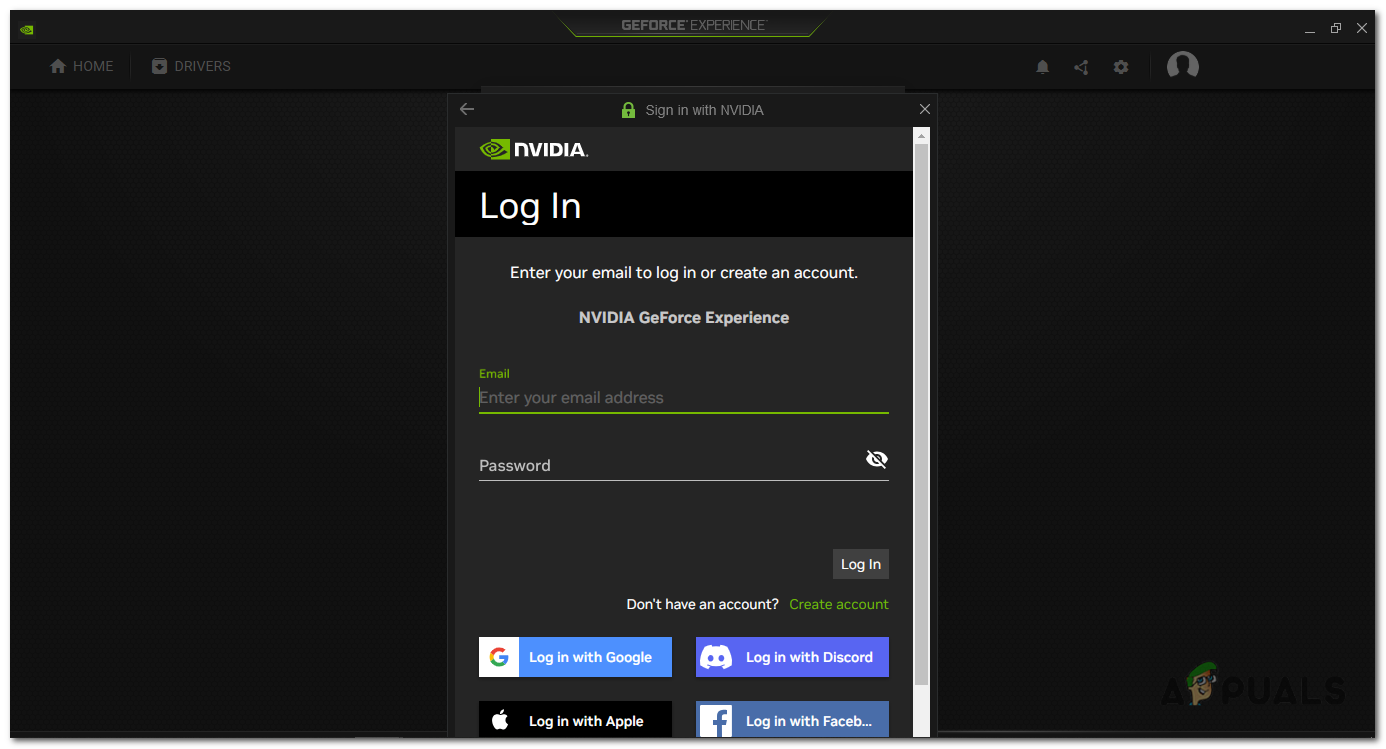
log in to your Nvidia account. - Once you are logged in, the Nvidia GeForce Experience software will automatically scan your system for installed games, Nvidia graphics drivers, system hardware and available driver updates.

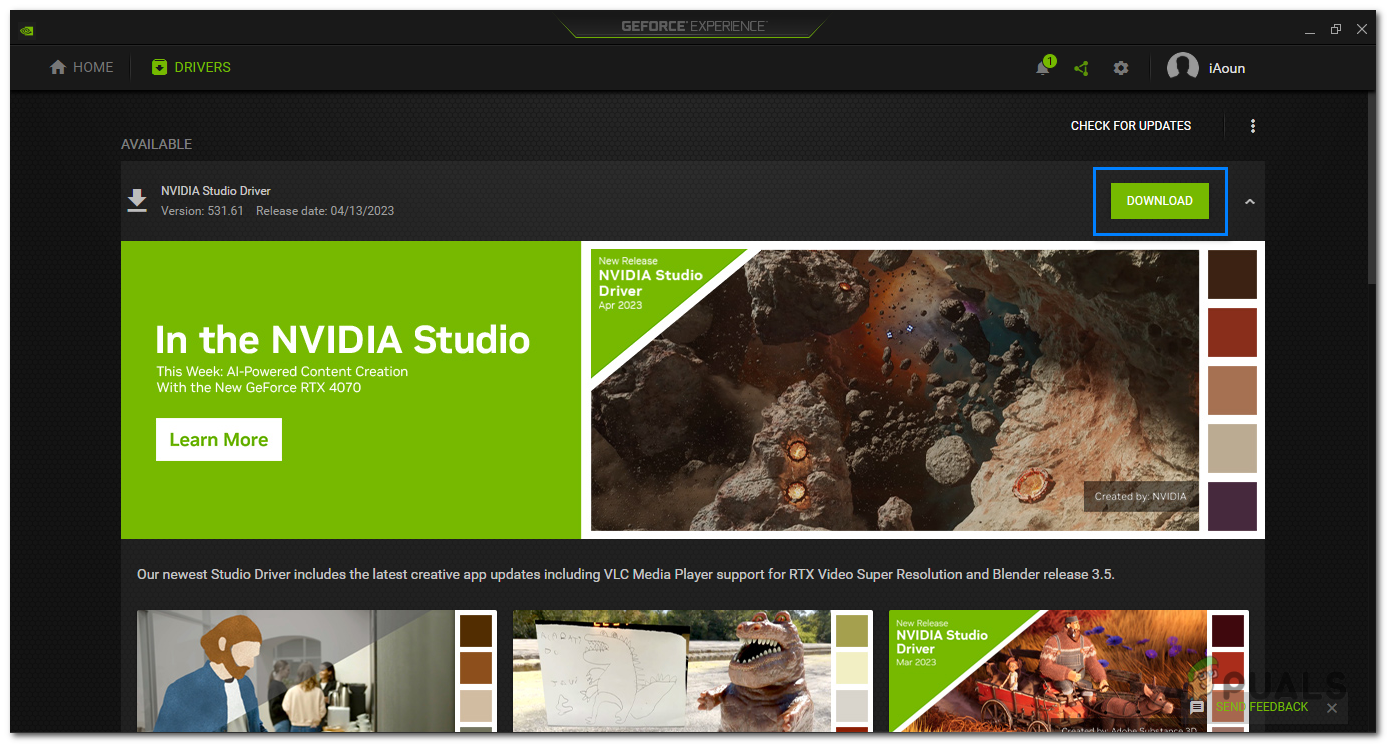
- To install the graphics driver, go to the DRIVERS tab.
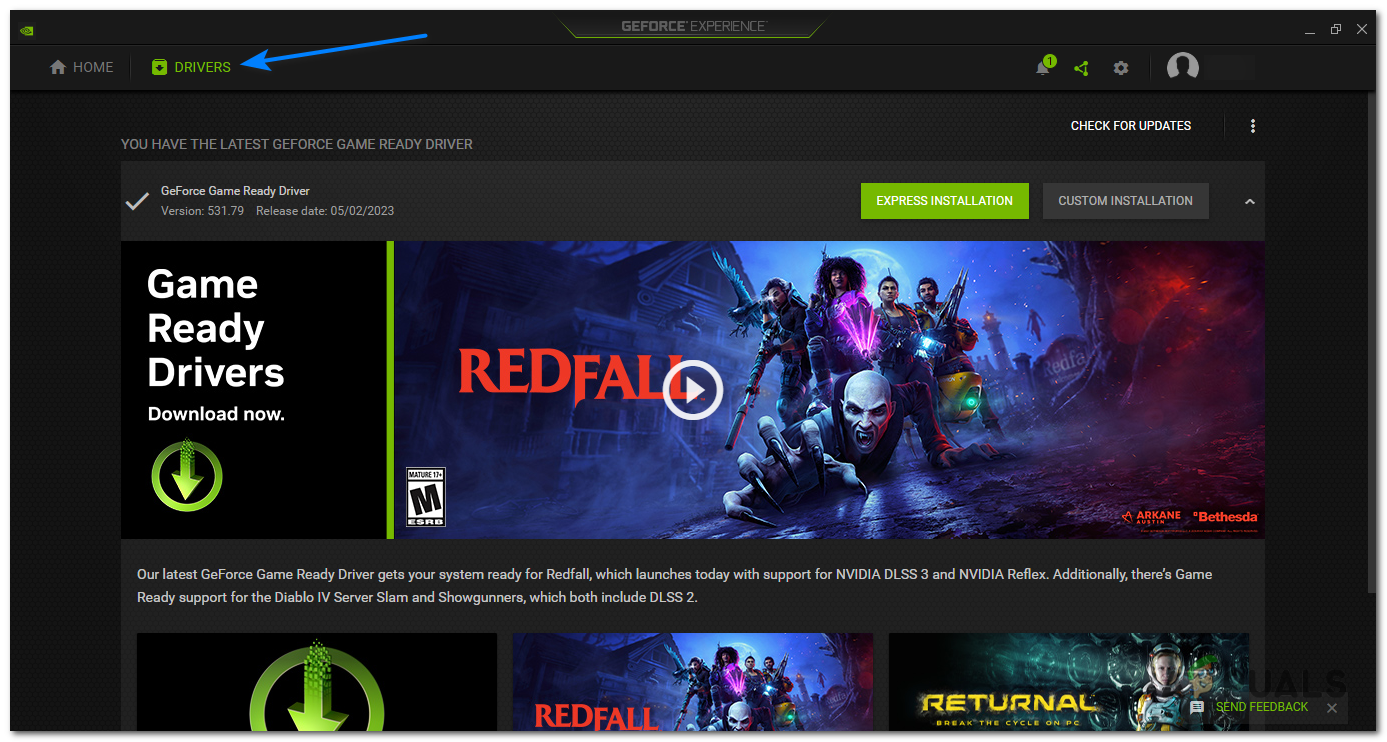
go to the DRIVERS tab - Click on the “Download” button to begin downloading the new driver.
Click on the “Download” button - Once the driver has been downloaded, click on Express Installation to start the installation process; your screen may flicker or go black while the driver is being installed.
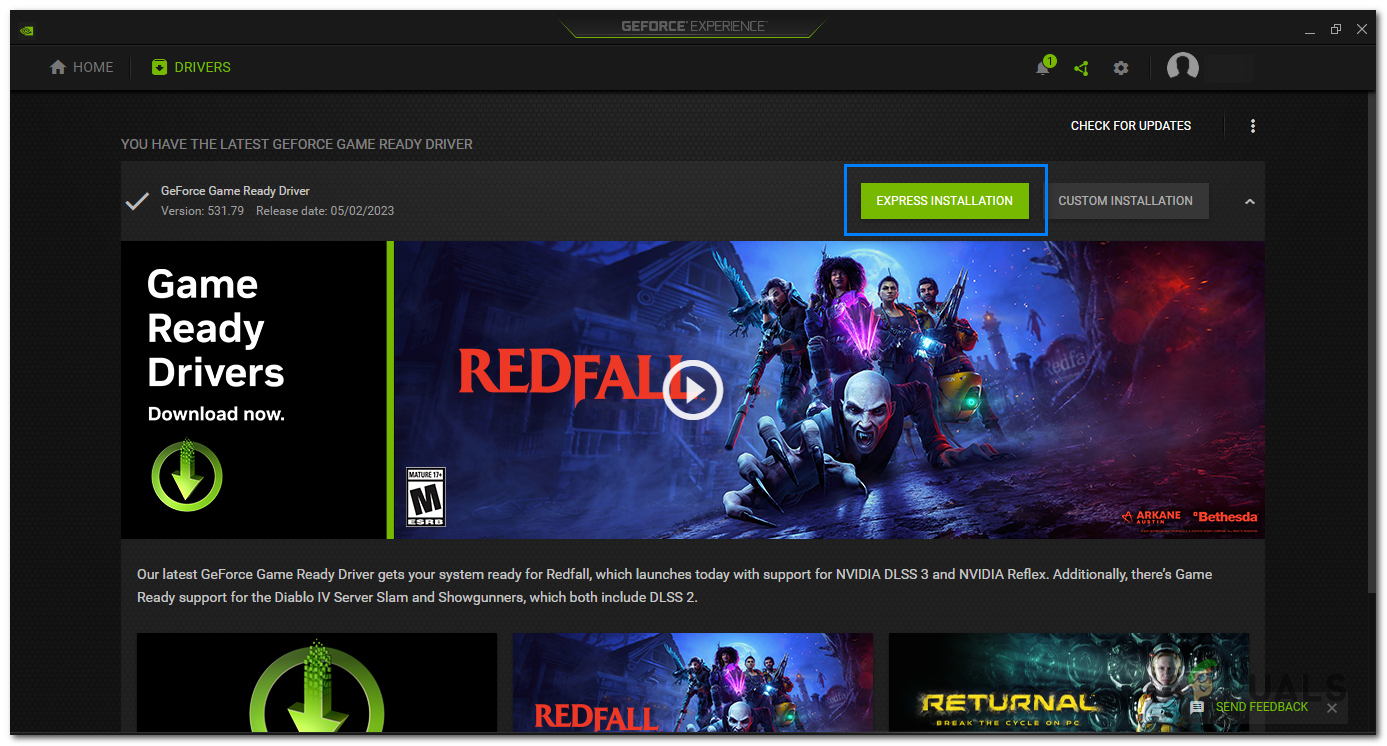
click on Express Installation to start the installation process - After the driver update is installed (it will take a few minutes), restart your computer to ensure that the changes take effect.
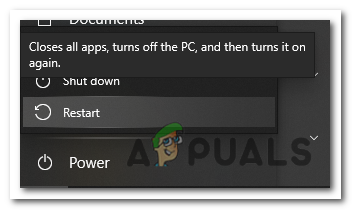
restart your computer
If a new driver is available, you will see a notification or a message indicating that an update is ready. Click on the notification or navigate to the “Drivers” tab within Nvidia GeForce Experience to install the update.
Through Windows Update
Note: Please note that this method is not recommended as there are several reports of Windows Update installing the wrong or older driver. Which can seriously hurt performance and stability of your graphics driver. Therefore, it is advised to consider alternative methods.
Windows Update is a built-in Windows feature that allows you to automatically update your drivers. To use Windows Update to update your Nvidia graphics driver, follow these steps:
- Open the Start menu and search for “Check for updates”.

Open the Start menu and search for “Check for updates”. - Click on the “Check for updates” button.
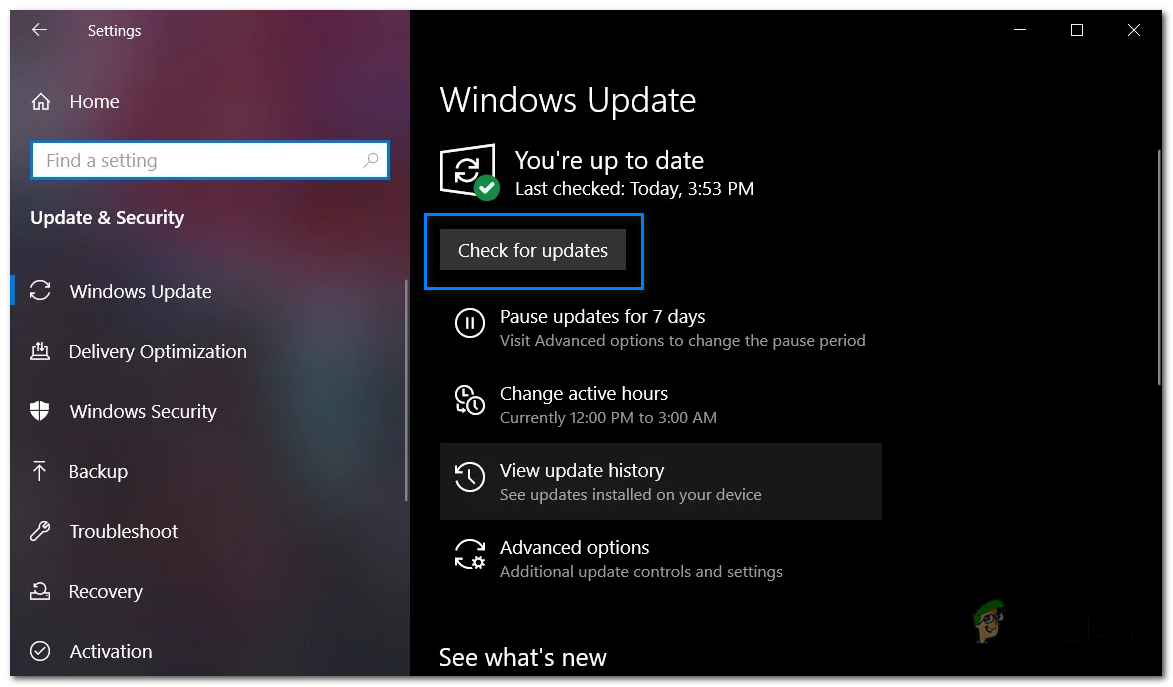
Click on the “Check for updates” button. - Windows Update will scan your computer for any available updates, including driver updates.
- If there are any available driver updates, click the download button, and they will begin downloading and installing automatically for you.
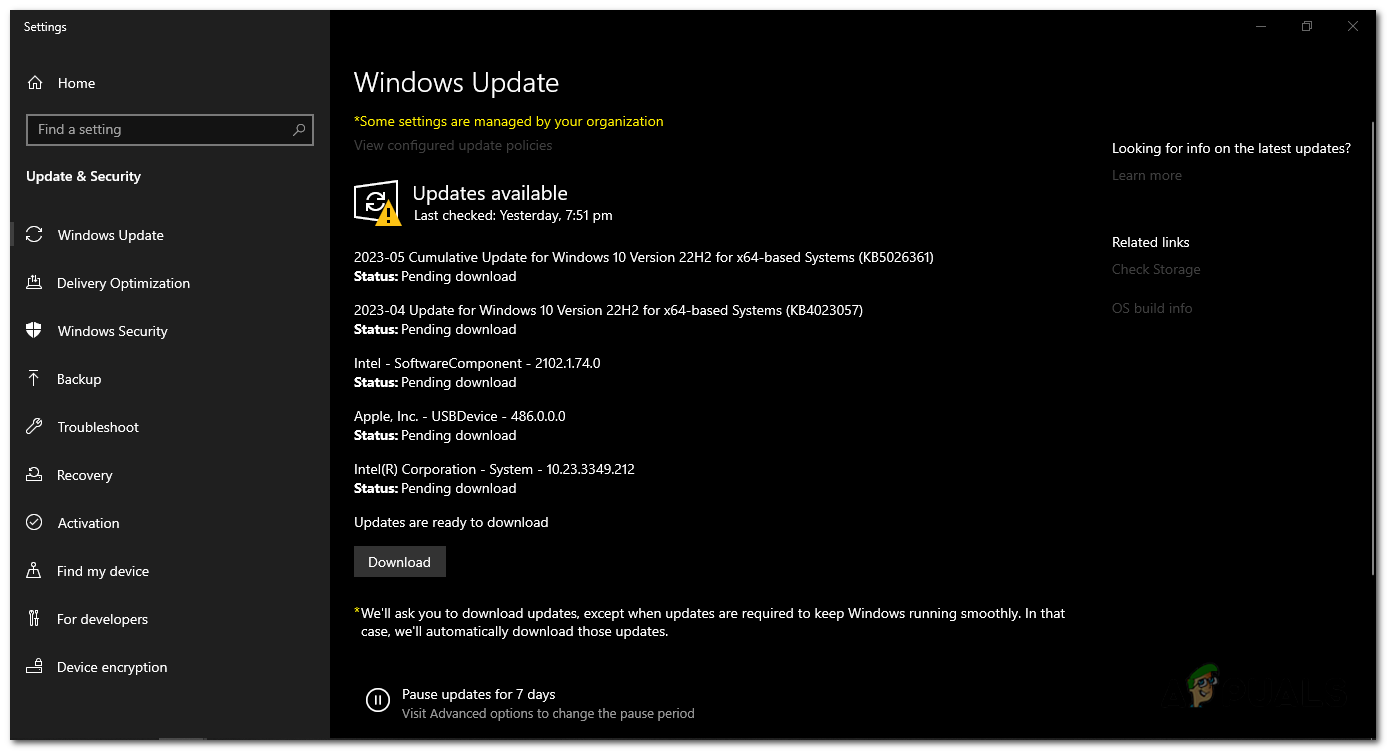
click the download button
Through Nvidia’s Website
To download and install Nvidia graphics drivers from Nvidia’s website, you can follow these steps:
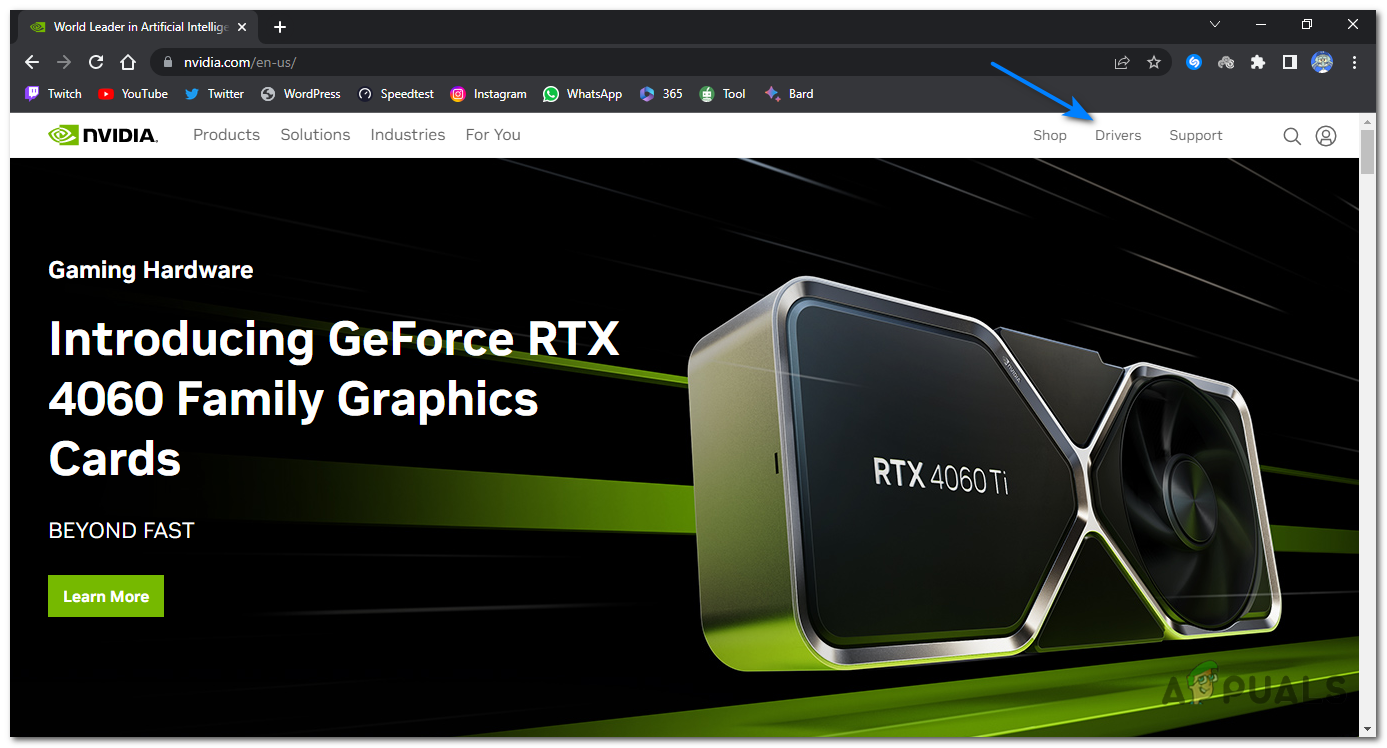
- Go to the Nvidia website at www.nvidia.com.
Go to the Nvidia website - On the Nvidia website, navigate to the “Drivers” section. This section is located at the top right of the page.
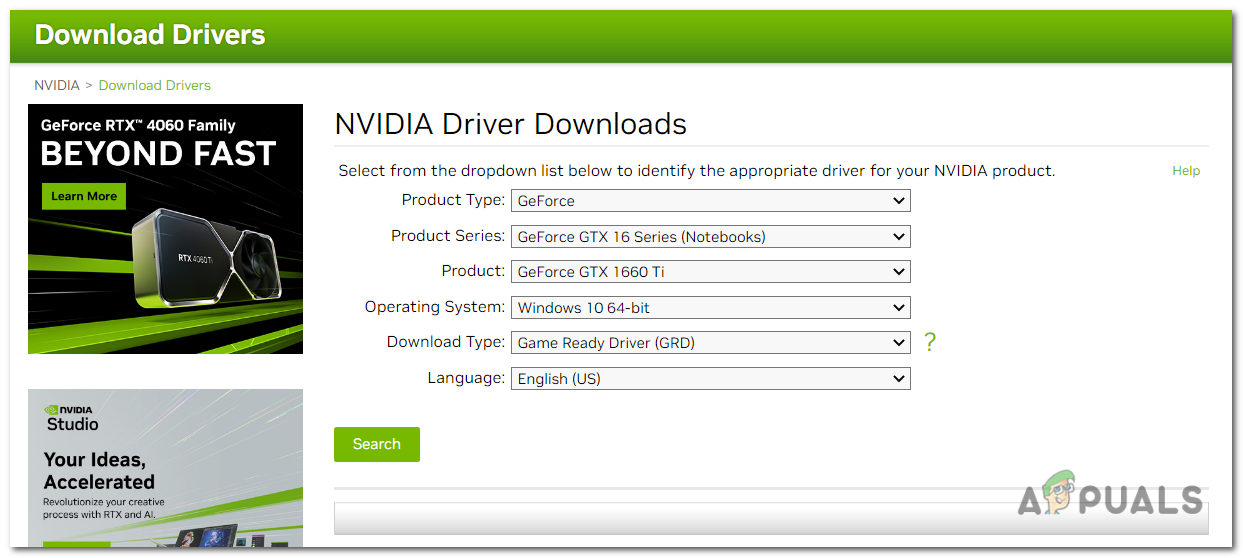
On the Nvidia website, navigate to the “Drivers” section. - In the Drivers section, you’ll typically find options to search for drivers based on your graphics card model or select your graphics card series. Choose the appropriate options to narrow down the available drivers, and press “search”.
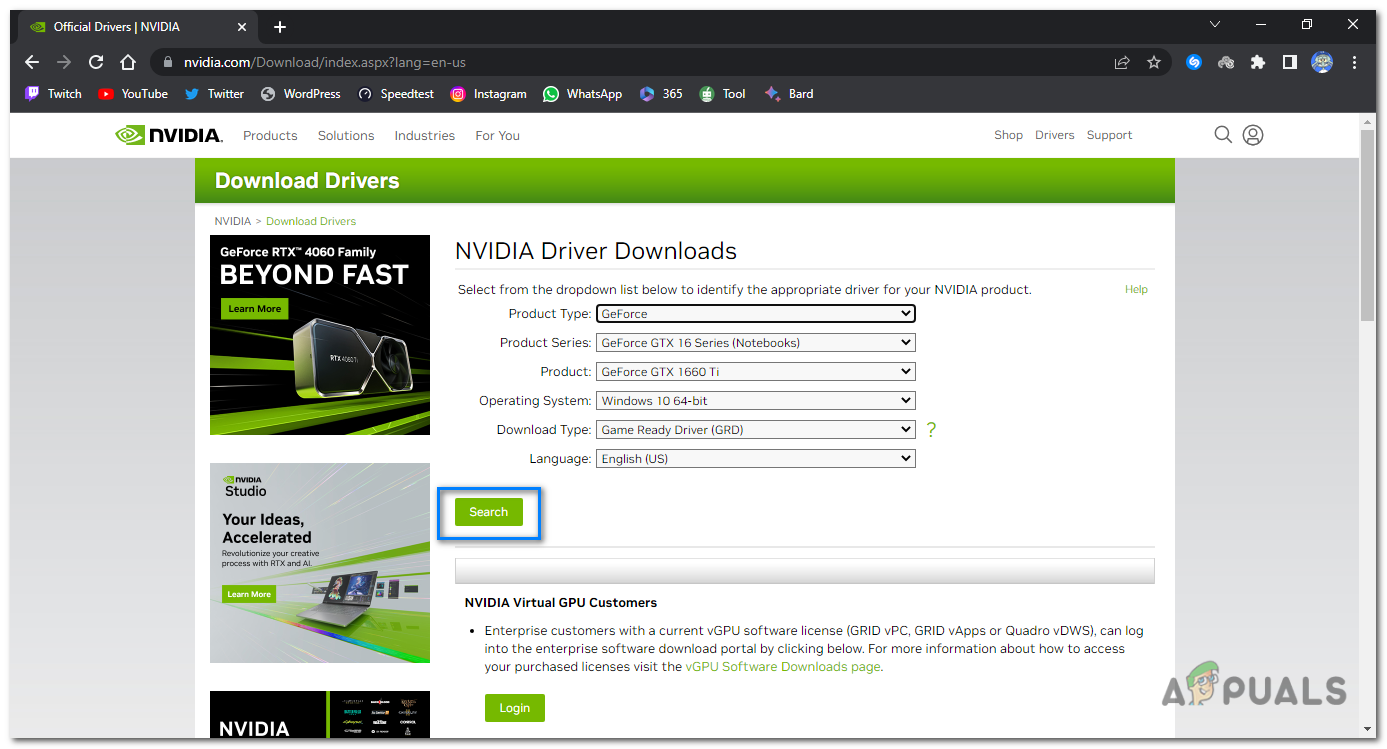
search for drivers based on your graphics card model or select your graphics card series - Click on the “Download” button next to the driver.
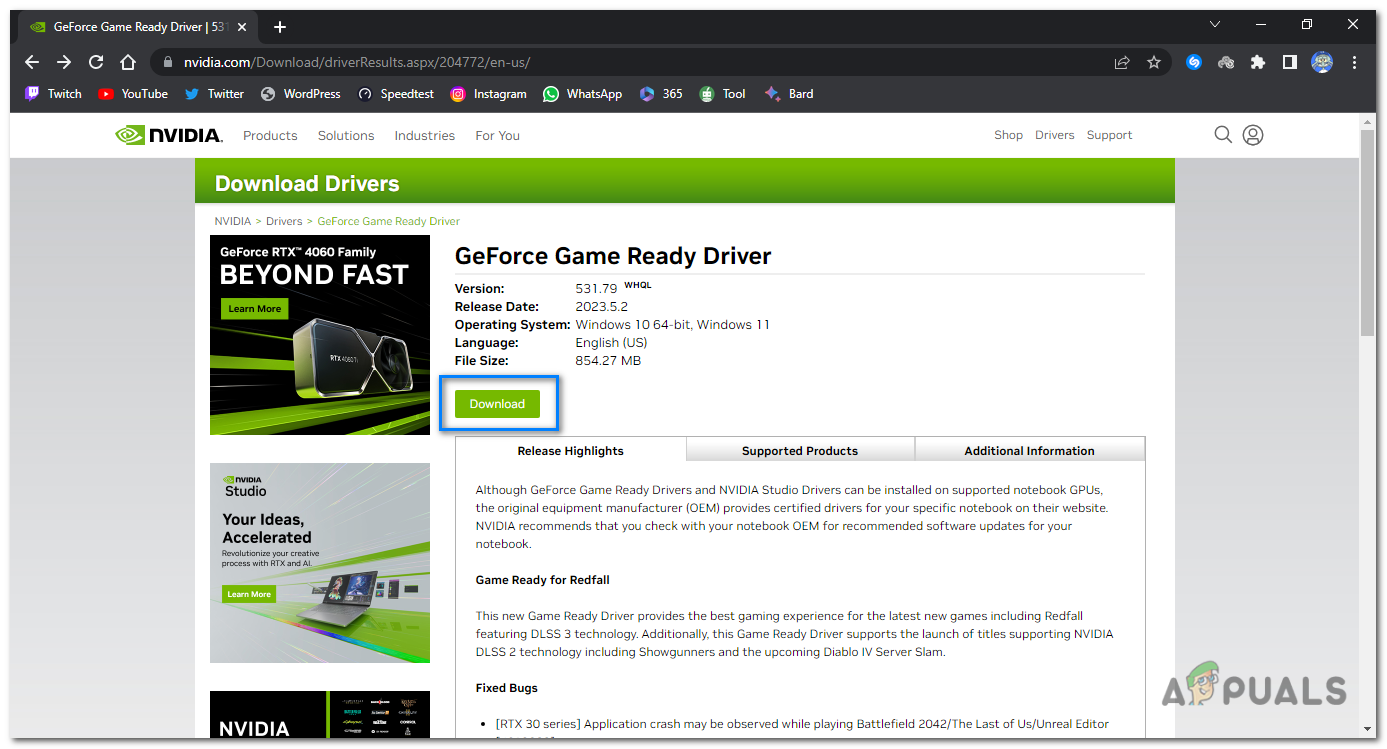
Click on the “Download” button next to the driver - You will be prompted to another window, press “Download” again to start the download.
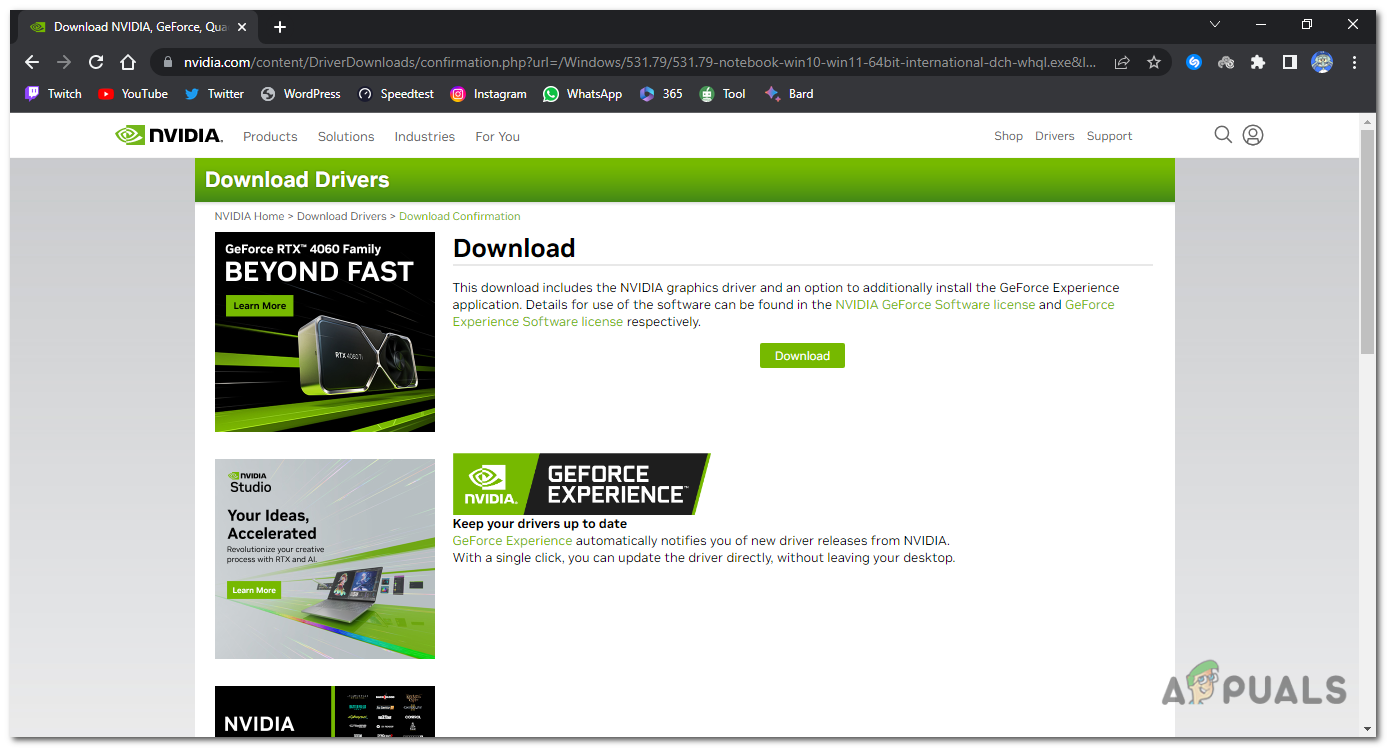
press “Download” again to start the download - Once the download is complete, locate the driver file on your computer and double-click on it to run the installer. The file will usually have a .exe extension.
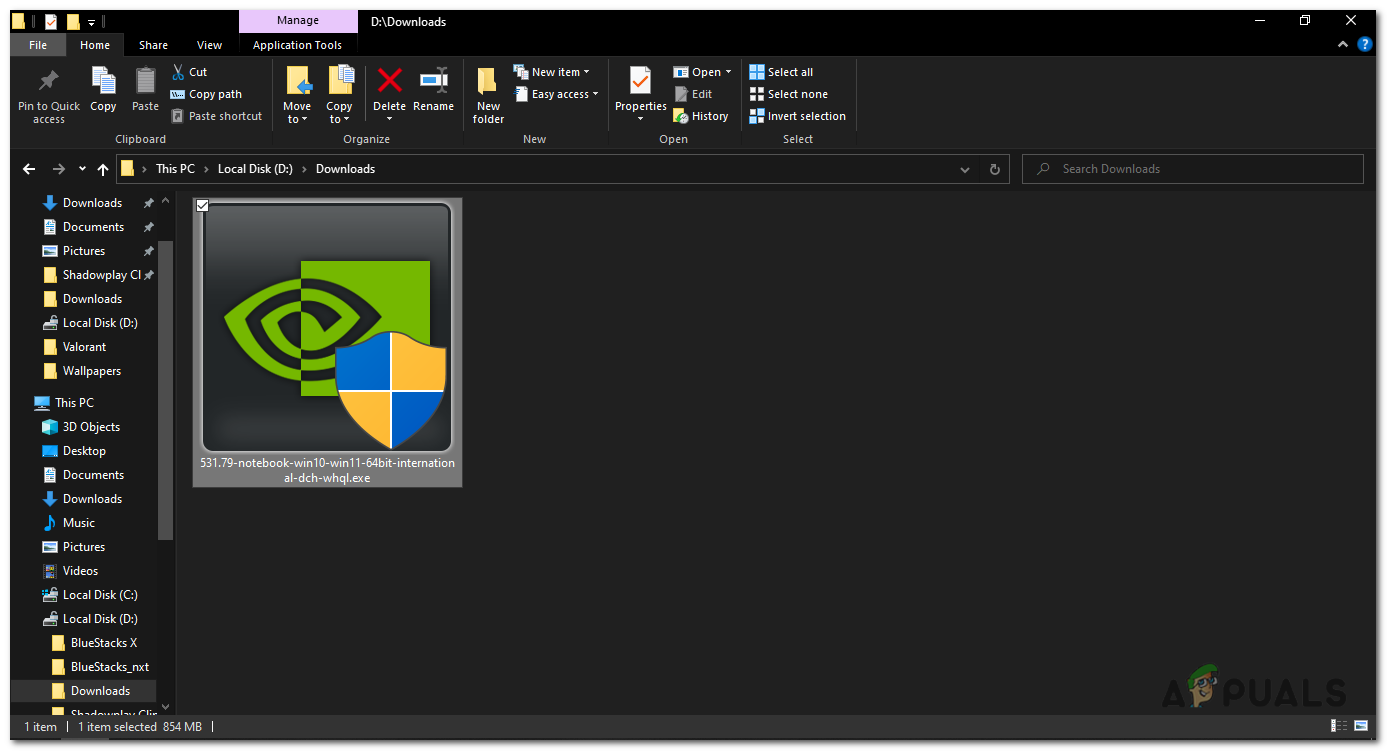
locate the driver file on your computer - Choose the Extraction path and press OK.
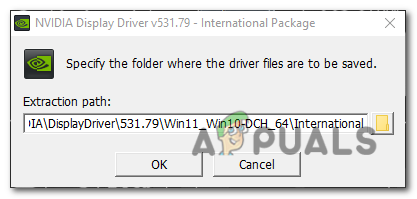
Choose the Extraction path and press OK - The driver installation process will start after the installer saves the driver files on your computer.

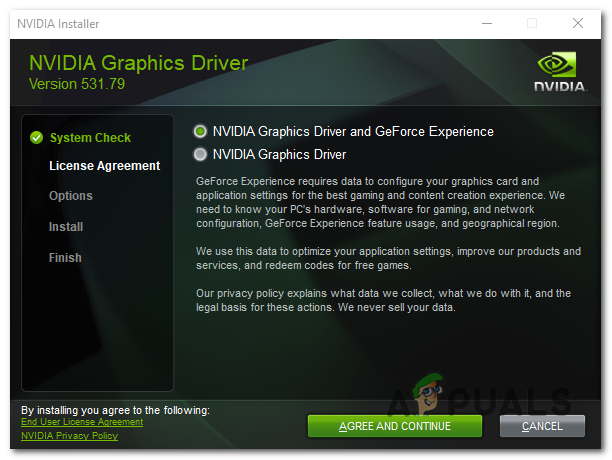
The driver installation process will start after the installer saves the driver files on your computer - Select “NVIDIA Graphics Driver and GeForce Exprience” and press “AGREE AND CONTINUE”.
Select “NVIDIA Graphics Driver and GeForce Exprience” and press “AGREE AND CONTINUE” - Choose express installation: During the installation process, you will be presented with installation options. Select the “Express Installation” option. This option will install the driver with default settings and recommended components.
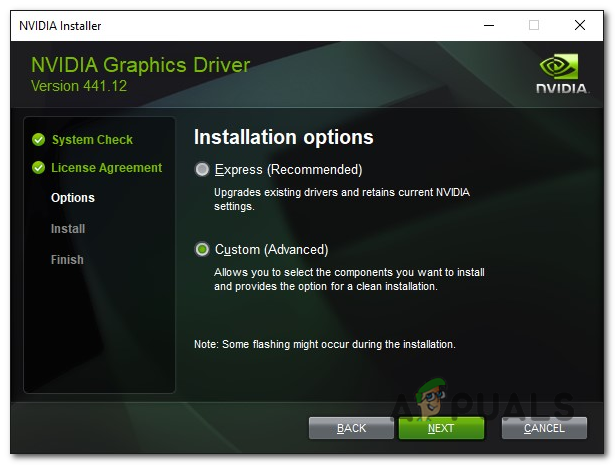
- Customize installation options (optional): Some driver installers provide customization options during the installation process. You can choose to perform a clean installation, select specific components to install, or modify other installation settings. Customize these options according to your preferences.
- Your screen may flicker or go black while the driver is being installed.
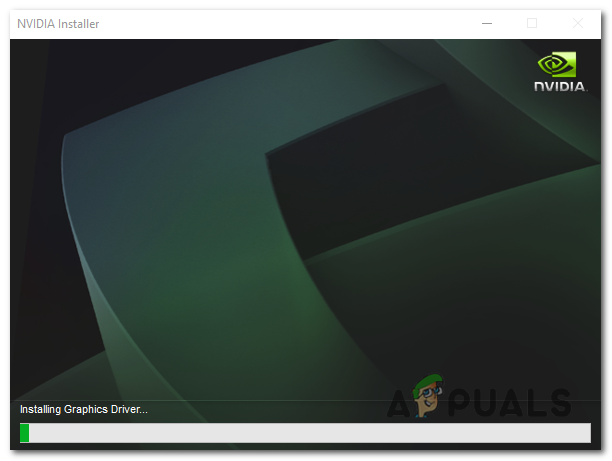
Your screen may flicker or go black while the driver is being installed - After the driver update is installed, restart your computer to ensure that the changes take effect.

restart your computer
How to update your graphics driver if you have an AMD GPU?
Updating a AMD Radeon Graphics driver is pretty straight forward and it can be done in two different ways:
- Using AMD Adrenalin Software.
- Using Windows Update.
Through AMD Adrenalin Software
AMD Adrenalin Software is a free application that allows you to automatically update your AMD Radeon Graphics driver, as well as optimize your games for the best possible performance. To use AMD Adrenalin Software, you will need to download and install the application from the AMD website. To do that, follow these steps:
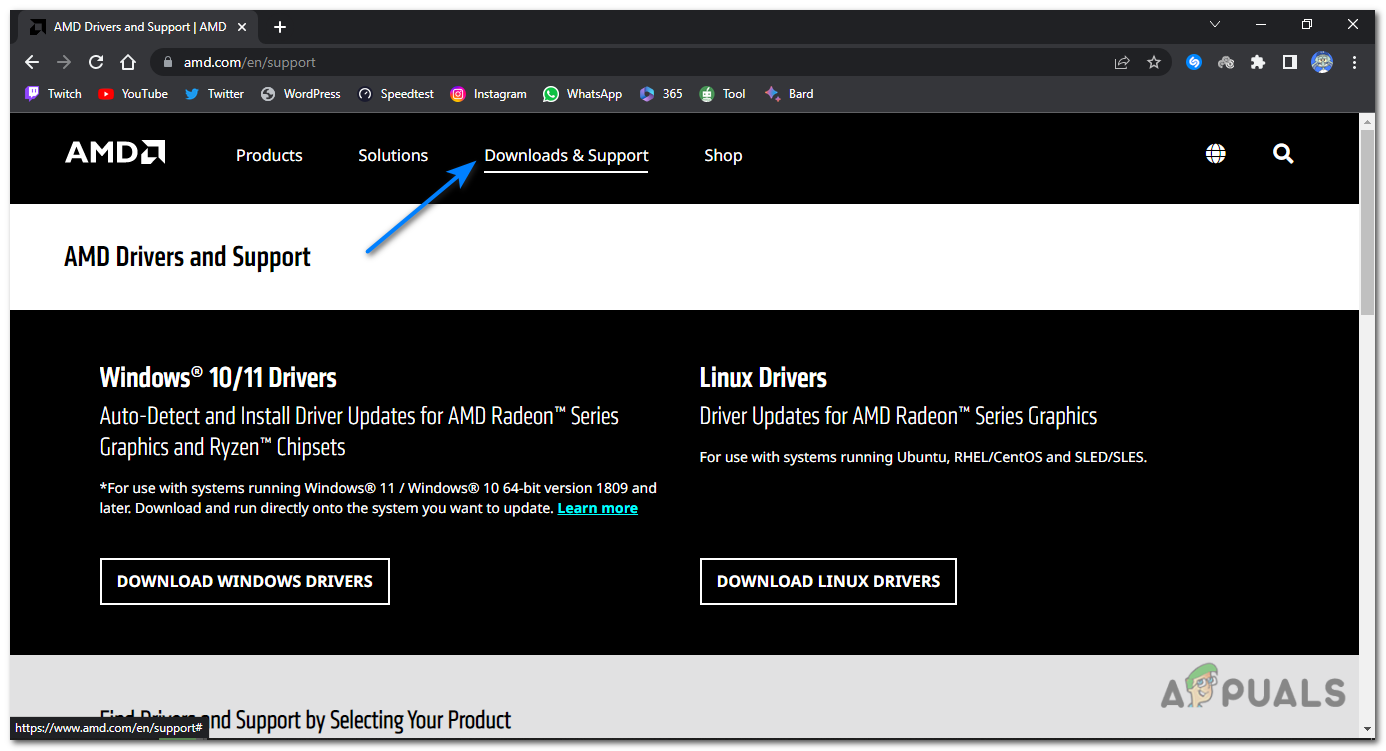
- Visit the AMD website: Go to www.amd.com.

Visit the AMD website - On the AMD website, click the “Download & Support” section. This section is located at the top of the page or can be accessible through a menu.
click the “Download & Support” section - In the “Download & Support” section, under the “Radeon Graphics & AMD Chipsets” option, click on “drivers”.
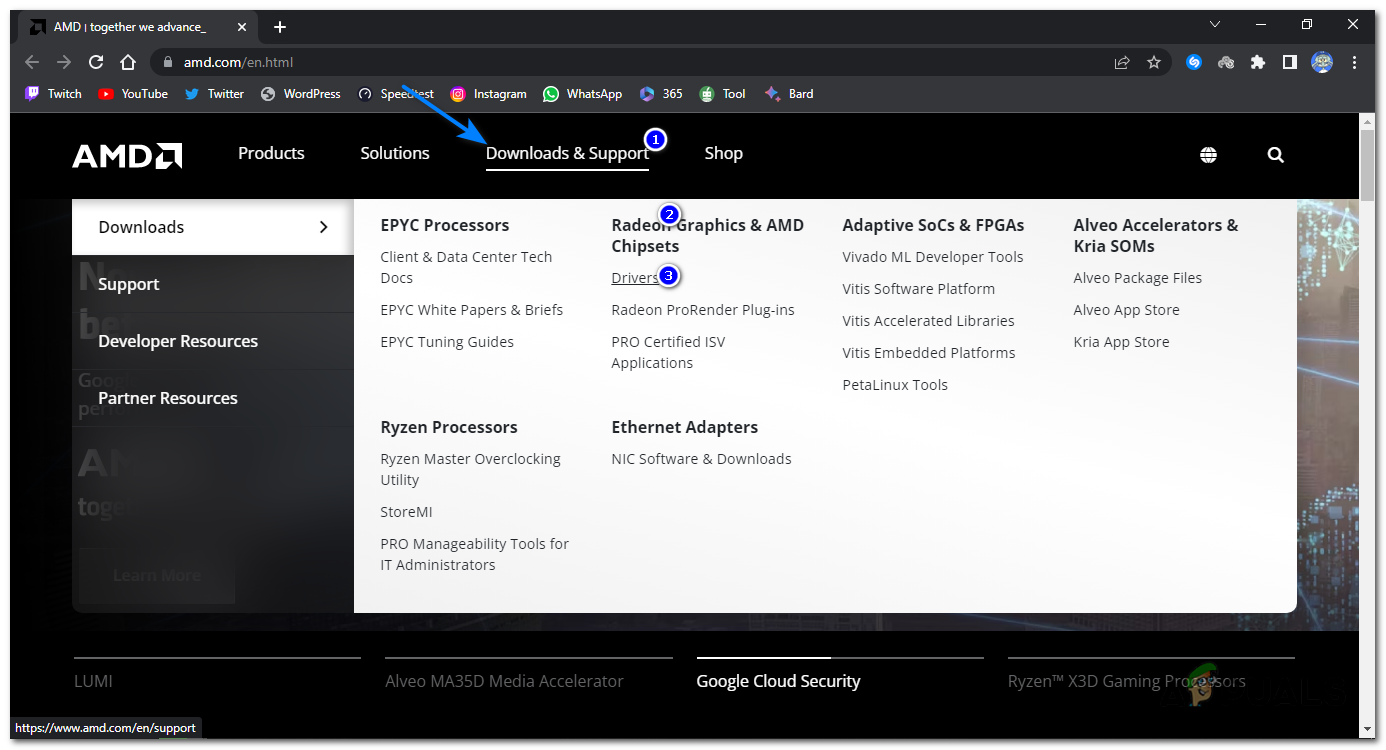
In the “Download & Support” section, under the “Radeon Graphics & AMD Chipsets” option, click on “drivers”. - This will open a new page, left-click on the “DOWNLOAD WINDOWS DRIVERS” option. The AMD Adrenalin Software will start downloading.
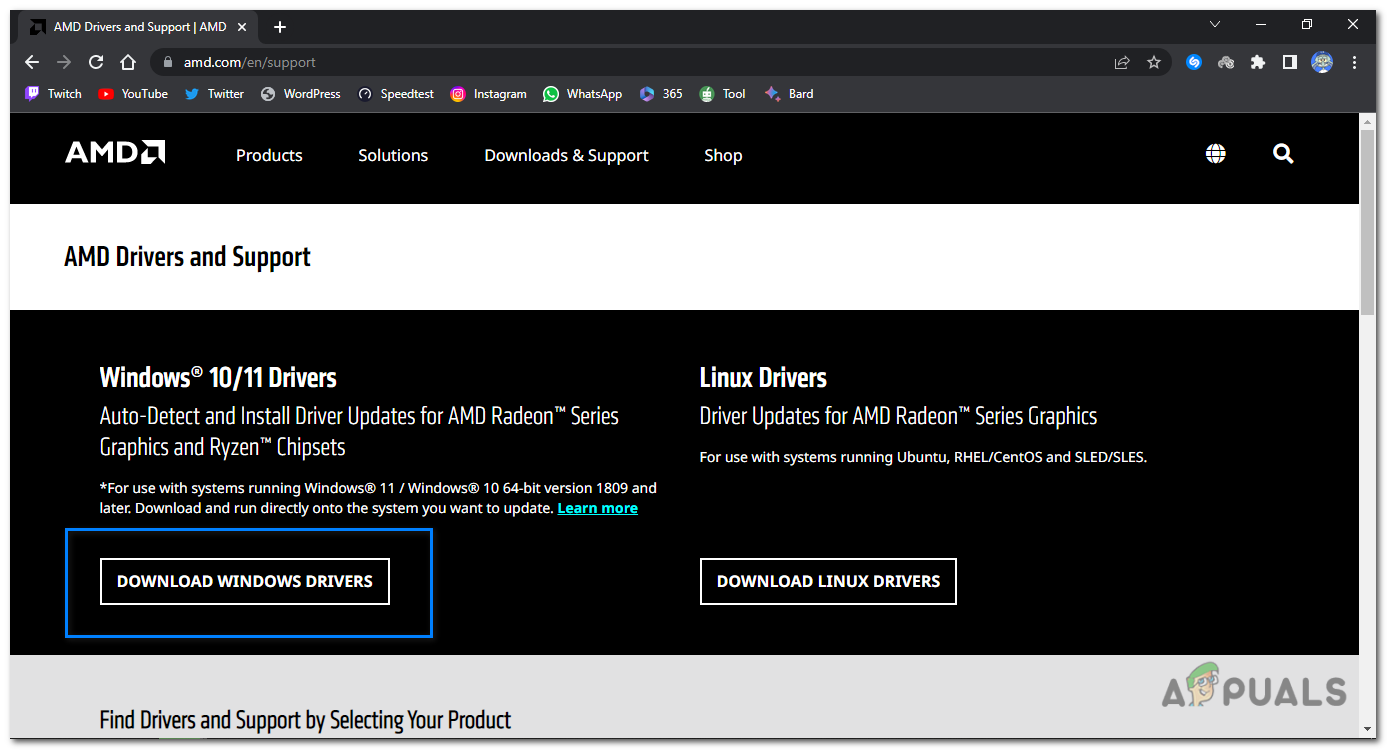
left-click on the “DOWNLOAD WINDOWS DRIVERS” option. - Locate the downloaded file and double-click on it to run the installer. Follow the on-screen instructions to proceed with the installation.
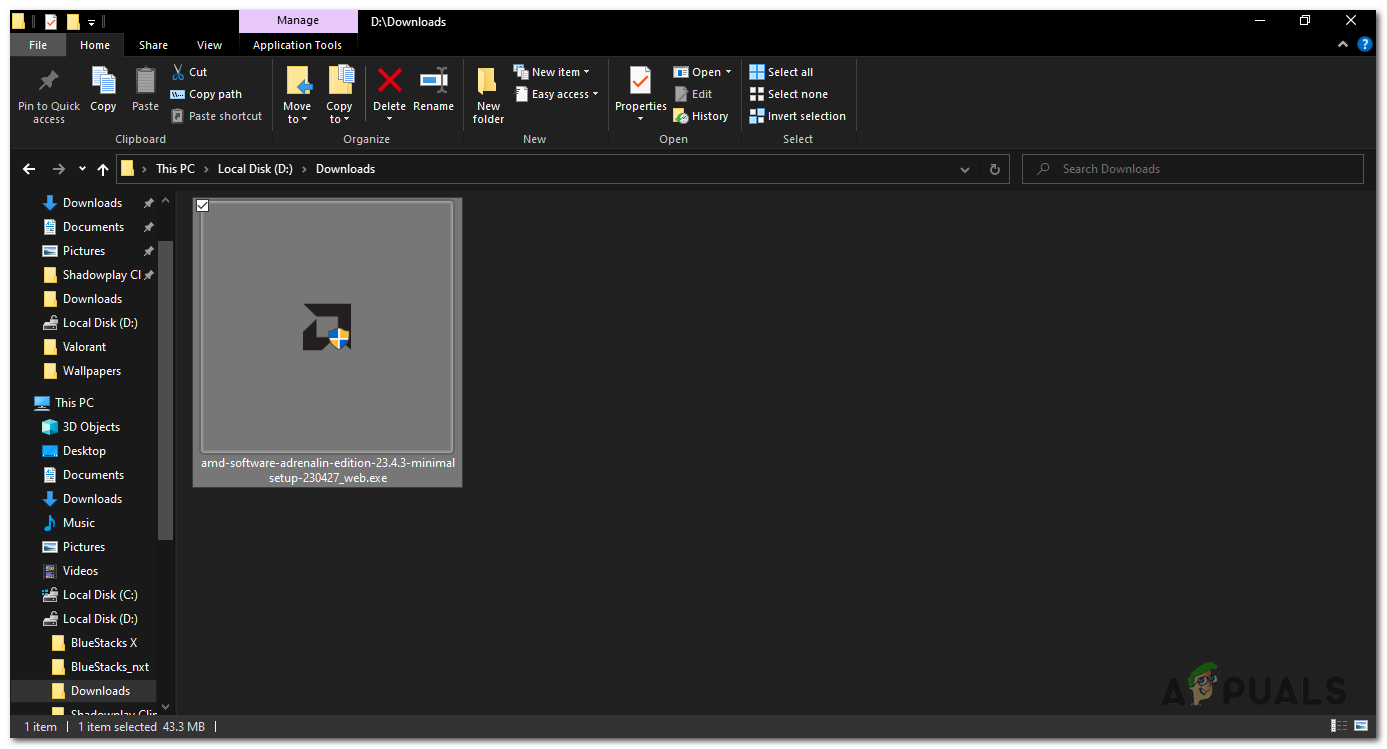
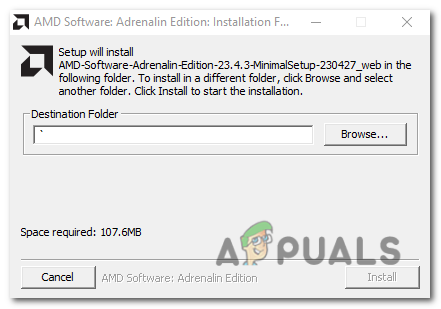
Locate the downloaded file and double-click on it to run the installer - Choose your destination folder and click install.
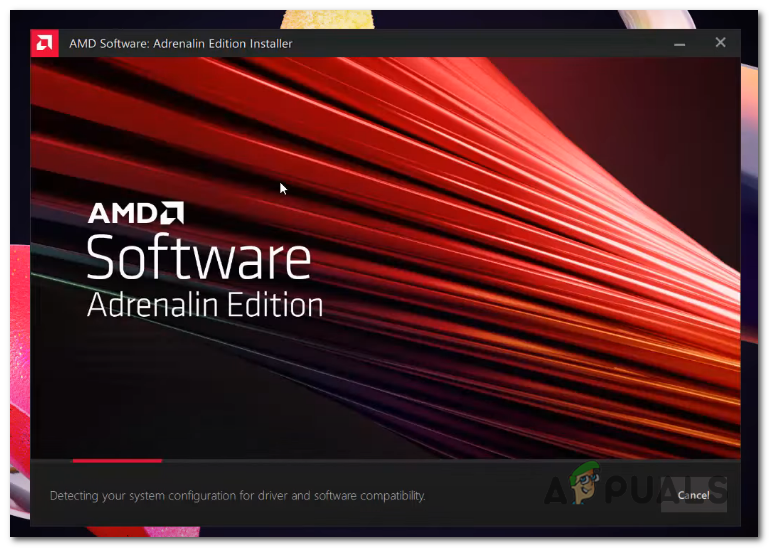
Choose your destination folder and click install. - The AMD Adrenalin software will launch and detect the system configuration for driver and software compatibility.
- The software will now open a new window with the option to install the most recent graphics driver for your AMD GPU; to do so, click the install button.
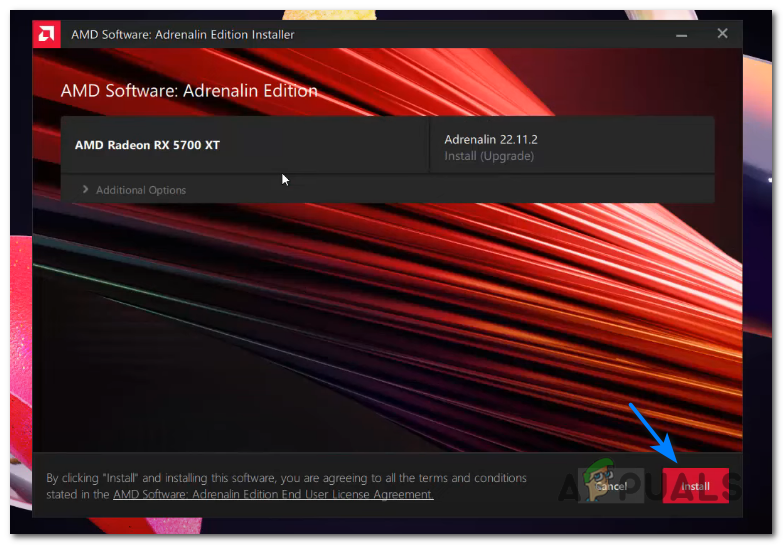
Press install - It will start installing the graphics driver, and your screen may flicker during the process.
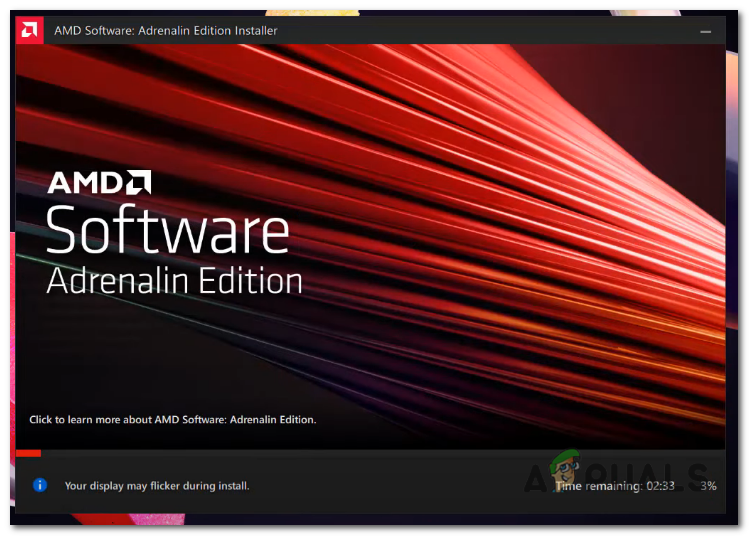
It will start installing the graphics driver, and your screen may flicker during the process. - After the installation is complete, Restart your computer.
Restart your computer
Through Windows Update
The process is the same for all graphic card manufacturers; to follow along, refer to the NVidia guide above; the steps are the same and will work on any card.
How to update graphics driver if you have an Intel GPU?
You can update the Intel graphics driver using Windows update or the driver updating tool made by Intel.
Intel Driver & Support Assistant is a piece of software provided by Intel Corporation. It is intended to help Intel product users in keeping their system drivers up to date in order to achieve optimal performance and compatibility. The Intel Driver & Support Assistant searches the user’s PC for Intel hardware components and notifies them of available driver updates. Follow these steps to update your INTEL graphics driver:
- Determine the model of your Intel Graphics by accessing the Device Manager on your Windows computer. You can open the Device Manager by right-clicking on the Start button, selecting “Device Manager” from the menu, and then expanding the “Display adapters” category.

- Open a web browser and go to the Intel Driver & Support Assistant website at https://www.intel.com/content/www/us/en/support/detect.html.
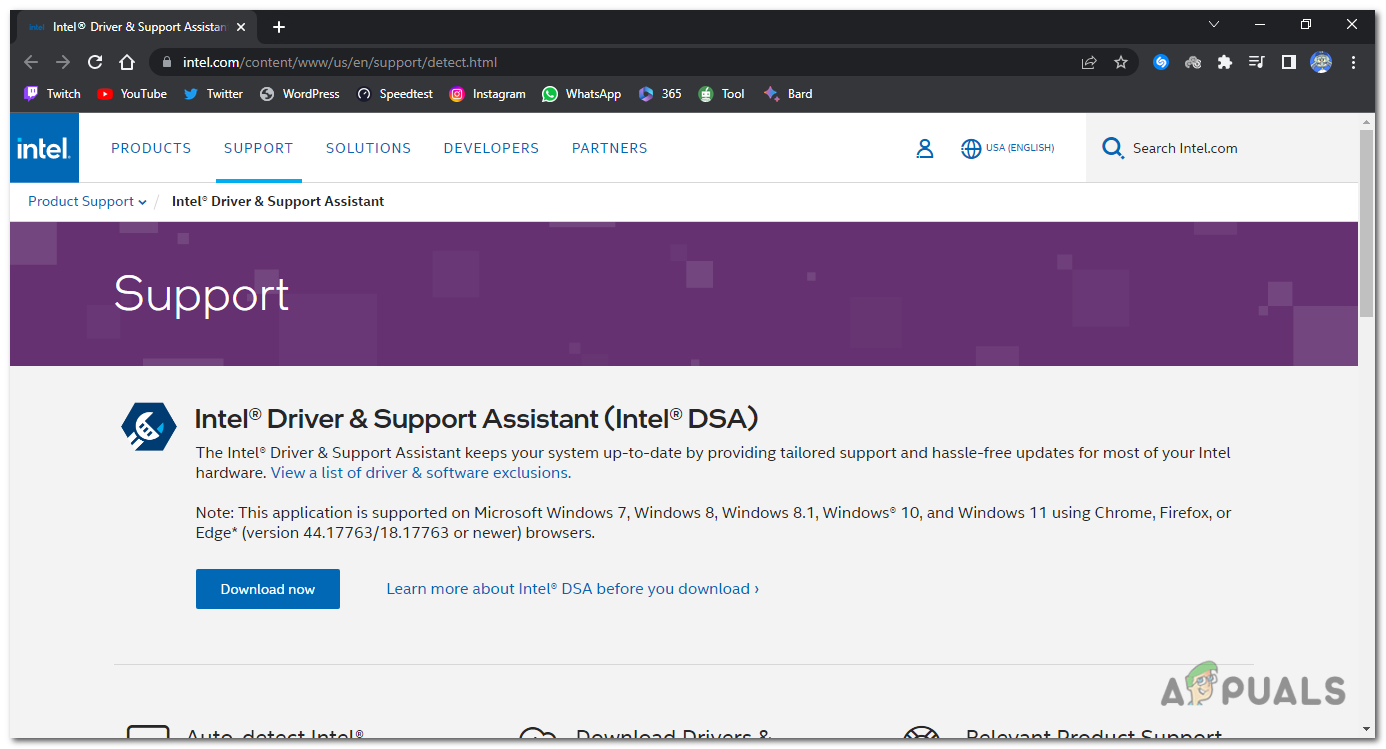
Open a web browser and go to the Intel Driver & Support Assistant website - Click on the “Download Now” button to download the Intel Driver & Support Assistant installer.

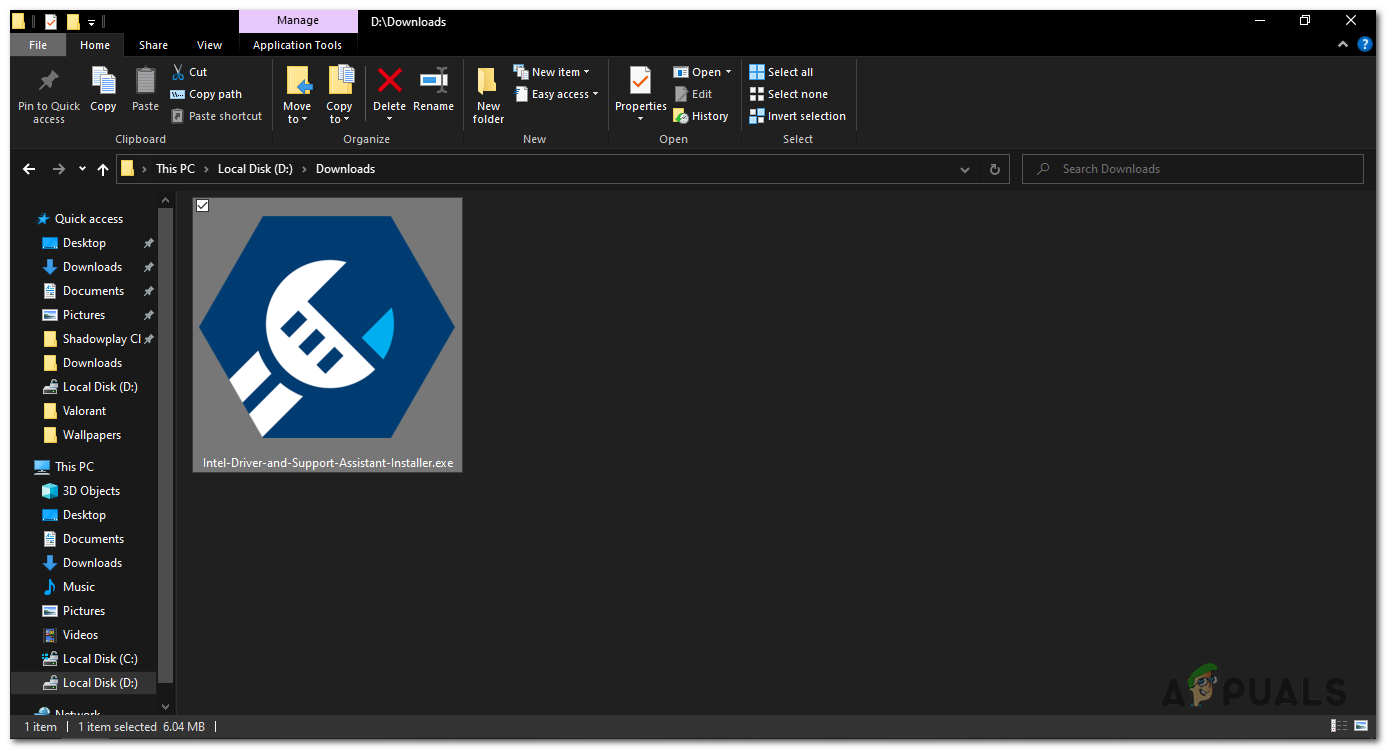
Click on the “Download Now” button - Once the download is complete, locate the downloaded file and double-click on it to run the installer.
locate the downloaded file and double-click on it to run the installer - The installer will guide you through the installation process. You will need to accept the terms and conditions.
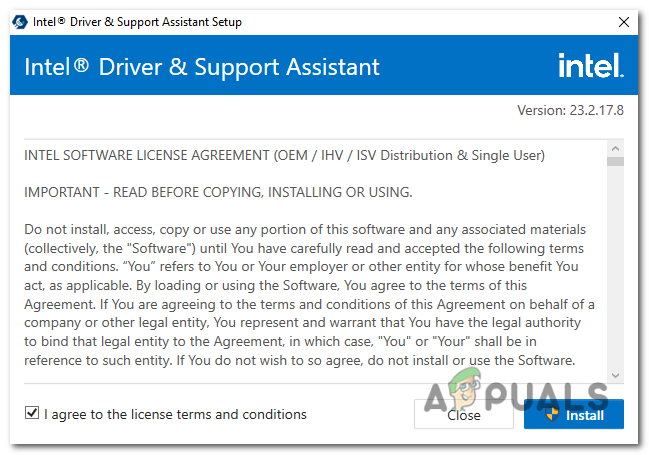
accept the terms and conditions and press install - Restart your computer after the installation is done.
Restart your computer after the installation is done - Launch the Intel Driver & Support Assistant application from the desktop or by searching for it in the Start menu.
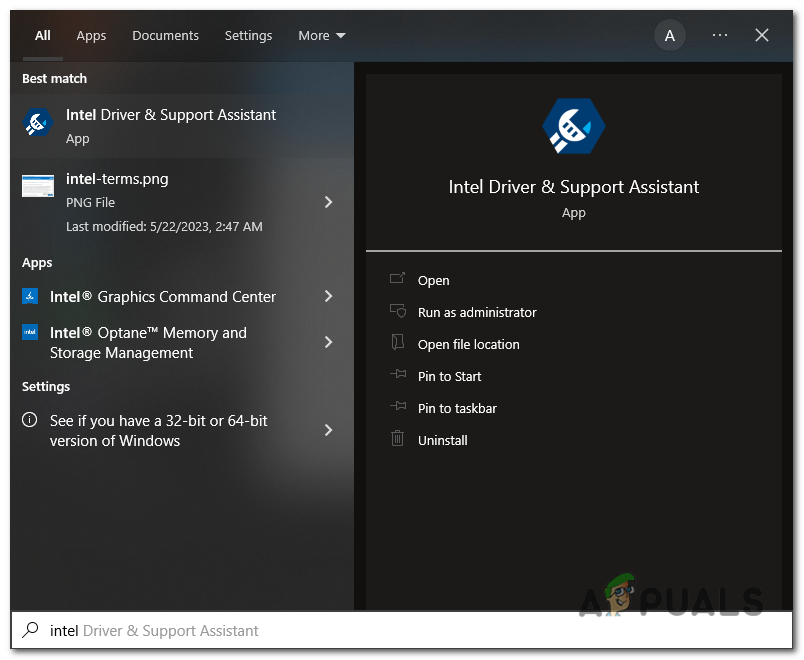
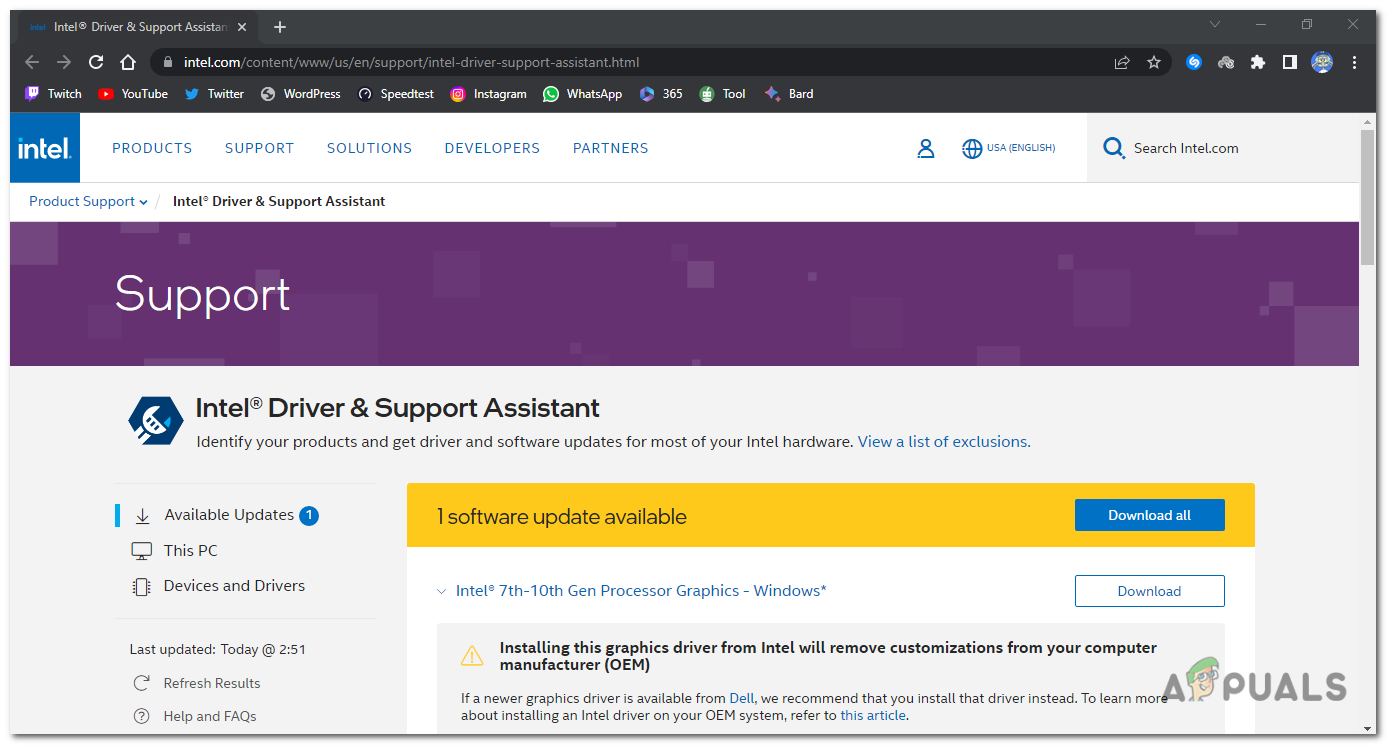
Launch the Intel Driver & Support Assistant application - When you launch it, it will load a webpage with software updates that need to be installed.
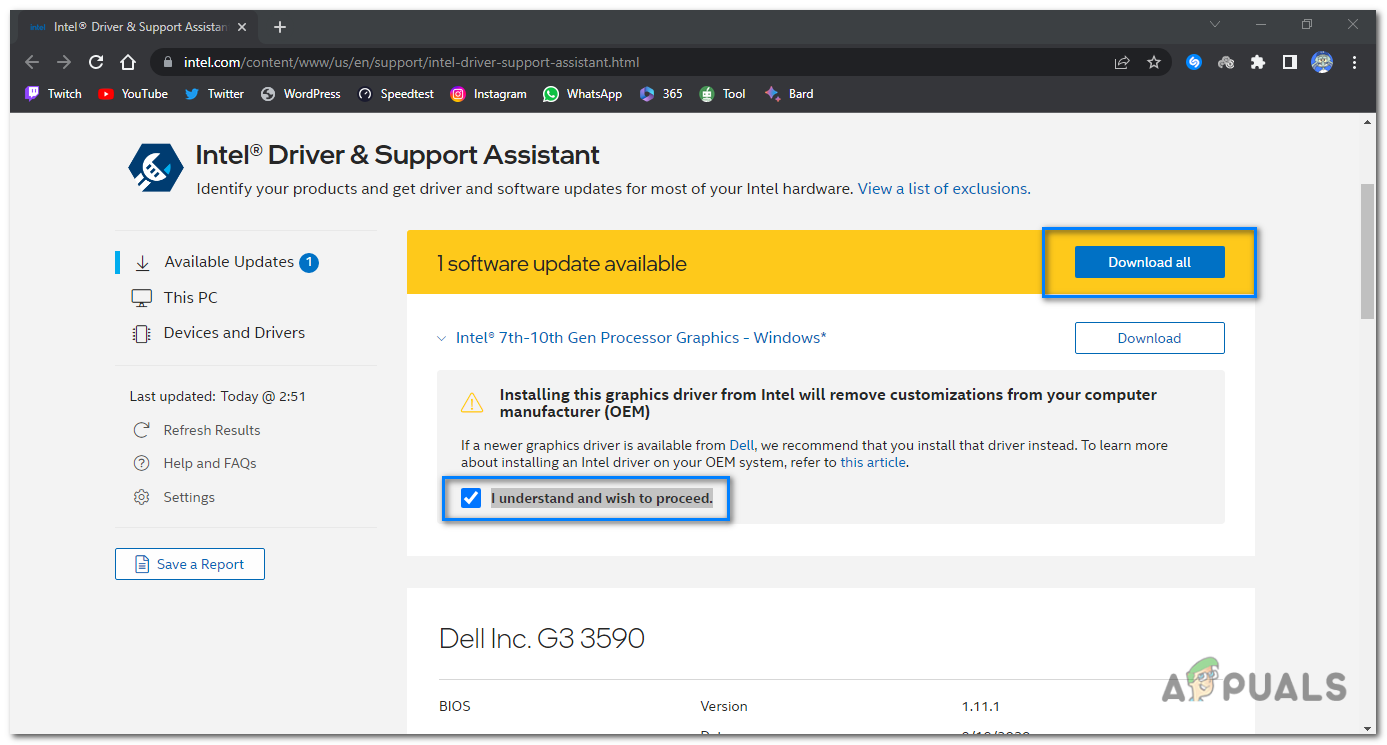
- Check the “I understand and wish to proceed” box and click on Download all.
Check the “I understand and wish to proceed” box and click on Download all. - It will start downloading the graphics driver.
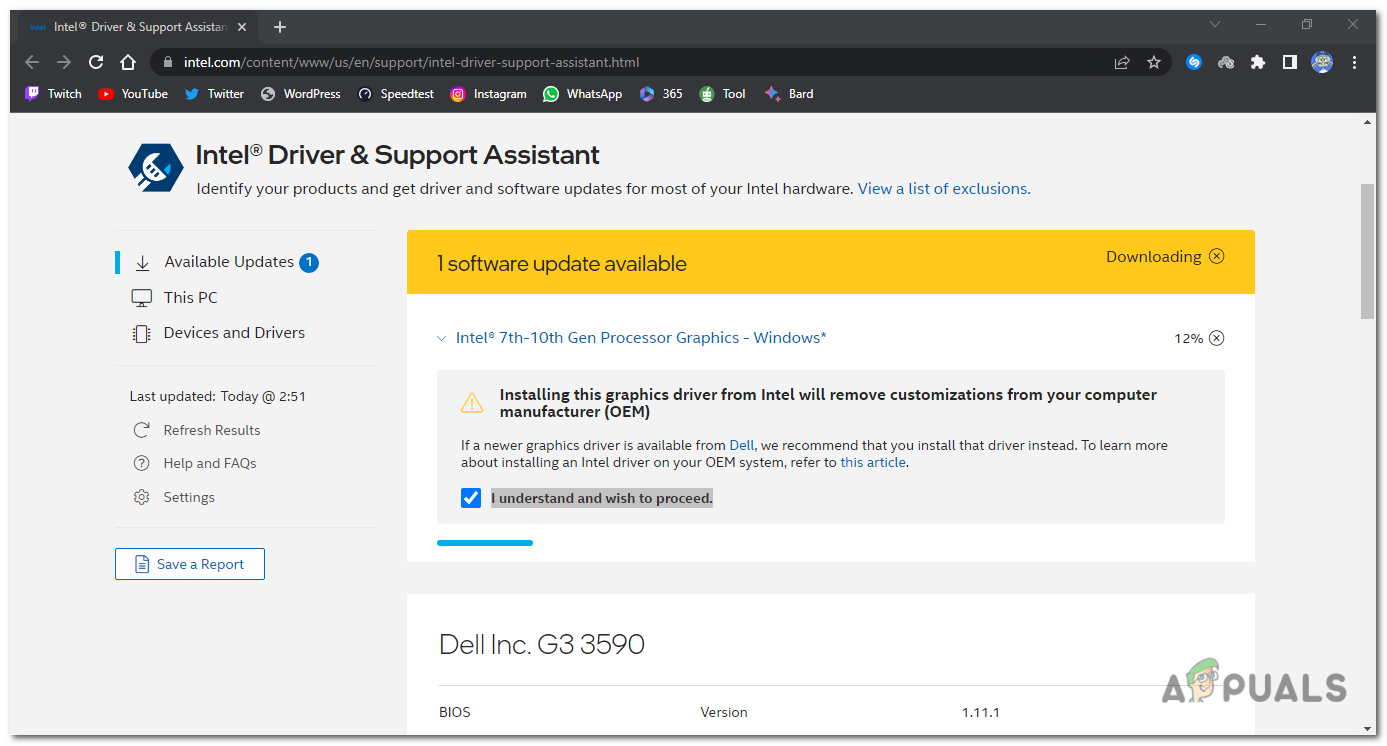
it will start downloading the graphics driver - Once downloaded, click on Install all.
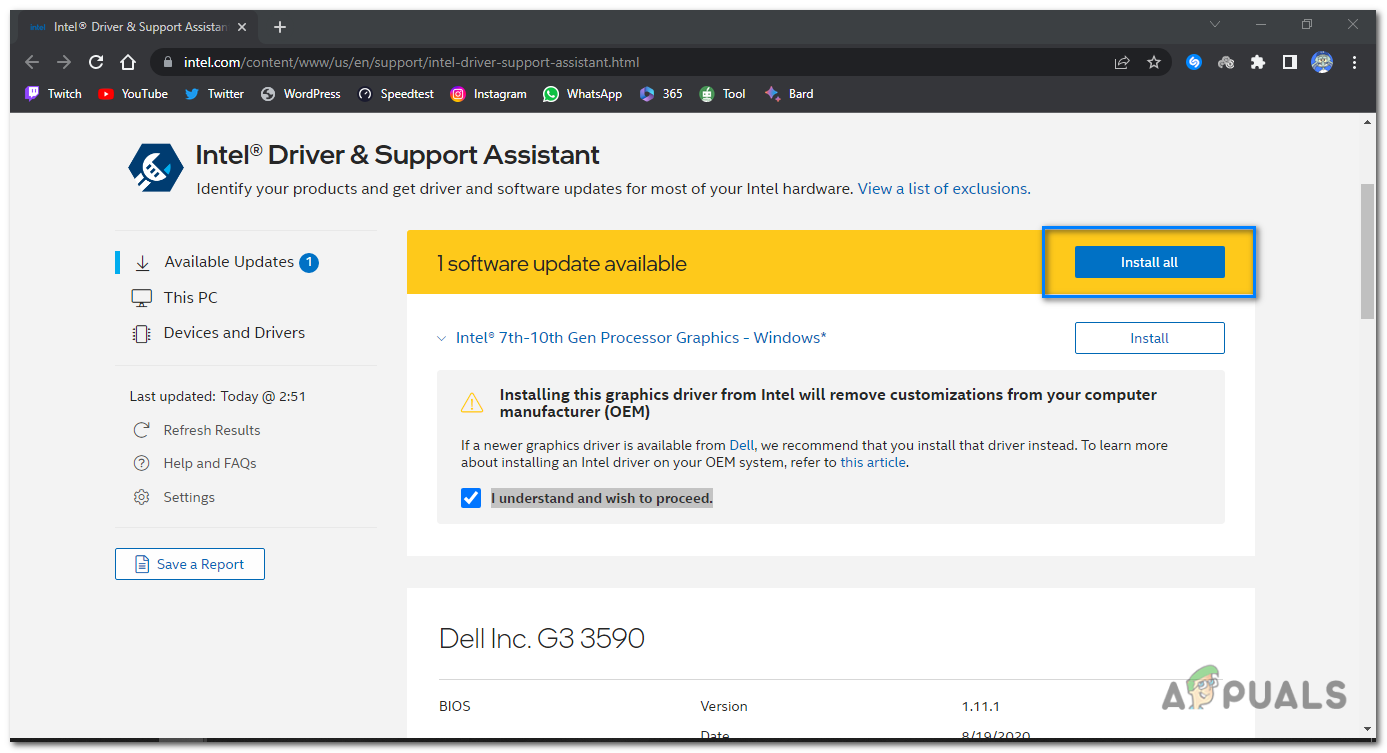
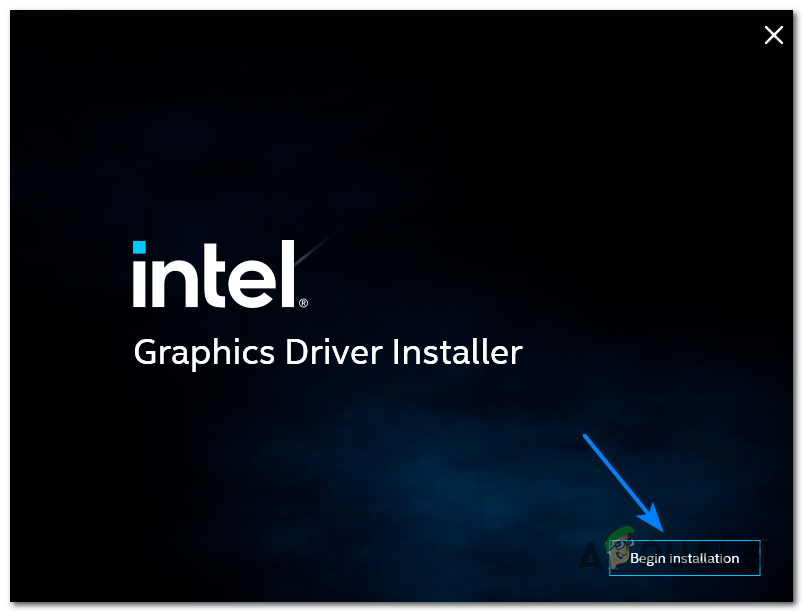
Once downloaded, click on Install all - The Intel Graphics Driver Installer window will open, press the Begin installation button.
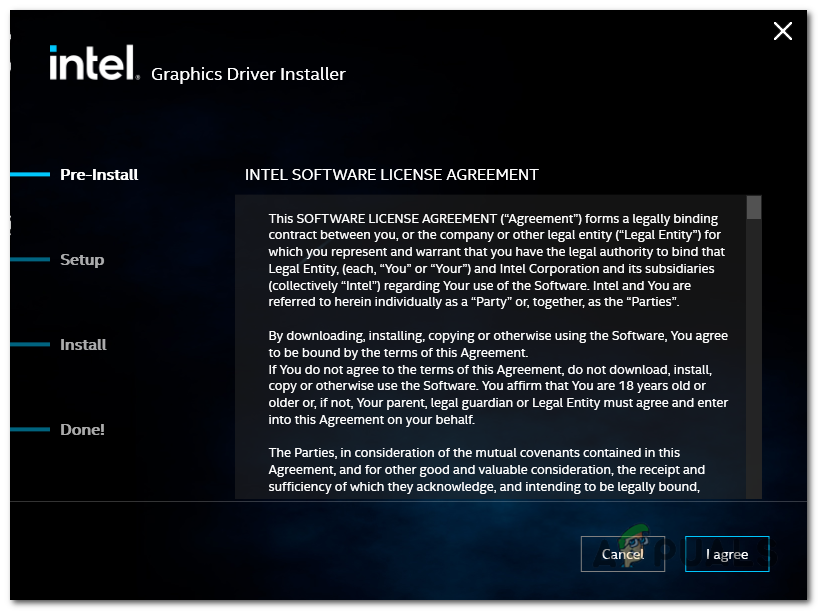
press the Begin installation button - Agree to the Intel software liscense agreement.
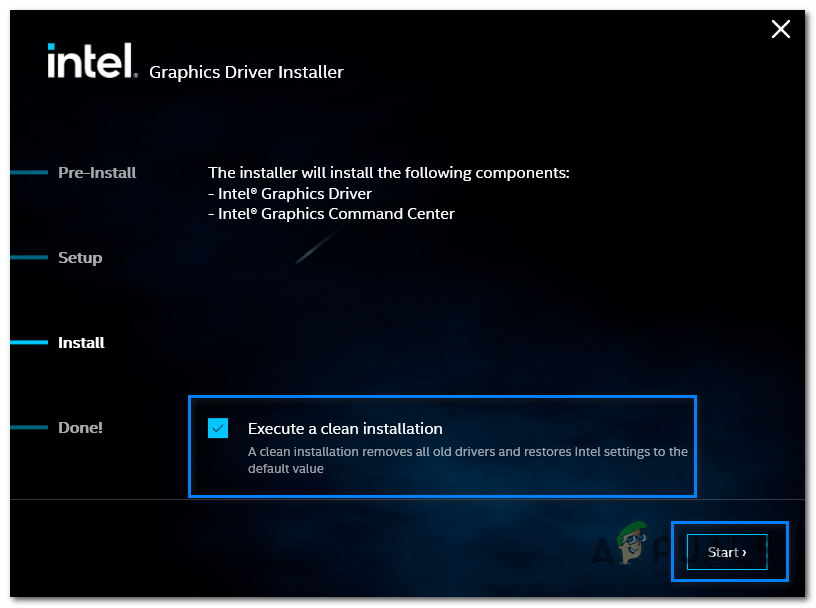
Agree to the Intel software liscense agreement - Check the “Execute a clean installation” box and press Start.
Check the “Execute a clean installation” box and press Start - It will start installing the new graphics driver.
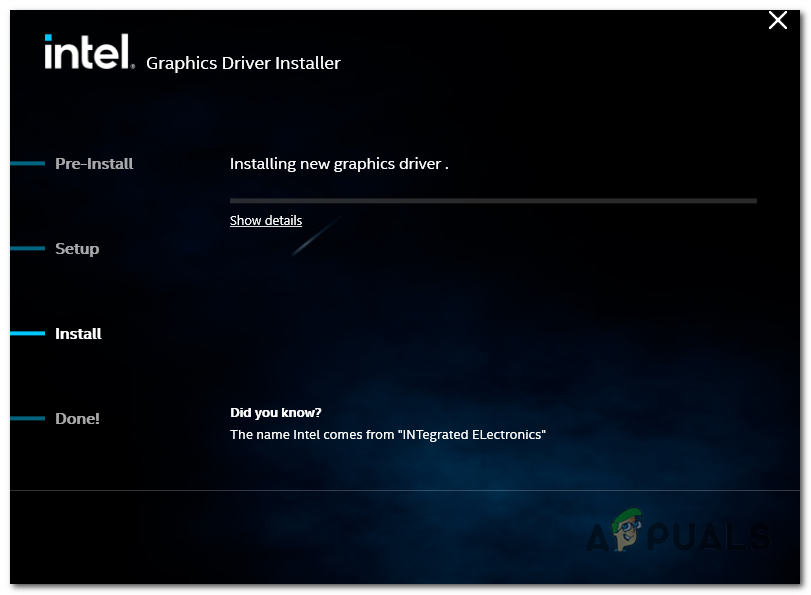
installing the new graphics driver - When the driver installation is complete, click Reboot Recommended to restart your computer and verify that the changes are applied.
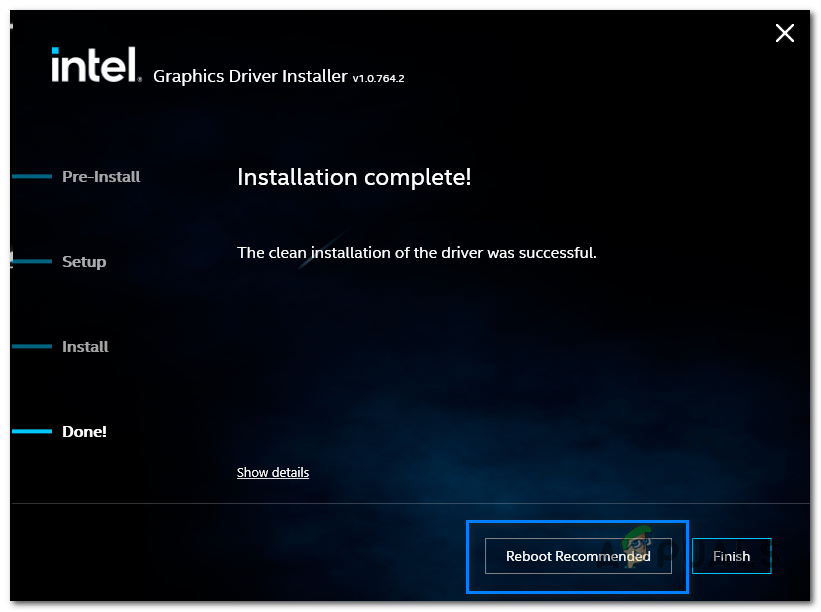
click Reboot Recommended to restart your computer - After restarting, you can verify the installation of the updated Intel Graphics driver by accessing the Device Manager again. Expand the “Display adapters” category, right-click on your Intel Graphics device, and select “Properties” from the menu. In the Properties window, go to the “Driver” tab and check the driver version and date.
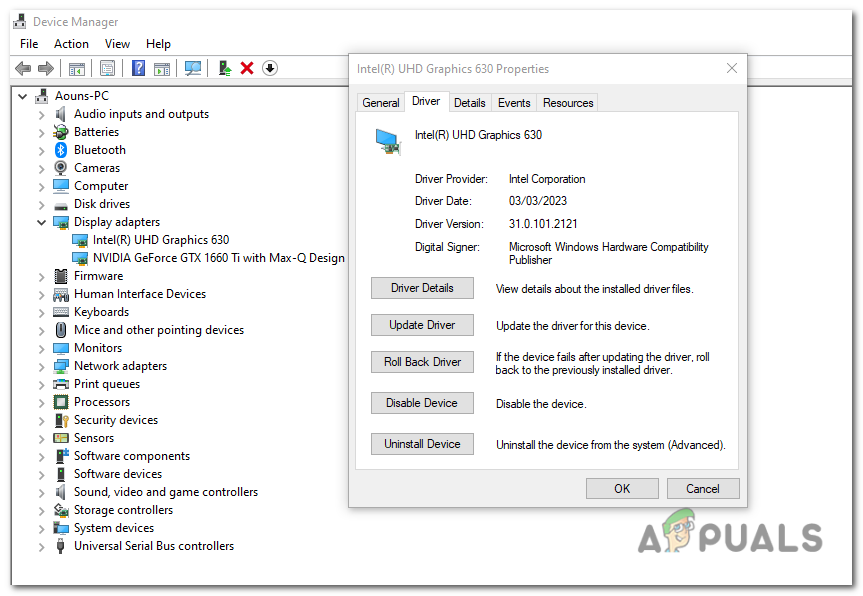
Driver details in device manager


