How to Fix ‘This interaction failed’ Error in Discord?
Unable to interact with the bots in Discord? Don't worry! We got you covered
 Reviewed by Huzaifa Haroon
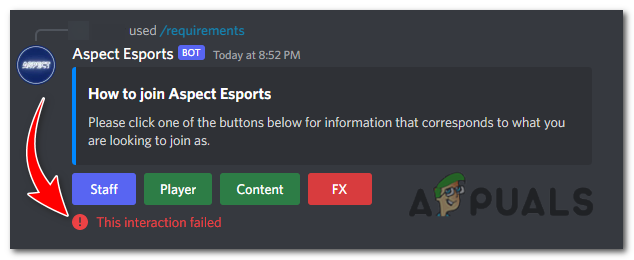
Recently, Discord users have been encountering the “This interaction failed” error while using Discord’s new slash commands for bots. This error can disrupt your Discord experience and prevent you from interacting with bots. Sometimes, this can be a very serious issue because some Discord servers use these interactions as their verification system, and if this interaction fails, you will not be able to verify yourself.
This error may be caused by an outdated Discord client, server issues, internet connection problems, etc. However, this error can be easily fixed. To do so, follow these steps:
1. Reset Internet Connection
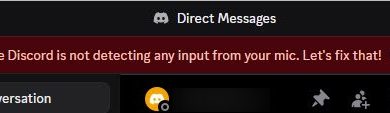
A stable internet connection is necessary for Discord to function correctly. If you’re experiencing network issues, such as high latency or intermittent connectivity, it can result in this error occurring.
Try resetting your internet connection by restarting your router or modem. Unplug the power source, wait for a few seconds, and then reconnect it. This can help resolve any temporary network issues that might be causing the error.
For me, this issue resolved once I switch to my mobile network instead of using the Wi-Fi.
2. Update Discord
Using an outdated version of the Discord client can lead to compatibility issues and errors with the new slash commands, including the “This interaction failed” error. It is crucial to keep your Discord client up to date to ensure a smooth experience. To update your Discord, follow these steps:
2.1 For Desktop:
- Close the Discord client, and restart your computer.
- Open the Discord client, and it will automatically check for updates, make sure you are connected to the internet.
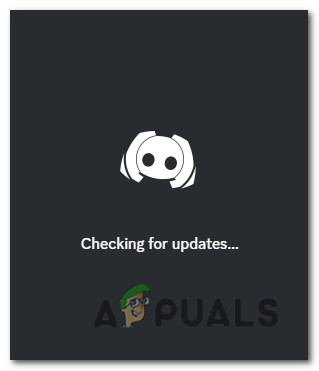
Discord automatically checking for updates, after launching.
Note: For any reasons this doesnt work, you will have to re-install the Discord client. To reinstall Discord, you can follow these steps:
- Close the Discord client if it is currently running. You can right-click on the Discord icon in the system tray (bottom-right corner of the screen) and choose “Quit Discord” to ensure it is fully closed.
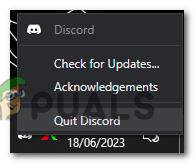
Right-click on the Discord icon in the system tray and choose “Quit Discord”. - Press the Windows key on your keyboard or click on the Start button to open the Start menu.
- Type “Control Panel” and open the Control Panel application from the search results..
- Under the “Programs” section, click on the “Uninstall a program” option.
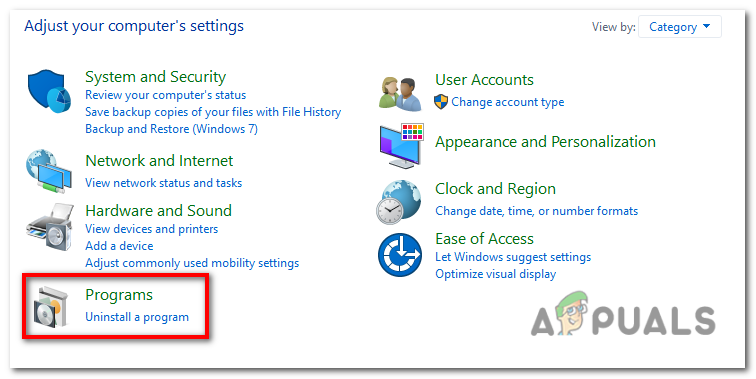
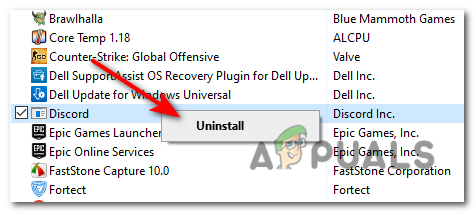
Under the “Programs” section, click on the “Uninstall a program” option. - A list of installed programs will appear. Scroll down and find “Discord” in the list.
- Right-click on “Discord” and select “Uninstall” from the context menu. Follow the prompts to uninstall Discord from your computer.
Right-click on “Discord” and select “Uninstall” from the context menu. - Once the uninstallation is complete, restart your computer to ensure any remaining files or settings are cleared.
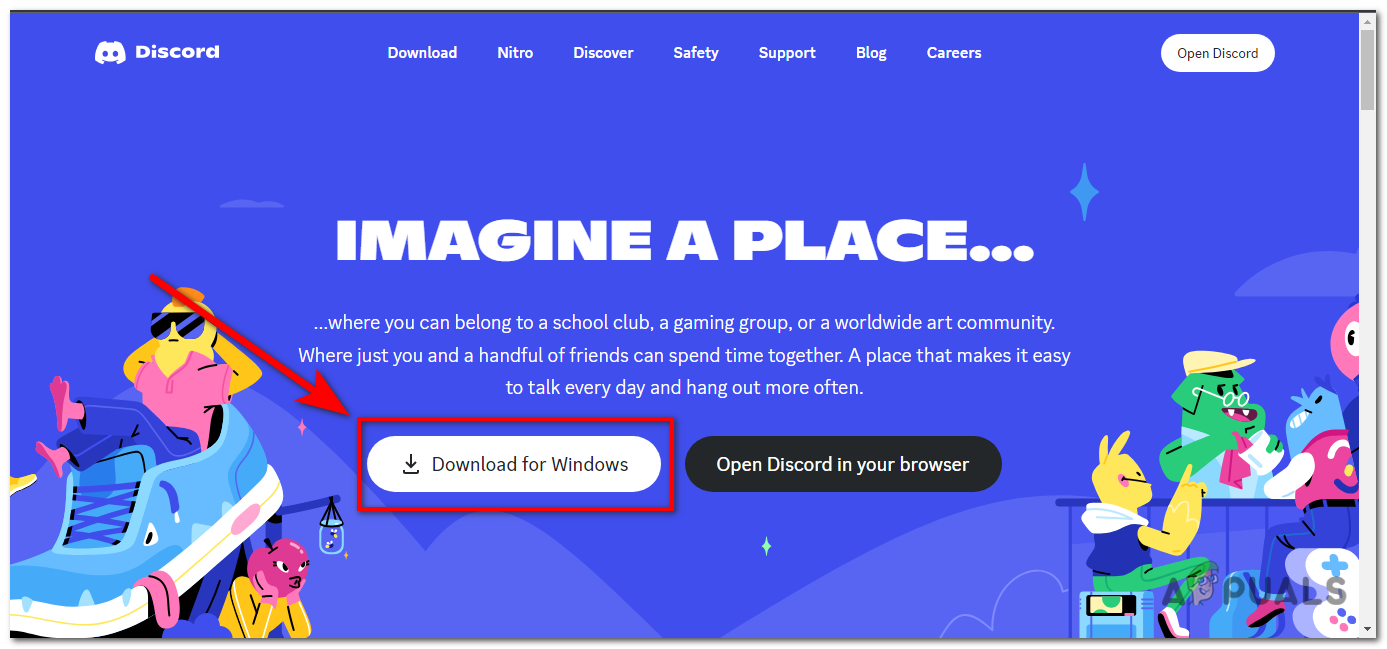
- After your computer restarts, open a web browser and visit the official Discord website at https://discord.com/.
- On the Discord website, click on the “Download for Windows” button. The website should automatically detect your operating system.
On the Discord website, click on the “Download for Windows” button. - Run the Discord setup file that you just downloaded. Follow the on-screen instructions to install Discord on your computer.
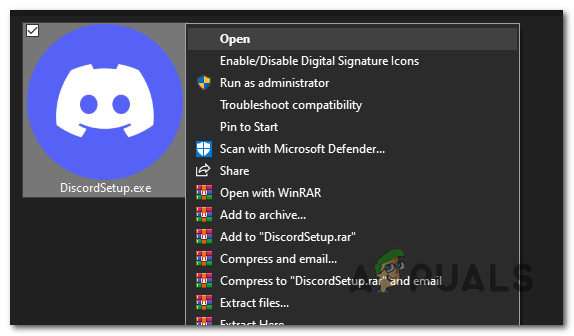
Run the Discord setup file that you just downloaded. - Once the installation is complete, launch Discord and follow the prompts to set up your account or log in with your existing credentials.
2.2 For Android:
- Open the Google Play Store on your Android phone.
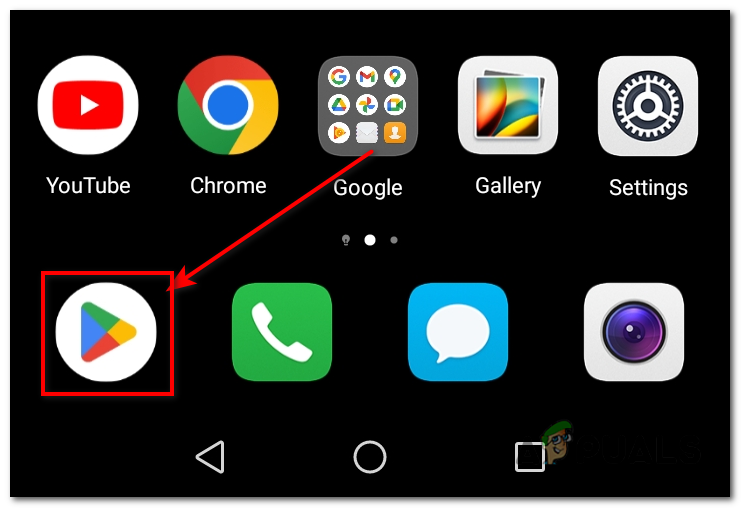
Open the Google Play Store on your Android phone. - Tap on the Google profile at the top-right corner of the Play Store to open the menu.
- From the menu, select “Manage app and device”.
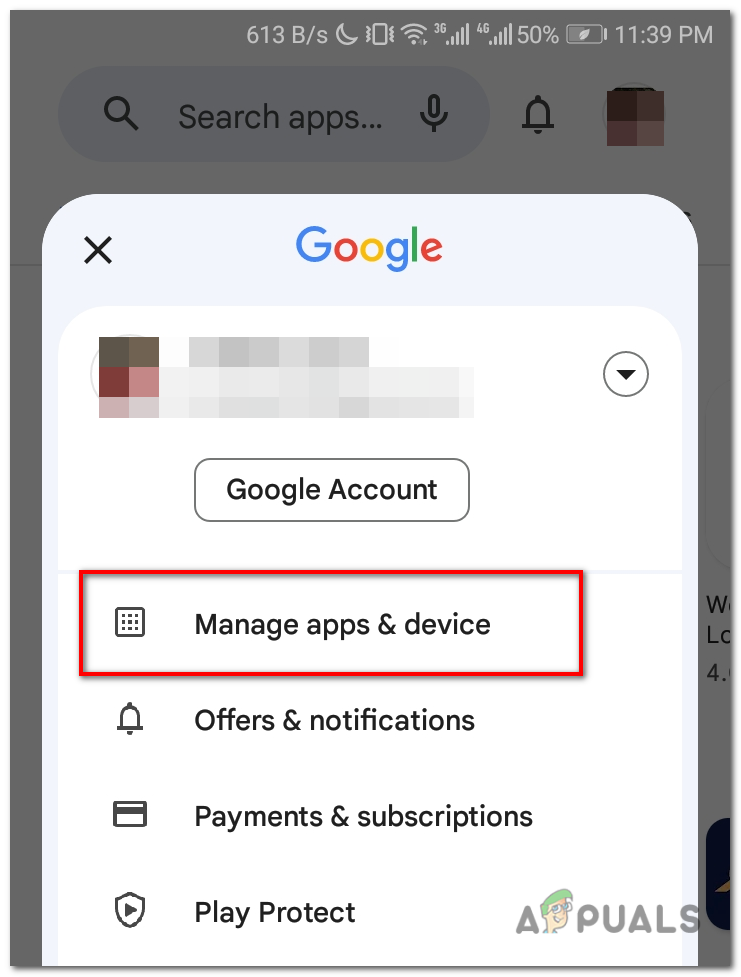
From the menu, select “Manage app and device”. - You will see a list of apps that have available updates. If Discord is listed, you will find it under the “Updates” tab.
- Look for Discord in the list and tap on the “Update” button next to it. If you don’t see an update button, it means Discord is already up to date.
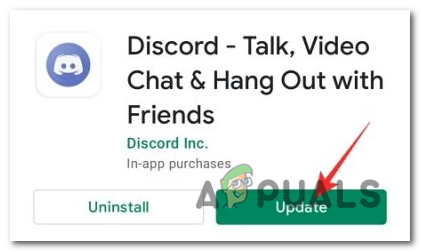
Look for Discord in the list and tap on the “Update” button next to it. - The Google Play Store will start downloading and installing the update for Discord.
- Once the update is complete, you will be able to launch Discord with the latest version.
2.3 For iOS (iPhone/iPad):
- Open the App Store on your iPhone or iPad.
- Tap on your profile picture or the “Today” tab at the bottom.

Tap on your profile picture on top right corner of the screen. - Scroll down and find Discord in the list of installed apps. If an update is available, you will see an “Update” button next to it. If not, Discord is already up to date.
Scroll down and find Discord in the list of installed apps. If an update is available, you will see an “Update” button next to it. - Tap on the “Update” button next to Discord.
- The App Store will download and install the latest update for Discord.
3. Check if the Bot is offline
Sometimes this error occurs when the client cannot contact the bot, which in most cases is due to the bot being offline for maintenance. To see and check whether the bot is offline or not, follow these steps:
- Open the Discord Client.
- In the server where the bot is located, locate the list of members on the right-hand side of the screen.
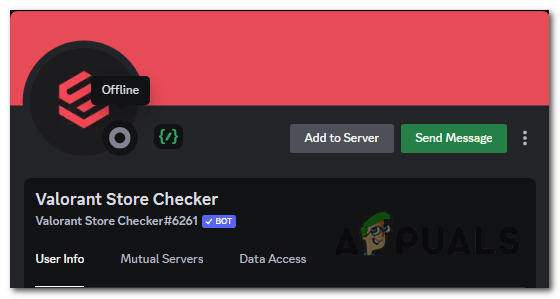
- Look for the bot’s username in the member list. If the bot is offline, its status will be displayed as “Offline”.
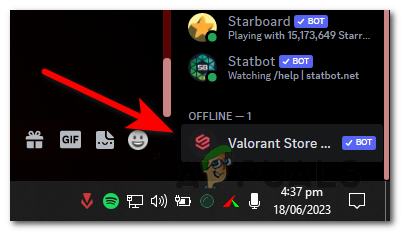
Look for the bot’s username in the member list. If the bot is offline, its status will be displayed as “Offline”. - Alternatively, you can check the bot’s status by looking for a gray or dimmed indicator next to its username. This indicates that the bot is currently offline.
you can also check the bot’s status by looking for a gray or dimmed indicator next to its username.
4. Check status of Discord’s servers
Check the Discord server‘s status if you are experiencing this error, because if they are offline, that could potentially be the cause. To check the status of Discord’s servers, you can follow these steps:
- Open a web browser on your computer or mobile device.
- Visit the Discord status page by going to the following URL: https://status.discord.com/.
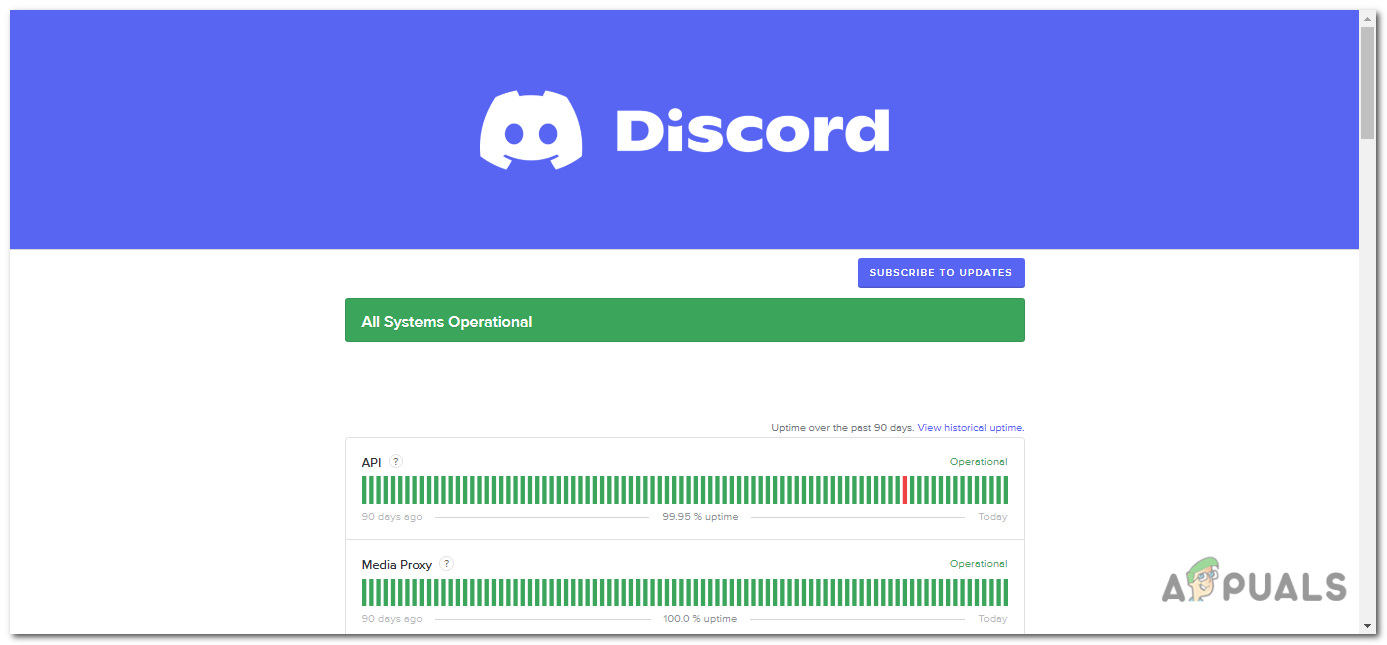
Visit the Discord status page by going to the following URL: https://status.discord.com/. - On the Discord status page, you will see a list of different Discord services and components.
- Each service or component will have an indicator next to it, displaying its current status. The indicators can be one of the following:
Operational: This indicates that the service or component is running normally without any issues.

Partial Outage: This means that there are some issues or disruptions affecting the service or component,
but it is still partially operational.

Major Outage: This indicates a significant issue or outage that is affecting the service or component,
causing a disruption in its functionality.

Maintenance: If Discord is undergoing scheduled maintenance, this indicator will be displayed.
During maintenance, there may be temporary service interruptions.

Degraded Performance: This means that the service or component is experiencing reduced performance
or functionality but is still operational to some extent.
- You can click on each service or component to get more detailed information about its status and any ongoing incidents.
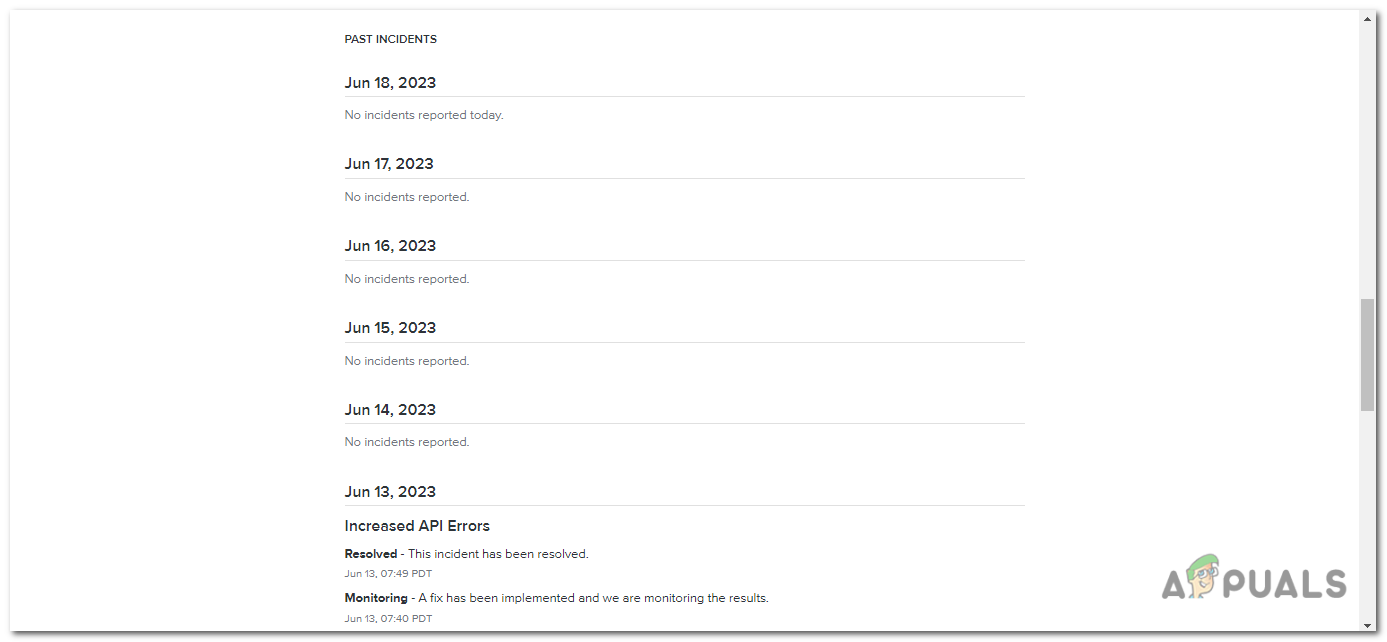
list of incidents that happened with Discord servers in the past two weeks.
5. Clear Discord Cache
Damaged cache files can be fatal, causing programs to malfunction and produce errors. As a result, cleaning cache files occasionally may cause the applications to reset and improve your user experience. To clear the Discord cache, follow these steps:
- Close the Discord application if it is currently running. You can right-click on the Discord icon in the system tray (bottom-right corner of the screen) and choose “Quit Discord” to ensure it is fully closed.
- Press the Windows key on your keyboard or click on the Start button to open the Start menu.
- Type “%appdata%” (without quotes) and press Enter. This will open the AppData folder.
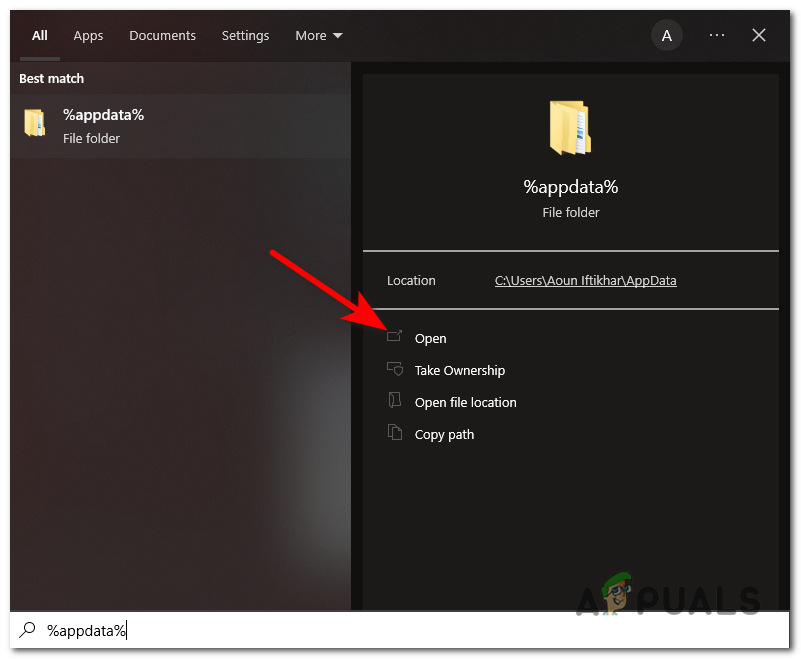
Type “%appdata%” (without quotes) in the start menu and press Enter. - Within the AppData folder, locate the Discord folder and open it.
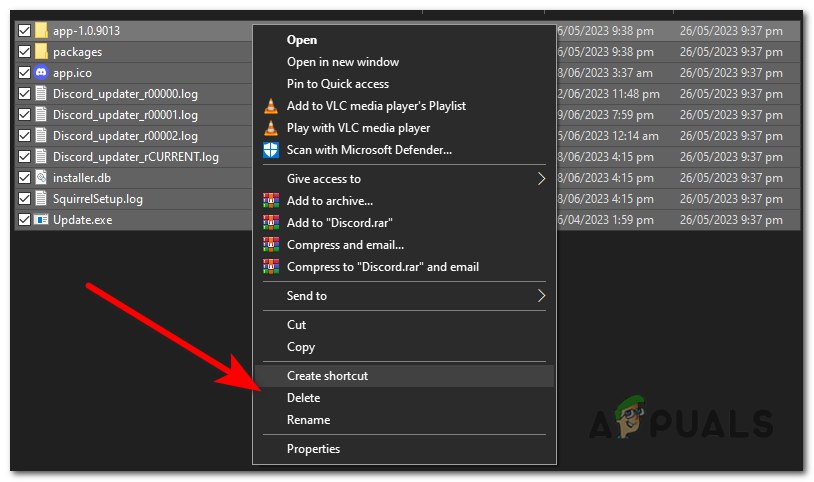
- Inside the Discord folder, you will find several files and folders. Select all the files and folders by pressing Ctrl+A on your keyboard.
- Once all the files and folders are selected, right-click on any selected item and choose “Delete” from the context menu. Confirm the deletion if prompted.

Select all files, right-click on any selected item and choose “Delete” from the context menu. - After deleting the files and folders, close the File Explorer window.
- Press the Windows key + R on your keyboard to open the Run dialog box.
- Type “%localappdata%” (without quotes) and press Enter. This will open the LocalAppData folder.
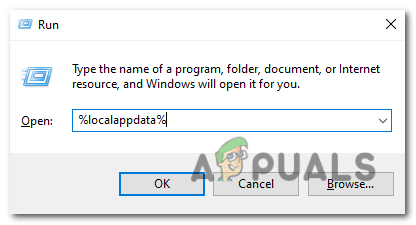
Type “%localappdata%” (without quotes) and press Enter. - Within the LocalAppData folder, locate the Discord folder and open it.
- Inside the Discord folder, repeat the same steps as before: select all the files and folders, right-click, and choose “Delete”. Confirm the deletion if prompted.
select all the files and folders, right-click, and choose “Delete”. - Once the files and folders are deleted, close the File Explorer window.
- Restart your computer to ensure any remaining cache files are cleared from memory.
After following these steps, the Discord cache on your Windows computer should be cleared. When you next launch Discord, it will create new cache files.
6. Disable Hardware Acceleration
Hardware acceleration is a feature that utilises your system’s GPU to enhance Discord’s performance. However, in some cases, it can cause conflicts and result in errors. To turn it off and fix this error, follow these steps:
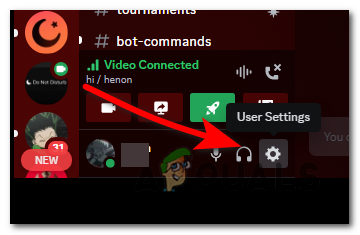
- Open the Discord client.
- Click on the “Settings” icon, which is represented by a gear icon located at the bottom left corner of the Discord window.
- In the left hand menu, scroll down and select the “Advanced” category.
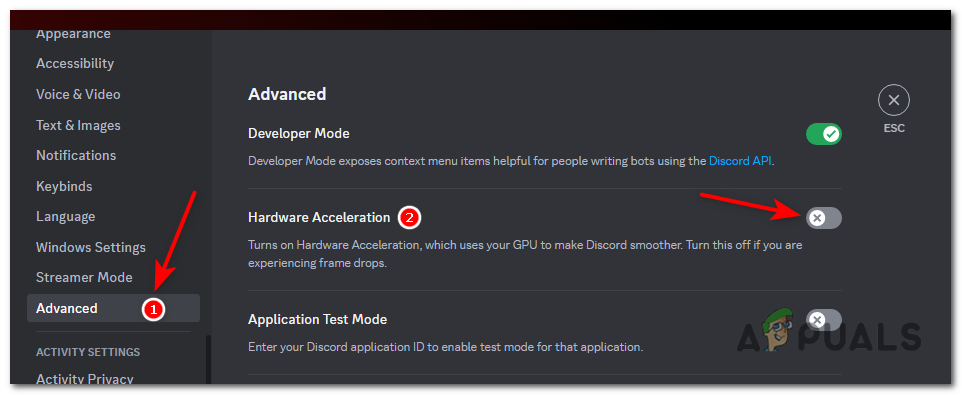
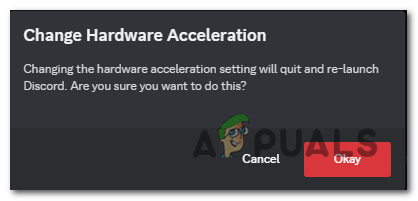
- Look for the option labeled “Hardware Acceleration” and toggle the switch to the off position.
- A prompt will appear, press “Okay” to restart your discord.
This can be useful if you experience graphical glitches or performance issues while using Discord. However, keep in mind that disabling hardware acceleration may impact Discord’s performance on certain systems, so you can re-enable it if needed.
7. Change DNS Servers
Changing DNS servers can help resolve connectivity issues and improve network performance, which can help fix the problems regarding connections with the bot servers. By using reliable DNS servers, you ensure that your computer can efficiently resolve domain names, which is essential for Discord and other online services to function properly.
- Press the Windows key on your keyboard or click on the Start button to open the Start menu.
- Type “Control Panel” and open the Control Panel application from the search results.
- Under the “Network and Internet” category, click on “View network status and tasks”.

Under the “Network and Internet” category, click on “View network status and tasks”. - In the Network and Sharing Center, click on the active network connection you are using. This could be labeled as “Ethernet” or “Wi-Fi,” depending on your connection type.
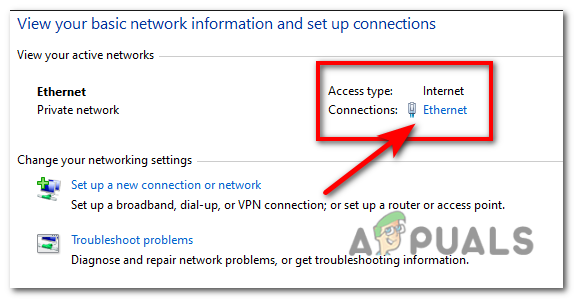
In the Network and Sharing Center, click on the active network connection you are using. This could be labeled as “Ethernet” or “Wi-Fi,” depending on your connection type. - In the new window that opens, click on the “Properties” button.
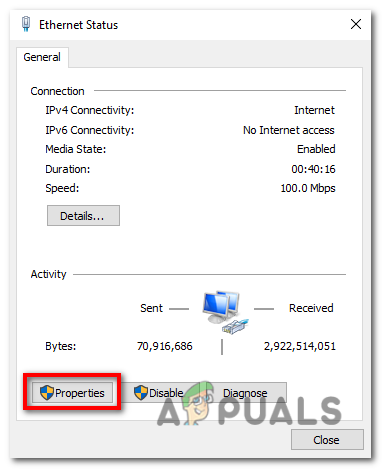
Click on the “Properties” button. - Scroll down the list of items and locate “Internet Protocol Version 4 (TCP/IPv4)”. Select it and click on the “Properties” button.
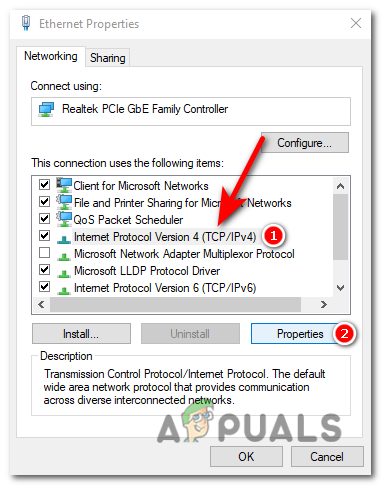
Scroll down the list of items and locate “Internet Protocol Version 4 (TCP/IPv4)”. Select it and click on the “Properties” button. - In the Properties window, you will see two options: “Obtain an IP address automatically” and “Use the following DNS server addresses”. Select the latter option.
- If you want to use Google DNS, enter “8.8.8.8” in the “Preferred DNS server” field and “8.8.4.4” in the “Alternate DNS server” field.
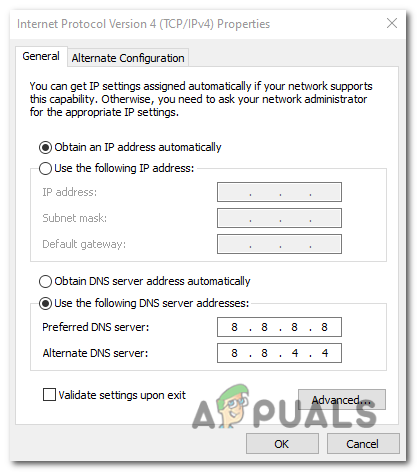
If you want to use Google DNS, enter “8.8.8.8” in the “Preferred DNS server” field and “8.8.4.4” in the “Alternate DNS server” field. - If you prefer to use Cloudflare DNS, enter “1.1.1.1” as the preferred DNS server and “1.0.0.1” as the alternate DNS server.
- Click “OK” to save the changes. Close any open windows and restart your computer to apply the new DNS server settings.
Reviewed by Huzaifa Haroon