How to Clear Cache for One Site?
All sites and applications store information in “cache” to reduce loading times and provide a smoother experience. However, this cache might end up slowing down your computer instead of increasing the performance if it is corrupted or damaged. All web browsers offer a convenient option to delete cache stored by them but by doing so, the cache is deleted for all websites; hence any preferences stored will be lost. You also might need to clear cache for a specific site when you want clear information just for one platform.

If you have to delete the cached data for a specific website, the process gets a little tricky and complex. Therefore, in this article, we will be guiding you on the process to delete cache only for a specific website without altering contents of other ones. Make sure to adhere to the instructions carefully in order to avoid permanent loss of important data.
How to Clear Cache for a Specific Site?
After a detailed investigation, we figured out the process of deleting the cache for a particular site. Since the method varies from browser to browser, we listed the method for some of the most used ones only.
For Google Chrome:
- Click on the “Menu” icon and select “Settings“.
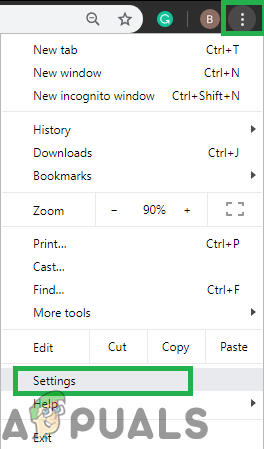
Clicking on the Menu button and then on the “Settings” option - Inside settings, scroll down and click on the “Content Settings” button under the “Privacy” heading.
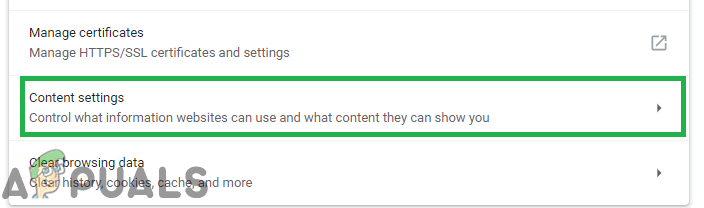
Clicking on the “Content Settings” option - Click on “Cookies” and then click on the “See all cookies and site data“.
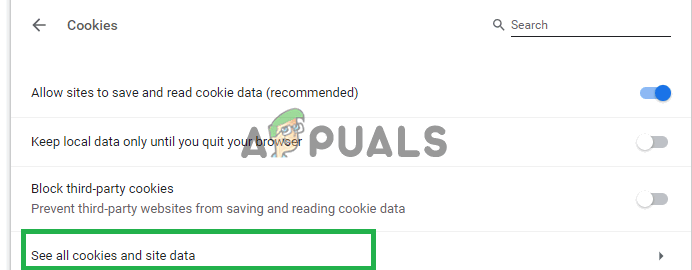
Clicking on the “Show all cookies and site data” option - Now in the search bar type the name of the website.
- Click on the “Remove All” button to remove all of the cached data from that website.
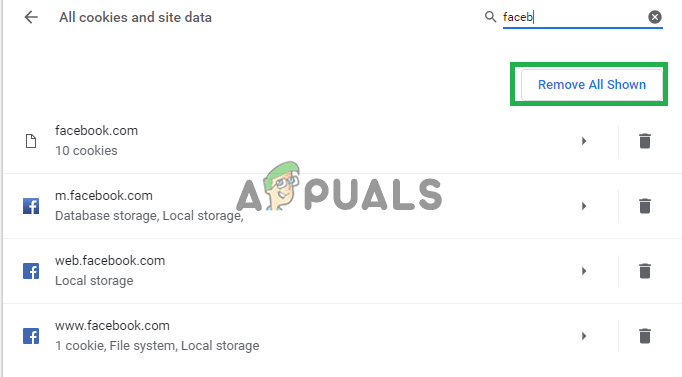
Clicking on the “remove all” option after typing the name of the website Note: You can also click on the sites name and select specific data to delete
- Click on “yes” in the prompt and the data will be deleted.
For Firefox:
- Open Firefox and click on the “Options” icon in the top right corner.
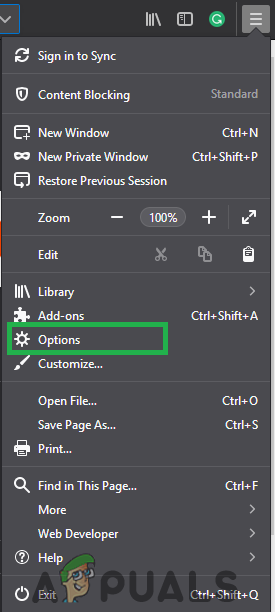
Clicking on the menu button and selecting “Options” from the list - Click on the “Privacy and Security” Tab in the left pane.

Clicking on the “Privacy & Security” option - Scroll down and click on the “Manage Data” option under the Cookies & Data heading.
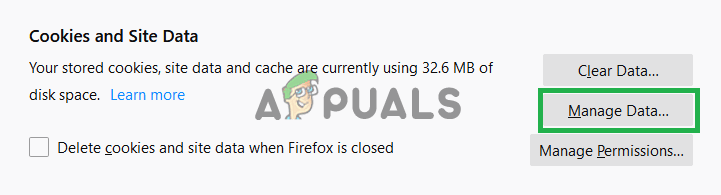
Clicking on the “Manage Data” option - Select the website from the list and click on the “Remove Selected” option.
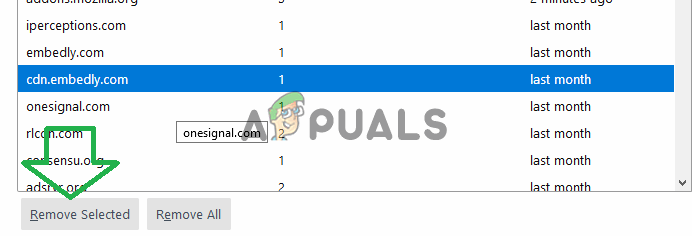
Selecting the website and clicking on the “Remove Selected” option Note: You can also search for a specific website by typing its name in the search bar.
- Click on “yes” in the prompt and the data will automatically be deleted.
For Microsoft Edge:
- Open the website for which the cache has to be cleared.
- When opened, press the “F12” button on your keyboard.

Clicking on the “F12” button - Click on the “Network” option and then press “Ctrl” + “R” simultaneously.

Clicking on the “Network” option - The page will be refreshed and cookies will be deleted.


what version of chrome are you referencing as my settings look nothing like those you show