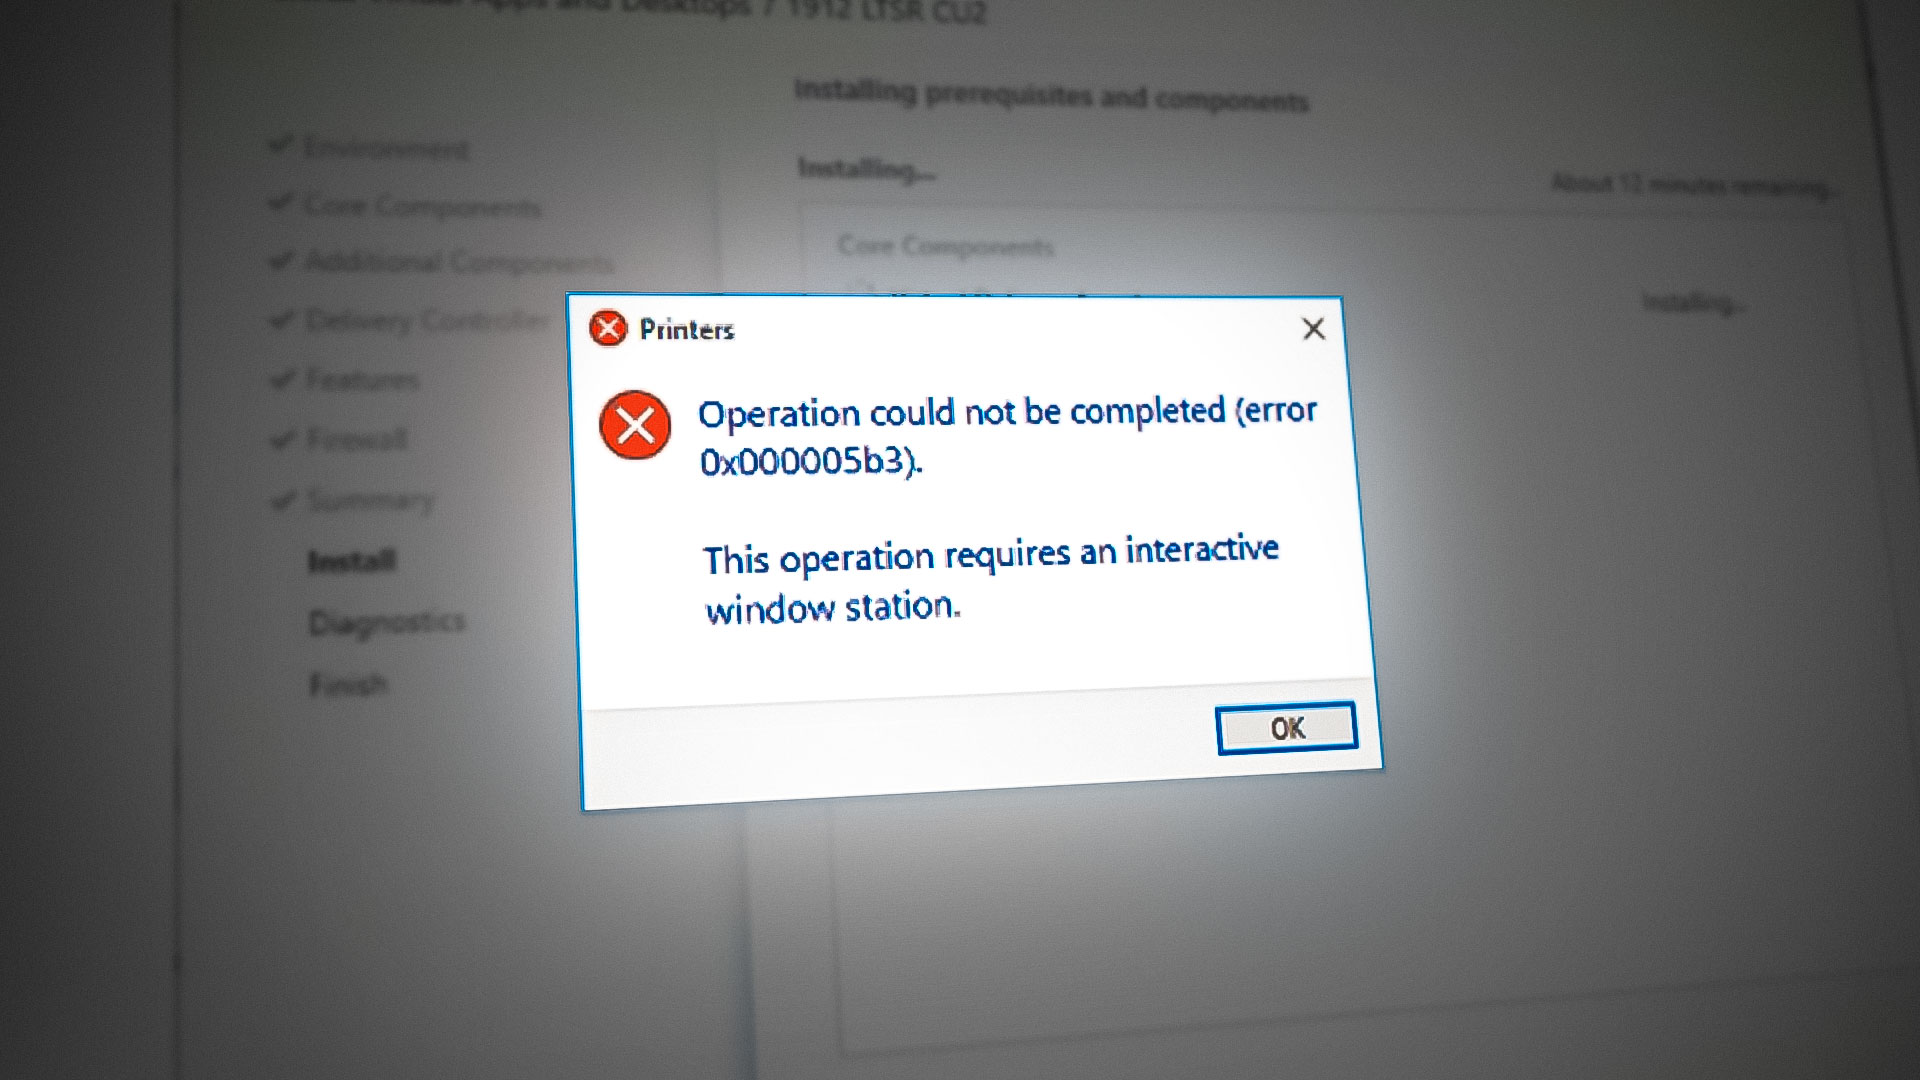
Fix: Operation could not be completed (Error 0x000005b3)
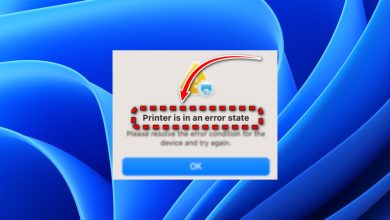
When attempting to connect to a network printer, you may encounter the error “The operation could not be completed. Error 0x000005b3.” This error is typically caused by corruption in the printer driver, resulting in an operational error for the network printer.
To resolve this issue, follow the steps below to fix Error 0x000005b3 on your network printer:
Workaround: Restart your Computer Properly
An improper Windows shutdown can cause driver issues, including the one you are experiencing. As a workaround, it is recommended to fully restart your computer to resolve the issue. Follow the steps below to perform a proper system shutdown:
- Open the Windows Start Menu by pressing the Win key.
- Restart your computer by clicking on the Power option and selecting “Restart”
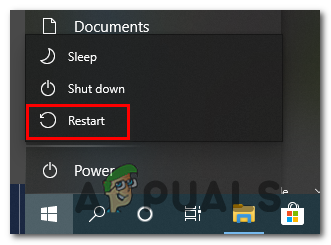
Restarting the Windows computer - After restarting the computer, all the drivers will boot properly.
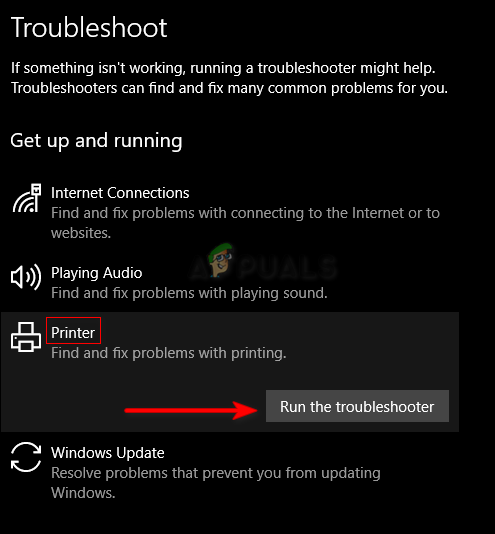
1. Run the Printer Troubleshooter
Windows includes a built-in Troubleshoot feature that can scan and suggest solutions for various Windows issues.
To address the error you are encountering, you can utilize the Printer Troubleshooter, which is designed to identify and resolve problems related to printers. Follow the instructions below to run the Printer Troubleshooter:
- Open the Windows Settings with Win + I.
- Navigating to Update and Security > Troubleshoot > Printer.
- Click on the “Run Troubleshoot” option under Printer.
Running the Printer Troubleshooter - When the troubleshooter detects any problem, it will fix them.
- Restart your system to make the necessary changes.
2. Update Printer Drivers
Having an outdated driver is the most likely cause of the Printer Driver error. When you continue using an older version of a driver, it can prevent certain actions from being performed on your Windows computer.
Therefore, you should check if an update is available for your installed printer driver before connecting the network printer. Follow the steps below to update the installed printer driver on your system:
- Open the Run command with the Win +R keys.
- Type” devmgmt.msc” and click OK.
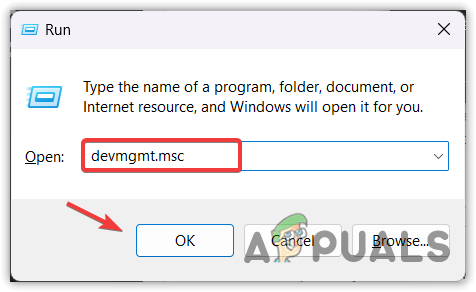
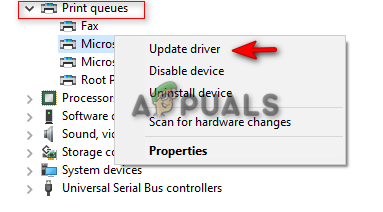
Opening Device Manager using Run Program - Click on the “Print queues” option.
- Right-click on the installed driver and select the “Update Driver” option.
Updating Printer Driver - Now, choose an option to search for an update automatically.
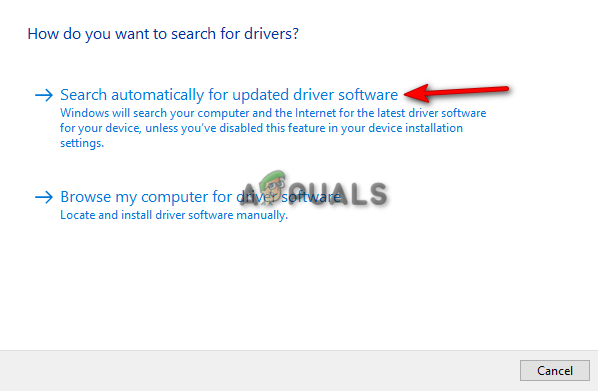
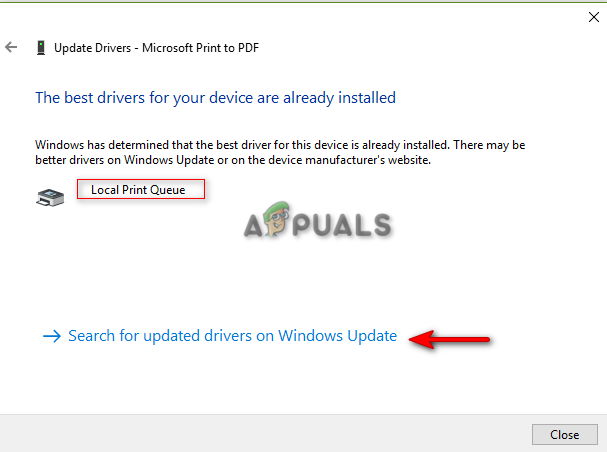
Searching for a driver automatically - After the system has found the best driver, click on the “Search for updated drivers on Windows Update” option.
Searching for updated drivers on Windows Update - If there is an available patch on the Windows Update page, check each box and select the “Download and Install” option. Restart your computer to make the required changes.
3. Delete Temporary Files
Your system saves cache as temporary files. When this cache becomes corrupted, it can cause errors in some drivers. Therefore, you should ensure that you delete all the temporary files saved on your system, as they could be the reason why your network printer is not starting.
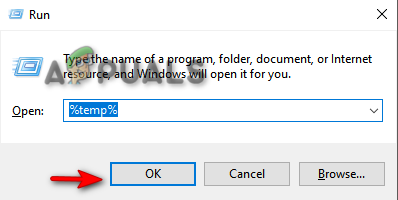
- Open the Run command with the Win +R
- Type “%temp%” and click OK.
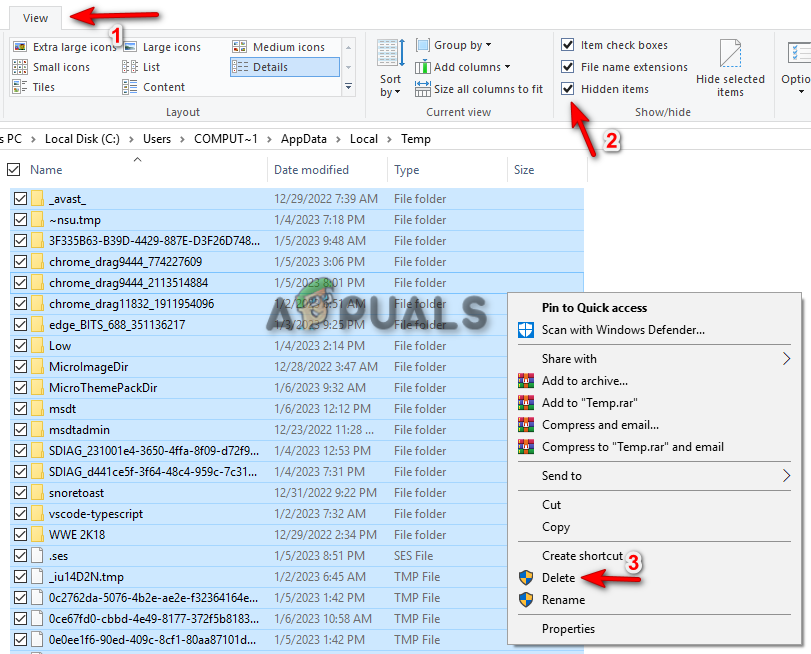
Opening the temporary file directory - Click on the “View” tab and check the “Hidden Items” box on top of the window.
- Delete all temporary files by pressing the Ctrl+ A +Delete.
Deleting Temporary Files - Restart your computer and make the required changes.
4. Set full permission for SYSTEM Account
When a driver fails to access certain System Account permissions, it is prevented from starting. To resolve this issue, you need to ensure that the driver is granted all necessary System Account permissions by adjusting the driver’s security settings. Follow the steps below to change the driver security settings:
- Open the File Explorer with Win +E keys.
- Paste the following path into the search bar:
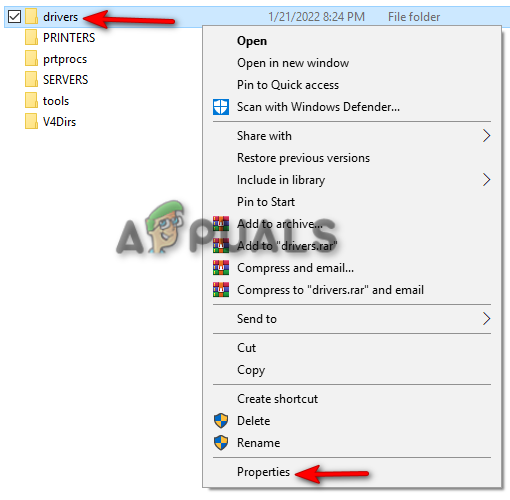
C:\Windows\System32\spool
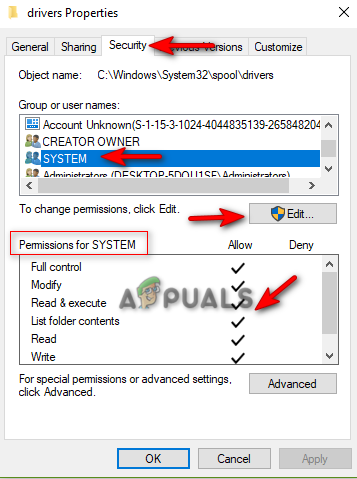
- Right-click on the “drivers” folder and select the Properties option.
Opening drivers properties - Open the “Security” tab.
- Select the “SYSTEM” option under “Group or user names.”
- Click on the Edit button and change the permissions to “Allow”.
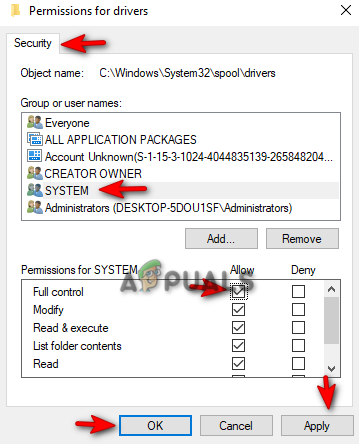
Editing System Permissions - Select the “SYSTEM” option under “Group or user names.”
- Check the “Allows” boxes of all SYSTEM permissions.
- Confirm the changes by clicking on Apply and OK.
Confirming changes to System permissions - Lastly, restart your computer.
5. Run the Print Spooler Service Automatically
You may also encounter an error message from your network printer if the Print Spooler service fails to start automatically. This can occur if your Print Spooler service is currently set to a manual startup type. To resolve this issue, follow the steps below to change the Print Spooler service to an automatic startup:
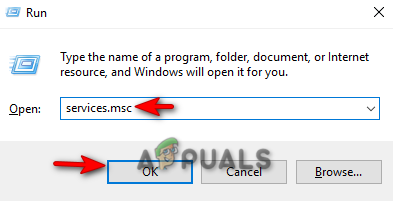
- Open the Run command with the Win + R
- Type “service.msc” and click OK.
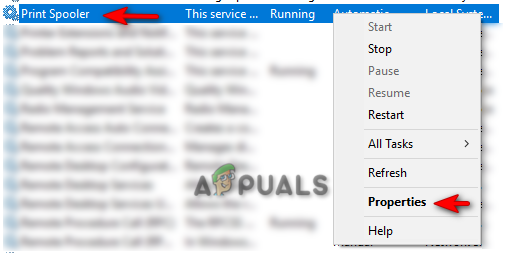
Opening Windows Services - Find the “Print Spooler” service and open its properties by right-clicking on it and selecting the “Properties” option.
Opening Print Spooler properties - Open the “General” tab and change Startup Type to “Automatic“.
- Confirm the changes by clicking on Apply and OK.
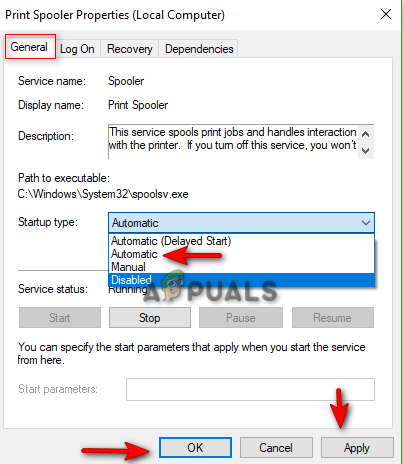
Setting the Print Spooler Startup type