How to Use iCloud to Sync Notes Across All Devices
 Reviewed by Huzaifa Haroon
- Apple Notes seamlessly integrates with iCloud, allowing you to access your notes across all Apple devices and iCloud.com.
- It offers a range of features including text formatting, checklists, attachments, and collaboration options, making it a versatile tool for organizing thoughts, tasks, and ideas.
- You can access Apple Notes and iCloud from various platforms, including iOS, macOS, Windows, and Android, allowing for flexibility in note-taking and accessibility.
In our digital age, staying organized is essential. Apple Notes offers a convenient solution for managing your thoughts, ideas, and to-do lists seamlessly across all your devices. Whether you’re using an iPhone, iPad, Mac, or even a Windows PC or Android device, Notes keeps your content synced and accessible wherever you go.
In this guide, we’ll walk you through the basics of accessing and using Notes, explore how to sync your notes across different platforms, and provide some handy tips and troubleshooting advice along the way. Let’s dive in!
Table of Contents

Why Use Notes on iCloud?
Using Notes on iCloud.com offers several compelling advantages:
- Accessibility: Access notes from any web browser.
- Cross-Platform Compatibility: Works across various devices and platforms.
- Backup and Recovery: Automatically backs up notes for added security.
- Collaboration: Share notes and folders for seamless teamwork.
- Convenience: Intuitive interface for easy organization and searching.
READ MORE: How to Import All Your iCloud Photos to Google Photos ➜
How to Access and Use Notes on iCloud
iCloud offers a convenient platform for managing notes across various devices. Here’s a guide on how to access and utilize notes effectively:
Step 1: Create Notes
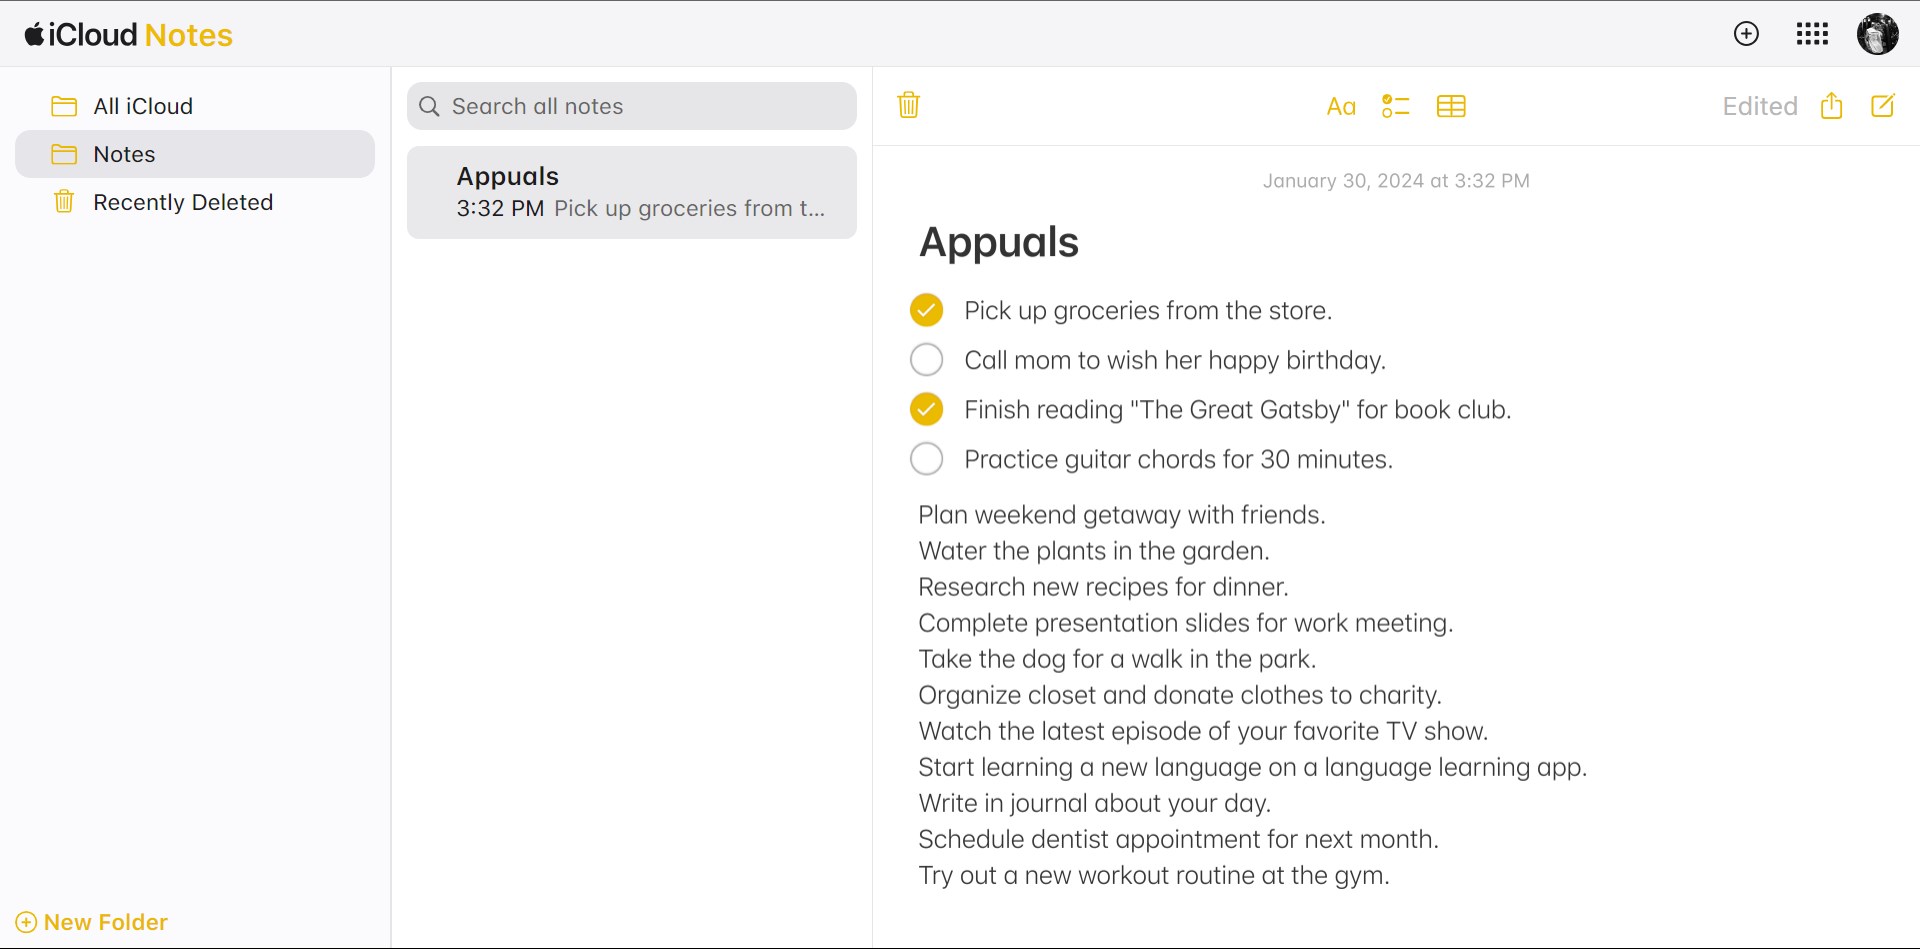
You can easily start a new note and adjust formatting in Notes on iCloud.com. Notes are organized by last-modified date, with the most recent note displayed at the top.
To create a new note on iCloud.com:
- From the iCloud.com homepage, click the “New Note” button in the corner of the
Notes tile.
Click on the button - Begin typing your note.
Your changes are automatically saved, and your new note will appear in the notes list, identified by the initial text.
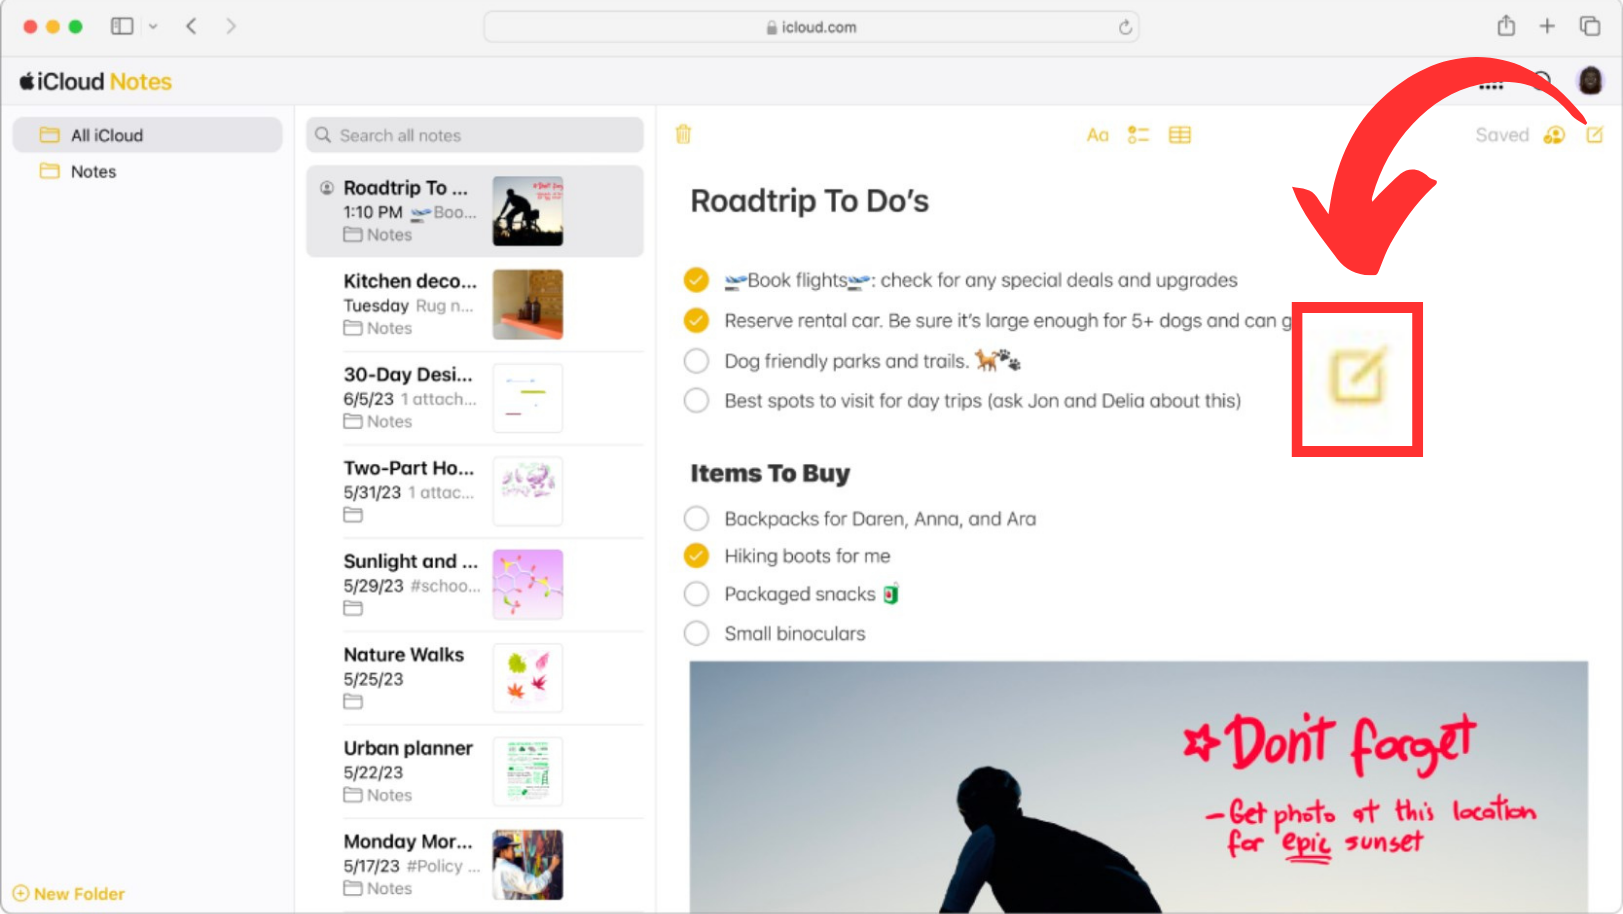
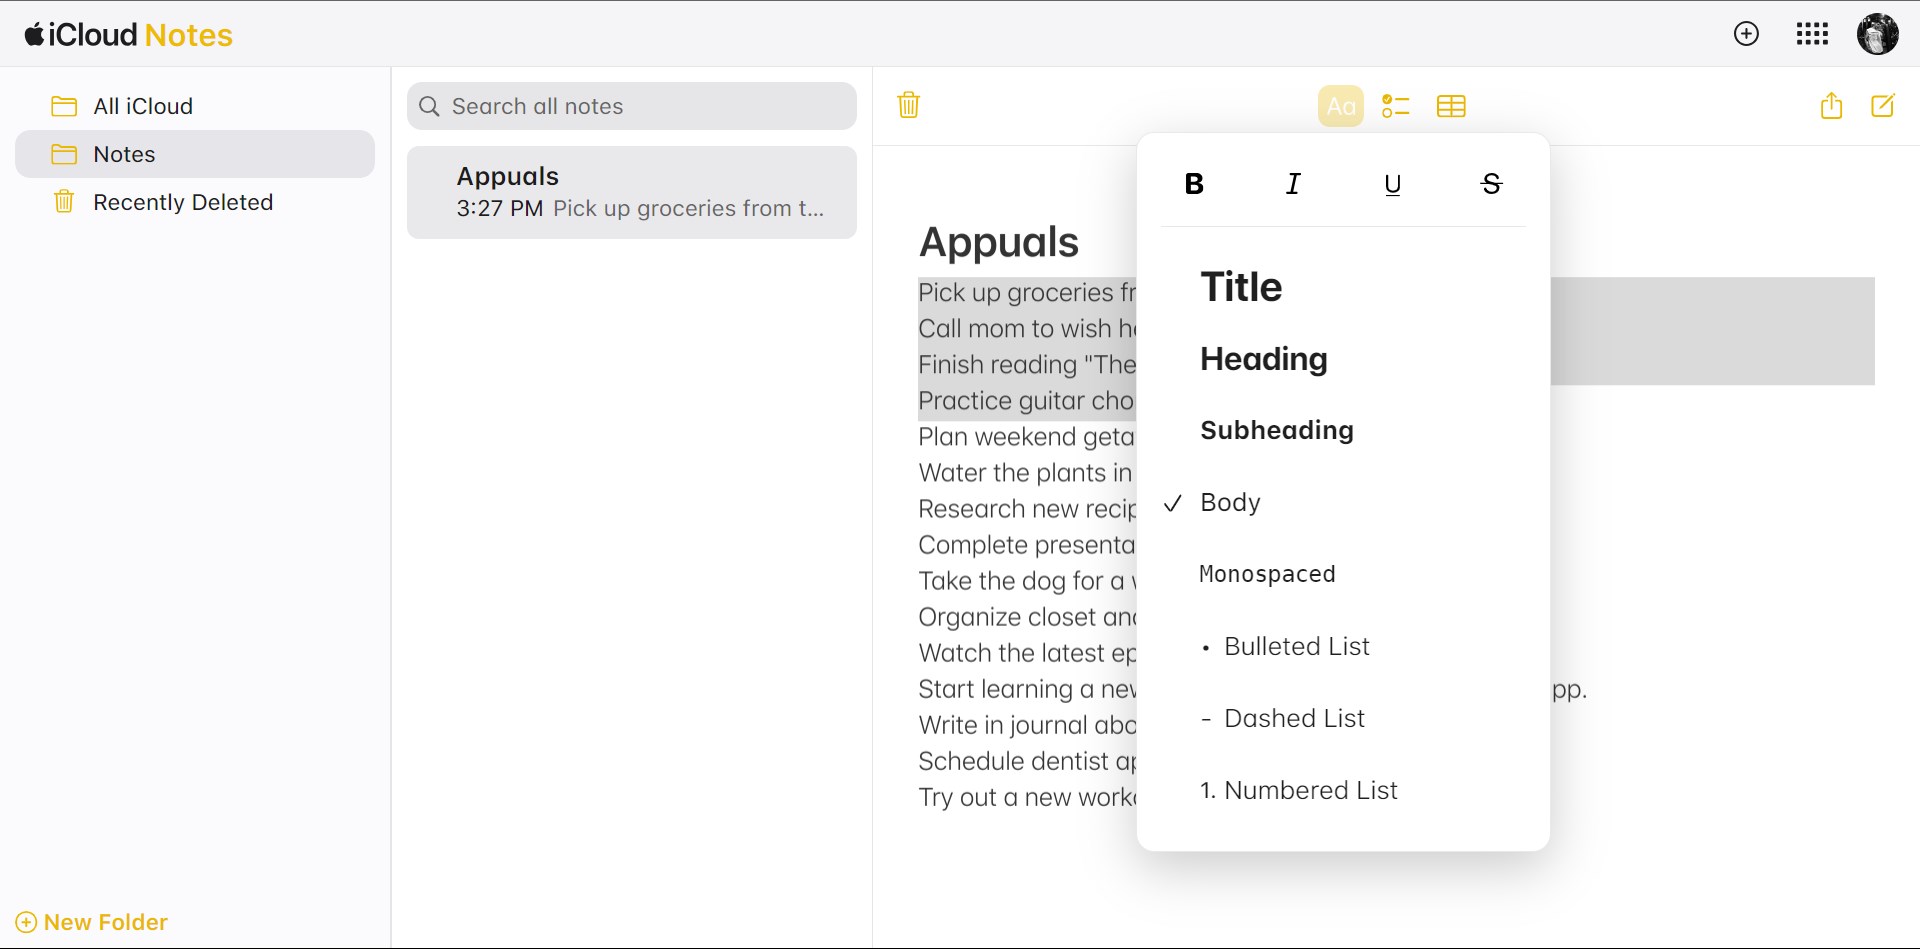
Step 2: Format Notes
To format lines or words within a note:
- Select the text you want to format.
- Click the “Choose a style” button in the Notes toolbar.
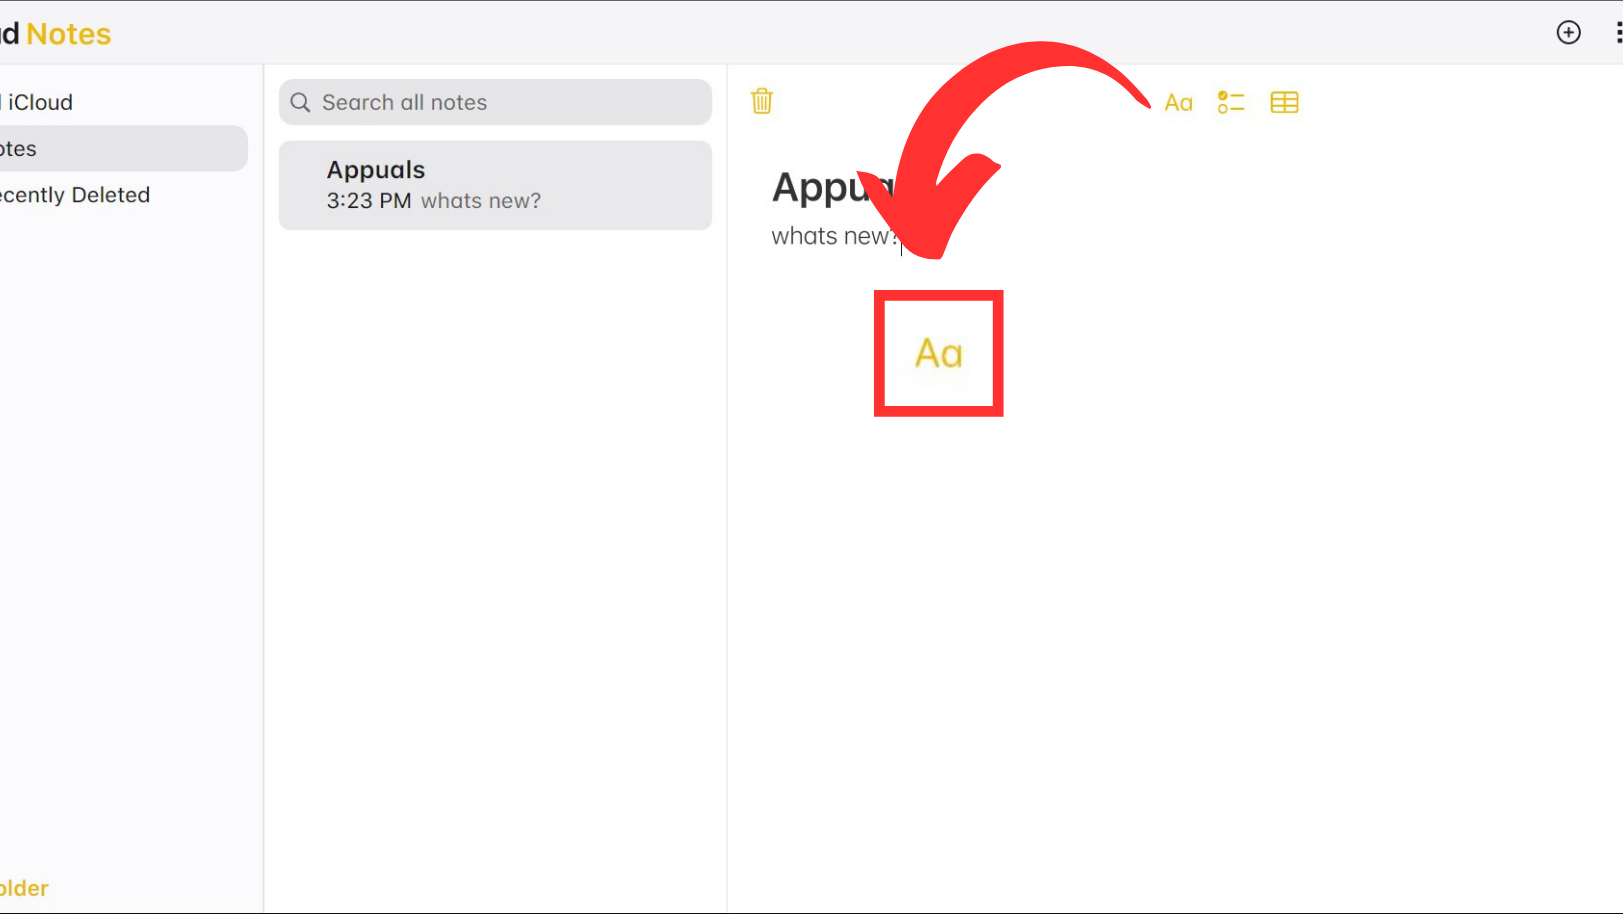
Click on the button - Choose the desired formatting option.
Attachments can be added to notes using the Notes app on your Apple devices signed in with the same Apple ID. You can view or download these attachments in Notes on iCloud.com.
Step 3: Add or Edit Lists
To add or edit lists in Notes on iCloud.com, follow these steps:
↪ Turn Existing Lines into a Formatted List:
- In Notes on iCloud.com, select a note.
- Select the lines to convert into a list.
- Now, click the “Choose a style” button in the Notes toolbar and choose Bulleted List, Dashed List, or Numbered List.
Choose a list style
↪ Create a Checklist:
- In Notes on iCloud.com, select a note.
- Do either of the following:
- Click a blank line and then click the “Make a checklist” button in the Notes toolbar.
- Select the lines and click the “Make a checklist” button in the Notes toolbar.

Click on the Checklist button
- To mark a task as complete, click the empty circle next to the task.
Check the circles of completed tasks
↪ Add a New List Item or End a List:
- In Notes on iCloud.com, select a note containing a list.
- Do either of the following:
- Click anywhere in a list, then press Return or Enter.
- Click at the end of the last list item, then press Return or Enter twice.
↪ Increase or Decrease List Level:
- In Notes on iCloud.com, select a note containing a list.
- Now, implement either of the following methods:
- Increase list level: Click at the beginning of a list item, then press Tab. Alternatively, press Command-] (on Mac) or Control-] (on Windows).
- Decrease list level: Click at the beginning of a list item, then press Shift-Tab. Alternatively, press Command-[ (on Mac) or Control-[ (on Windows).
READ MORE: How to Delete A Teamspace in Notion: Step-by-Step Pictures ➜
Step 4: Organize Notes in Folders
You can organize your notes in iCloud.com by creating folders. Here’s how:
↪ Create a Folder:
- Click “New Folder” at the bottom of the folder list.
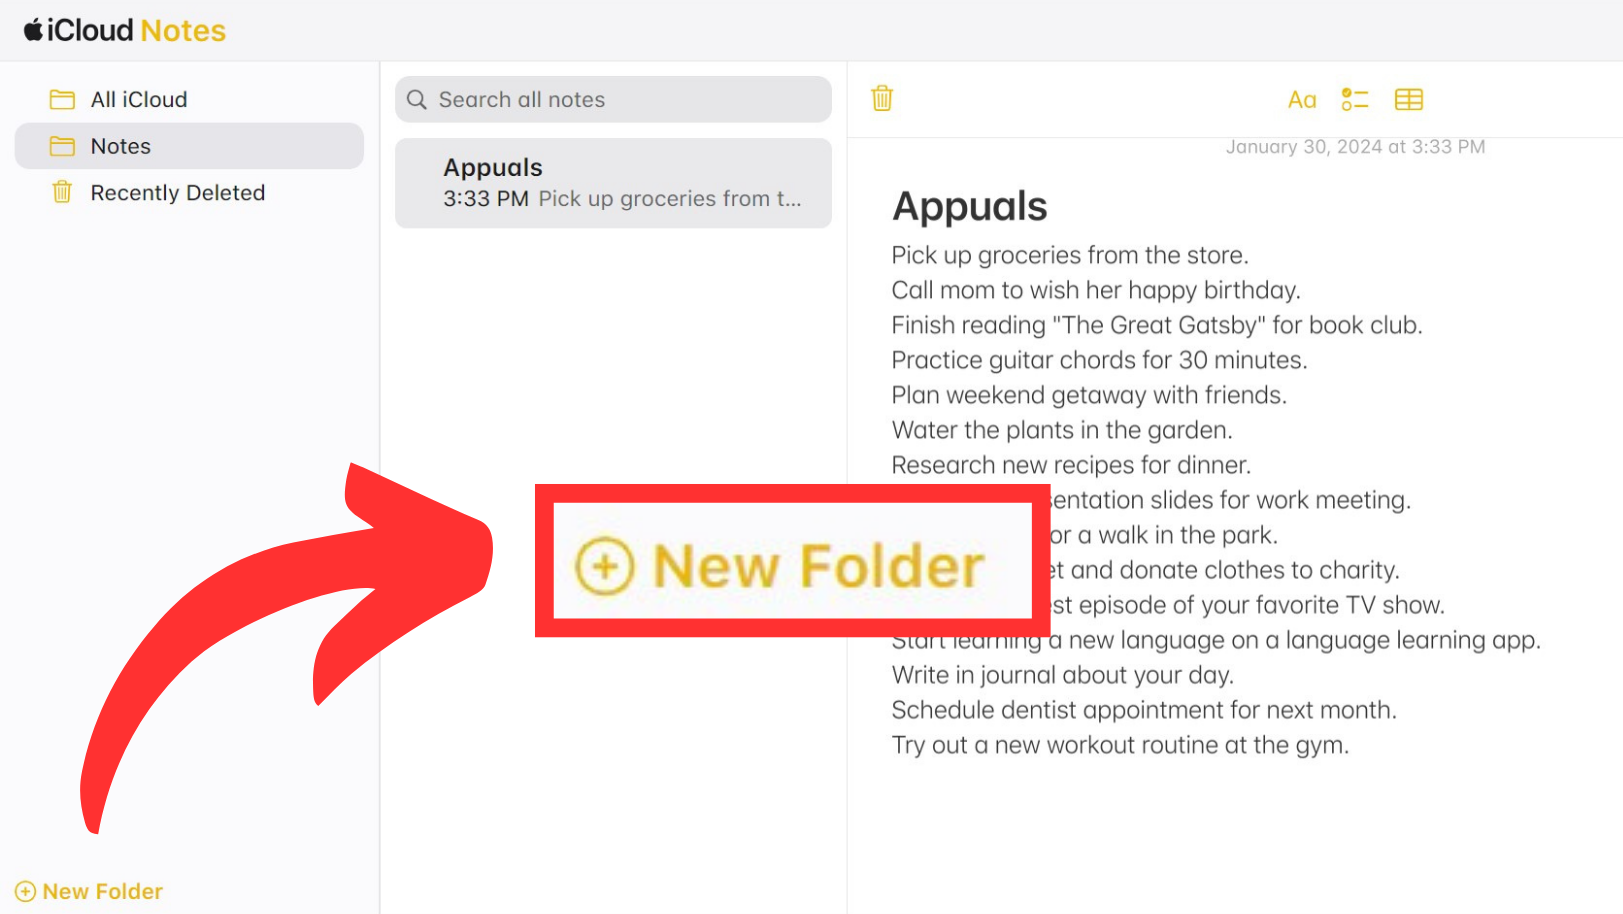
Click on New Folder - Name the folder and press Return or Enter.
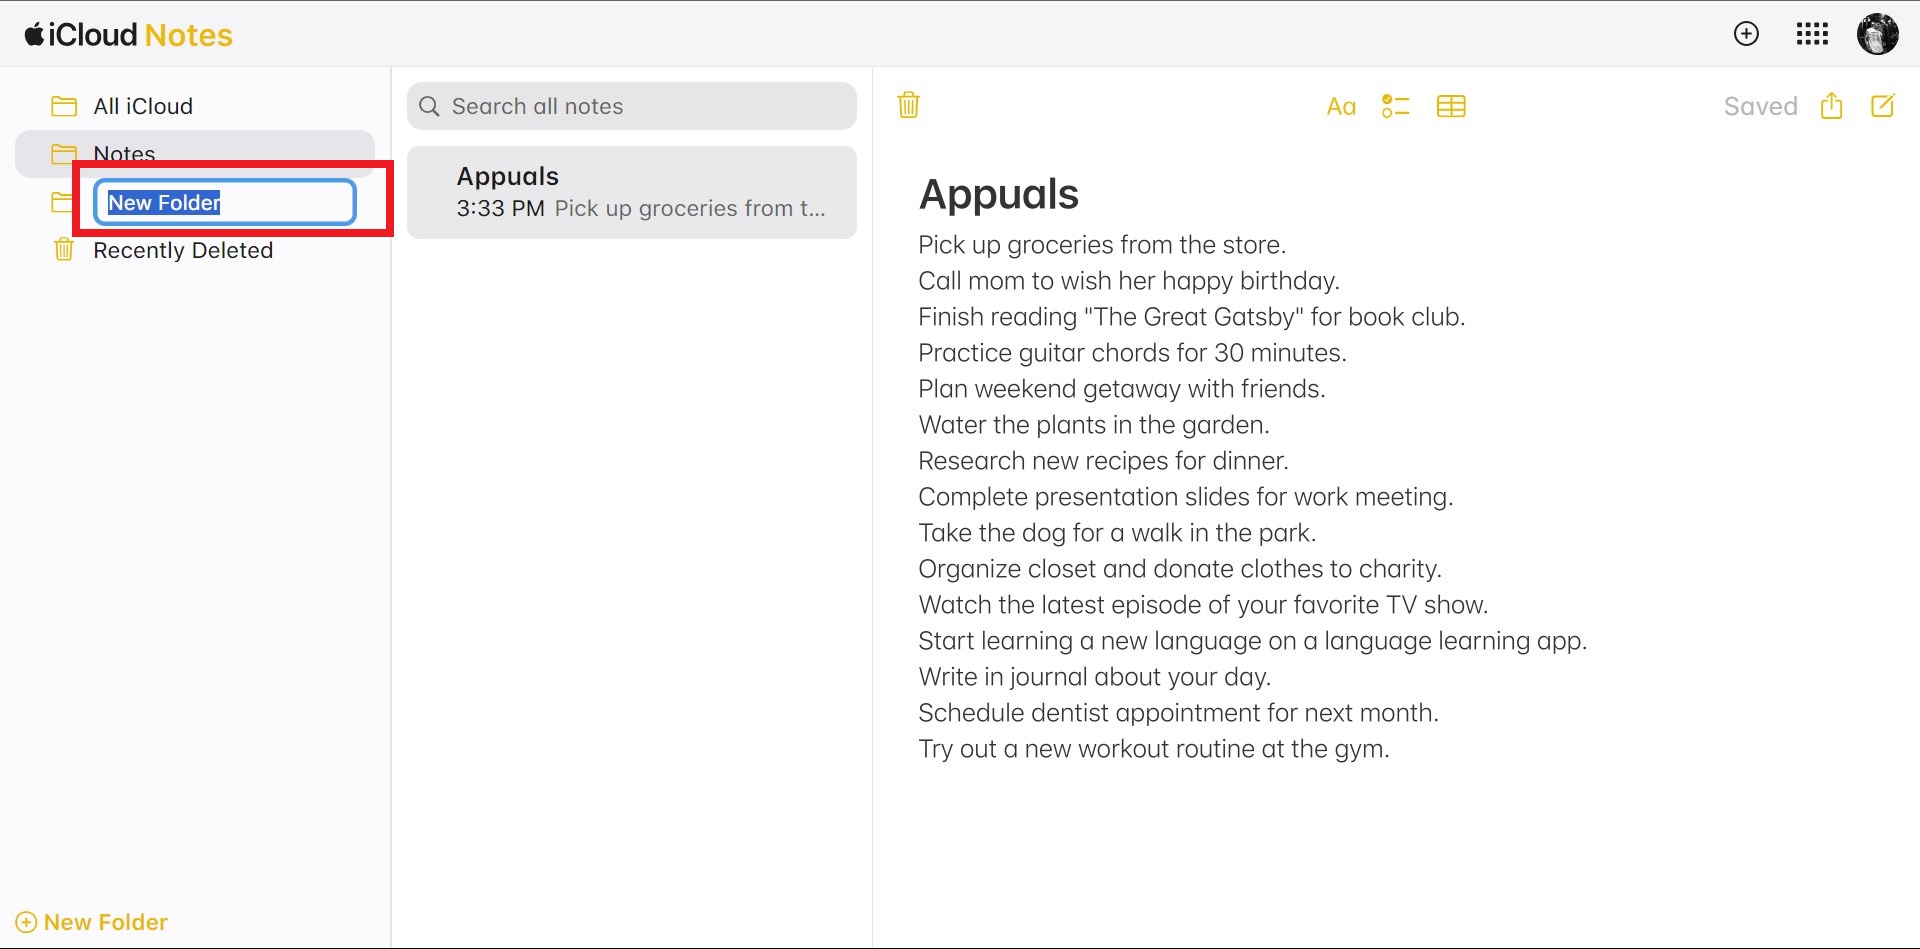
Name the folder - Your folder will appear alphabetically in the folder list.
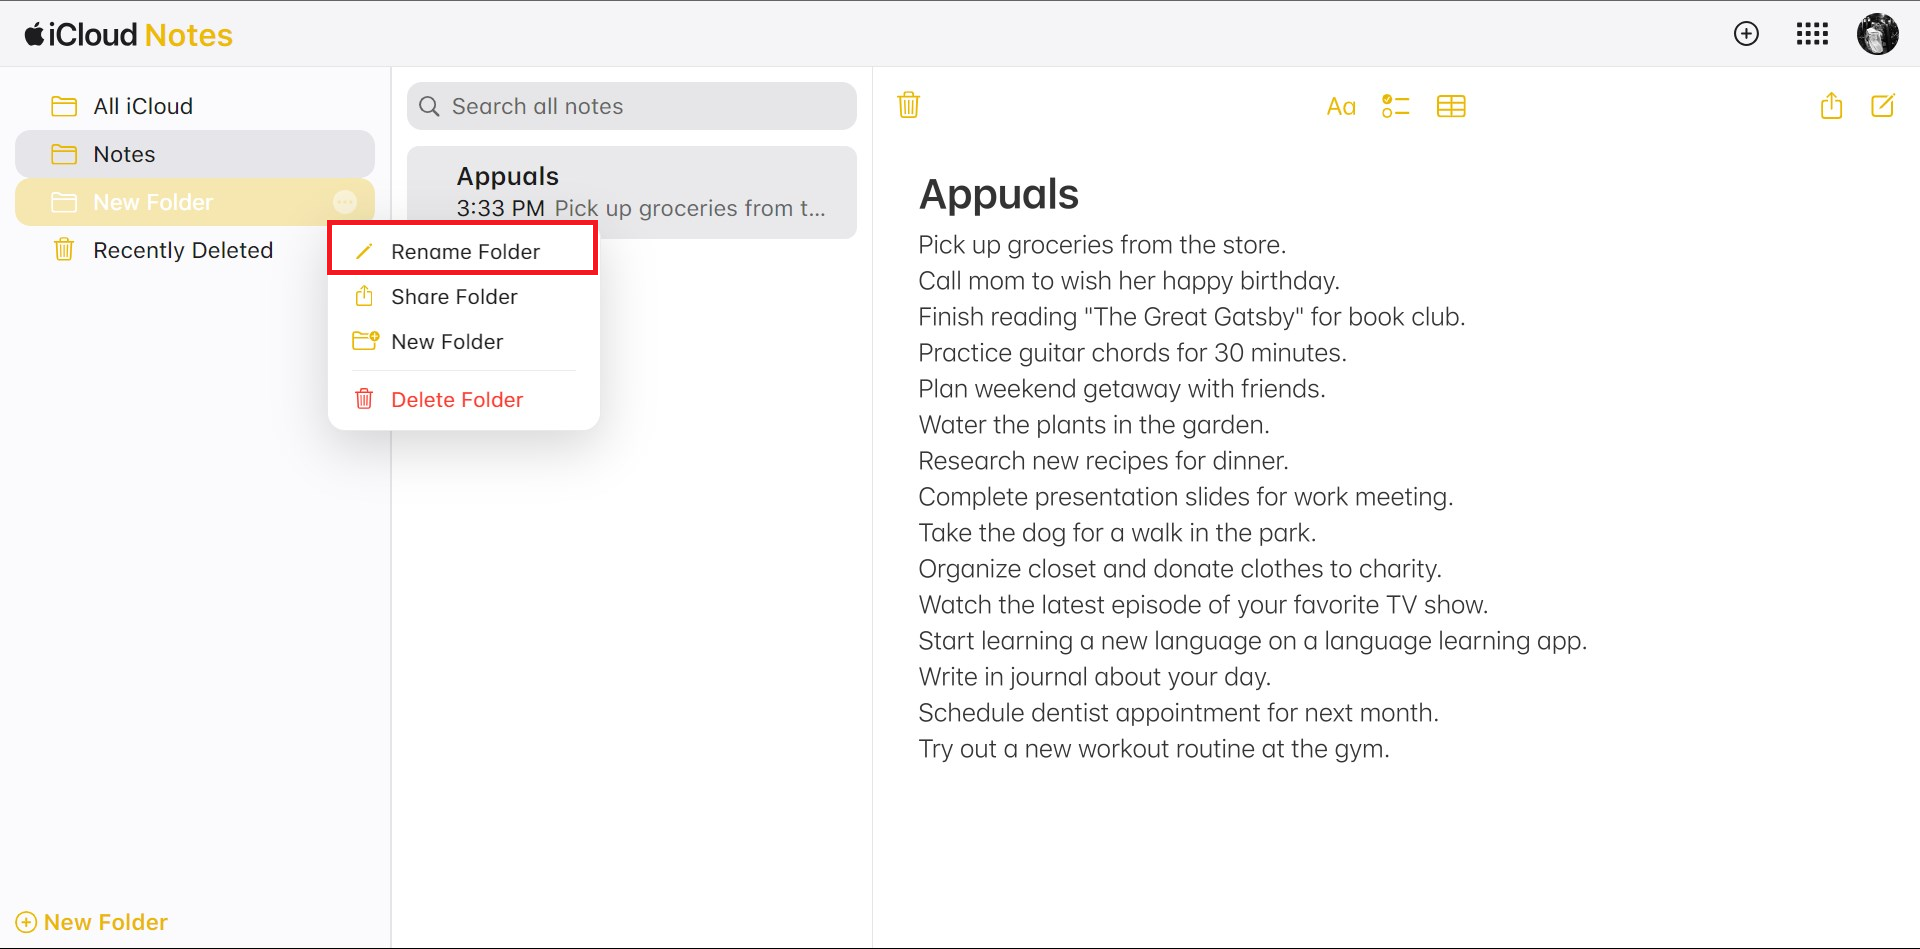
↪ Rename or Move a Folder:
- To rename a folder: Hover over the folder, click the More button, select “Rename Folder,” enter a new name, and press Return or Enter.
Choose Rename folder - To place a folder inside another: Drag and drop it onto the desired folder.
- To move a subfolder to the top level: Drag and drop it into the “All iCloud” folder.
↪ Delete a Folder:
- Hover over the folder you want to delete and click the More button.
- Select “Delete Folder.”
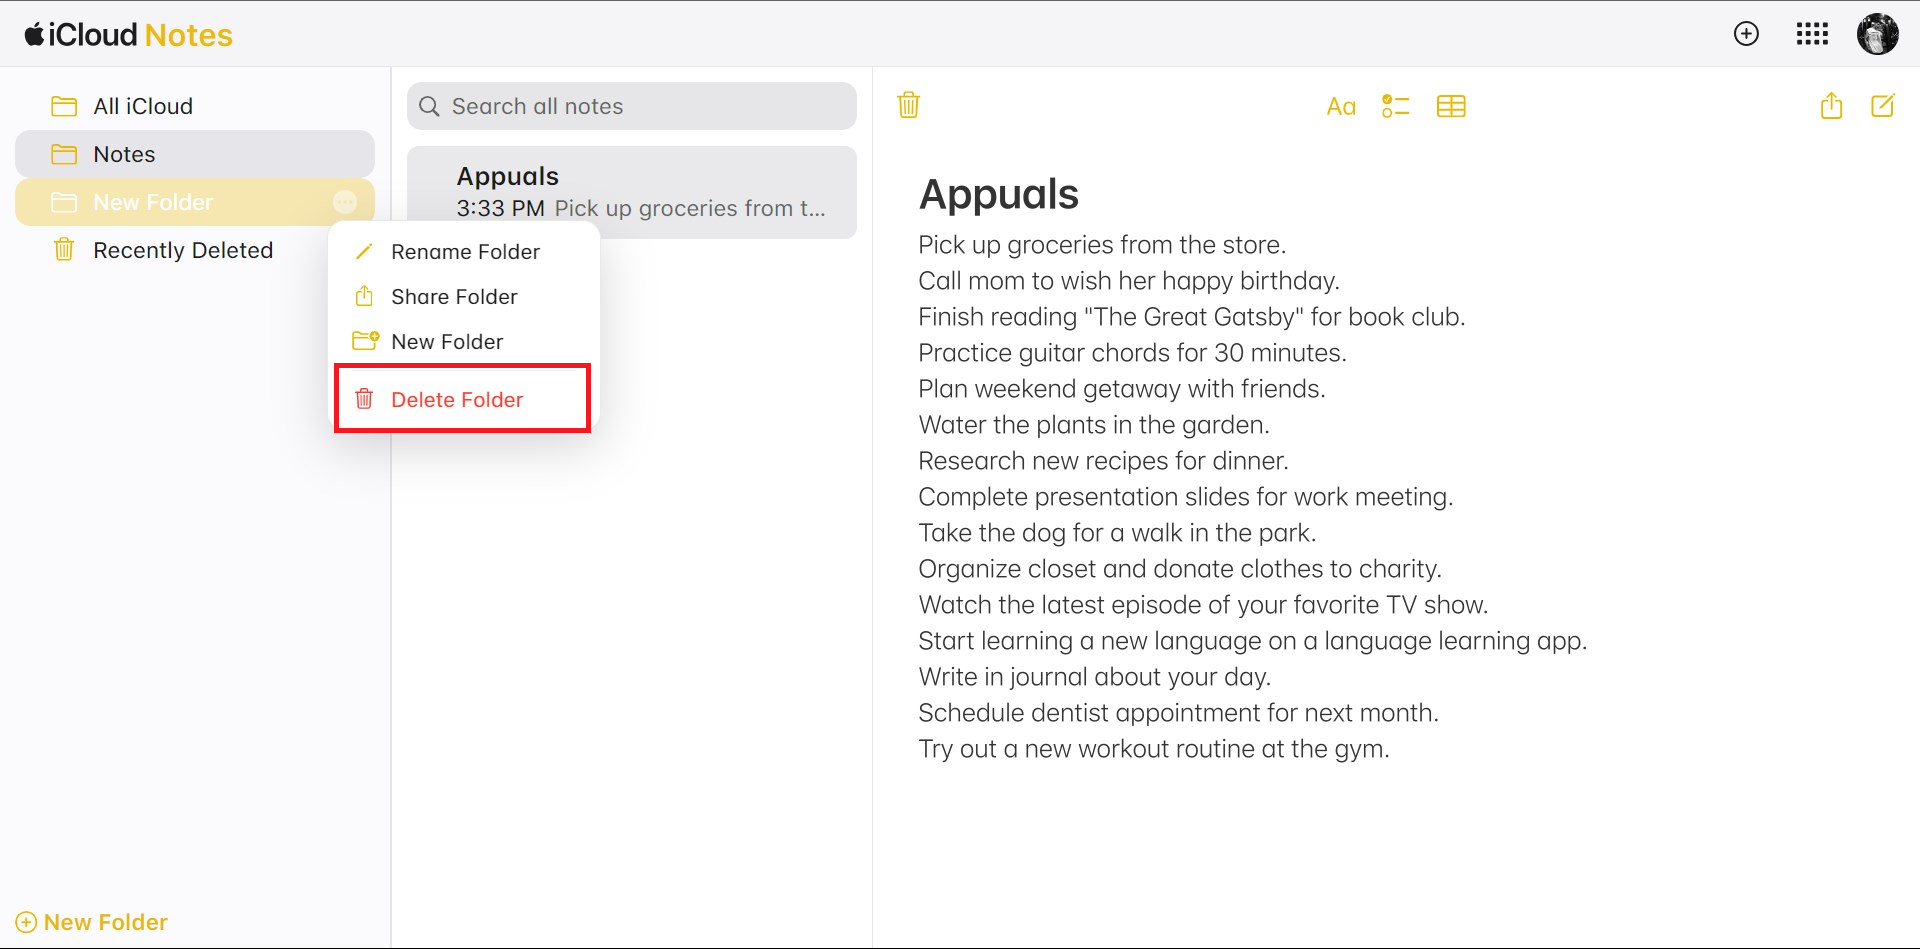
Select Delete Folder - Deleted folders and their notes move to the “Recently Deleted” folder for 30 days before permanent removal.
↪ Move a Note to Another Folder:
- Drag the note to the desired folder. Notes are listed by last modified date. Note sharing permissions align with the folder’s permissions.
- You cannot move notes to the “All iCloud” folder.
Step 5: View Notes and Locked Notes on iCloud.com
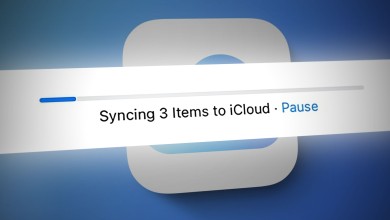
When you sync Notes with iCloud, your notes stay updated across iCloud.com and all devices where Notes is enabled in iCloud settings.
↪ Viewing a Note:
- In Notes on iCloud.com, select the desired note from the list.
View Notes
- If needed, switch to a different folder to locate the note.
↪ Viewing and Closing Locked Notes:
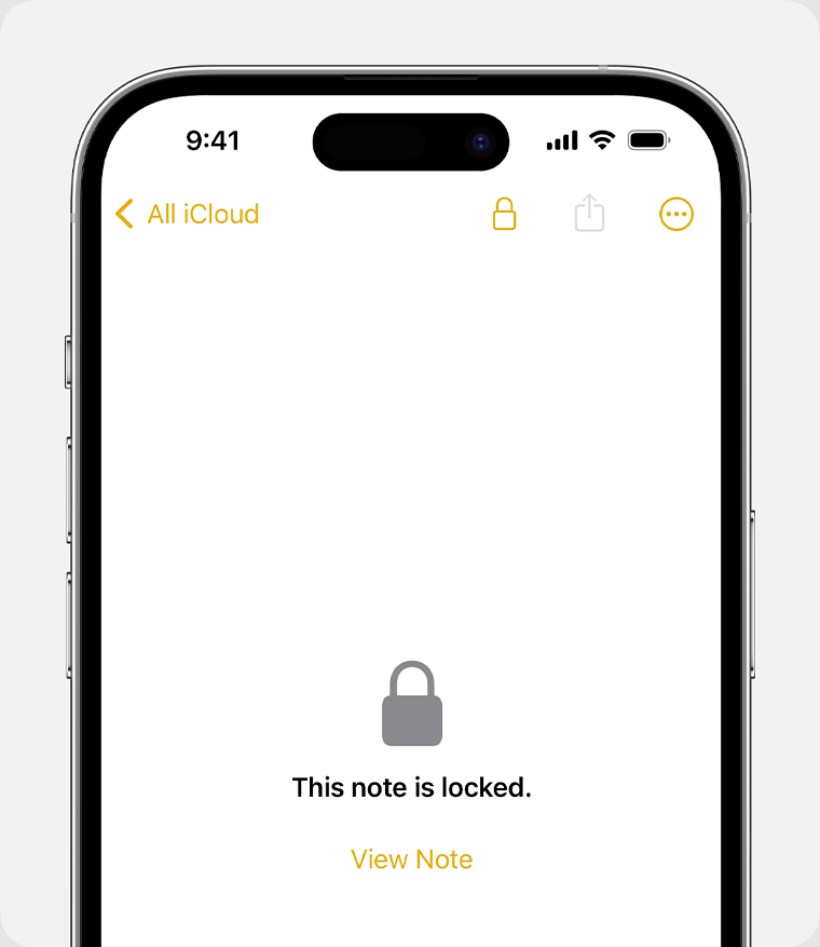
You can access notes you’ve locked on an iPhone, iPad, iPod touch, or Mac signed in with the same Apple ID. To view locked notes on iCloud.com:
- Select a locked note from the list and enter the password you set for locked notes.
- Once you enter the password for one locked note, you can access other locked notes without re-entering the password. Notes are re-locked after inactivity or upon closing the browser.
- To close locked notes, click the Lock button in the Notes toolbar.
↪ Note Locking:
- To lock, unlock, change the password, or reset the password for locked notes, utilize the Notes app on your iPhone, iPad, iPod touch, or Mac.
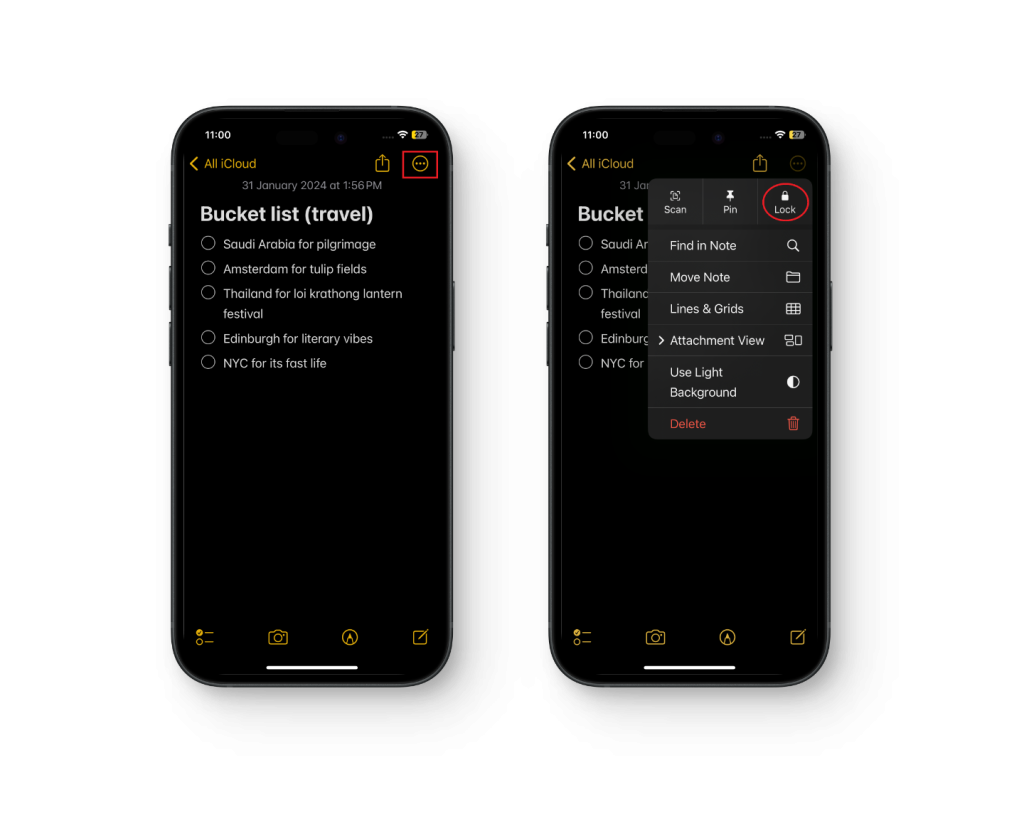
Tap on More > Lock to lock a note - Also, keep in mind if you’ve locked your notes with your device’s passcode or login password, you cannot access them on iCloud.com.
Step 6: View or Download Attachments
You can attach various items to your notes using the Notes app on your Apple devices signed in with the same Apple ID. Here’s how you can view and download these attachments in Notes on iCloud.com:
i. View Photos, Audio Files, Maps, and More:
- In Notes on iCloud.com, select the note containing the attachment you wish to view or play.
- Double-click the attachment.
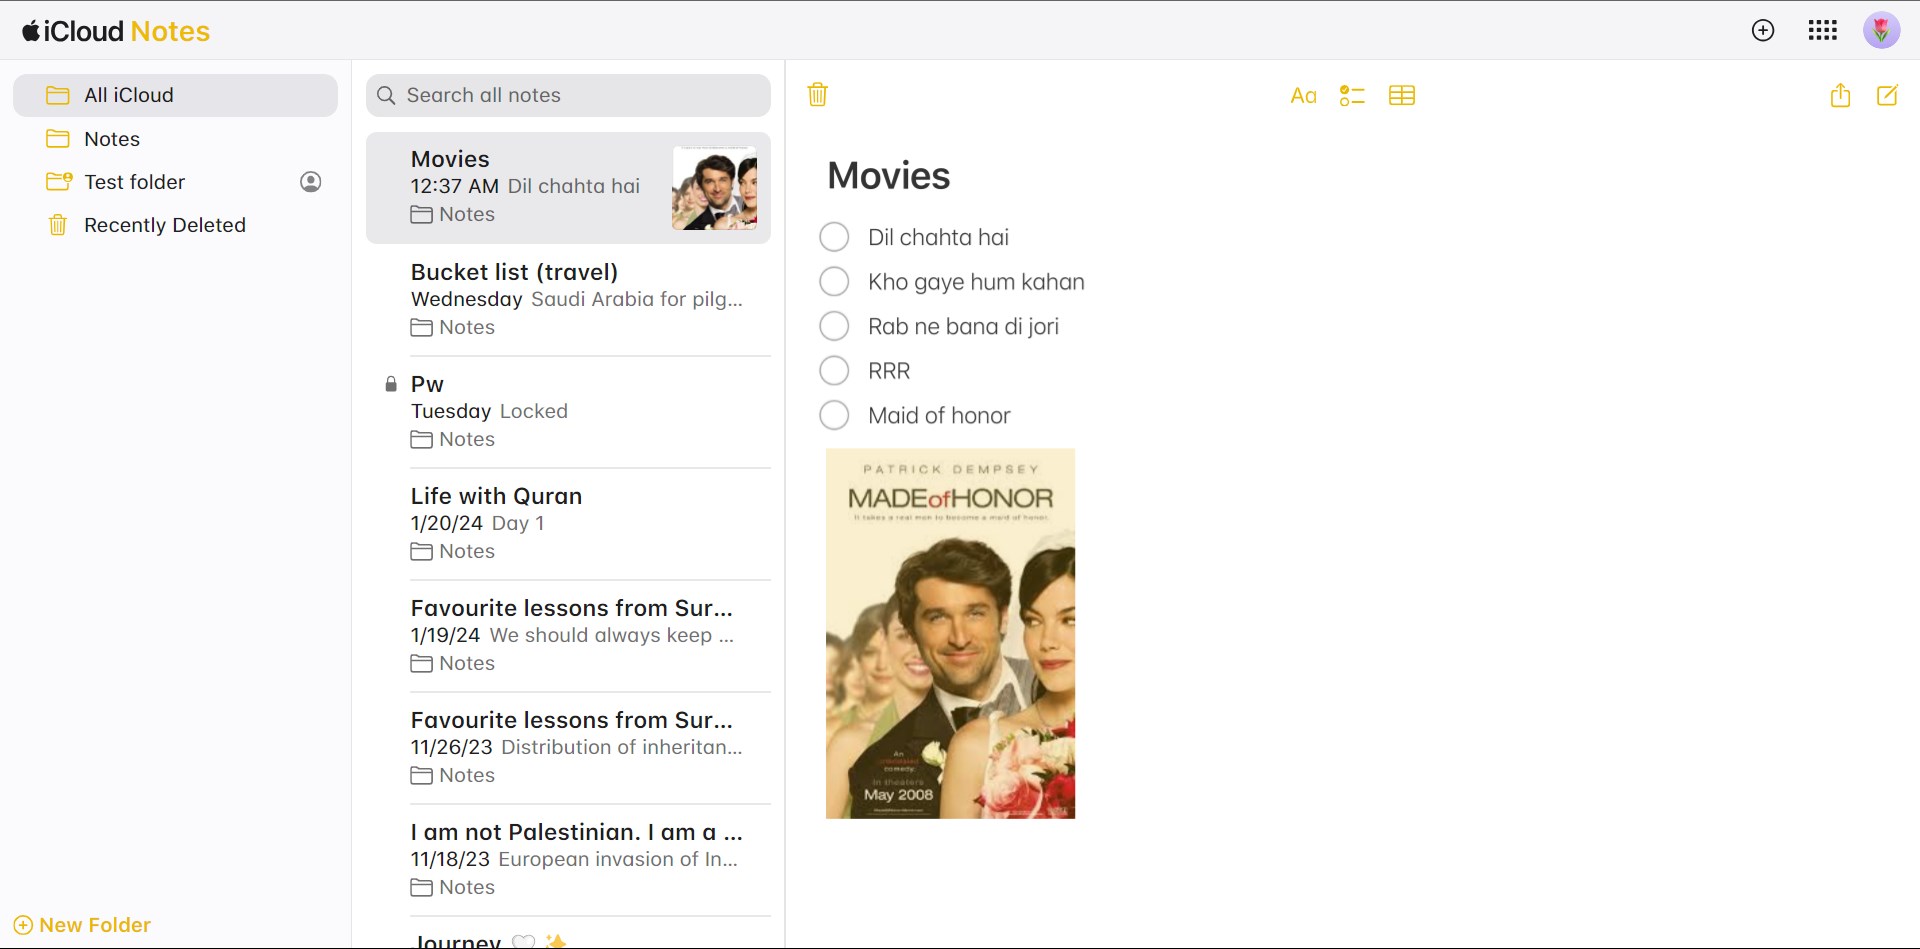
Double-clicking the attachment will highlight it yellow - The attachment is either downloaded to your computer, opened in the appropriate application, or both.
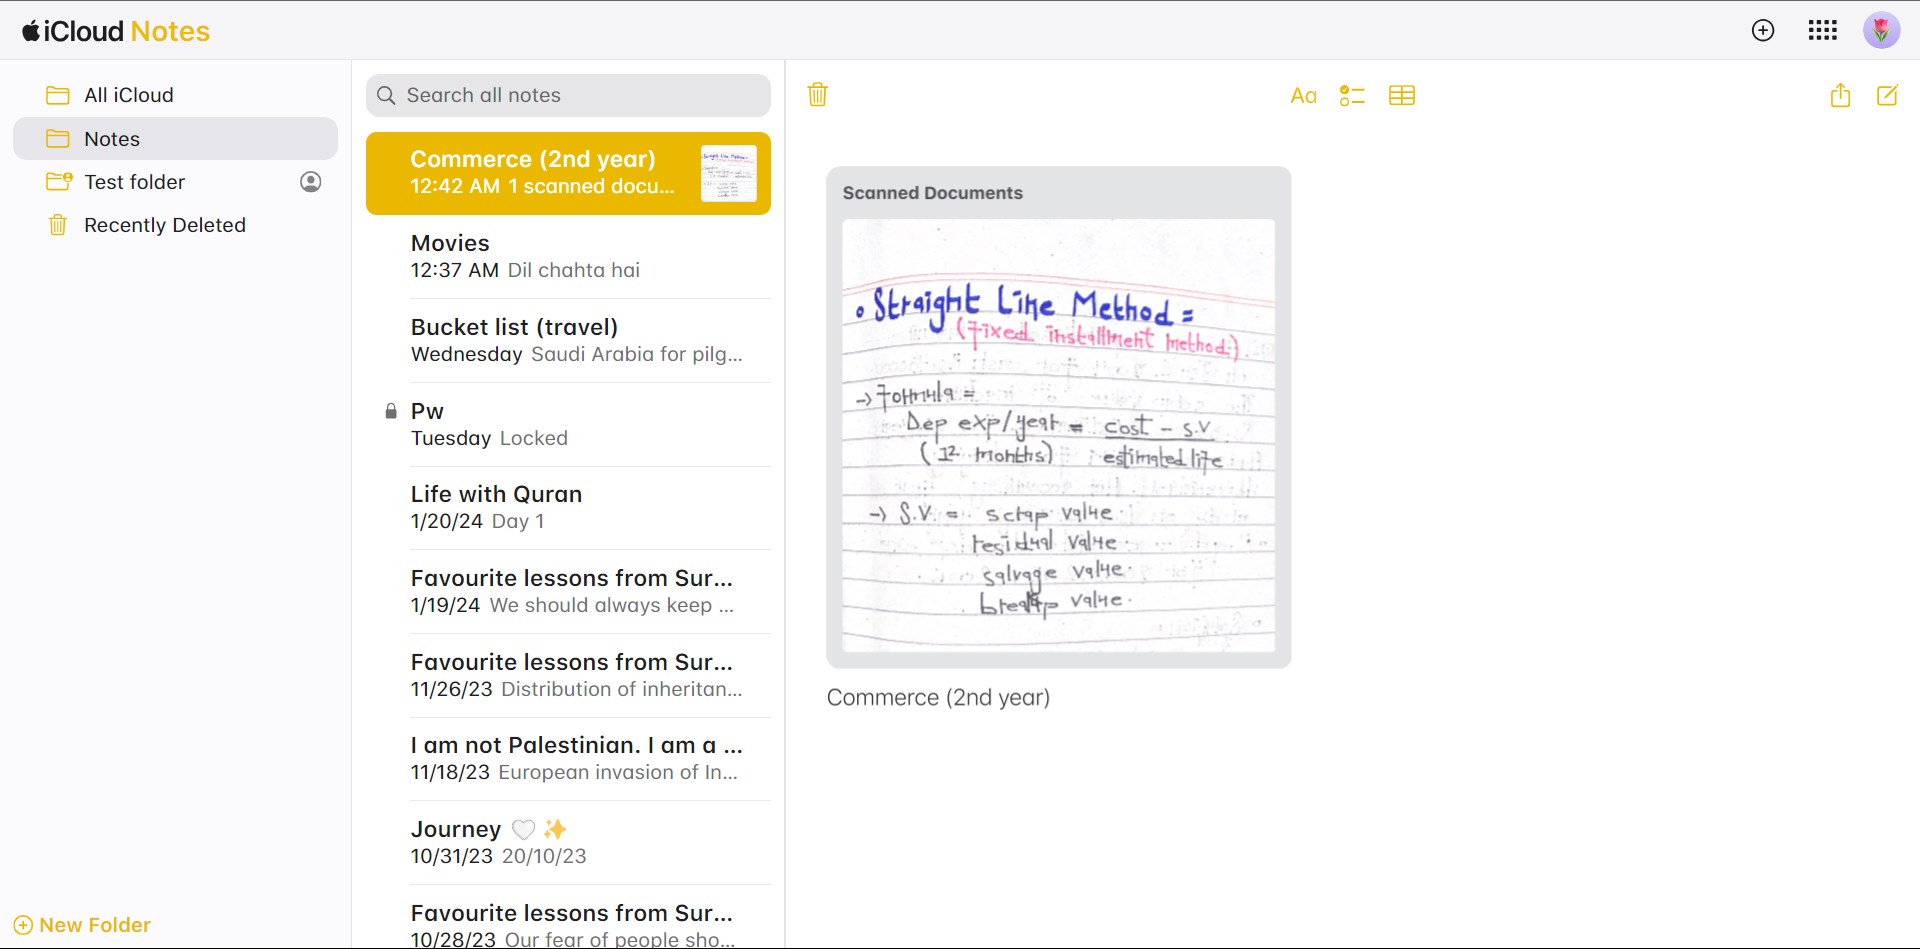
ii. Viewing and Downloading Scanned Documents:
- Select the note containing the scanned document.
- To view the document, double-click its thumbnail.
- To download the document, double-click its thumbnail and then click the download button.
- For multiple documents, click their thumbnails in the Scanned Documents window.
iii. View and Edit iWork Documents:
- Choose the note containing the Pages, Numbers, or Keynote attachment.
- Double-click the attachment.
- The attachment opens in Pages for iCloud, Numbers for iCloud, or Keynote on iCloud. Any changes made only affect the copy in iCloud Drive, not the attachment in the note.
Step 7: Delete and Recover Notes
You can manage your notes effectively by deleting those you no longer need and recovering recently deleted ones within 30 days. Here’s how:
↪ Deleting a Note:
- In Notes on iCloud.com, select the note you wish to delete.
- Click the “Delete” button in the Notes toolbar.
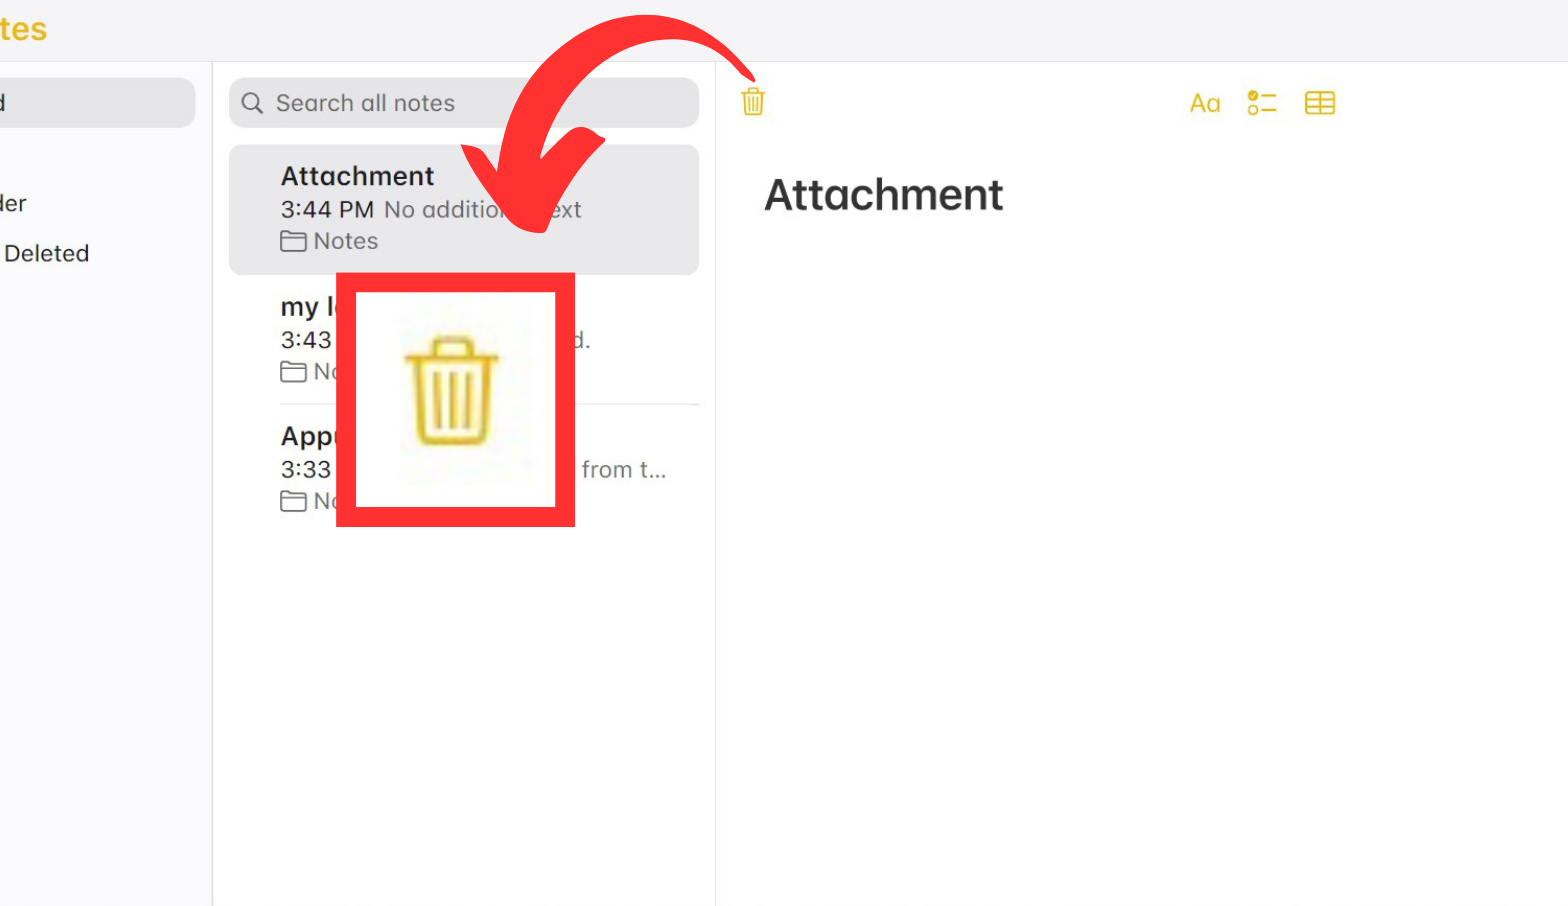
Click on the bin icon - The deleted note is moved to the Recently Deleted folder on iCloud.com, and all your devices are signed in with the same Apple ID.
↪ Recovering Recently Deleted Notes:
- Navigate to the “Recently Deleted” folder in the folder list on the left.

Select Recently Deleted - If the folder is empty, no notes can be recovered.
- Select the desired note and click “Recover” in the Notes toolbar.
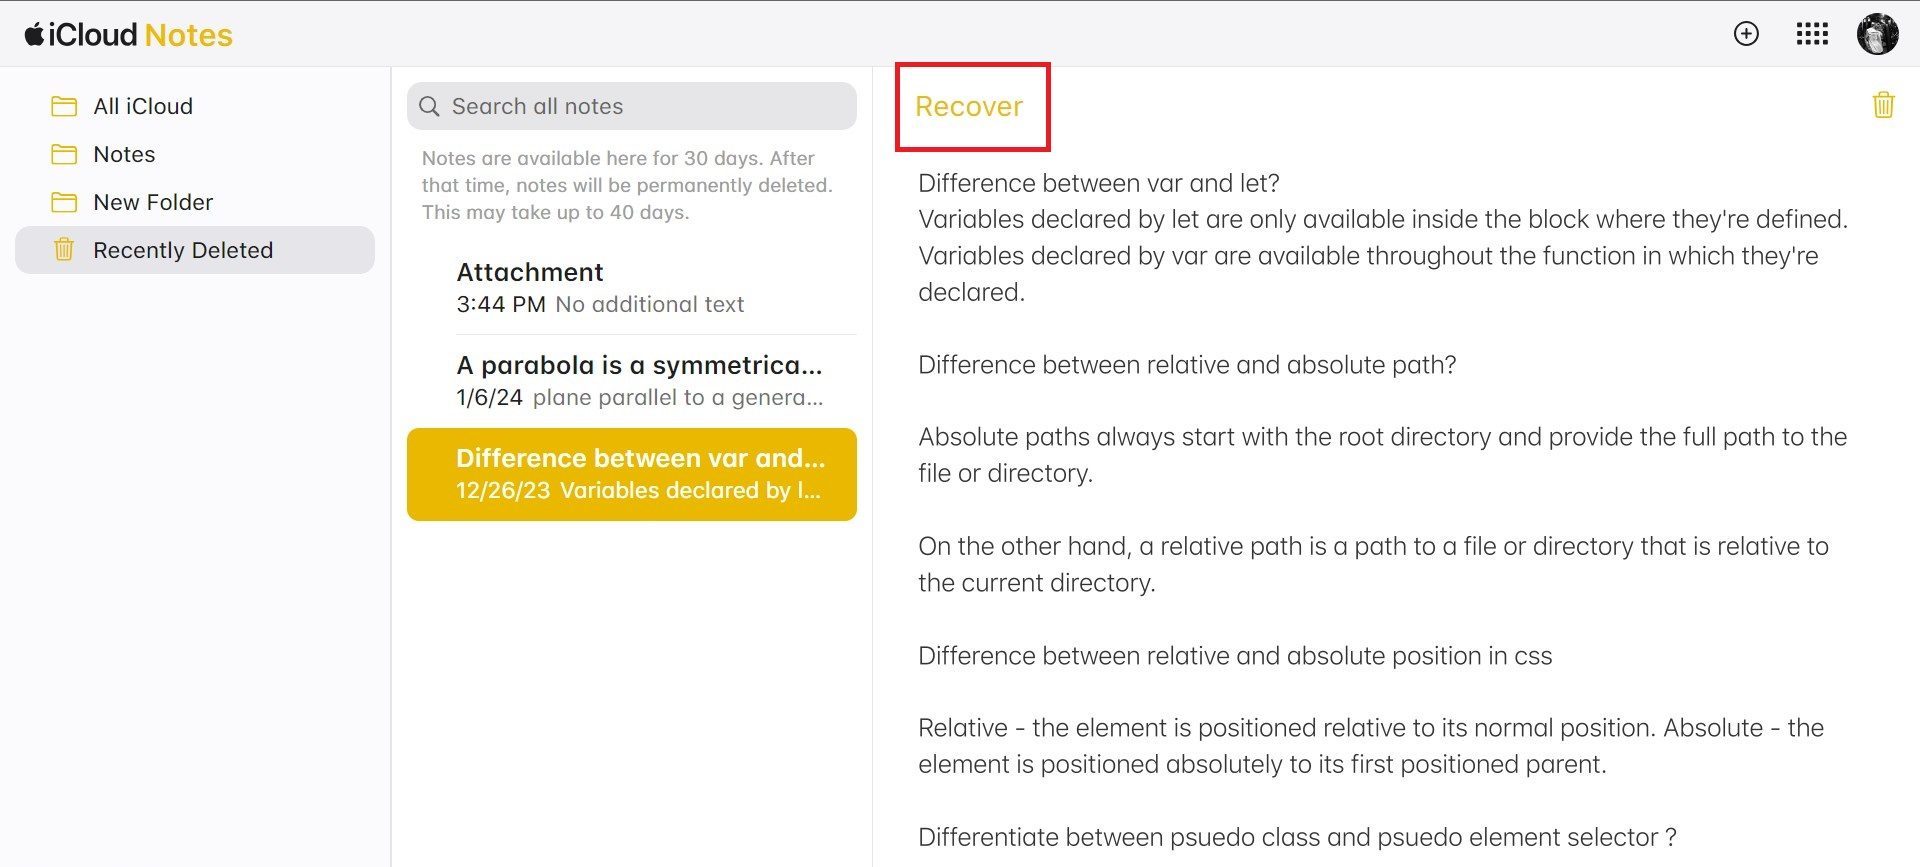
Click on Recover - The note is restored to the Notes folder. Alternatively, drag the note directly to another folder.
↪ Permanently Removing Deleted Notes:
- In the “Recently Deleted” folder, select the note you want to remove permanently.
- Click the “Delete” button in the Notes toolbar.
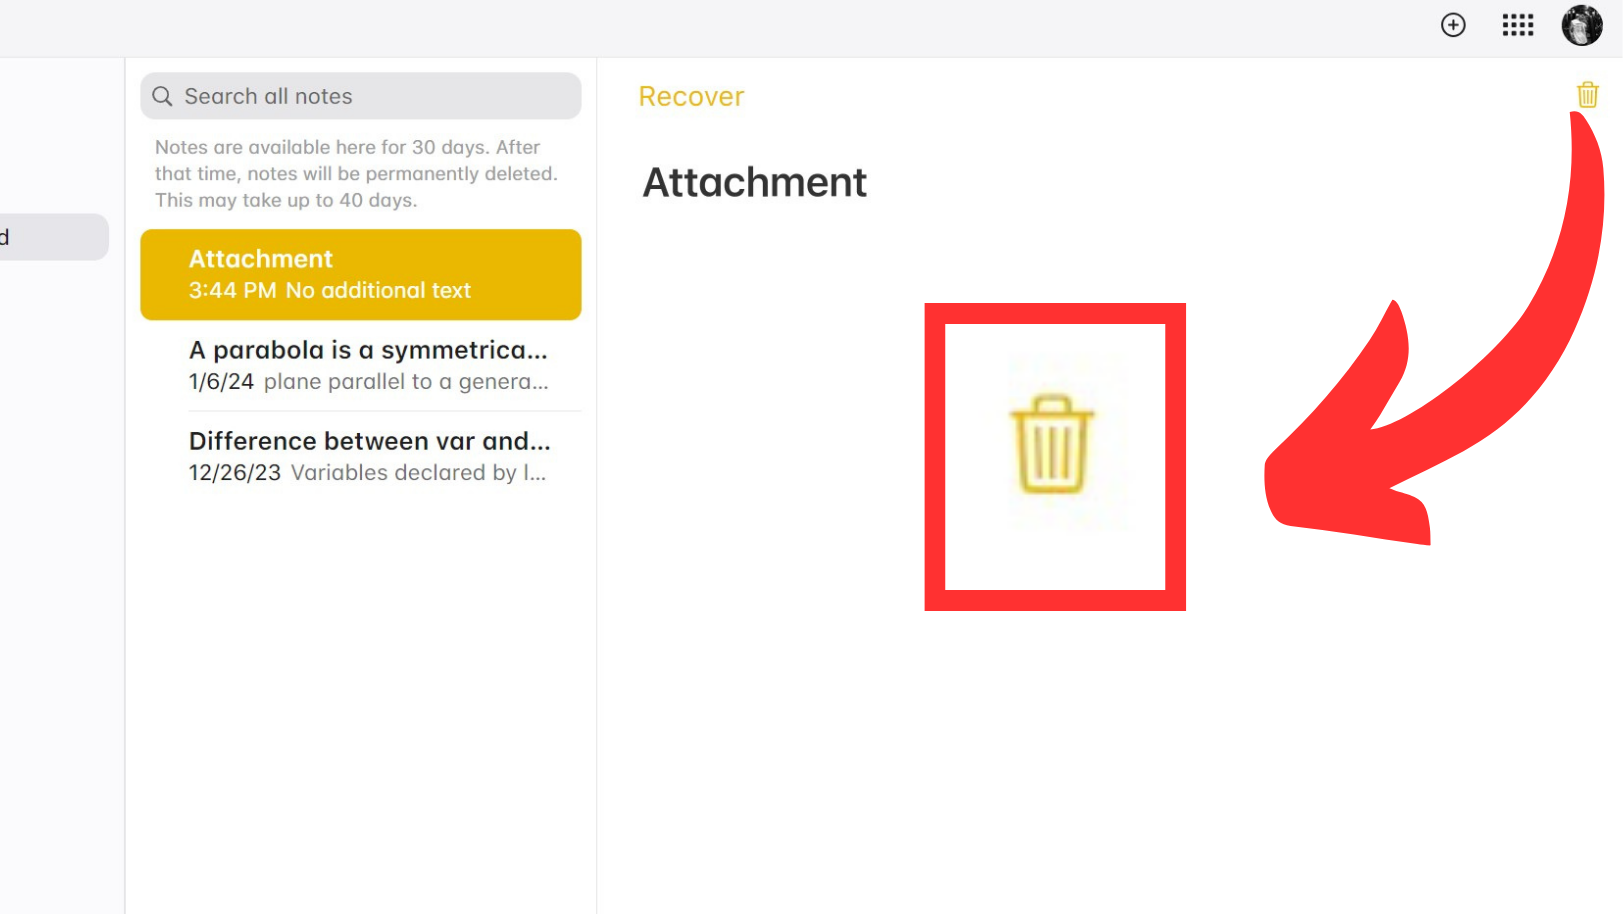
Click on the bin icon - The selected note is immediately removed from all your devices. Notes left in the Recently Deleted folder are automatically and permanently removed after 30 days.
Step 8: Search Notes
Effortlessly find the exact note you need by utilizing the search feature in Notes on iCloud.com by following these steps:
- Click the search field located at the top of the notes list.
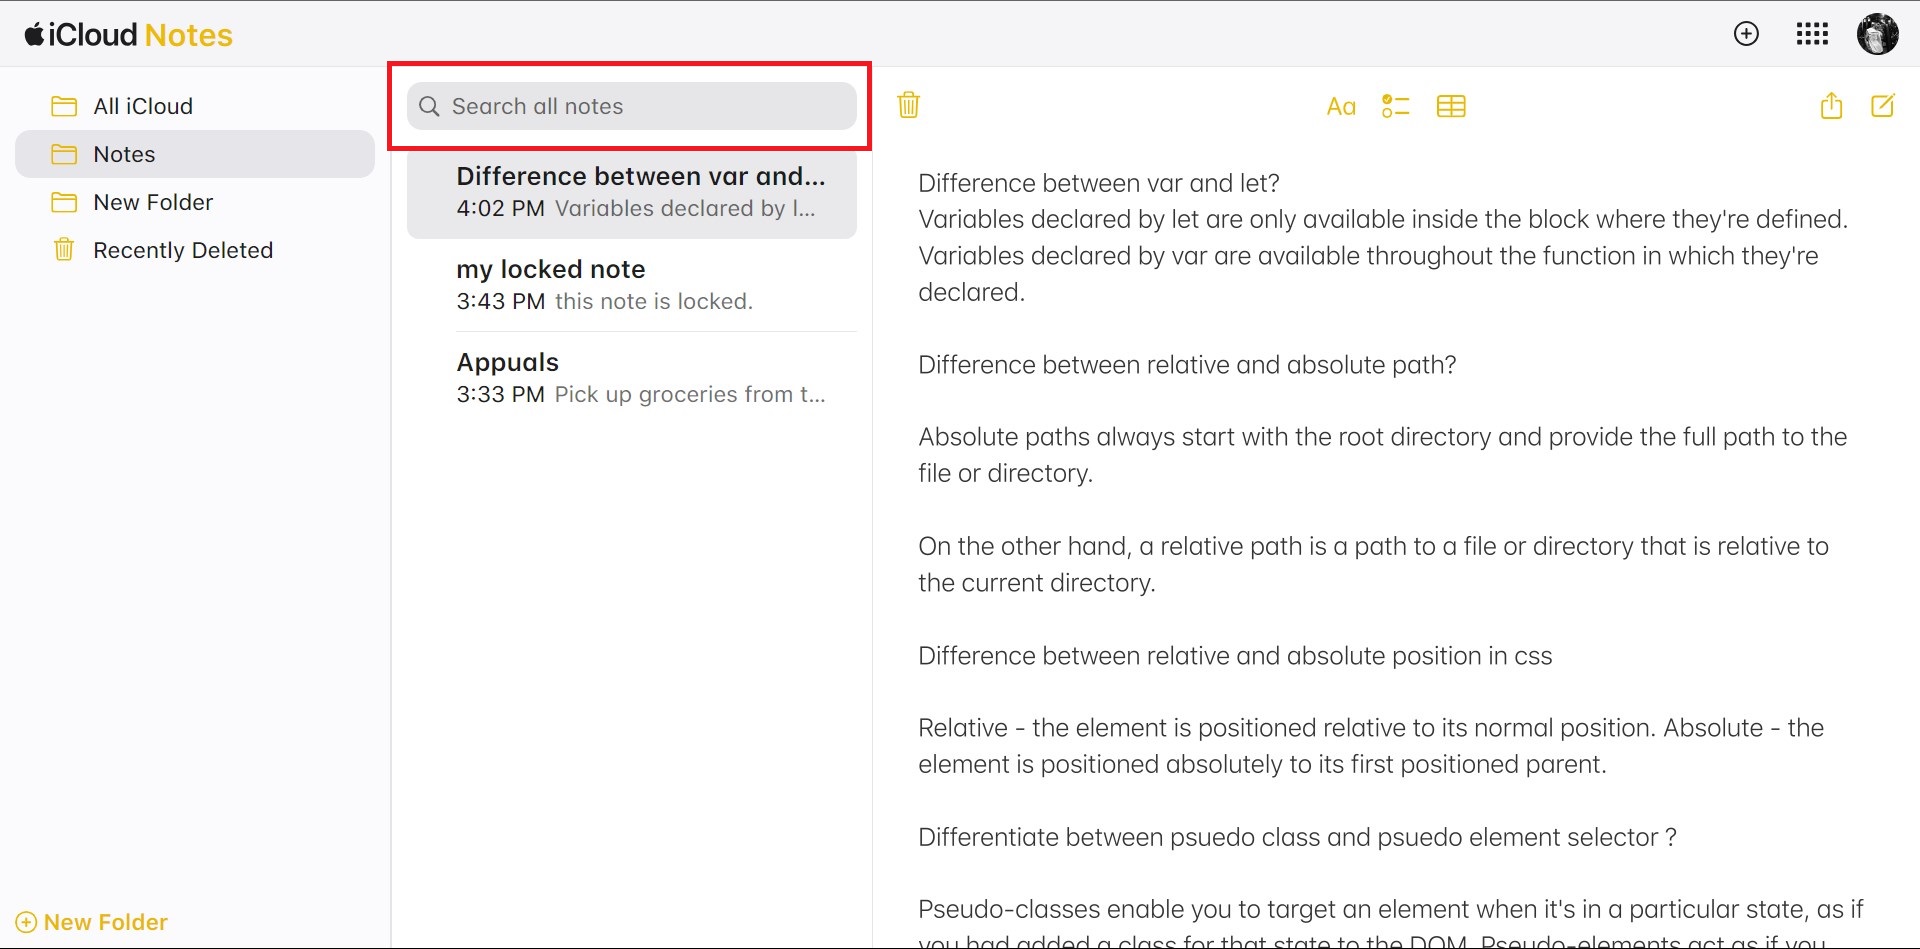
Search using this field - Explore suggested search options to refine your search criteria efficiently.
- Type specific text, an emoji, or keywords related to your search query.
- To clear the search and return to the complete notes list, click the delete button within the search field.
READ MORE: How to Recover Deleted Notes in iPhone? ➜
Step 9: Share Notes
Invite others to collaborate on your notes by sharing them on iCloud.com. Follow the below-mentioned steps to do so:
↪ Share Notes:
- Choose the note you want to share in Notes on iCloud.com.
- Click on the Share Button.
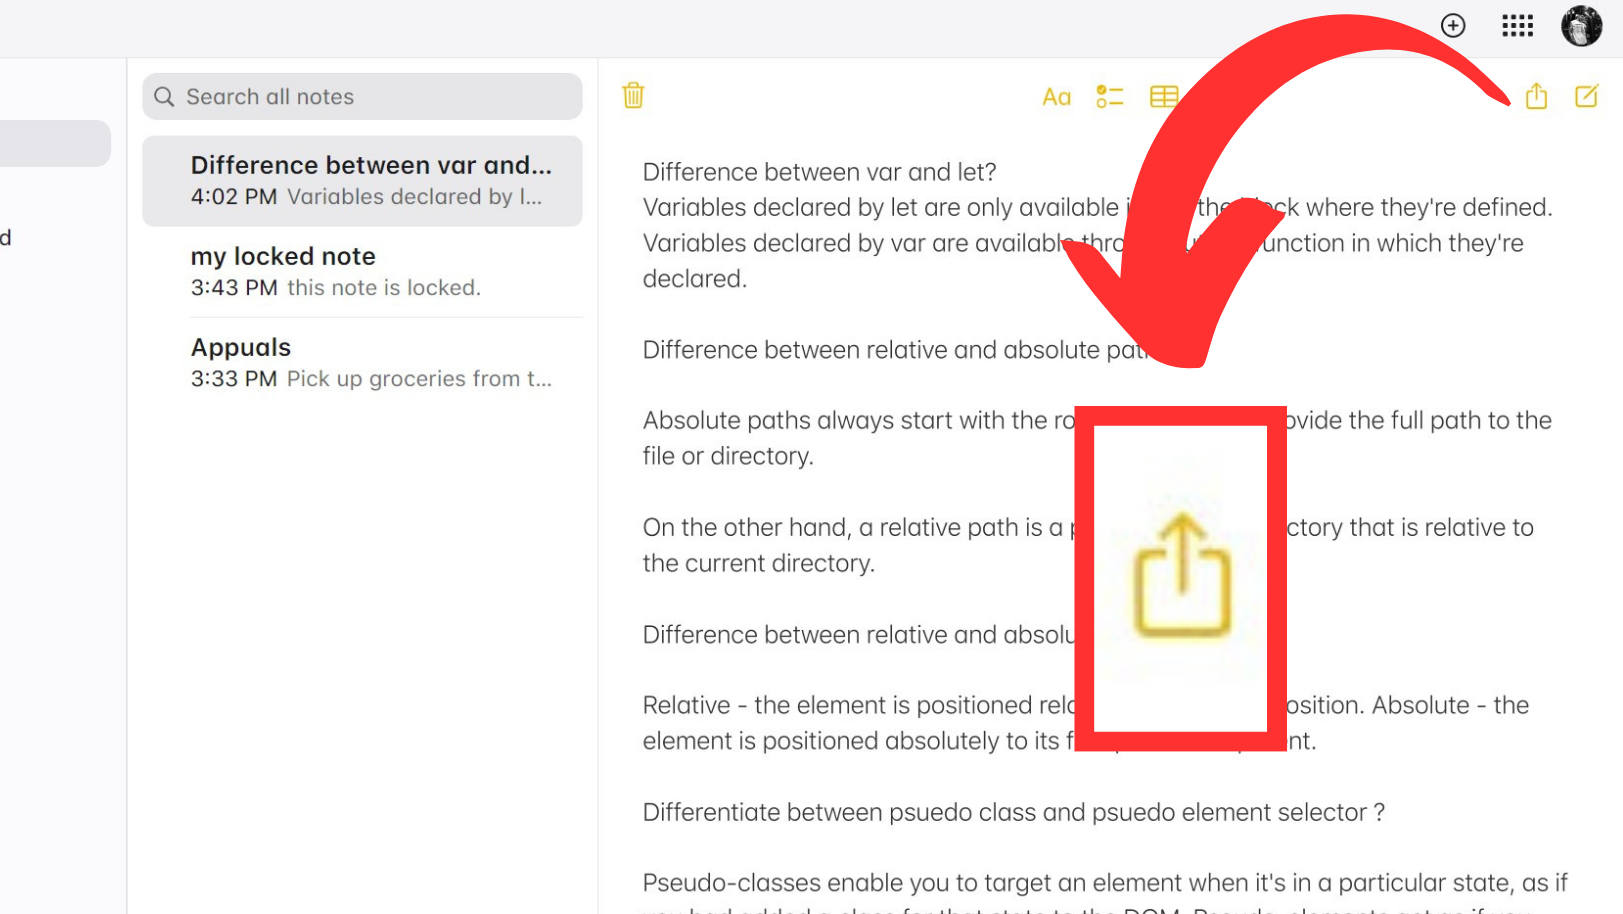
Click on the Share button - Choose Sharing Option:
- Email: Specify permission levels and recipient email addresses. Add a message if desired, then click “Send“.
- Copy Link: Copy the link and specify permission levels and recipients.
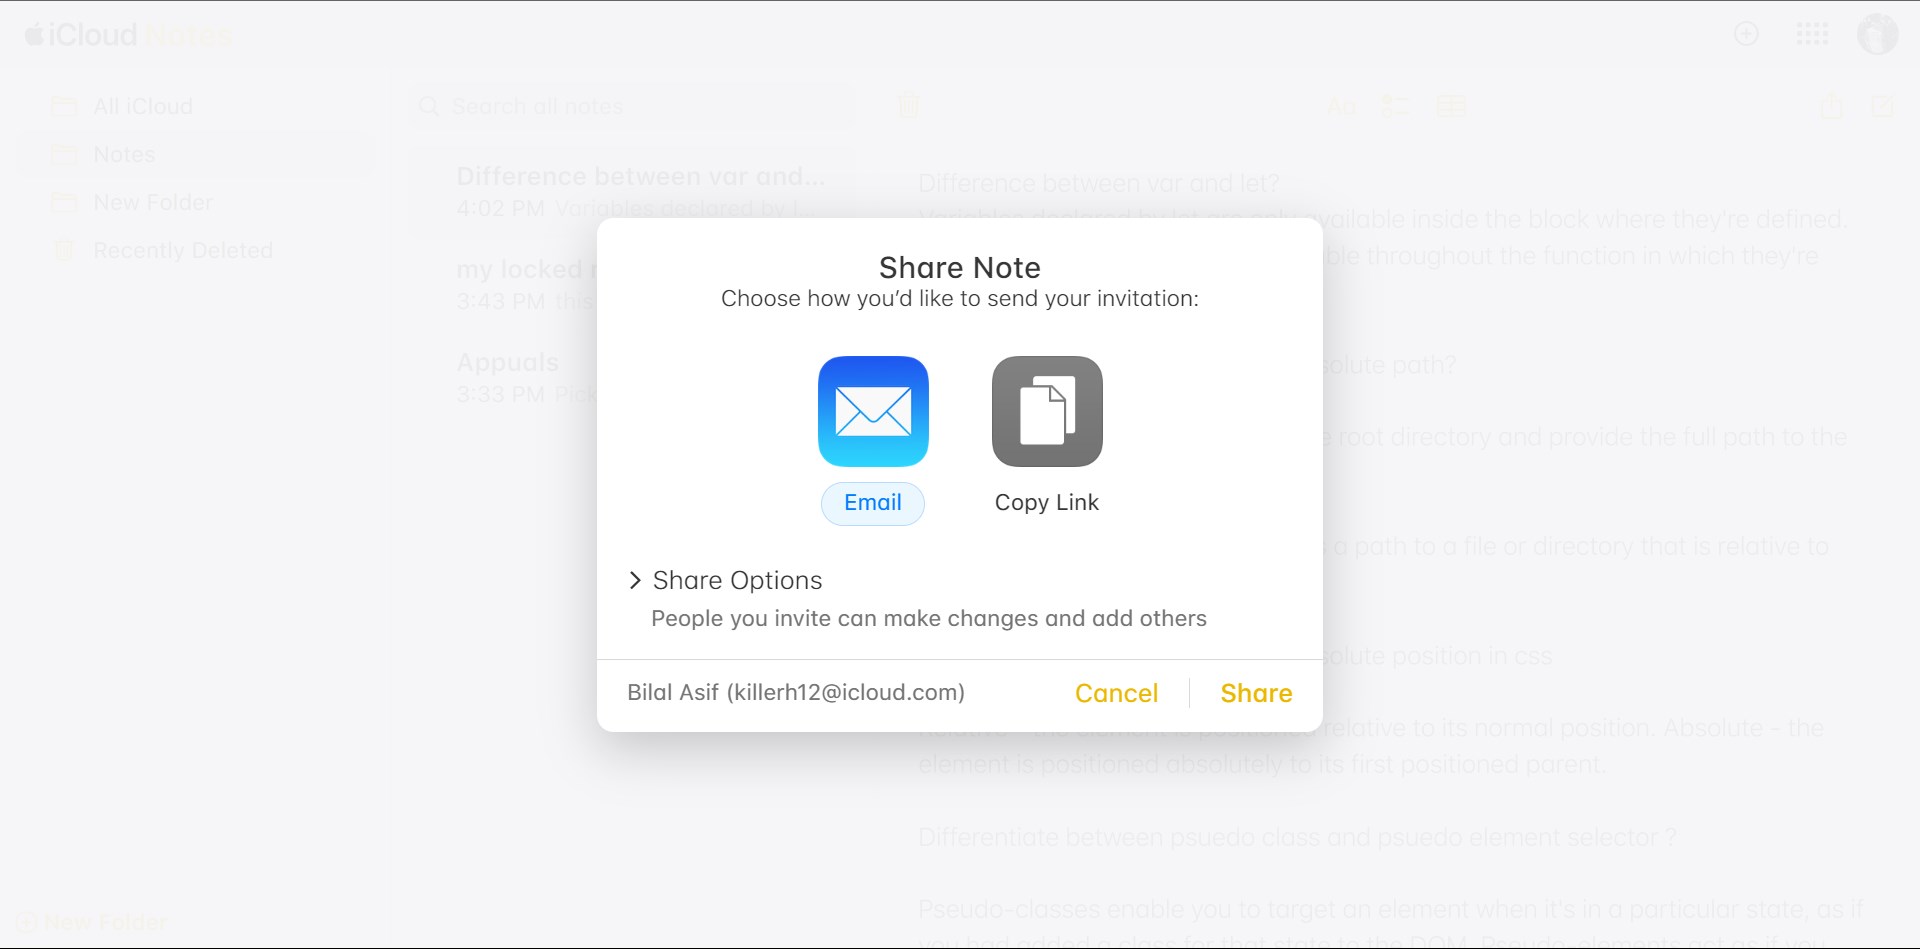
Choose Share options
- Only invited individuals can view and edit the note.
↪ Manage Participants:
- In the notes list, select the shared note.
- Click the Participant Icon.
- To Manage Participants:
- Add Participants: Click “Add People” at the bottom of the participants list.

Select Add People - Manage Permissions: Adjust permissions by hovering over a participant’s name, clicking the More button, and selecting the desired option.
- Remove Participants: Hover over a participant’s name, click the More button, and choose “Stop Sharing.”
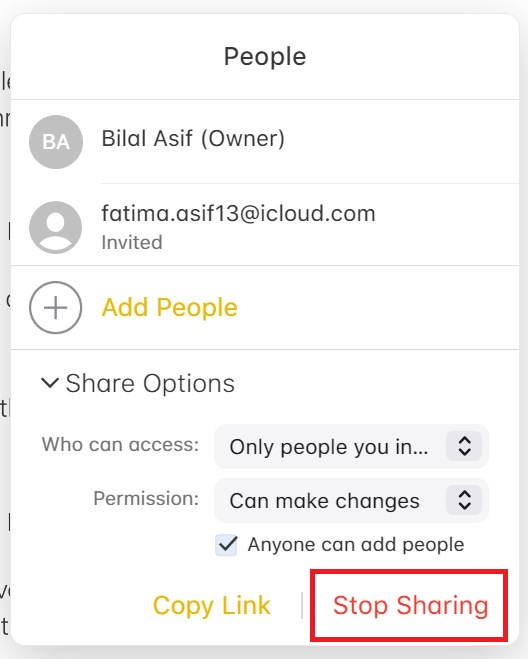
Select Stop Sharing
- Add Participants: Click “Add People” at the bottom of the participants list.
↪ Remove Yourself from a Shared Note:
- Choose the note you want to remove yourself from.
- Click the Participant Icon.
- Hover over your name, click the More button, and select “Remove Me.“
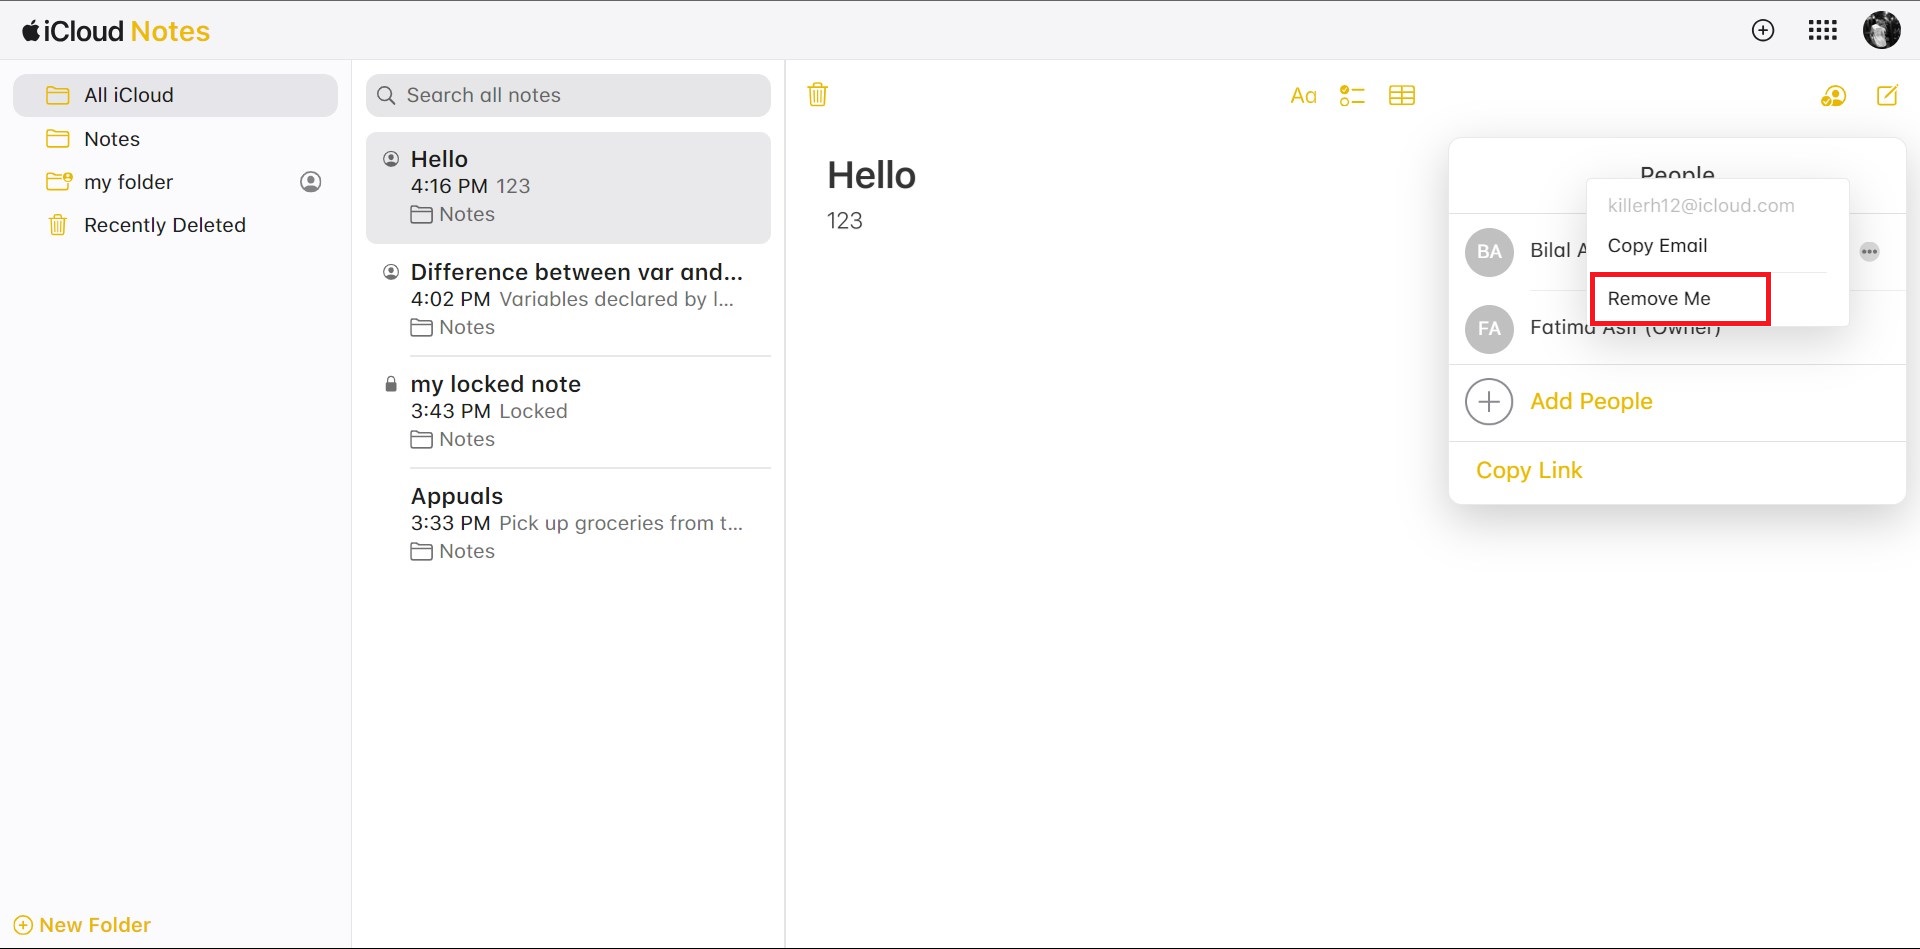
Click on Remove me
Step 10: Share Folders
You can easily share folders in Notes on iCloud.com to collaborate with others. Implement the following process to do so:
↪ Share Folders:
- In Notes on iCloud.com, hover to the right of the folder you want to share in the sidebar.
- Click the More button, then select “Share Folder” and “Share Options“.
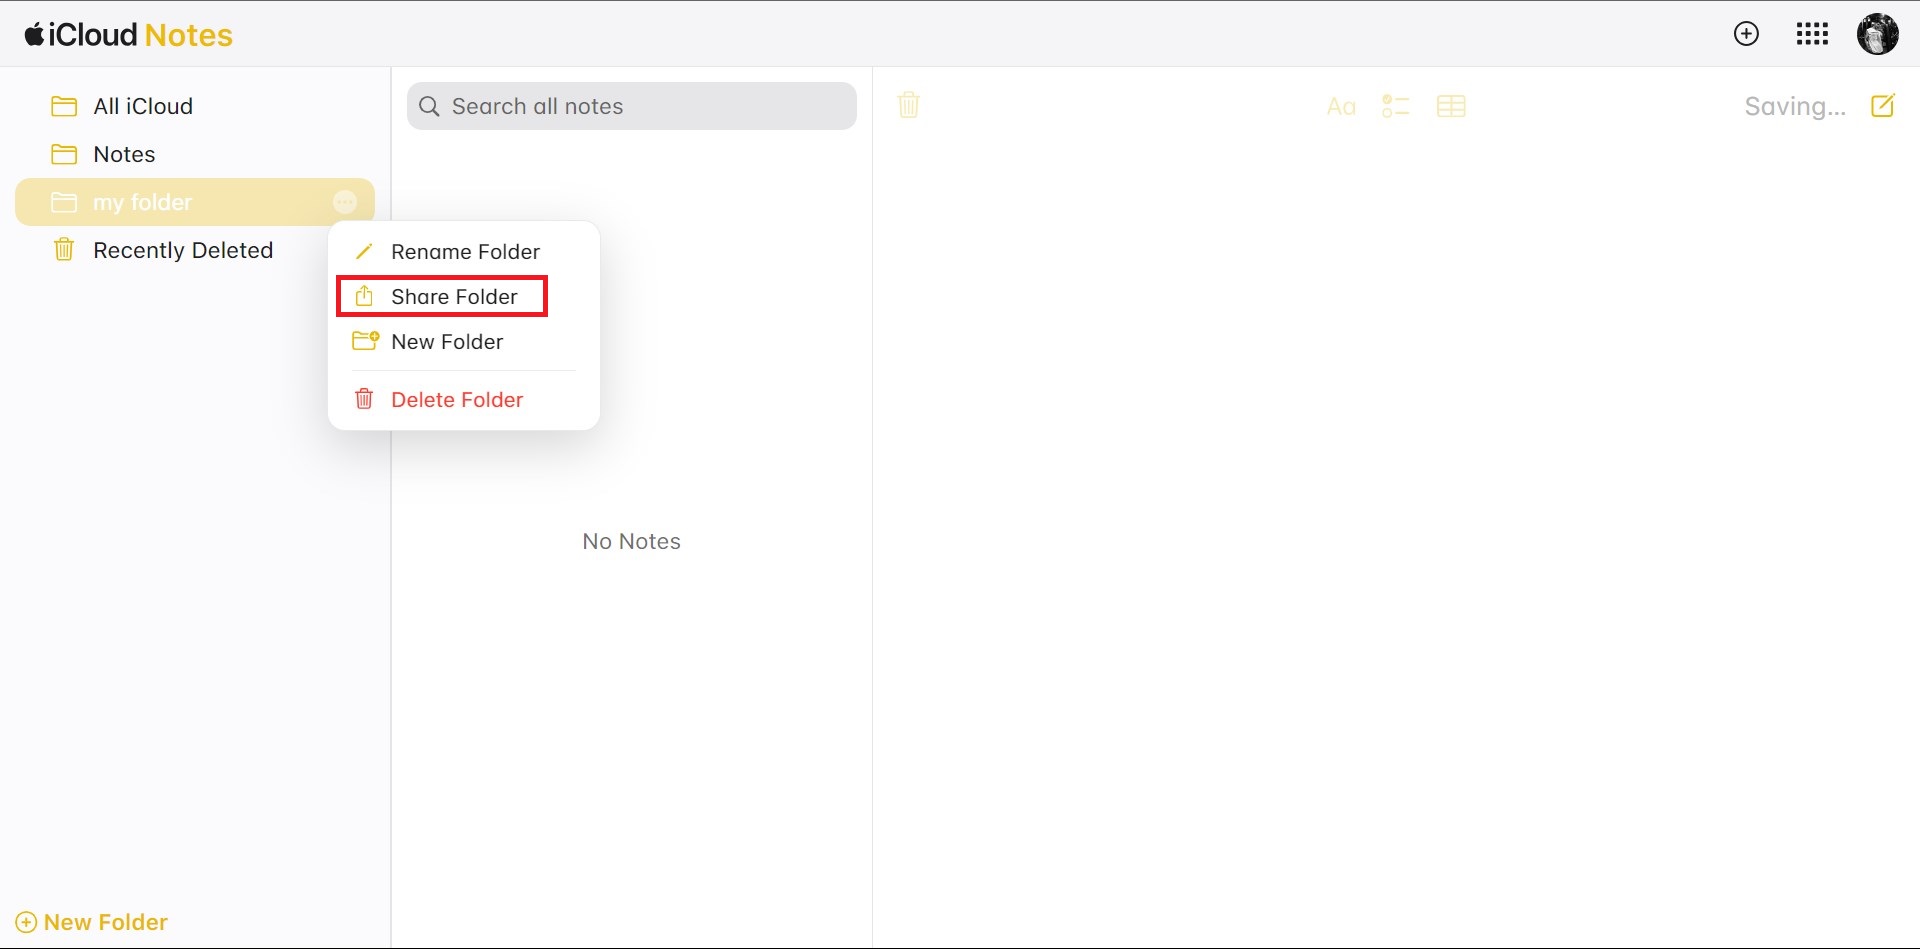
Select Share Folder - Finally, choose the Sharing Option:
- Email: Select “Email,” specify participant permission levels, and add email addresses. Write an optional message and click “Send.”
- Copy Link: Choose “Copy Link,” add participant email addresses or phone numbers, and set permission levels. Click “Share.”
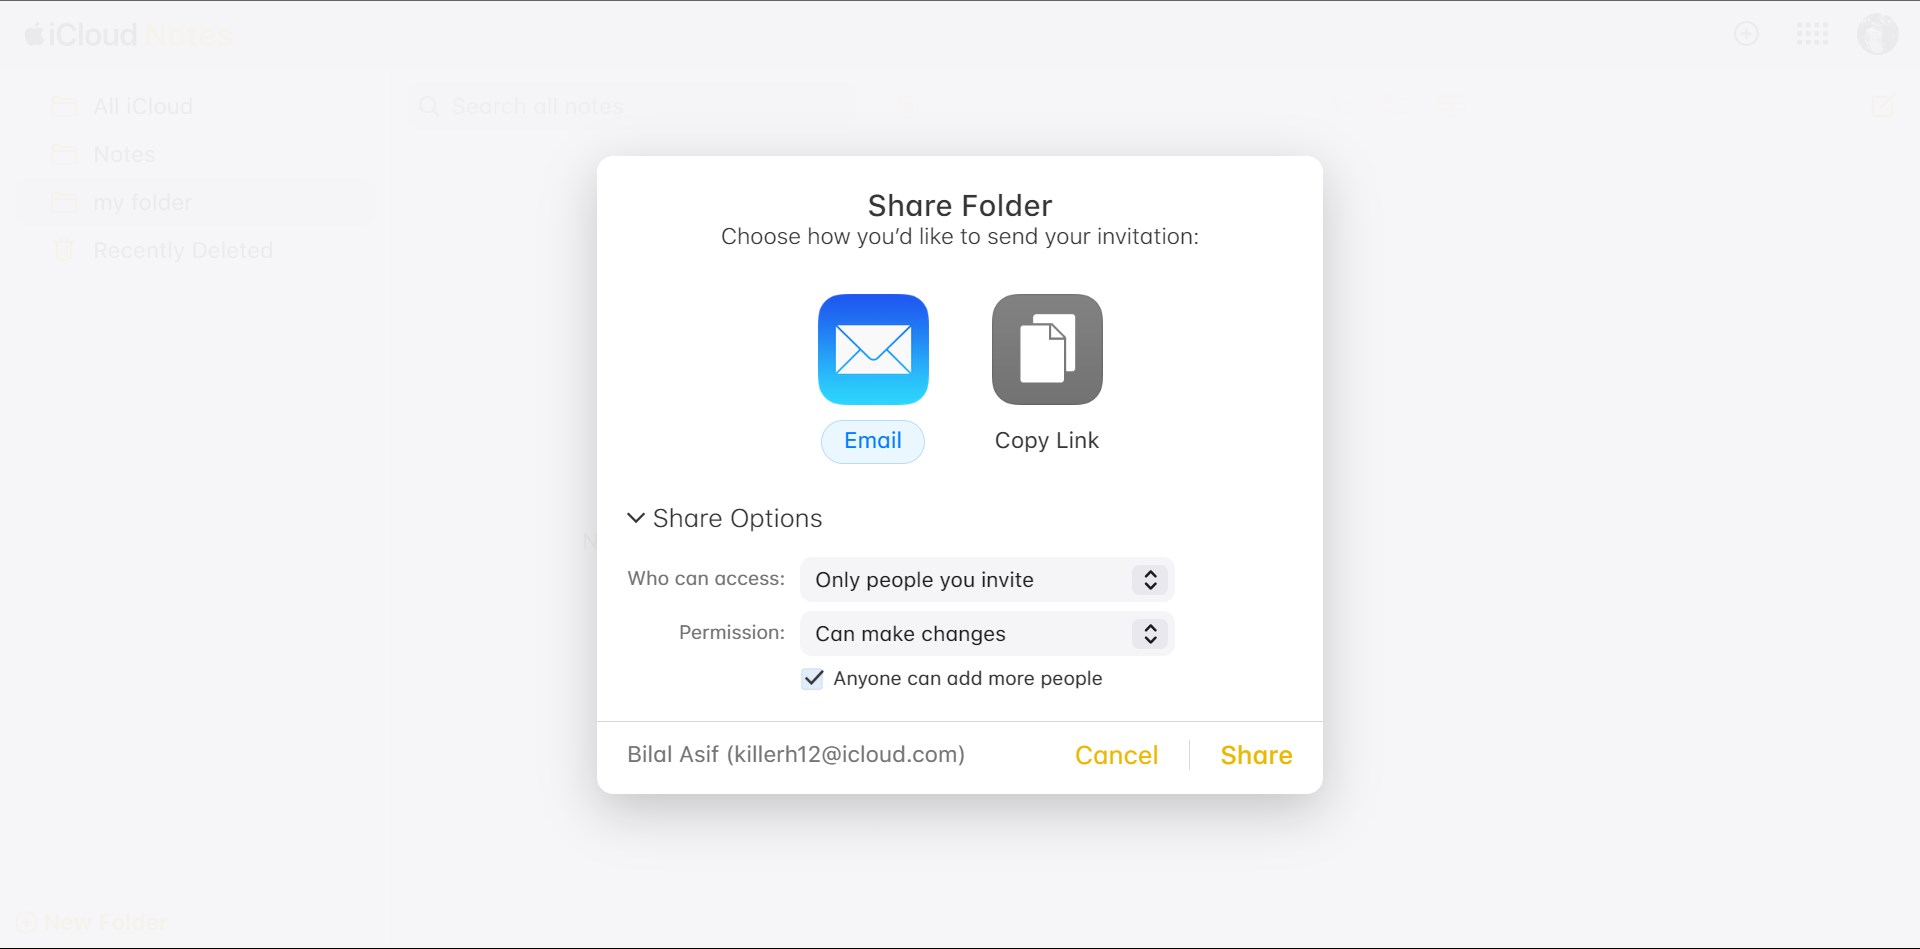
Choose Share Options
↪ Manage Participants in a Shared Folder:
- Click the “Manage Participants” button next to the shared folder in the sidebar.
- Now, Manage Participants:
- Click “Add People” at the bottom of the participants list.
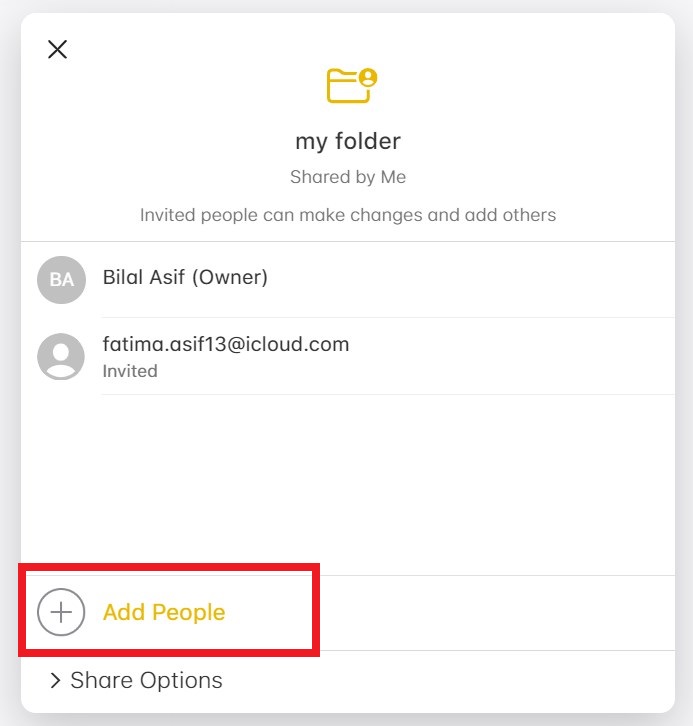
Select Add People - Hover over a participant’s name, click the More button, and adjust their permissions.
- Hover over a participant’s name, click the More button, and select “Remove Access.”
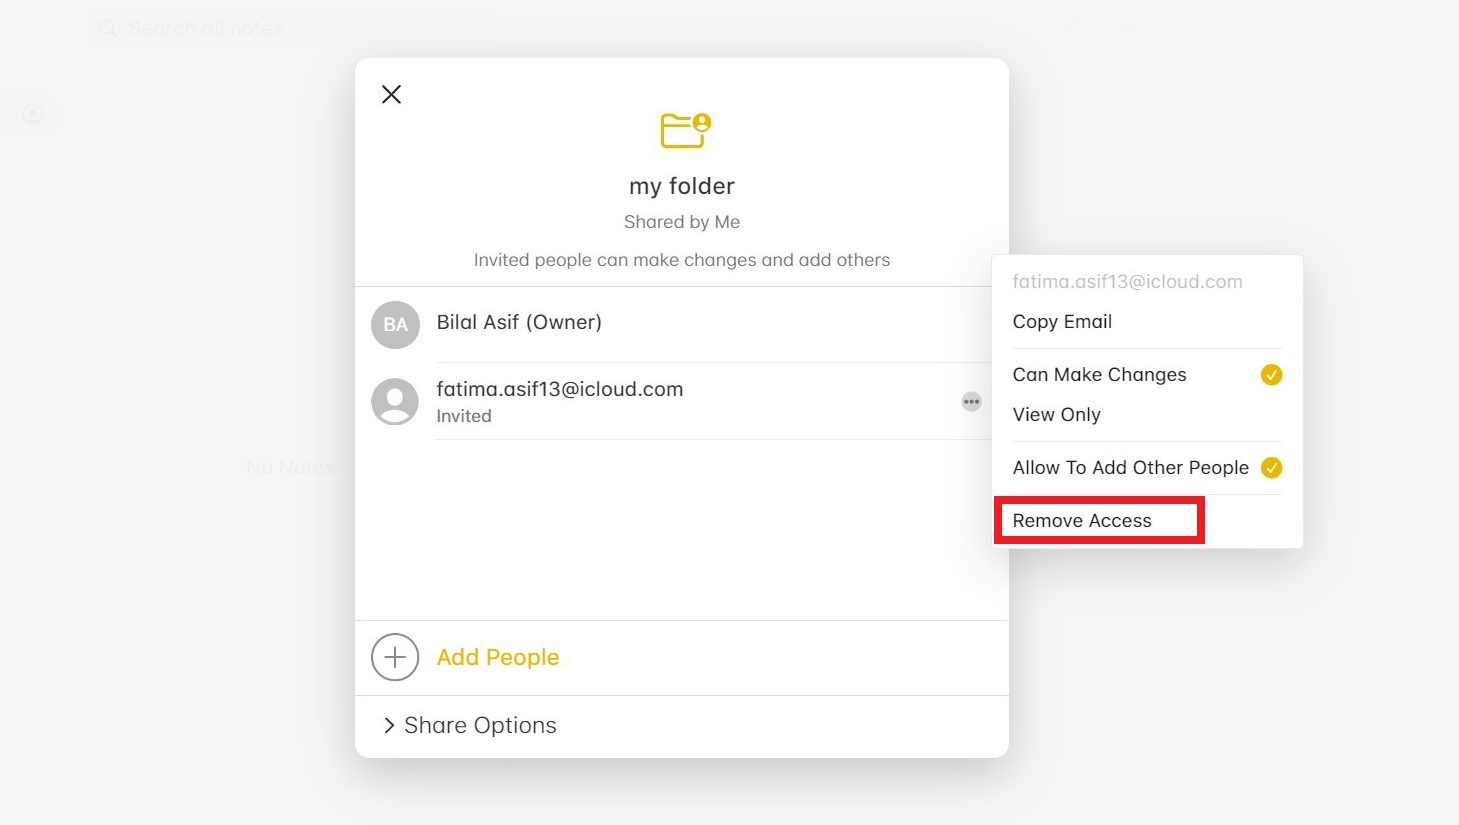
Select Remove Access
- Click “Add People” at the bottom of the participants list.
Tip: Adjust participant permissions directly from a shared note by clicking “View Participants” and then “Manage in Shared Folder.”
↪ Remove Yourself from a Shared Folder:
- Click the “Manage Participants” button next to the shared folder in the sidebar.
- Now, hover over your name, click the More button, and choose “Remove Me.“
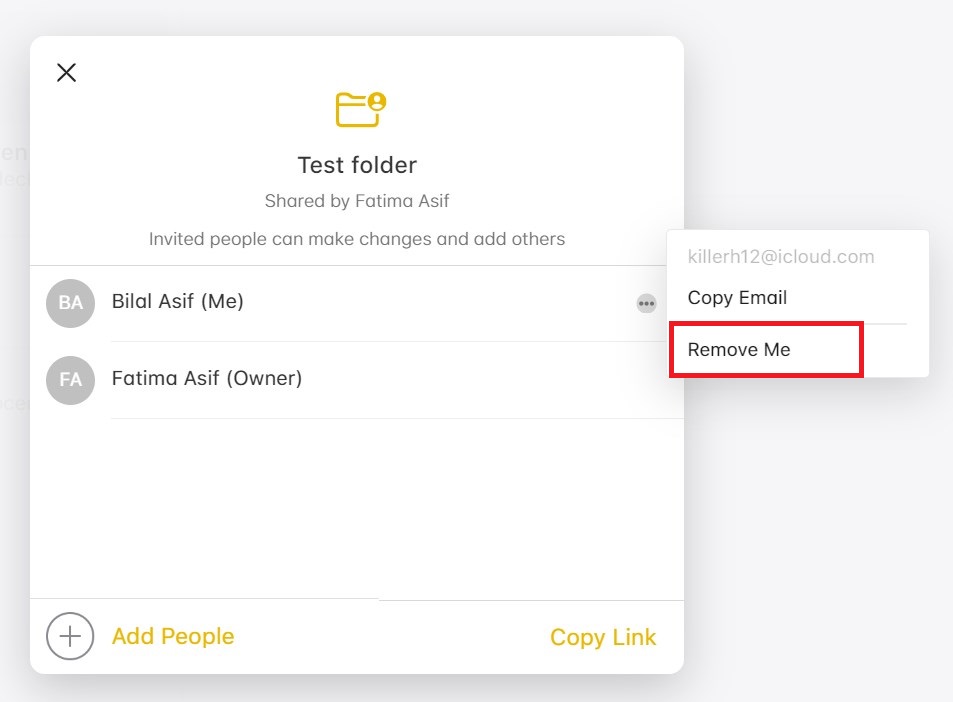
Select Remove Me
How To Sync Notes Across All Devices (Including Non-Apple Devices)
To sync notes across all devices, including non-Apple devices, you can use various methods. Here, we have explained in detail how you can do so. So. let’s get into it.
↪ For Apple Devices (iPhone, iPad, iPod, Mac)
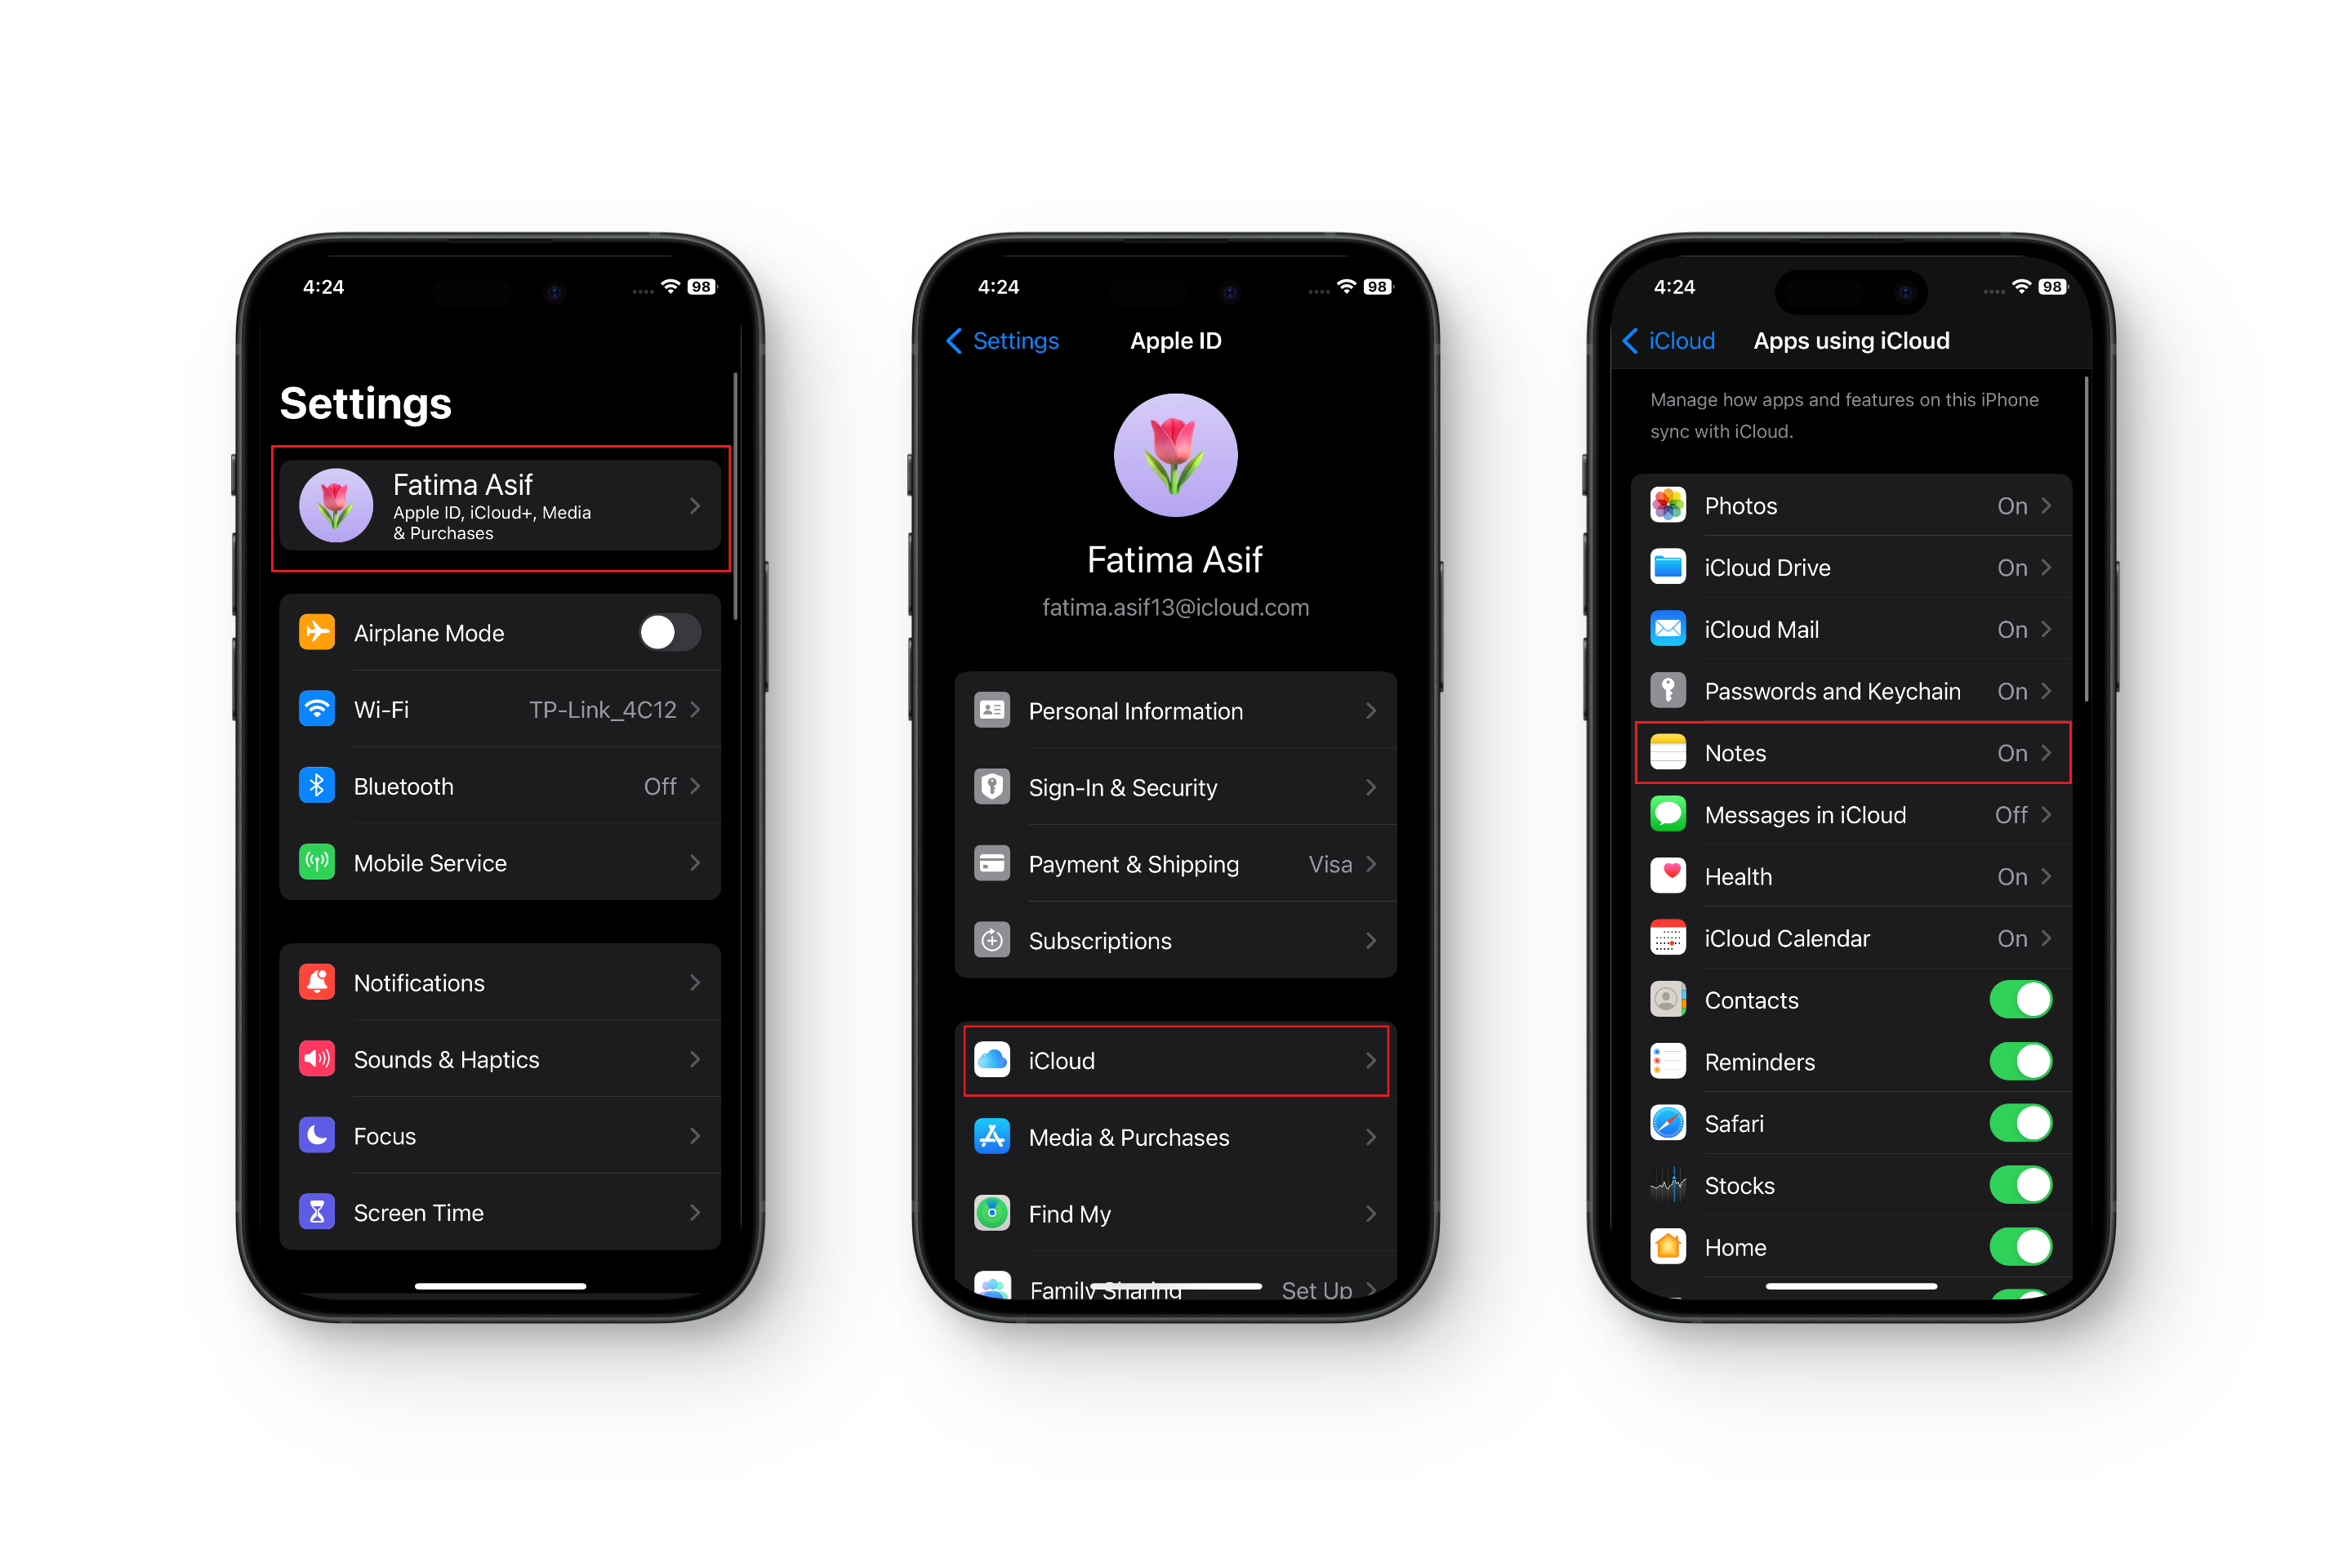
- Ensure that iCloud is enabled for Notes on your iPhone/iPad.
- Go to Settings > [Your Name] > iCloud > Notes, and toggle the switch to enable Notes syncing with iCloud.
- Now, your notes will sync across all your Apple devices logged in with the same Apple ID.
↪ For Non-Apple Devices (Windows/Android)
By utilizing the iCloud web interface, you can access Apple Notes and other Apple services from any browser, whether on Windows or Android devices. To access Apple Notes via iCloud in a web browser:
- Visit iCloud.com in a web browser.
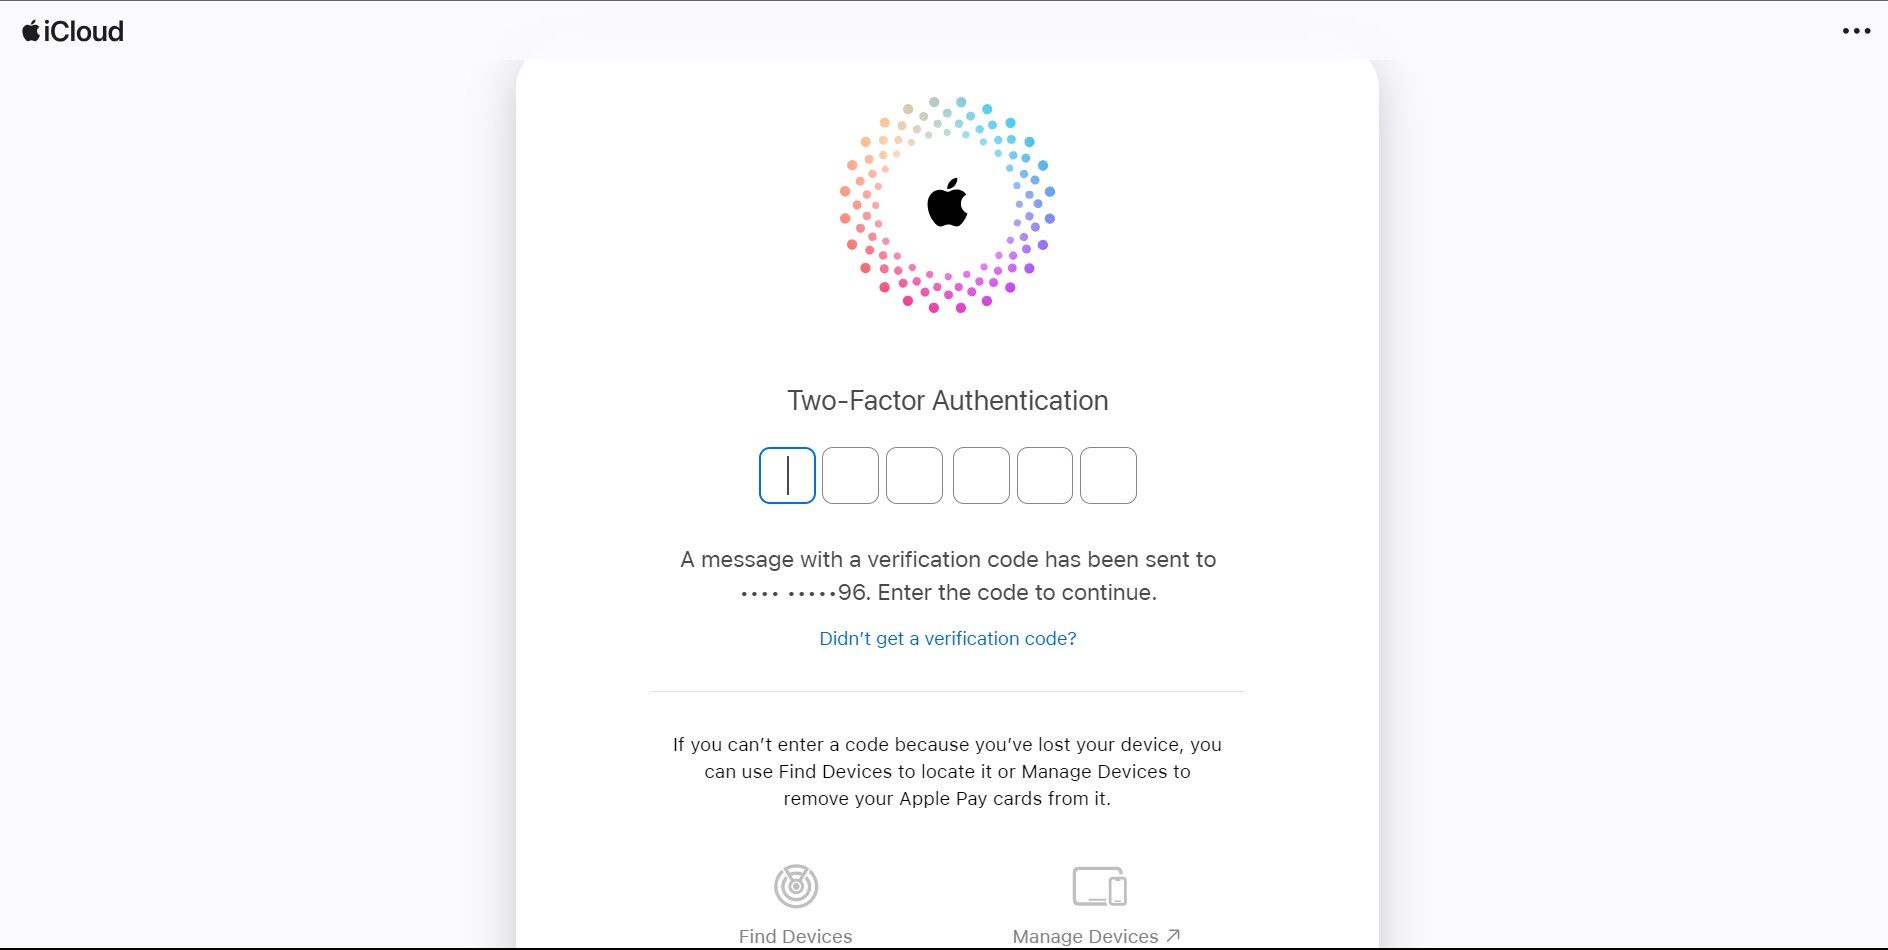
- Log in with your Apple ID credentials.

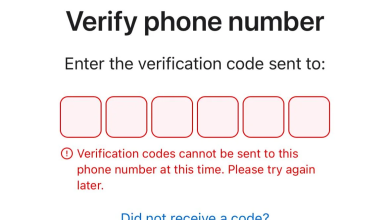
Enter your credentials - If prompted, complete the two-factor authentication process.
Enter the code - Once logged in, click on “Notes” to access the web-based version of Apple Notes.
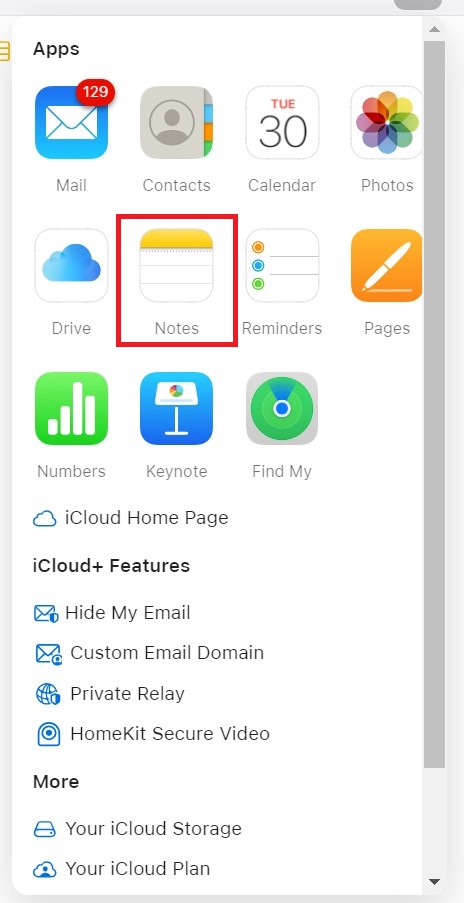
Select Notes - Here, you can view, edit, and create new notes, as well as share them with other iCloud users.
Tips & Tricks for Using Notes
Here are some useful tips and tricks for making the most out of Apple Notes and iCloud:
- Utilize checklists for task management.
- Organize notes with folders for better categorization.
- Collaborate with others by sharing notes or folders.
- Access notes on iCloud.com from any web browser.
- Use Siri integration for hands-free note-taking on iOS devices.
Troubleshooting Common Issues
Here are three common troubleshooting tips for Apple Notes and iCloud:
- Notes Not Syncing: Verify iCloud sync is enabled for Notes on all devices and check internet connectivity.
- Missing Notes: Check the Recently Deleted folder in Apple Notes and ensure notes aren’t archived or stored elsewhere.
- Two-Factor Authentication Issues: Ensure correct codes are used for two-factor authentication and devices are trusted.
READ MORE: How to Sync Photos from an iPhone to a Mac – 4 Easy Ways ➜
Final Words
To sum it up, Apple Notes and iCloud provide convenient tools for organizing and accessing your notes across devices. With features like syncing, collaboration, and secure locking, managing your digital notes becomes efficient and hassle-free.
Remember, if you encounter any issues or have questions about using Apple Notes or iCloud, don’t hesitate to reach out to Apple Support for assistance. Embrace the simplicity and convenience of these tools to enhance your productivity and streamline your digital workflow.
FAQs
Apple Notes doesn’t have a specific limit on the number of notes you can store. However, note content does count towards your iCloud storage quota, so you may need to upgrade your storage plan if you reach your limit.
Yes, you can access and edit your notes offline on Apple devices. Any changes made while offline will sync automatically once your device reconnects to the internet.
Currently, Apple Notes does not support creating subfolders directly within folders. However, you can organize notes by using descriptive titles and tags for better categorization.
Reviewed by Huzaifa Haroon