Best Marvel Rivals PC Settings to Fix Low FPS, Lag, and Stuttering
Marvel Rivals can run smoothly in the lobby, then lose frames as soon as a team fight starts. Brief pauses can also interrupt aiming with a high FPS reading, because the counter does not show how evenly those frames arrive.
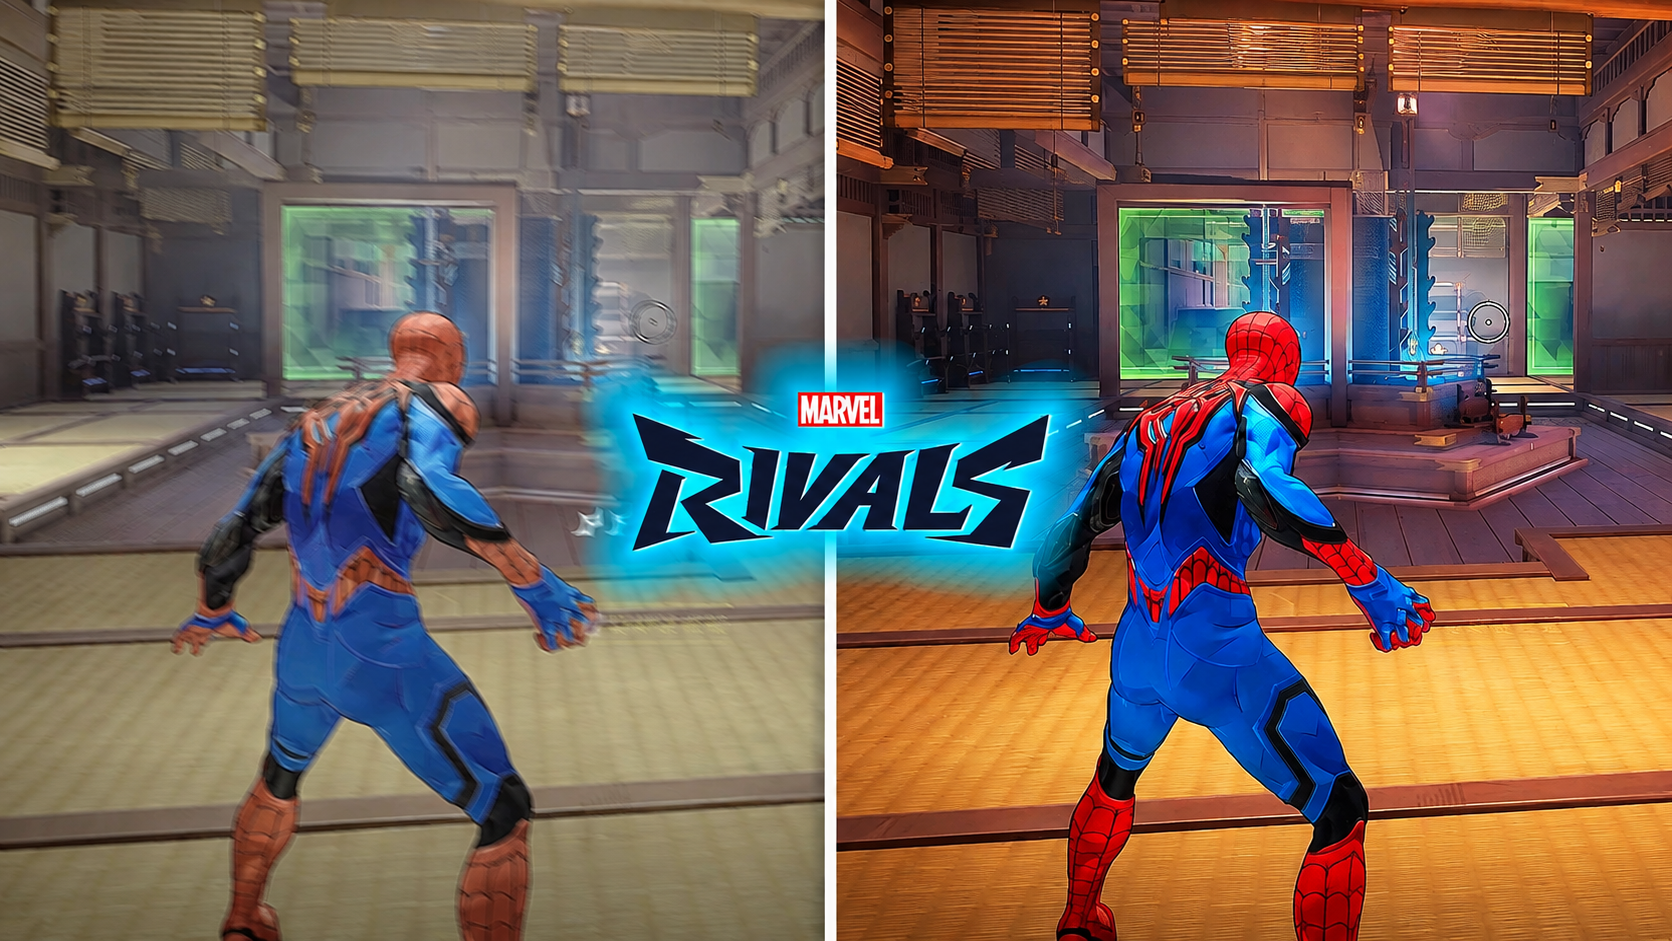
Lighting, reflections and ability effects make combat more demanding than the lobby. Frame Generation can make the FPS reading higher without making your controls equally responsive, so a bigger number alone is not proof that the problem is fixed.
Before Changing Settings
Finish any game update and let shader preloading complete. These are graphics programs the game prepares in the background; entering a match before they finish can cause stuttering or rendering problems.
Save screenshots of your current settings. Change one group at a time, using the same resolution, test and background workload. Compare the built-in Performance Test, then check a comparable fight; the Practice Range alone may miss combat drops.
If characters teleport while camera movement stays smooth and ping or packet loss rises, check the connection instead. A Server Connection Failed message needs different troubleshooting; lower graphics cannot repair that connection.
1. Lower the Graphics Settings That Make Fights Slow Down
Lighting and reflections add work each time the graphics card draws a frame. Reducing them can recover FPS without lowering the screen resolution. Lower detail settings help further, but will not eliminate every CPU or shader-related pause.
| Graphics setting | Value to compare |
|---|---|
| Global Illumination | Off |
| Reflection Quality | Off |
| Model Detail | Performance |
| Shadow Detail | Low |
| Post-Processing | Low |
| Texture Detail | Low for the comparison; raise it if memory allows. |
| Effects Detail | Low |
| Foliage Quality | Low |
- Open Settings > Display and record the current graphics, FPS limit and V-Sync settings.
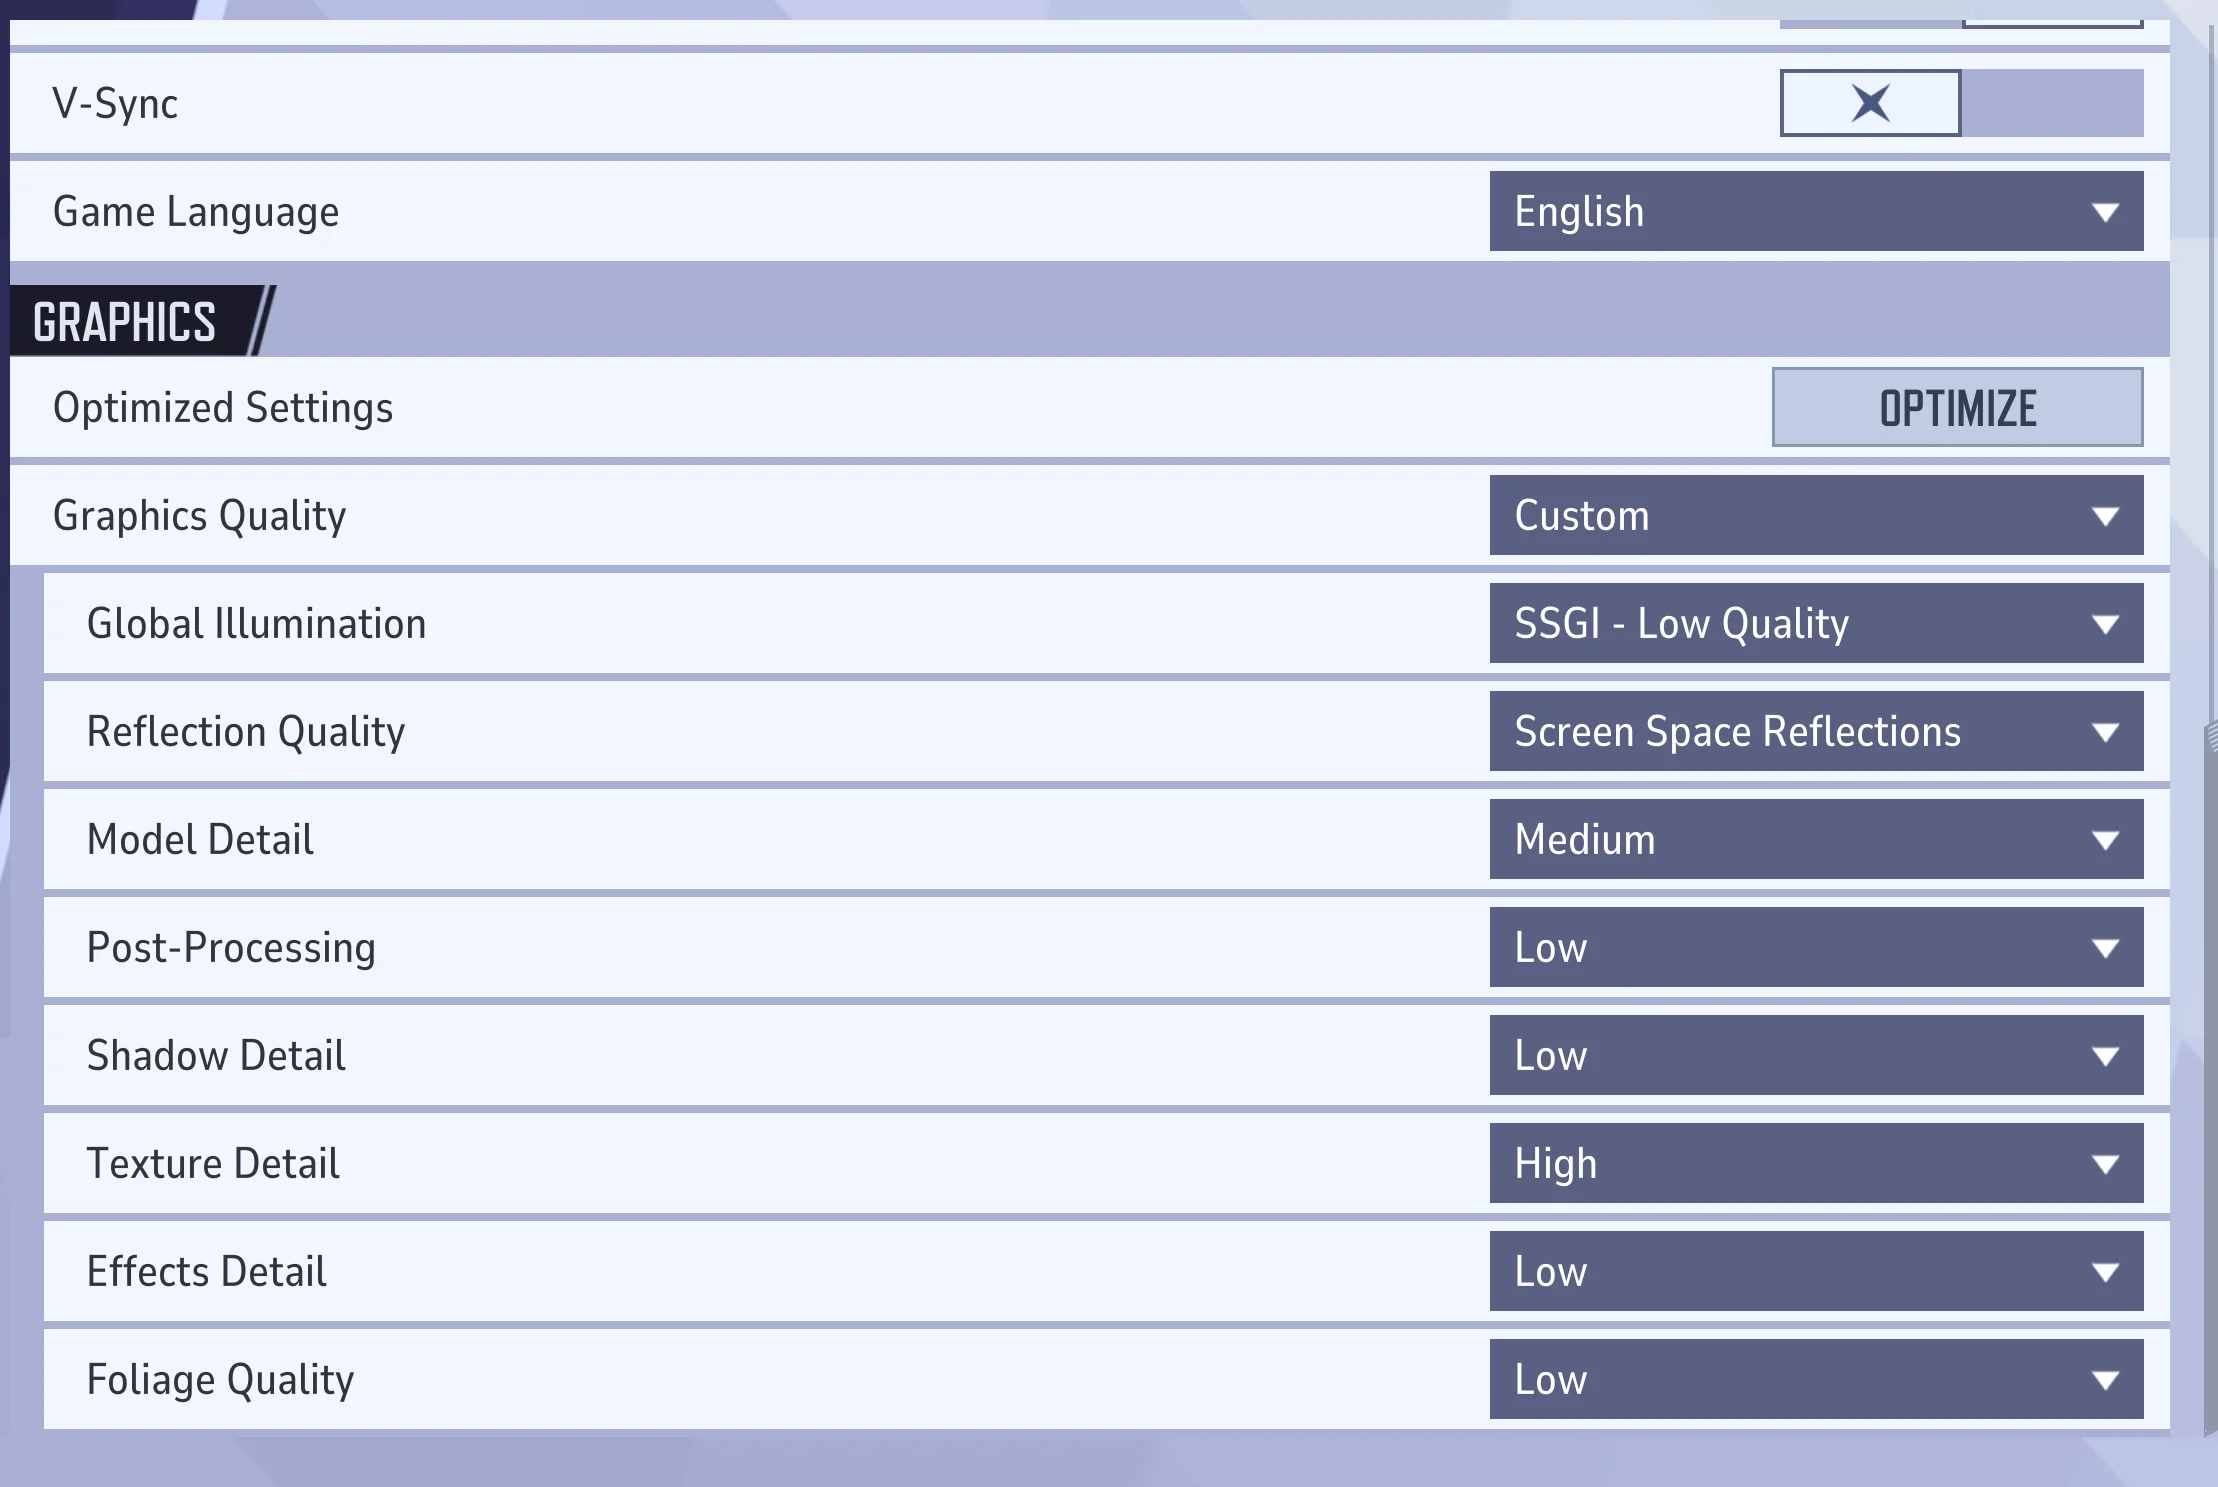
Keep a screenshot so any unsuccessful change can be reversed. - Set Frame Generation Mode to Off and restart if prompted. Run the Performance Test and record its result before changing the graphics. The illustration shows the Off setting, not benchmark results.
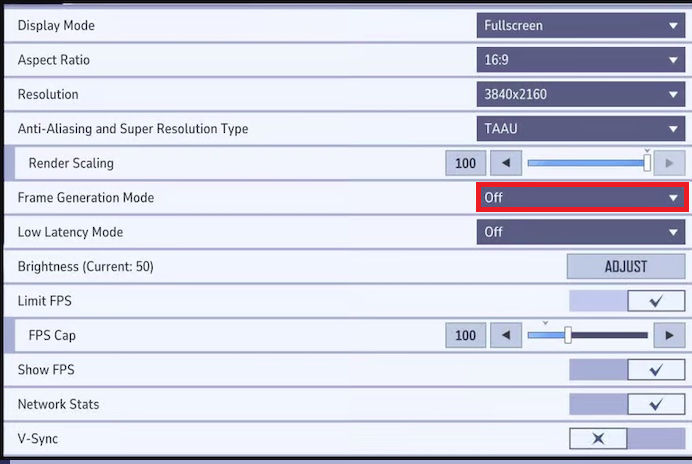
Record the actual result and keep the test conditions consistent. - Set Global Illumination and Reflection Quality to Off. Repeat the test; leave either option unchanged if it was already off.
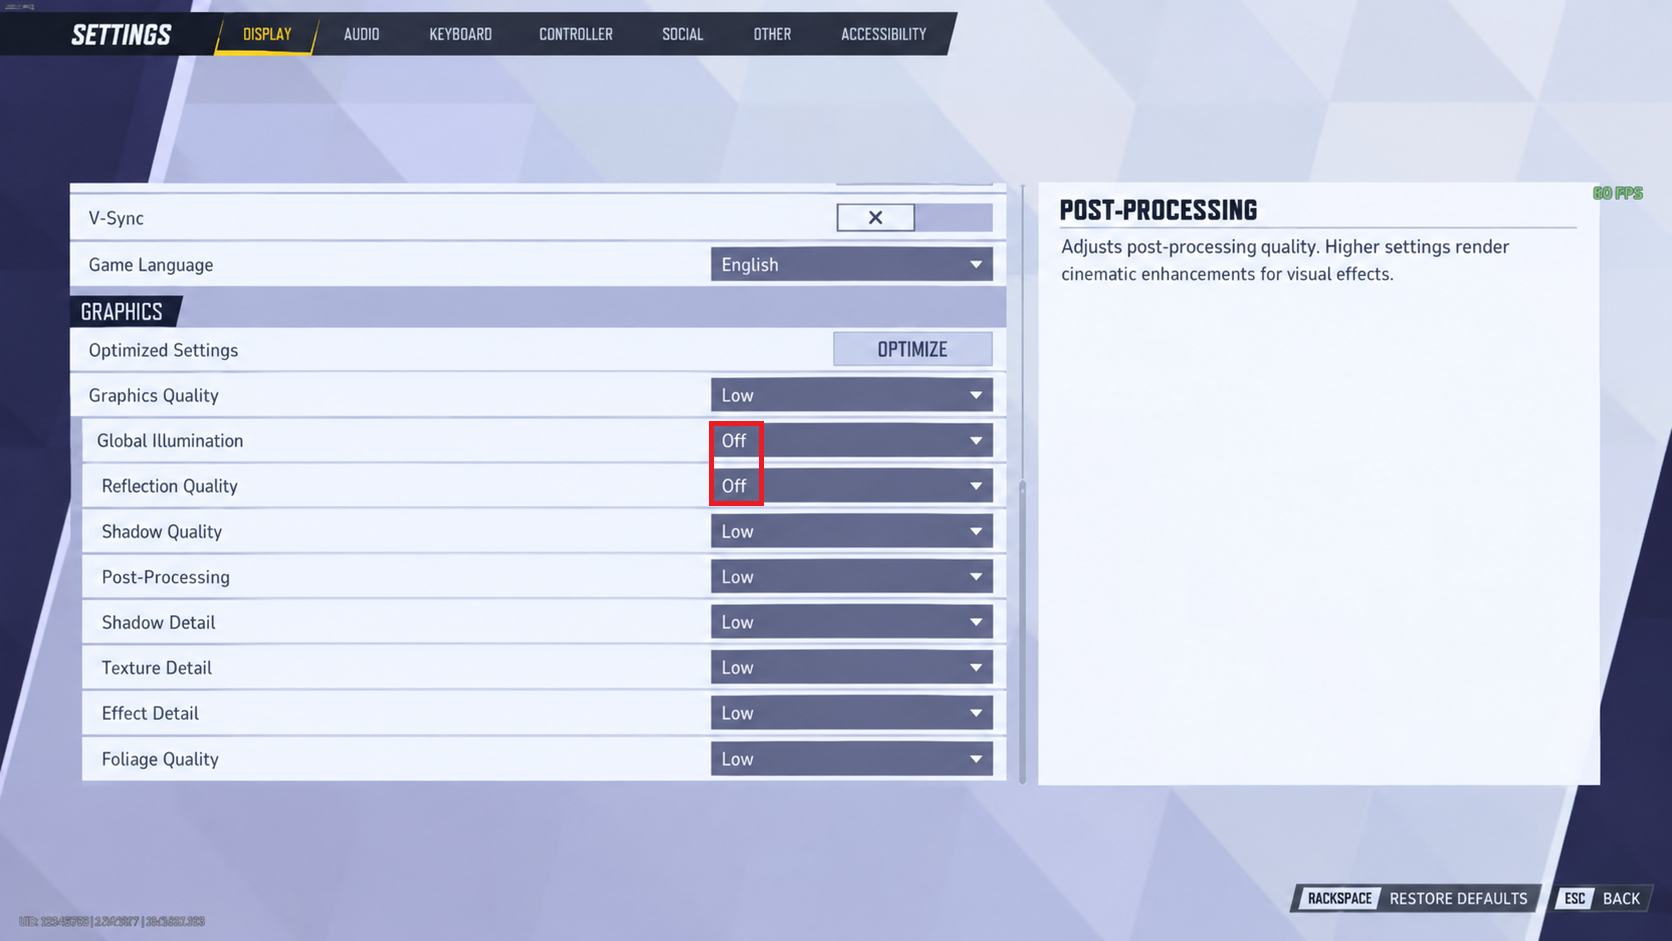
Off sacrifices visual detail to reduce rendering work. - If fights still lose frames, set Model Detail to Performance and compare the remaining Low values above. The model screenshot highlights Performance but keeps higher lighting and textures; follow the table for this lower-detail comparison.
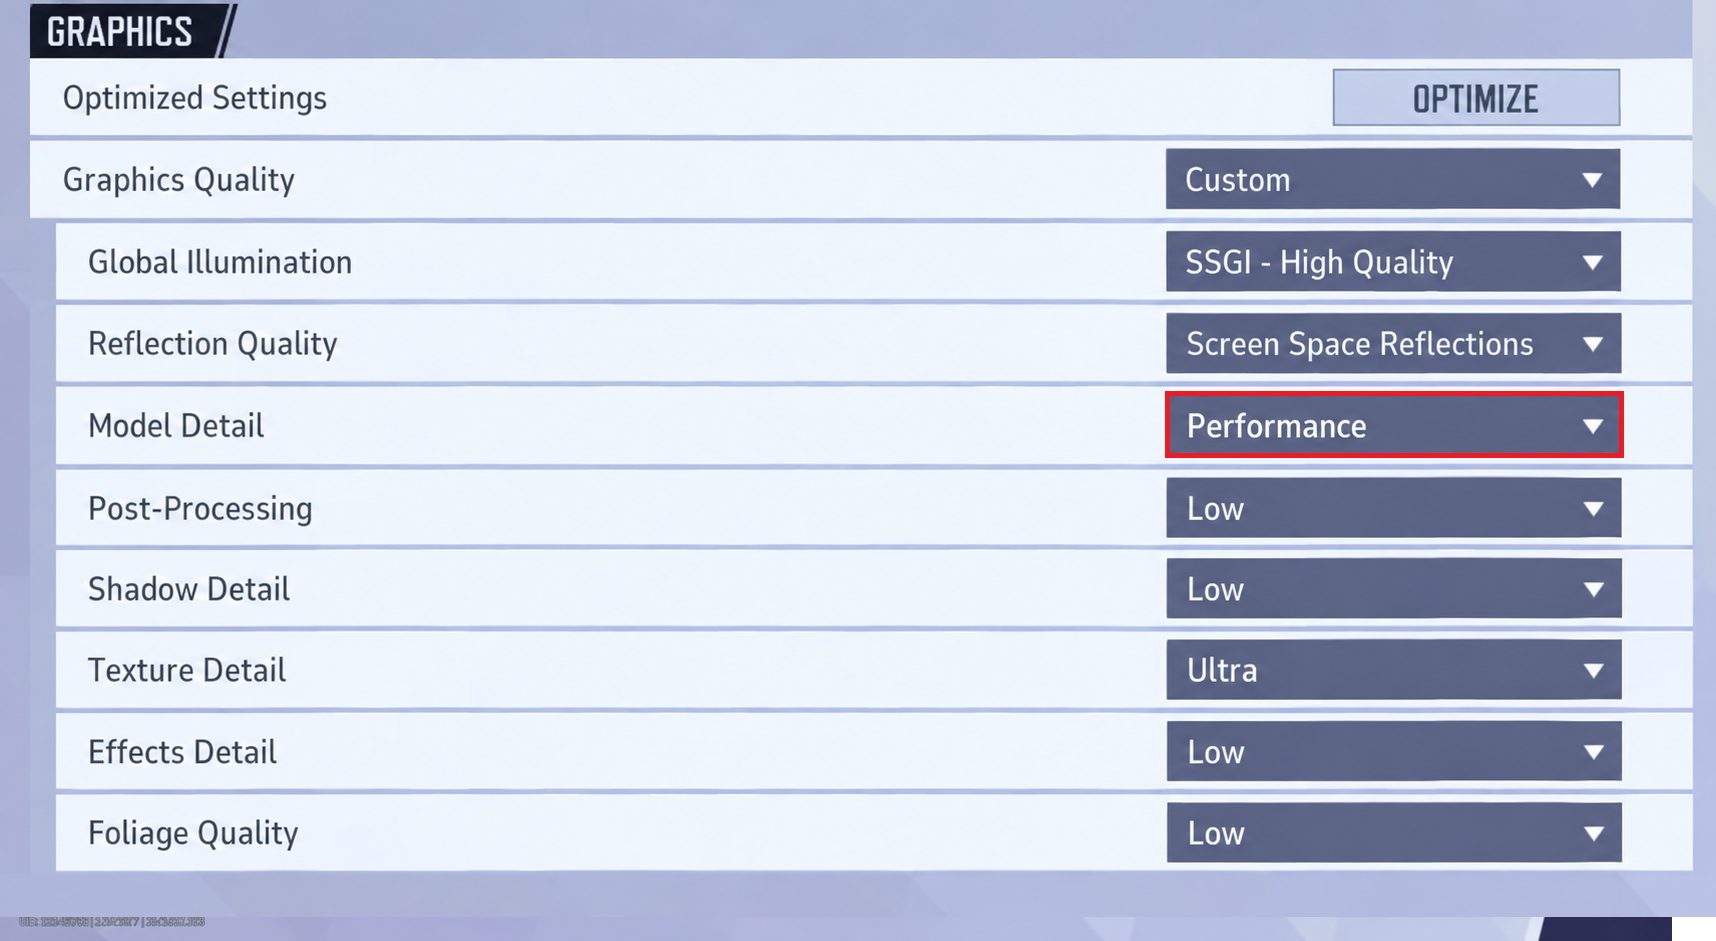
Raise individual settings later if the PC has enough performance headroom. - Apply the changes if required, rerun the Performance Test and check a comparable fight.
Once combat improves, raise individual options you value. Try SSGI – Low Quality for lighting or Screen Space Reflections for reflections. Texture Detail mainly affects image detail and video-memory use; reducing it is not a guaranteed average-FPS gain.
2. Use the Game’s Upscaling Without Making Heroes Too Blurry
Upscaling draws the game at a lower internal resolution, then reconstructs it at your display resolution. This reduces the graphics card’s workload, but cannot resolve a CPU limit or network delay.
- In Settings > Display, keep the monitor’s native output resolution. Under Anti-Aliasing and Super Resolution Type, choose NVIDIA DLSS for a supported RTX card, or an available AMD FSR or Intel XeSS option.
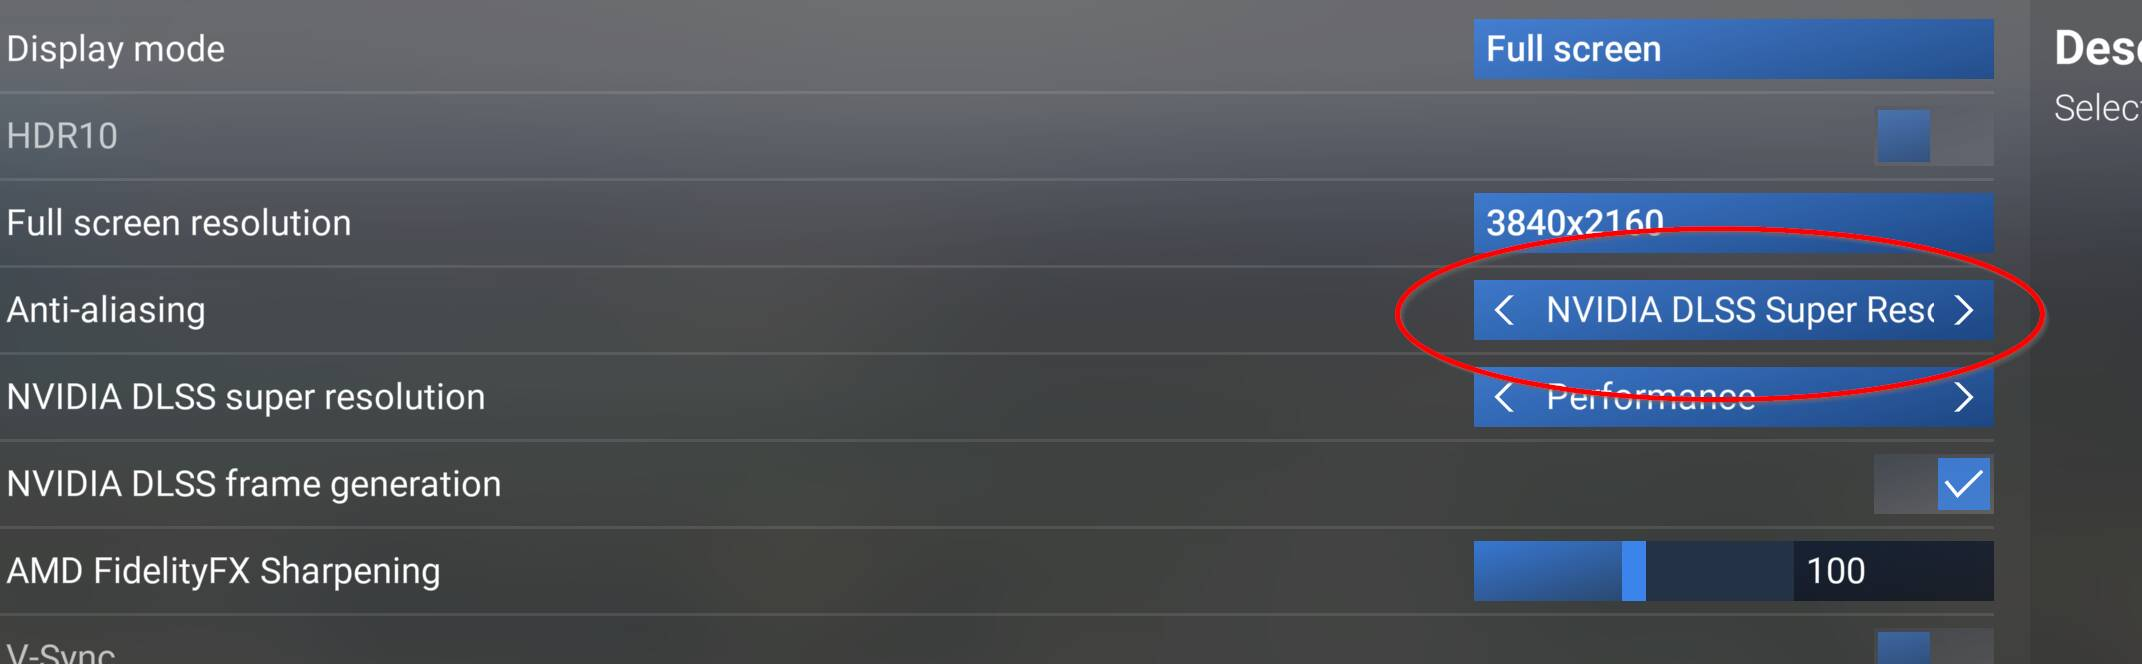
Available options depend on the graphics hardware and installed game build. - Set the in-game Super Resolution Mode to Quality. Compare Balanced, then Performance only if more FPS is needed. Keep Frame Generation off during these tests.
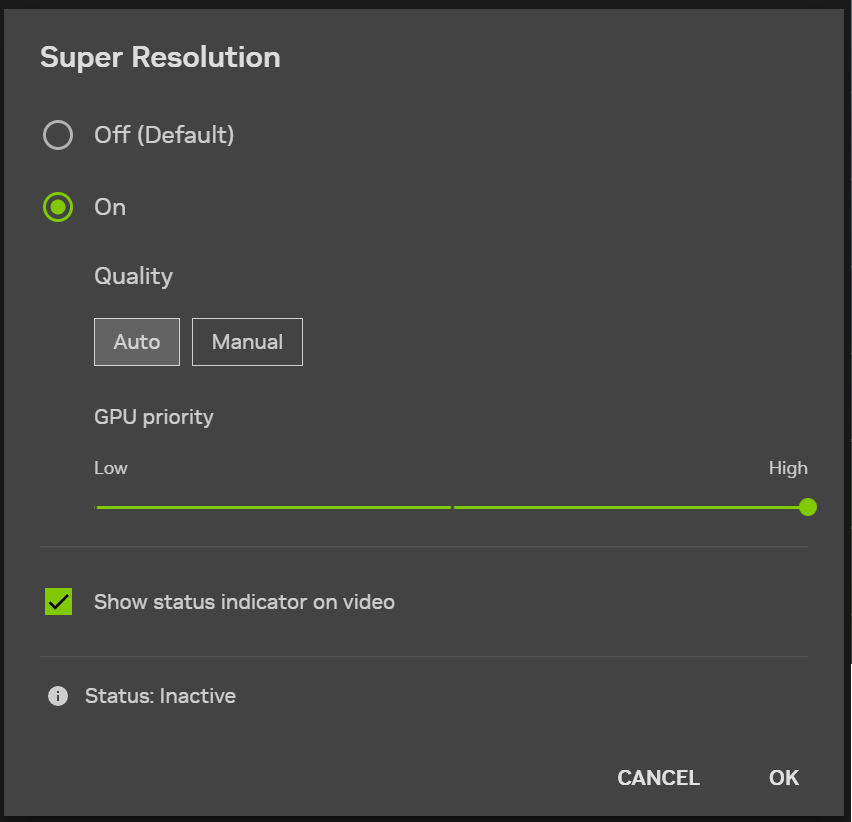
Choose the clearest mode that meets the frame-rate target. - Check distant heroes, moving edges and ability effects after each change. Keep the clearest mode that reaches your target; return to Quality or Balanced if Performance makes targets difficult to read.
Keep the model preset unchanged; the developer’s DLSS model-preset explanation distinguishes the choices.
If the counter stays exactly at your FPS limit, the cap may be hiding a gain. Otherwise, little improvement at lower internal resolution is a reason to restore the clearer mode rather than accept more blur.
3. Compare Aiming With Frame Generation Off
Frame Generation inserts additional displayed frames between frames the game renders. The picture can look smoother without an equivalent improvement in response to your mouse. Disabling it makes that trade-off easier to judge.
- Keep your chosen upscaler, but set Frame Generation Mode to Off in the game’s Display settings. Apply the change and restart if requested.
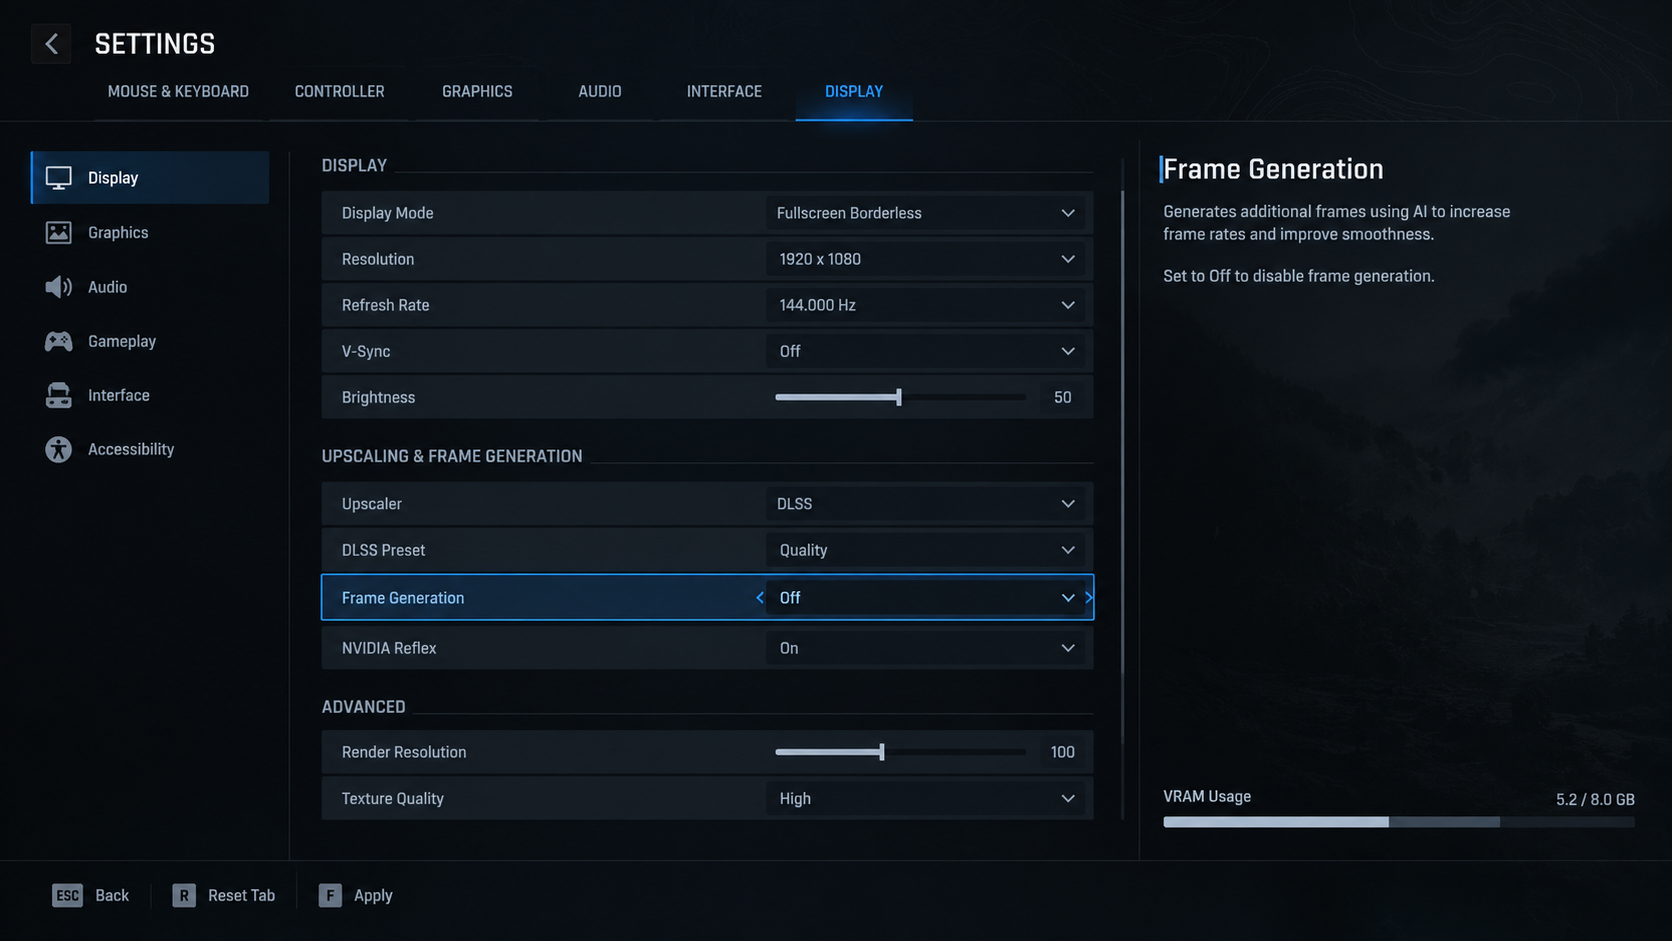
The displayed FPS can fall while aiming feels more immediate. - Enable the in-game Low Latency Mode offered for your hardware: NVIDIA Reflex or Radeon Anti-Lag 2. This is separate from the driver’s global Low Latency Mode shown below.
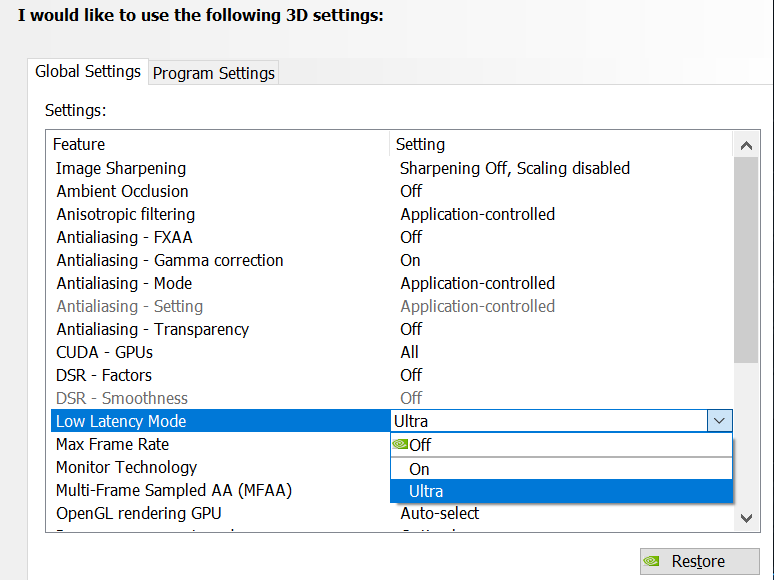
This example requires supported NVIDIA hardware; keep the previous setting for comparison. - Repeat camera movements and target tracking in the Practice Range, then check actual play. Restore the previous latency setting if stuttering or response worsens.
Keep Frame Generation off if aiming improves, even if the counter falls. These latency settings affect local response, not network ping.
4. Set an FPS Limit the PC Can Maintain
A lobby frame rate is a poor target for a busy fight. A sustainable cap can reduce unnecessary workload and make frame delivery more consistent, although it cannot prevent a long shader, storage or engine stall.
- Keep Frame Generation Off. In Settings > Display, record the old limit and enable Limit FPS. Leave any driver-level limiter unchanged so the comparison stays clear.
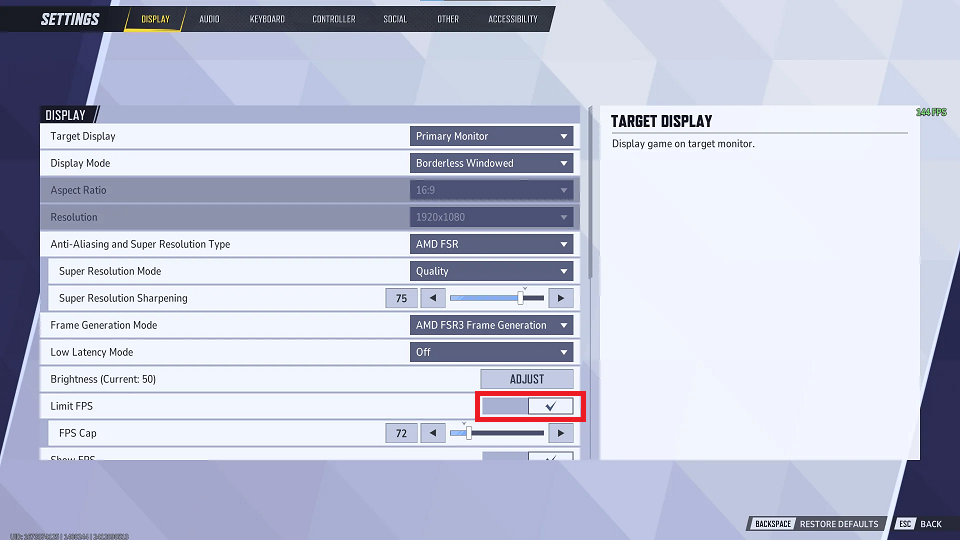
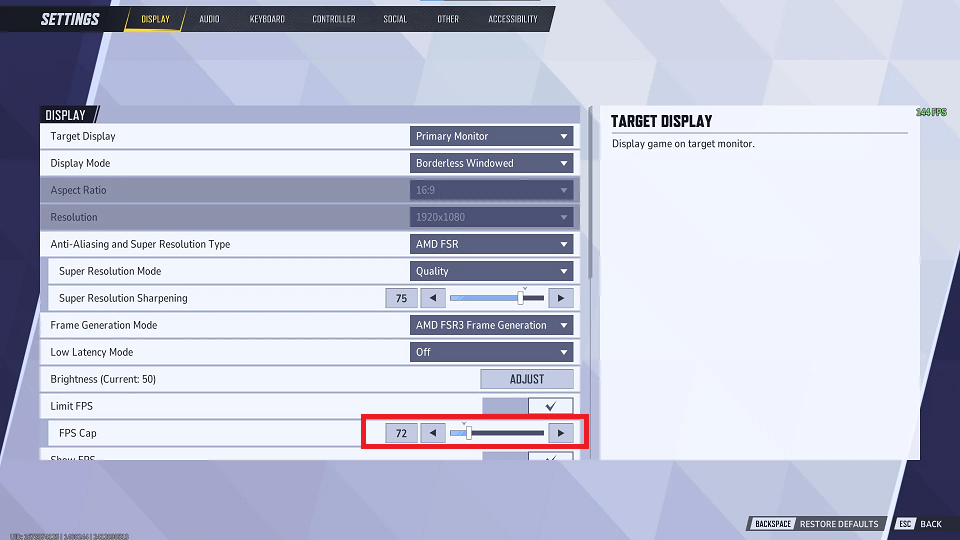
Choose a target the PC can sustain during combat. - Choose a cap the PC sustains in demanding fights. For example, compare 60 FPS if it normally delivers 70-90, or 120 FPS if it stays above 120. The pictured 72 FPS and enabled Frame Generation are not settings to copy.
The correct cap depends on sustained performance and the display. - If V-Sync is on and controls feel delayed, compare it Off. Restore it if tearing becomes distracting. Leave an already working G-SYNC or FreeSync configuration unchanged.
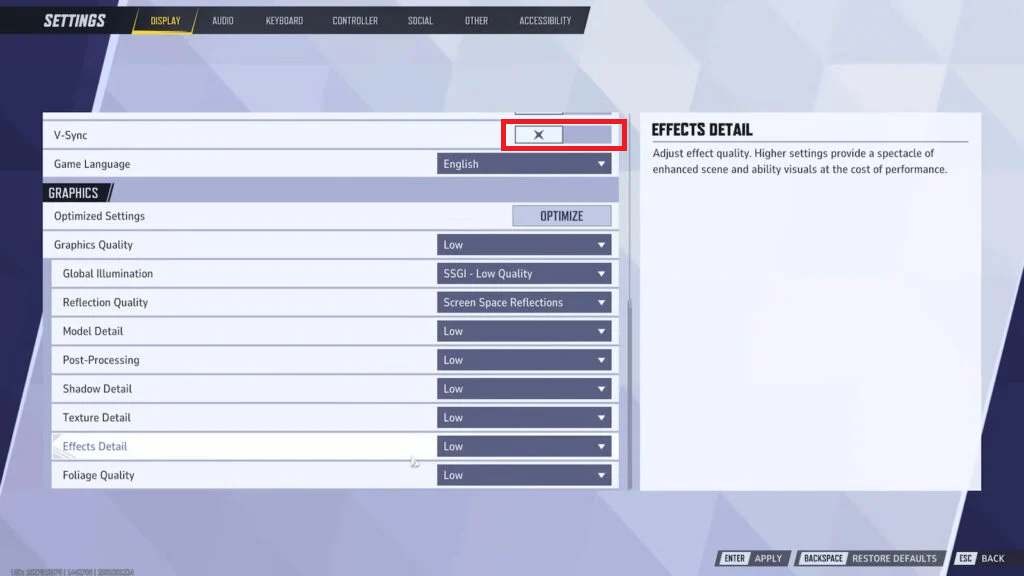
Restore the previous V-Sync setting if tearing outweighs any responsiveness improvement. - Retest demanding fights. Keep the cap if motion is steadier; restore the old value if it only lowers FPS without reducing the pauses.
A high-refresh monitor does not guarantee the PC can reach that rate. If multi-second drops persist across several caps, further reductions are unlikely to identify the cause.
If Low Settings Still Stutter
Compare your hardware with the official PC requirements. NetEase recommends an SSD, and meeting minimum specifications does not guarantee high-refresh performance. An unchanged result at lower settings deserves more investigation, not increasingly blurry graphics.
A CPU-limited Performance Test is a reason to consider the optional Performance Optimization (Beta) under Settings > Other, when available. It targets CPU rendering on mid-to-high-end processors, not Model Detail or the DLSS preset.
Record its original state, read any download/privacy prompt and restart as instructed. Compare the same test afterward; turn it back off if performance or stability worsens. If it was already on when trouble began, compare it off before enabling it again.
For continuing problems, record the game build, CPU, GPU, driver, RAM, storage type, resolution and test results. Note whether drops begin immediately, after several matches or on one map.
If the game closes to the desktop with an Unreal error, keep the crash details. It needs different checks from a brief pause that recovers.
Follow the developer’s client diagnostic collection instructions with the game closed. Share the generated archive privately with official support, not in public chat. Stay with supported game settings rather than downloaded configuration packs or hidden engine edits.


