Fix: WSAPPX High Disk and CPU Usage Issue in Windows
Ever seen wsappx using excessive amount of your CPU power in Task Manager? Here's everything you need to know
 Reviewed by Muhammad Zubyan
The wsappx process runs in the background of Windows 8/10 and is responsible for the operation of the Universal Windows Platform (UWP) and the Windows Store. The main task of this process is to install, update, or uninstall the Windows Store’s applications.
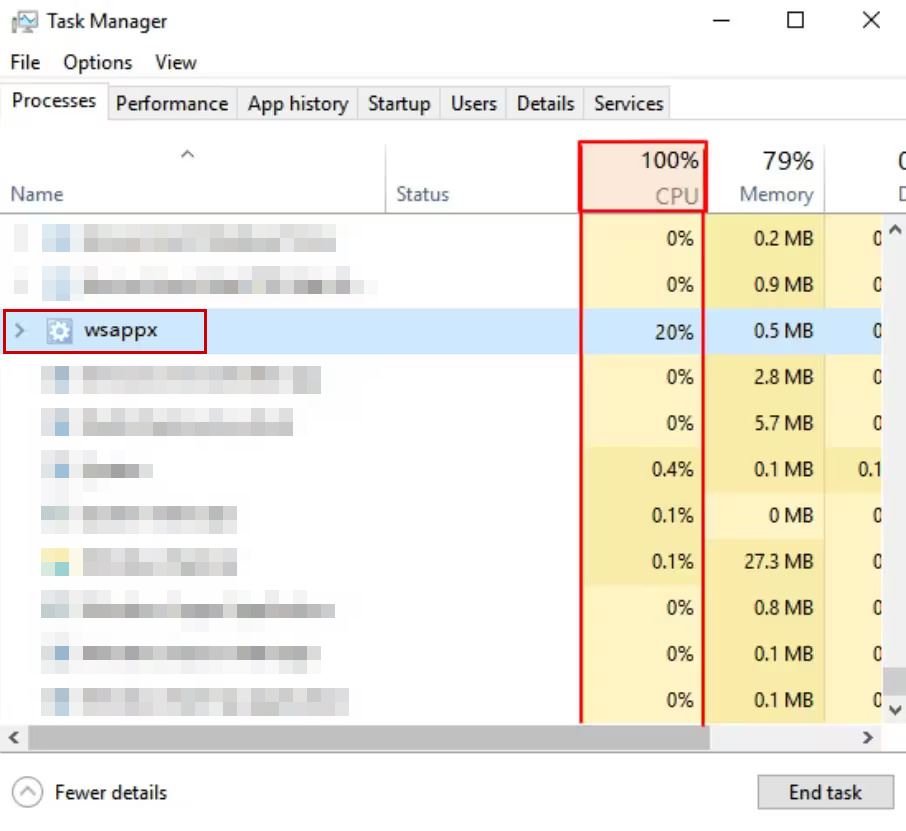
During this time, its CPU usage can shoot up, and it starts using 100% of the RAM. This obviously prevents users from using any other applications on their PC or laptop. It is not a virus or malware, but this issue needs to be addressed for the computer to run properly.
One of the reasons for high disk usage in wsappx is the automatic updating of apps in the Windows Store. The second reason is that your CPU contains numerous bloatware programs.
First, disable the auto-update in the Windows Store; second, remove the bloatware software. Apart from these two methods, there are five more through which you can reduce wsappx high CPU usage.
1. Run the SFC Scan
The SFC scan will scan your entire computer and search for any damaged or corrupt files that may be causing high CPU usage. If found, the SFC command will automatically replace or repair them without any manual input.
Here’s how to run the SFC scan:
- Click the Windows icon on the bottom left and type cmd.
- Now select Run as administrator to open the command prompt.
- Paste the following command and hit enter:
sfc/ scannow
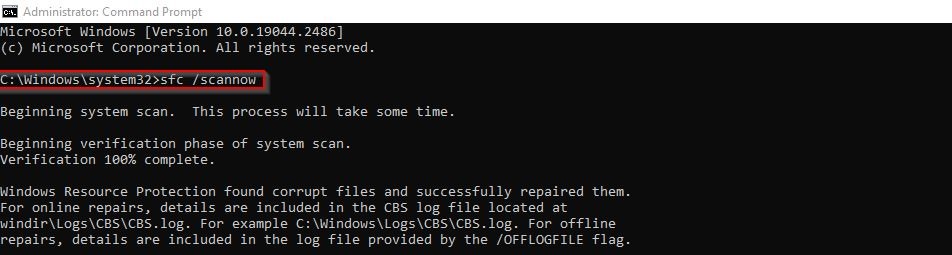
- Wait for the scan to complete and repair the issue.
- Now open the Task Manager and see if the problem is fixed or not.
2. Remove Bloatware Programs
Bloatware programs are the default applications that come with Windows. They include calculators, notification managers, new apps, and more. These programs appear harmless, but they can occupy a significant amount of CPU space and become the cause of the wsappx high disk issue.
Now, you can open Task Manager and see which applications are using the most RAM. If they are of no use, consider uninstalling them.
Here’s how to remove bloatware on Windows:
- Type Add in the search bar of Windows.
- Click on the Add or remove programs option.
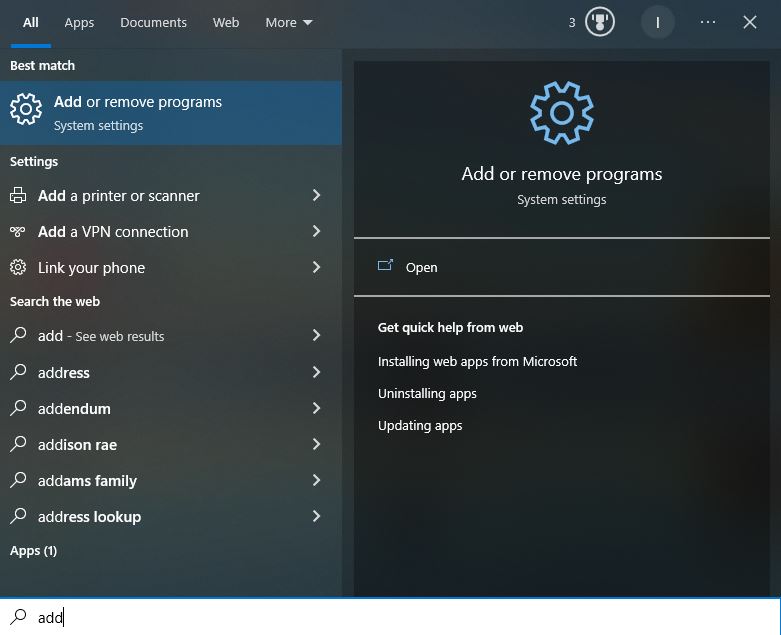
- Find the application that needs to be deleted.
- Click on it and select Uninstall.

- Select Uninstall or OK on the confirmation prompt.
- Repeat the same process for other programs you want to remove.
3. Disable Auto-Updates in Windows Store
The AppXSVC sub-service of wsappx manages the installation, uninstallation, and updating of apps. While the apps are being updated, this service gets to work and uses a significant amount of RAM. Therefore, disabling the auto-updates will prevent this service from starting.
Here are the steps for this:
- Open the Microsoft Store and click on your profile picture on the top right.

- Now go to Settings > Home.
- Turn off the App updates option.
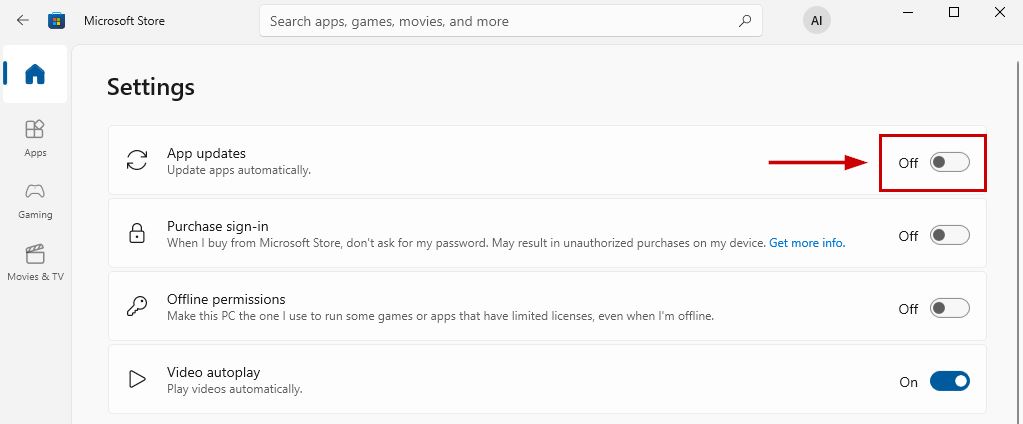
Disabling auto-updates is not a big problem because you can always manually update the apps that you want. Simply click on the same dotted menu, and then select ‘Downloads and updates’ to see the available apps.
4. Disable Windows Store
If you don’t use the Windows Store often, then disabling it is a good option. This will negate the high CPU usage problem since the main purpose of wsappx is related to the apps in this store. Once disabled, you can rest assured that there won’t be any programs using excessive RAM.
Follow the steps below for this method:
- Press the Windows icon and R keys together to open Run.
- Hit Enter after typing: gpedit.msc
- Expand Local Computer Policy and then Computer Configuration.
- Now navigate to Administrative Templates > Windows Components.
- Next, locate Store and click on it.
- Right-click on Turn off the store application and select Edit.
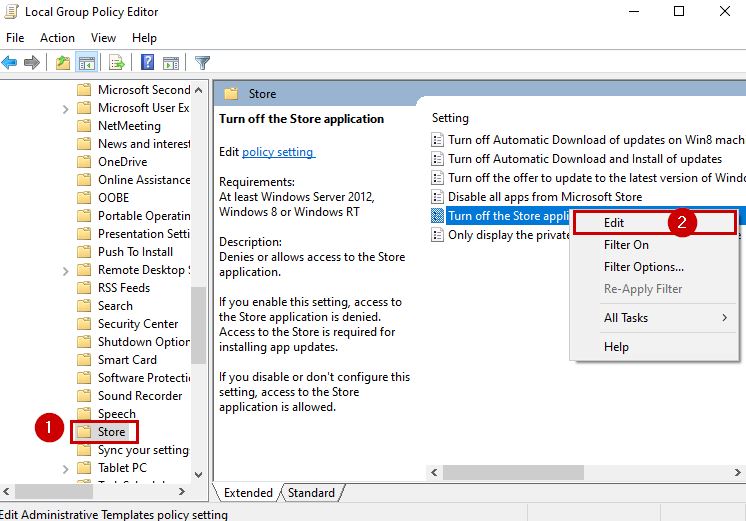
- Set the option to Enabled and click on Apply and OK.
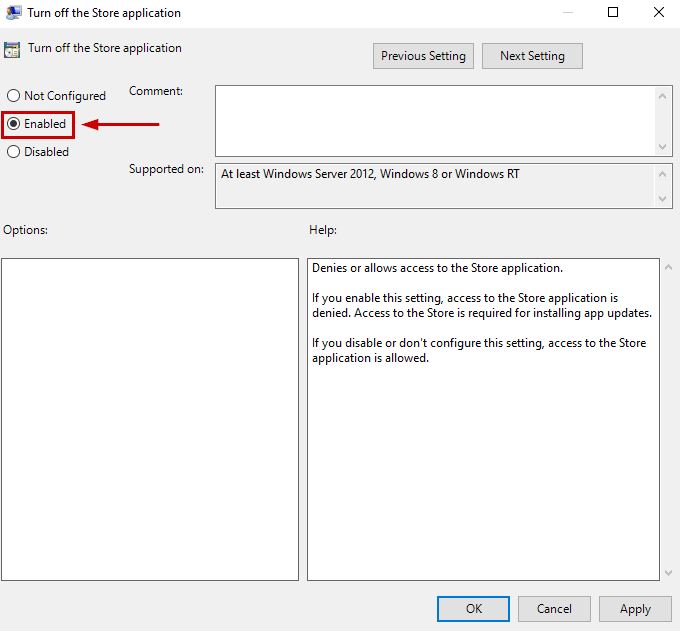
- Now restart your computer and the wsappx high disk problem will be fixed.
5. Increase Virtual Memory
Virtual memory basically increases the memory needed for your processes to run smoothly. This happens for a limited time and makes the PC more efficient by improving its performance. Note that extending virtual memory does not affect the memory of your hard disks.
The process to increase the virtual memory is simple and can be done in the following ways:
- Open the Windows search bar and type Performance.
- Select the Adjust the appearance and performance of Windows option.
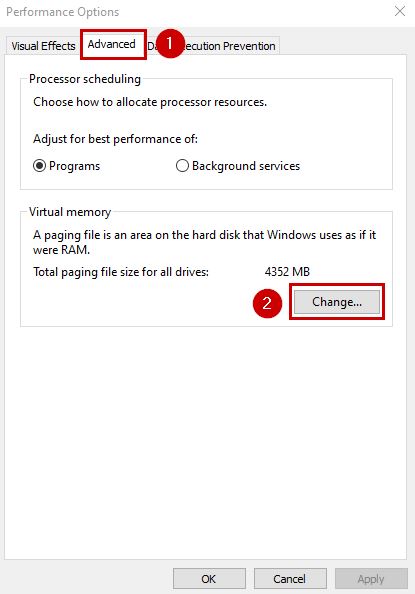
- Now go to the Advanced tab and click on Change under the Virtual Memory section.
- Untick the Automatically manage paging size for all drives option.
- Select the System managed drive and click Custom size.
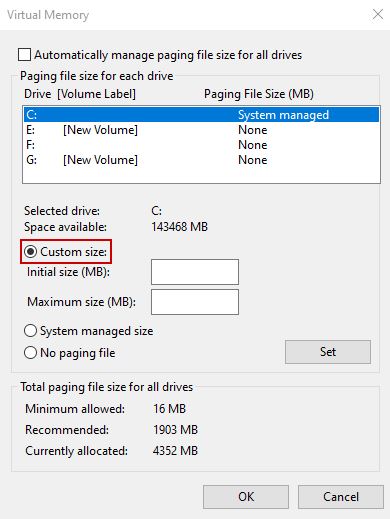
- Now set the initial size to whatever the size your RAM is.
- Next, set the Maximum size double to the initial.
- Press OK to save the preference.
6. Run the CHKDSK command
The Check Disk command thoroughly scans your hard drives and SSDs to repair the corrupt files. This helps the drives process better after their bad sectors get removed.
Here’s how to run the CHKDSK scan:
- Select Run as administrator while opening the command prompt.
- Type in the command below:
chkdsk C: /f
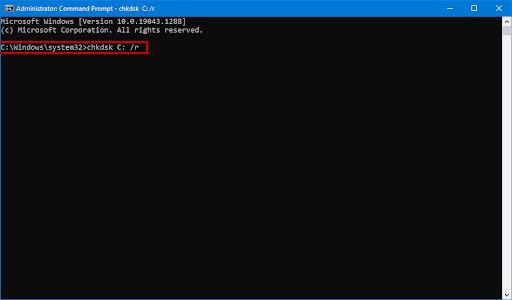
- Now wait until drive C gets scanned.
- Once done, run the same command for other drives by replacing C with their alphabet like chkdsk D: /f, chkdsk E: /f, etc.
7. Update Device Drivers
Incompatible or outdated device drivers are one of the primary reasons for inefficient CPU performance and issues like wsappx high disk usage, 0x800B0003 Windows error, UNEXPECTED KERNEL MODE TRAP, and more.
Therefore, it’s recommended to keep updating your device drivers from time to time.
The easiest way is to let Windows automatically find the updates using the following steps:
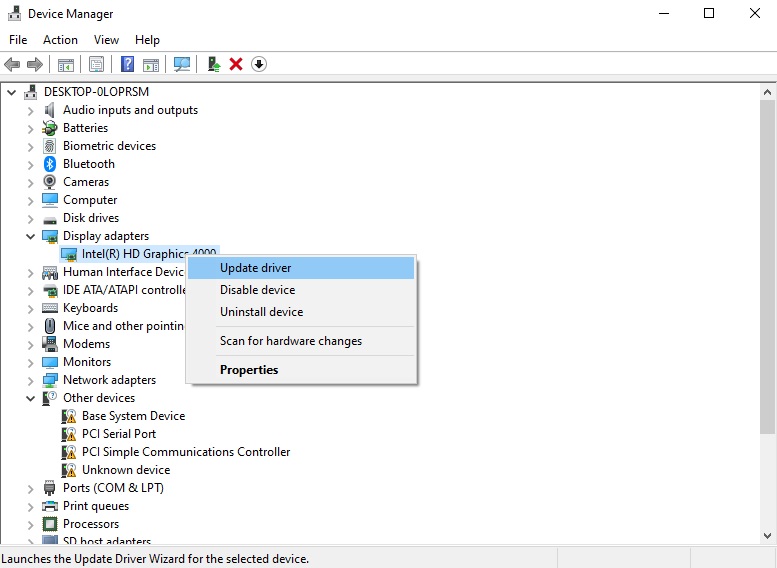
- Press the Win and R keys together to bring up the Run dialog box.
- Type devmgmt.msc and hit Enter.
- Now here you need to click the drop-down arrow next to Disk drives, Display Adapters, DVD/CD-ROM drives, and Sound, video, and game controllers.
- Afterward, right-click on the driver and then click on Update driver.
- Lastly, select the Search Automatically option.
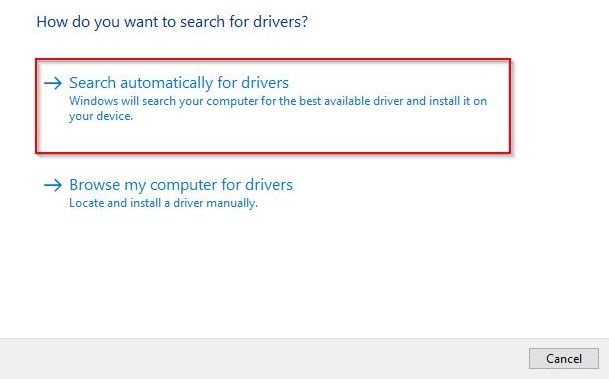
- Install the updates if Windows finds them.
You can also manually update the drivers on the manufacturer’s website.
Reviewed by Muhammad Zubyan


