How to Keep Track of Hyper-V Resources?
Setting up a network whether it may be at a smaller scale or larger, it has never been this easy. On top of that, it is becoming cheaper and more cost effective which is all thanks to the virtualization technology that we have now. A lot of companies opt for a virtual infrastructure instead of buying and using physical hardware due to a number of reasons which includes easier setup and configuration and cost efficiency. In addition to that, there are a lot of tools available that let you deploy and manage virtual machines which include VMware, Hyper-V and many more.
While using virtual machines is a really convenient way of deploying your network, the main objective is to make sure that they are running optimally which directly reflects your network performance. This way, you will be able to monitor your network performance and be able to troubleshoot any issues that may arise. One of the very common issues that comes up in a network is the lack of resources due to poor management. When you are monitoring a network, you have a limited amount of resources that you need to manage carefully in order to avoid any hiccups that may present themselves. This applies to virtual machines that you have deployed to make sure that none of them eat away more resources than they should. This can be achieved pretty easily with the Virtualization Manager from SolarWinds which we are going to use in this article to show you how to keep track of your Hyper-V resources.
Installing Virtualization Manager
Virtualization Manager is another great product from the wide set of products that have been developed by Solarwinds which let you use IP scanner on your network and deploy tools to make the job of a system administrator easy. To be able to keep track of your Hyper-V resources, you will have to first install the VMAN or Virtualization Manager tool on your network. Therefore, open up this link and download the product via the options provided. You can choose to evaluate the product using the two week free trial that is provided by SolarWinds on all of their products so that you can make up your mind. Once you have downloaded the installer, follow the instructions down below to install the product:
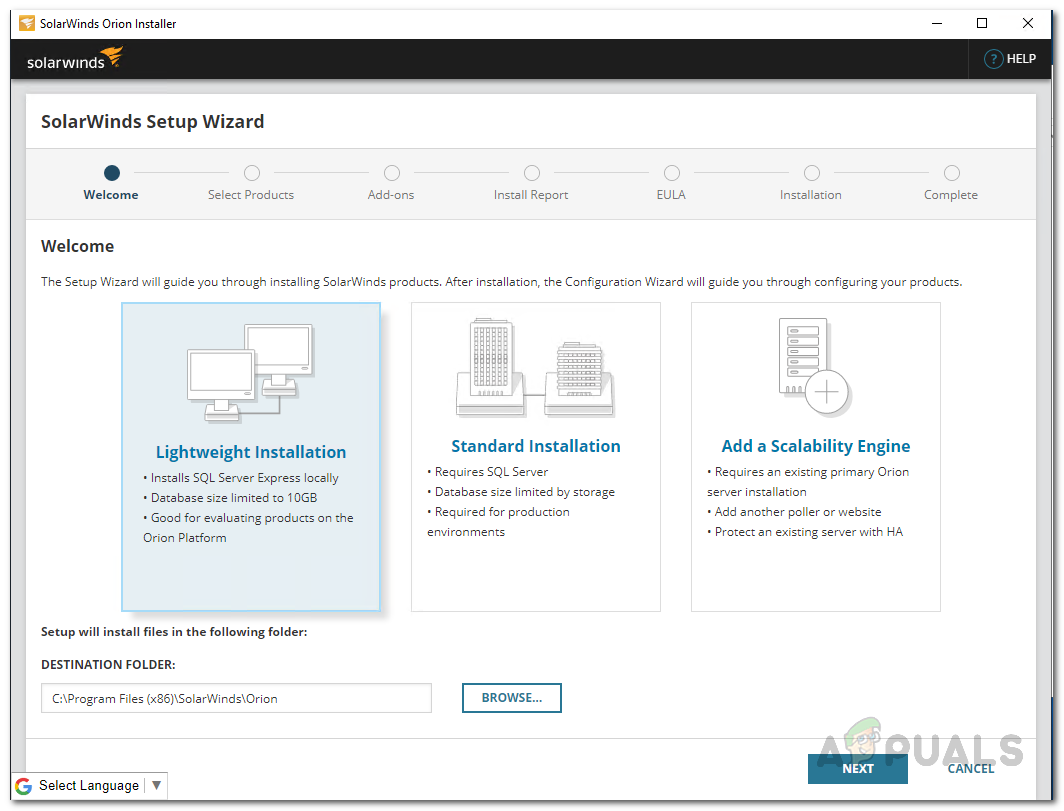
- First of all, run the installer that you downloaded from the link provided above.
- Upon running the Orion Installer, you will be asked to choose the type of installation you want on the first tab. Here, you can choose Lightweight Installation which is best for evaluation purposes as it installs all the required components on your system. However, if you wish to use an existing SQL Server, Standard Installation should be your choice here in such a case.
Orion Installation Type - After that, on the Select Products page, check that the Virtualization Manager is selected and then click the Next button.
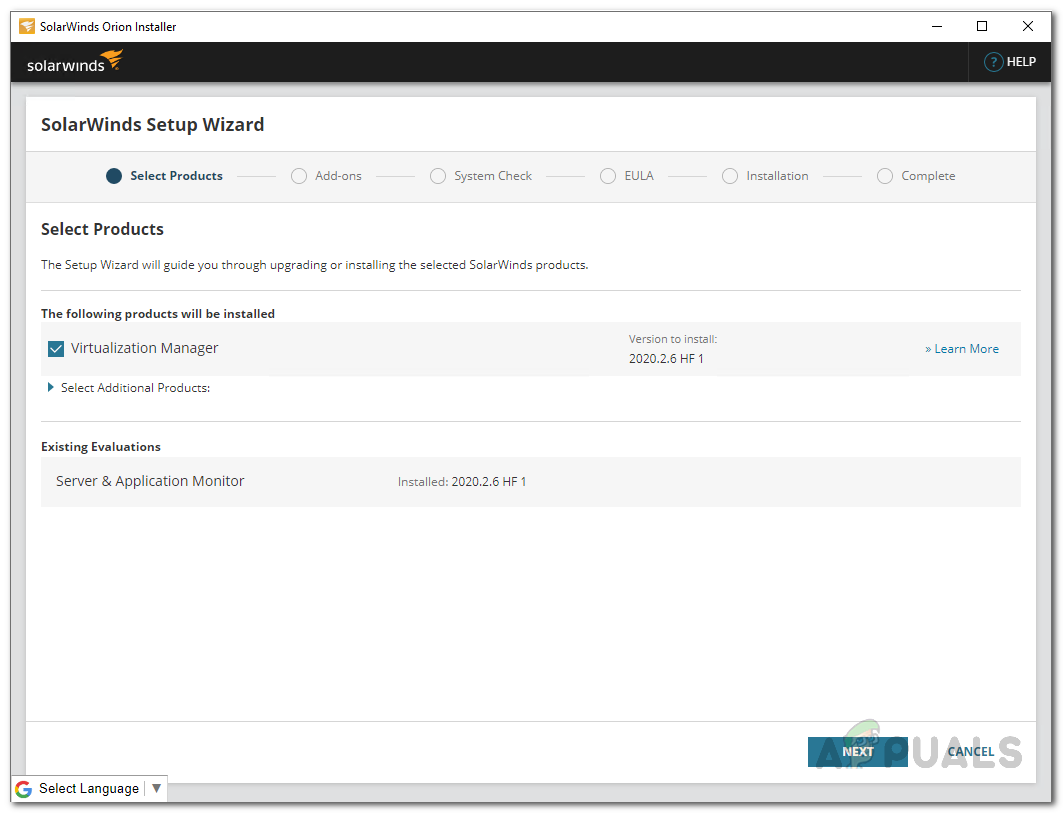
Making sure Virtualization Manager is Selected - Wait for the Orion Installer to perform some system checks. After that, you will be prompted to agree to the license agreement. Agree with them and click the Next button.
- At this point, the SolarWinds Orion Installer will begin to download the required files for Virtualization Manager and then install it on your system. Wait for it to complete and then click the Finish button shown.
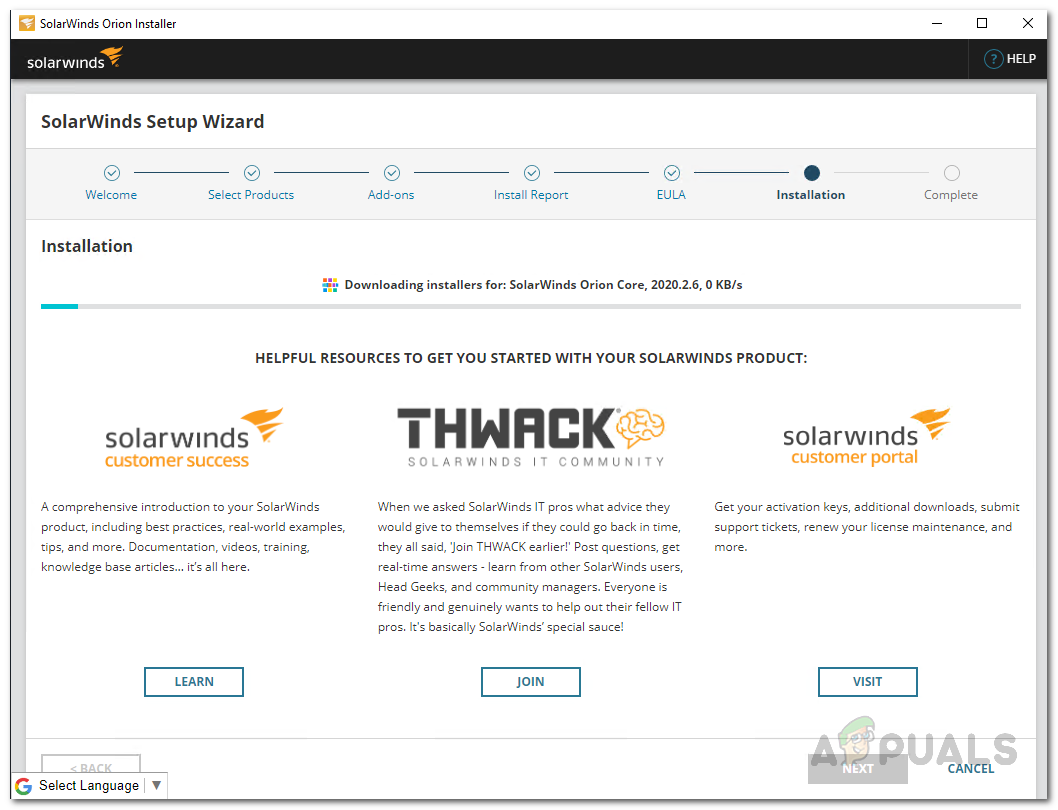
Orion Installing Virtualization Manager - After the Orion Installer has completed, the Configuration Wizard should come up. Here, you will have to provide your database settings if you went with the Standard Installation earlier. Go through the wizard to provide your database settings and then wait for it to finish configuring.
- Once it has completed, click on the Finish button provided.

Finished Configuration Wizard
Add Hyper-V to Orion Platform
Now that you have installed the Virtualization Manager on your system, you will be able to use the Orion web console to add your Hyper-V devices to the Orion Platform for monitoring purposes. Once you close the Configuration Wizard, the Orion web console should automatically open up in a web browser at “hostnameORIPaddress:8787” where 8787 is the default port. In case it doesn’t, just enter the above address in the browser to access the web console. Once the web console is up, follow the instructions given down below to add your Hyper-V devices to the Orion Platform:
- First of all, as you open up the web console, you will be asked to create a password for the admin account as this is the first time you access the console. Create a password for the admin account and then click the Save and login button.
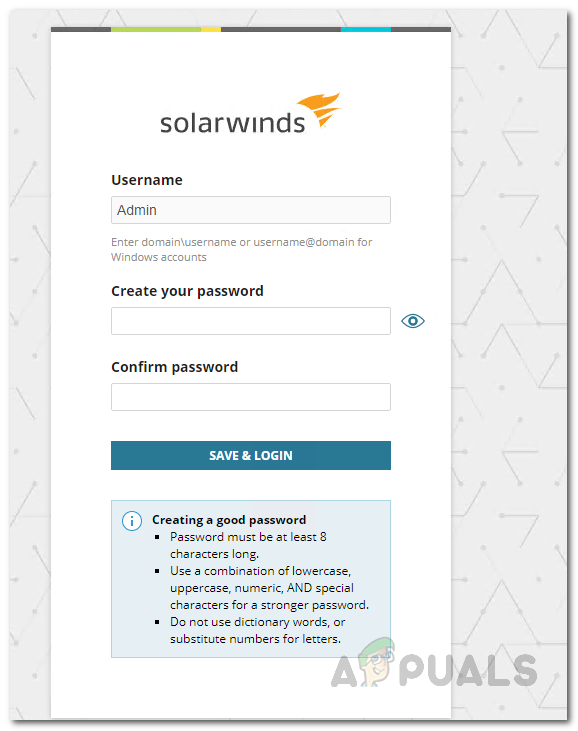
Creating a Password for the Admin Account - Once you have logged into the web console, click on the Settings drop down menu and then choose the All Settings option.
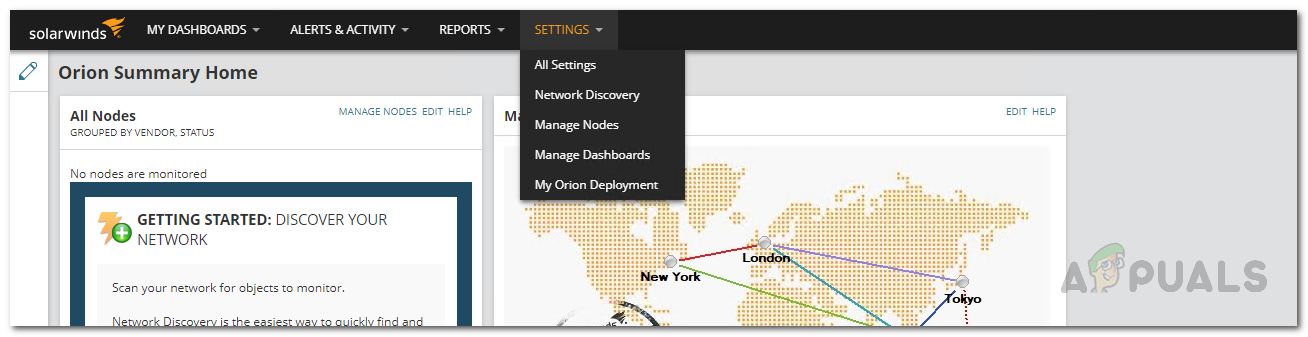
Navigating to All Settings - On the All Settings page, under Getting Started with Orion, click on the Add VMware, Hyper-V or Nutanix entities option provided.
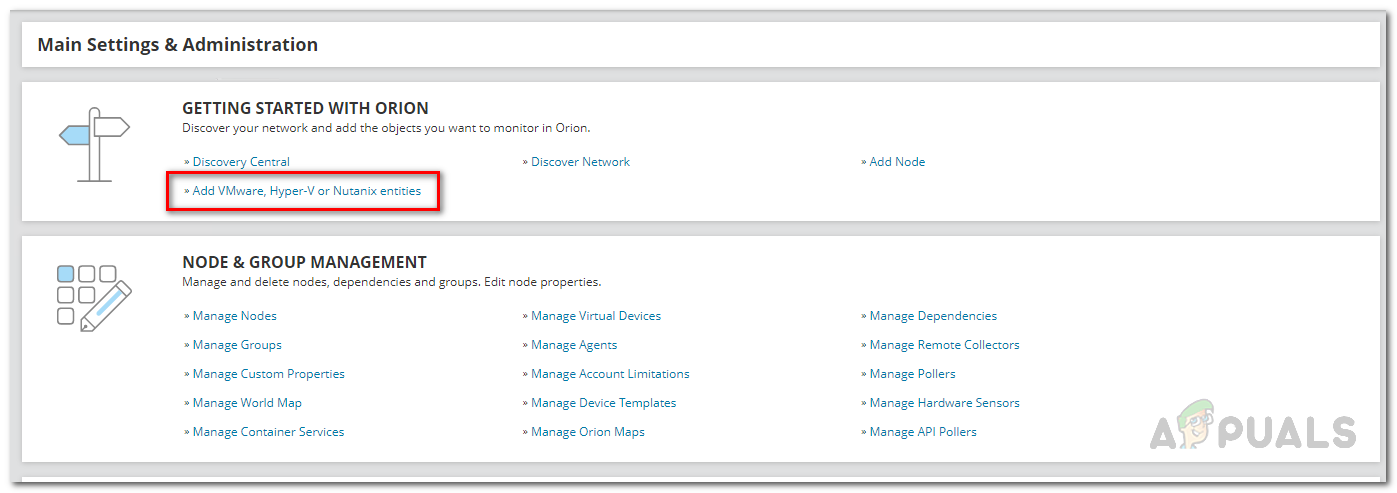
Adding Hyper-V Host - Now, on the Type of Object tab, choose the Hyper-V Host option and then click the Next button.
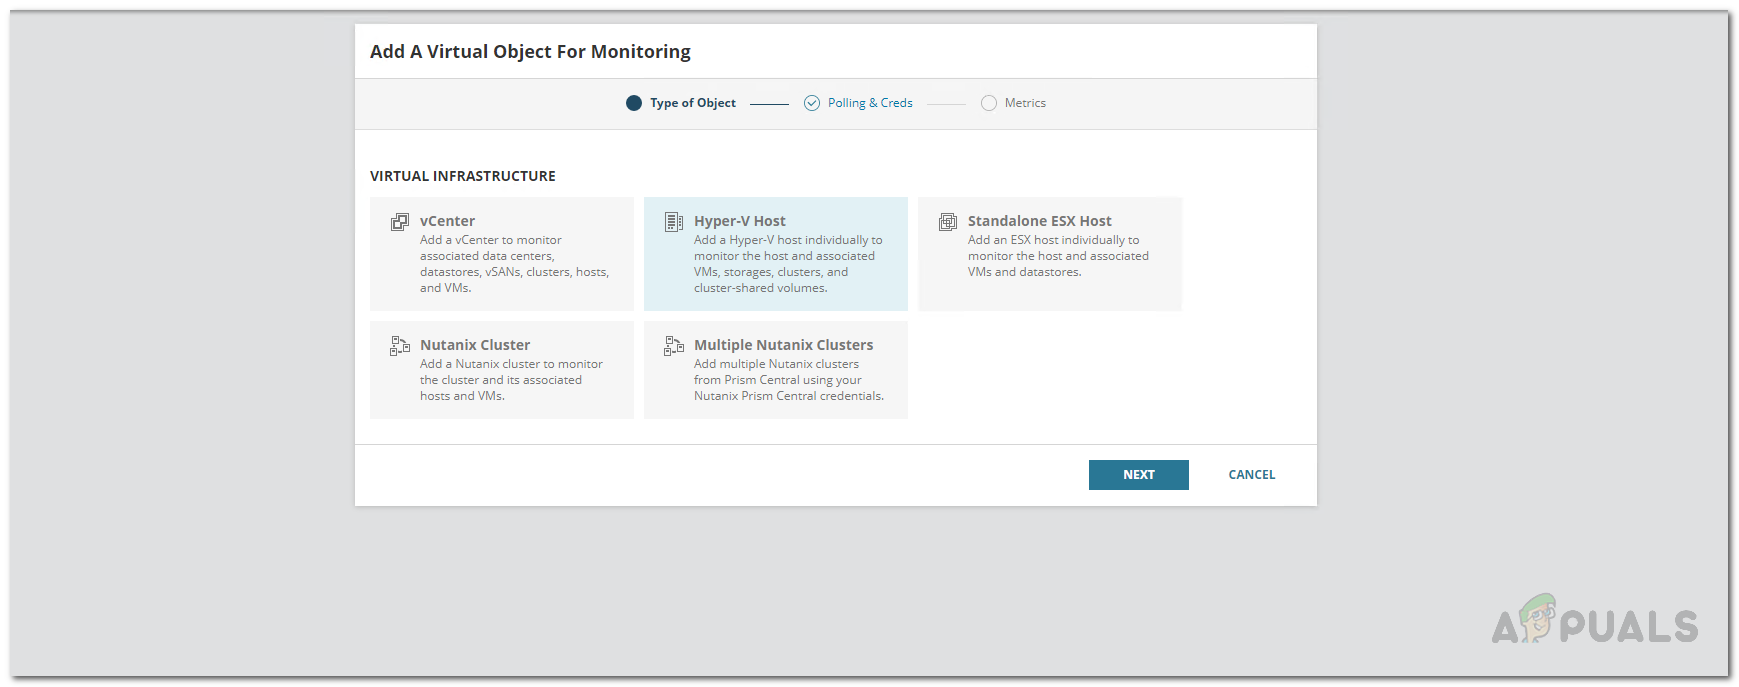
Selecting Hyper-V Host as Object Type - After that, on the Polling and Creds tab, provide the IP address of the virtual object and then follow it up by providing the credentials of the Hyper-V account to be used.
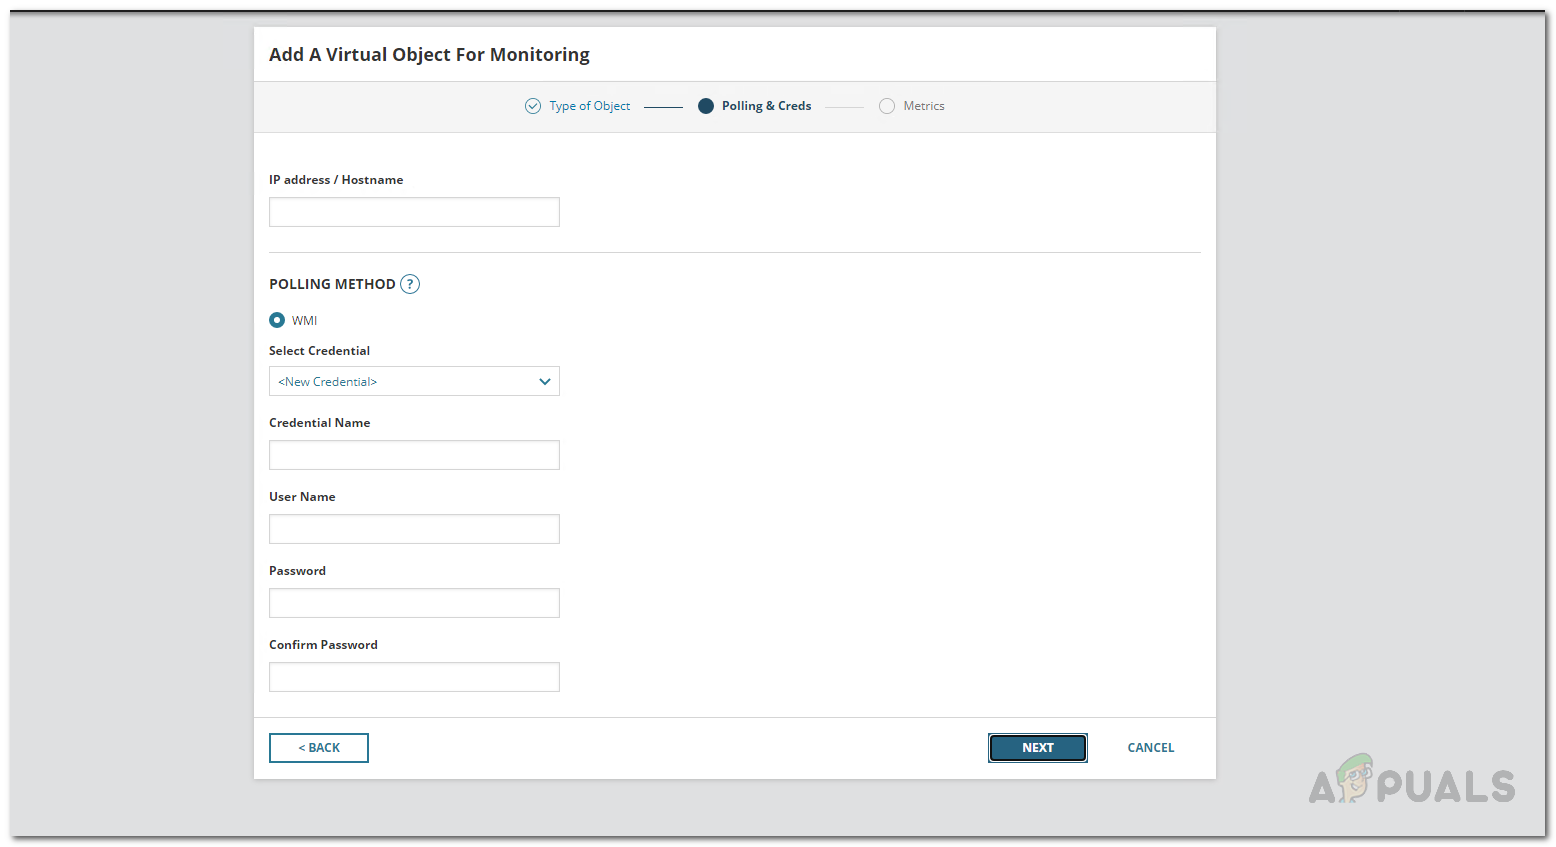
Providing Hyper-V Host Details Note: Make sure that the account that you are using for monitoring has Enable Account and Remote Enable permissions.
- Once you have provided the required credentials, click the Next button.
- On the Metrics page, you will be shown what type of metrics Virtualization Manager will be monitoring.
- After that, click the Finish button to finalize adding the virtual object to the Orion Platform.
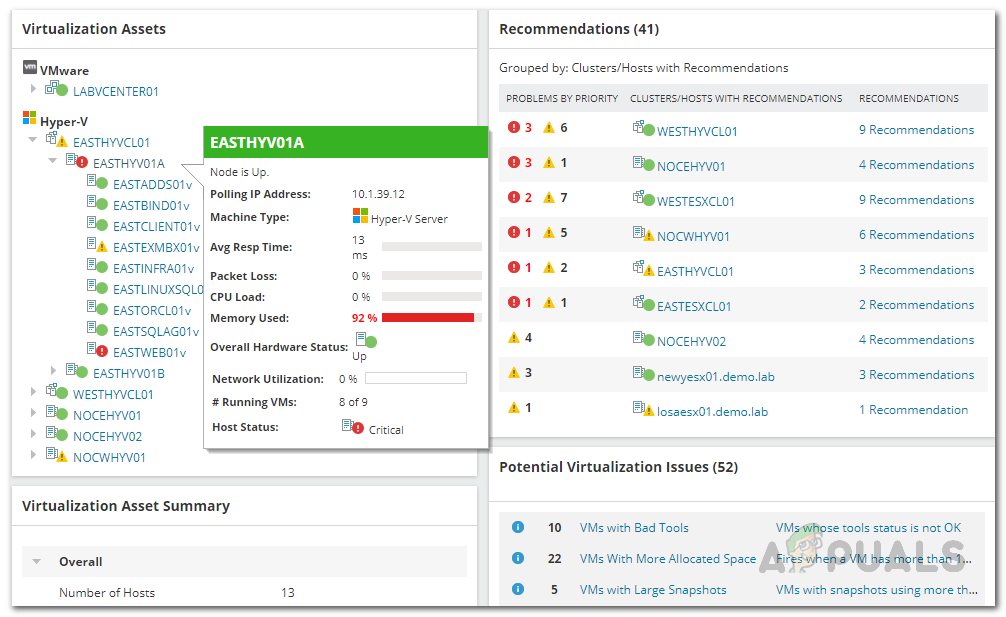
Track Hyper-V Resources
We have now added the Hyper-V object to the Virtualization Manager tool. As soon as you finish adding the Hyper-V host to the Orion Platform, the Virtualization Manager starts monitoring it. You will have to give the Virtualization Manager some time initially so that it can collect enough data in order to display it for you. You can view the summary of the added devices by navigating to My Dashboards > Virtualization > Hyper-V. From there, you can keep track of the different sorts of resources that are being used by your devices.